Easy DIY Sponge Painted Wall! Try this simple sponge painted kids room feature wall using dollar store sponges!
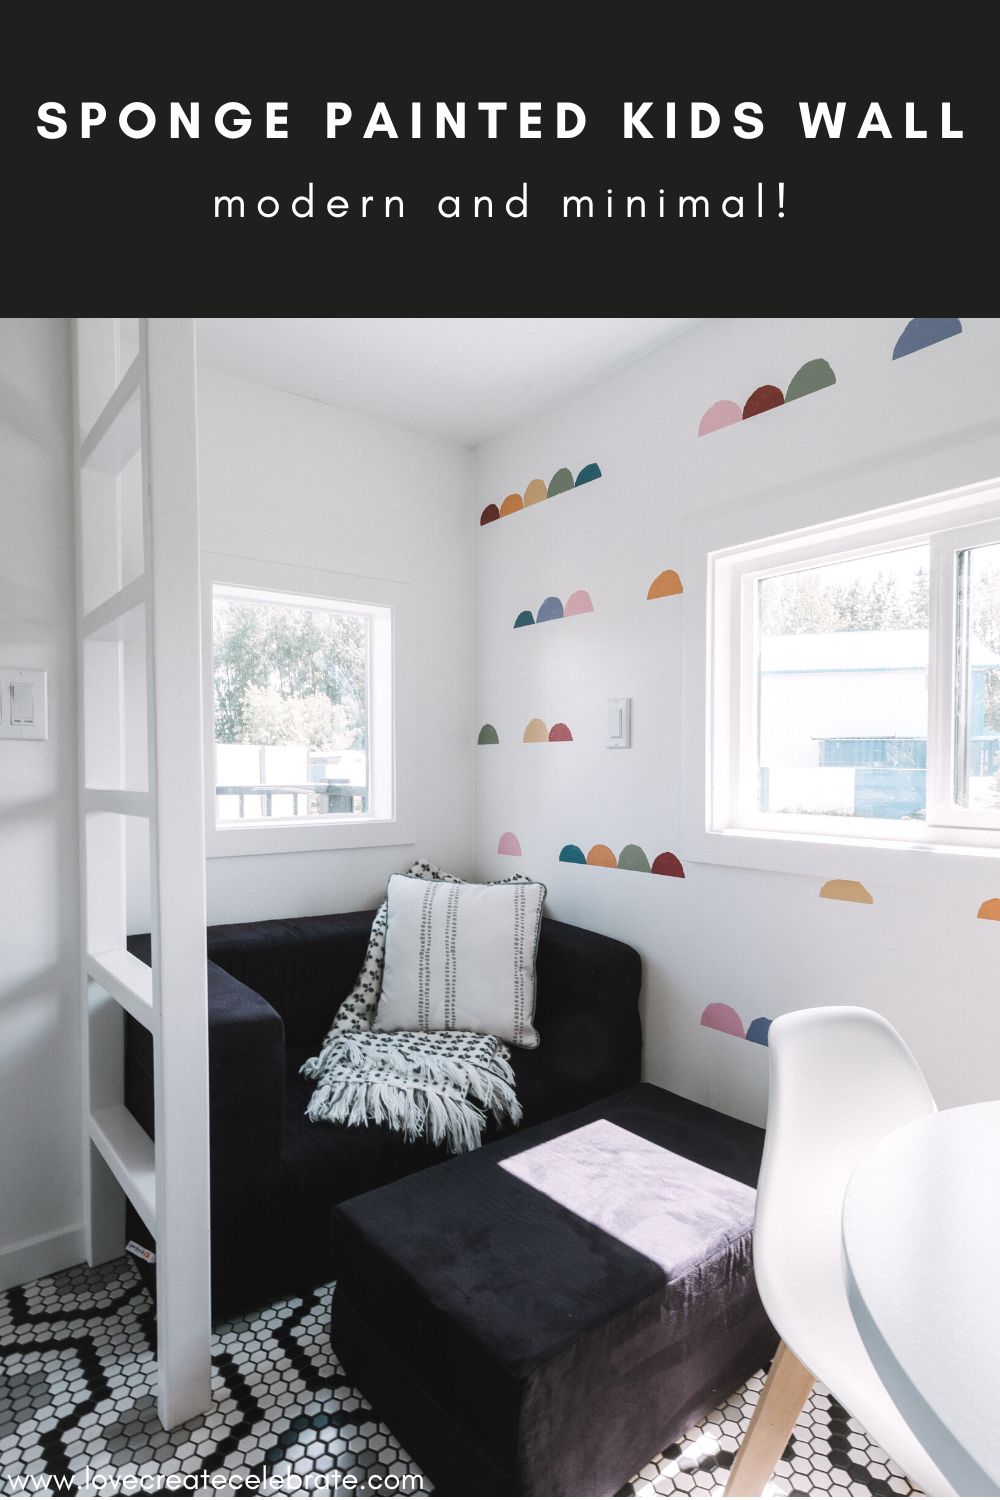
Find me a kid who doesn’t love fun colours in their room! Admittedly, I don’t use a ton of fun colours on the walls in our home, but when it came time to do the kids’ playhouse wall, I knew I had to bring some fun into the space! My daughter helped me create this sponge painted kids wall, and our littles absolutely loved it!
*This post may contain affiliate links. When you buy a product through one of our links, we get a commission at no cost to you! Thank you for supporting our blog so that we can continue to bring you posts like these. For more information, please see our disclosure page.*
How to Make your Sponge Painted Kids Wall
Since we were already spending so much on the kids playhouse structure, I wanted to keep the costs for this wall down to a minimum. I came up with an idea that only needed dollar store sponges and some sample paint pots!
Materials Needed
- Dollar store sponges
- Scissors
- Paint – seven colors
- Paper plates
- Painters tape
Step-by-step Tutorial for your Sponge Painted Kids Wall
You really do not need to have any special skills to do this project. If 6 year old can sponge paint with me, then anyone can!

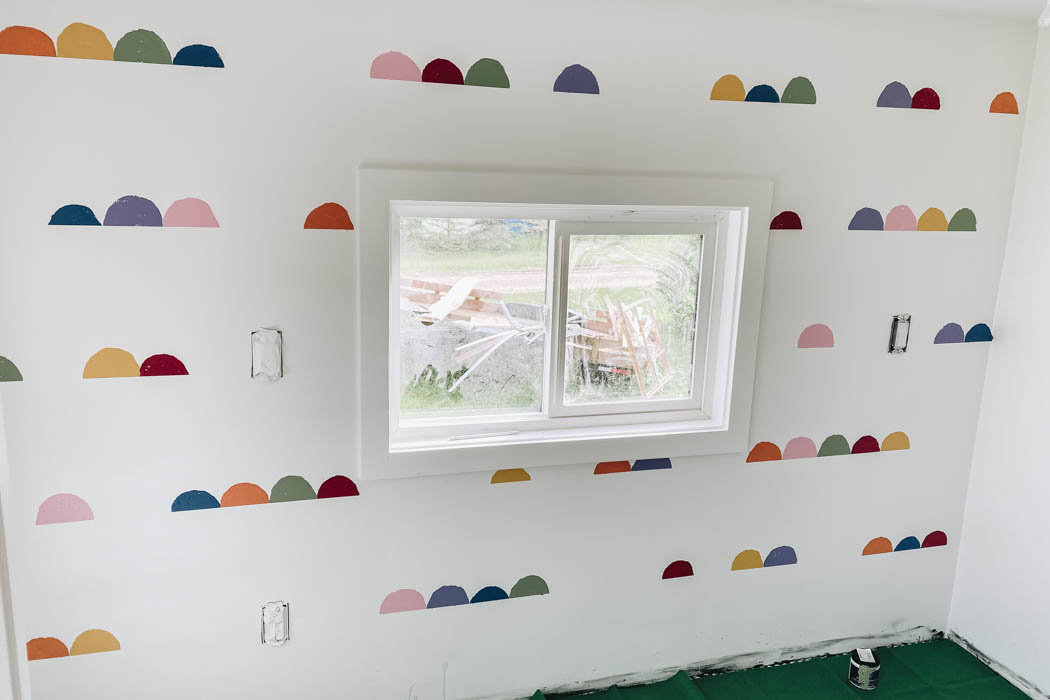
To prepare your wall, measure where you would like your lines of sponge painted shapes to be. I spaced out some sponges on the wall to decide where I wanted my lines to be.
Make sure when you are measuring that you take into account that the lines you draw will be the bottoms of your semi-circles (rainbows).
I drew my lines 12 inches apart from one another, and then I marked those spots on various points along the wall so that I would easily be able to stretch the painters tape across the wall and keep it level.
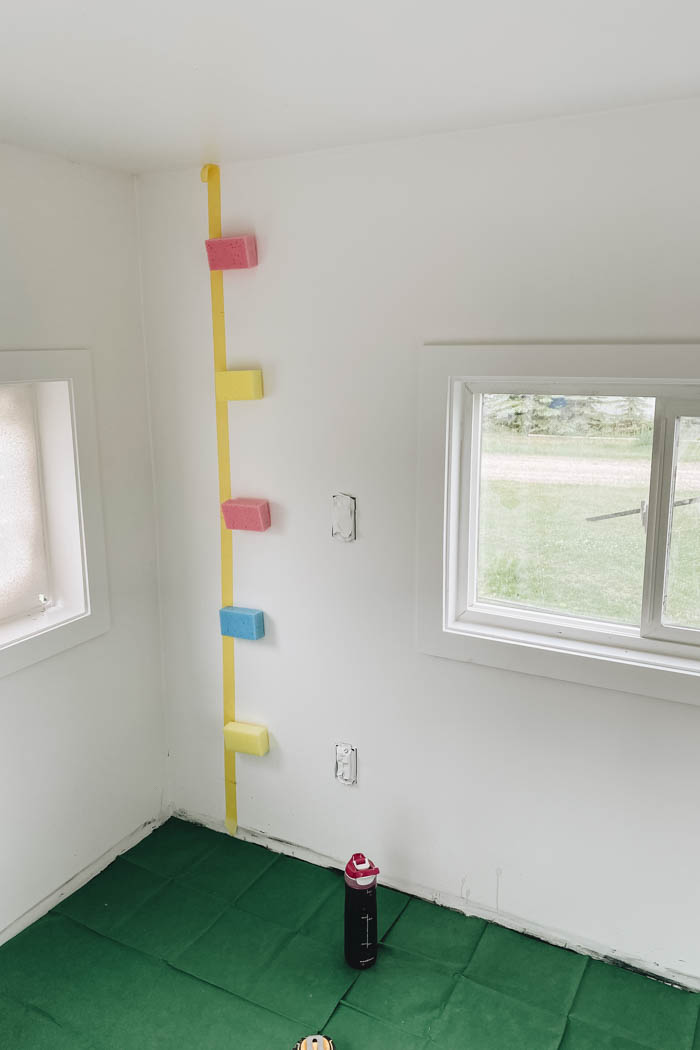
Then place horizontal lines of painters tape to guide your sponge painted shapes. I suggest using the thicker painters tape, because you will have some of the sponge paint on the tape, and a thicker tape will help avoid getting extra paint on the walls.

Draw a half circle on your sponges. This will be the shape that will be painted on your walls. You can trace the outline a roll of tape on your sponge to create the half circle shape.
I deliberately tried to give all of the circles a slightly different arch. That way it provided some visual interest and changed the shapes on the wall, but if you want to use the exact same shape, I recommend marking lines on your tape roll so that you know when to start and stop your tracing.

Now cut the sponges into the proper form. This part is a little finicky, but the important part is making sure that the edge that will be pressed against the wall has a nice semi-circle shape to it.


Next, pour the seven different colors of paint, each onto their own paper plate so that you can dip the sponges into them.

Here are the colours I chose below. I called this my muted rainbow because it’s your typical rainbow colours with a little less saturation. The white in the photo is the white we used on the walls.

Next, dip the sponges into the paint one at a time and press them onto a line on the wall. I randomized the number of semicircles I used in a row or at a time, and randomized the amount of spacing.
You can take your time to measure everything out exactly, but I really think there is some beauty and fun in the random patterns that really suites a kids space.
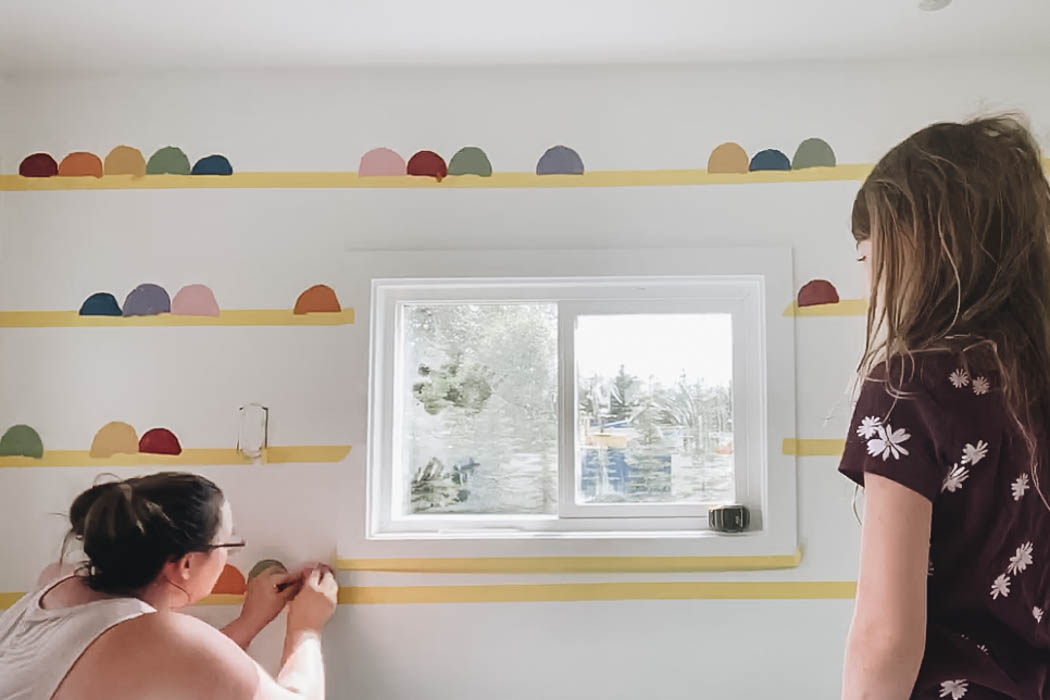
This was part of my children’s playhouse project so my daughter came out and even helped stamp some of those little rainbows on the wall. She did a great job and was so proud that she got to work on the wall herself.

Finally, when you’re all done, remove the painters tape. If you remove it carefully while the paint is still wet, it will come off easily and leave a nice paint edge.
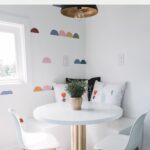
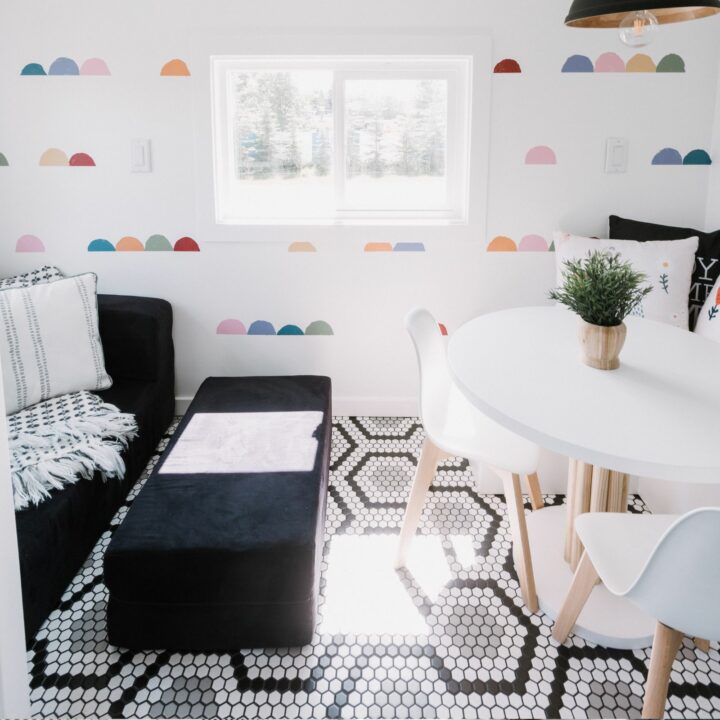
The Finished Sponge Painted Wall
I was so happy with the end result! It’s so fun and colourful, and perfect for a kids space. Here’s what it looks like in the kids playhouse after the rest of the kid sized furniture and decor was put inside.
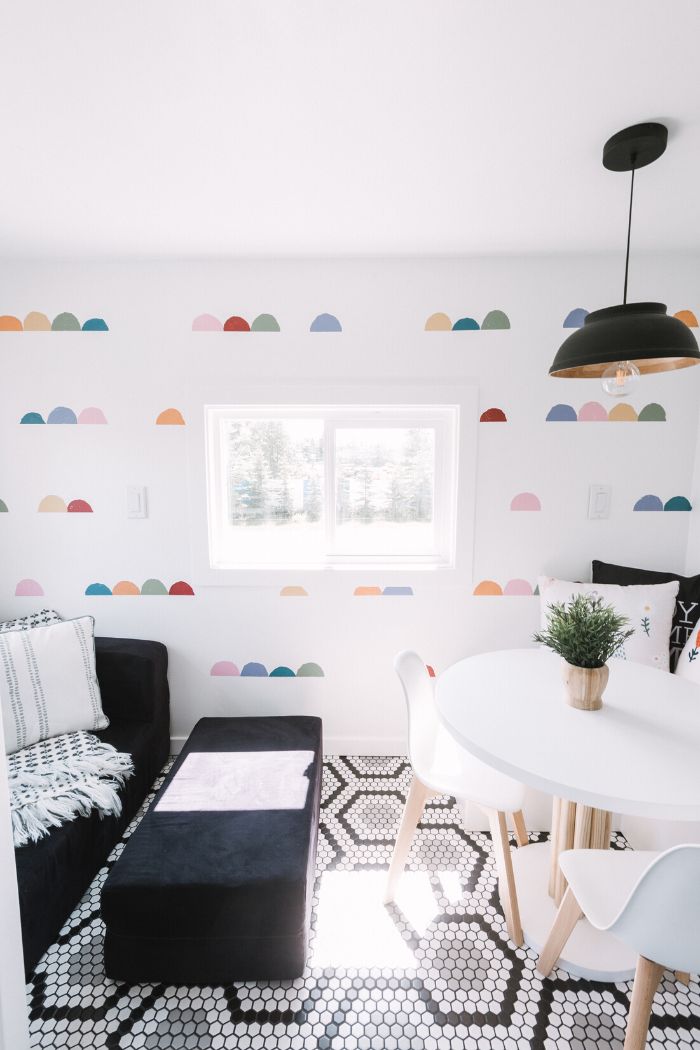
The kids still love this design and pattern on the wall! It’s amazing that you can do a totally fun feature wall for just a couple of dollars!


The Full Playhouse Reveal
If you haven’t seen this full playhouse reveal it is definitely worth checking out! You can also check out the video below!
More Dollar Store DIY Projects
Click the video below to see how to make 30 DIY projects using dollar store supplies!
Don’t forget to subscribe to our YouTube channel for more great dollar store DIYs!
Sponge Painted Kids Wall
Easy DIY Sponge Painted Wall! Try this simple sponge painted kids room feature wall using dollar store sponges!
Materials
- Dollar store sponges
- Scissors
- Paint - seven colors
- Paper plates
- Painters tape
Instructions
- Cut the dollar store sponges into half circle shapes
- Pour the seven colors of paint, each onto their own plate
- Put a lines of painters tape on the wall
- Dip the sponges into the paint one at a time and pressed them onto the line of painters tape
- When finished, remove the painters tape