
Learn how to use the Rustoleum Countertop transformation paint kit to transform your outdated counters. Plus a review of how the paint held up a year later!
A kitchen renovation is a huge project. It’s expensive. It goes on for months. It leaves us with nothing to eat except pizza and microwavable meals. So putting it off until you are absolutely sure you know what you want is so wise. We don’t know what we want yet and we’re definitely not ready to dole out the money for it. So we made a few temporary changes last year in our Weekend Makeover, and now I’m finally sharing our Rustoleum countertop transformation paint review.

*This post may contain affiliate links. When you buy a product through one of our links, we get a commission at no cost to you! Thank you for supporting our blog so that we can continue to bring you posts like these. For more information, please see our disclosure page.*
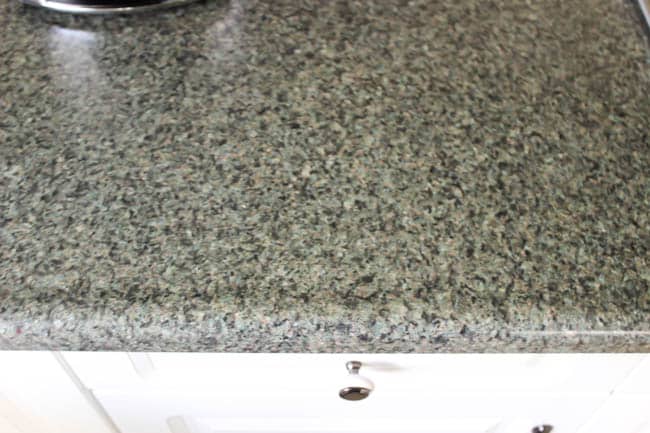
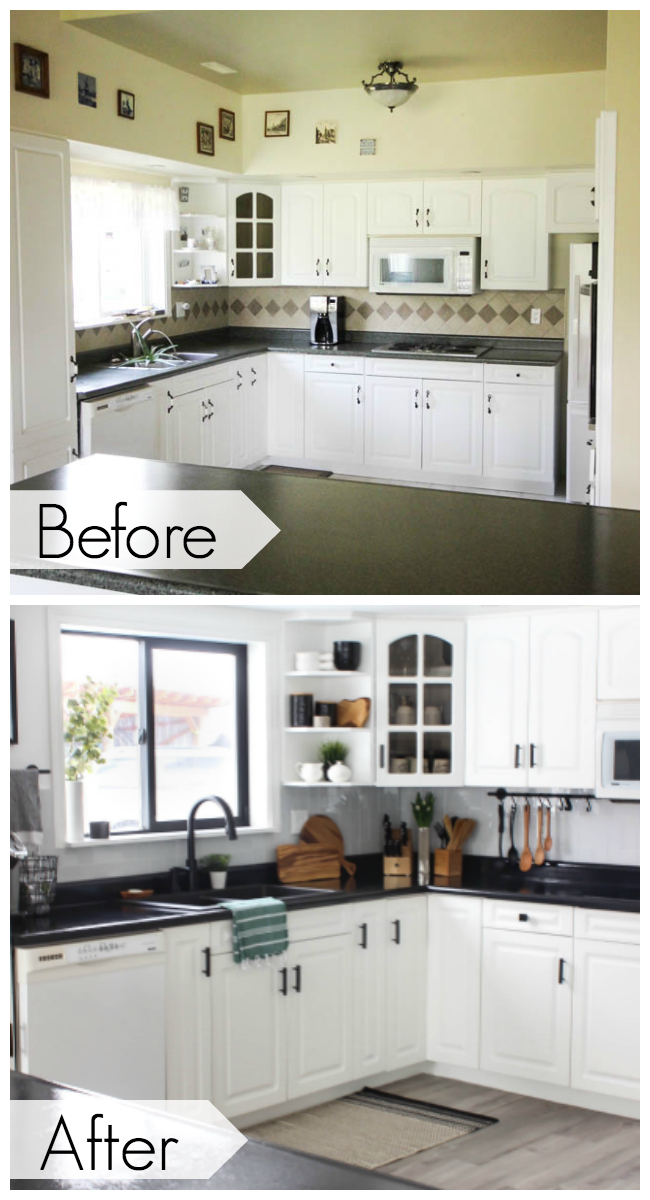
This was our kitchen when we moved into the home. Our long term plan in this outdated home is to build an addition in 5-10 years. The addition to the house would include a master bedroom and ensuite as well as a garage. It will cut into the existing kitchen, making it a good time for those big renovations. But I didn’t want to wait until then to touch the kitchen. I was itching to use some paint on those green countertops.
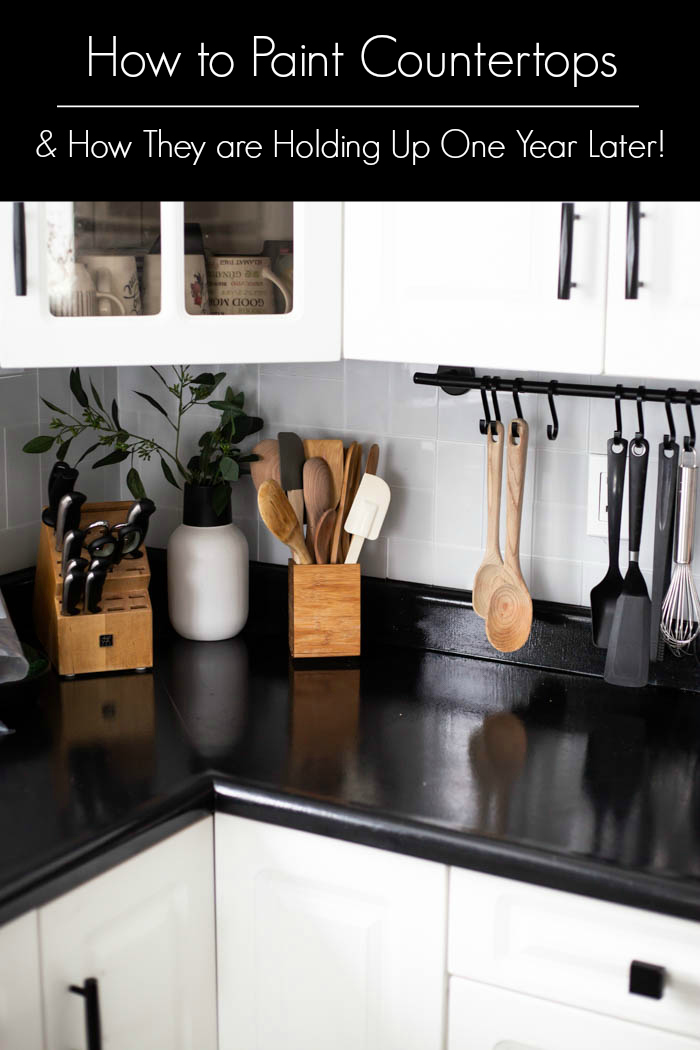
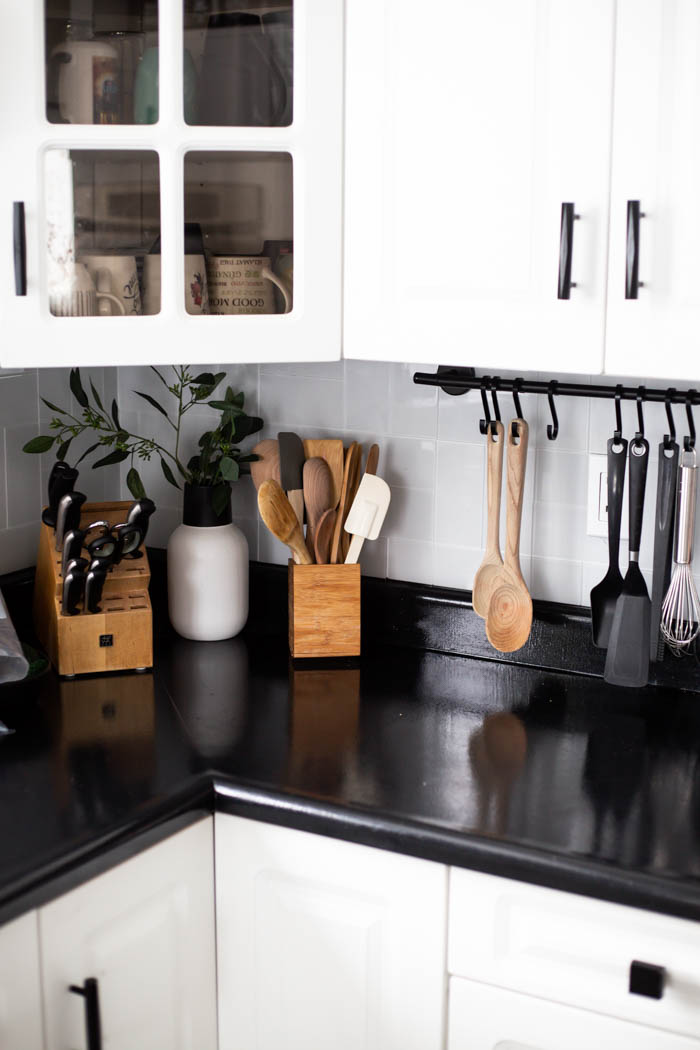
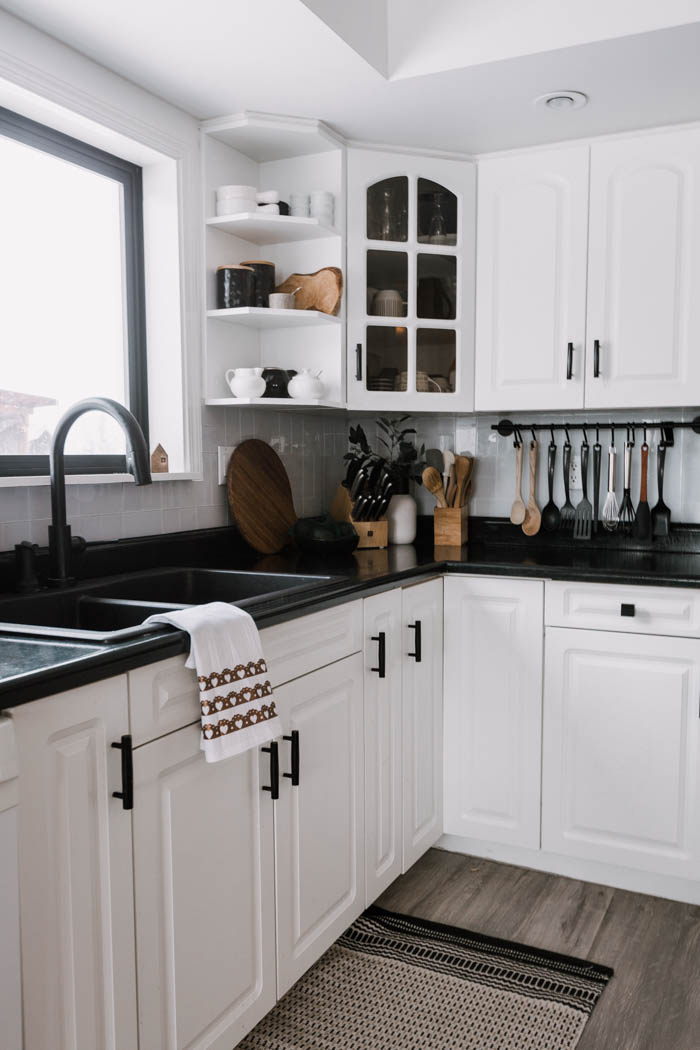
As part of a weekend makeover project, we planned to revamp our kitchen in just three days. We painted countertops, added new peel and stick tiles, changed out all of the hardware, changed the sink, and added a new faucet and accessories. We somehow managed to get the entire kitchen done and the transformation was amazing! The newly painted black countertops was a huge part of that transformation.
Everything you need to know about the Rustoleum Countertop Transformations Paint Kit
Countertop paint is a great idea if you’re looking to update laminate or arborite counters, but it’s not a permanent fix. We’ve had these painted countertops for over a year now, and I’ll share my honest review of how they are holding up at the end of this post!
The process of using the countertop paint is a multi-step and multi-day (usually) process. There are a few things that you need:
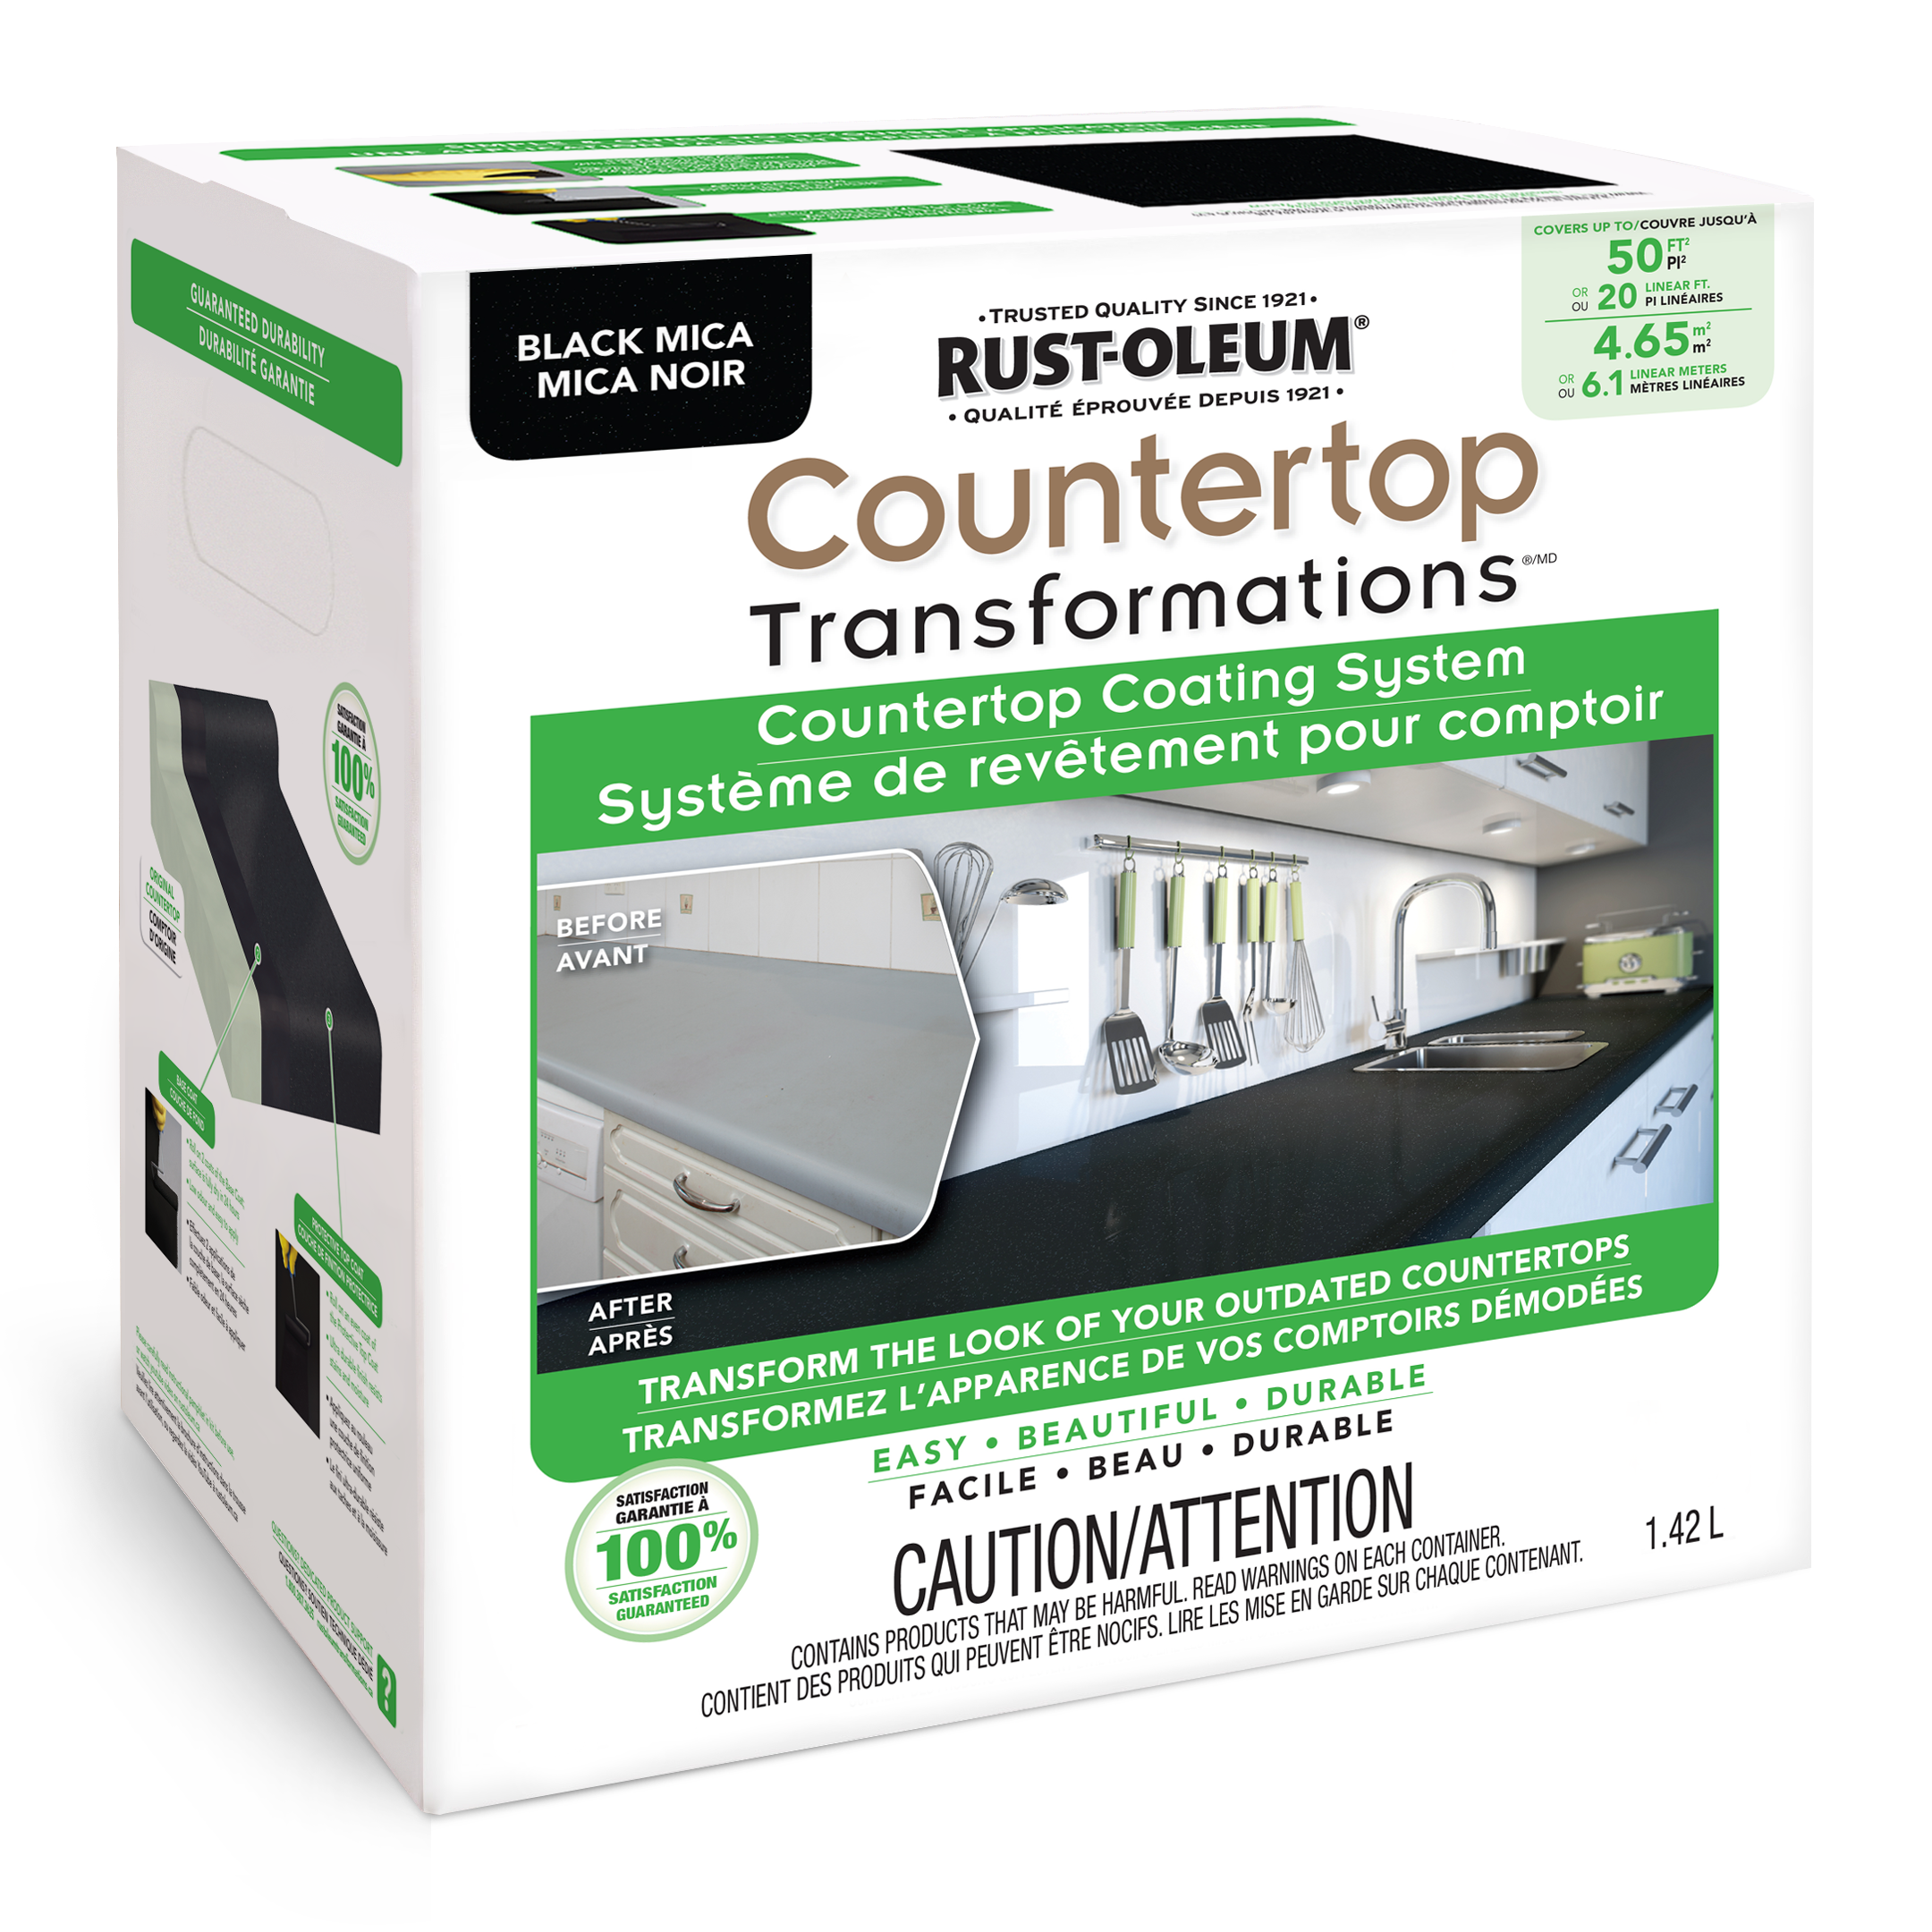
- Rustoleum Countertop Kit – they have one kit that makes your countertops look like marble with paint, and another kit that makes them look like a solid slab – we used the Black Mica kit
- Face Masks
- Dollar store foam rollers
- Tac Cloths
How Many Countertop Transformation Kits Do I Need?
A large rustoleum countertop transformation kit is enough to cover 50 square feet of countertop. We have a lot of counter space in our kitchen and one kit of countertop paint was exactly enough to cover all of the counters. If you are only doing a small countertop, it may not be worth it for you, because once you open the kit, you can’t save any and reuse it on another project later. It’s only good at one time, and it’s too expensive to use on just a small countertop.
How to Use the Rustoleum Countertop Transformation Kit
The countertop transformation kit comes with everything you need (except the face masks that I would recommend), and detailed instructions, but I’ll run through the process here too.
Since we did this transformation as part of our Weekend Renovation on Instagram, we recorded the process of us adding the Countertop paint for the first time and shared it. Check out the “Kitchen Reno” highlight on our Instagram page to watch the kitchen transform. We’ve also creates an entire video about How to Paint Countertops that you can watch to see all of the paint application steps live.
The process is fairly straightforward, but I’ll lay it all out for you here. Make sure you still read all of the directions that come in your countertop paint kit before you start though!
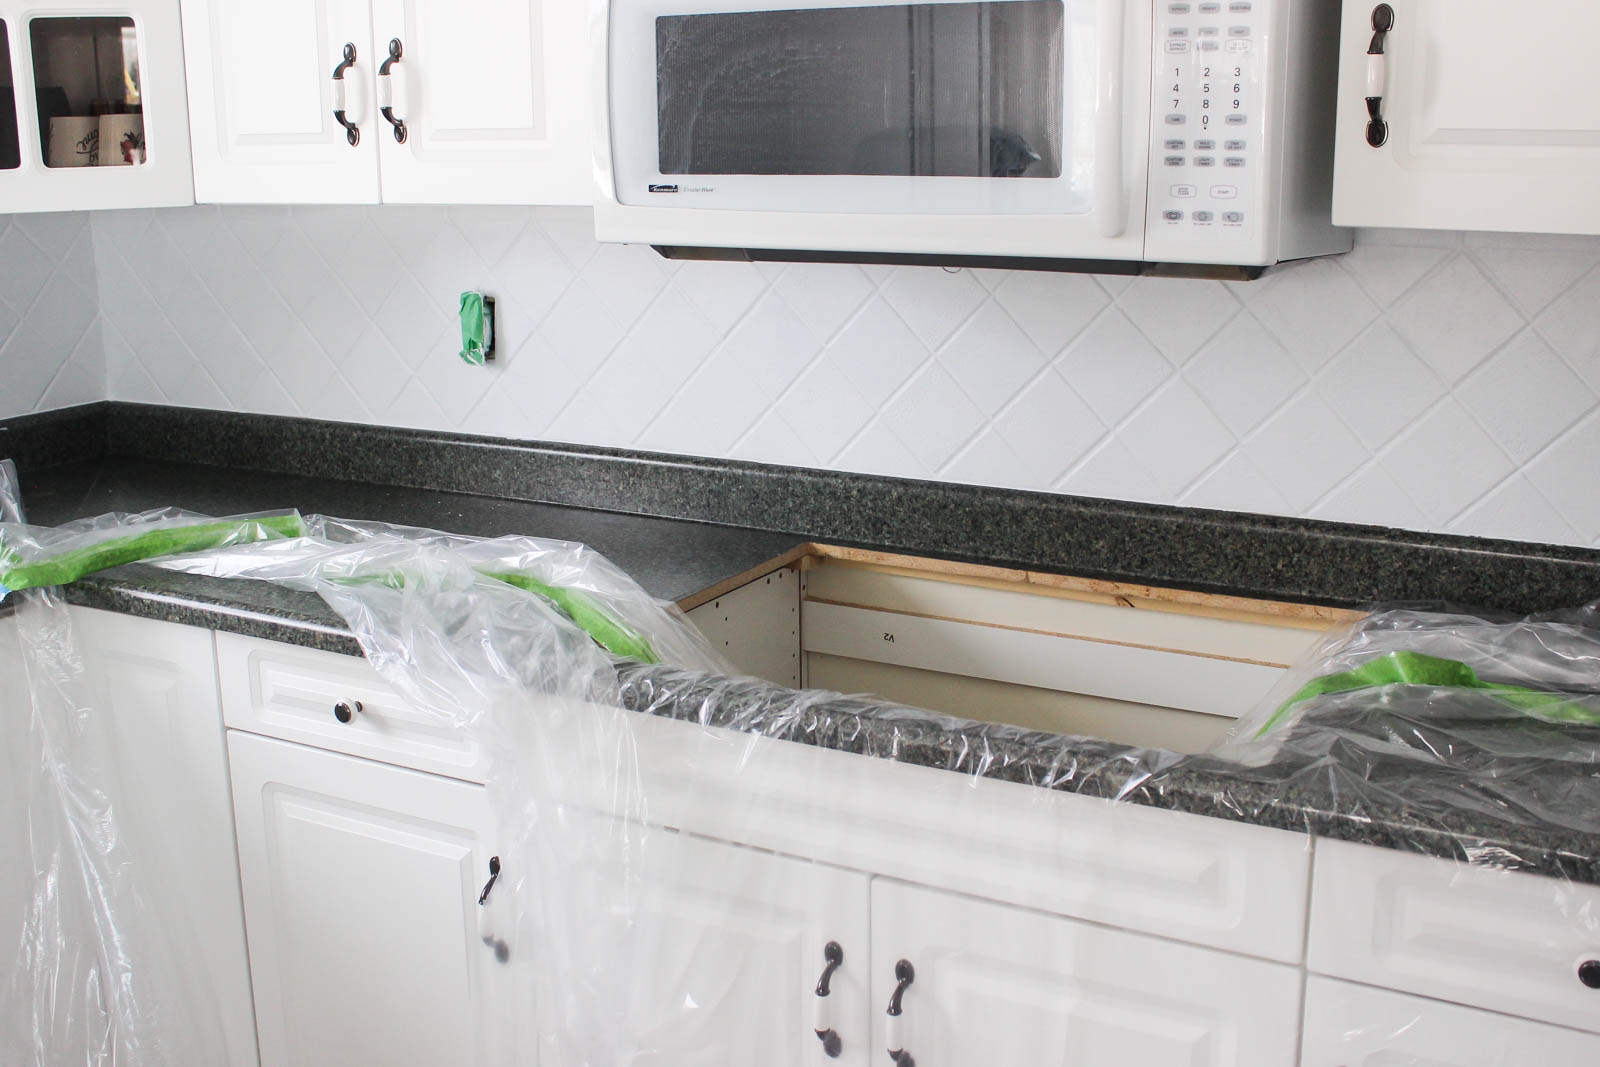
STEP 1: Repair & Clean Countertops
If your countertops have any cracks or large chips, you’ll need to repair these before you use the countertop transformation kit. Use an epoxy putty to fix these areas because the epoxy you use on the countertops will be able to adhere to it (i.e. don’t use a wood putty or filler). You do not need to worry about small scratches or chips because these will fill easily.
Once the repairs are done, completely clean all countertops with soap and water to remove any grease or debris. Allow the counters to dry before beginning the next step.
STEP 2: Prep Countertops for Paint
Each kit comes with a diamond embedded sanding block that you use to sand down the countertops. Push down in a circular motion on all surfaces of your countertop. Sanding them gives the epoxy something to grab onto and stick to once you are ready to paint, so make sure that you sand all of the tops and edges of your countertops so that there are no shiny sections remaining.
When you are done sanding, wipe down your countertops to remove all of the dust. We found Tac Cloths to be the best way to remove the dust easily. When all of the dust is gone, use painters tape to tape off any surfaces that you don’t want paint on. You can also use the painters tape to tape a drop cloth or protective sheet under the counters to protect all of your cupboards and appliances. Cover any drains so that you don’t get any paint or particles in your drain either.
STEP 3: Paint Base Coat
If you are applying one of the countertop transformation paint kits that has decorative chips in it, you will have to mix that first before applying the base coat. If you are applying decorative paint chips, you will have to do this while the paint is still wet. Our kit did not have chips in it, so read your instructions thoroughly if you are completing this step.
Next mix the base coat and apply it to your countertops. You will probably want a Face Mask for this as it is very stinky. Your Rustoleum countertop paint kit will come with a foam roller that you can use to apply the paint. Apply it smoothly and evenly on all of the surfaces. Any cutting that needs to be done (e.g. in corners or edges) can be done with paint brush. You can apply a second layer of the base coat after two hours. If you have any paint runs or missed spots, make sure to sand them down and fix them at this stage.
STEP 4: Apply Top Coat
After 12 hours, you can apply the top protective coat. the protective coat comes as a two part epoxy that needs to be mixed (an activator and a base). Once you mix this together, you must use all of it within 4 hours.
Use the same process as above to paint it on. Using a paint brush for any cutting and painting any edges, and a roller the paint onto larger surfaces. We found that the roller that came with the kit was “shedding” and we ended up switching it out for some foam dollar store rollers we had on hand instead and were very happy with that. The little hairs in the first section of our painted countertop did not stay on forever, but they were very noticeable for weeks and I was very glad that we had switched rollers.
STEP 5: Allow Time for Countertop Paint to Set
Once you are done painting, make sure you don’t do anything that will create excess debris or dust in your kitchen for at least 4-6 hours. After that time, you can gently remove your painters tape and drop cloths, but be careful when removing the tape that it doesn’t peel any of the countertop surface with it.
Avoid using your newly painted countertops for the first 48 hours. After that the kit suggests that light use is ok, but we actually put a small scratch in ours on the third day, so the longer you can let your countertops set, the better! Allow at least a week before resuming regular countertop use.
Before and After Video of Countertop Transformation Kit Application
If you’re interested in seeing what our kitchen looked like before and after our countertop transformation, and seeing the results of the countertop paint up close, it’s all in the video below!
We created this video FOUR years after we initially painted our countertops, so you can see exactly how well they stood up as we share all of the scratches and reactions.
We also chat about why we decided to paint again, and share the entire application process!
How to Care for Your Painted Countertops
Once the countertop transformation paint has cured, you can clean them easily with soap and water or a mild cleaner. Avoid anything too abrasive, as it could scratch the surfaces of your painted countertops. Avoid cutting directly on the surface of the counters so that you don’t scratch the countertop paint. Also, be careful what appliances you set on the counter, and consider placing anything with sharp edges or surfaces on top of a cutting board or trivets. Try not to drag anything across the countertop surface.
Review One Year Later: How did the Rustoleum Countertop Transformation Paint Hold Up?
We’ve had our paint on the counters for over a year now, and I wanted to share an honest review of how they are holding up, and whether or not we are satisfied with the results.
The immediate results of the countertop paint were amazing! We had a ton of friends and family members come over that were surprised by how nice and natural the paint looked. The colour was beautiful, the finish was smooth, and the quality was excellent.
But it is paint, and there are bound to be a few issues. It took me about 24 hours to add the first scratch to the countertop. To be fair… the kit says specifically to use lightly for the first week, and I was probably a bit heavy handed. But I did put a small scratch into the countertop paint right away.
Over the course of the year we have put several scratches in the paint surface. Some because we were dragging appliances, or bowls with a little edge that caught the paint. Anything heavy and metal (e.g. a coffee machine or mixer) has a high probability of scratching your painted countertops. I have a wire basket that was sitting on the countertop collecting bills and paperwork, and I didn’t realize that every time it was moved around, it was also scratching the surface. So it will stay there until we touch up the paint, or completely redo the kitchen!
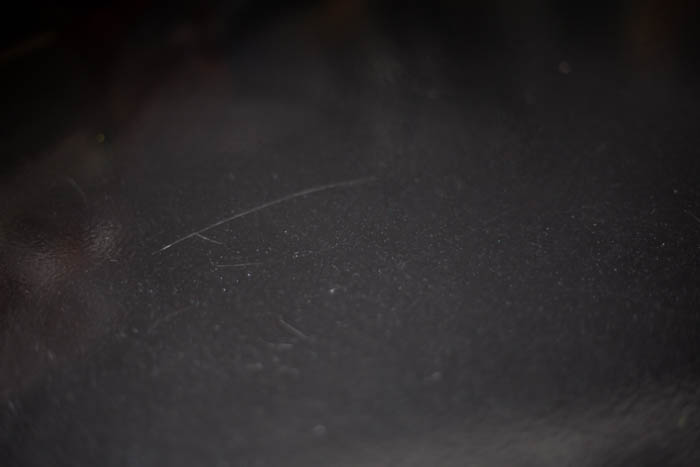
The beautiful thing about the black countertop paint, is that it hides the scratches easily. While we know where each scratch is, guests of ours had a hard time finding them, even when we pointed out that there were scratches to find.
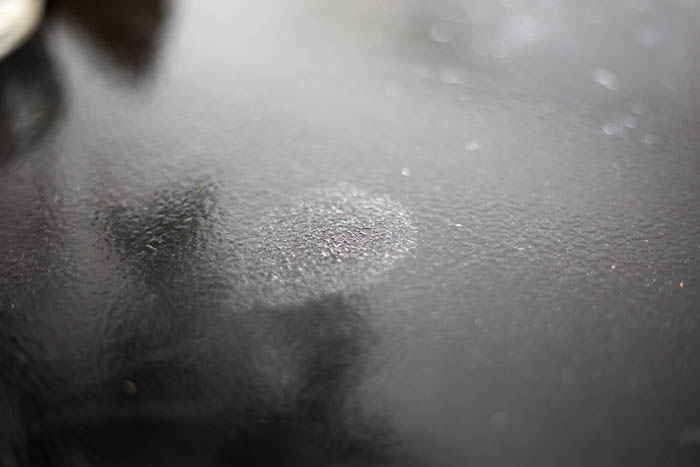
Below is an example of what the scratches look like on the surface of the painted counters:
There is also one spot on our counters that has “reacted” in some way to the paint. I have no idea what happened in this photo below, but it seems like something got onto the surface of the paint and reacted to it, causing it to bubble. It’s just one spot, and I’ve never had anyone notice it (or at least mention it to me!), but I always know it’s there!
Would We Use the Rustoleum Countertop Paint Again?
Short answer: yes. The process of applying the paint is very easy, and it made a HUGE difference in the look and feel of the space. I was so happy we did it when it was done. Over time, it has gotten more scratched, but honestly, I feel like for a countertop paint, it has held up really well. And this is just about the most traffic a countertop will ever see.
I would definitely use this paint in a bathroom, or bar, or somewhere that doesn’t see as much traffic because I feel like it would hold up even better. For a kitchen, it’s not a permanent solution, but it’s a great option for a few years. After that you can either buy a new kit and touch it up again (still way cheaper than new countertops!), or buy the new countertops you’ve been saving for!
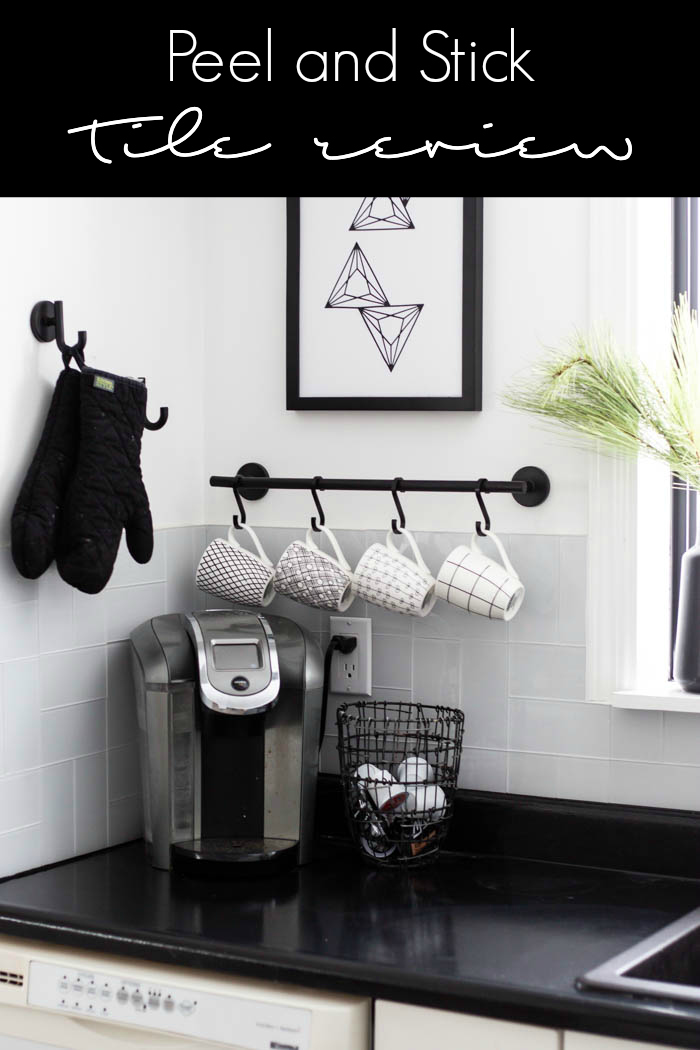
If you’re curious how the peel and stick tile in our kitchen held up, you can read about it in this Peel and Stick Tile Review!
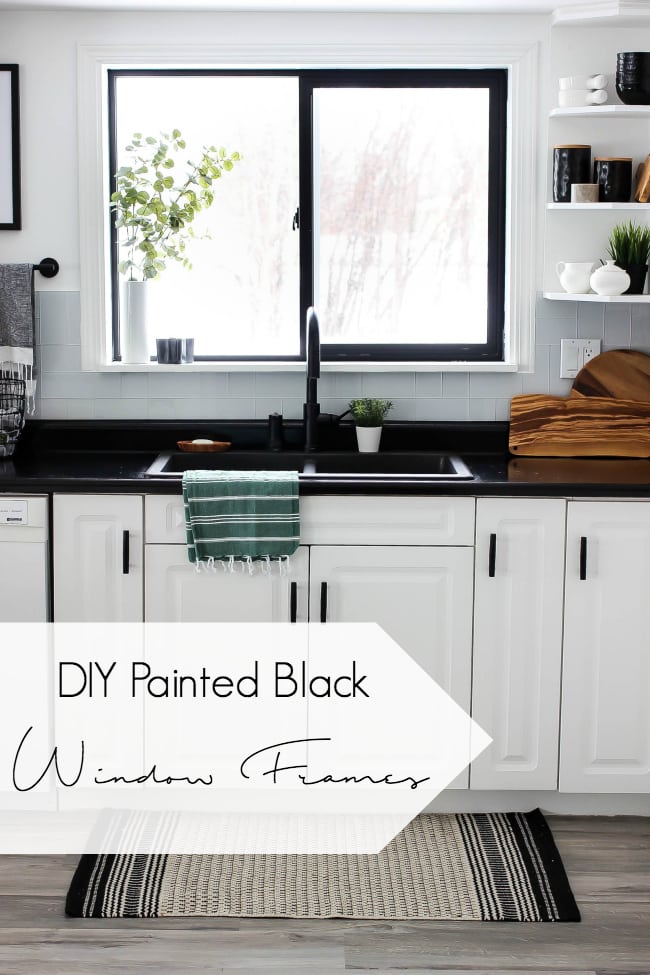
Another quick upgrade we did was painting our window frame in the kitchen black! It made a huge difference, and was a very easy project to tackle!

Karlee wilcox
Sunday 28th of January 2024
Is it okay to use paint sprayer to apply the countertop kit? Or is it only to be applied with brush?
Lindi
Monday 29th of January 2024
I would use a brush/roller, the clean up with a sprayer with the epoxy would be a pain, and the epoxy self levels really nice.
Wayne
Thursday 13th of August 2020
Hello I want to refinish my formica kitchen counter tops but my formica curls up to the bottom of the top cabinets (appx 16") will the epoxy stay put and not run down the back splash ?
Lindi
Wednesday 26th of August 2020
We did the sides of our countertops and it was fine! It's just like paint, you just want to watch for drips.
Helene
Thursday 9th of July 2020
Where did you get your utensil rack for the wall?
Lindi
Thursday 9th of July 2020
From IKEA :)
Lesley Cox
Wednesday 1st of April 2020
I love the countertop color but I cannot find the Rustoleum Black Mica. Can you help?
Lindi
Friday 3rd of April 2020
It's available at Lowe's and Home Depot in Canada :)
Laurie Bokenfohr
Saturday 22nd of February 2020
I mixed top coat with dry powder. I realized I did wrong so how do I removed top coat so I can do base coat
Lindi
Sunday 23rd of February 2020
I think the only thing you can do is sand it all off, but that's a big job! Make sure you're wearing masks too!