
DIY IKEA Vanity Hack! How to transform your Godmorgon IKEA vanity into a stunning modern built-in! Learn how to add a fluted finish too!
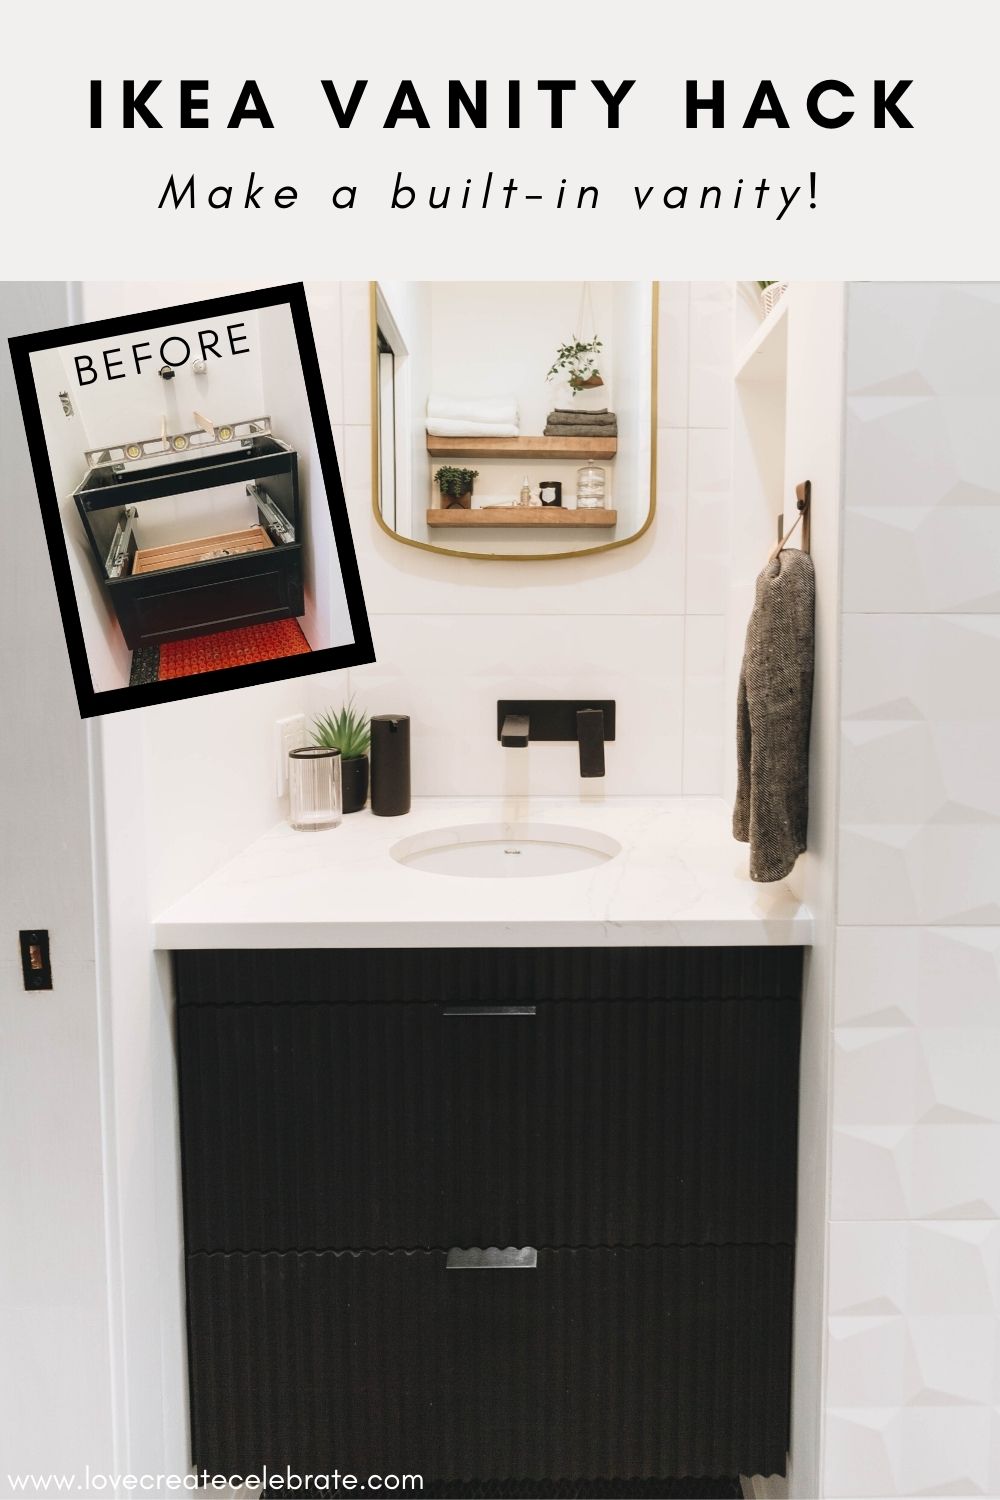
Today we’re going to share our DIY IKEA vanity hack. I’m so excited about this! If you saw our bathroom makeover, this IKEA vanity hack is one of my favorite parts of the whole bathroom! We took a run-of-the-mill IKEA vanity that we found in the AS-IS section and we totally made it look custom and built-in for our brand new en suite.
We picked up a smaller Godmorgon unit from the AS-IS section at IKEA and put it together. Then we installed it in place in the bathroom.
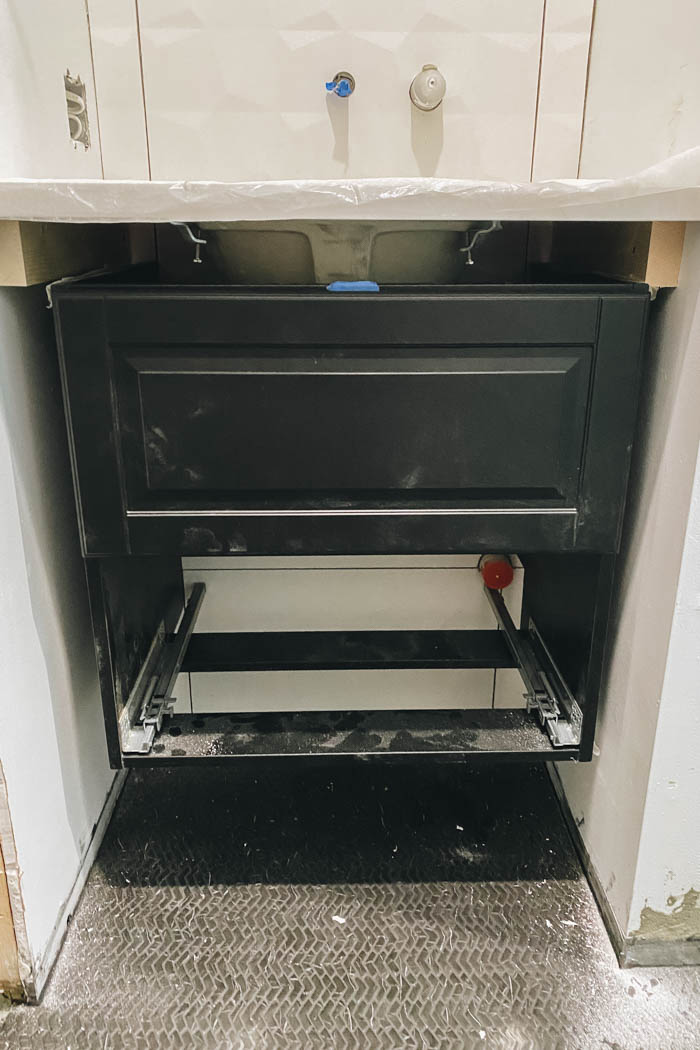
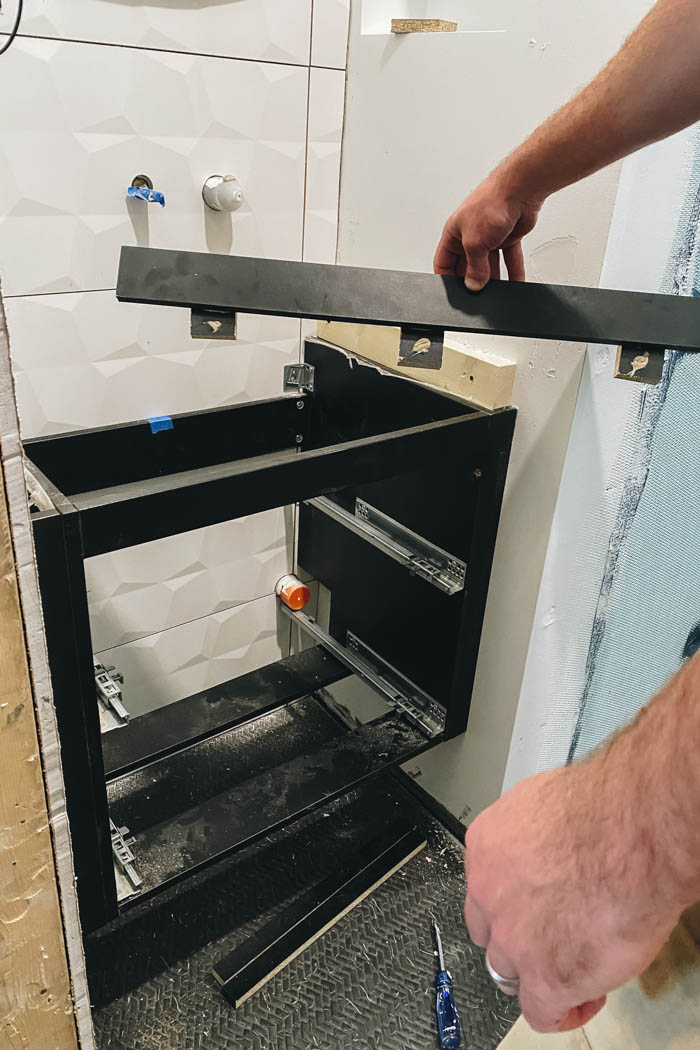
This is where the vanity is going to live. We teporarily installed it with block that’s holding the countertop up, so this is everything’s final position. You can see that the vanity would typically leave gaps on either side, if we didn’t modify it to make it look built-in. Now we know what we need to do to make it look built-in and one hundred percent custom to this space.
We raised the vanity counter height just a little bit because we have an undermount sink and wanted to minimize how much the sink impacts the drawers. Because of this, we will be using filler panels on both sides and at the top.
The spacing will be a little bit different on each drawer because we have plumbing to work around. The plan is to then take the IKEA drawer faces off and make our own custom drawer faces and when they are closed, they will be completely custom to the space.
Making Filler Pieces
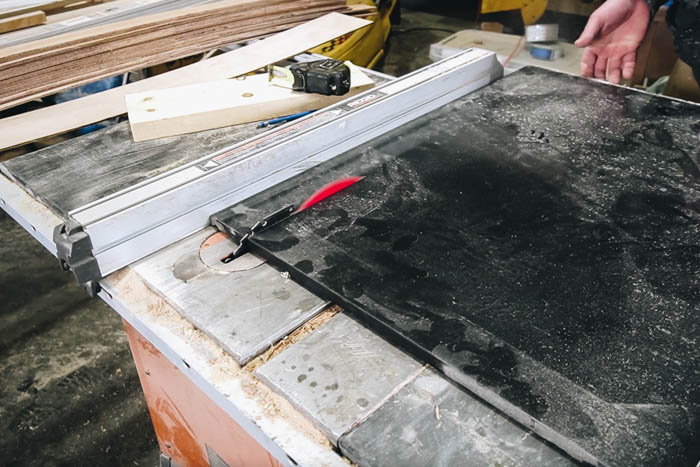
We had leftover material from our office makeover with IKEA cabinets and it was an exact match to the vanity cabinet, so we decided to cut those pieces for the filler panels. You could also use wood and paint it to match.
To make the filler pieces, you’re going to measure the top, middle and bottom of each side. You want to do this in case there are any variations in your wall. The closer to the wall the filler piece is, the more custom built-in the look will be.
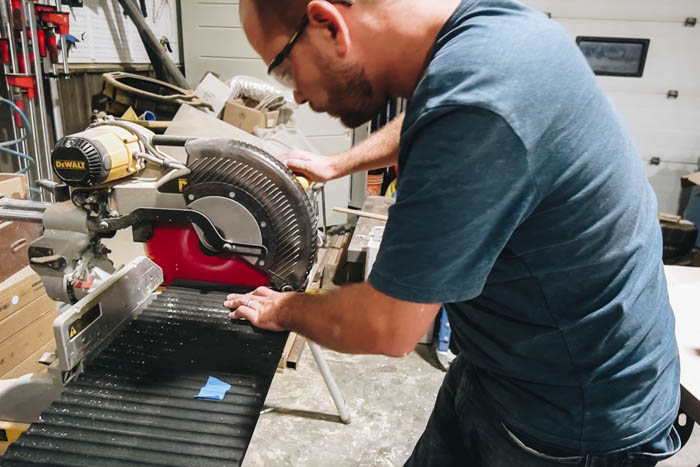
While cutting the panels, we added tape on top to protect the finish and minimize the chip up from the miter saw. Once they are cut, dry fit them a couple of times to make sure the have a nice tight fit. Counter sink holes from inside the cabinet then use 3/4″ screws to attach the filler pieces to the cabinet.
Making Drawer Fronts
In order to make the drawer fronts you are going to need either pine boards or MDF. We weren’t sure if we were going to stain them or paint them so we used pine board. If you know you are going to paint them you can use MDF.
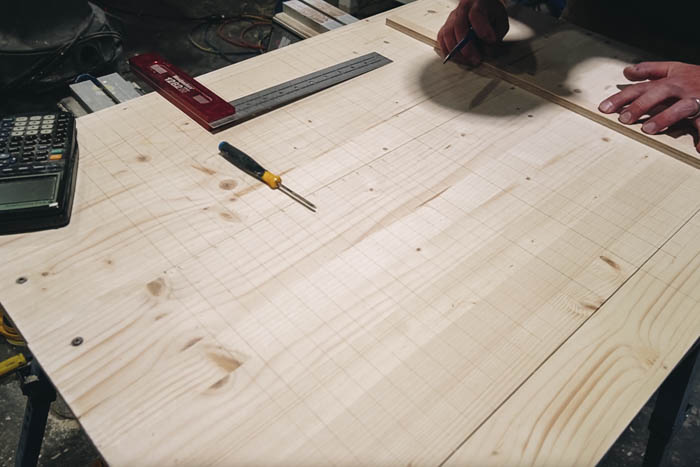
You first want to cut your boards to height. For the bottom two drawers we mimicked the exact size of the IKEA drawer faces. For the top drawer we added a custom filler piece to make up for some of height that the undermount sink required.
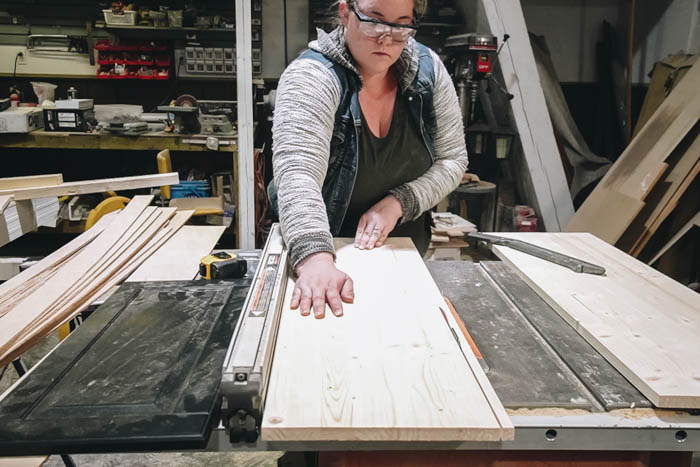
Once we had the height cut, we cut the boards down to a width that was actually wider than what our final width of the cabinet faces were going to be. We did this because we weren’t sure what our pattern was going to be and it gave us a little extra material to hold everything in place until we finished all the drawer faces.
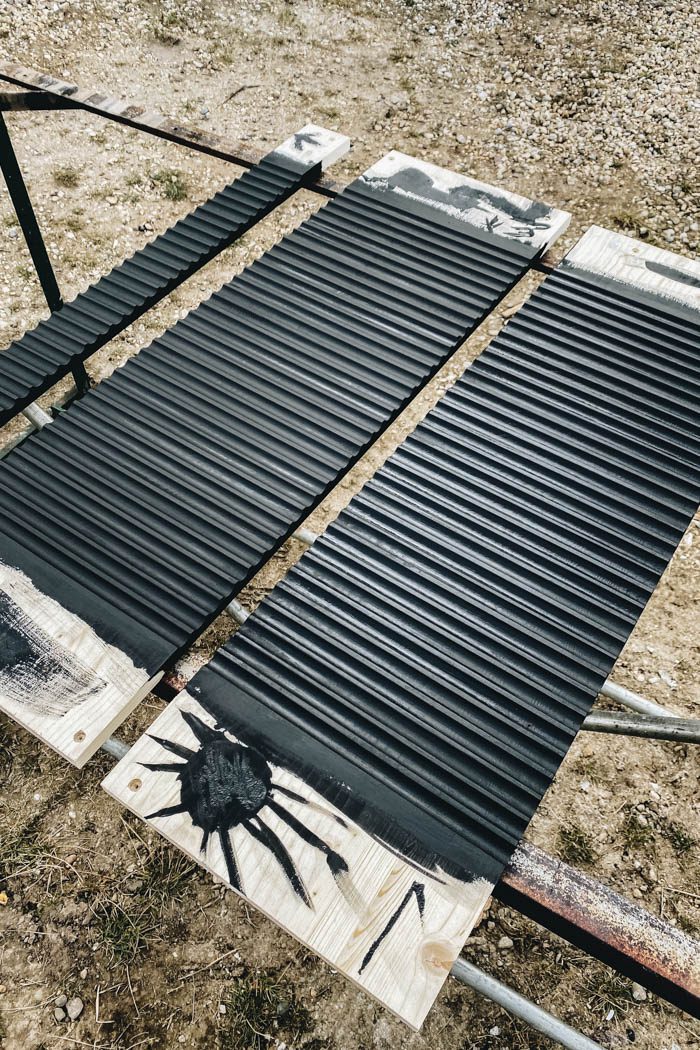
How to Get a Fluted Finish
I had a specific design in mind that involved a fluted look for the final vanity faces. We tried a bunch of different router bits to see what would look best and what would match the final design goal.
We experimented with three elements.
- Depth of the cut
- The router bit type
- The spacing
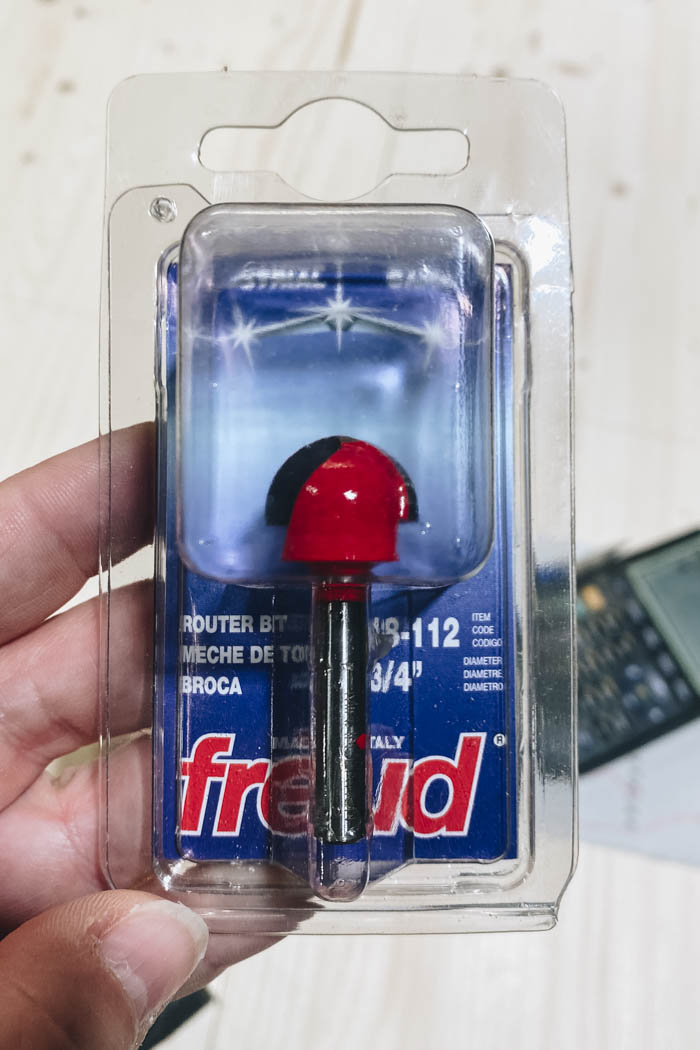
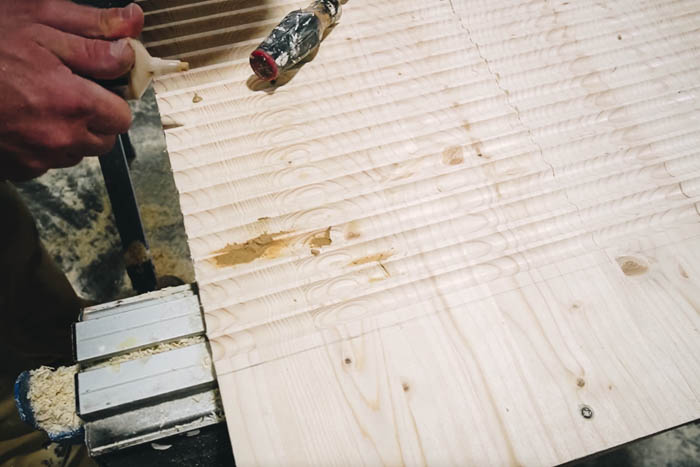
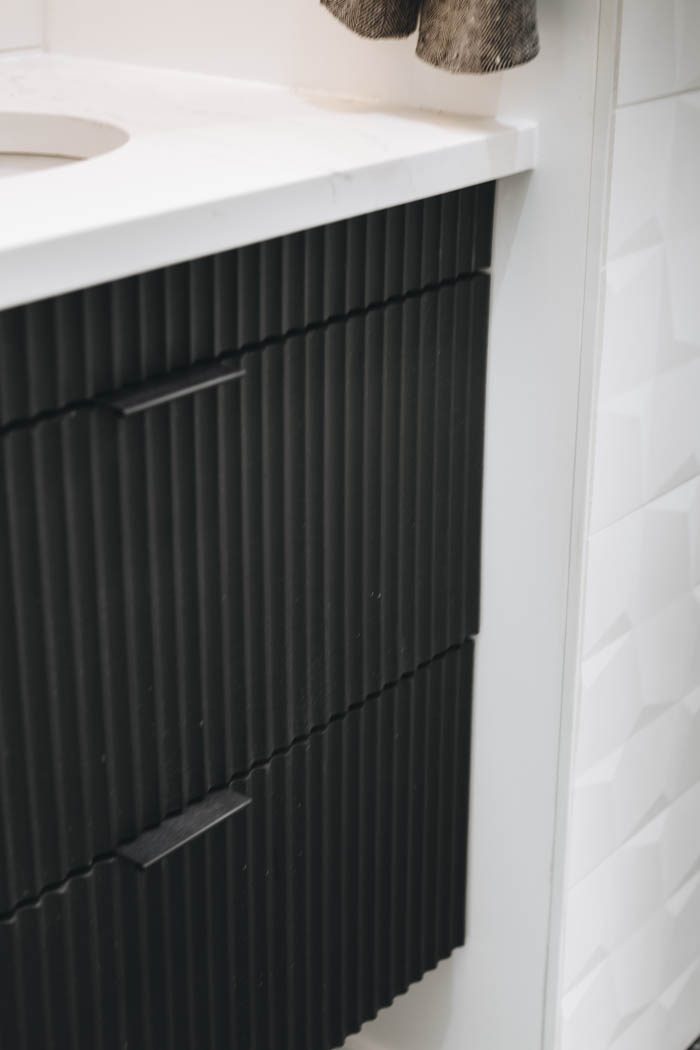
We finally settled on a 3/4″ round nose router bit, spacing of 7/8″, and a depth of 1/4″.
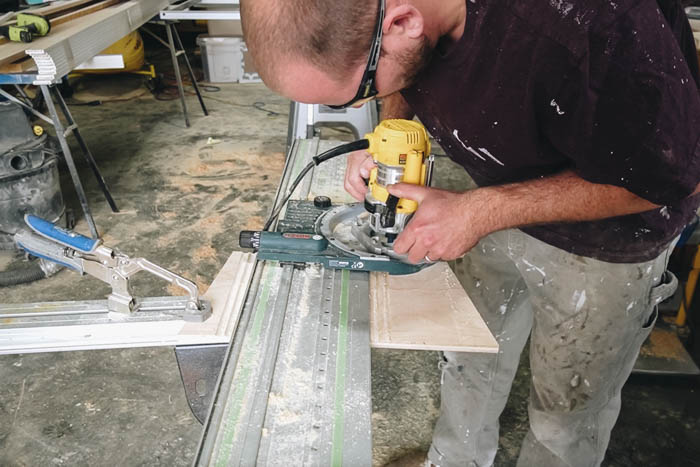
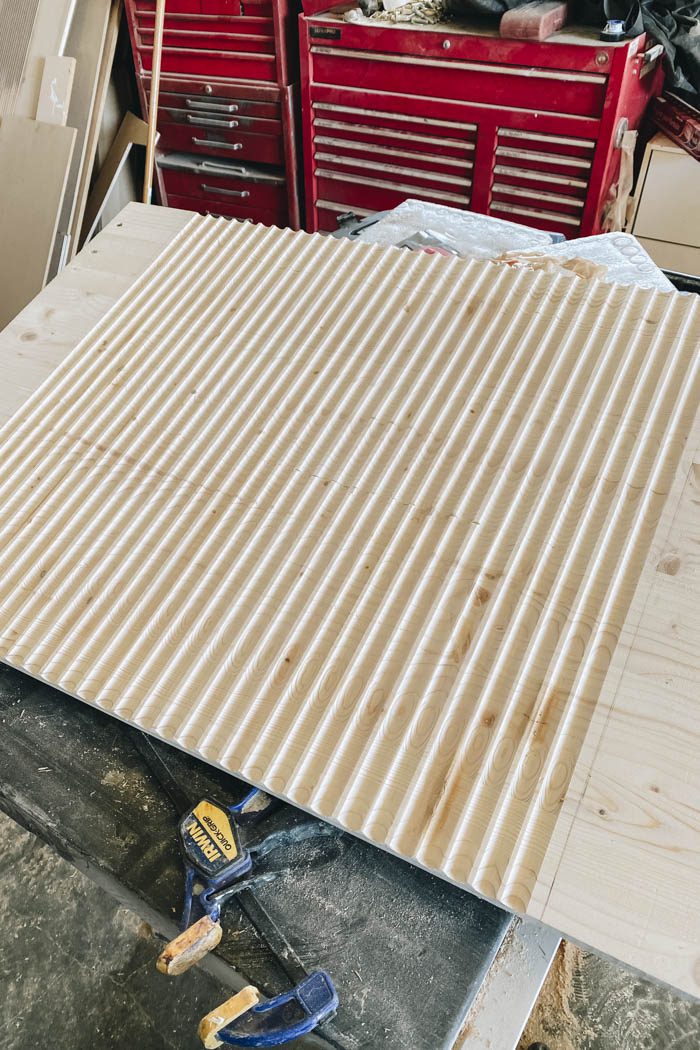
All three faces were attached together, using stir sticks in between (for spacing and to make sure the drawers would open and close nicely) to make sure we had a continuous pattern and that it would match up when the faces were all attached. We gave everything a good sanding first with 120 grit sandpaper, then with 220 grit sandpaper for a nice smooth surface to apply the design.
Next we marked all the lines for the design and set up the track and router guide to start cutting the grooves. This process took a bit of time and patience, but overall worked very well! You can watch the full YouTube video below to see this process in action.
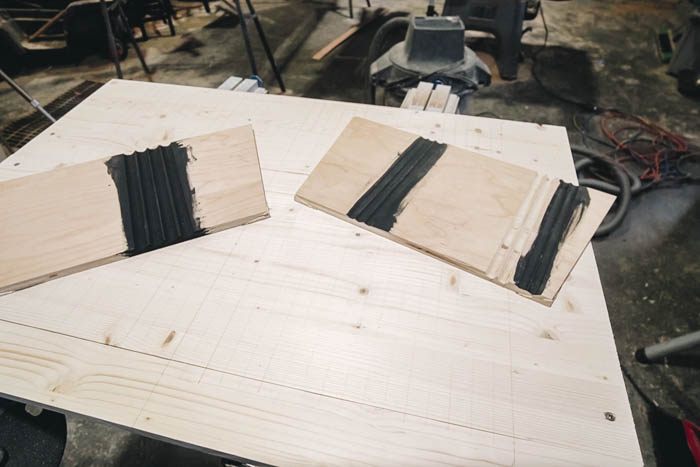
We did all three panels fully and then went back to address a couple areas with chip out (where the router took off a little more than we wanted). We did have a couple of damaged spots. For those spots we filled them with wood filler to patch, then sanded all the grooves gently to get them ready for paint.
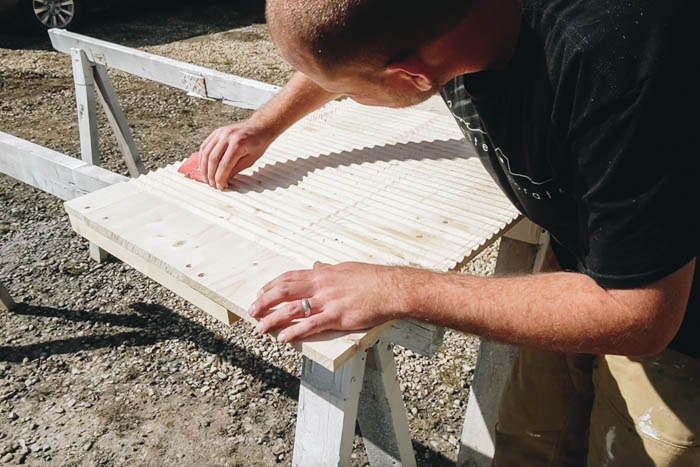
We applied 2 coats of black paint to the Ikea vanity hack drawer faces and set them aside to dry. We noticed a few more imperfections after the first coat of paint, so we filled those and sanded again before applying the second coat.
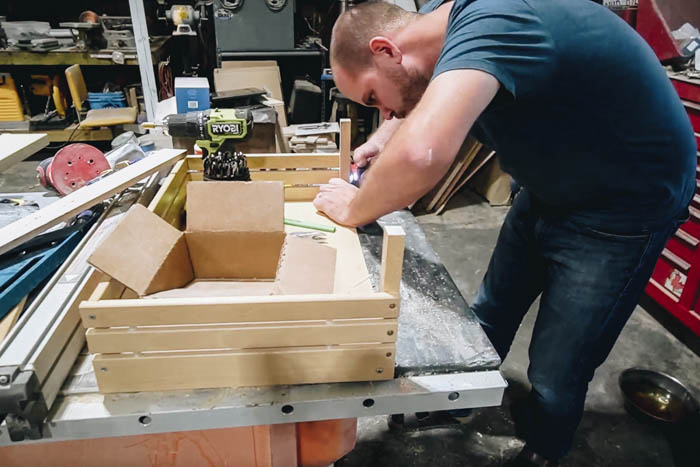
Modifing IKEA Drawers
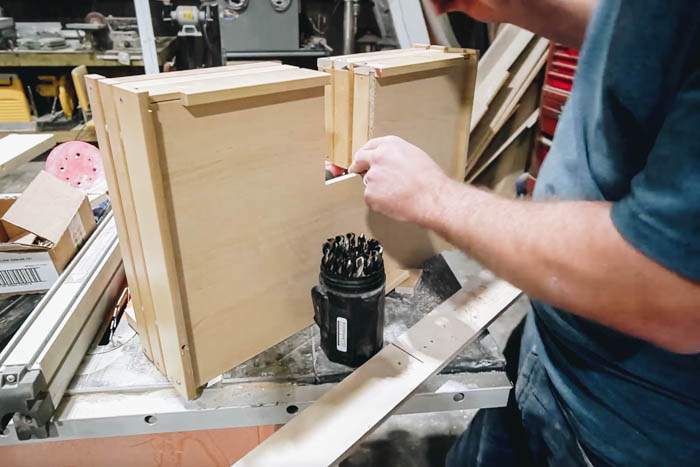
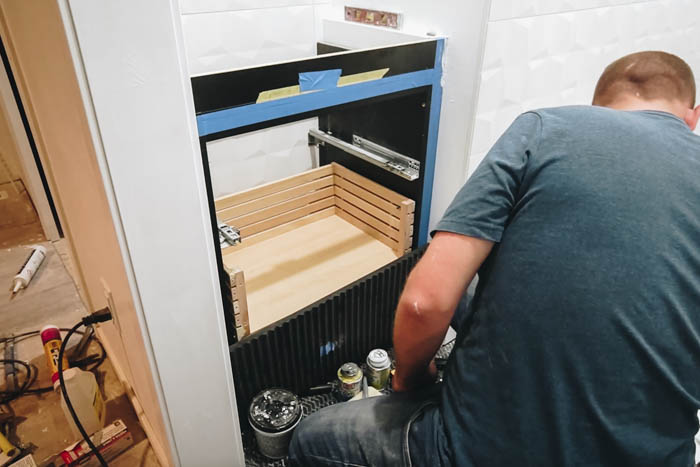
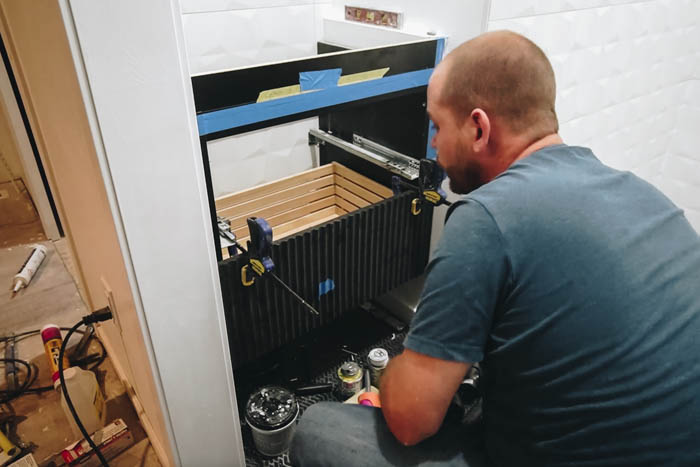
The next step is to modify the IKEA drawers. Because we made custom fronts, the IKEA hardware wouldn’t work to attach them to the drawer. We had to come up with our own solution so I tried a couple of different methods to install the drawer face to the drawer.
The best option was using a little block that you attach to the side rails of the IKEA drawer and drilling a hole through that block to the front face to attach the faces (in the third photo underneath)
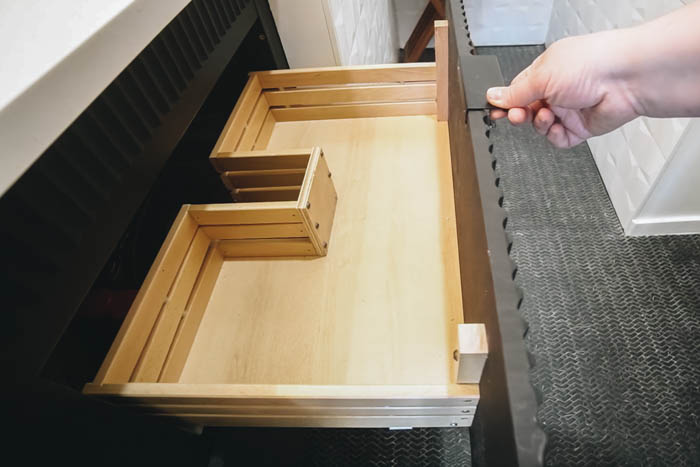
We also had to modify one of the drawers to accomodate the drain pipe that extended down into the drawer area. We cut the hole on the back of the drawer and used some of the old drawer slats to box it out and finish the drawer.
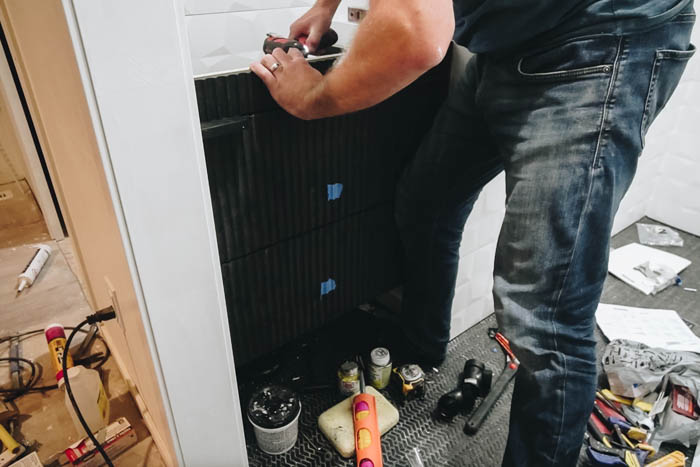
Attaching Drawer Faces to the IKEA Vanity Hack
We took measurements from the center of the vanity to each side and transfered them to drawer face. The reason we had to do this, if you remember, is because we actually left the drawer faces long so that we could get a nice custom fit when we went to install them. Doing it this way for each drawer face will ensure that all the grooves line up and you have a perfect fit when you go to place them.
Now you can install your drawer faces using the blocks we added.
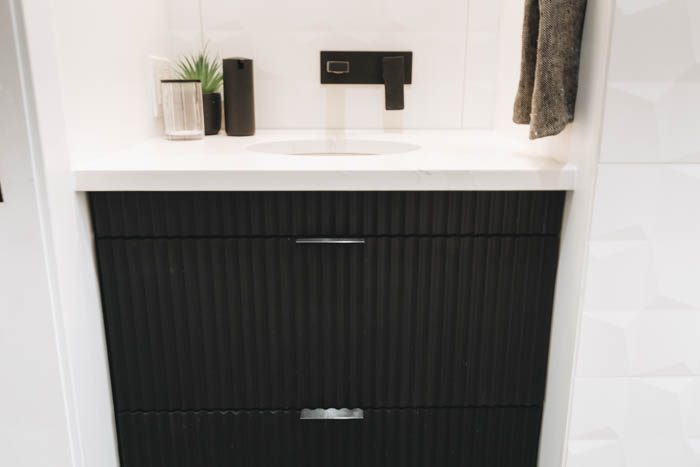
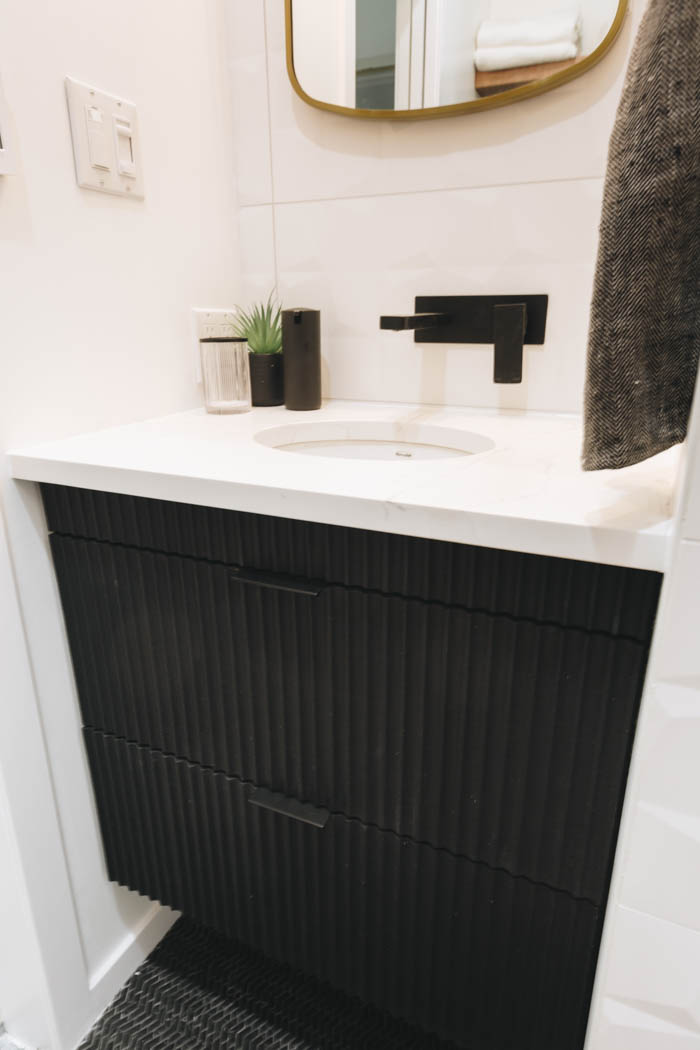
You can see when the drawers were all done that we had this piece we had added is attached both the side of the IKEA cabinet drawer and to the drawer front. We used these drawer pulls to add a modern touch and attached them to the top of the drawers.These pieces are what pulled it all together and gave it the beautiful finish with custom fronts.
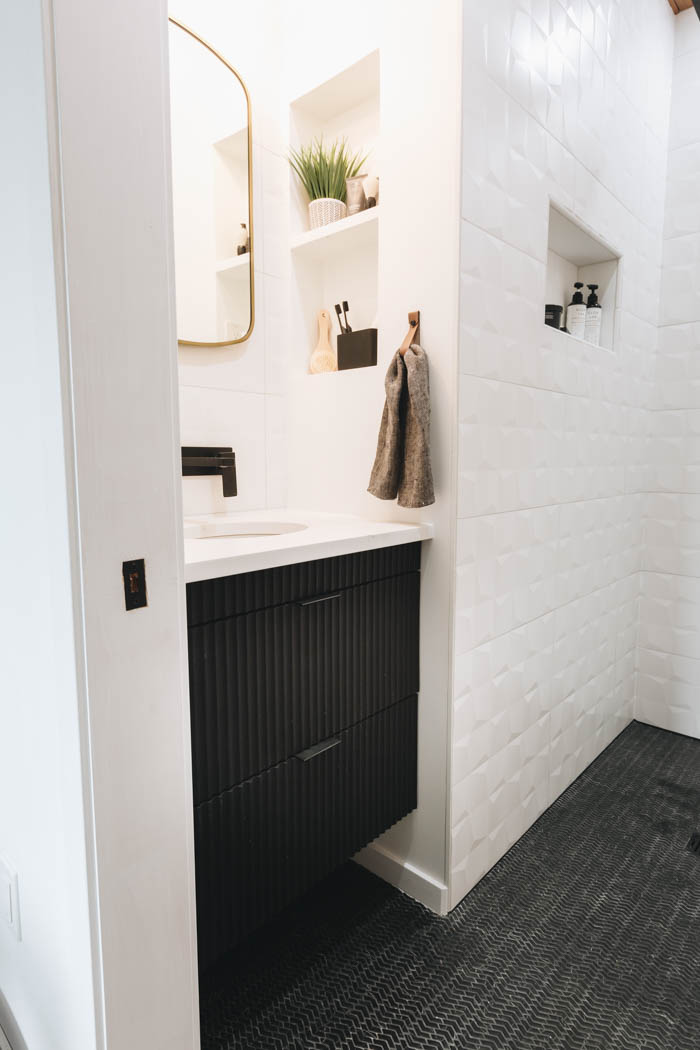
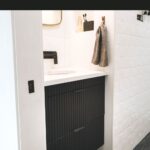
Our Finished IKEA Bathroom Vanity Hack
This vanity is by far my favourite part of this bathroom ensuite and it was extremely affordable compared to buying a custom piece already made.
How to Do a DIY IKEA Vanity Hack
Be sure to watch the video tutorial to bring all of the instructions to life and get a visual of the steps to do your own IKEA bathroom vanity hack.
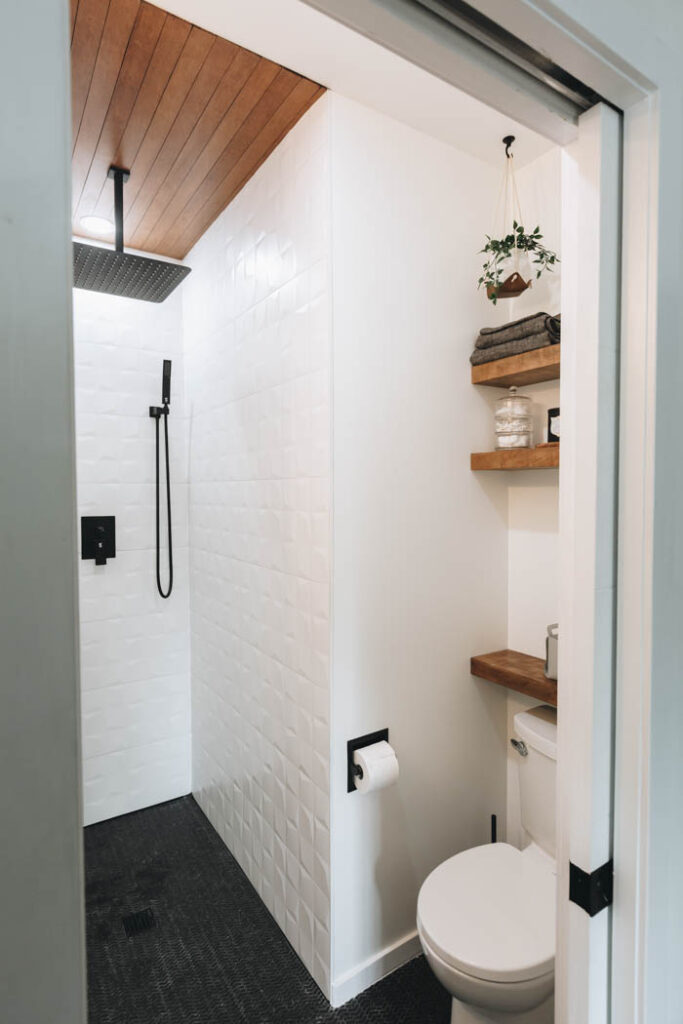
Be sure to check out the full bathroom reveal!


Neha @ Love Food Recipes
Monday 31st of January 2022
Wow! This is really amazing. Thank you for sharing such articles. Informative & helpful;)