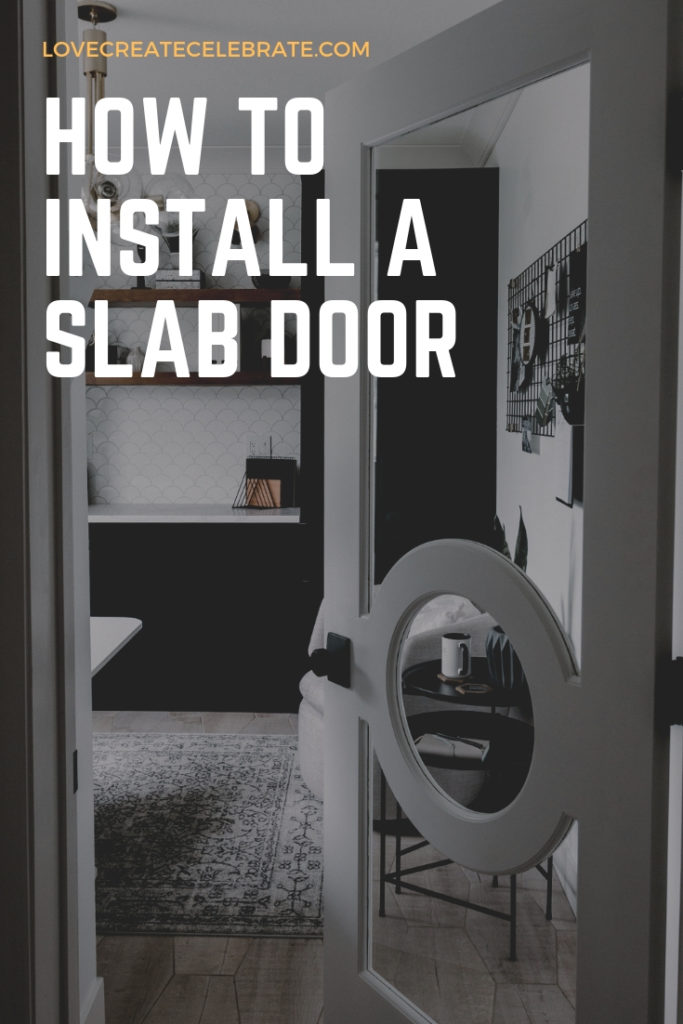
Learn how to install a slab door in a few easy steps! Add interior doors to any room with this DIY tutorial, including how to add knobs and hinges.
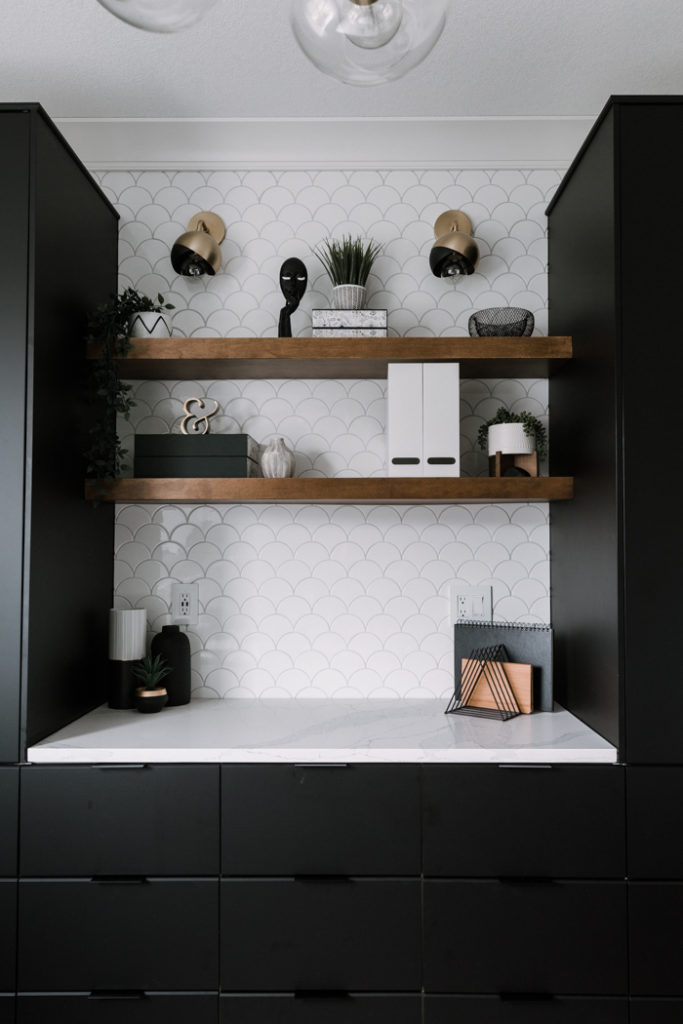
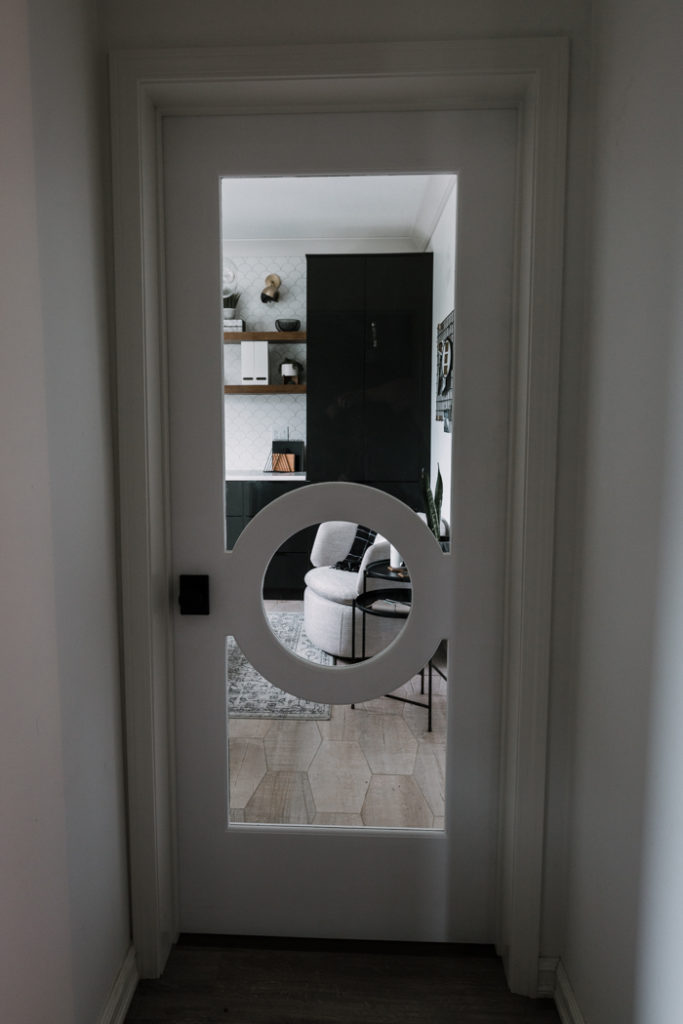
Here’s the thing about interior doors…. they don’t have to be boring! When we started to renovate my home office, it was a great opportunity to add a fun door to the hallway. This door frame was built, but there had never been a door here before, so we were starting from scratch, and picking out beautiful knobs and hinges to make it all into a beautiful stand-out feature of the room!
*This post was sponsored by Schlage and may contain affiliate links. As always, opinions are 100% our own. For more information, please see our disclosure page.*
You have a bunch of options when it comes to installing a new door. In our case we just needed a door as the door jamb and casing was already there. All we needed was to add a door, hinges, and a knob/striker plate.
Materials Needed to Install a Slab Door
Tools Needed to Install a Slab Door
- Router or chisels
- Circular saw or track saw
- Straight edge
- Measuring tape
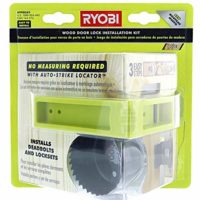
- Door Knob installation jig (optional but makes install of knob quick and easy
You can also buy doors that are pre-hung in a door jamb/casing and can be installed into a framed opening. But since we already had the jamb installed we opted to just get a slab door.
How to Install a Slab Door
Our casing was already installed, but if you have to install casing as well you can follow this great tutorial. Ensure your casing is level, as if it is out of level you will have a hard time getting your door to open and close nicely.
Taking Measurements for Knobs and Hinges
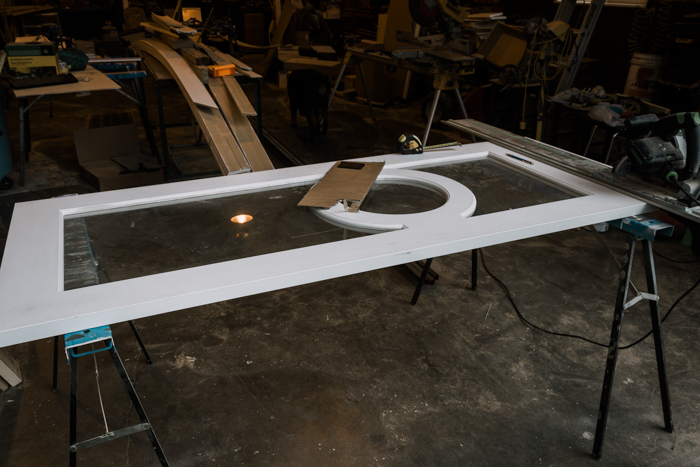
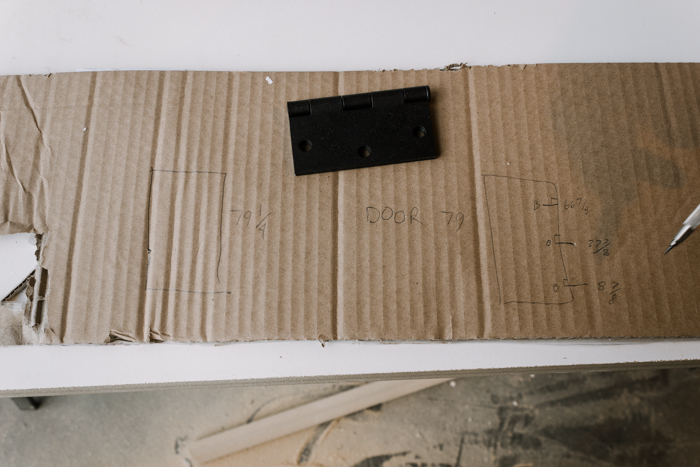
First, measure your door jamb to determine size of your slab door, the standard width sizes for interior doors are 24”, 28”, 30”, 32” and 36″. The height for all passage doors must be a minimum of 80 inches. As you can see from our very technical drawings above… we needed a 32″ wide x 80″ tall door.
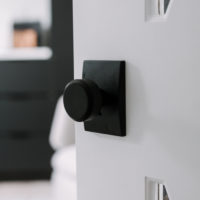
The next step is to set the knob height for the door. Typically door knobs are set around 36″ from floor height. In the door we choose we wanted to center the knob near the circular pattern, resulting in a knob height of 35 1/2″.
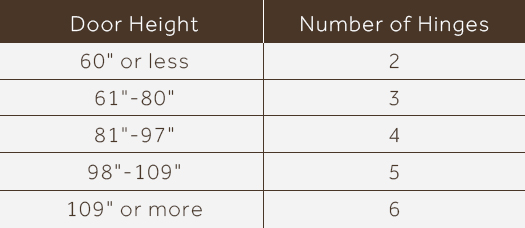
Determine your hinge type, style, and location. Typically interior doors use 2-3 Hinges. As this door is solid 32″ wide MDF door with glass (making it a bit heavier) we decided to go with 3 hinges.
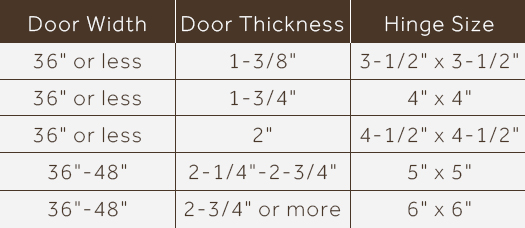
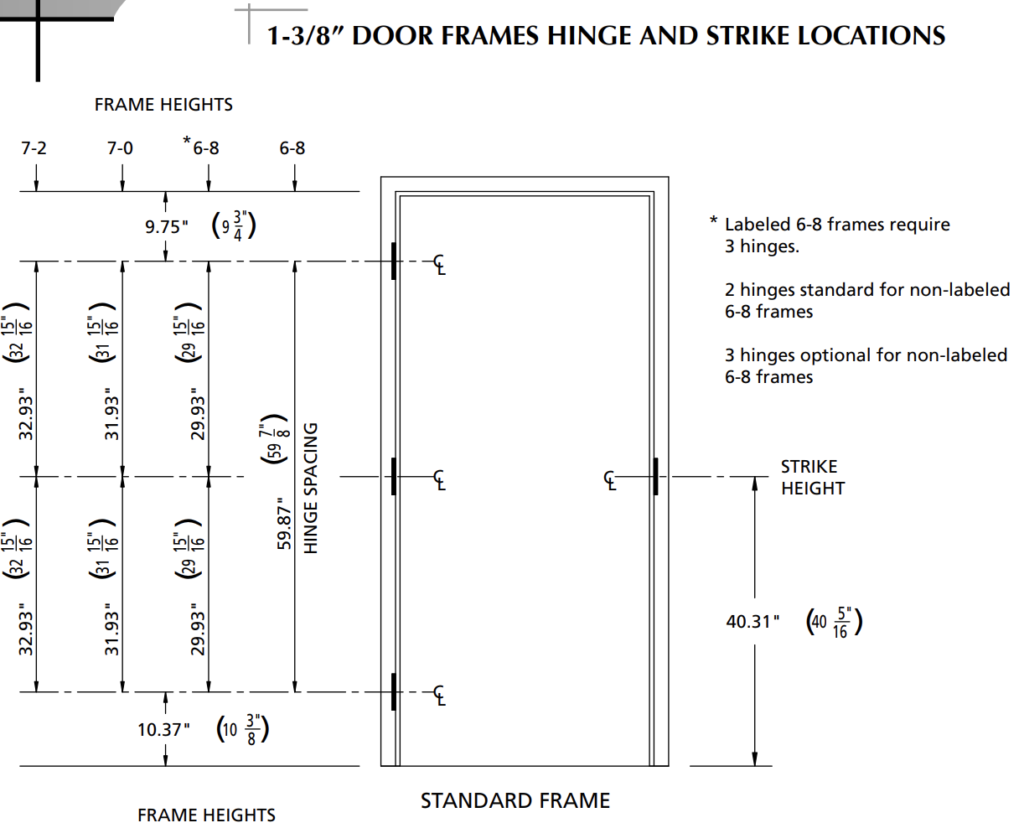
You can use the guide below to help set your hinge height/location (note the striker plate will be set by your knob height and may vary from the dimension noted below):
Installing Knobs and Hinges
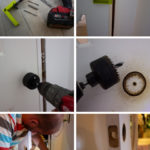
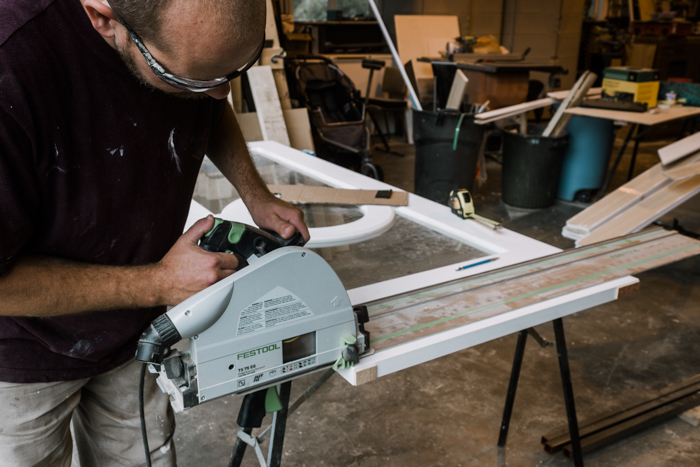
With your hardware chosen you can now get ready to start installation of your hinges and slab door. In order to have the proper clearances around the door we had to remove 1″ off the bottom of our door.
The next step is very important. We are marking out the measurements for all of the hinges. If you mark these incorrectly, it could cost you a whole door, so measure, measure again, and check one more time!
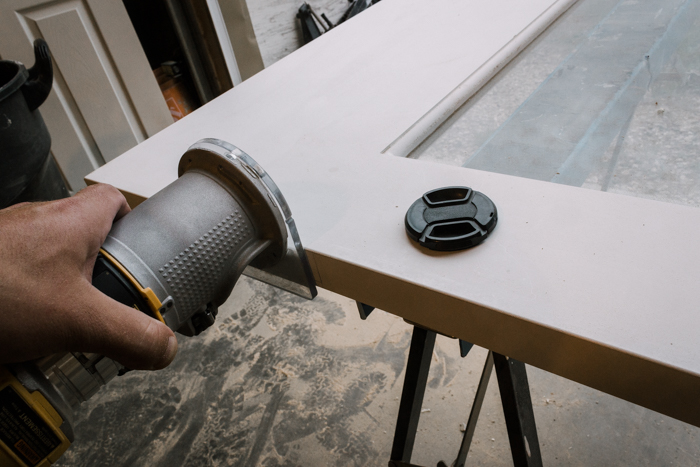
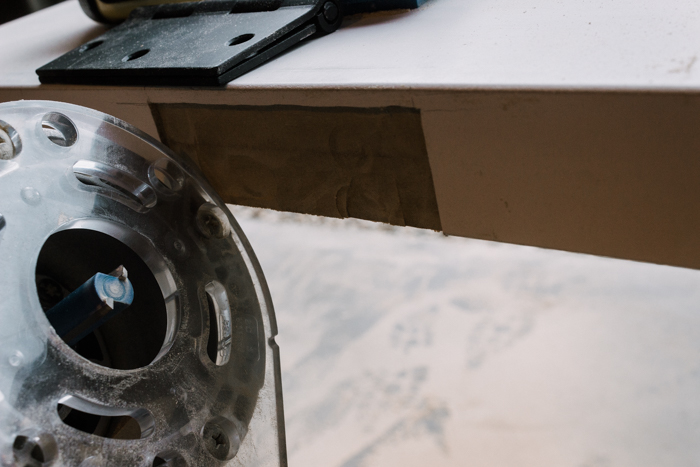
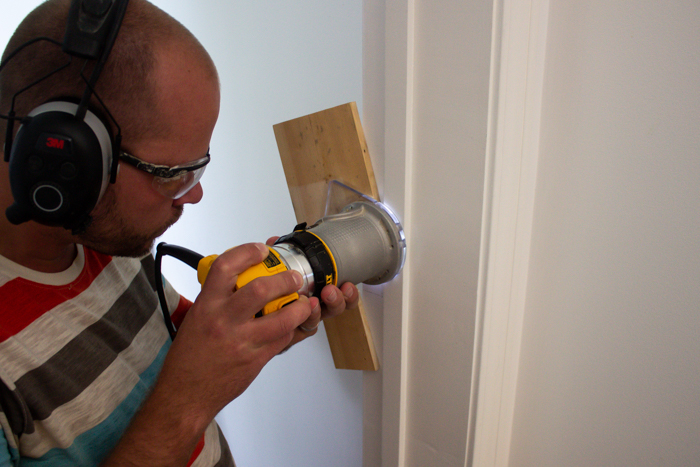
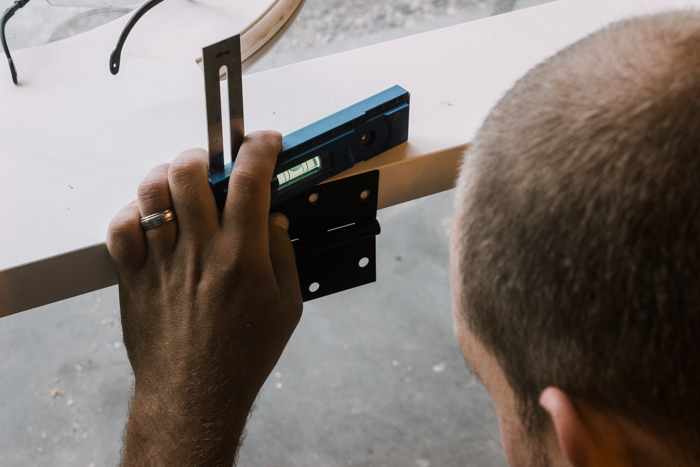
Using a router or chisel remove the material from where you will mount your hinge, only take enough material away to allow your hinge to mount flush with the face of the door jamb or door.
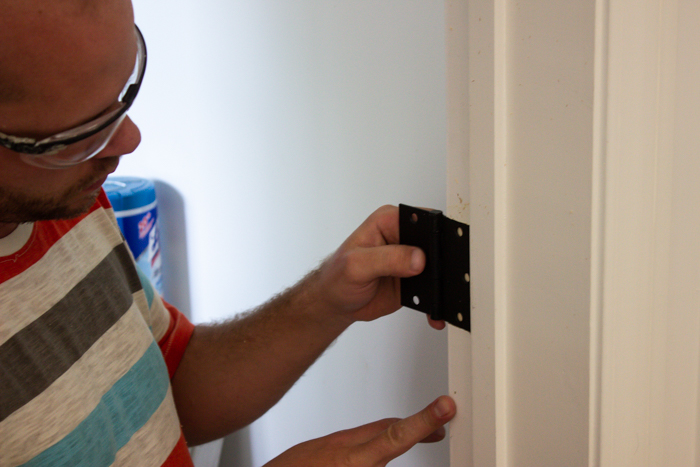
With the material removed you can mount your hinges to the slab door and to the door jamb. Mount each side of the hinge individually to each element (remove the pin to separate the pieces). You will likely need two people, one person to hold the door and one person to install the pins into the hinges
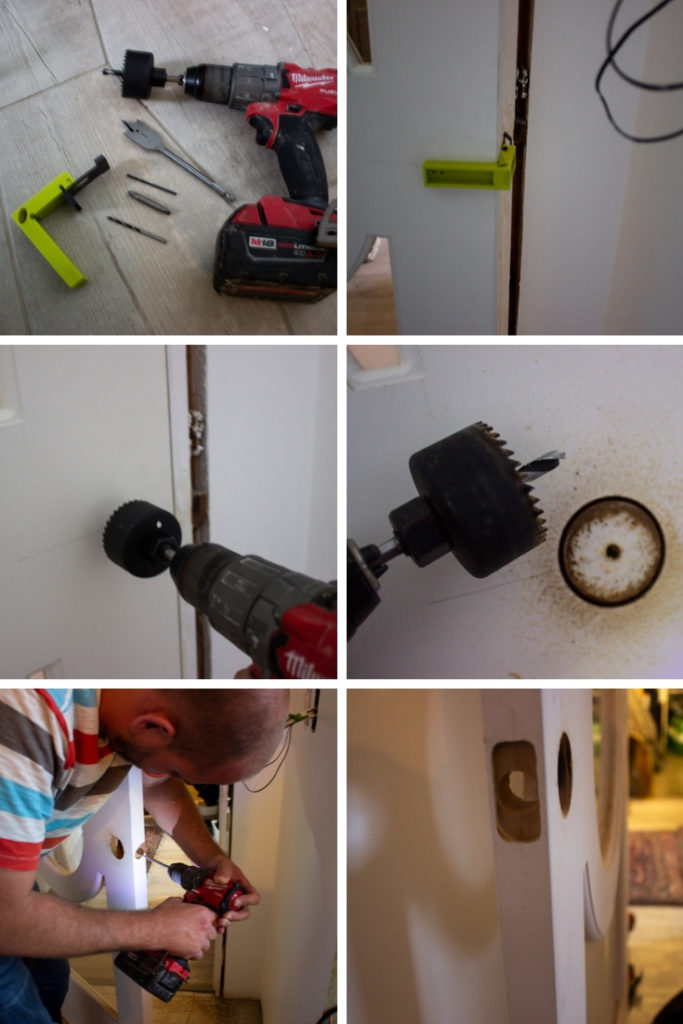
With the door installed you can move onto your knob. We use a slick knob jig to help with the door know installation and the striker plate installation.
Using the knob jig you can quickly locate the holes for the knob and the latch. Once everything is marked, you can easily cut the locations for them using a chisel or router
With everything cut you can install your knob and hardware and test your door.
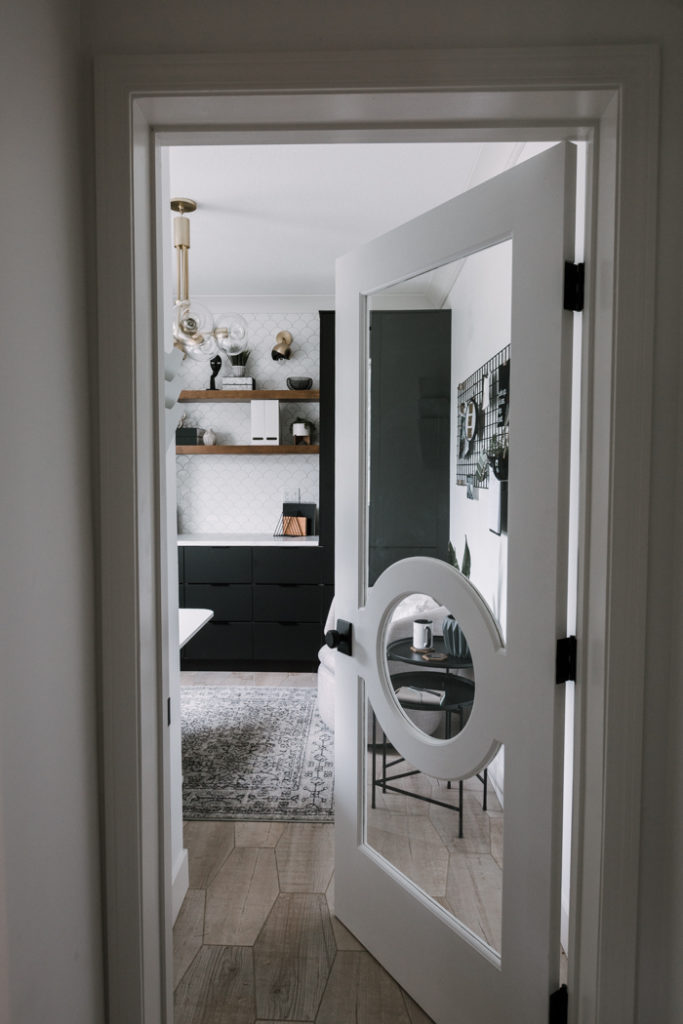
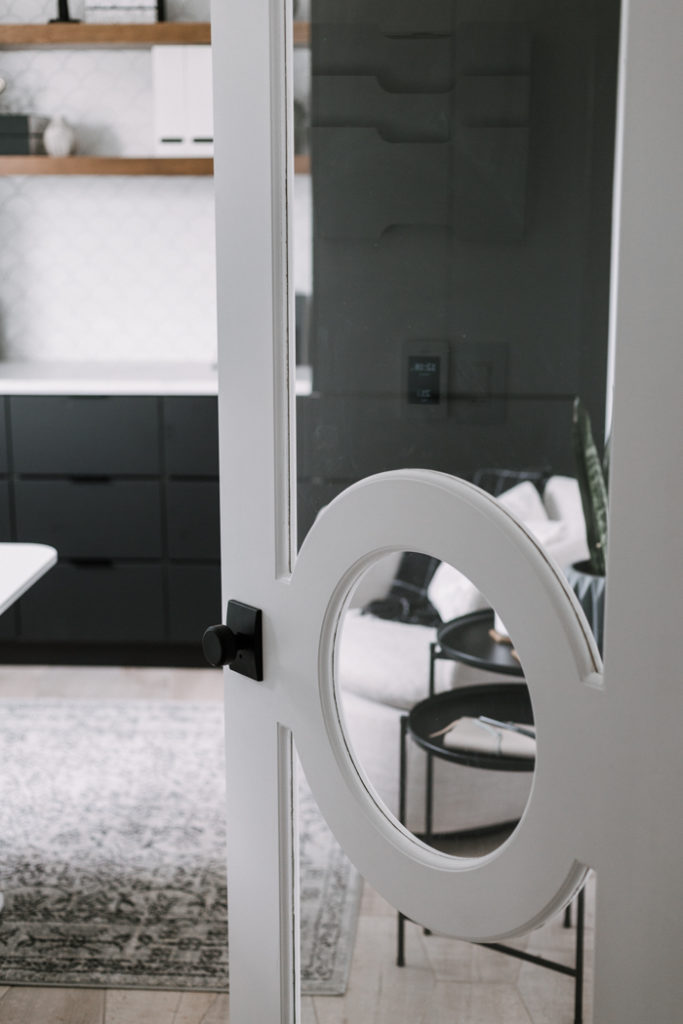
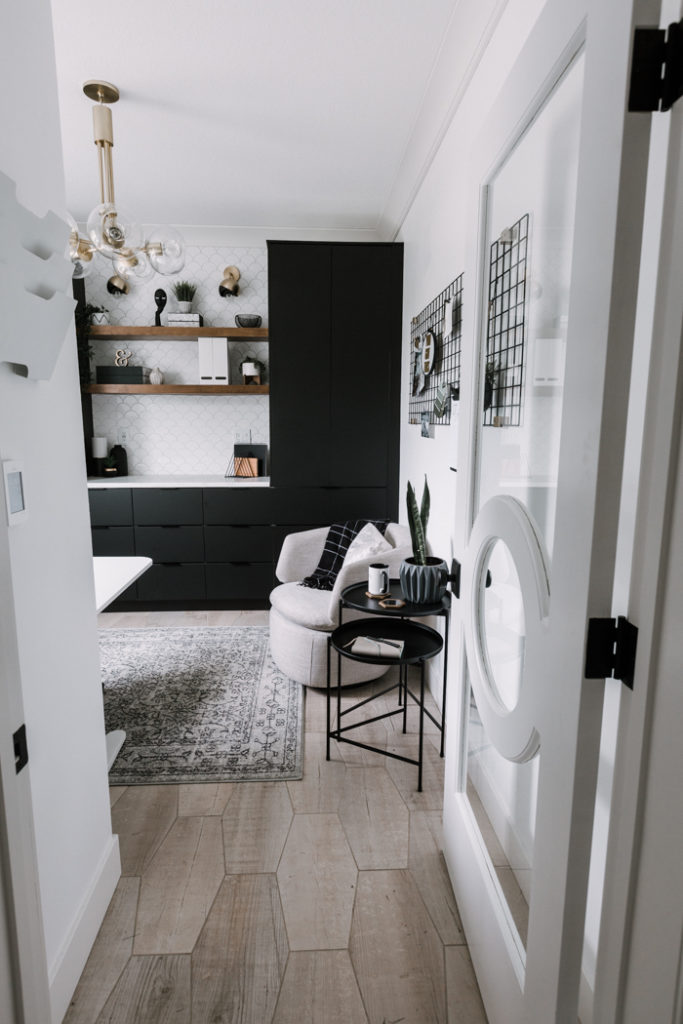
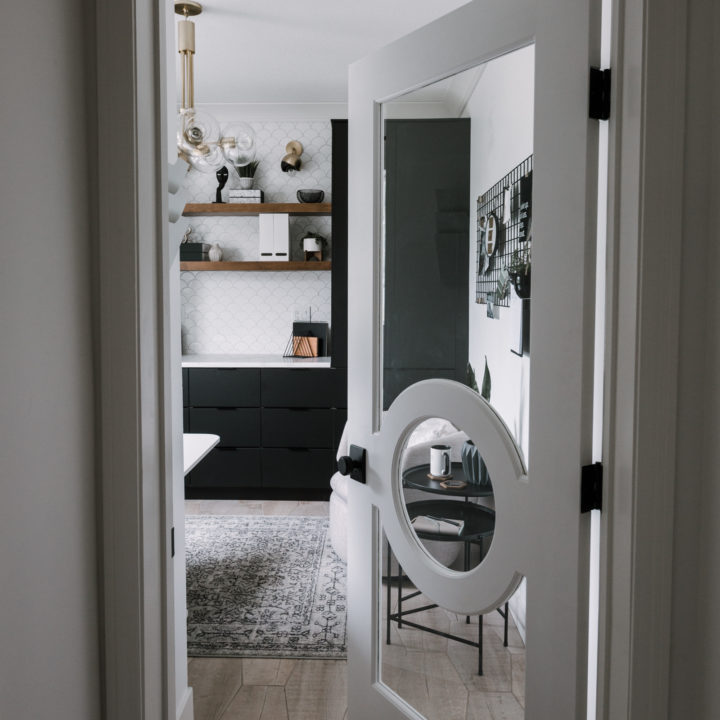
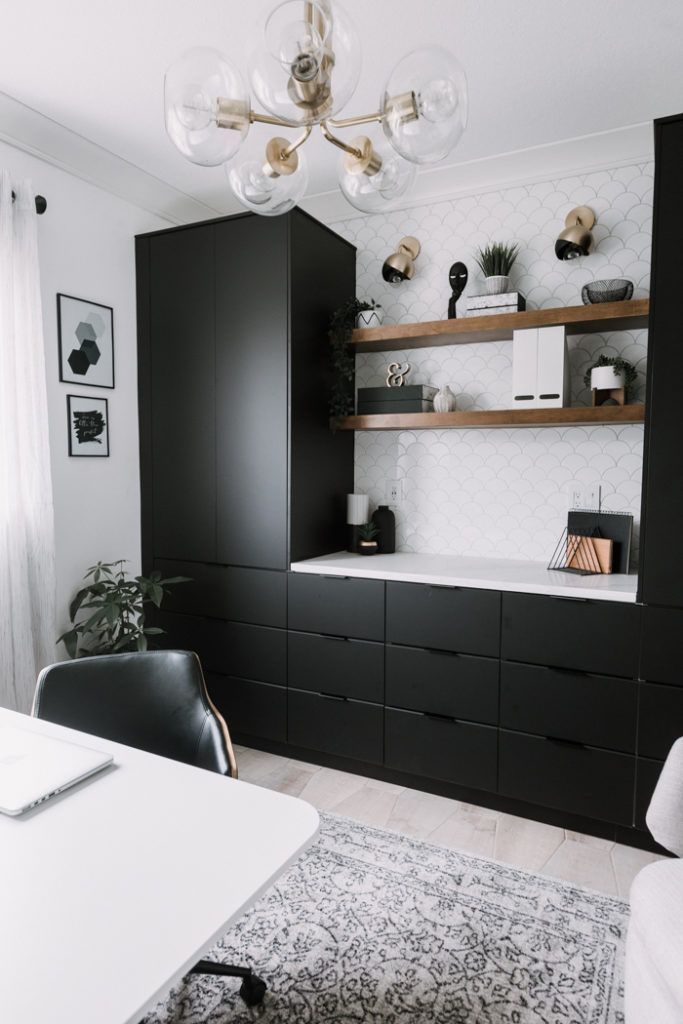
Our Installed Modern Slab Door
I could not be happier with these door choices! The details are everything, and these matte black hinges and knobs make all the difference in this space, adding so much style and sophistication!

How to Install A Slab Door
Materials
- Door
- Knob
- Hinges
Tools
- Router or chisels
- Circular saw or track saw
- Straight edge
- Measuring tape
- Door Knob installation jig (optional but makes install of knob quick and easy
Instructions
- Our casing was already installed, but if you have to install casing as well you can follow this great tutorial. Ensure your casing is level, as if it is out of level you will have a hard time getting your door to open and close nicely.
- Measure your door jamb to determine size of your slab door, the standard width sizes for interior doors are 24”, 28”, 30”, 32” and 36. The height for all passage doors must be a minimum of 80 inches, in our case we needed a 32" wide x 80" tall door.
- Locate knob height or set knob height for door. The International Building Code has established doorknob height between 34 and 48 inches above a finished floor. Typically door knobs are set at 36" from floor height.
- Determine your hinge type, style, and location. Typically interior doors use 2 or 3 Hinges.
- You can use the guide in the post to help set your hinge height/location (note the striker plate will be set by your knob height and may vary from the dimension noted)
- With your hardware chosen you can now get ready to start installation of your hinges and slab door. Measure the inside of your door jamb. You are going to want 1/16" to 1/8" gap around your door. Cut your door height as needed.
- We marked out the locations of the 3 hinges on the casing and on the slab door. You are going to want to pay attention to how your door is opening and closing to ensure you mark the locations/sides correctly. Measure twice, as this step is critical and will determine how well your door will mount to the door jamb.
- Using a router or chisel, remove the material from where you will mount your hinge. Only take enough material away to allow your hinge to mount flush with the face of the door jamb or door.
- When your door is ready, give it a coat or two of paint before installation.
- With the material removed you can mount your hinges to the slab door and to the door jamb. Mount each side of the hinge individually to each element (remove the pin to separate the pieces). You will likely need two people, one person to hold the door and one person to install the pins into the hinges.
- With the door installed you can move onto your knob. We use a slick knob jig to help with the door knob installation and the striker plate installation. It quickly locates the holes for the knob, latch, and striker plate. First start by marking the height of the knob (floor to center of handle distance) near the handle edge of the door. Using the knob jig you can quickly locate the holes for the knob and the latch. The jig will also transfer the location of the knob onto your door jamb for the striker plate. Once the striker plate and latch plates are marked out use a chisel or router to remove the material to allow the plates to sit flush with the face of the door jamb (striker plate) and latch plate (door).
- With everything cut you can install your knob and hardware and test that your door opens and closes easily.
Recommended Products
As an Amazon Associate and member of other affiliate programs, I earn from qualifying purchases.


Don’t forget to check out the entire home office renovation for all of the sources and the full reveal!
And if you’re looking for another great money-saving project, try out these wood wrapped floating shelves! (An IKEA hack!)