
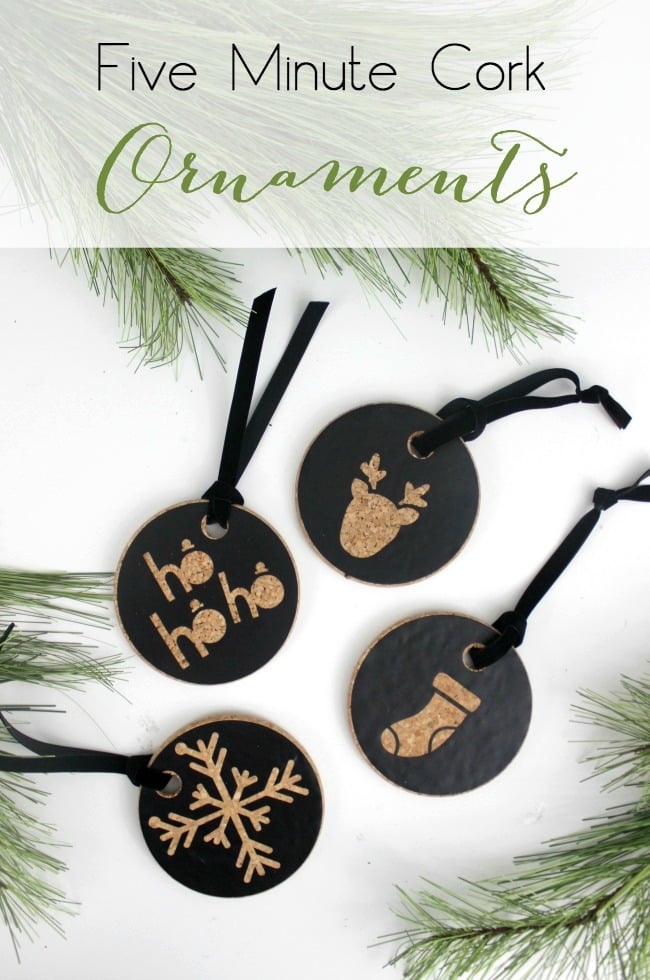
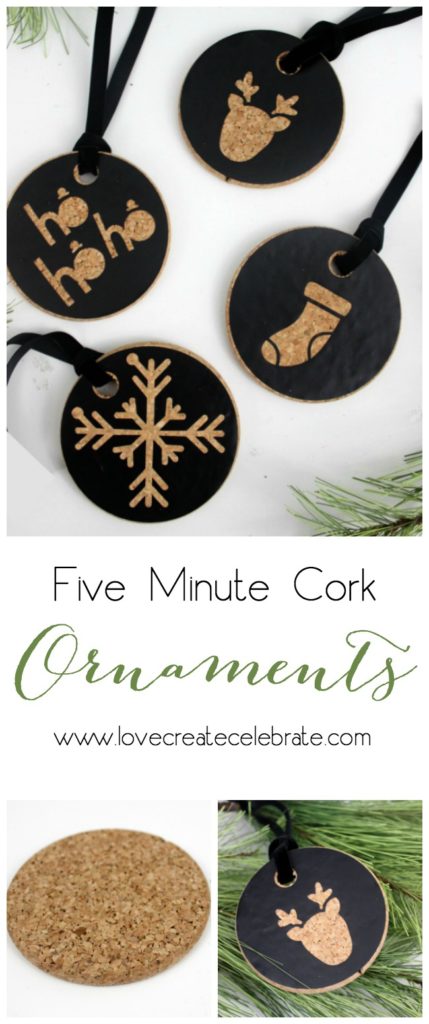
It has been a busy month my friends! Did you catch the Dream Closet Reveal yesterday? That closet occupied so much of my time of the last six weeks, but I couldn’t be any happier to get dressed in the morning now! With all that hard work behind me, it’s time for a quick and easy DIY craft. These Easy Cork Christmas Ornaments will be perfect!
*This post may contain affiliate links for your convenience. For more information please read my disclosure policy*
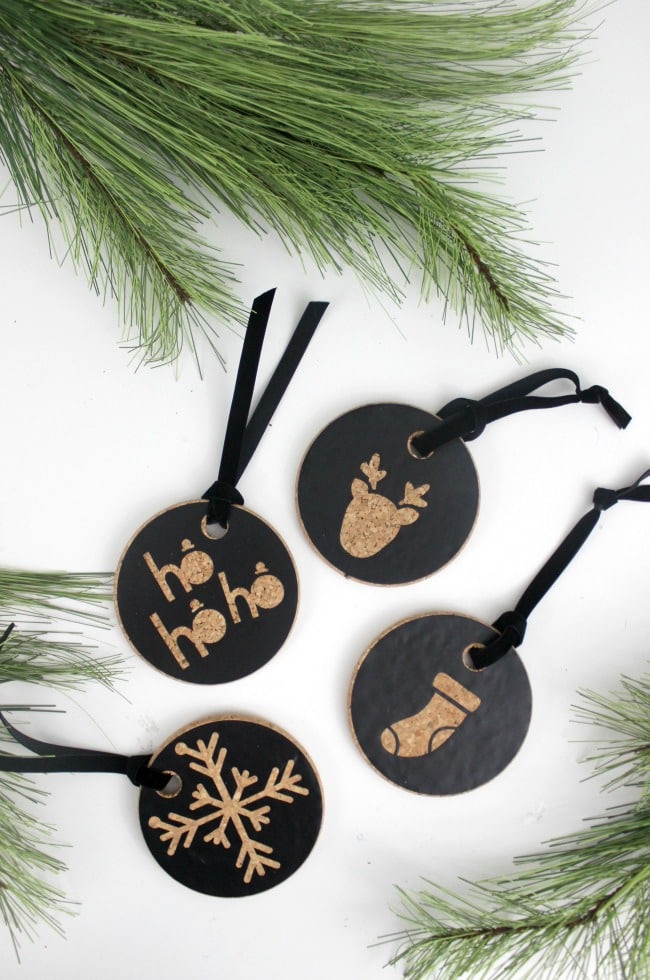
Be Makeful challenged some creative DIYers to make something out of Cork Coasters this month and you know I’m always up for a creative challenge right?! So I jumped on board!
Materials:
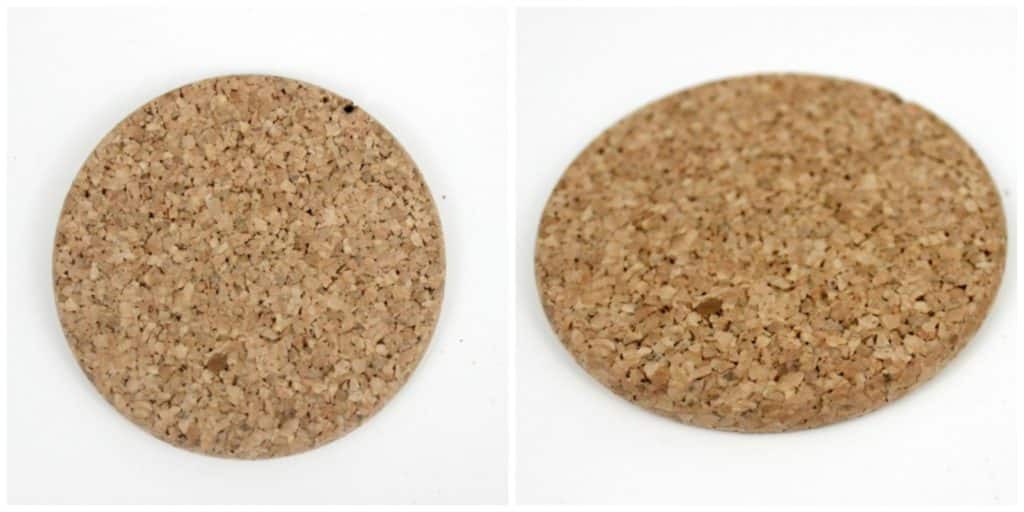
Cork Coasters
Vinyl
Cricut Explore Air 2 or Stencils
Drill
Ribbon – I used velvet ribbon :)
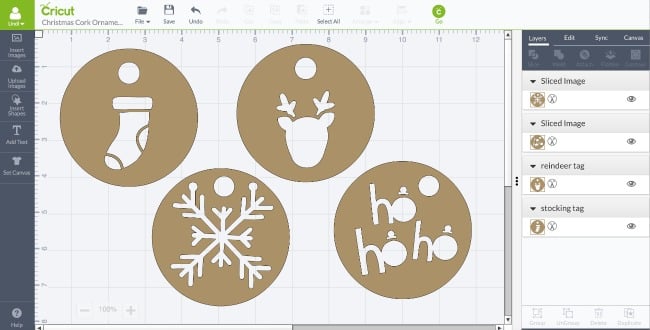
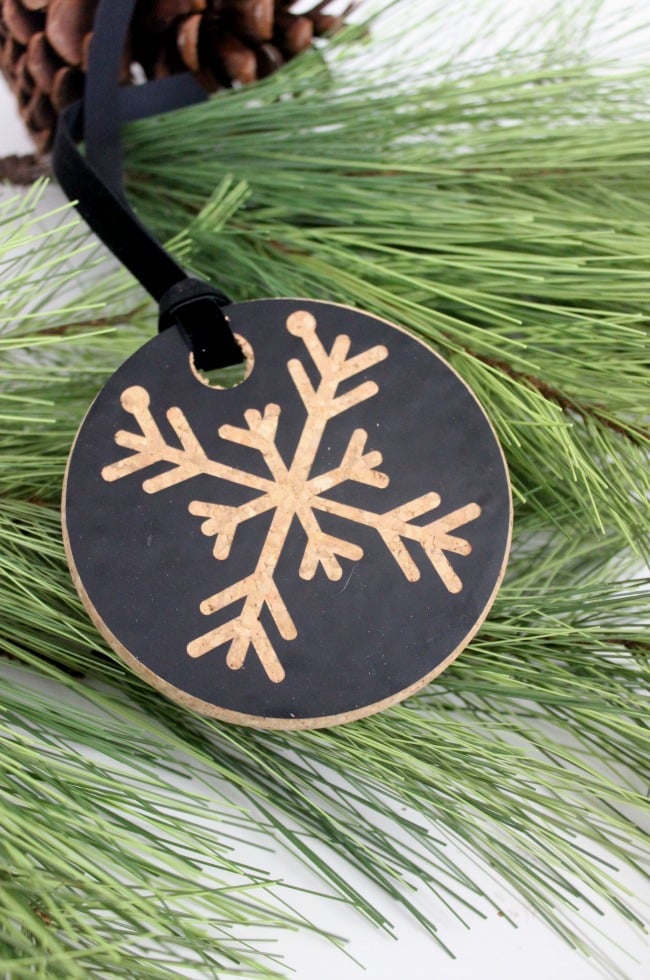
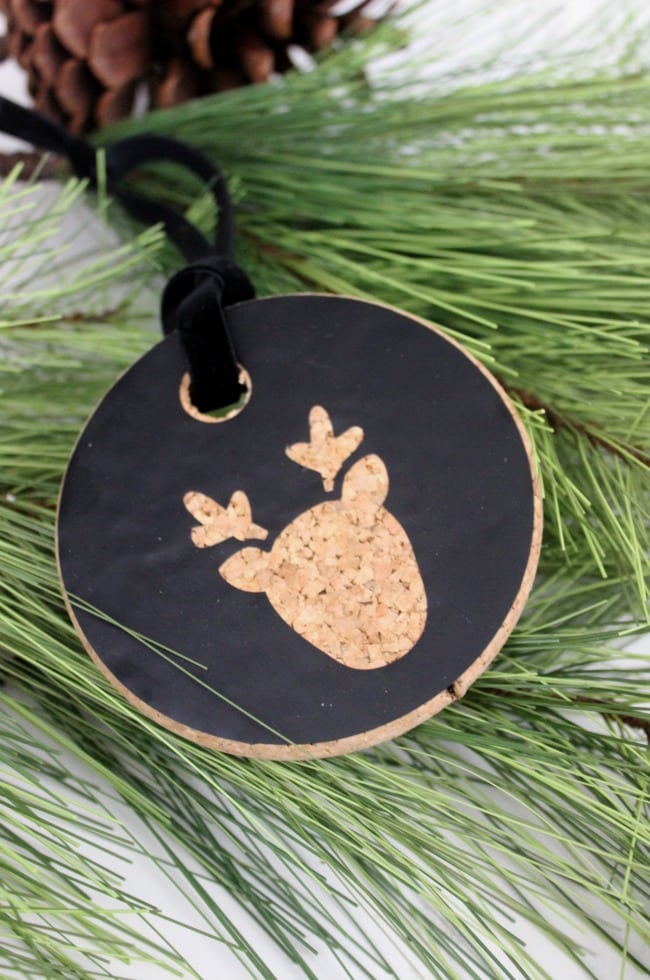
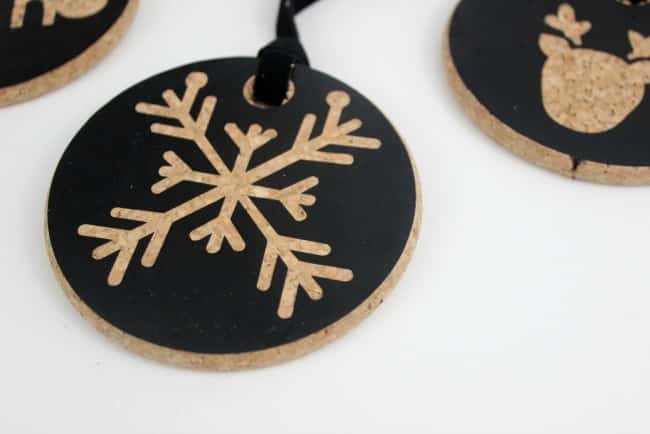
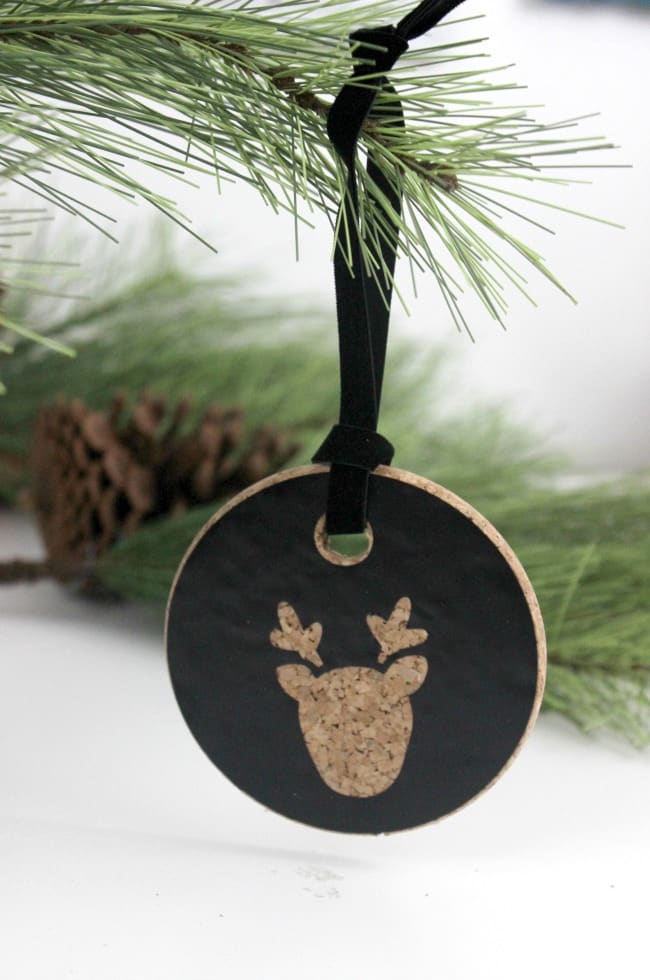
The first thing you need to do it open up your Cricut Explore Air 2 to this page – no point reinventing the wheel! Just use my design! Set your Cricut to vinyl, put the vinyl in place and cut. If you don’t have a Cricut, send this post to whoever got your name in the secret santa draw! lol. Or draw your own stencil, and use a craft knife to cut the stencil out.
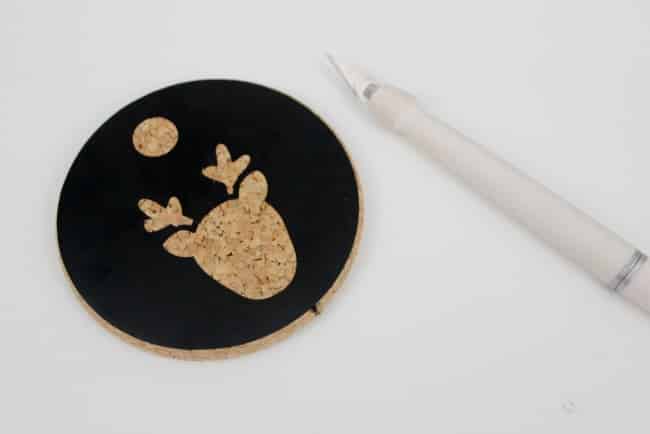
Peel off the vinyl stencil and stick it right on top of those coasters. Then use a drill to make a hole for the ribbon to go through and string up that beautiful new ornament! You can cut each picture twice and put it on the front and back of the coaster, but I recommend waiting to put the back vinyl on until after you have drilled your hole.
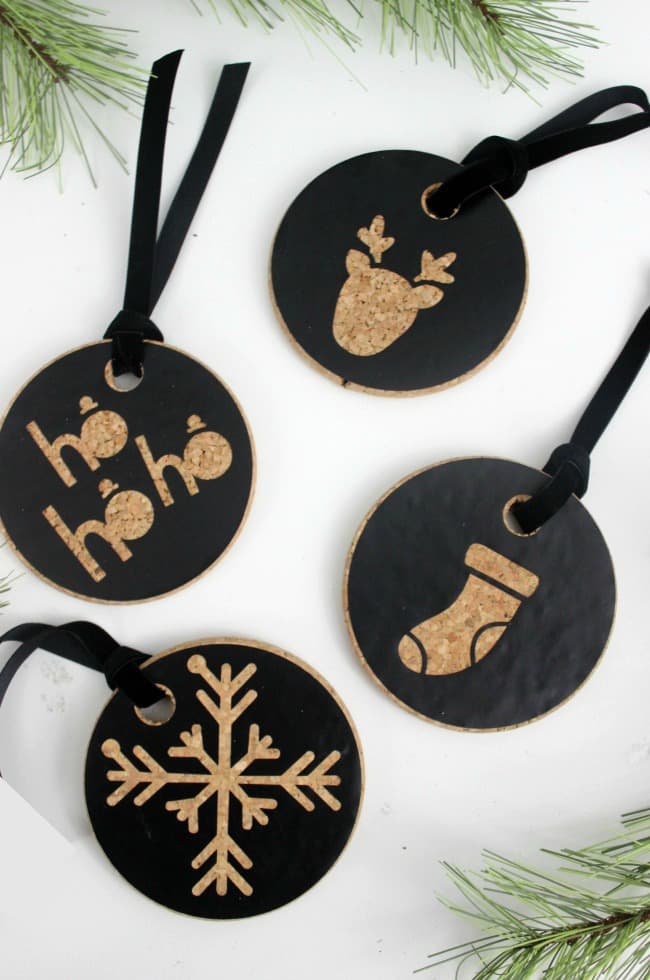
It will take you less than 5 minutes to make these modern ornaments. I couldn’t be happier! Let me know what you think of them :)


DIY Christmas Ornaments with the Cricut - Hey, Let's Make Stuff
Tuesday 28th of November 2017
[…] Village Ornaments – See Lindsay Spiral Pattern Paper Ornament – Try It Like It Cork Christmas Ornaments – Love Create Celebrate Mini Scrap Fabric Stocking Ornament – Inspiration Made Simple […]
Moonlight & Mason Jars Weekly Link Party - My Life From Home
Tuesday 21st of February 2017
[…] Easy Cork Ornaments | Love Create Celebrate […]
Yami | The Latina Next Door
Wednesday 30th of November 2016
These are so adorable! I have been thinking about getting a Cricut Explore for a while now. Looks like I need to make the investment.
DIY CHRISTMAS ORNAMENTS + LINK PARTY 177 - A Fresh-Squeezed Life
Tuesday 29th of November 2016
[…] Easy Cork Ornaments | Love Create Celebrate […]
DIY Christmas Ornaments - Grace and Good Eats
Tuesday 29th of November 2016
[…] Easy Cork Ornaments | Love Create Celebrate […]