
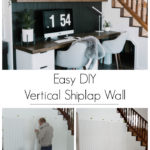
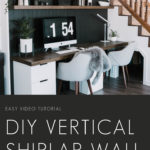
Learn to make your own easy DIY Vertical Shiplap Wall with this tutorial! Including a video step-by-step guide for this amazing accent wall!
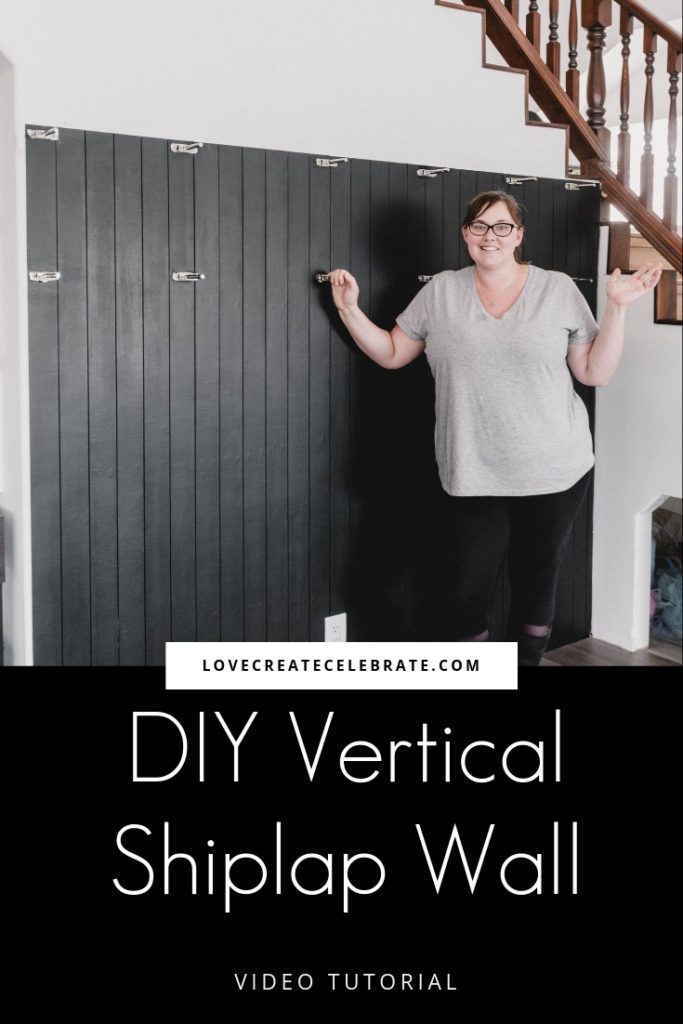
This shiplap wall has been a dream of mine ever since we moved into this home! When Joanna Gaines first started sharing shiplap walls, homeowners everywhere went crazy adding it into there home! I’ve never really been itching to do the traditional horizontal shiplap, but when I got the idea to do this vertical shiplap, I got very excited, very quickly, lol. We did this easy DIY vertical shiplap wall in one day – two days if you count the next coat of pain – and we love it!
*This post may contain affiliate links. When you buy a product through one of my links, I get a commission at no cost to you! Thanks for supporting my blog so I can continue to bring you posts like these. For more info, please see my disclosure page.*
When I was dreaming up this space, I wanted what I called “Modern Shiplap” to act as a feature wall. When I say modern shiplap, specifically I meant, thin boards, deep colours, and a standout accent wall!
Everything you need to make your vertical shiplap wall
Materials:
- 1/4″ thick 4’x8′ plywood (good 1 face)
- Bullseye 1-2-3 Primer
- Top coat paint (we used Para Paint Forge Black)
- Putty
- Construction Adhesive
- Plus Acrylic Latex Caulk
Tools:
- Tablesaw
- Jig saw or Oscillating Multi Tool for cuts around outlets and switches
- Brad Nailer
- 4′ Level
- Caulking Gun
- Tape Measurer
- Putty Knife
- 200 grit sand paper or sanding block
- Stud Finder
- painting supplies
- 2-3 Canadian Nickels (or similar 1/16″ spacer)
How to Make a DIY Vertical Shiplap Wall
Once again, I feel like the EASIEST way to learn how to do a project like this, is to watch it in action! We shared our entire process from start to finish in this video tutorial, including a few things that we did wrong – learn from our mistakes!
We also wrote out the steps in more detail, so if you have any questions at all about the video above, please read on and see if we can answer your question!
How Many Shiplap Boards Do I Need?
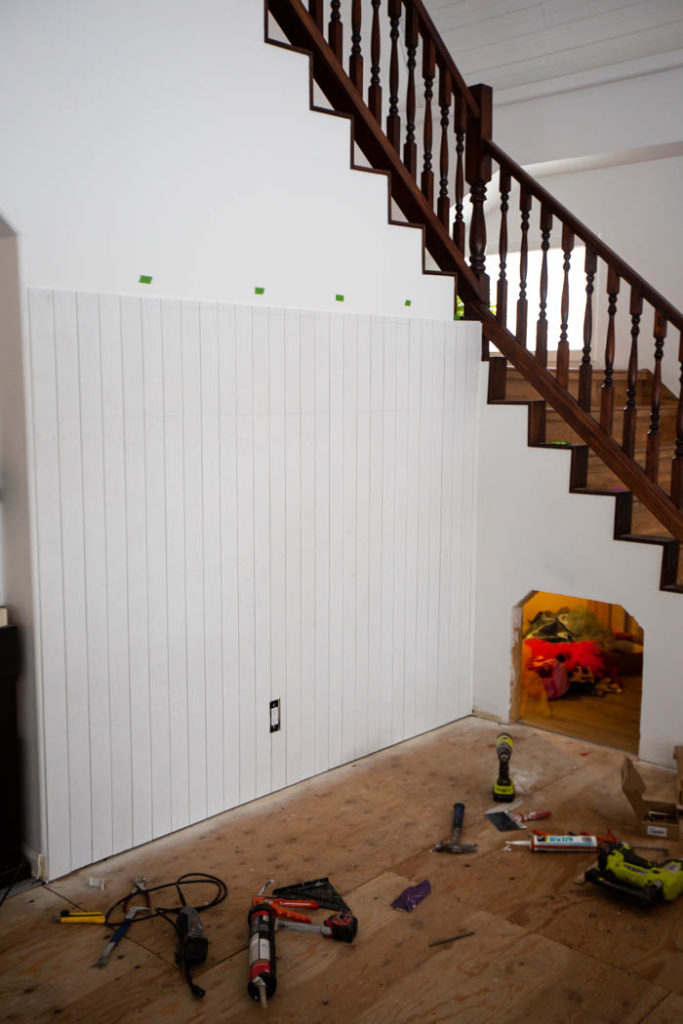
Start by determine the area and length of board required. Standard home wall height will range between 8′ and 9′. For the area were we installed our vertical shiplap we were ending near a floating shelf and working in a corner with a stairway. After using some painters tape as a visual aid we determined that the height of our vertical shiplap would be 71″. If you’re wall height is 8′ or less, you can use one plywood board for height.
If you are working with a wall height greater than 8′ (96″) – which is the standard length of the 4′ x 8′ sheet of 1/4″ plywood – than you used you have a couple of options:
- You can work off the top of your baseboard which may give you another 3-5″ in height depending on your baseboard style.
- You can mitre the ends of the slats you cut at a 45 deg. angle and glue and secure them together. This will require a bit more work and maybe a bit of putty and sanding to make it look smooth. But if you take some time people won’t even realize the joint is there after you prime and paint it.
- Similar to horizontal shiplap often seen you could stagger your shiplap joints and have visible joints going vertically.
How many plywood boards do I need to make shiplap boards?
Measure your wall area (length and width of wall(s) you want to install the vertical shiplap on) and determine how many sheets of plywood you will need. As we just did the vertical shiplap wall treatment to a small area we only ended up needing two sheets of 1/4″ thick 4’x8′ plywood (good one face). We created a excel sheet that can calculate how many boards and sheets of plywood you will need for your project here:
Sign up to our e-mail list to download your vertical shiplap calculator:
Before You Start Your Shiplap Wall
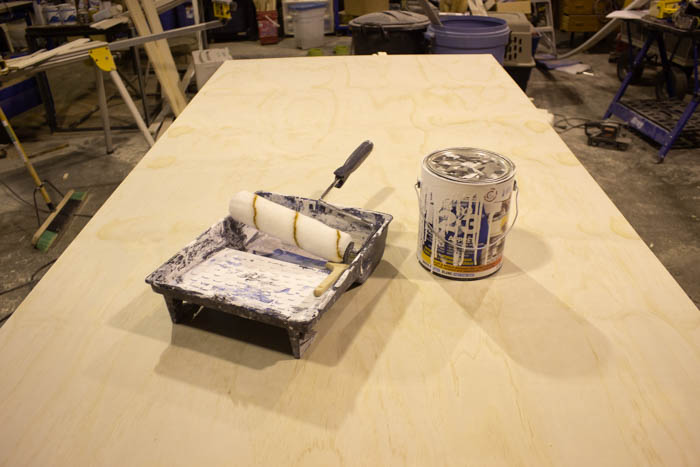
Now that you have your materials you can prep your boards. We put one coat of Bulls Eye 1-2-3 Primer to seal the wood and make it easier for painting once the boards were cut down. Once the paint cured you could also put once coat of your desired colour on the plywood as it will make it easier for your final coat of paint once they are installed (we didn’t do this but realized it would help afterwards).
You should also paint your wall with your final colour choice at this time as the gaps between the boards are quite narrow and hard to paint between (again we didn’t do this and fought to get paint between the boards once they were installed – see our big mistake in the video above!).
How to Cut Your Own Shiplap Boards
With the paint dry you can begin cutting the slats to size with a table saw. Begin with cutting the boards the plywood sheet to length. As the area on the wall we wanted to install the boards was only 71″ high we cut the entire plywood sheet down to 71″ for height. We then set our table saw fence at 3″ and ripped the two sheets of plywood down into a whole bunch of 3″ slats. The downloadable calculator above will tell you how many boards you need to cut! Although you may want a couple extra in case something accidentally happens to one of your boards.
Installing your DIY Vertical Shiplap Boards
If your slats aren’t going up the entire length of the wall (like our scenario where we ended at a floating shelf), use your level to mark a line where you want the tops of the board to end.
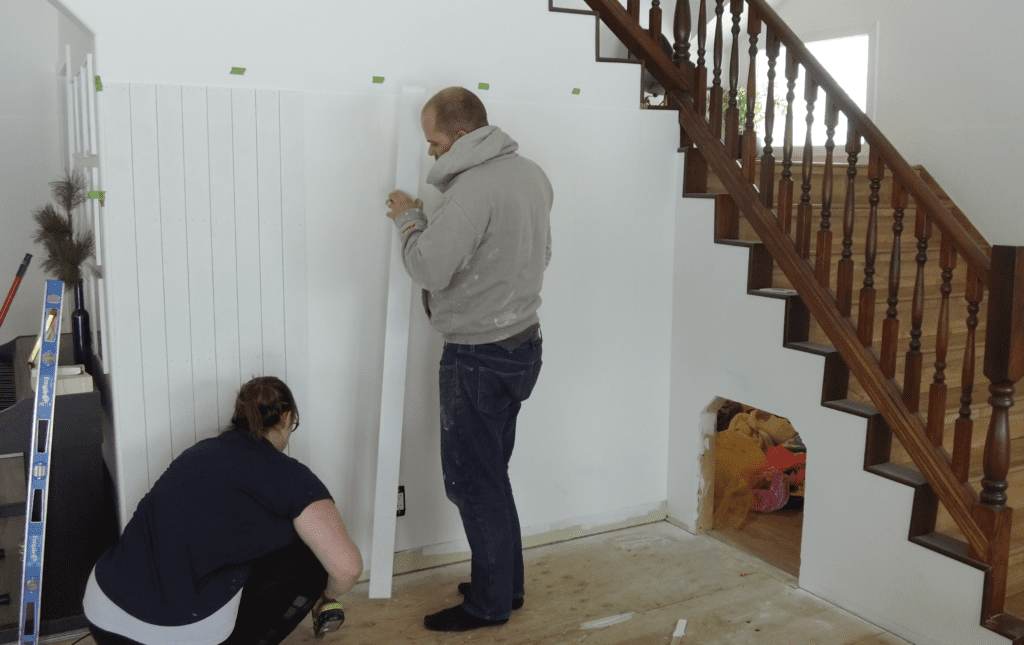
Now you are ready to start installing your vertical shiplap! We started from the wall/corner that would be the most visible as we didn’t want to end up with a partial board in a highly visible area.
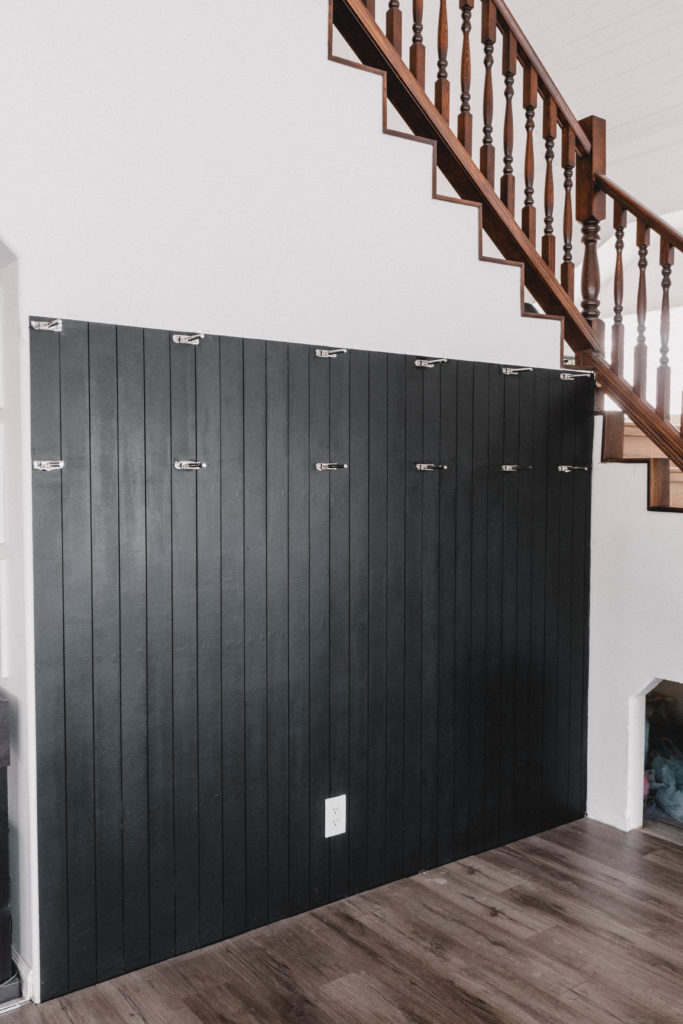
As the boards are being installed vertically you won’t be able to catch studs on every board so we used a construction adhesive on the backs of all the board. We did mark out the studs so that we could would catch them on the boards that did sit in front of them. For the boards that didn’t nail into a stud we would brad nail them at serval spots along the length of the board, angling the nails at opposite angle into the wall to ensure the shiplap board is held tightly against the wall while you are waiting for the construction adhesive to set. We used a Nickel to space out our boards, but you can also use a spacer that is about 1/16″ wide. We sanded the edges of all our boards lightly prior to installing them on the wall to remove any small burs or blemishes on the edges of the boards.
Place you first board up (with construction adhesive on the back) and use a level to ensure it is true. Using your brad nailer you can nail it into place. Now take your second board (again with construction adhesive on the back) and some of your nickels (or spacers) and place on the wall and the edge against the first board. You may need a second set of hands to hold everything in place. You can now secure your second board with a couple of nails. I would take your level and do a quick check that the second board is true, if everything looks good continue with a few more nails to ensure it won’t move when you install the next board. If your second board somehow got out of level, complete a couple of checks and determine what went wrong, you want to ensure your first boards are level as it will cause issues throughout the install if your boards start to go on a angle (an unlevel floor or unlevel corners and walls could cause issues so don’t assume the surface you are working on and around are necessarily level). Continue this until you reach the end of your wall.
How to Put up the Final Shiplap Row
When you come to the end you may need to do a custom cut on your last piece. This piece may not be 100% true (same width) if the adjacent wall is out of level. If this happens you can take measurements at the top, middle and bottom, add your 1/16″ space and transfer these measurements onto a board and cut it with a table saw. I than used a latex caulking to seal the corner and first edge to fill in the gap and give it a nice clean look prior to painting.
How to Deal with Outlets, Switches, Etc.
If you have any outlets, windows, doors, switches, etc you may need to cut the vertical shiplap to work around your given obstacle. If this occurs just reference the adjacent board, remember your 1/16″ gap and mark out the cut on the corresponding piece of vertical shiplap.
Putty, Sand & Paint
With the shiplap all in place you can putty all you nail holes and mitre joints (if your boards were longer than 8′. Sand these locations once the putty dries and you can than paint your wall with the desired final colour. We had to use narrow brushes to paint between the gaps on our vertical shiplap wall, but if you painted the wall and boards with a coat of the top coat paint prior to installation of the boards just some minor touch up of the gaps should be required.
You will see in the video and on some of the pictures that we installed brackets for floating shelfs, this is an optional step. We will do a post at a later date about the floating shelves installation.
Our Beautiful DIY Vertical Shiplap Wall
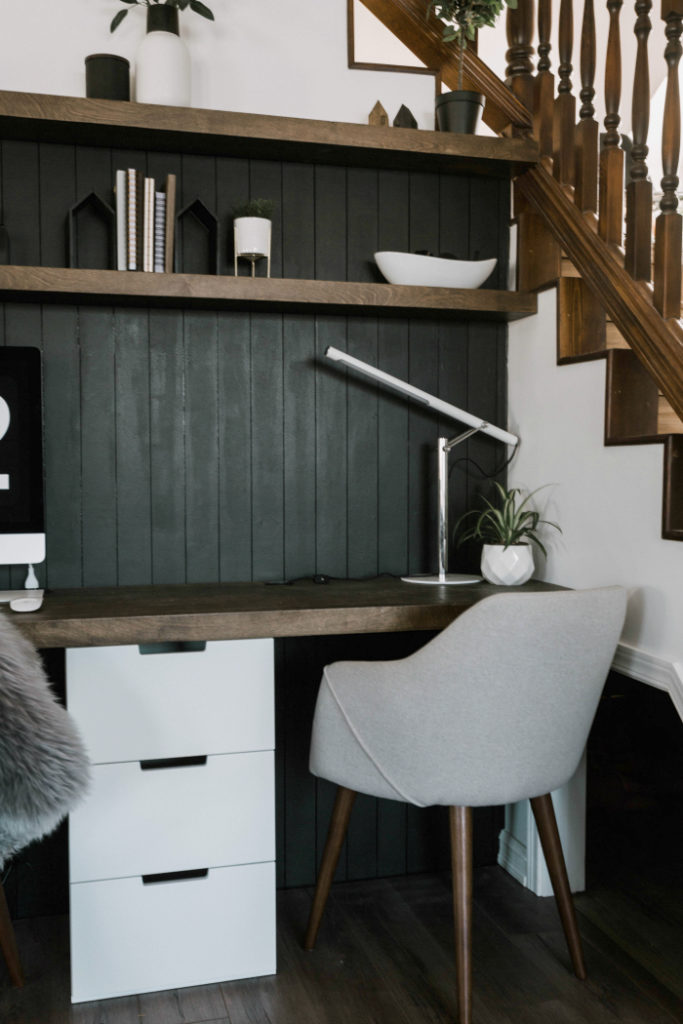
This wall is EXACTLY what I wanted behind this desk! I could not be happier with the character, texture, and depth is brings to the space. Black shiplap was a bold choice, but it paid off.
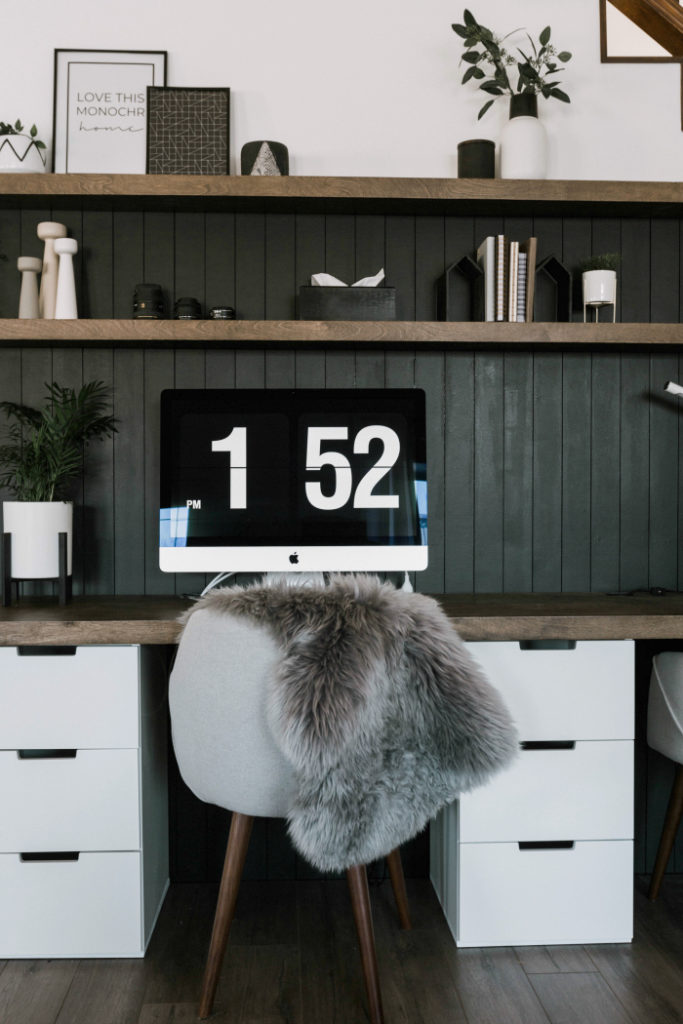
Read about the Full Desk Space Renovation that cost less than $500!
If you like DIY wall treatments, you’ll love this tutorial for a DIY Wood Accent Wall!

Easy German Schmear Tutorial On A Faux Brick Wall - Making Manzanita
Tuesday 21st of May 2019
[…] Or install shiplap vertically! […]