
Gorgeous Modern Moulding Accent Wall! Make your own stunning feature wall with some mouldings, a few tools, and this simple DIY tutorial!
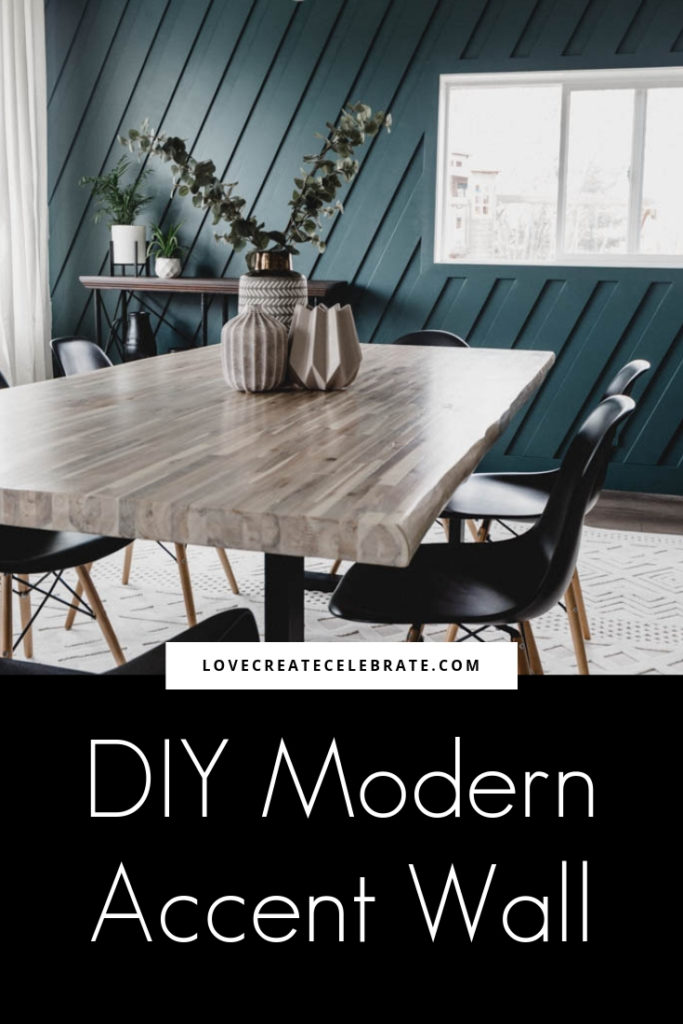
Does your home have any accent walls? Most people move into homes that are blank slates. Neutral tones on every wall and tons of possibility. Feature walls make such a huge first impression in a room. When done on the right walls, they can be absolutely stunning! Most of us think of painting a wall when we think of feature walls, but adding character and dimension to those walls makes an even bigger statement! I’m excited to share how we tackled this modern moulding accent wall. Hopefully it will inspire you to create your own!
*This post was sponsored by Metrie. As always, opinions are 100% my own. The post may contain affiliate links. For more information, please see my disclosure page.*
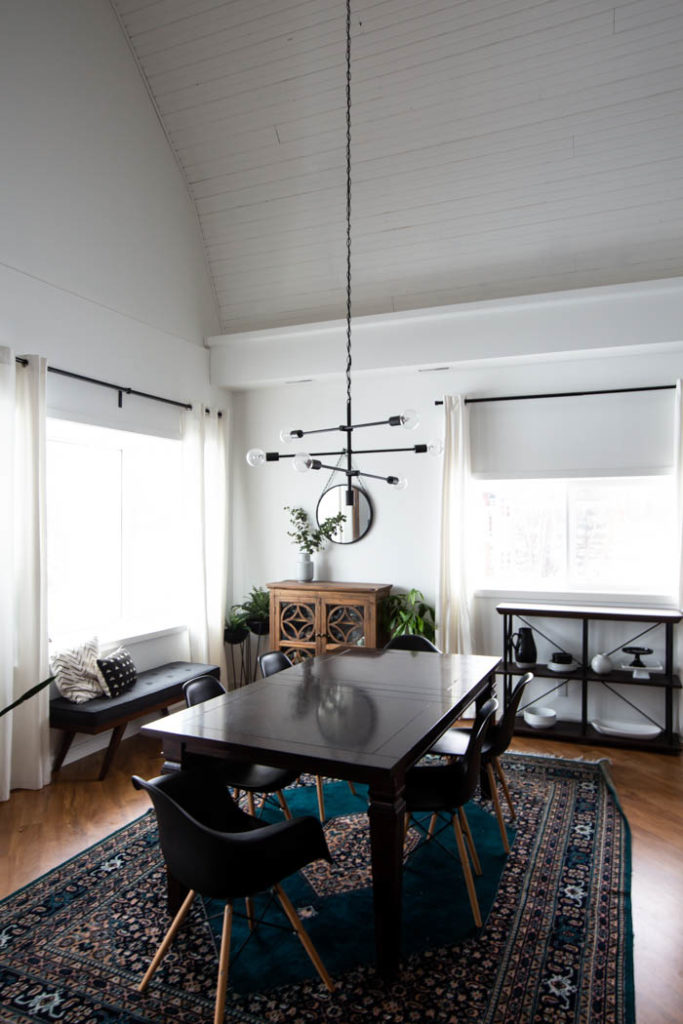
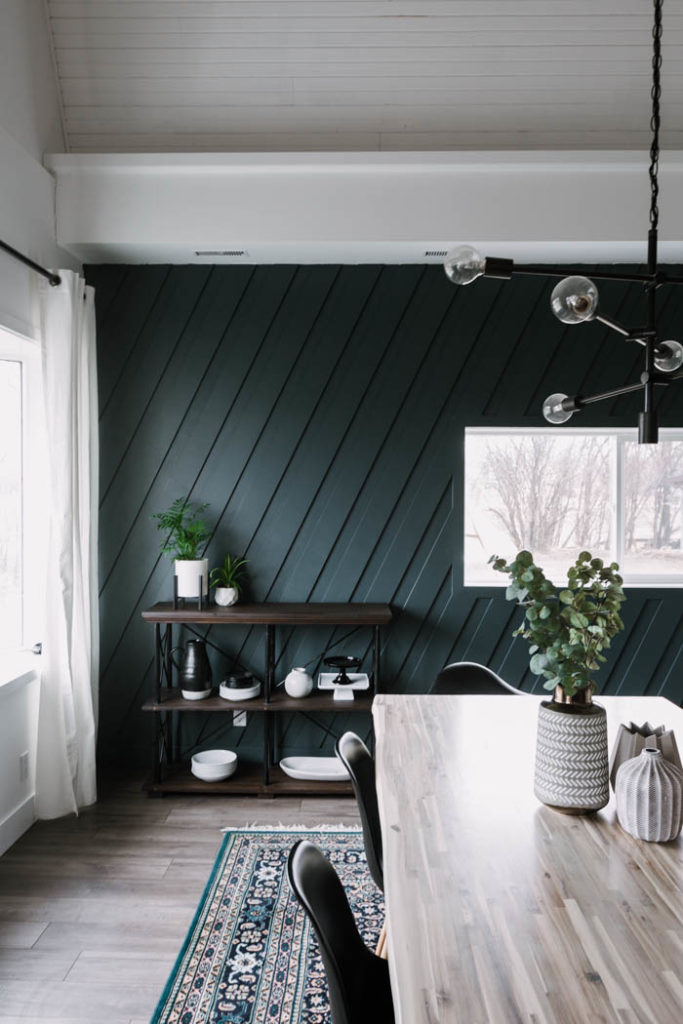
This (above) is a photo of our dining room before we renovated it. We did an absolutely crazy thing and renovated our entire dining room in just three days – including building and painting this feature wall!
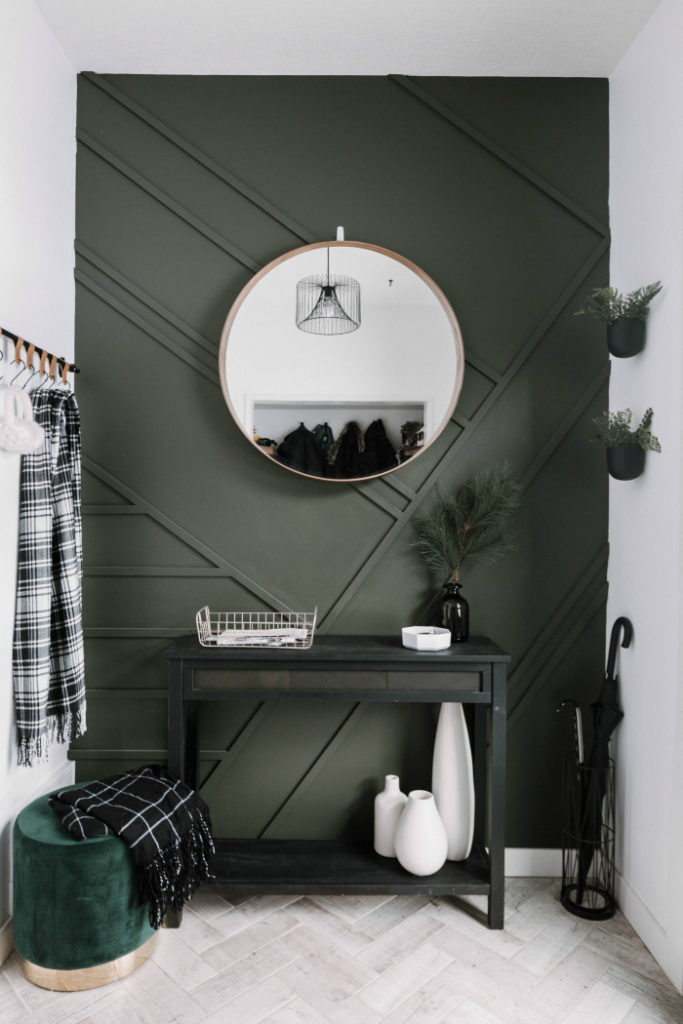
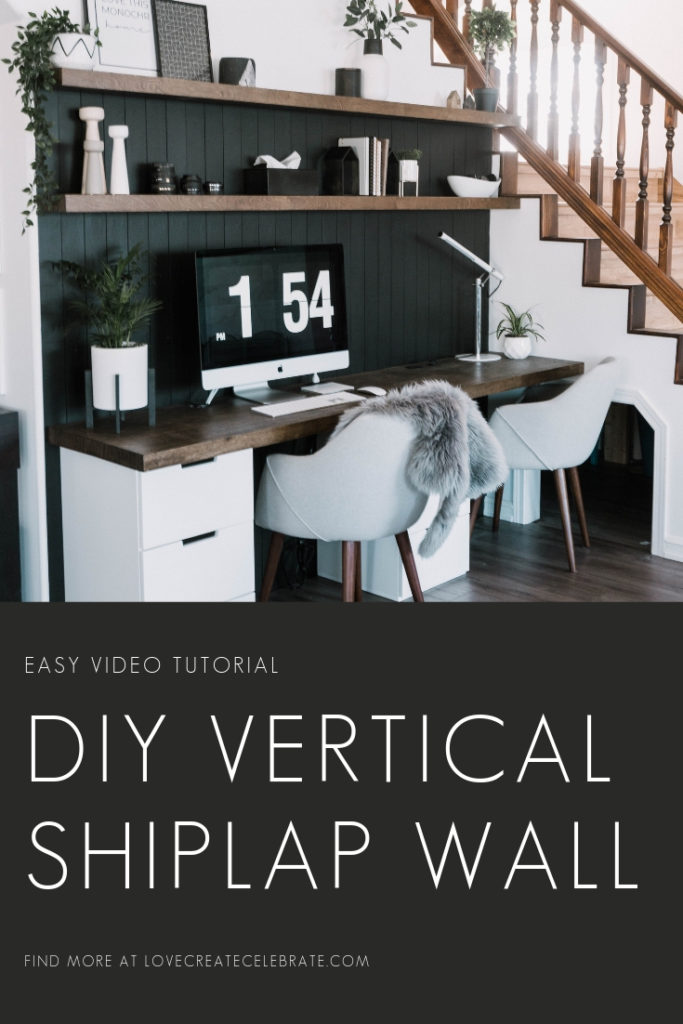
This isn’t the first feature wall we’ve done! First we did a modern wood accent wall in our entry, then we did this vertical shiplap wall in our office nook. Obviously we’re hooked on the idea. But the texture and dimension that the mouldings add to a wall are unbelievable!
Materials Needed to Make Your Own Modern Accent Wall:
There are a couple of cheap tools you can buy (linked to below) that will make your life easier as you attempt a feature wall like this, but most of the supplies needed are pretty basic. We really believe that anyone can tackle this project!
- Mouldings (We used 1/2″ think and 5″ wide flat stock mouldings, all 14′ long)
- Pro Laser Distance Measure
- Angle Measuring Tool
- Mitre Saw
- Cordless Sander
- Construction Adhesive
- Drywall Compound
- Stud finder
- Paint brushes and 3-4″ foam rollers
- Paint colour of your choice (we used Midnight in NY by Behr!)
Video Tutorial for How to Make Your Modern Moulding Accent Wall:
Here’s the thing about building a wall like this… some things are better explained or written out and some parts are better shown! We made the video to go along with the tutorial, because I had a feeling that the visual aid would be extremely helpful!
How to Build a Modern Moulding Feature Wall
Time to get down the the nitty gritty! The first couple of boards will always take the longest to cut. It can feel like you’re going no where…. but after the first couple of boards, you have a bass, you get into a rhythm, and it starts to go faster! I’ll try to run through a few different scenarios here to give you all of the tools you need to complete your modern moulding accent wall!
Prepping your Accent Wall
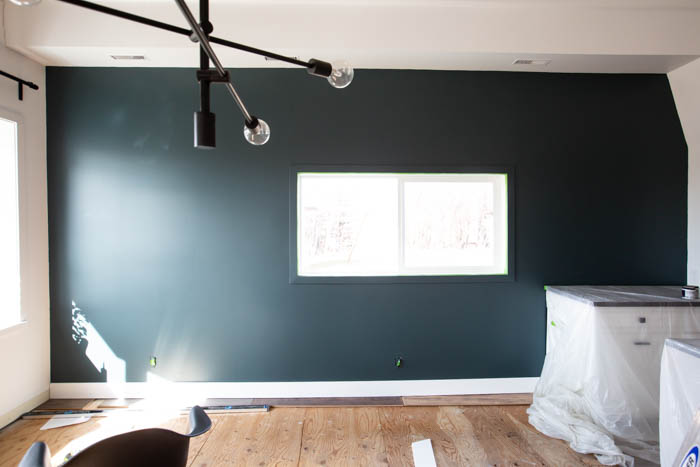
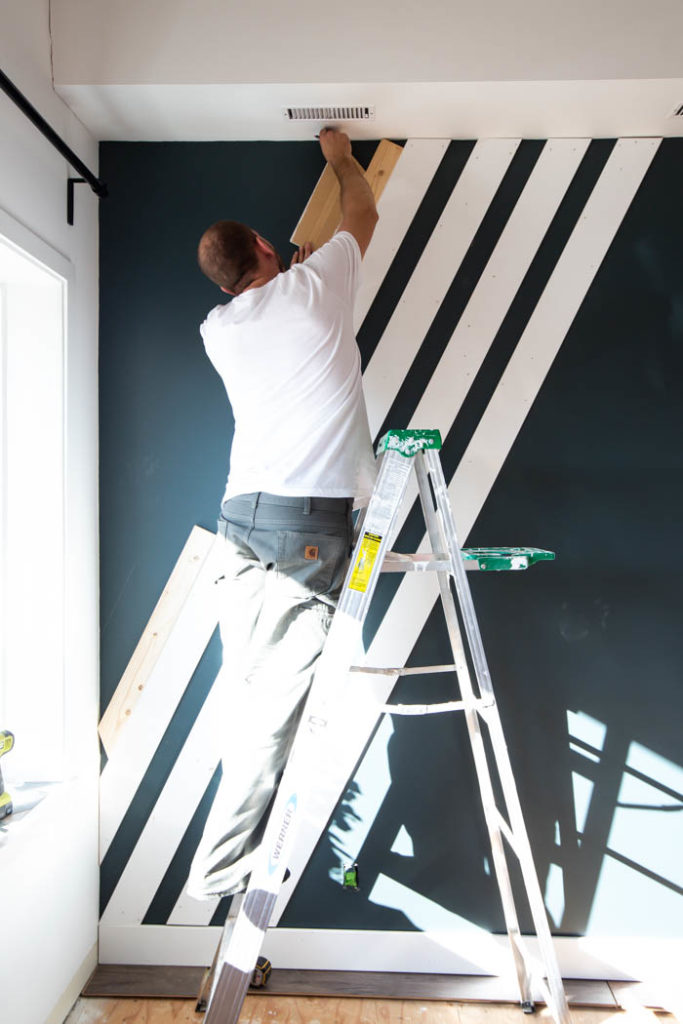
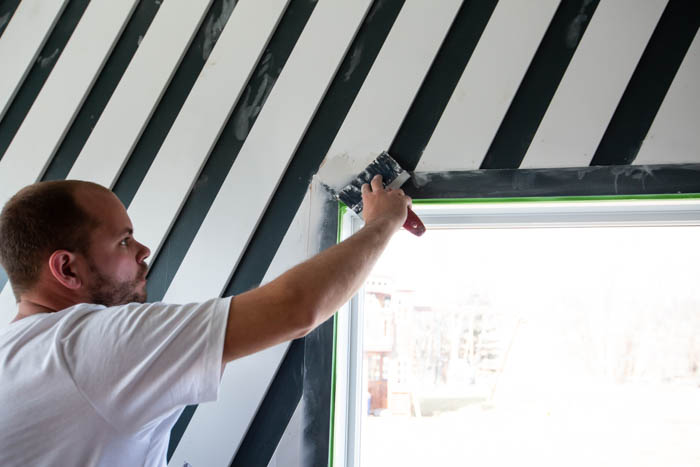
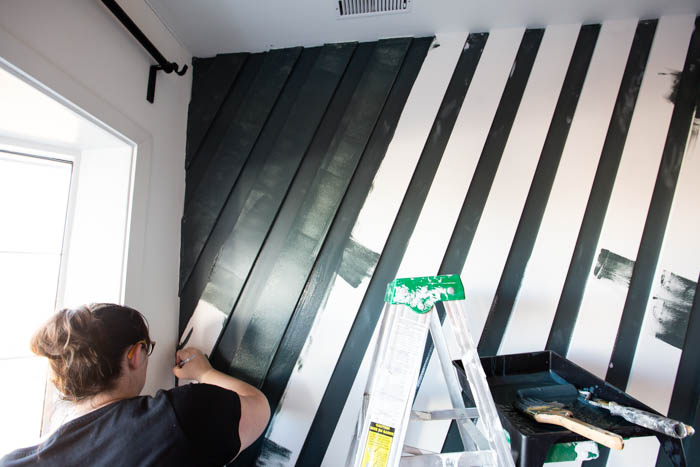
Start by giving your wall a couple of coats of paint. You technically could do all of the painting afterwards, but if your mouldings aren’t perfectly flush with the wall, it might make it a bit difficult to paint inside of the cracks after the mouldings are up. We decided to paint our window trim as well because we knew that the mouldings were the same thickness and we wanted the frame to blend into the pattern. Once the paint is dry, take a stud finder to find all of the studs along the wall. Once we found the studs, we drew a pencil line up and down the entire wall so that we would know every time that a moulding crossed a stud and make sure that we nailed into them.
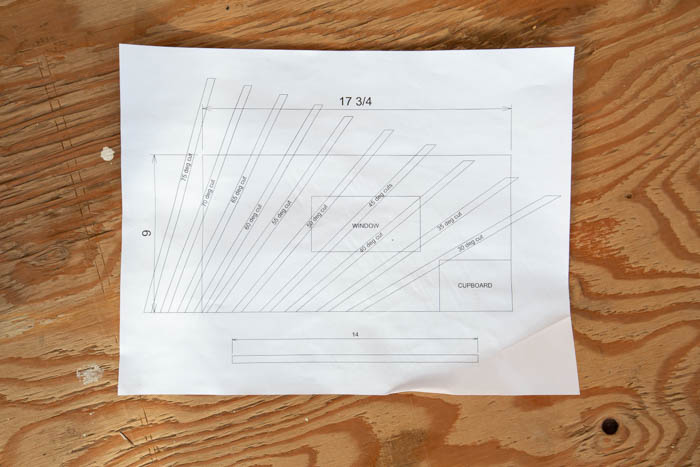
The other thing you need to do in preparation for your wall, is decide what angle you want your Metrie mouldings at on your modern feature wall. Russel drew out all of the possible angles for me, and I decided that the 65 degrees would look best on our wall. Depending on your wall size, you may choose to go with something different!
Putting Up the First Piece of Moulding
The first piece is always the hardest. What we would recommend doing, is starting in one of your corners so that the corner of the first moulding piece rests nicely in the corner, and you can work off that first board.
Start by cutting off a small piece (about a foot long), to use as a template. Cut the bottom of that board with a 65 degree angle, or the same that will be on your wall (for simplicity, I’m just going to say 65 degrees throughout the tutorial). Once you have your template piece, place it at the bottom of the wall and draw lines on either side. You will use these lines to determine the length of board you need.
For these measurements you can use your laser distance measure, or a tape measure. A tape measure will require two people so make sure that it is accurate. Put your measuring tool along the base of one of the pencil lines from the template you just drew on the wall (note: if you are using the laser tool, it measures from the middle & bottom of the tool). Follow the angle of the line your drew up to the wall and mark down the distance you measured.
Grab a new board and make a 65 degree cut on the bottom. Then measure the length that you just got and mark it on the board. Then cut another 65 degree cut (in the same direction) at that mark. Do a dry fit to make sure it fits nicely on the wall, and follows your template lines. The first board really needs to be accurate, or it can throw off all of the other board measurements.
How to Adhere Your Mouldings to the Wall
When you are ready to adhere your first Metrie moulding, you can add a few small drops of construction adhesive along the wall side of your moulding. Put the moulding in place, and nail it to the wall. If you marked all of your studs with a pencil earlier, you should be able to tell each spot that the board crosses a stud – be sure to place nails there.
Continuing the Pattern
We knew that we wanted a 3″ gap between all of our boards, so we went ahead and made a few three inch spacers out of some spare pine scraps we had. These spacers were always used between every board and ensured that we always had the correct gap going forward.
When you’re ready, you can follow the same instructions as the first board: placing and tracing your template piece, measuring the length, cutting the board, and attaching it to the wall.
When you come to a window, you will have to cut two separate pieces of moulding to go on either side of the window. When you come across outlets or switches, you will have to cut your moulding (a jigsaw is probably easiest), so that the outlet fits on moulding. Your outlets will likely already have enough wire to be able to pull them forward an extra 1/2″ to the new wall depth. When the outlet is half on the moulding, you can cut an additional small piece of moulding to go under the rest of the outlet so that it was all level.
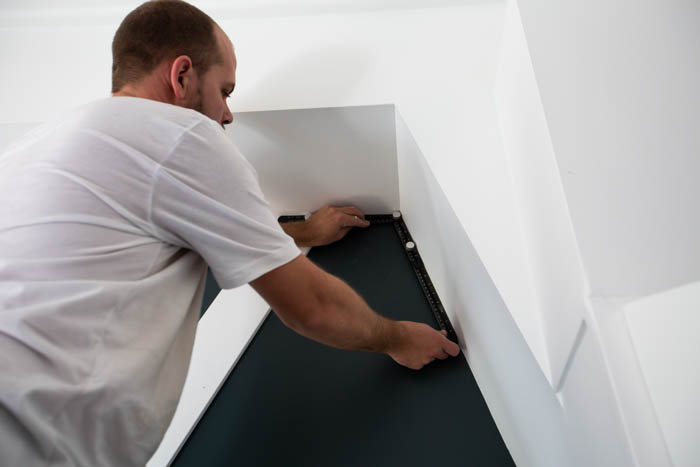
How to Measure Difficult Angles
There are a couple of spots that may cause you some trouble. First, going up the wall, where the angles are no longer 65 degrees, and then going around a window, opening, or other corner that isn’t square. We show how to do both of these in the video tutorial above, but I’ll write it here as well.
The easiest way to do this is with an angle measuring tool. You just put the tool in place at the correct angle, lock it, and then move it to your boards and transfer the angle there. Honestly, this tool makes your life SO much easier and it’s fairly inexpensive.
Alternatively, as you work your way up the wall, the bottom angle on your board is going to change. The best way to find that angle is to cut another template piece of moulding. Cut it at 65 degree angle. Place on of your spacers between the wall and your nailed on moulding, and then place your template between the wall and the spacer. Let it slide down until it’s wedged in place. Measure the distance at the bottom of the board. Take that same distance and transfer it upwards until it meets the edge of the other side and mark that spot. Draw a line between the two marks. And cut off the side with the 65 degree angle. This new small board can act as a template for the one that will go up on the wall.
How to Finish the Mouldings Around the Window
We wanted our transition between the mouldings and window trim to be as seamless as possible. To do this we filled all of the gaps between the trim and moulding with drywall compound, then sanded and reapplied until it was smooth (just like finishing drywall). In some cases, where our gaps were larger, we used caulking to fill the gaps, and then drywall compound on top.
Prepping and Painting the Wall
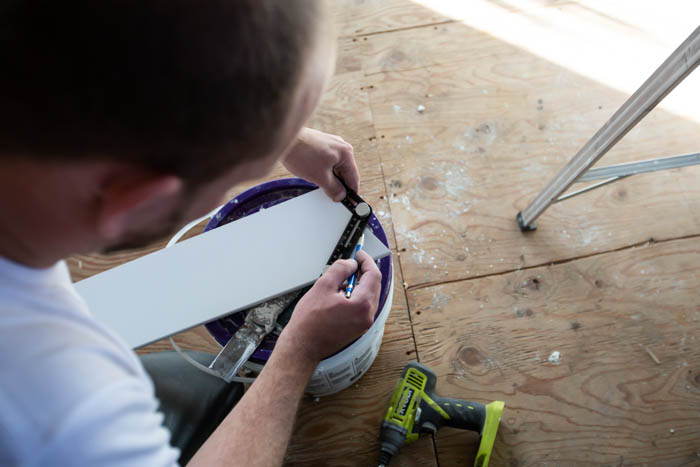
For the best possible finish on your moulding accent wall, you need to prep your mouldings and walls for paint. Fill all of your nail holes with drywall compound, and then sand it after it has set. Anywhere that your mouldings meet the walls or ceilings, you should use caulking to fill those gaps.
When you are ready to paint, we used a very small paint brush to do all of our edging, and then another slightly larger brush to do the sides of each moulding piece after it was up on the wall. Finally, we used a couple of small 3-4″ foam rollers to paint the tops of the boards and the gaps between the boards.
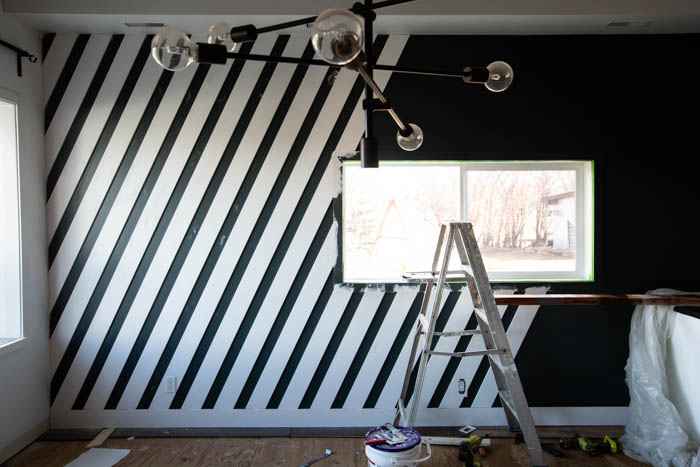
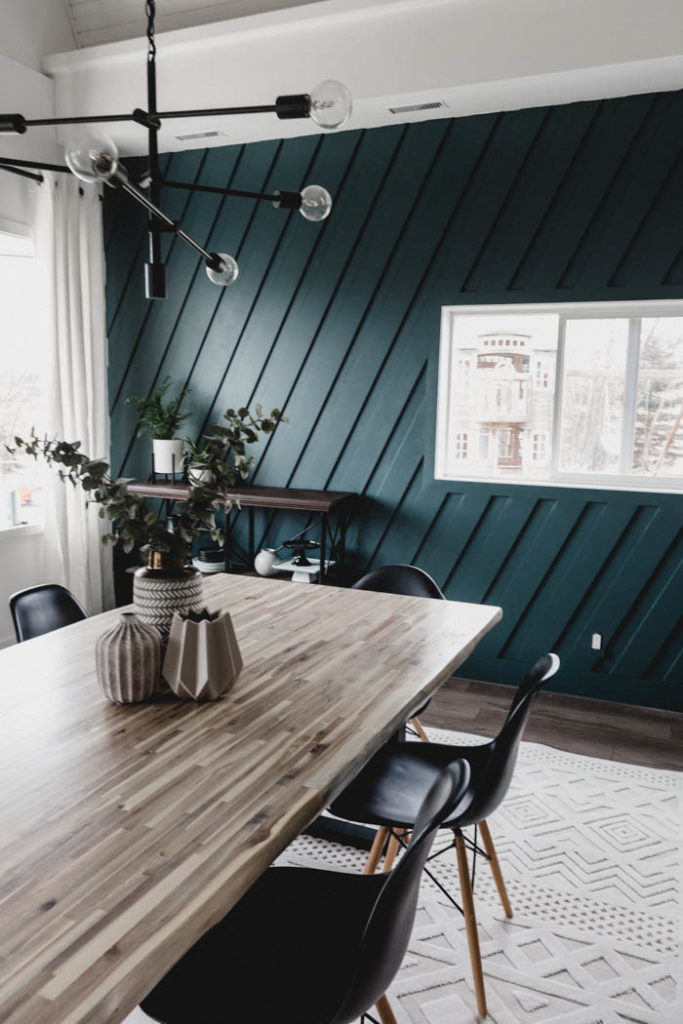
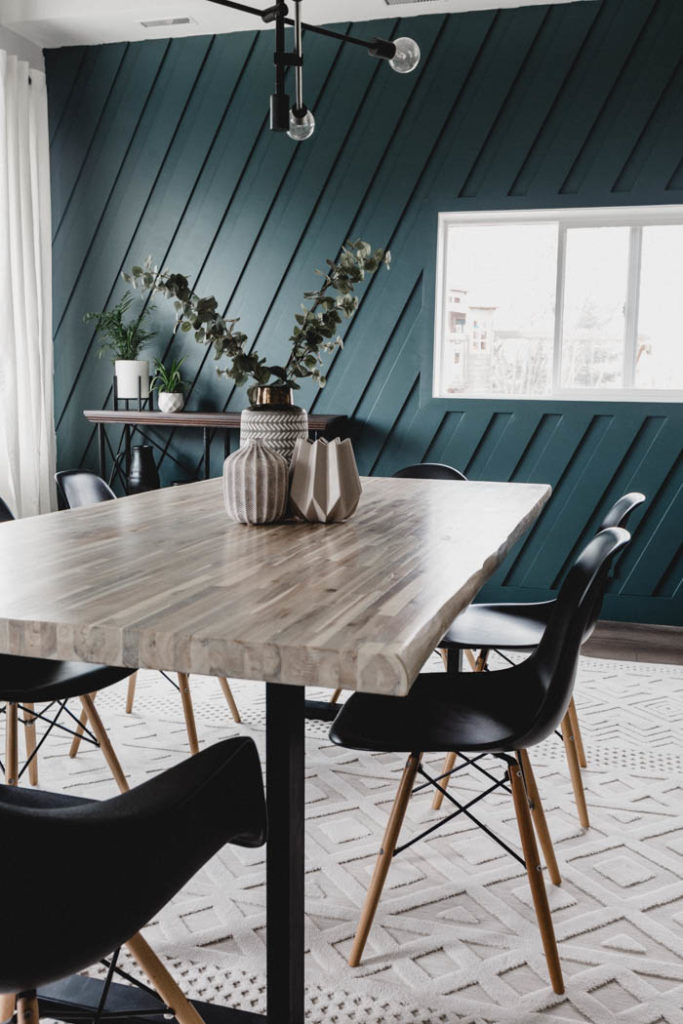
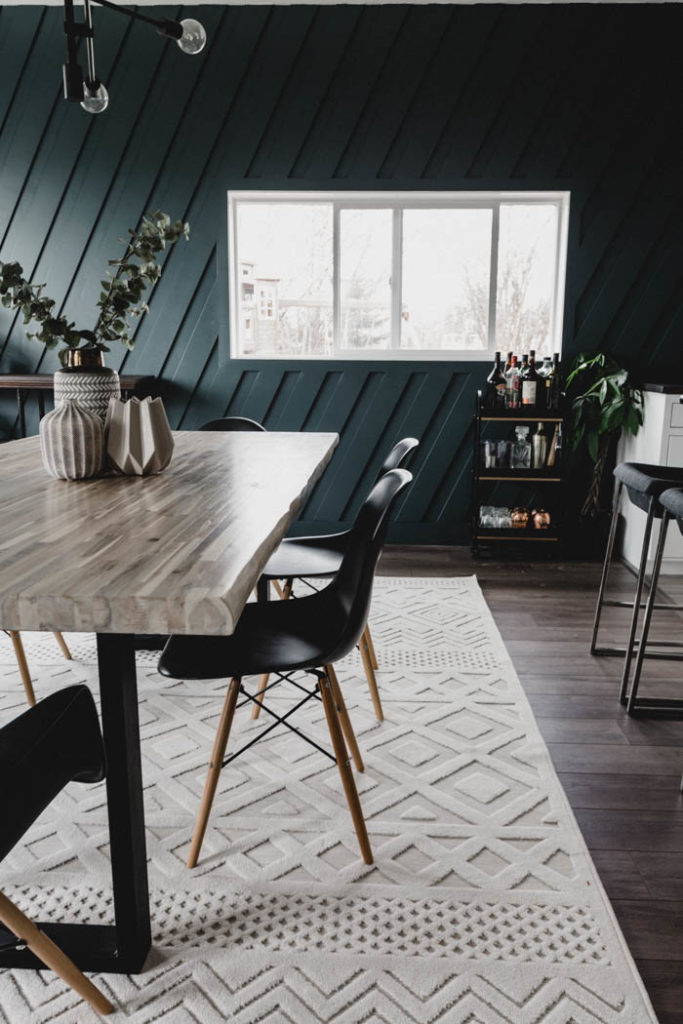
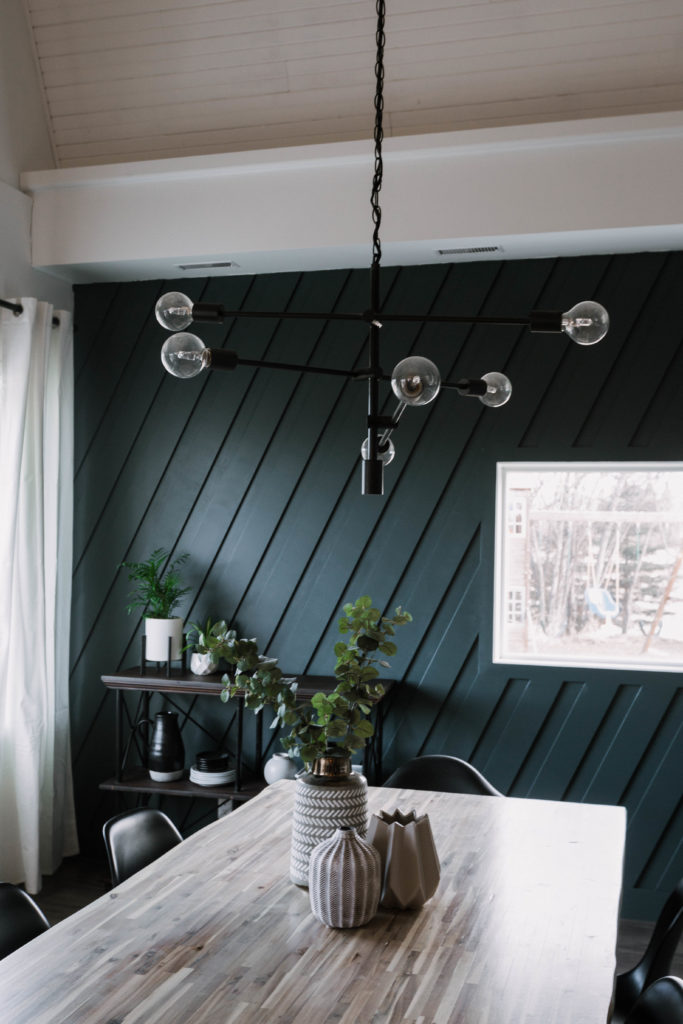
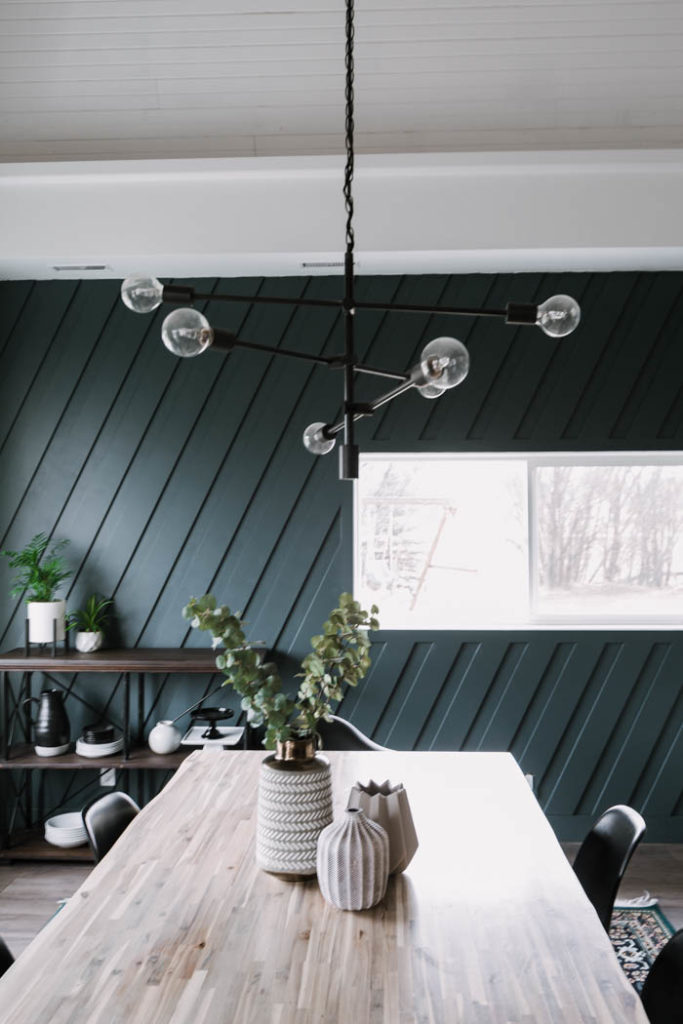
Our Finished Modern Feature Wall
We love this wall so much! It took less than two days to build and paint the entire moulding accent wall, and I honestly can’t explain how much I love it!
It makes such a visual impact and really sets the tone for the modern feel of the home.
If you liked this accent wall, you may like a couple of these other options:
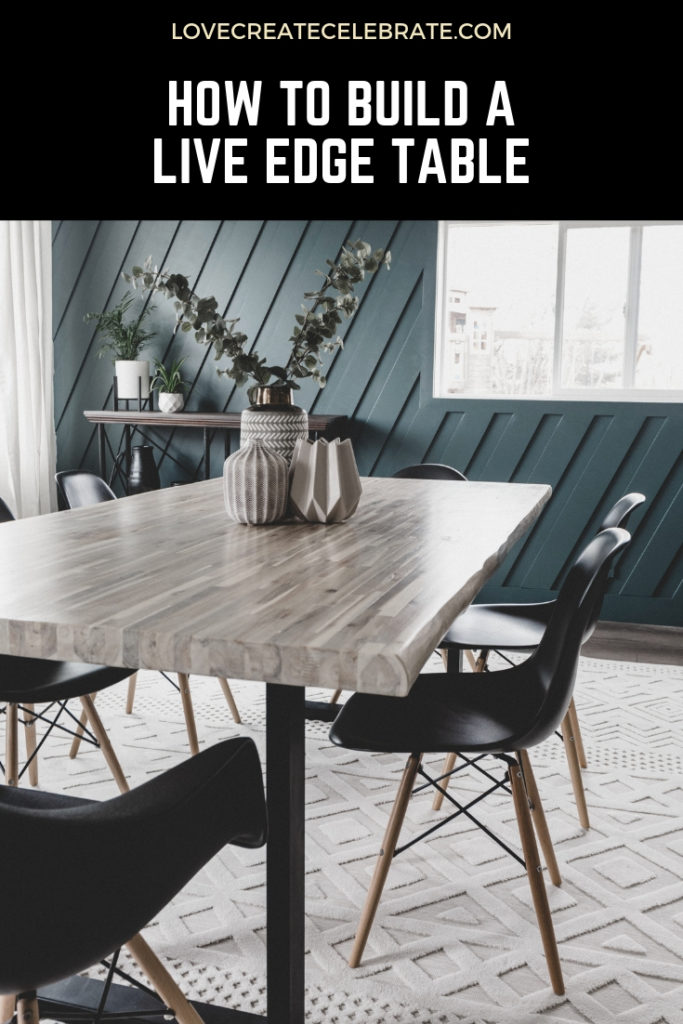
Or, if you’re wondering about that beautiful dining room table, it’s a DIY! Check out the entire DIY Live Edge Table Build!


Ashley
Sunday 16th of January 2022
Where is the blue rug in the before picture from?
Lindi
Sunday 23rd of January 2022
Hey! Unfortunately we inherited the rug and I haven't been able to find another one like it!
Falyn
Friday 5th of February 2021
Hello! Love this look and we’re going to attempt to recreate it in black in our bedroom! One question, did you trim the molding around the window or are those also 5”? They look thinner to me but maybe it’s just my eyes playing tricks. Thanks!
Lindi
Saturday 6th of February 2021
Hey! Yes, they are thinner, lol. We used a different flat stock molding that was thinner around the window - I think 2.5" thick, but the same width so that they lined up with the wall moldings. If you finish it, I'd love to see!
brian
Tuesday 3rd of November 2020
Hi! love the DIY, what color did you used in the accent wall?
Lindi
Friday 6th of November 2020
It's called Midnight in NY by Behr Paint!
Karyn
Sunday 18th of October 2020
Gorgeous room and one of the best tutorials on DIY wall moldings.
Julie Carter
Thursday 1st of October 2020
Love your accent wall and color choice! Where did you get the rug pictured? Can you include a link to it?