
There are lots of benefits to using a dog bowl stand for your pets. Learn how to make your own using scrap wood! It’s a great beginner woodworking project that will look great in your home and make your furry loved one very happy!
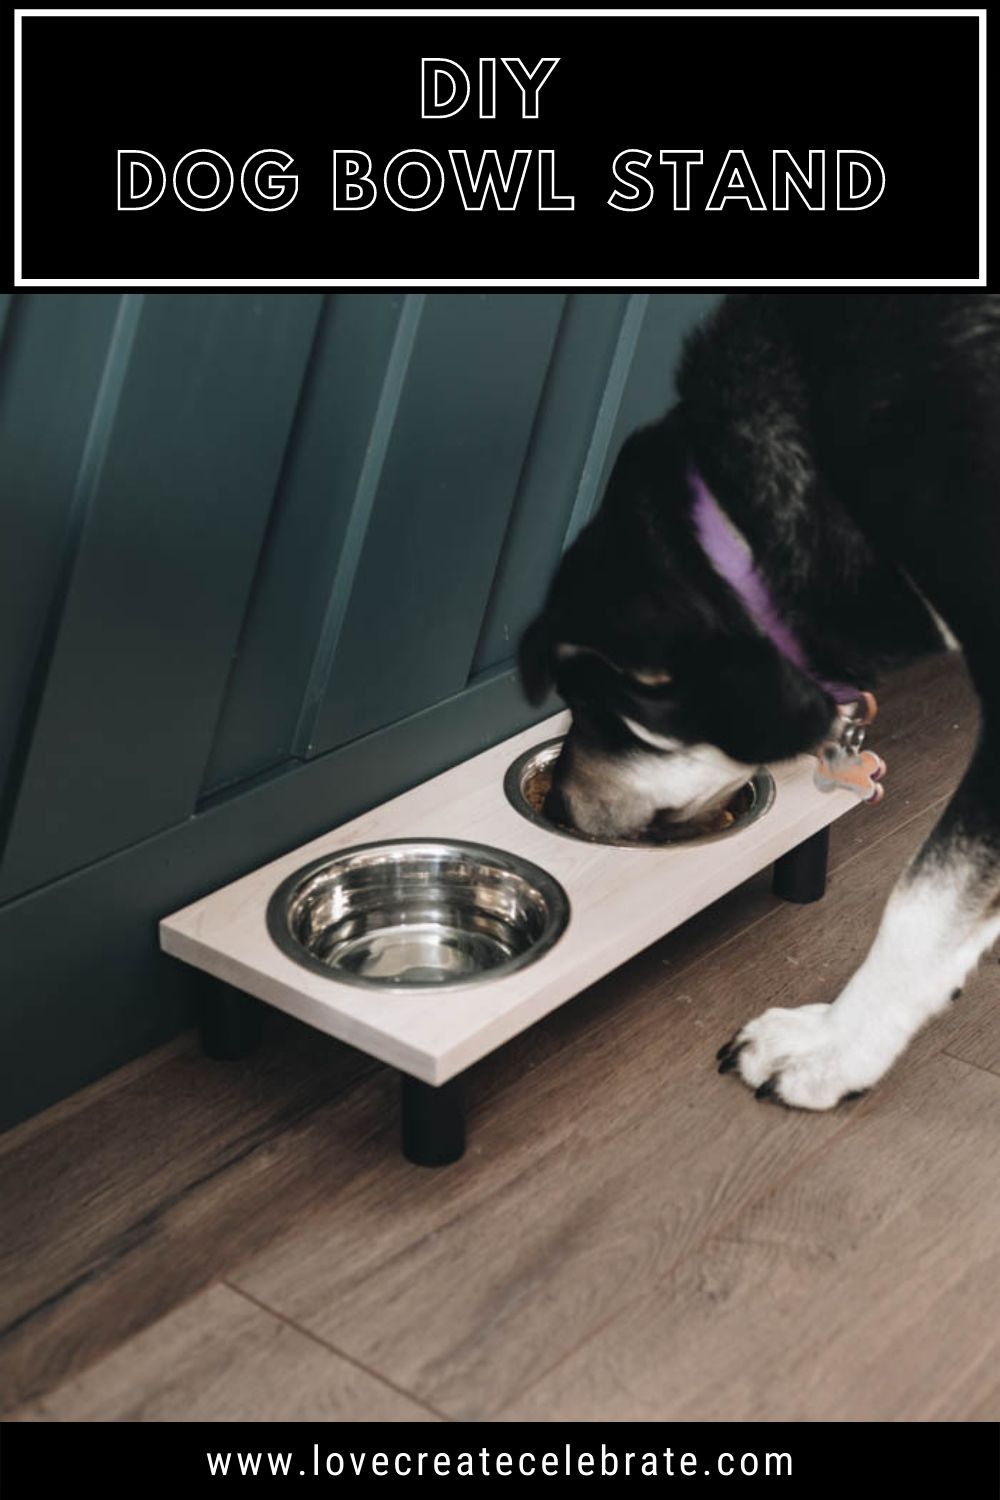
Dog bowls are not usually the most decor-friendly items to have in your home. They slide everywhere, food and water get slopped around and they just don’t look good. A DIY dog bowl stand is a perfect solution to all of these problems.
Are dog bowl stands good for dogs?
Dogs are designed to eat and drink from the floor. For this reason, the dog bowl stand we’re making today is only has the bowls about a 1/2″ higher off the floor than their bowl without the stand. For us, it is more aesthetically pleasing, and will certainly keep the food and water area neater and easier to clean!
Opinions on whether or not elevated dog bowl stands are good for dogs are mixed. They are great for older dogs because they cause less strain on the neck, and are often suggested for dogs with arthritis or other movement conditions, and various digestive issues. However there may be health risks to dogs using elevated dog feeders, so make sure to check with your vet before using one. If your dog requires an elevated food stand, it is easy to modify this design to raise it up higher for them.
*This post may contain affiliate links. When you buy a product through one of our links, we get a commission at no cost to you! Thank you for supporting our blog so that we can continue to bring you posts like these. For more information, please see our disclosure page.*
How to Make a Dog Bowl Stand
Supplies
- Scrap wood ( I used a scrap piece of maple)
- 1″ dowel
- Stainless steel dog dishes
- Black Paint
- White Stain
- Wood glue
- Miter saw
- Scroll saw or Jigsaw
- Clamps
My husband is an amazing woodworker, as you all know, and he’s taught me a lot. However, I’m slowly trying to do more projects on my own, and this is one of them! It’s a simple project, but still is a chance to show off some of the stuff I’ve learned!
I dug into our scrap wood pile for this project. Using scrap wood for projects is a great way to use up that scrap wood and it makes the project FREE!
Step-by-step tutorial
I’m using this scrap piece of maple that we had. It does have a knot in the back, but I’m going to be able to cut that off to make it into a stylish dog bowl holder.
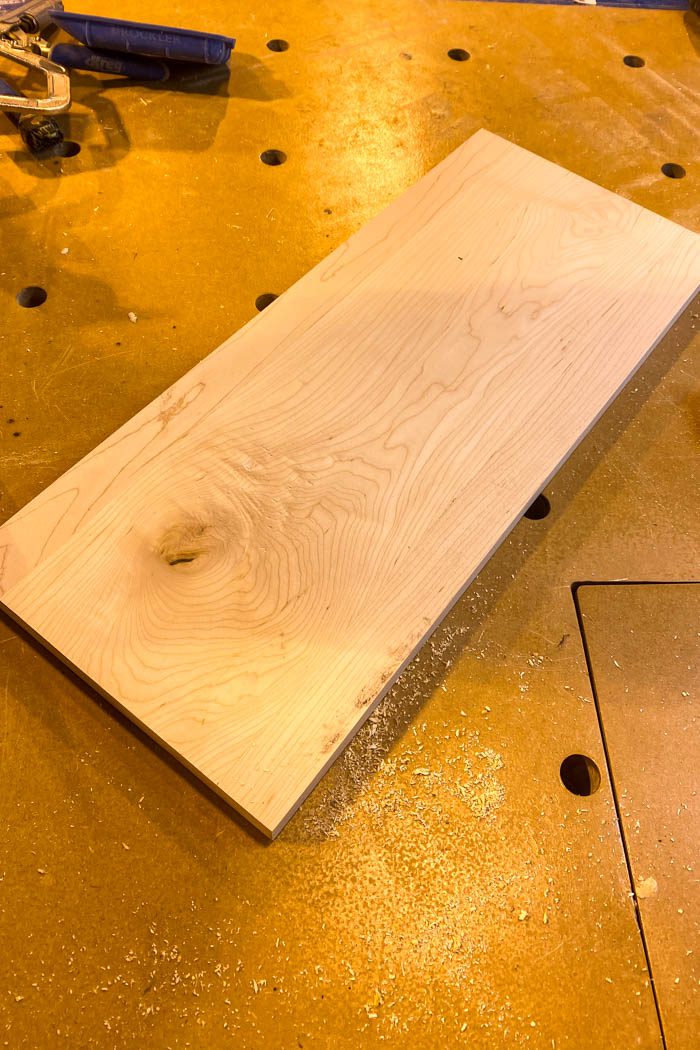
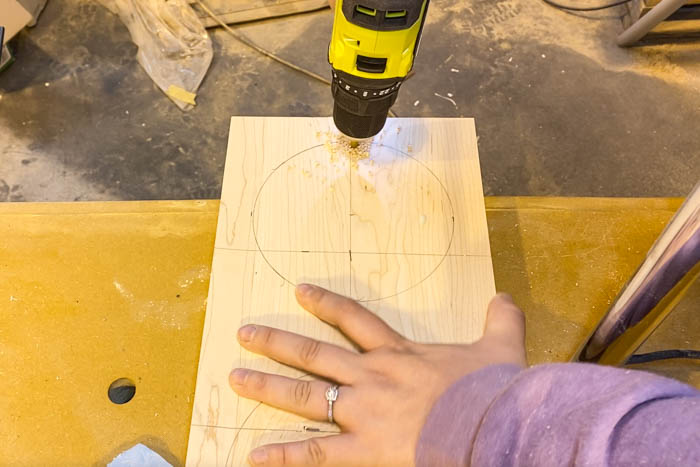
The first thing I did was cut my maple board to the size I needed. I cut it to 16″ in length. Then I needed something to help me draw and cut the circles out. I found a frog tape lid just sitting in our shop that was the exact size I needed. I used it to trace the circles.
The next step is to cut out the circles. To do this, I found the center where I wanted my dog bowl to be, which was four inches from either side. Next, I measured out the size of the diameter on all the sides and then traced out my circle template.


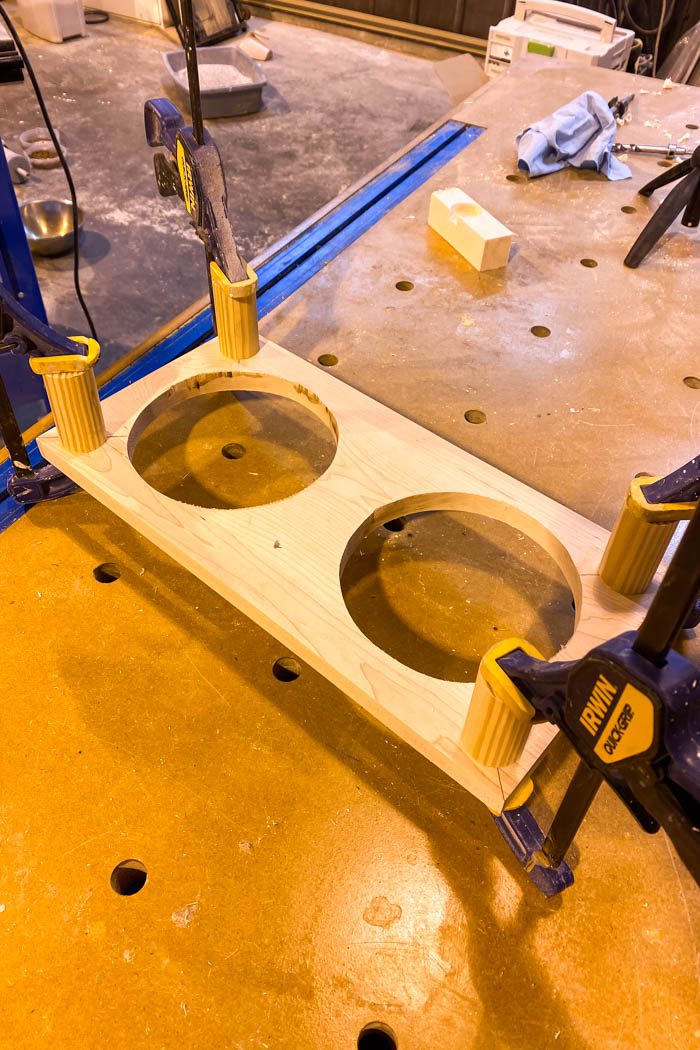
I drilled a hole near the edge of both circles and cut out the circles. You can use a scroll saw or a jigsaw to easily cut the circles out for your DIY dog bowl stand. Sand down all the edges to get a nice smooth finish.
The great thing about this project is that you circles don’t need to be perfect because the stainless steel dog bowls will cover up the rim a little bit and no one will be able to see it.

Once everything was cut and sanded, I did a dry fit to make sure that the bowls fit in nicely. Then I got to work making the legs for the raised dog bowl stand.
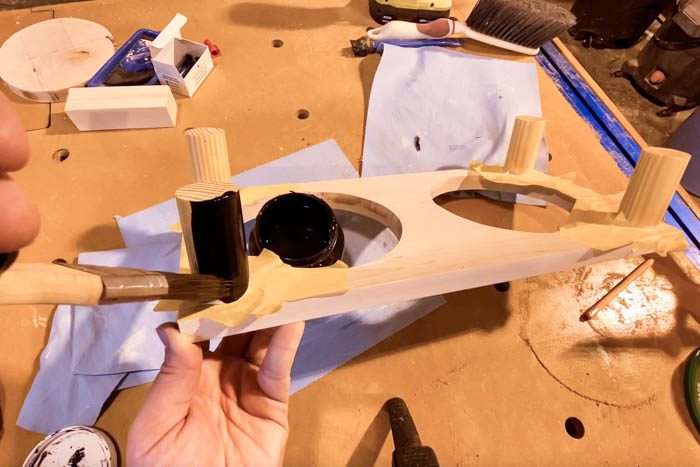
I had a leftover 1″ thick dowel and cut four 2 1/2″ pieces from it with my miter saw to be used as the legs. Next, I used a speed square to draw lines at 45-degree angles on all four corners of my piece so that I could have a spot to put my dowel.
Using wood glue and clamps, I centered the dowels on the lines and wiped away any excess glue.
When it came to finishing the piece, because I was working with two different types of wood, I didn’t want to stain the whole piece. I knew the stain would end up looking different on both types of wood, so I decided to stain the top and paint the legs.
I used a white stain called Linen that kind of gives the wood a white-washed look, but still shows the wood grain underneath. Because this piece will definitely have water spilled on it, I applied polyacrylic to all the stained parts of the dog bowl stand.
Lastly, I painted the legs black, taping off the wood around them to protect it.
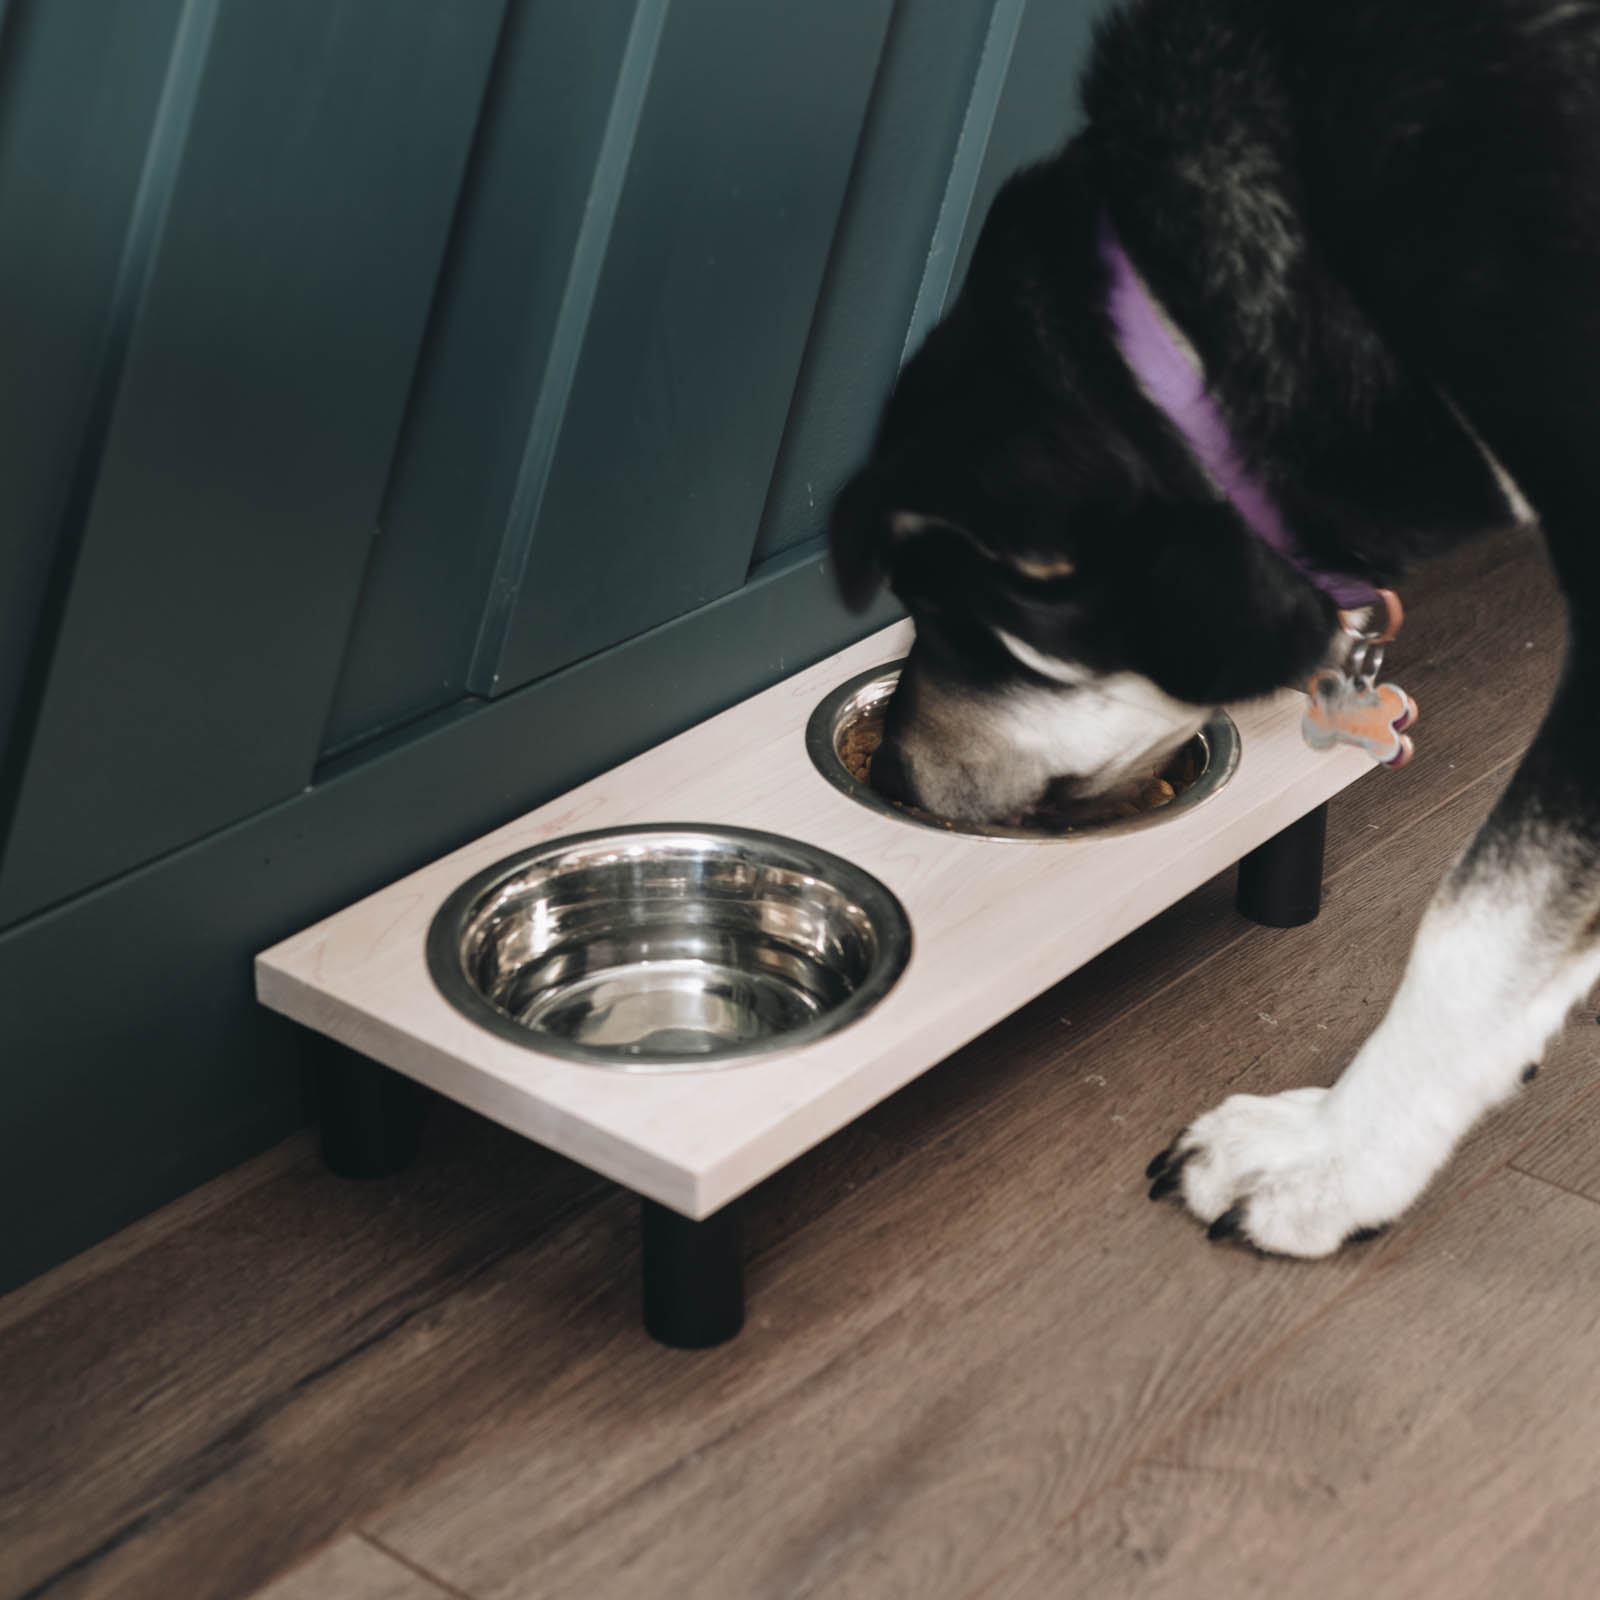
Finished dog bowl stand
Here is how my finished pet food dish turned out. I’m really happy with the end result!
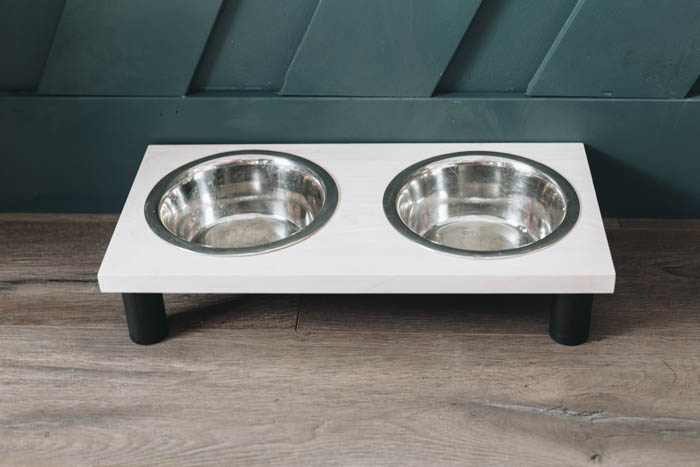
I love the colors together and I love how sleek and modern it looks.

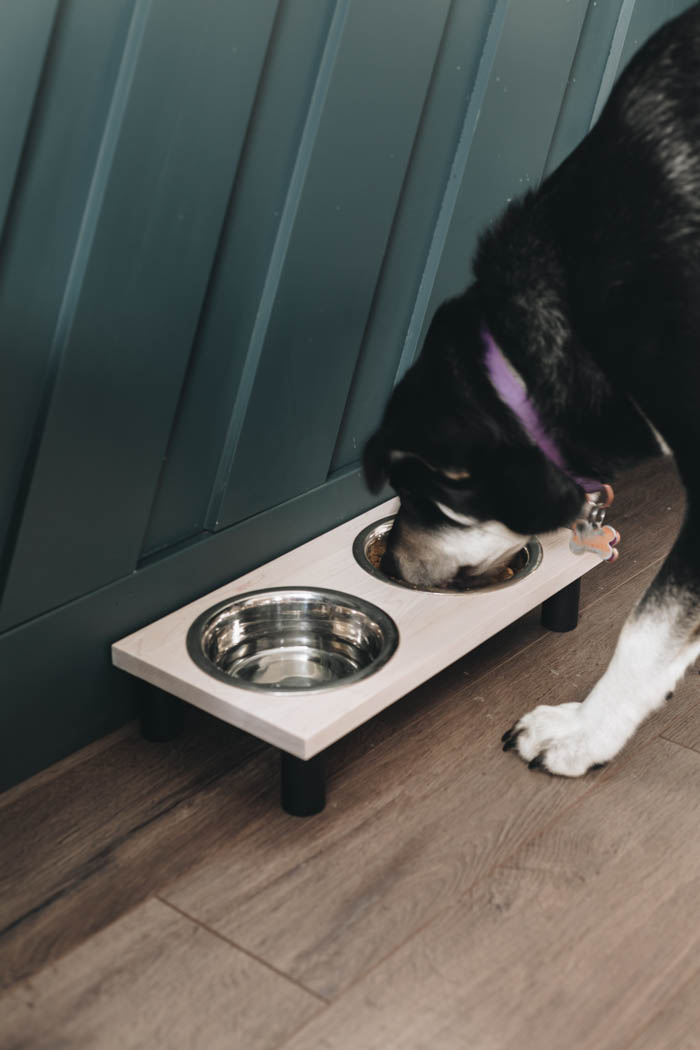
My dog definitely doesn’t mind using it, so overall it was a great DIY project.
Easy Scrap Wood Ideas
Watch me make this DIY dog bowl stand and our indoor firewood holder from scrap wood in the video below.
And if you’re looking for more great scrap wood ideas, here’s a ton of ideas for whatever you’re working on!
DIY Dog Bowl Stand from Scrap Wood
Materials
- Scrap wood ( I used a scrap piece of maple)
- 1" dowel
- Stainless steel dog dishes
- Black Paint
- White Stain
- Wood glue
Tools
- Miter saw
- Scroll saw or Jigsaw
- Drill
- Clamps
Instructions
- Cut your scrap piece of wood to 16" in length.
- Trace and cut out holes for dog bowls using a scroll saw or jigsaw. Sand completely and do a dry fit to make sure the stainless steel dog bowls fit.
- Cut legs from the dowel and attach using wood glue and clamps.
- Finish by staining the top and painting the legs of your DIY dog bowl stand.
