Easy Dollar Tree Decorative Boxes DIY. Use dollar store materials to create beautiful decorative boxes to brighten up any space in your home!

If you’re decorating your open shelving, all of the little decorative sculptures and holders you buy will add up, and quickly! 5 or 6 pieces is easily over $150 already! Which is why I try to come up with easy dollar store solutions like this simple decorative boxes DIY project.
This project is one of six office organization ideas we did, and it’s a quick and inexpensive DIY that I did along with other dollar store projects to organize our home office! Six simple projects to decorate and organize for less than $10, instead of hundreds.
How to Make DIY Decorative Boxes
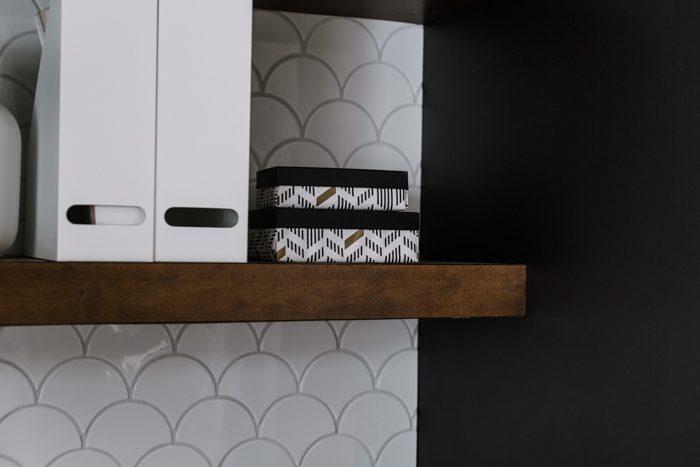
I’m genuinely so happy with how these turned out. This DIY project was done 3 years ago, and I still decorate my shelves with these boxes and still use them to store knicks and knacks.
Materials Needed
- Dollar Store Boxes
- Dollar Store Tote Bags
- Black Gel Stain
- Scissors
- Fast-Drying Glue
Step-by-step Tutorial for my Decorative Boxes DIY
This project was a quick and easy little storage solution. I found these boxes left over from Christmas at the Dollar Store, as well as these tote bags, which I grabbed right away, just because I really loved the pattern on the sides of them.
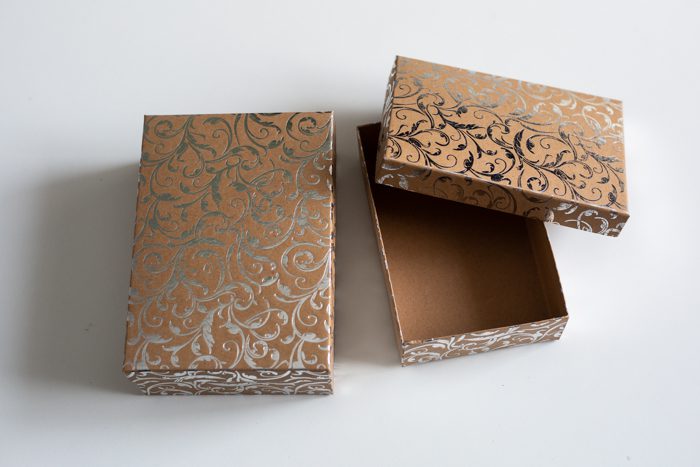

If you guessed that I may not be a fan of the pattern on the Christmas boxes, you would be right. So my first step was to try and paint the lids black. I did two coats on the first lid just to see how well it would actually coat and dry before I did the second lid.
I thought the pattern on these tote bags would make a really nice pattern for the bottom of my decorative boxes DIY. I started by cutting one whole side of the tote bag off, cutting any of the seams right off, and then got rid of the excess pieces.
My plan was to wrap the bottom of these boxes, just like you would wrap a present. I started by bringing the tote bag material up one side of the box, leaving just enough at the top that I’d be able to fold some over and then snipping the corners so that they’d be able to fold down easily.
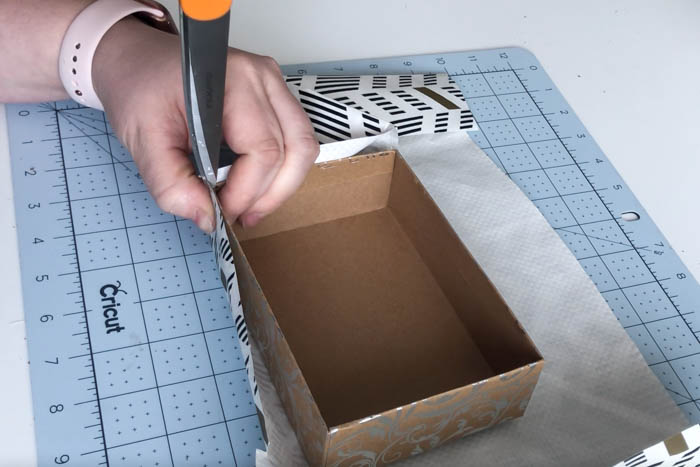
Once all of my cuts were done, I used one of my favorite, fast-drying glues to glue that side panel in place. Then I turned the box around and did the same thing on the opposite long side of the box.
On the shorter sides, I only wanted, maximum, an inch of the print to fold over inside the box, so the first thing I did was cut off any excess material.
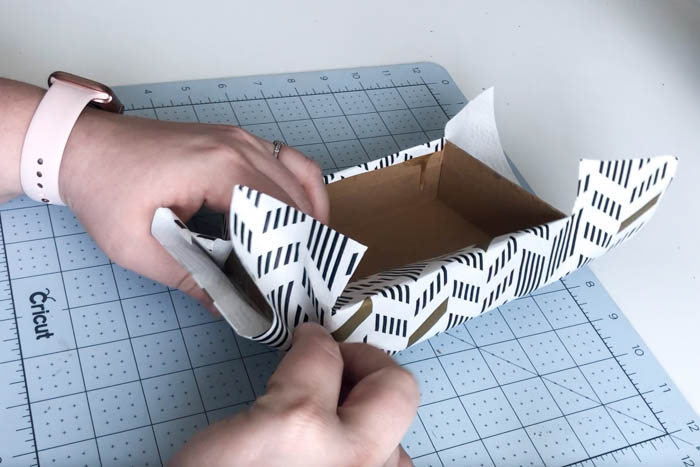
I folded over any sides that were left over, so they were kind of wrapped like a present, but kept a straight, flat edge on the side. And then I wrapped the leftover pieces inside the box. If you want to see exactly how I folded them, you can watch the video below!
Finally, I glued those pieces in place and did the same thing on my final edge of the box.
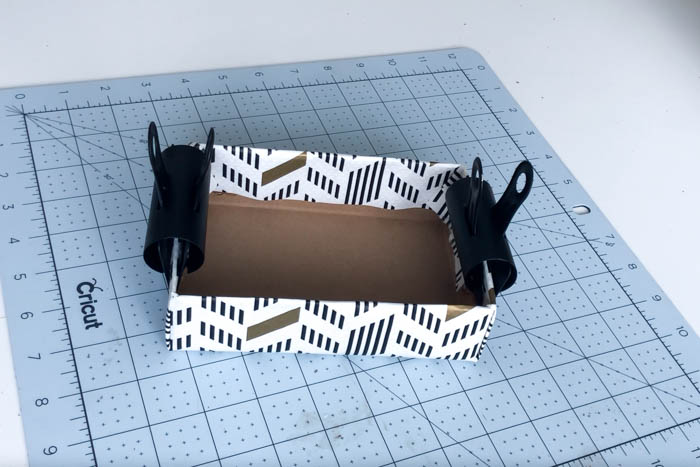
Then I repeated the entire process with a second box so that I would have two pretty boxes to stack and help organize my office.
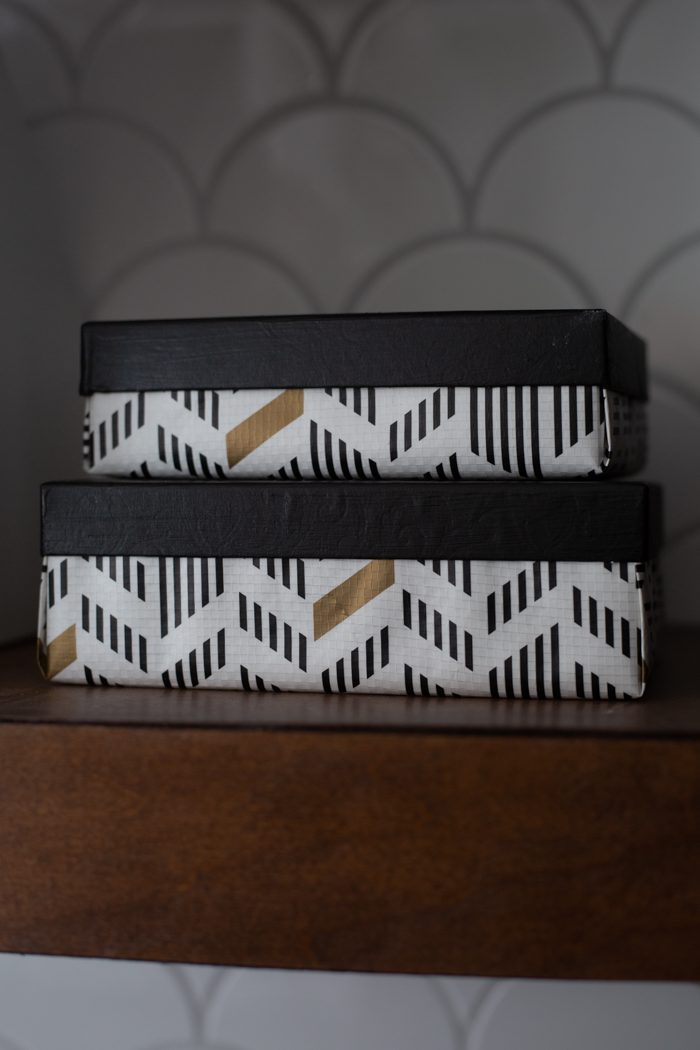
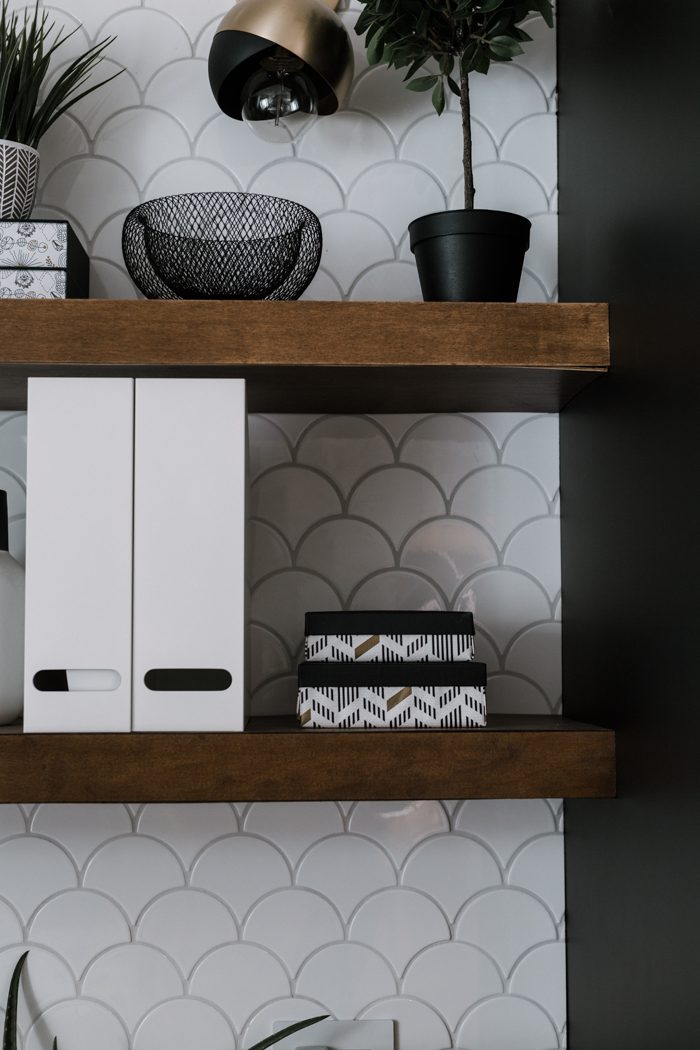
Finished Decorative Boxes DIY
Guys, I’m so happy that I had spotted that little patterned tote bag. I think my decorative boxes DIY looks just like store-bought boxes and they look amazing sitting on my shelves.
Not only does the pattern help create a really pretty box, it’s also a very functional piece, currently storing usb keys and extra cords in one tidy place.
More Dollar Store Office Projects
This file folder labels DIY was one of 6 projects I did to organize my office using dollar store supplies. Check out the video below to see how I made the other 6 quick and easy projects!
Don’t forget to subscribe to our YouTube channel for more great dollar store DIYs!
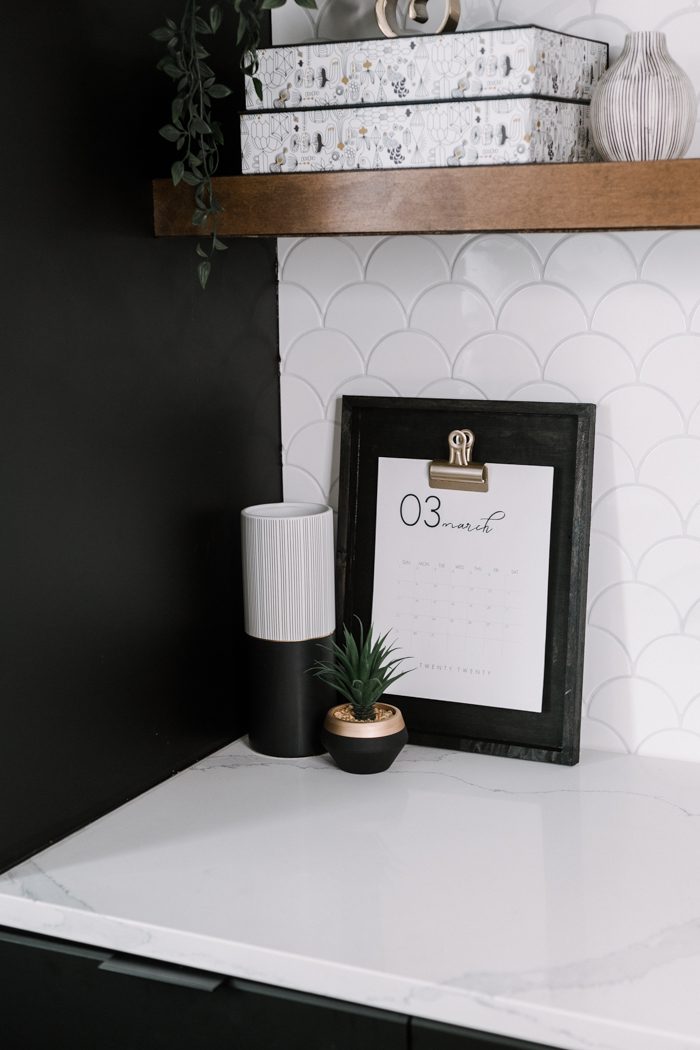
For more great dollar store DIY ideas, check out this beautiful calendar display!