
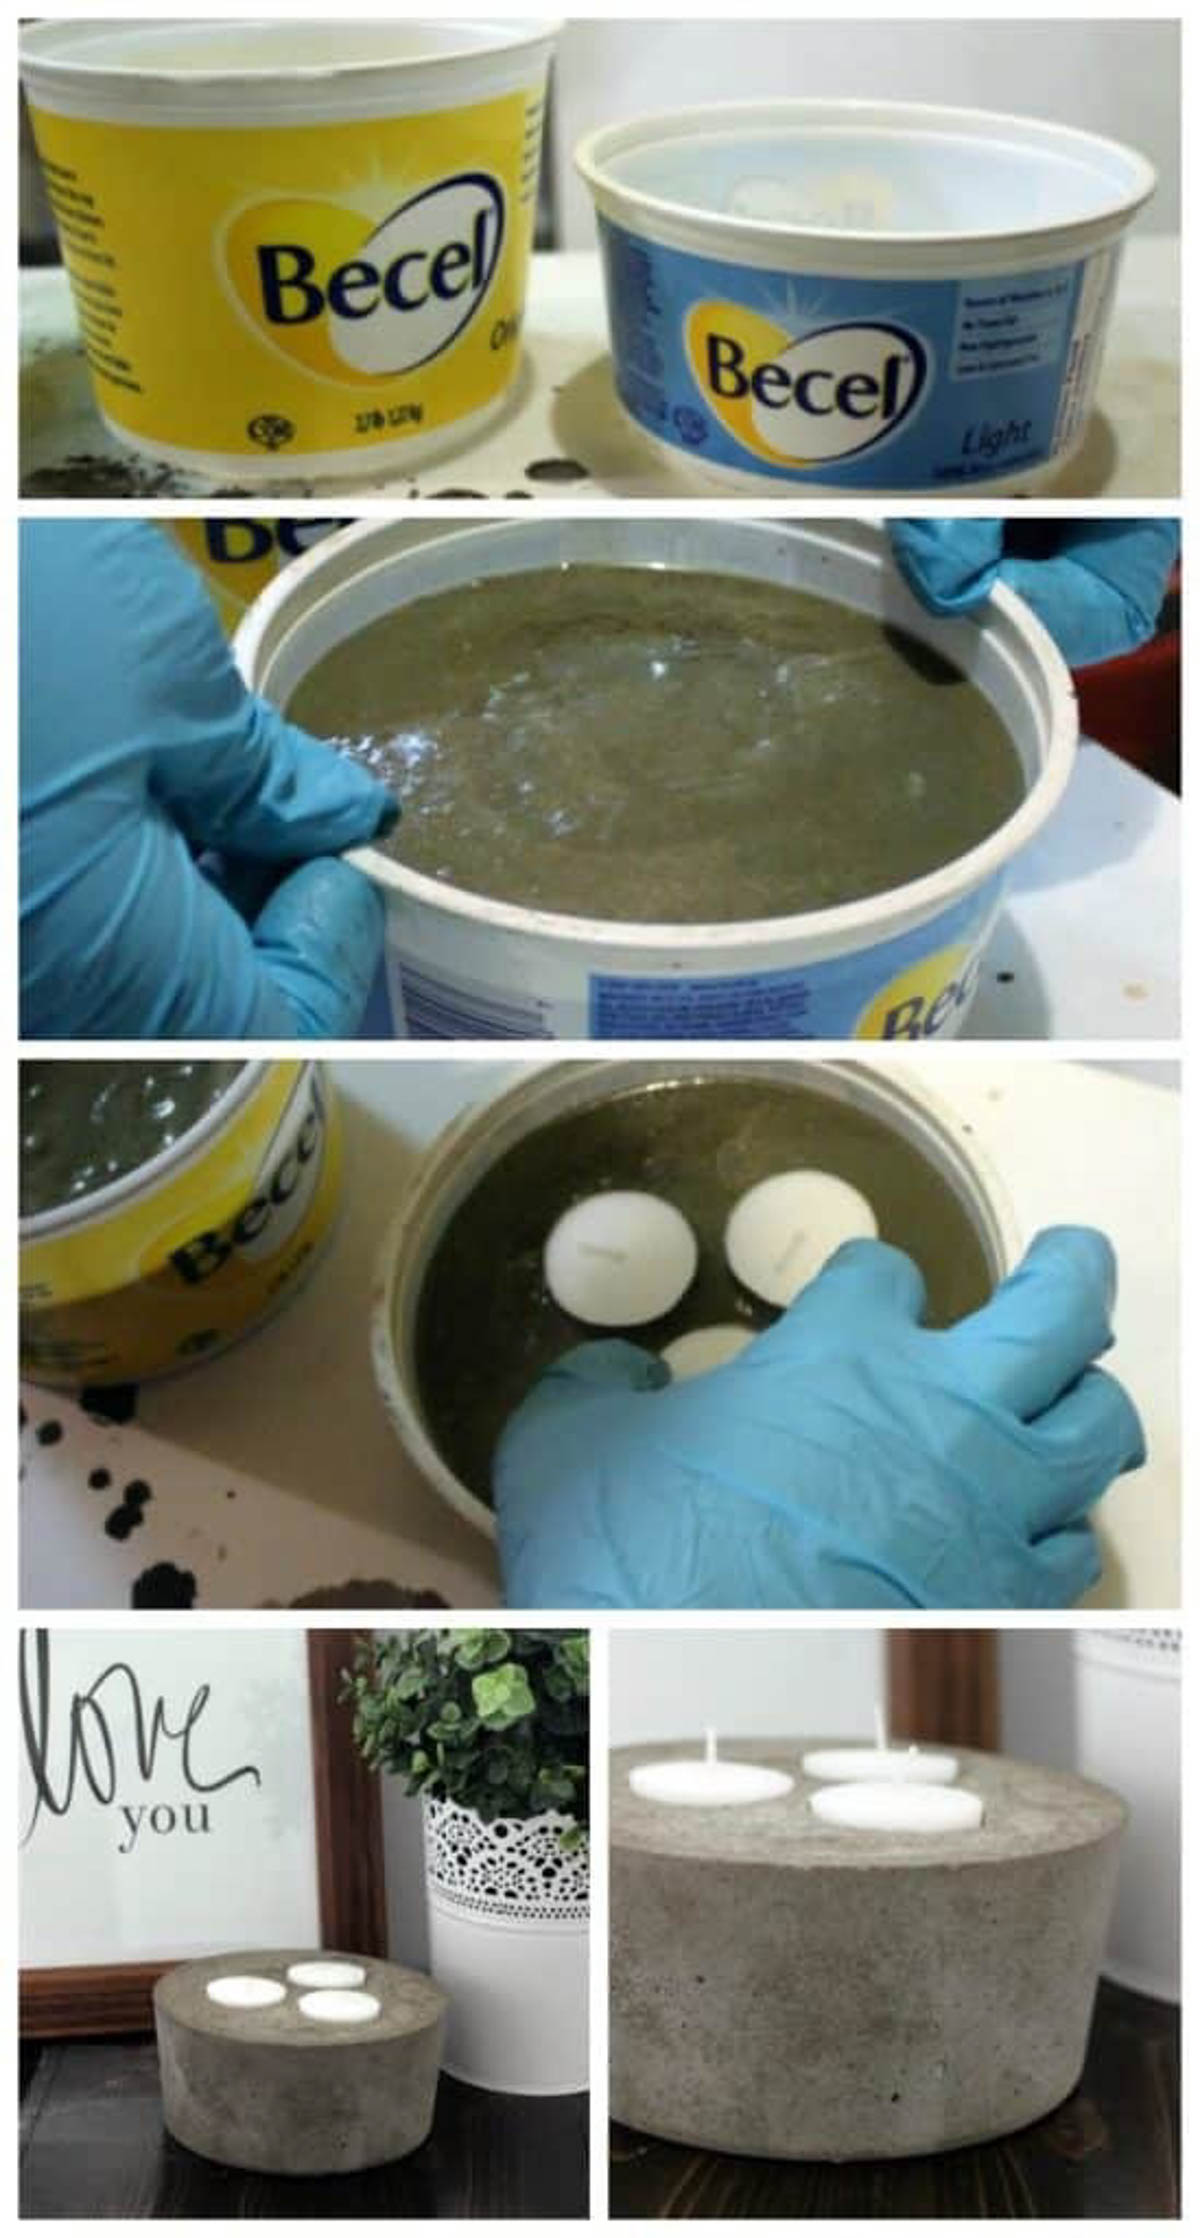
I’ll show you how to make a 3-wick concrete candle with just a margarine dish and some tea lights! The perfect DIY décor for any rustic or industrial style!
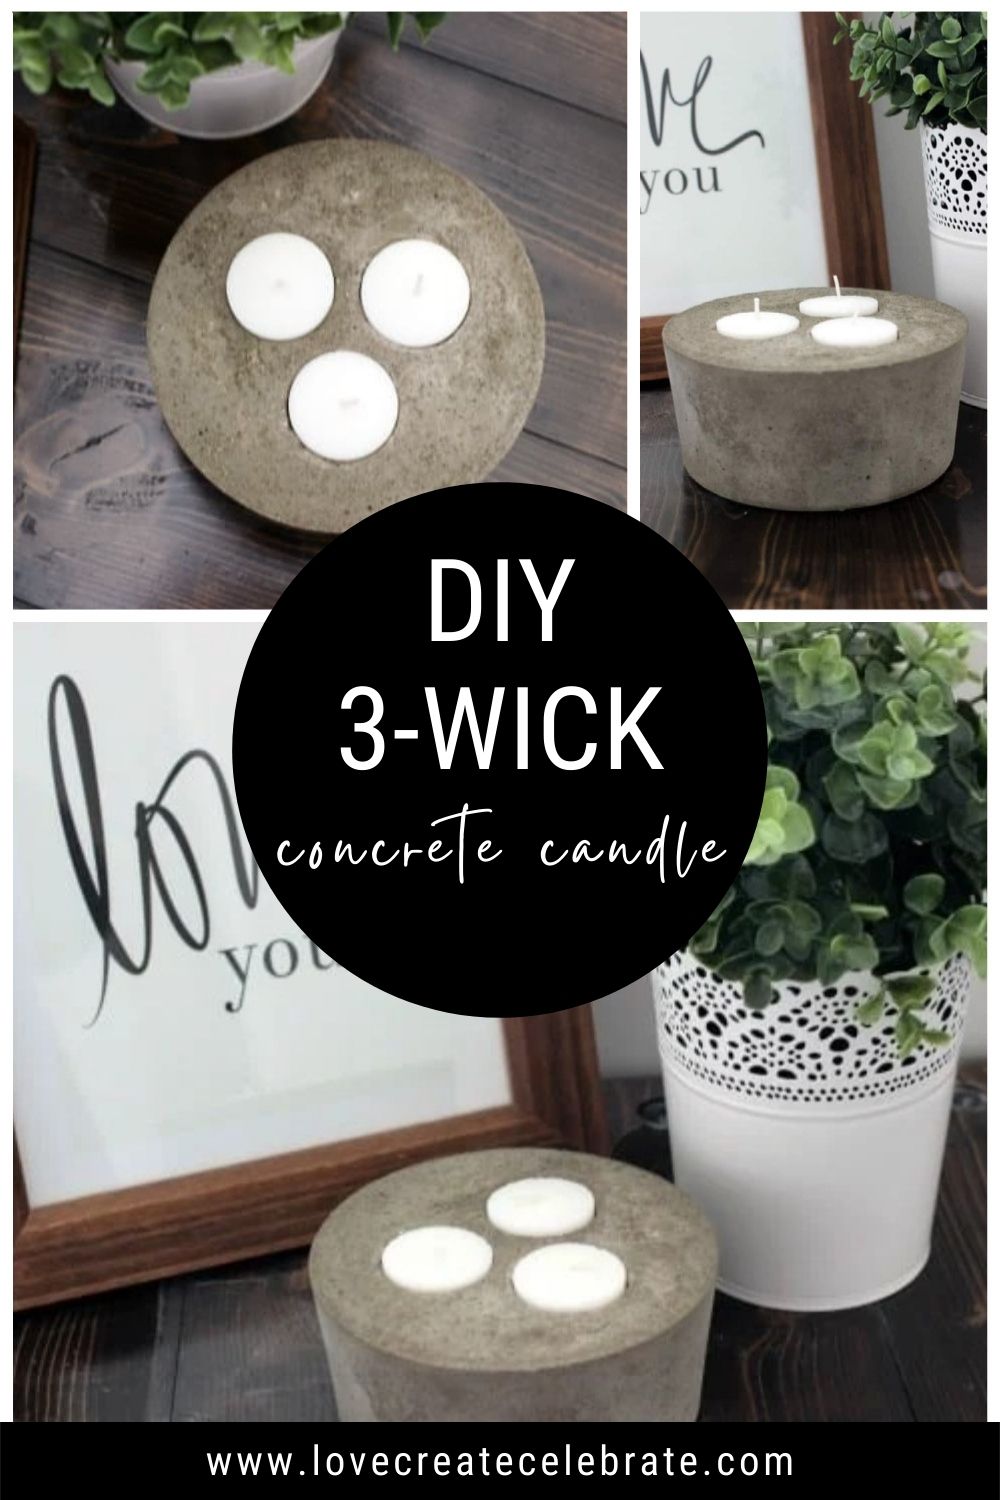
If you were following along with my crazy 6-week Guest Bedroom Renovation, then you know that I still have a few DIYs to share with you! I made this simple concrete candle holder with tea lights in no time at all with an old margarine dish! I can’t wait to show you how to make your own concrete candle for less than $5!
Put away the power tools… This project doesn’t need any! Don’t let working with concrete intimidate you, it’s a lot easier to work with than you think. This is the perfect concrete project to get you started!
How to make a concrete candle
Materials:
Bag of concrete
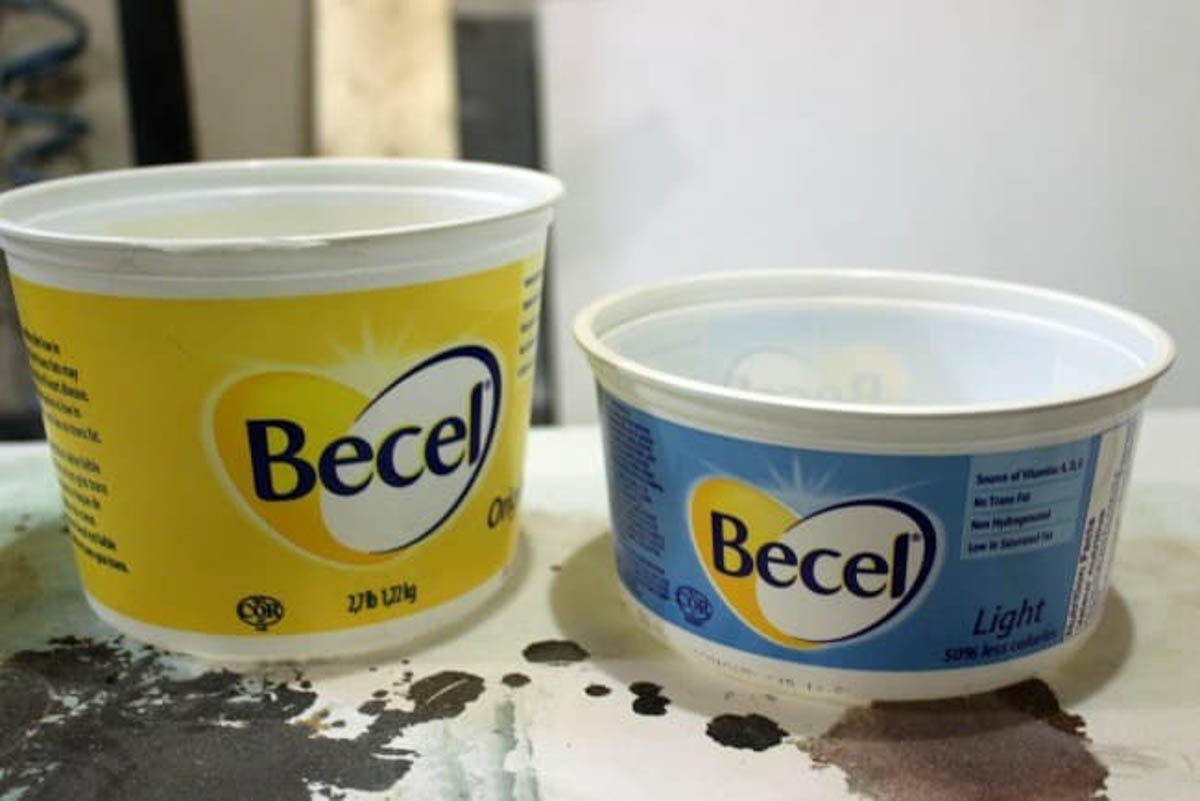
Old margarine dish (or other plastic container)
Tea lights
Gloves
WD-40
Clear sealer
Step-by-step tutorial
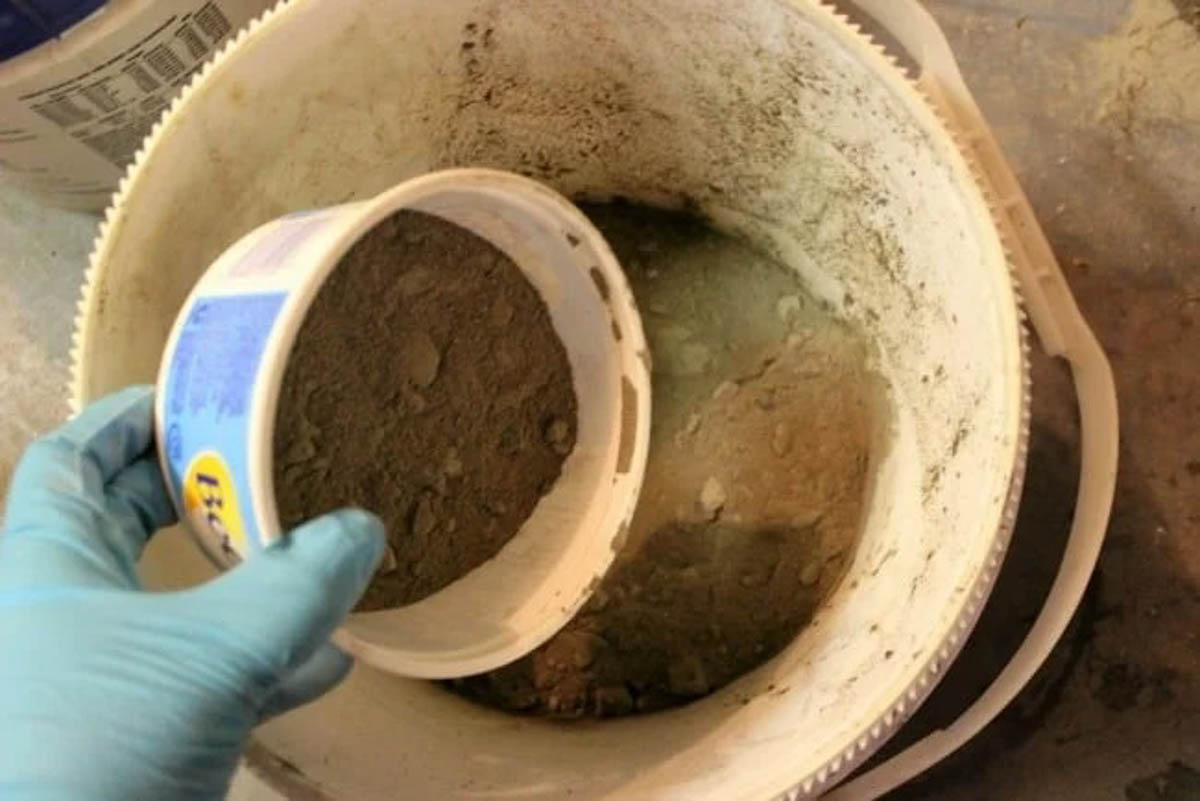
The first step is to get your concrete ready. Fill your plastic dish with concrete and pour it into your mixing bowl. Always use gloves when handling concrete mix!
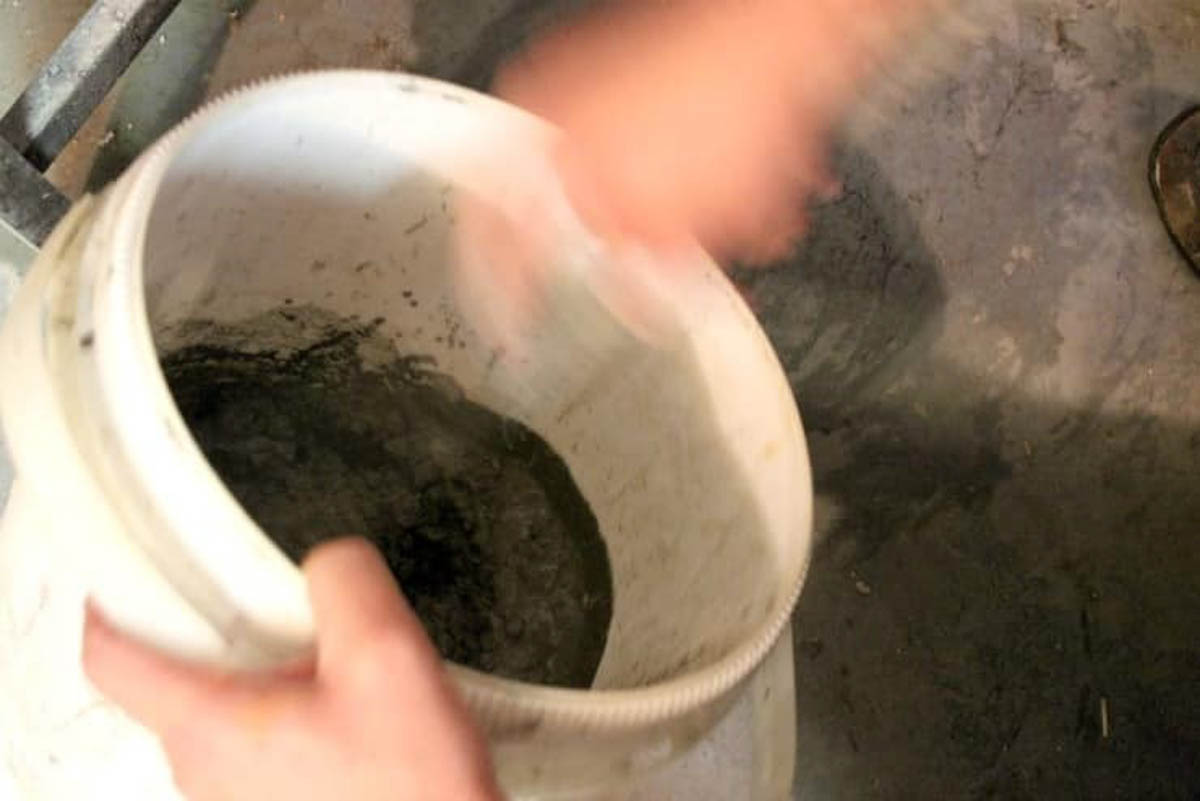
Add water, as per bag instructions, and stir until you get a smooth consistency. You want as many lumps gone as possible!
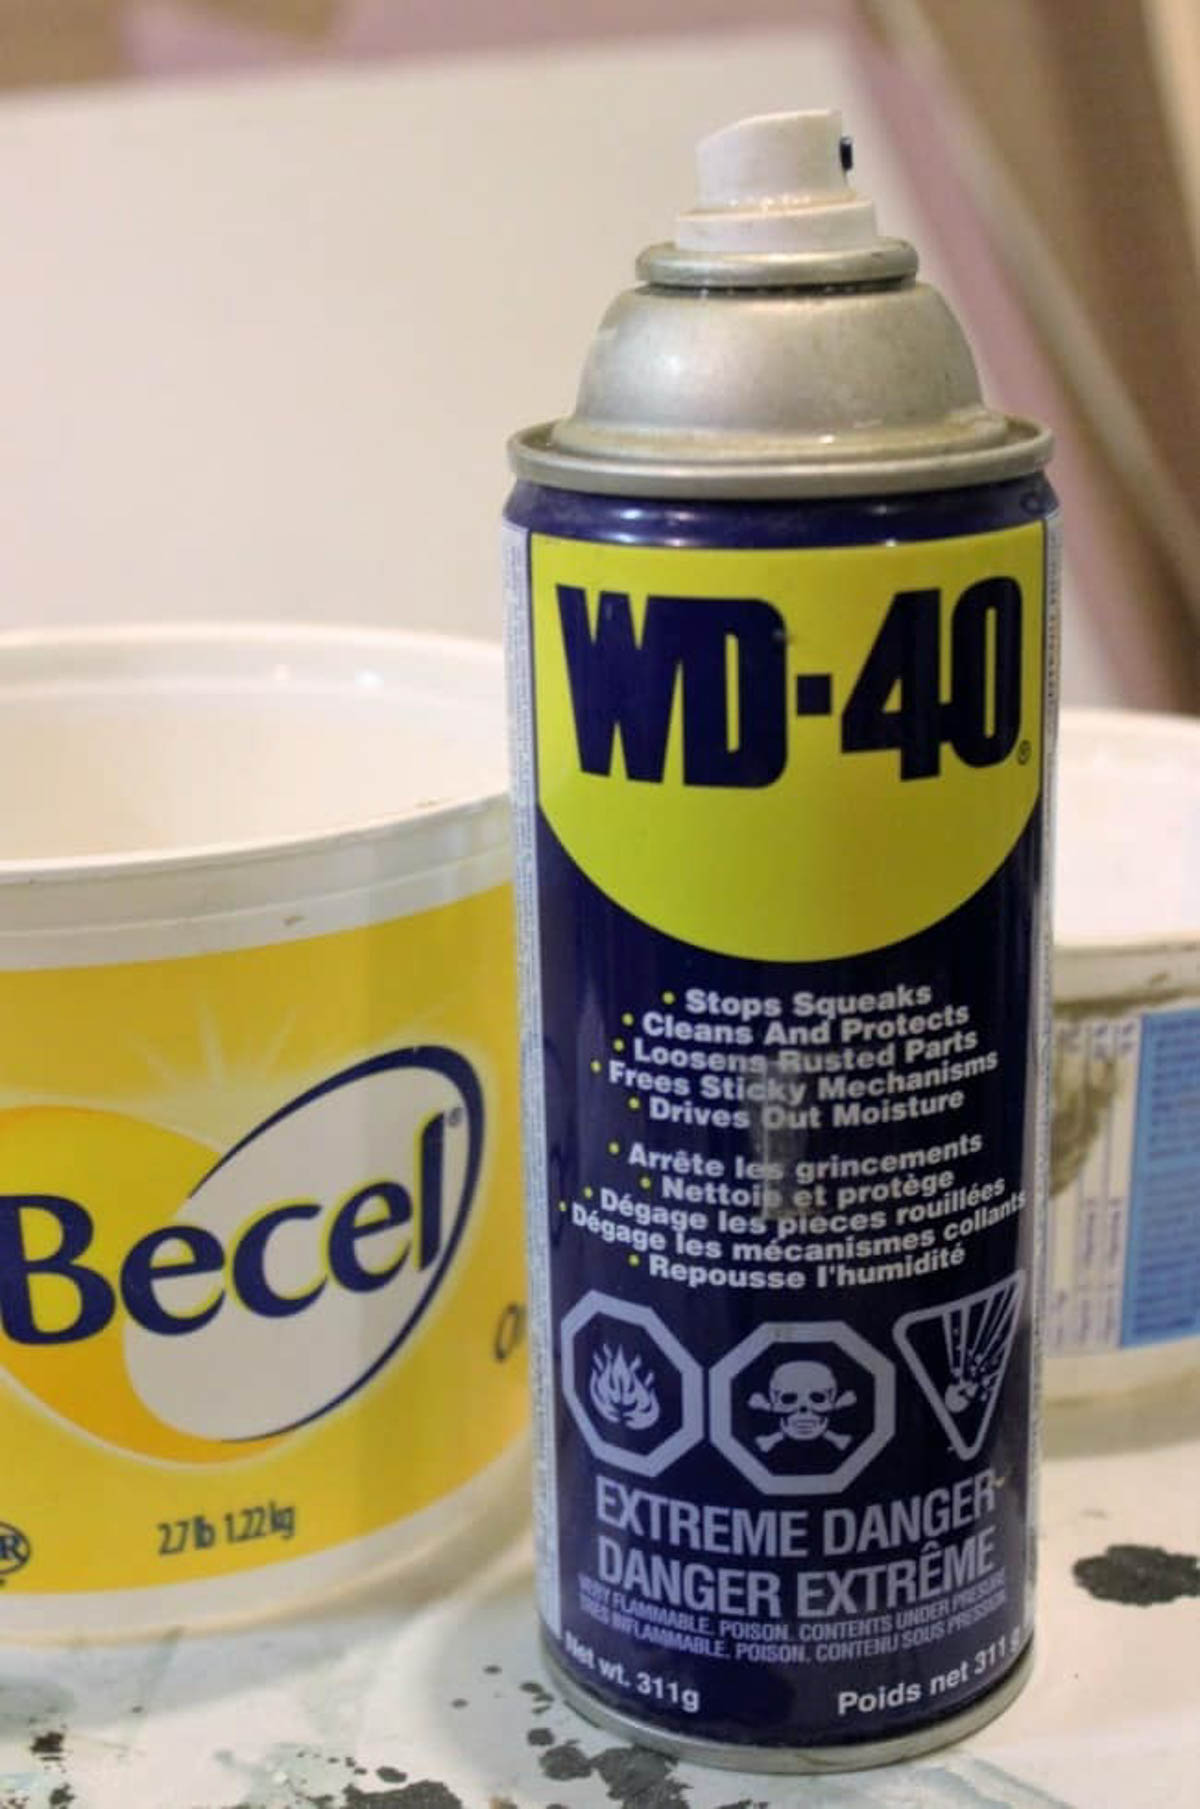
Spray the inside of your containers with WD-40 (<– This is my secret weapon!). This will prevent concrete from sticking to the sides of the container.
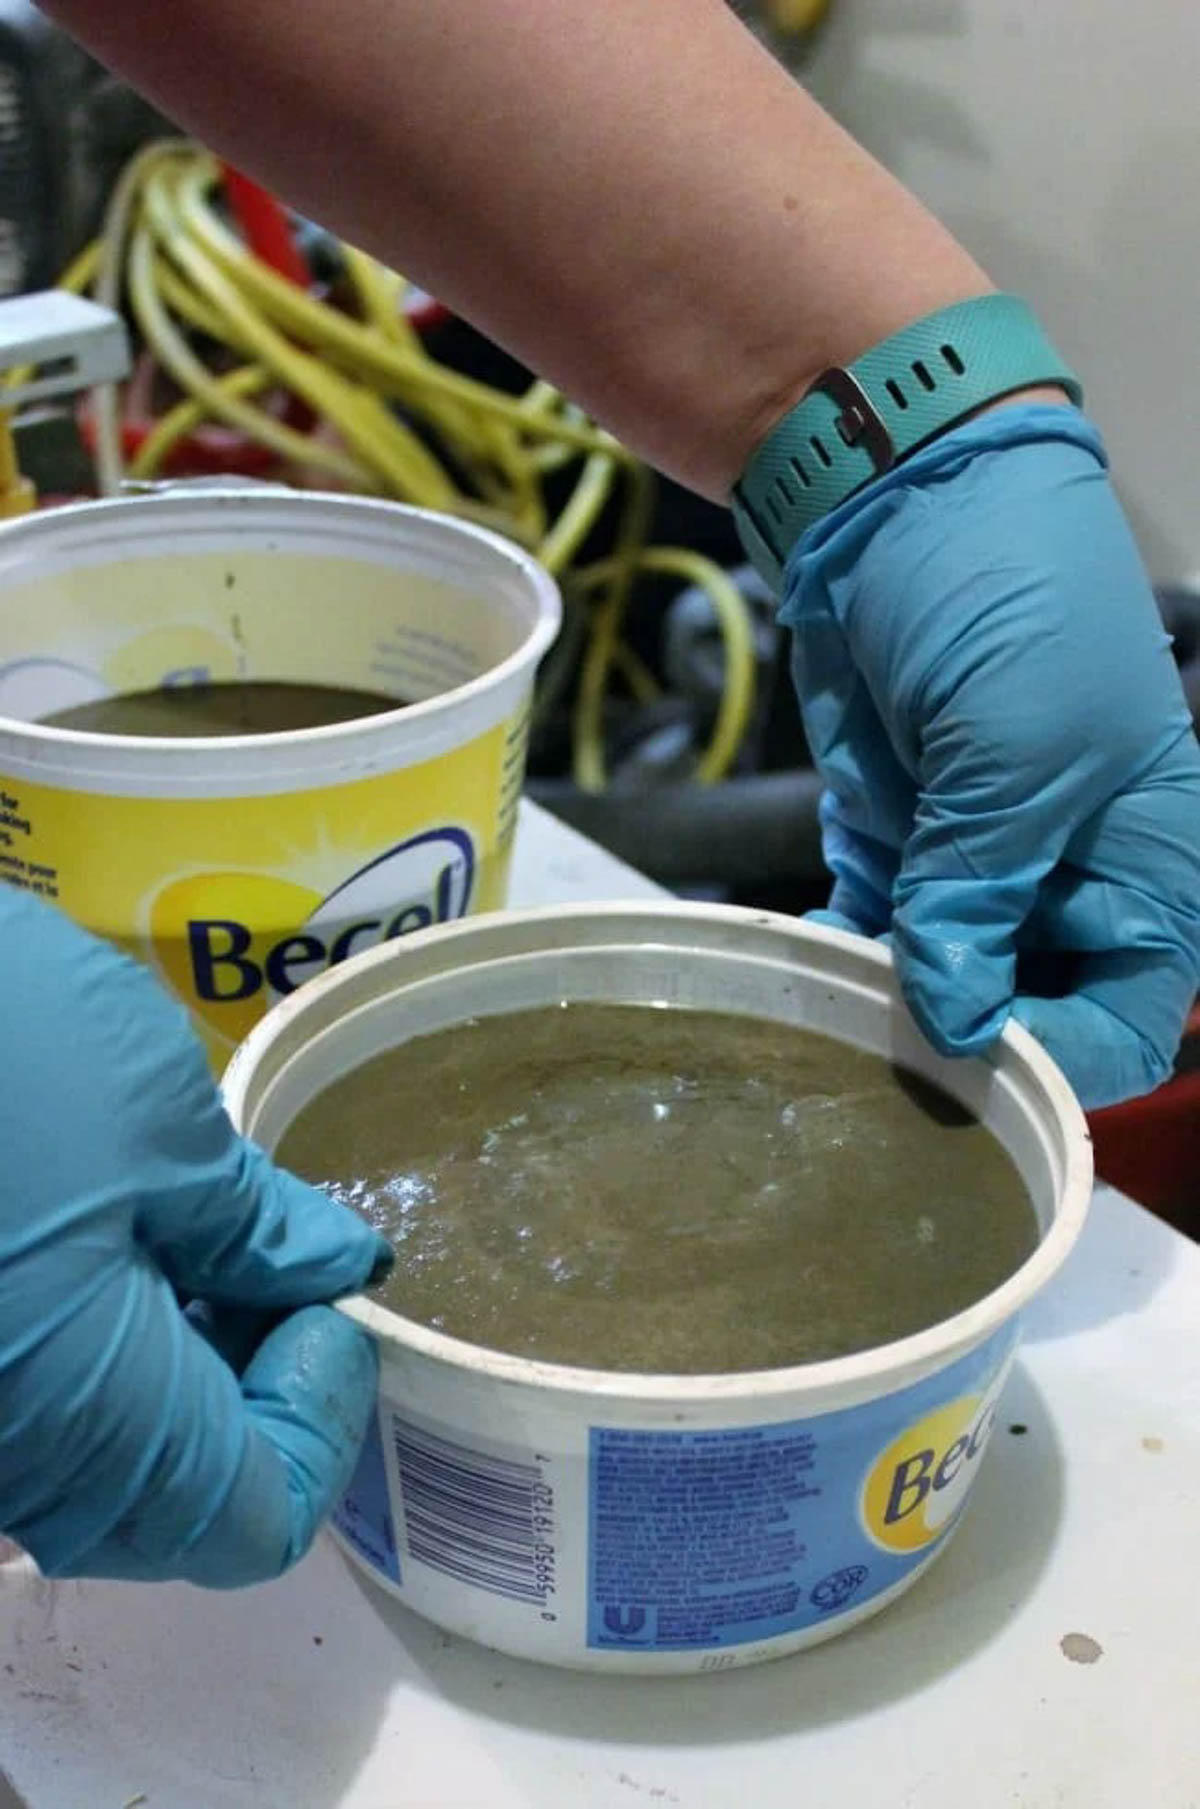
Pour your concrete into your containers. Pat the containers on the counter a bit to make sure the air bubbles are out.
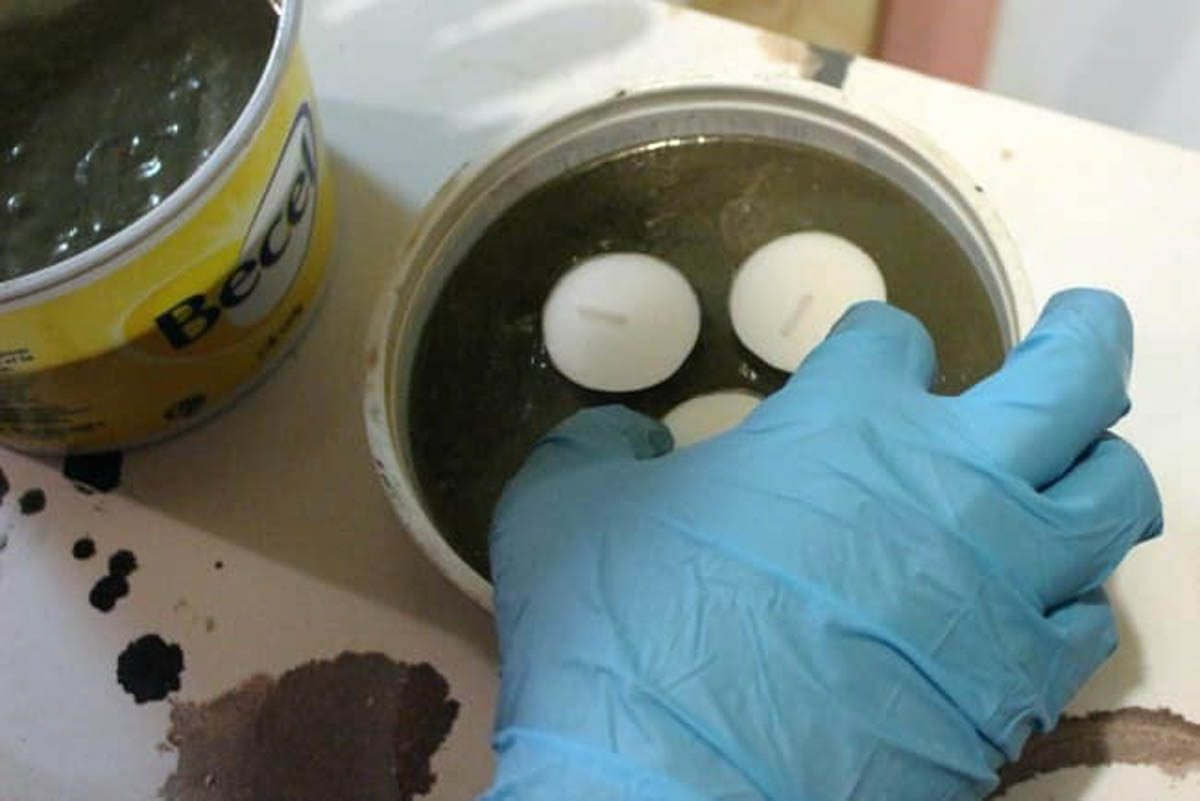
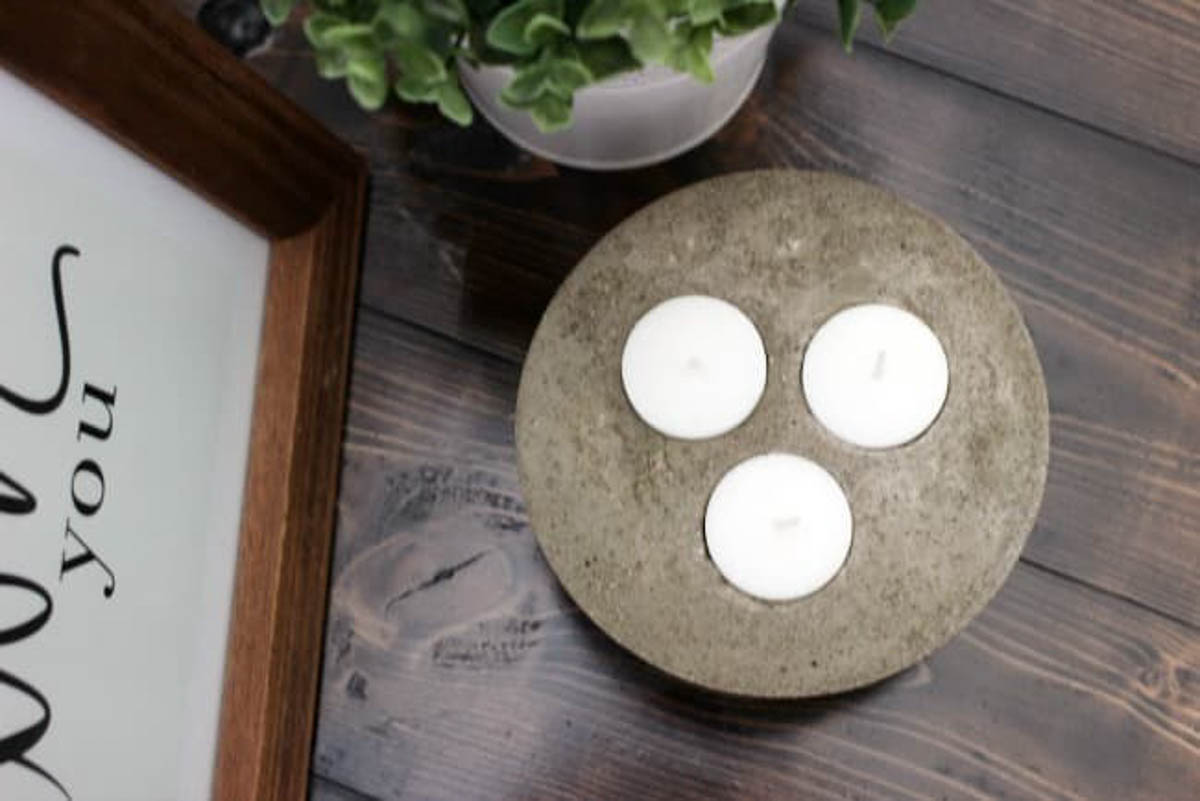
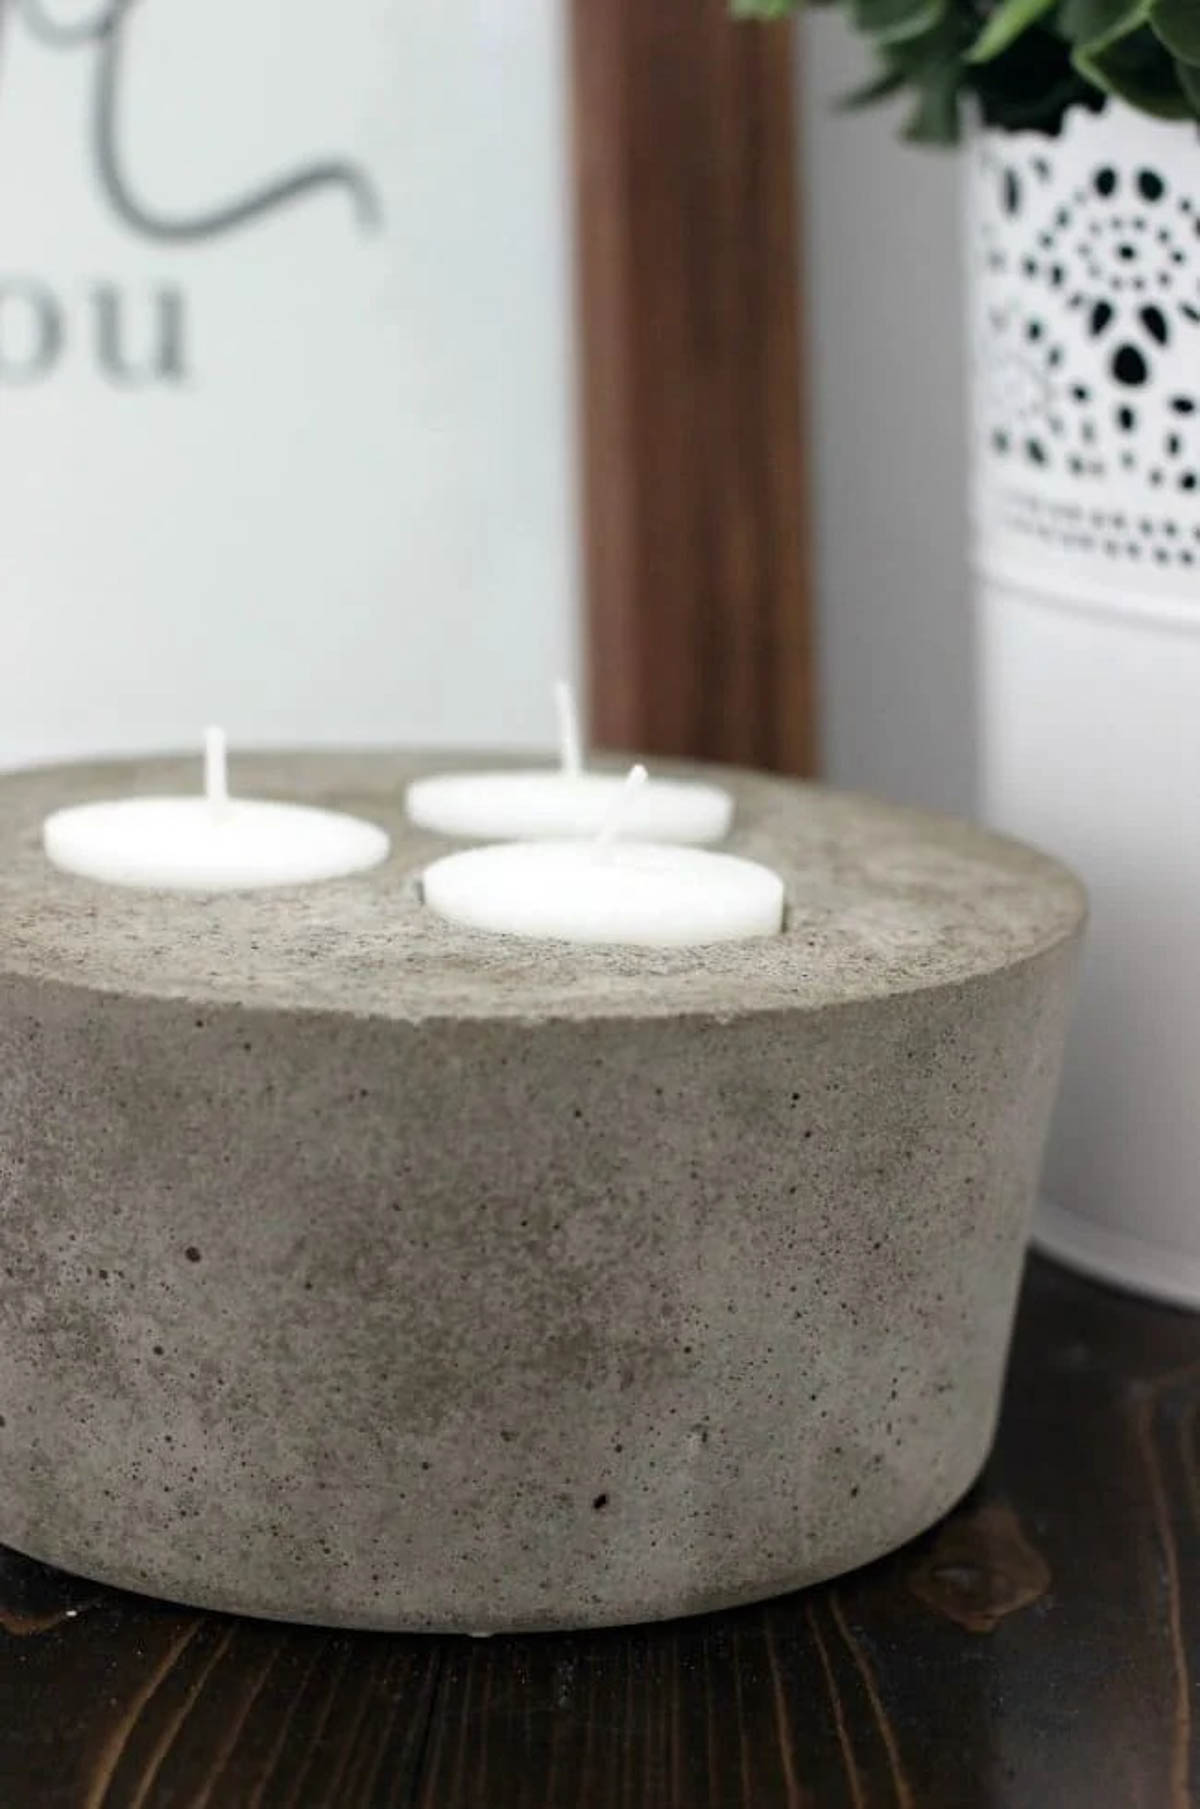
Finally, place your tea lights wherever you would like them to go (leaving the metal wrapper on). I placed mine around the center. They will rise up a bit. You can come back in a few minutes and push them down a bit more – as the concrete settles, they will too.
Leave your candles to dry for a week. When they are set, you should be able to bend the plastic container off and slide the concrete candle right out! You can also take out the tea lights, and bend the metal wrapper until it pops out.
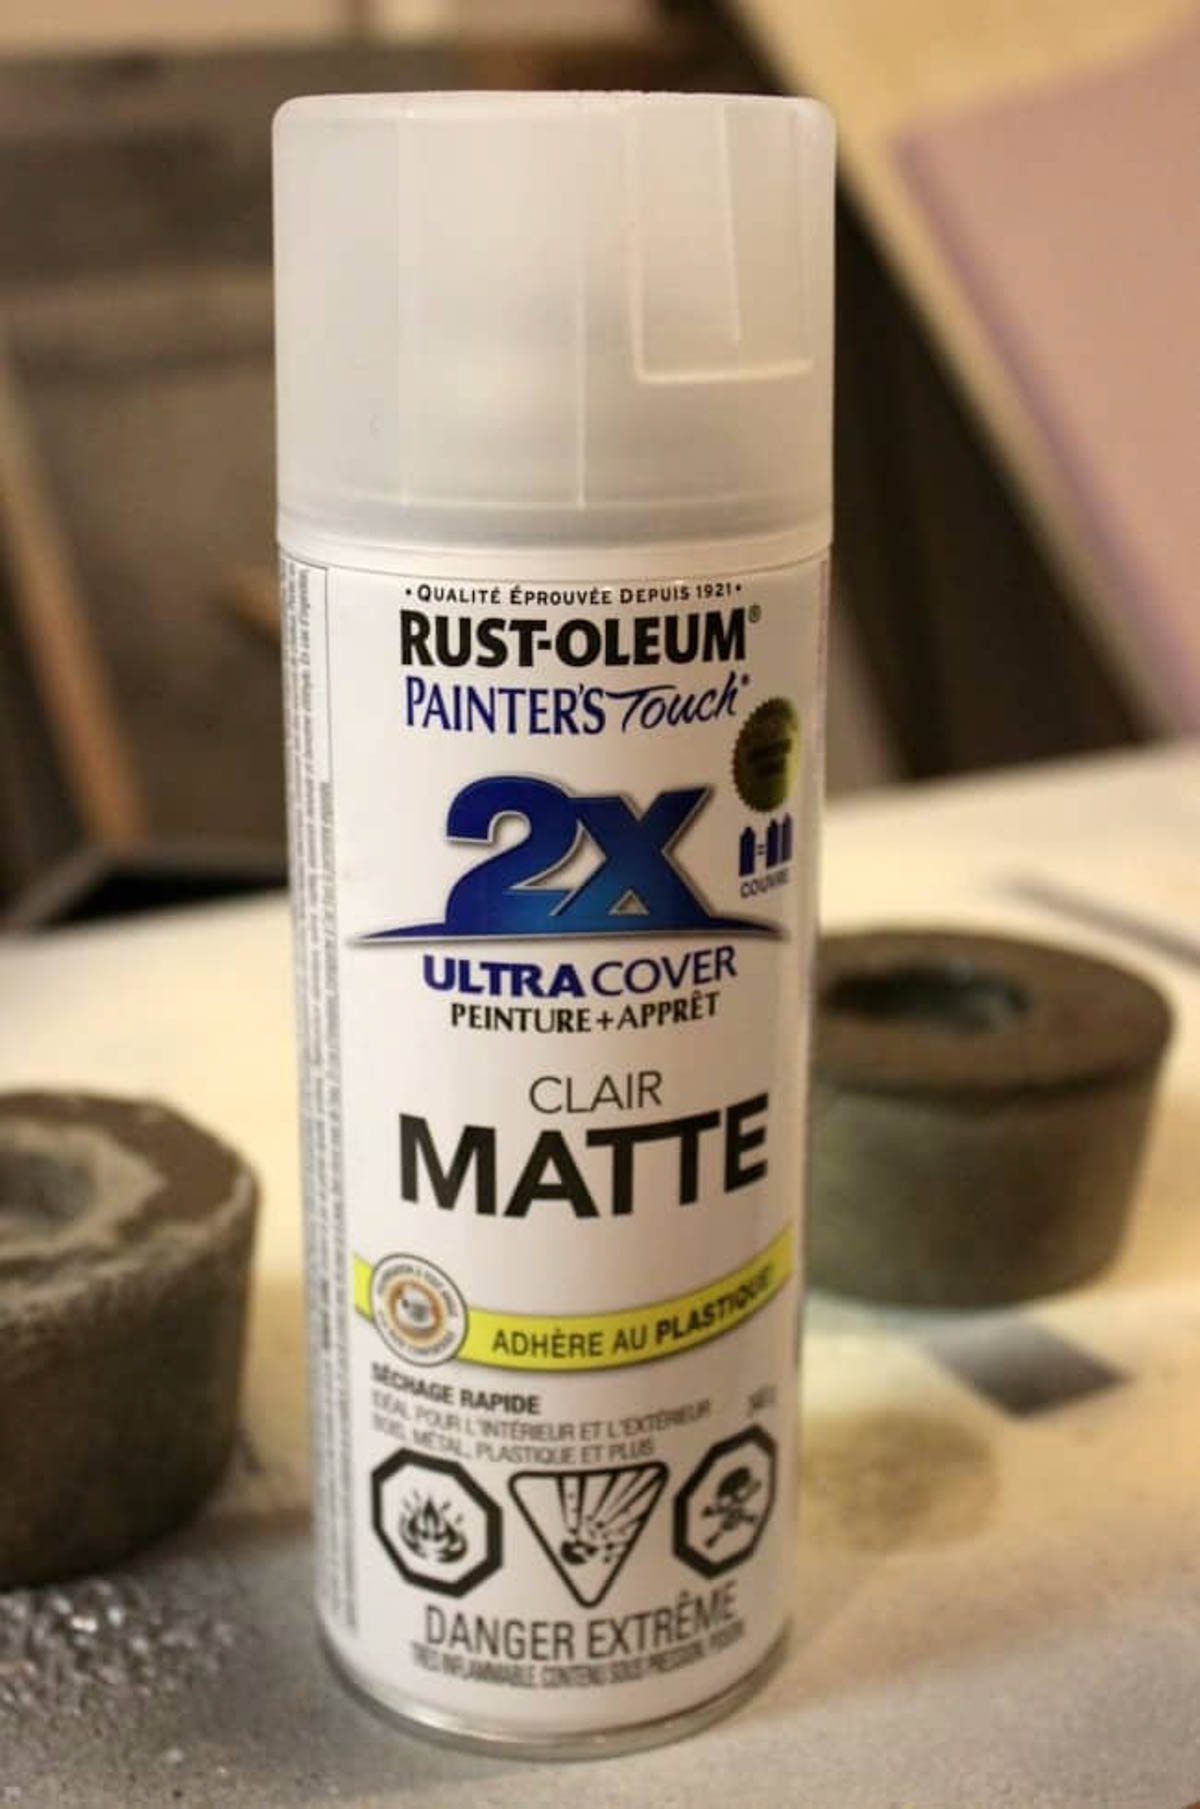
Finally, I use a clear spray paint to seal the candle holders and protect them.
I LOVE the look of these 3-wick candles. Finding a way to DIY one is even better!
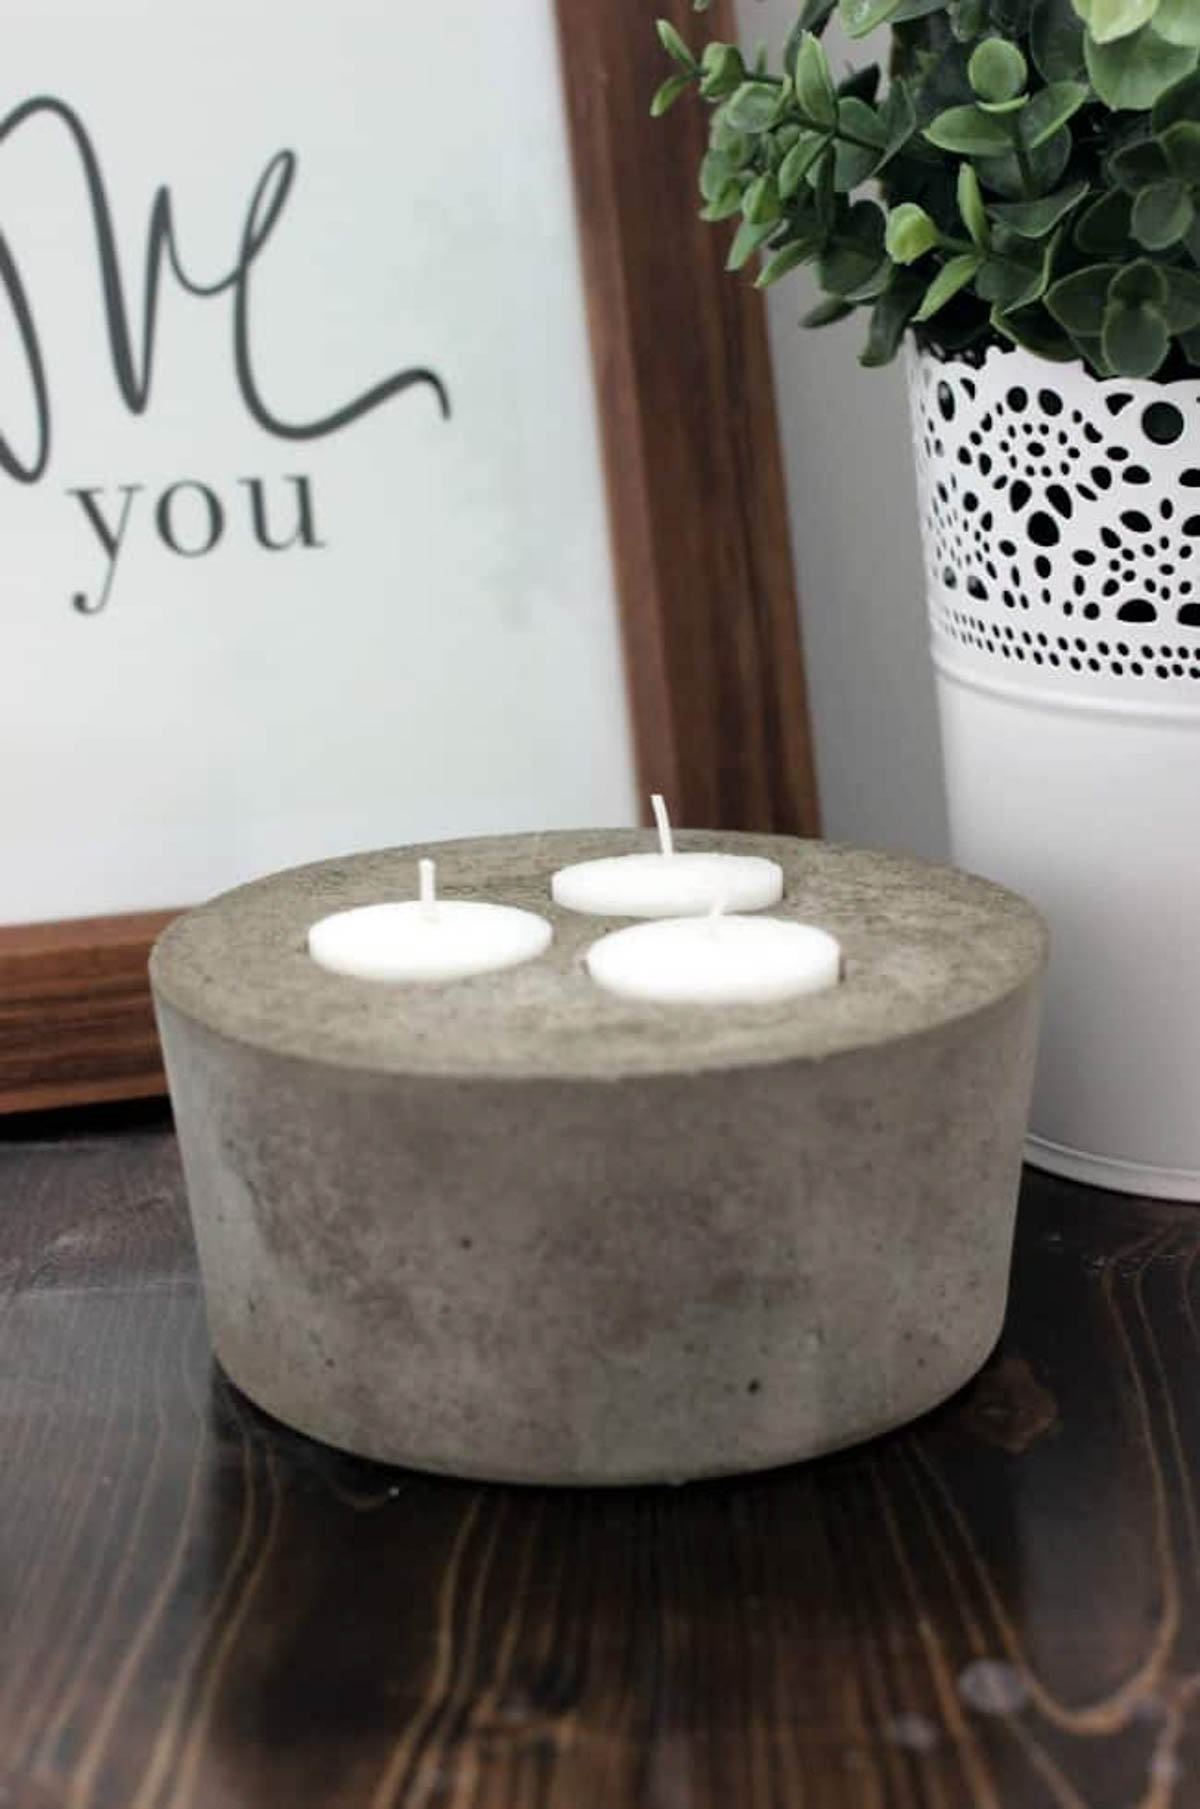
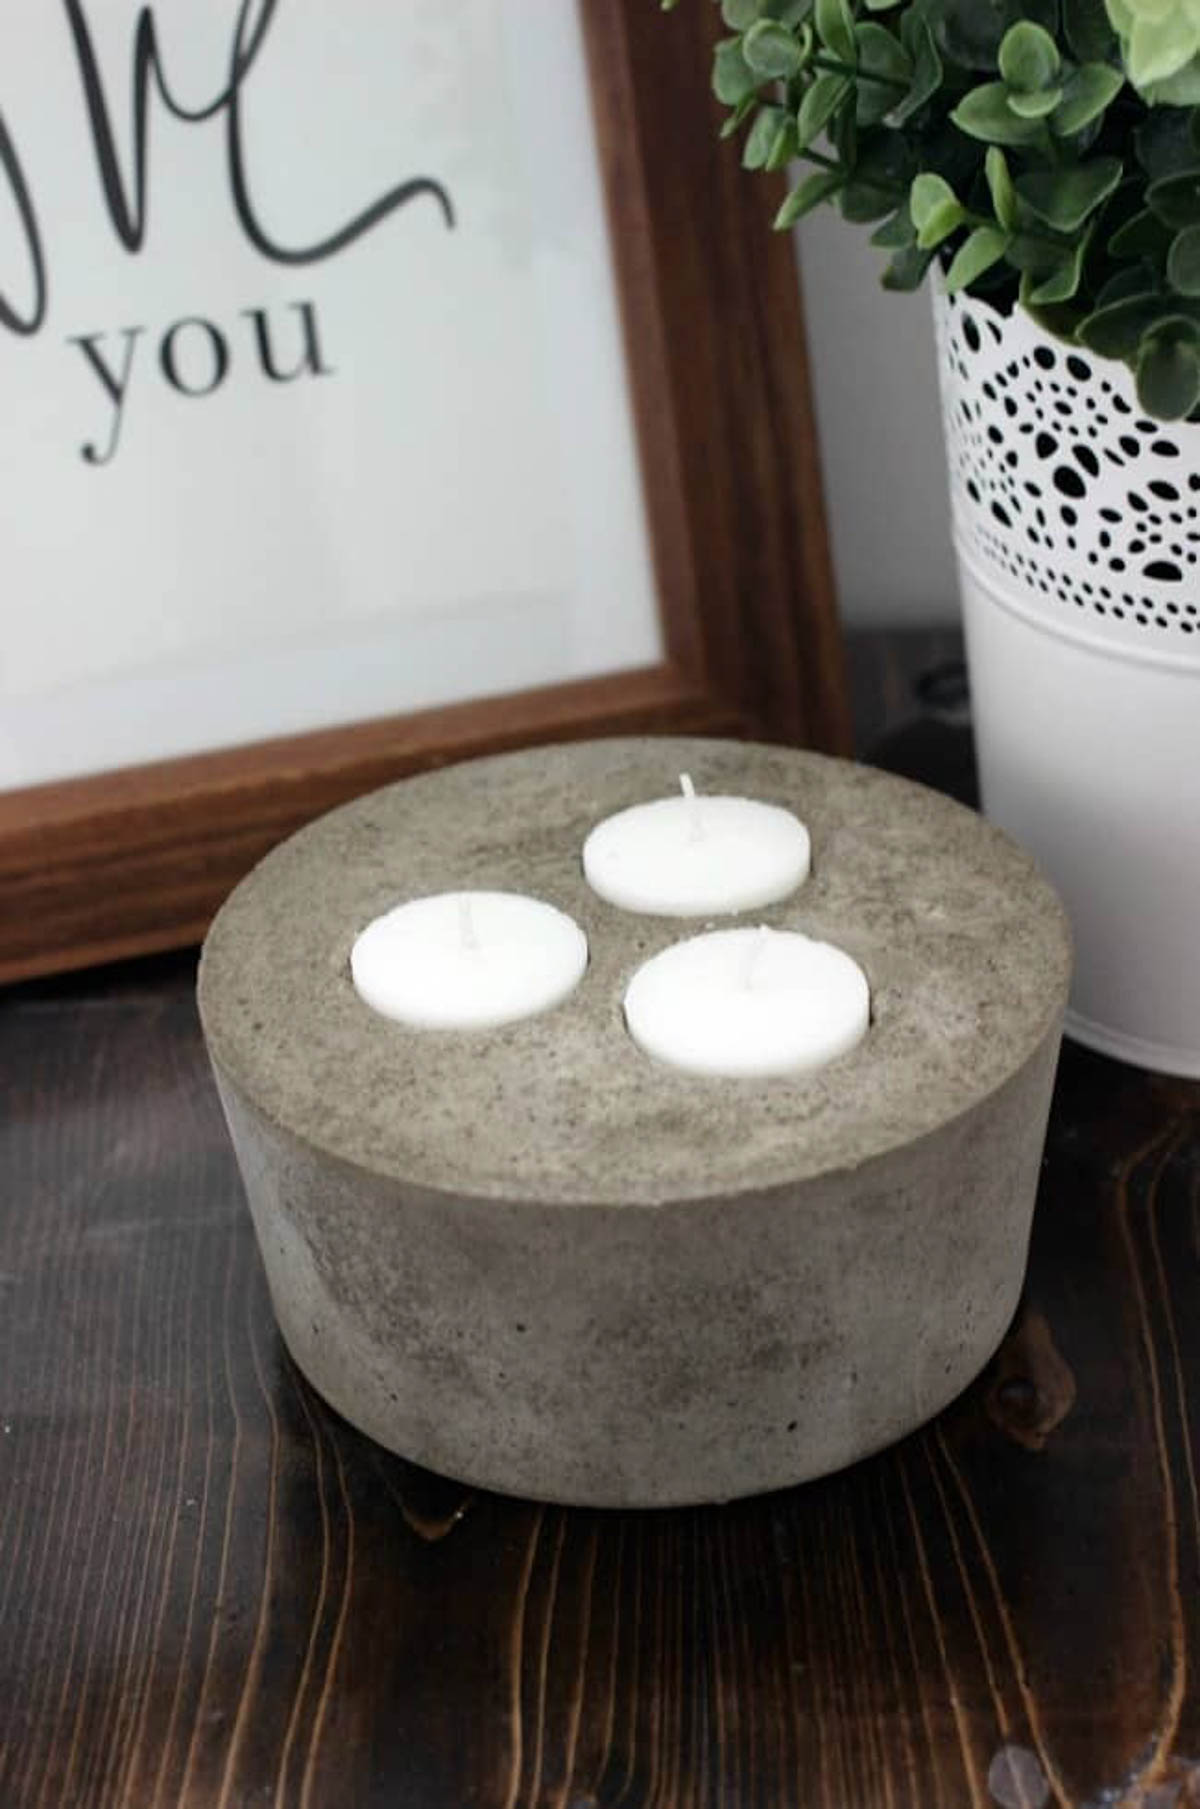

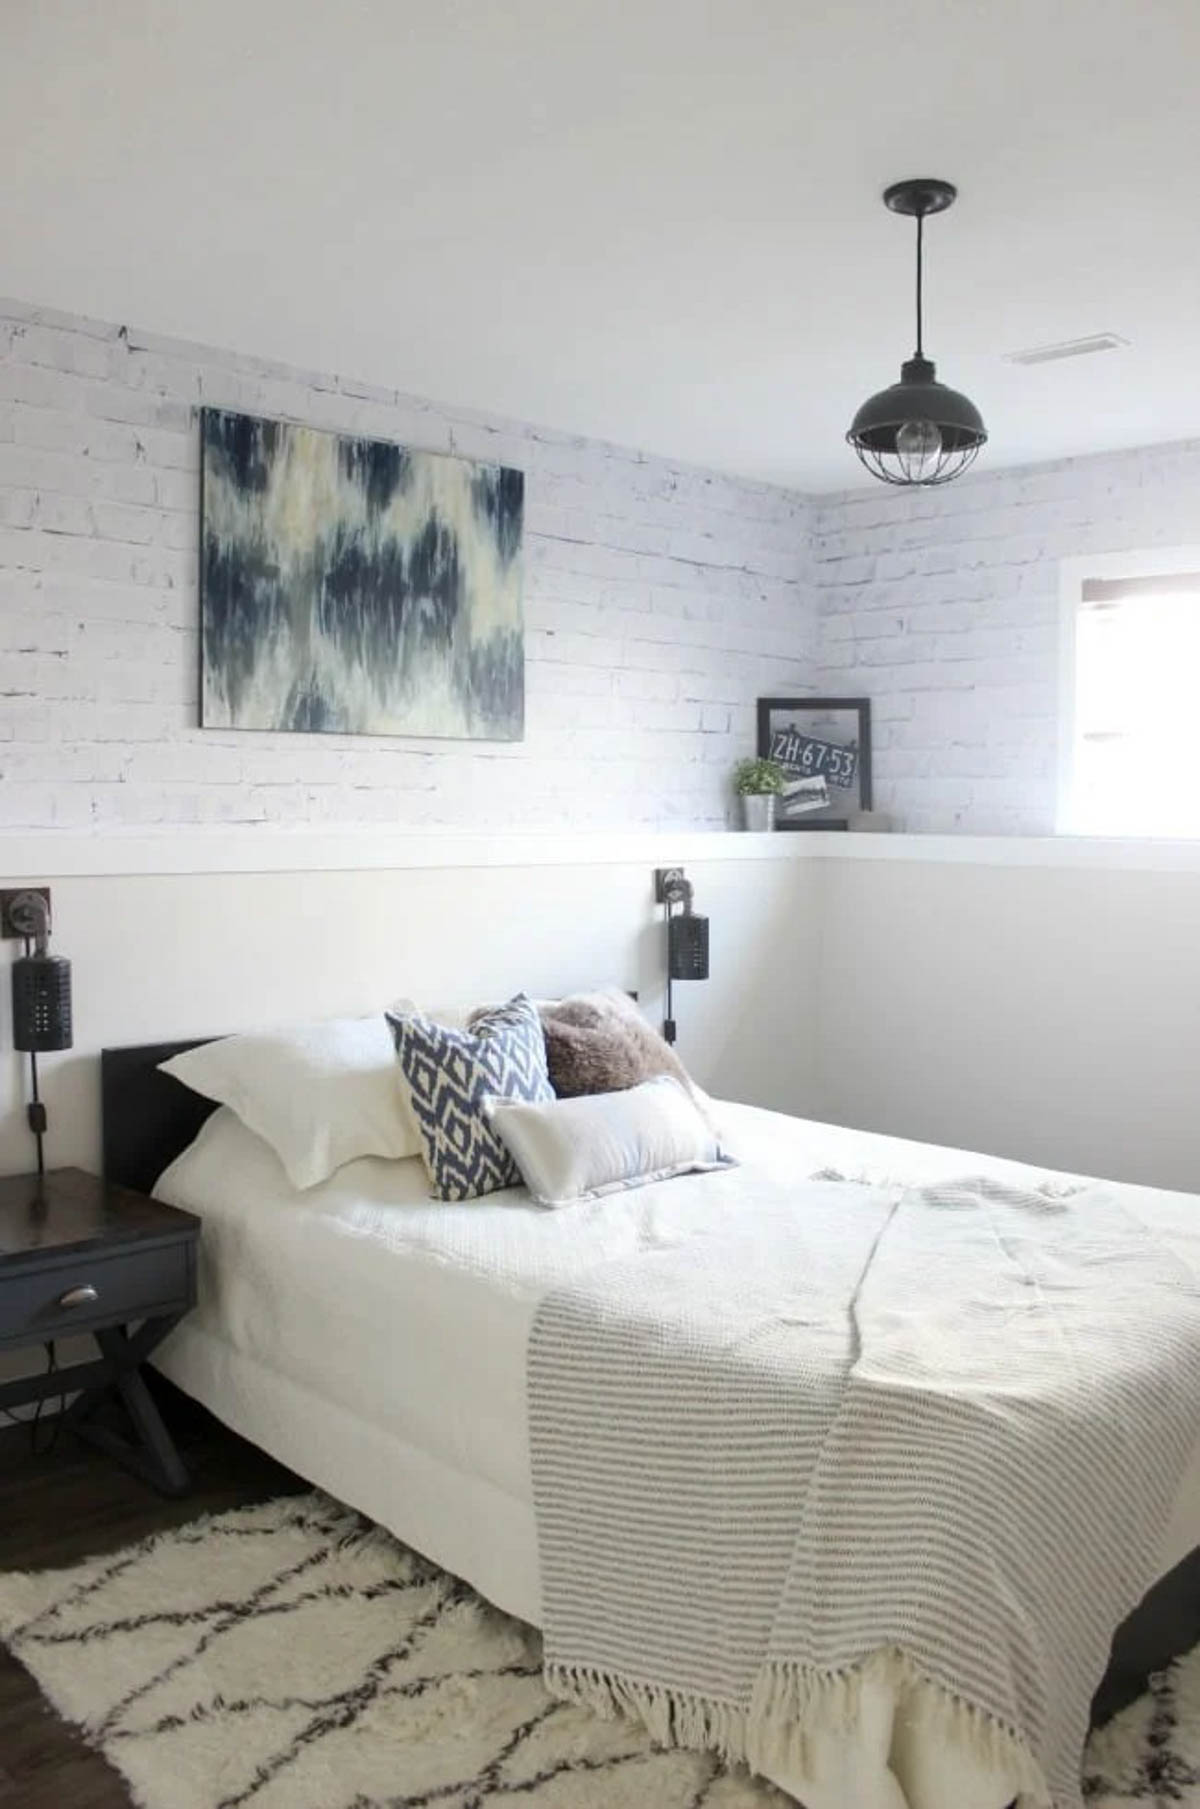
I used this candle to decorate my Industrial Guest Bedroom and I LOVE how it looks in this space :)
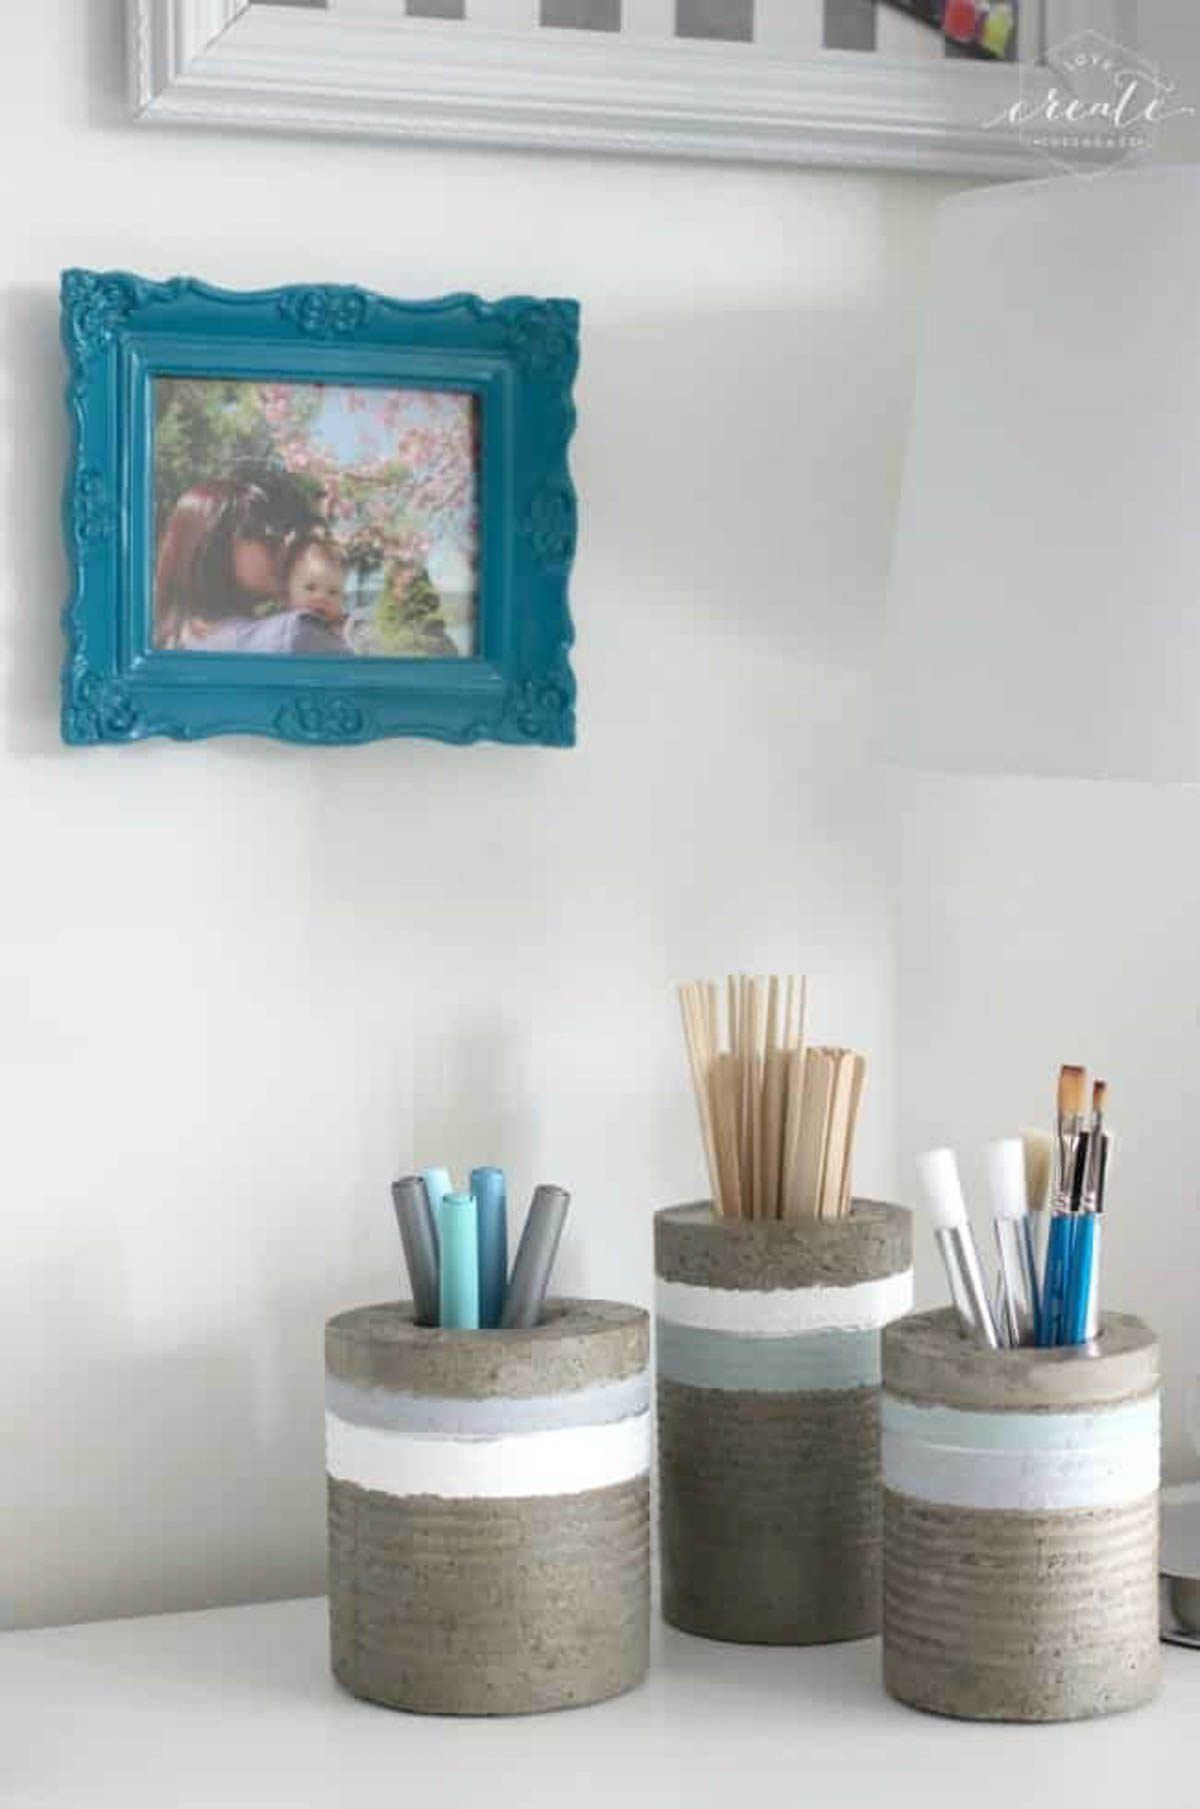
Or if concrete décor inspires you, see how I made these awesome concrete vases!

25 Must Make DIY Concrete Crafts To Transform Your Home - The Saw Guy
Sunday 23rd of June 2019
[…] At Love Create Celebrate she made some imaginative DIY Concrete Candles. Give any room in your home a more modern and industrial look with these. Learn to make your own. […]
10 DIY Concrete Projects to Try – Decorator Man
Sunday 6th of January 2019
[…] Image via: pobsecsale , lovecreatecelebrate […]
23 DIY Candle Holders for Added Homely Charm and Warmth - Homesteading Alliance
Wednesday 31st of October 2018
[…] The tutorial walks you through how to fill a butter tub with cement. From there, you create a place to hold three tea lights. […]
25 Must Make DIY Concrete Crafts To Transform Your Home
Tuesday 22nd of May 2018
[…] At Love Create Celebrate she made some imaginative DIY Concrete Candles. Give any room in your home a more modern and industrial look with these. Learn to make your own. […]
diy-concrete-crafts -
Saturday 19th of May 2018
[…] At Love Create Celebrate she made some imaginative DIY Concrete Candles. Give any room in your home a more modern and industrial look with these. Learn to make your own. […]