
Learn how to do an easy patio door replacement with this tutorial. From measuring your opening, to ordering and installing your new doors.
Our rear double patio doors had been in rough shape since we moved into our home 3 years ago. The doors let in a draft, didn’t close great, were restricted by the new interior flooring, had rotten areas, and the finish had seen better days. It had been on our to do list for a while but this summer we finally bit the bullet and decided to replace them. The original doors were actually bought used and installed by my parents when building the home over 17 years ago so they definitely got there money out of them!
*This post was sponsored by DAP Canada and may contain affiliate links. When you buy a product through one of our links, we get a commission at no cost to you! Thank you for supporting our blog so that we can continue to bring you posts like these. For more information, please see our disclosure page.*
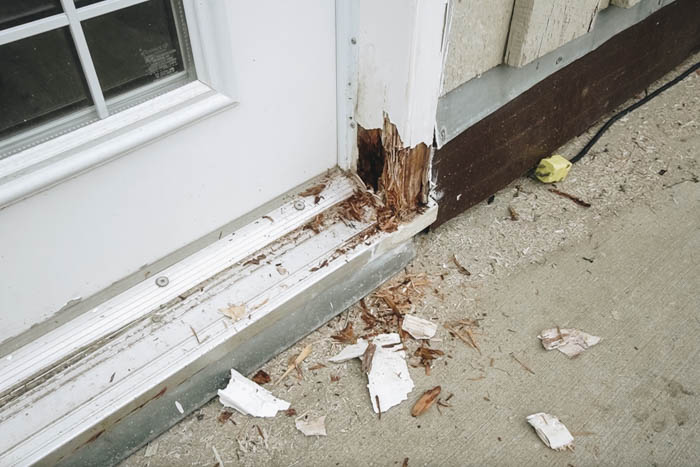
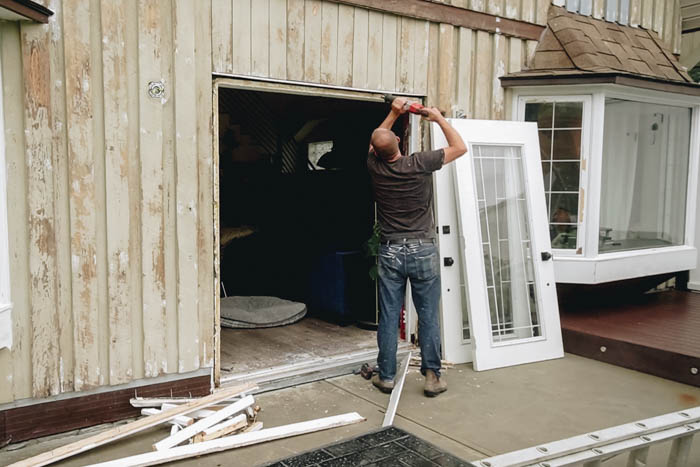
The photo above is the doors that are going to be replaced (before we painted the exterior). There are several reasons, that we wanted to change the French doors. You can see how much rot there was in the bottom of the doors, even before we ripped all the way into them. These doors actually swing into the the house (“in-swing”) and we loved the idea of having out-swing doors instead. The doors also had a decorative trim inside the glass, which we never loved. And finally, after replacing the flooring inside the house the door on the left couldn’t actually open anymore! The new flooring was 15mm thick compared to the old 8mm thick flooring and it blocked one of the doors.
We were beyond excited when the opportunity came up to partner with DAP Canada to complete our patio door replacement. They have all the perfect products to ensure the door was installed with a weather tight finish. From sealant, silicone, filler, and caulking, DAP has all the right products to ensure your door is installed so that it is weather tight and that your investment is protected from all the elements.
Measuring your Patio Door Opening
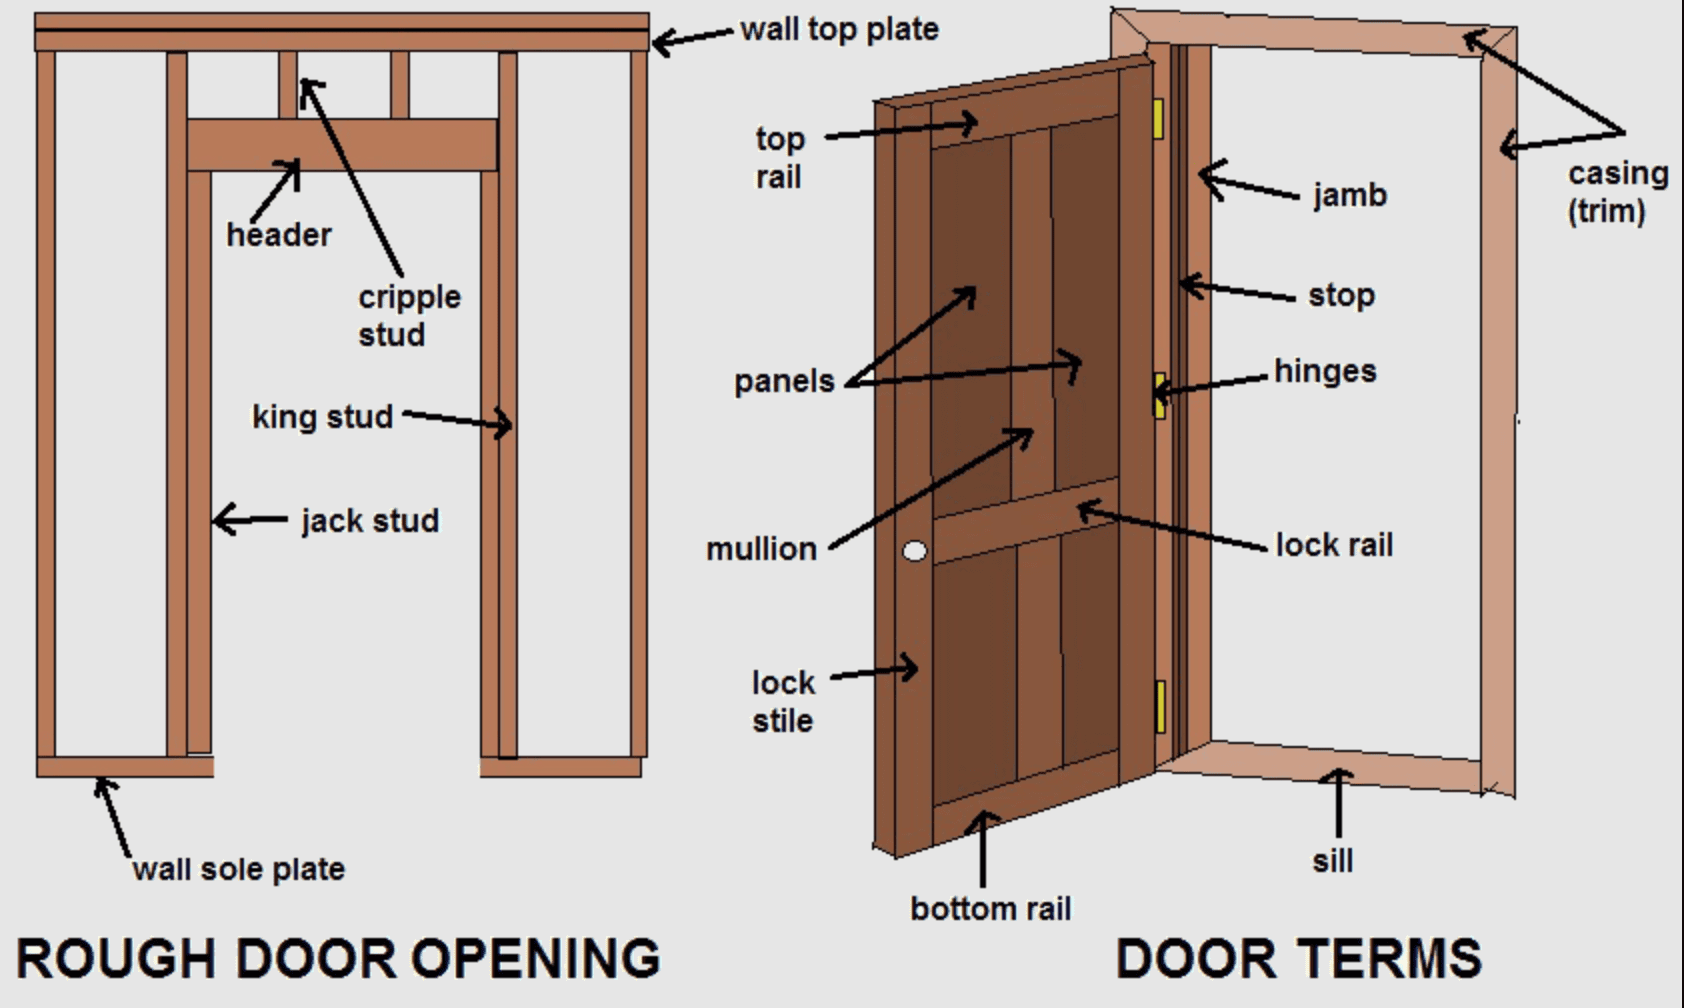
The first step is to measure your rough opening or the distance between the studs and the header and the floor/subfloor. In order to do this you will need to remove your interior moulding to get access to the framing of your home. Measure your distance between your two vertical door studs (Jack studs) and write it down.
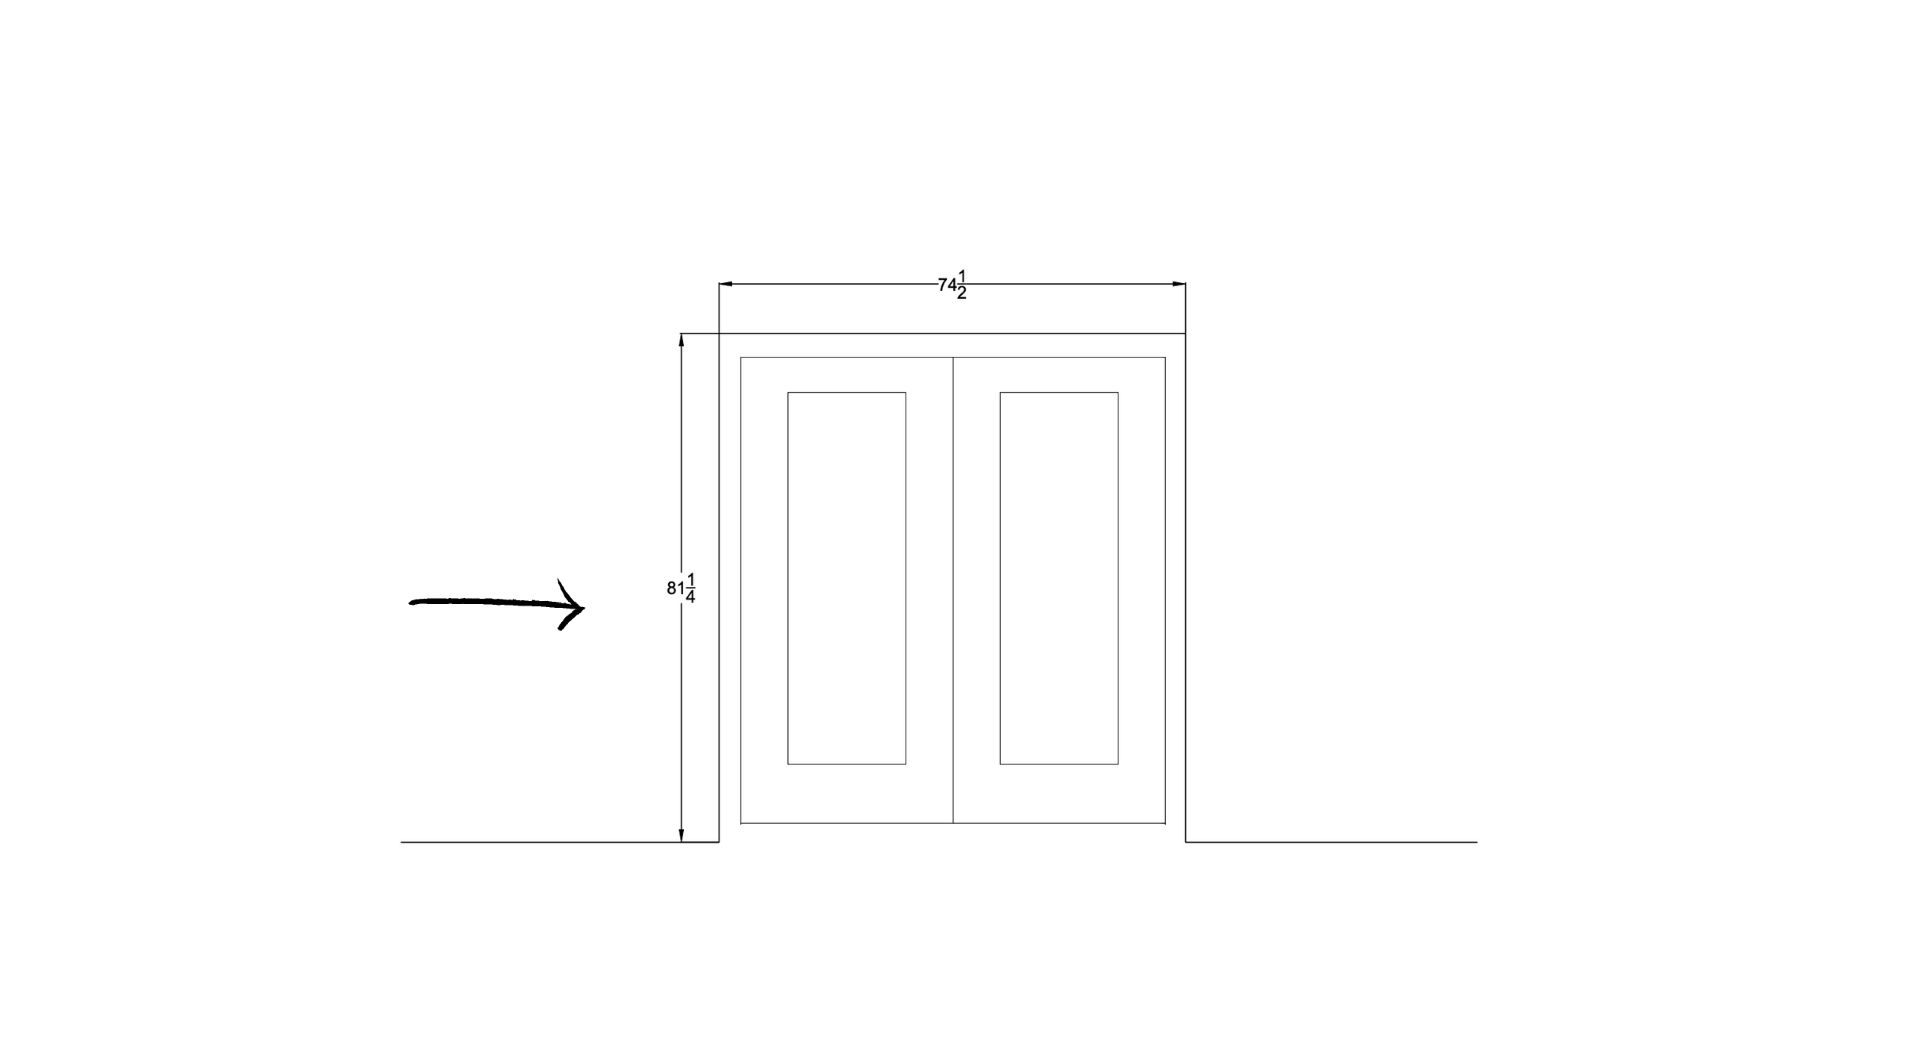
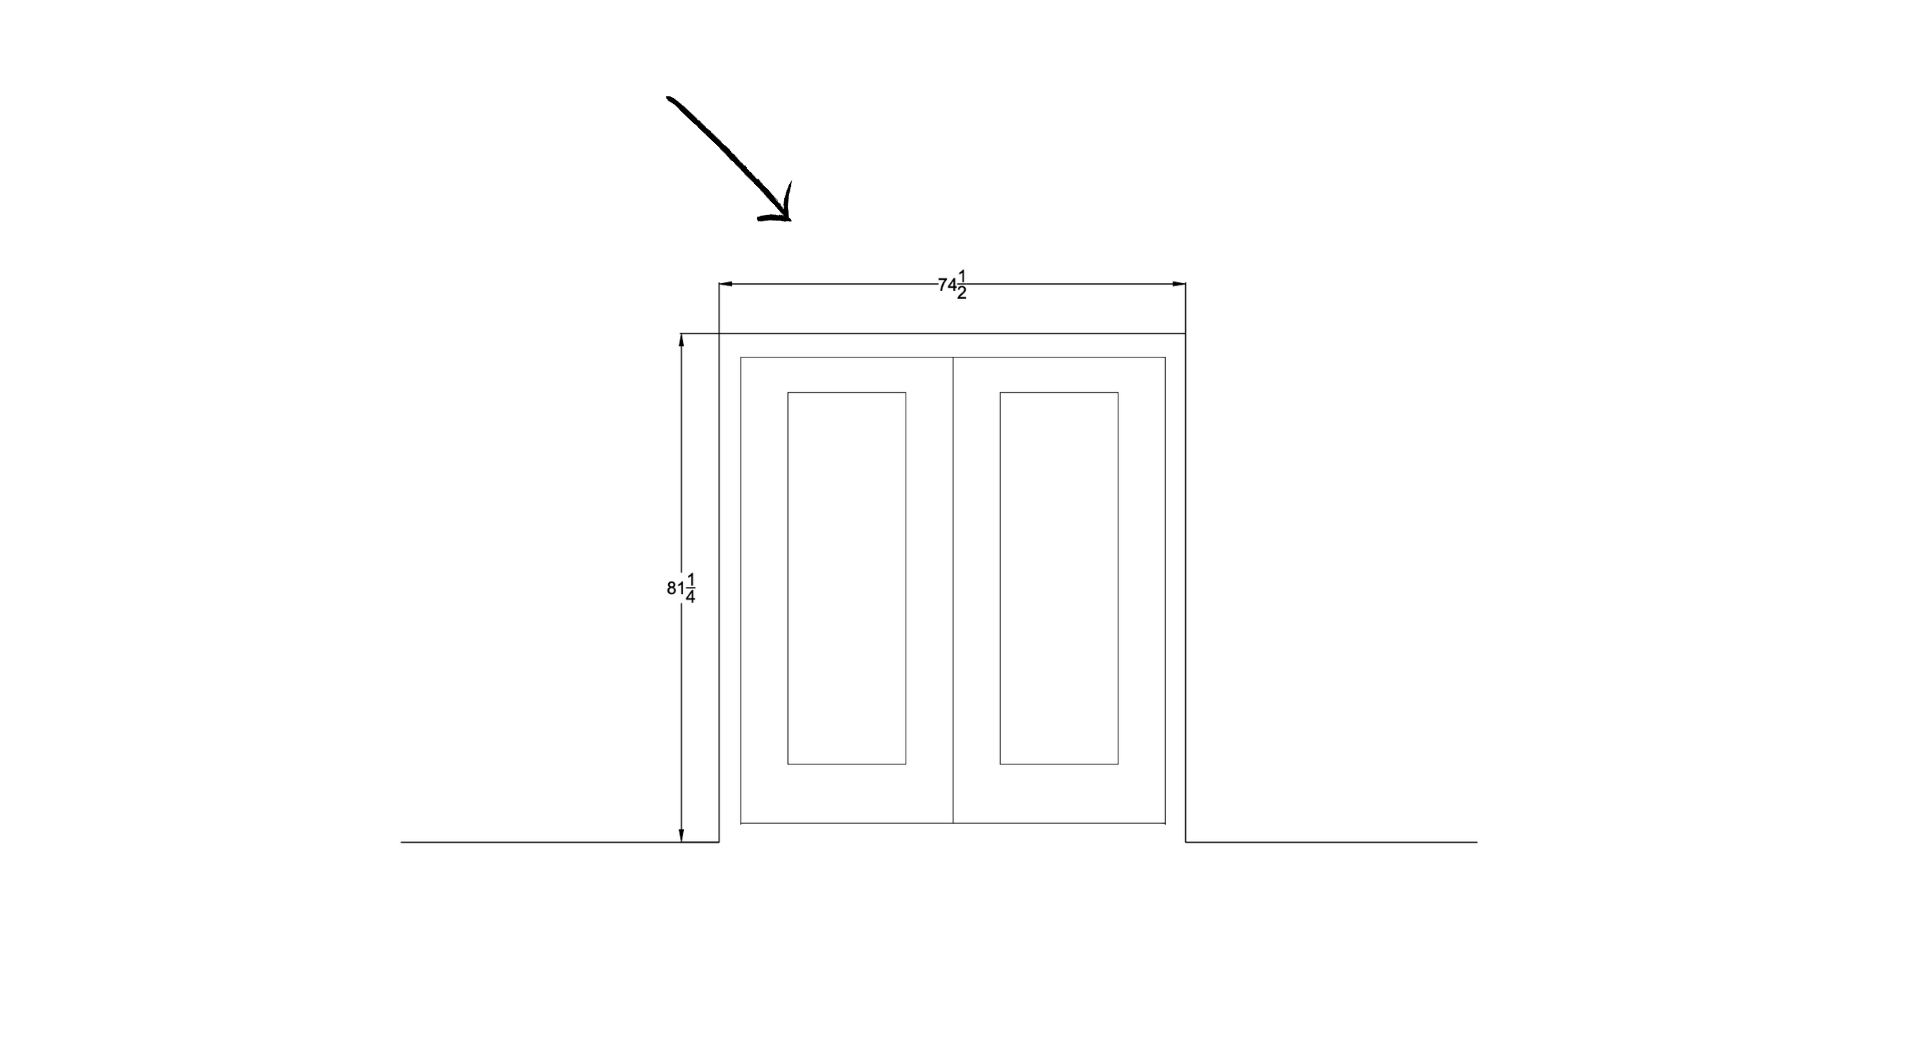
Complete the same measurement from the top of your sub floor (where your door will sit on) and to the bottom of the horizontal header and again record it. These measurements will give you the rough opening for the size your patio door can fit in.
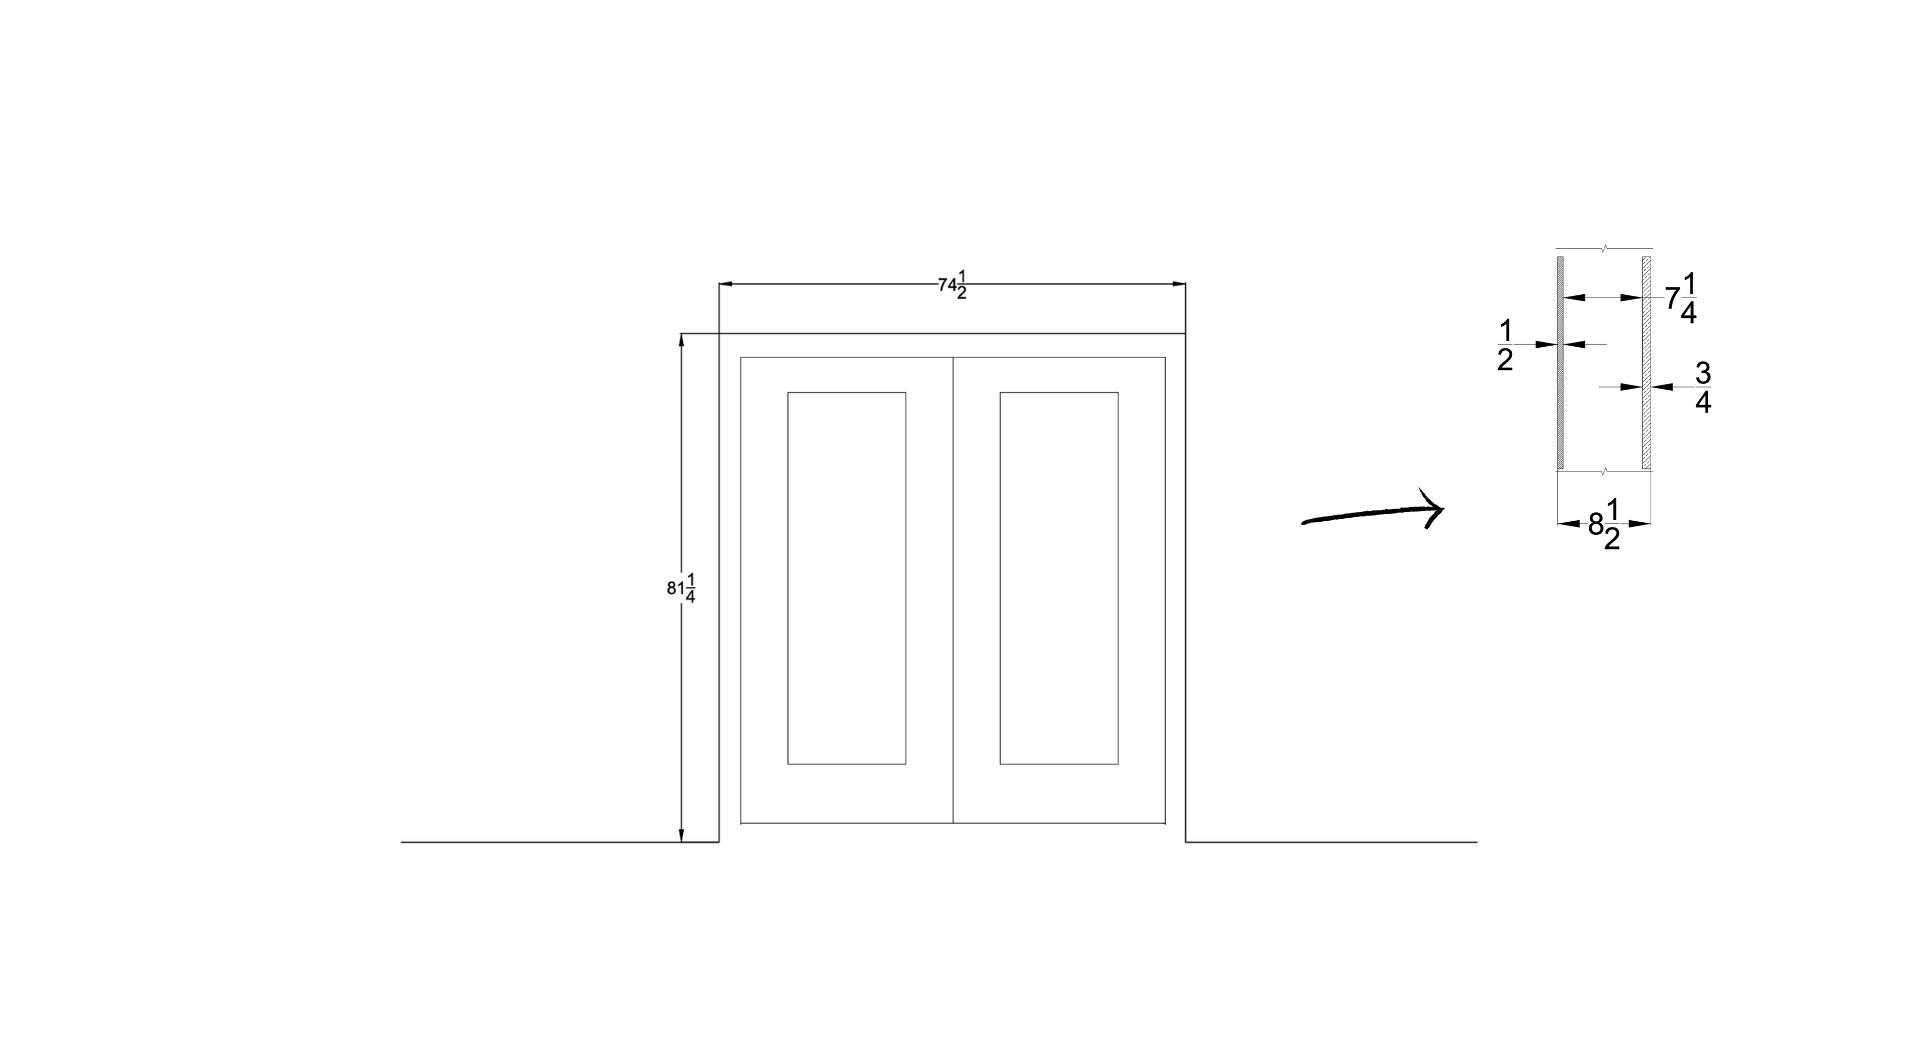
Next is to measure the thickness of your wall. Again with your moulding off you can measure the distance from the face of your drywall to the outside face of your exterior sheeting of your home (not to your siding). I was able to measure the existing door casing width but you cold also use a small rod or paint stick and push it up against the existing brick moulding (in between the door frame and house stud) and measure the width that way. Our measurement was 8 1/2″ which made sense as we had:
- 1/2″ drywall
- 7 1/4″ stud (2×8)
- 3/4″ of OSB (exterior house sheeting)
With all these measurements you can go to your local hardware store and order/pickup your new door. We had to order a custom door due to our jam width being uncommon (due to 2×8 framing) but you might get lucky and be able to pick a door right from the store. You are going to want your door to be slightly smaller than your rough opening to allow for shimming to level/square the frame to ensure for smooth door operation.
Patio Door Options
When it comes to picking up your new replacement patio door your are going to have a bunch of options to choose from. First is the way the door swings.
In swing vs out swing
Whether your patio door swings in towards the interior (in swing)of the house or out towards the exterior space (out swing) will determine if you need a in swing or out swing door. There are pros and cons to both types. Our door was originally an in swing but we opted to change it to an out swing type door. Here are the pros and cons of both
In Swing
Pros
- more favourable in snowy climates
- don’t take space away from exterior space of home
Cons
- easier to force open from outside (security)
- more susceptible to weather (wind and rain) issues due to door configuration
- require adequate room on inside of house to allow doors to swing open
Out Swing
Pros
- Better weather proofing due to door configuration
- harder to force open (security)
- don’t take space away from interior of home
Cons
- If you live in a snowy climate excessive snow may prevent doors from opening
- Higher chance doors may be caught by wind when opening to outside which may damage finish
- require larger/clear deck/outdoor space to allow to open outward
- hinges located on exterior may cause security issues if incorrect hinge type (security door hinges)
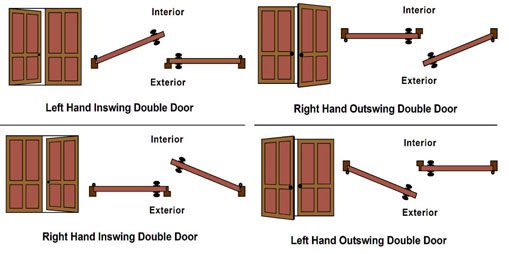
Right hand vs Left hand swing
The next option will be how your doors swing. We keep the same opening configuration which was a Left hand swing. Our left door had the active knob and deadbolt and the right door was held in place with pins in the top frame and bottom sill. You can see the configuration options above. You may also want to look into local building code and home association rules as these may affect which option you ultimately go with.
Patio Door material, styles, and finishes
You may have multiple types of door build types and finishes to choose from. When we ordered out door we were able to choose from steel, fibreglass, and wood doors. In regards to finishes we could choose from wood grain and smooth surface as well as painted/finished or just primed doors. We ultimately choose to go with a smooth primed fibre glass door due to the cost and look. We wanted to match the doors to our exterior window colours (can see the post here for how we customized our original PVC windows) and the painted option came with an extra $1000 price tag so we decided to paint them ourselves.
When choosing your replacement for your patio door you will also have options for glass. Our old doors had each had a single glass pane with a grid effect. We loved the light the glass brought in but didn’t like the look of the grid inside the glass so we optioned for one single pane in each door with no grid. Generally there are multiple options for glass configurations you can choose from depending on your door manufacture. You can see the modern custom front door we installed here with multiple small windows and a sidelight.
Once you decide on your options you can pick up or order your door. Our door took about 3 months to arrive but had some delays due COVID supply issues.
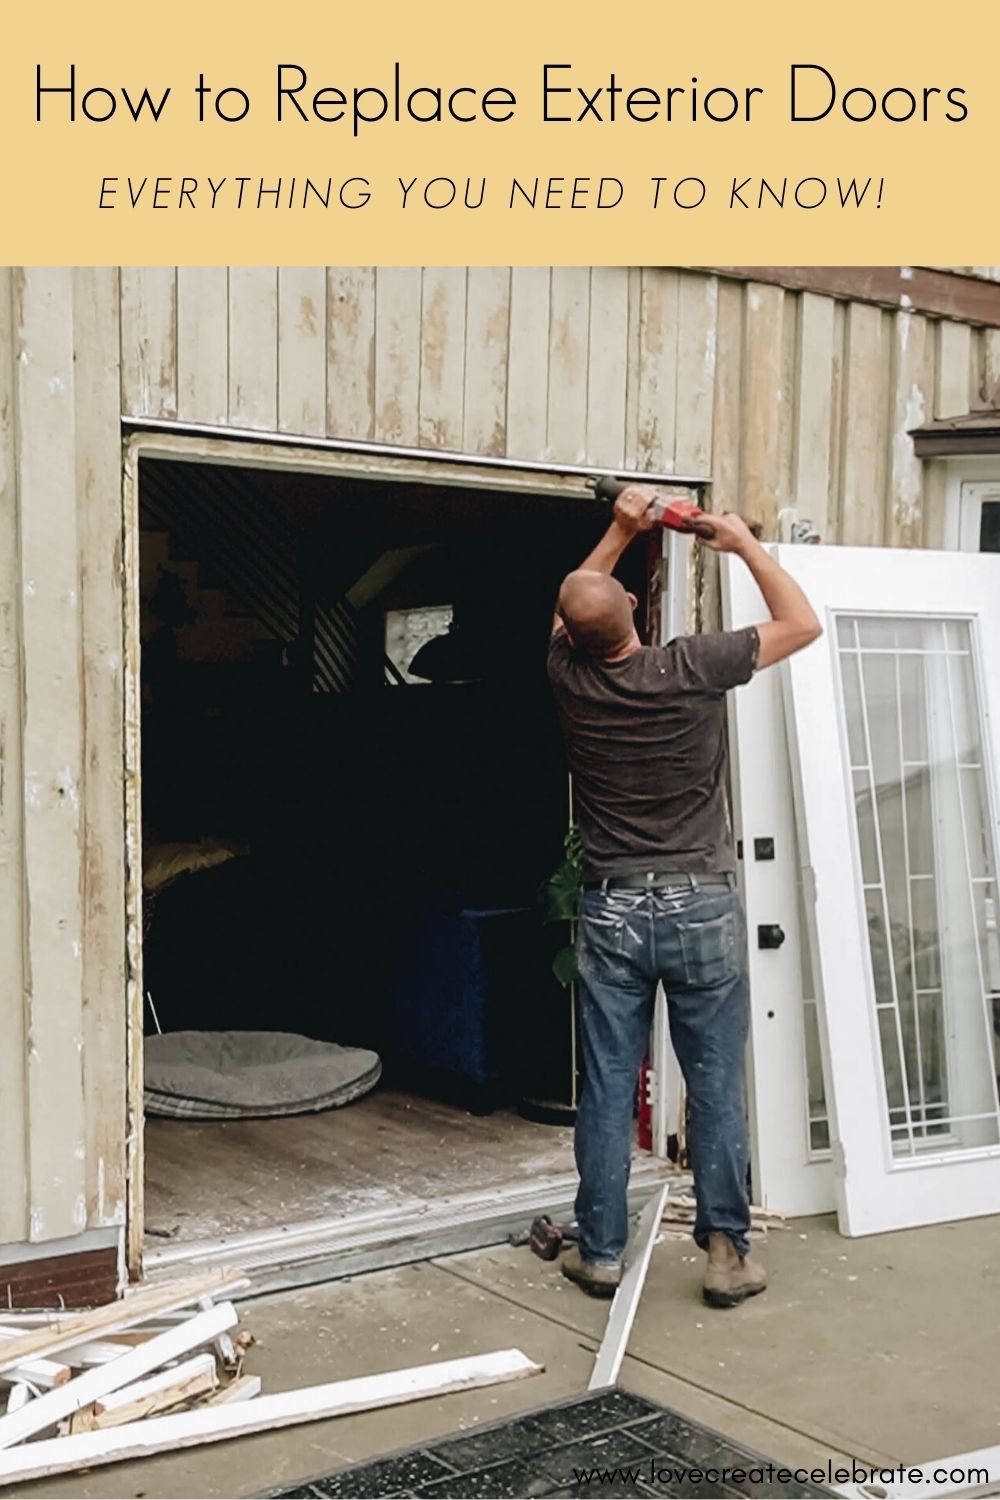
Removing your old Patio Door
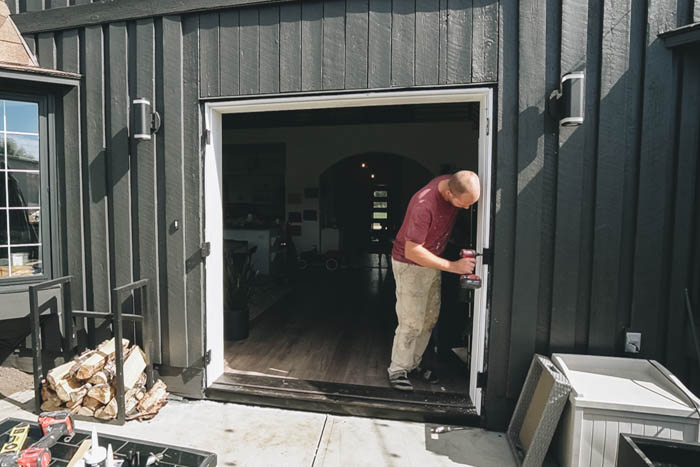
Once you have your new door you can start the process for the replacement of your new patio doors. I started by making sure all the moulding is removed to expose the entire door jam. Before you start you may want to check that everything looks ok on your door. Once we removed the plastic coverings on the new patio doors and took them off their pallet skid we noticed the bottom sill was 2 1/2″ short (missing one piece). This ended up causing us a 3 week delay before we had the right piece from the door manufacture and could install everything.
With the new patio door replacement ready and all the moulding removed I than removed the old doors. With the doors off I took my sawzall with a bi-metal blade (so I could cut the screws holding the old door in place) and cut between the door jam and house studs/header. This allowed the old door frame to be removed from the house.
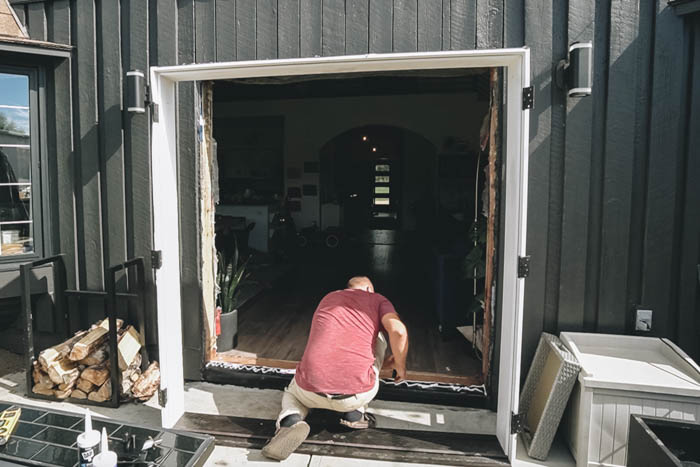
With the old door frame off you are going to want to remove any old foam and/or screws and check for any issues within the rough opening. We found some rot in the section of wood the door was sitting on (under the sill) so we replaced this rotten board with a new piece of pressure treated wood.
Replacing Your New Patio Doors
Video Tutorial of How to Replace Your Double Doors
In the video below we show the full patio door replacement from start to finish, including measuring, removal, and installation.
Don’t forget to subscribe to our channel so that you’re the first to see new videos!
Materials
The following is a list of materials I used to complete our patio door replacement:
- caulking
- silicone
- Window and Door Sealant
- Spackling
- Top Star Shim Screws
- Topstar Crown Bit
- 5/16 drill bit
Step 1 – Silicone:
The first step I took to install the new double patio doors was to lay a couple beads of DAP Silicone Ultra Window, Door & Siding Sealant to the bottom of the rough opening. This is to prevent any water from getting in under the door sill.
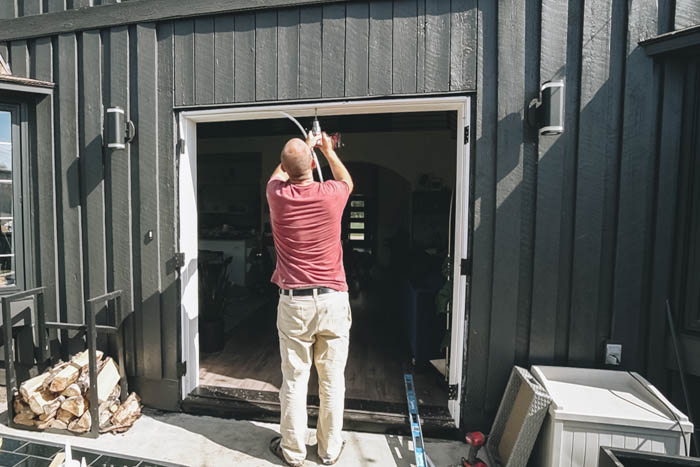
Step 2 – Install Frame:
The next step was to slide the frame in (I had removed the doors so it was easier to move around) to the rough opening. You are going to want to push it in so that the faces are flush with the drywall and exterior sheeting (not siding) of your home.
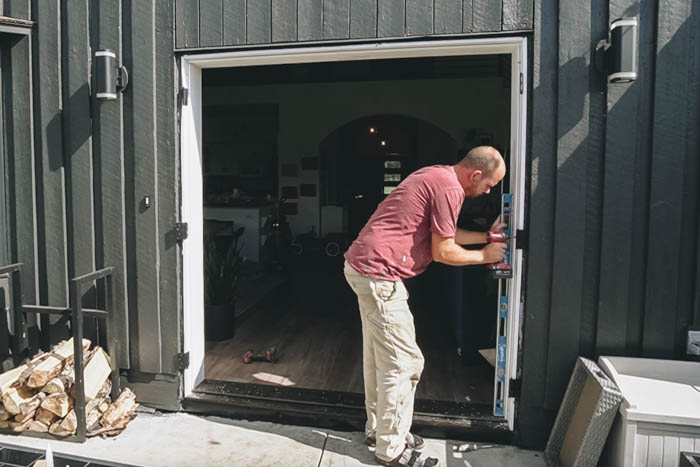
Step 3: Level/SquareFrame
I took a level to ensure the door was sitting level/square and used Top Star Shim Screws in stead of traditional cedar shims to secure the door frame to the house. These are great because they allow for adjustability even after the door is installed. They made for a quick and easy install of the door frame. I installed these are each hinge location and at the top/center of the door frame for a total of 7 locations.
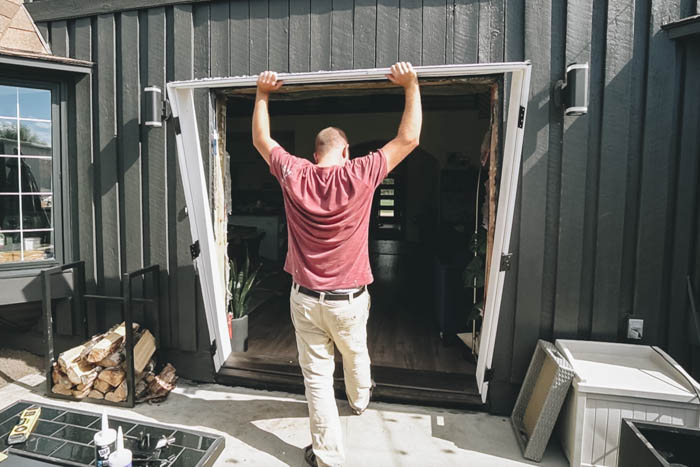
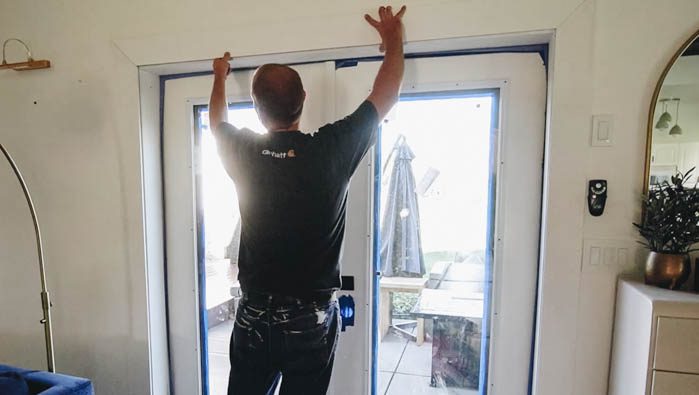
Step 4: Install Doors
Once I was happy with how the sitting I installed the new patio doors into the frame. I added holes in the bottom sill and top part of the frame for the door that is pinned closed and installed the door hardware. If you want to see a post/video of installing a door handle and deadbolt you can check out this post we did previously. Once I was happy with how the door open/closed/lock (I had to make a view minor adjustments using the Top Star Shim Screws)
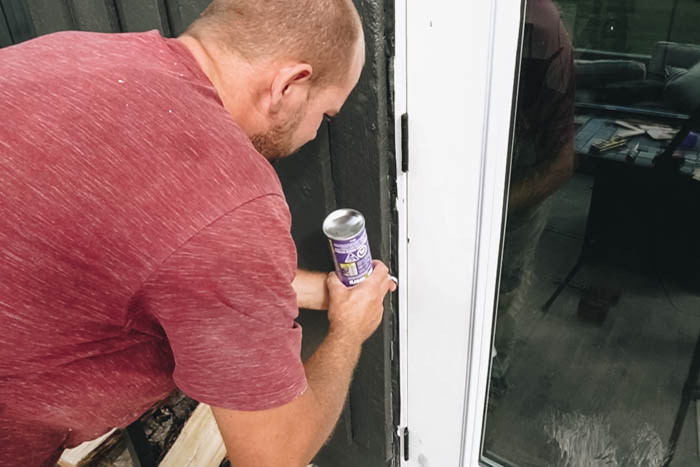
I added DAP No Warp® Window & Door Sealant in between the door frame and house studs/header where ever there were gaps. This product is great because it does not wrap or push on your door frame while its curing/drying.
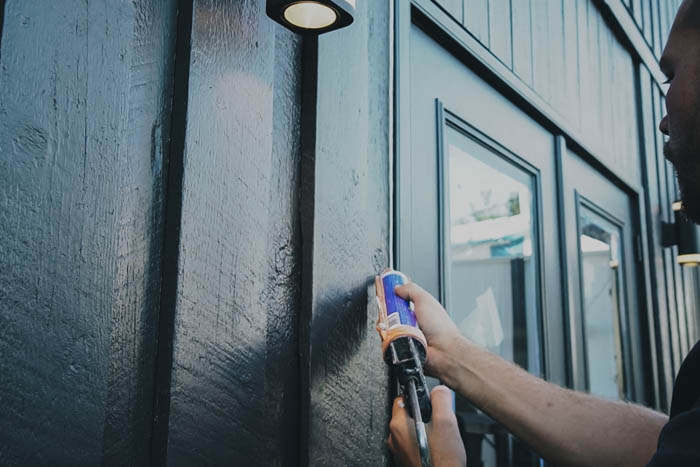
Step 5: Add Moulding
Now I added the bring moulding to the exterior and flat moulding (to match out existing trim) to the interior to finalize the installation of the door.
I used DAP EXTREME STRETCH caulking (which is paintable) and DAP DryDex® Dry Time Indicator Spackling to fill any gaps or nail holes along the moulding on the interior and exterior.
Step 6: Paint
Once the caulking and spackling are dry, give the moulding a light sand. I temporarily removed the hardware and placed the doors on some saw horse to paint. I used a primer to seal the wood on the jam and patio doors first. Than I used the same vinyl safe paint that we used on our exterior windows to paint the exterior side of the doors trim so everything would match. The interior was painted to match the existing interior trim (white).
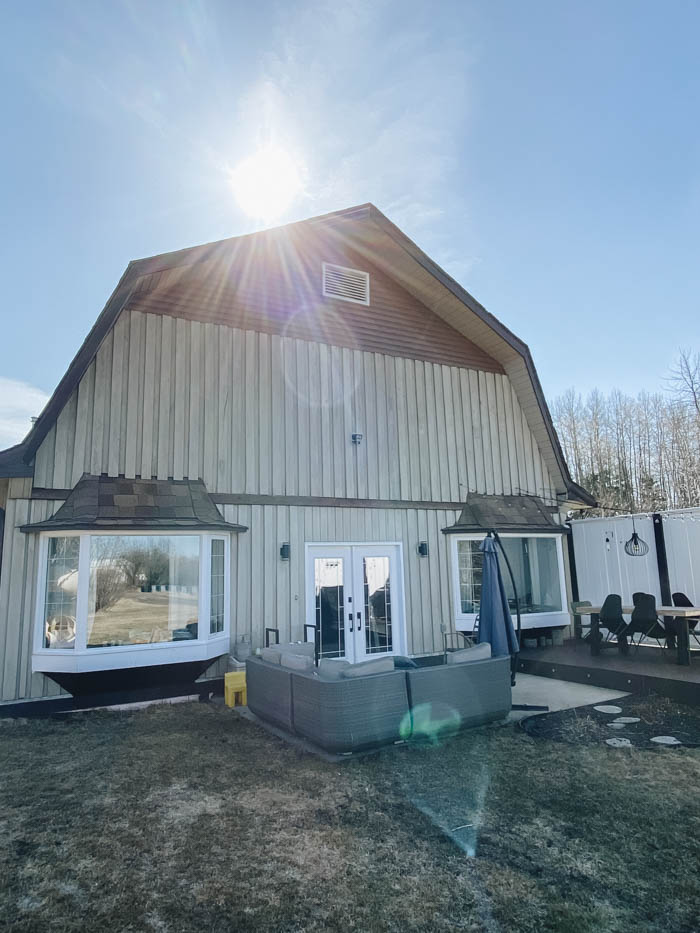
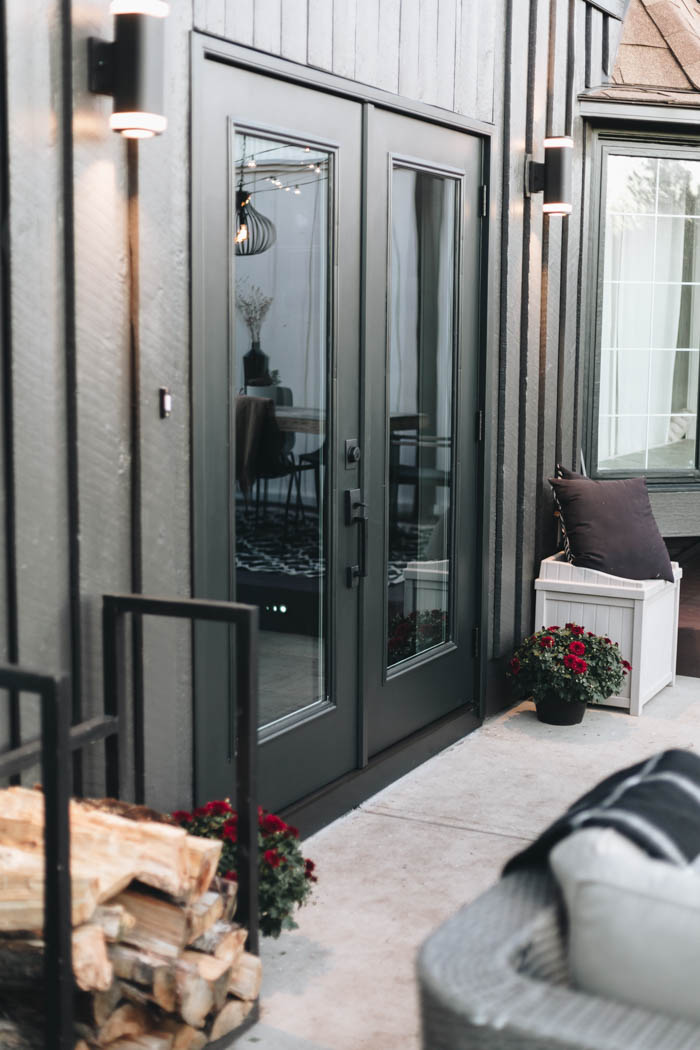
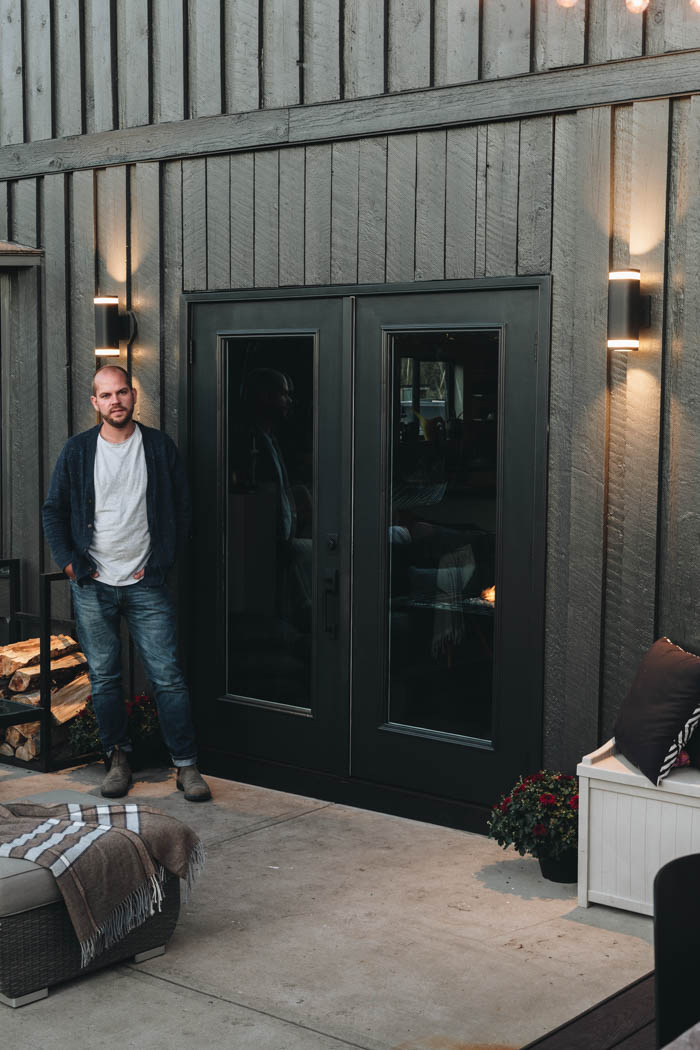
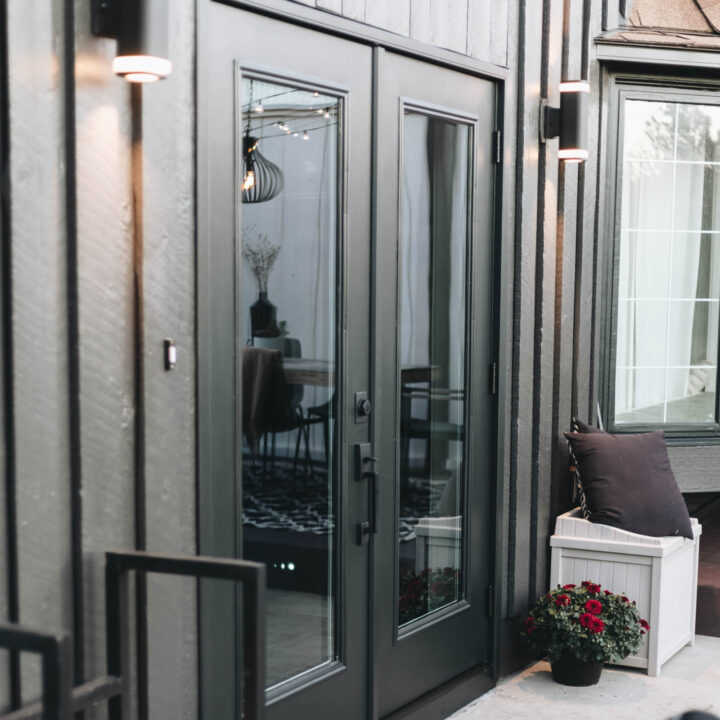
Our Finished Patio Doors
Hopefully the above steps are helpful in your patio door replacement! We couldn’t be happier with how the new doors turned out. Having everything the new doors weather tight with no drafts is a great change on our windy and rainy days!
Replacing these patio doors was relatively easy and was an huge improvement to the feel and function of our home. I only regret is that we didn’t do this sooner!

Patio Door Replacement
Learn how to replace your exterior patio doors with this tutorial. From measuring your opening, to ordering and installing your new doors.
Materials
- Patio Door
- Spackling
- Silicone
- Caulking
- No warp door sealant
- Top Star Screws
Instructions
- Remove Moulding
- Measure rough opening
- Order/pickup new door
- Remove old door
- Install new door frame
- Level and square new door
- Test new doors in frame and adjust as required
- Add no wrap sealant in any gaps between door jam/frame and house framing
- Installing interior mouldings
- Install exterior brick moulding
- Using caulking to seal perimeter and edges of all mouldings
- Using spackling to fill nail holes
- Give frame light sand
- Prime moulding/frame/doors as required
- Paint moulding/frame/doors as required
- Install door handles and deadbolt
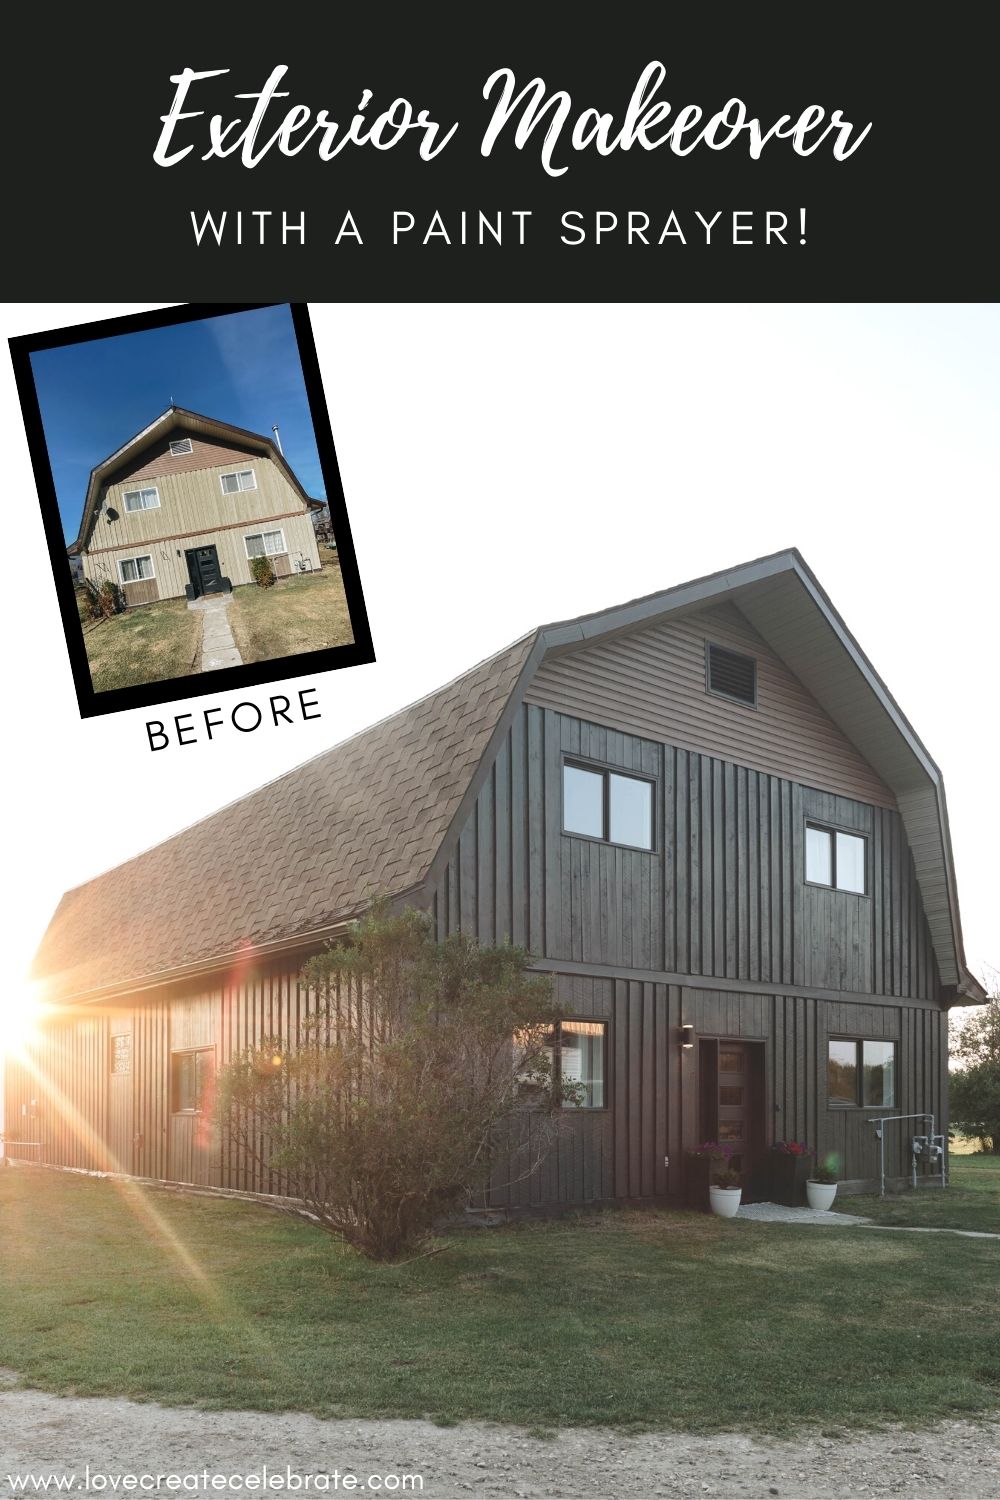
We also transformed the entire exterior this summer, by painting the house and all of the window frames! Check out the amazing before and after transformation!


Regina
Wednesday 4th of May 2022
I like this guide! Yes, updating a patio door is a great way to give the area a new look, especially if the existing one is too small, outdated, or unsightly. The right patio door can upgrade the patio from a basic outdoor area to an extension of the home’s interior and help create a proper outdoor living space.