
Amazing metal pegboard system for the garage! Learn how to install a metal pegboard system & extend an outlet for it to get your garage organized!
If you’re used to reading our blog, this post comes from my other half! I’ll let Russel take it from here…
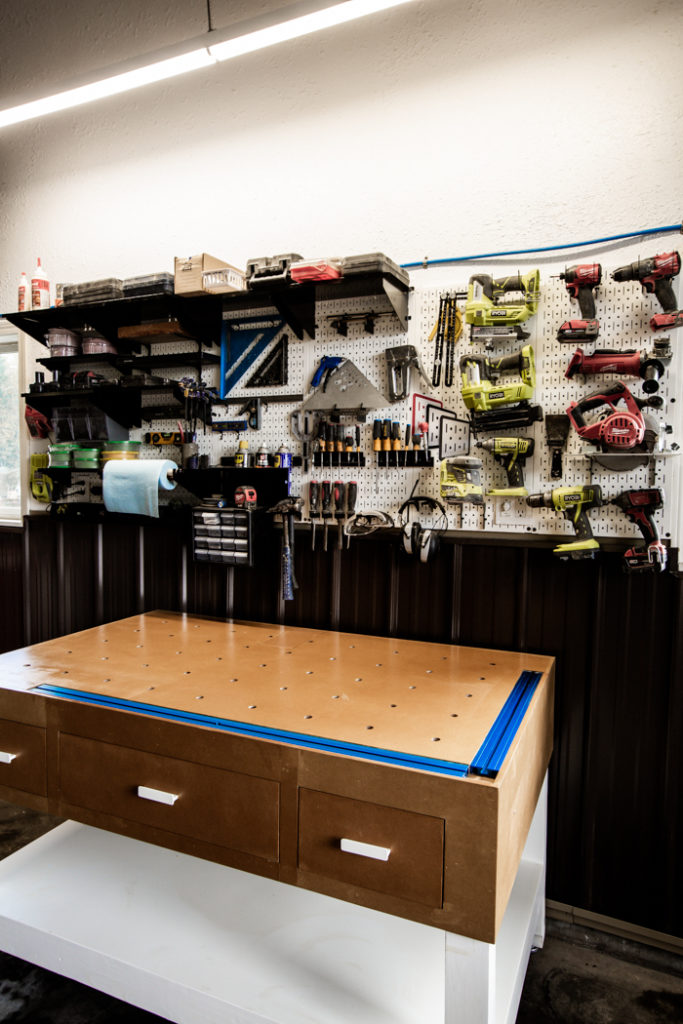
When we moved into this home, that originally belonged to my parents, I was lucky enough to inherit my father’s workshop. I miss him all the time, but being able to work in his shop brings back great memories of when we used to work on projects together. He taught me everything I know. Now that I’ve been working in the space though, my old habits are coming back. I’m constantly losing my tools <insert Lindi’s eye roll here>, and misplacing pencils. It was about time I organized the shop, starting with a new metal pegboard system. I’ll show you how I installed it, and how to extend an outlet if you have electrical in the wall already.
*This post was sponsored by Wall Control, and may contain affiliate links. As always, opinions are 100% my own. For more information, please see my disclosure page.*
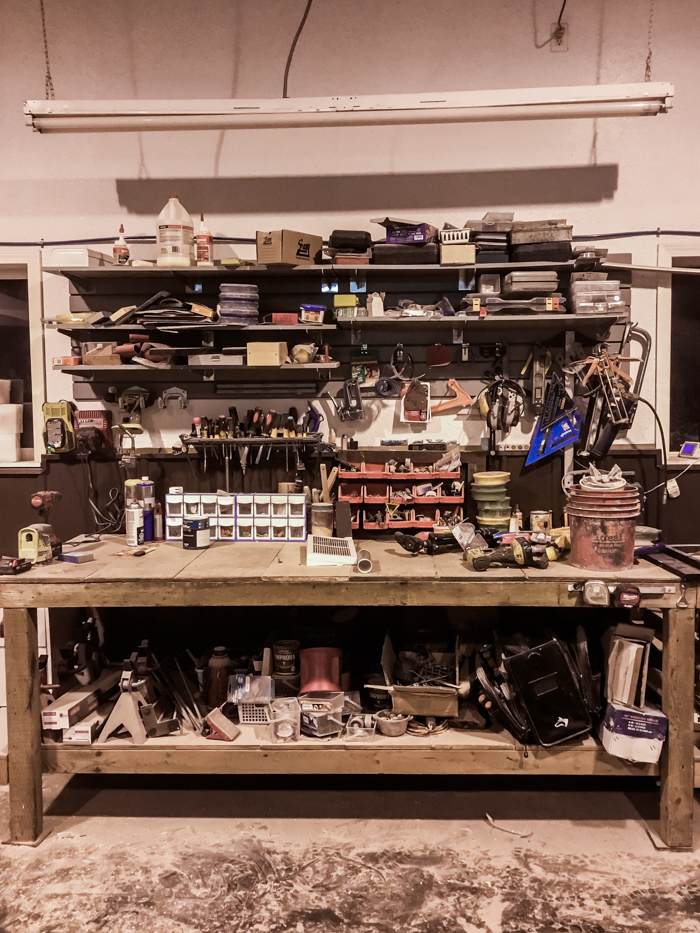
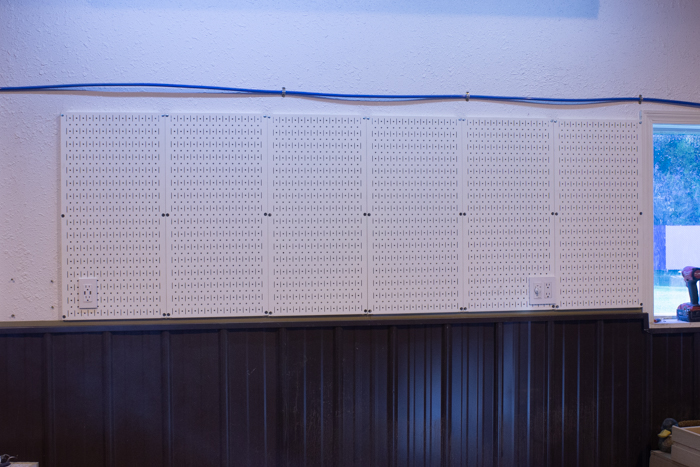
When we first moved into our home, the garage became the overflow for anything we didn’t have space for in the home. After we finally cleared some of that out, I was still left with a pretty unorganized and cluttered garage space (see the photo above for proof!). I started off by using the existing slat boards and benches for my tools and woodworking supplies but I knew this wasn’t my “dream” setup.
The slat board worked but I found the hardware for it limited. The slat board was made of MDF you had to be careful how much weight you hung on the board as I actually had a couple of shelves fall and damage the slat board due to putting too much weight on them. I had used cheaper pegboard in the past and it worked ok, but I found it flimsy.
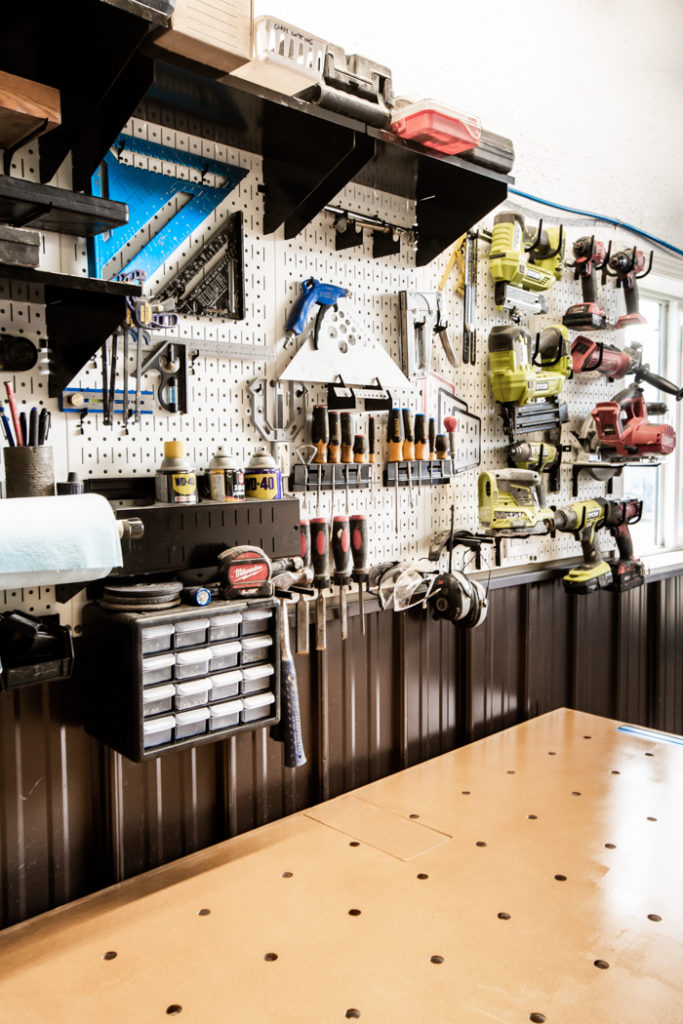
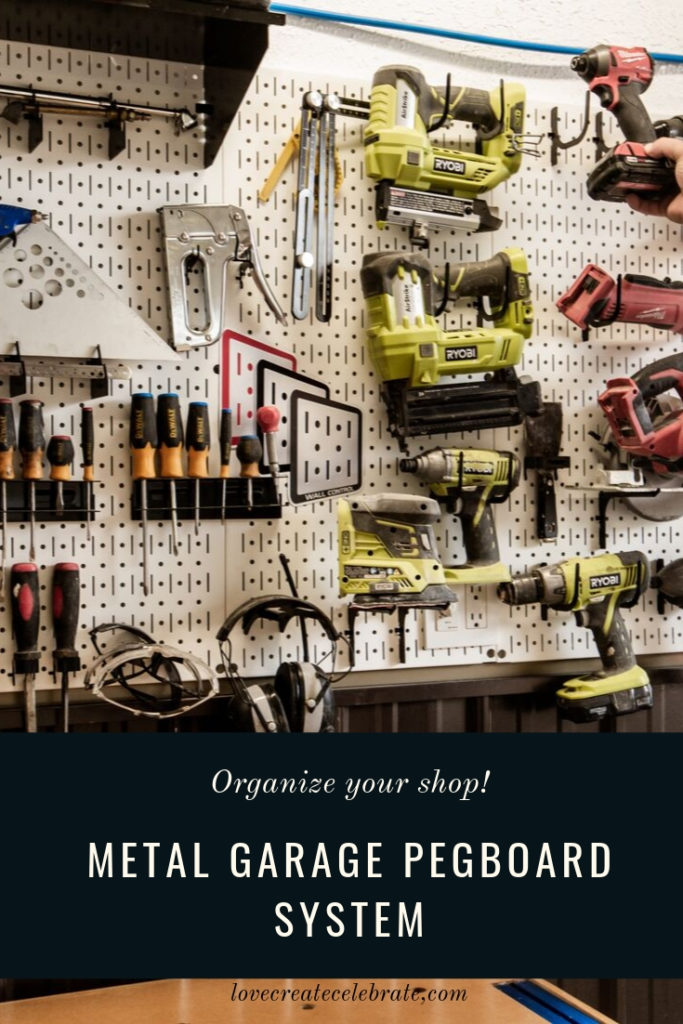
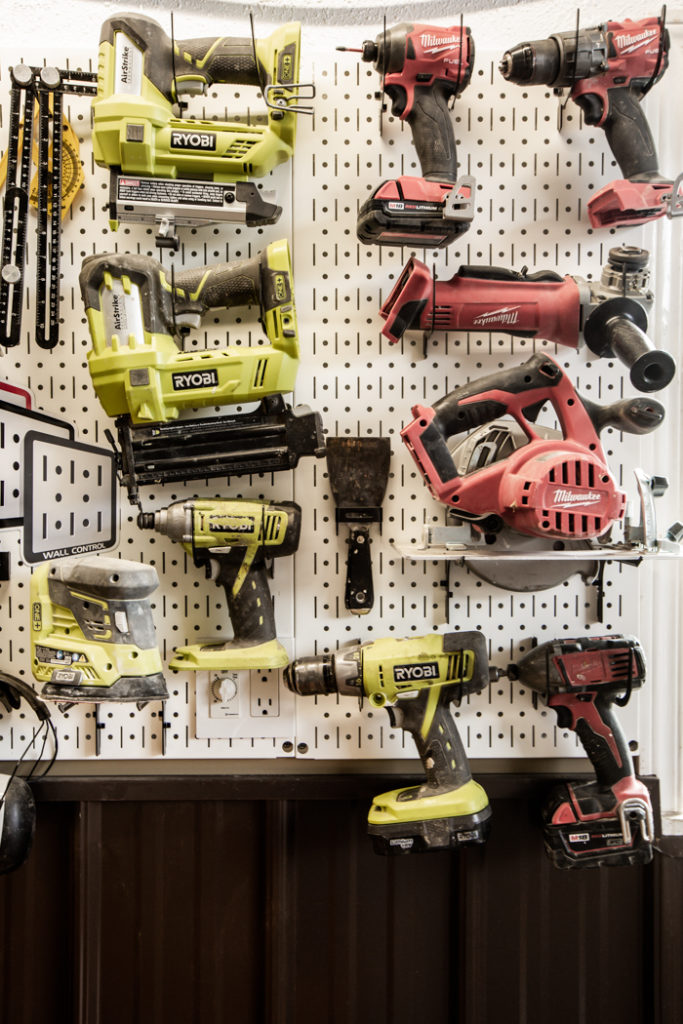
Our Metal Pegboard System for the Garage
Lucky for me I found the Wall Control Metal Pegboard system! I wanted a wall storage solution that would let me have easy access to all the tools and supplies that I used on a frequent basis, but at the same time being super versatile and customizable. Wall Control definitely checks all those boxes!

I went online and order the Wall Control Metal Pegboard and hardware I thought would best fit my tool storage and supply needs. My goal was to have a “home” for all my frequently used cordless tools, batteries, speed squares, levels, sanding paper, glue, etc.
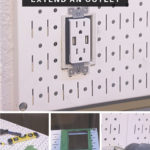
How to Extend an Outlet for Your Metal Pegboard System
For the wall I wanted to install the metal pegboard on I had to work around two electrical switches/outlets. I will describe below how I cut and the pegboard, extended the outlet boxes, and installed the electrical outlet/switches trough the Wall Control Metal Pegboard. First here is a list of the items needed to install an outlet or switch on/over the pegboard.
Materials Needed to Extend Your Outlet
- single gang electrical box outlet extender
- double gang electrical box outlet extender
- frog tape
- sharpie felt marker
- measuring tape
- Dremel with metal cutting disk and or Grinder with metal cutting disk
- speed square
Instructions for Extending Your Outlets
Probably the most important item(s) for working with electrical and the pegboard are the electrical box outlet extender. This allows you to extend the outlet box which prevents any of the electrical wires to touch or rub against the cut edges of the pegboard, protects the wires that extend from the wall to the switch mounted on the pegboard, and prevents any debris from being able to enter the box from the outside.
Your first step is to turn off the power to the outlets you are working around. Once you confirm the power is off you can remove the covers and pull the outlets and/or switches away from the wall.
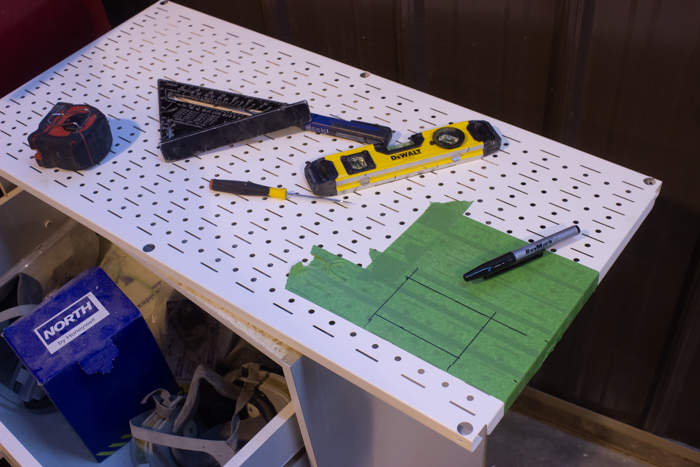
Next cover the rough area where the box will sit on the metal pegboard with tape. This allows you to draw on the metal pegboard and remove your marks once your work is completed. I ended up using a couple rows of frog tape.
Once you have the tape in place you can take the metal pegboard and hold it in place beside and above the outlet and transfer the outlet boxes outer limits onto the edges of the tape with your marker.
Take the metal pegboard down and now take a couple of measurements again along the wall where your metal pegboard will sit and confirm the markings are correct. Once you are 100% sure the measurements are correct take your speed square and mark out the box on the tape. You want to make sure these measurements are right as you only have one change to cut into your shinny new Wall Control Metal Pegboard! You can also take your outlet extender to confirm the hole you marked out will allow the outlet extender to be installed through it.
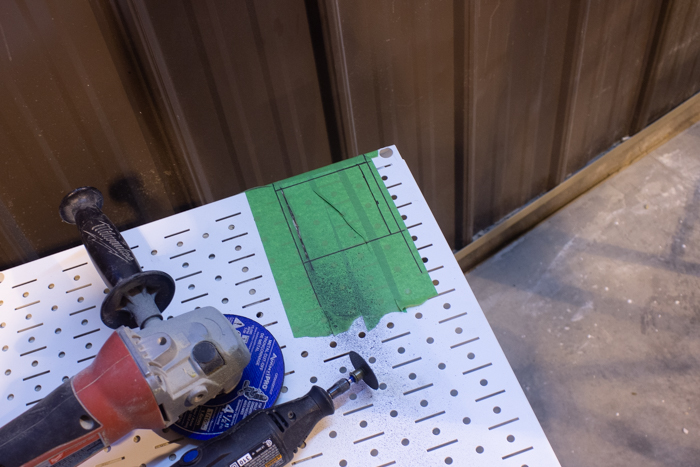
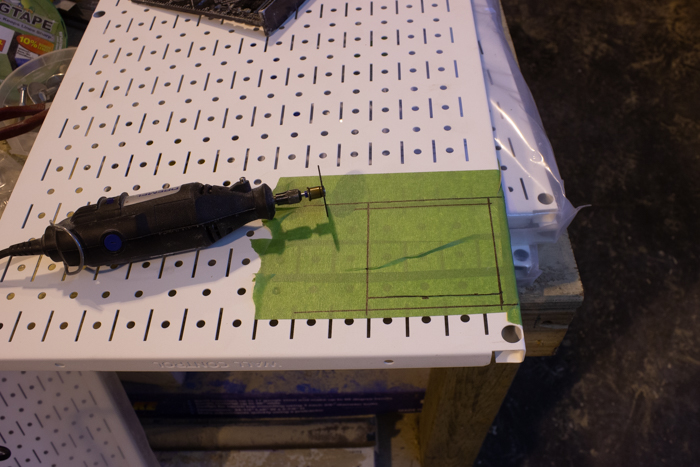
Taking your Dremel or girder you can cut along the line. I started with the grinder and then finished with the Dremel but the cuts can also just be completed with the Dremel (girder is just faster).
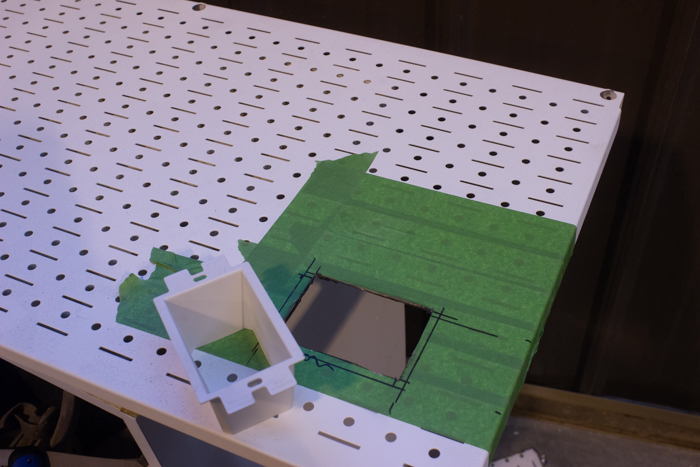
Careful with the cut out piece and edges from the metal pegboard as they may be hot right after completing the cut and/or have sharp edges. You may want to quick sand down the edges with your Dremel or some sanding paper to remove any metal burs along the cut.
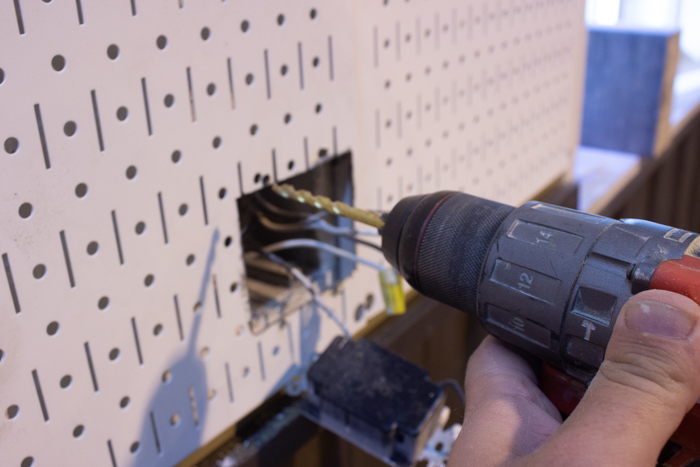
You will also need to add holes to the top and bottom of the outlet/outlet extender to allow for the screws from the outlet cover plate. Use the outlet as a template, mark the holes on the metal pegboard, remove the outlet and drill the two holes.
With your hole cut out you can take the board and install it on the wall. Once you secure you can take your outlet extender and install them over the pegboard and into the outlet. You may need to get longer screws for your outlet due the the extra distance the metal pegboard sits away from the wall with the outlet extended.
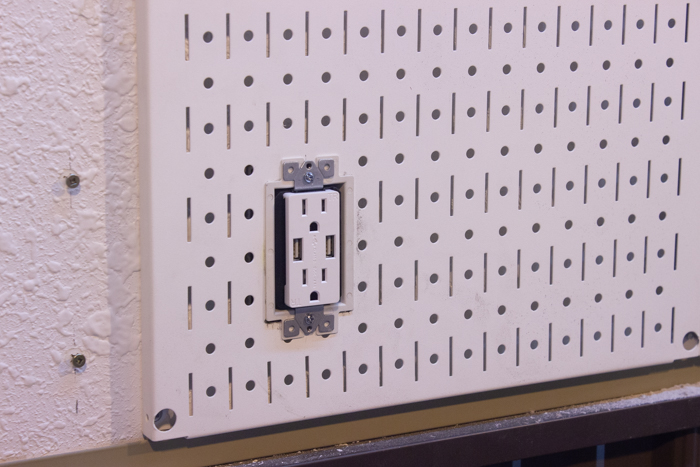
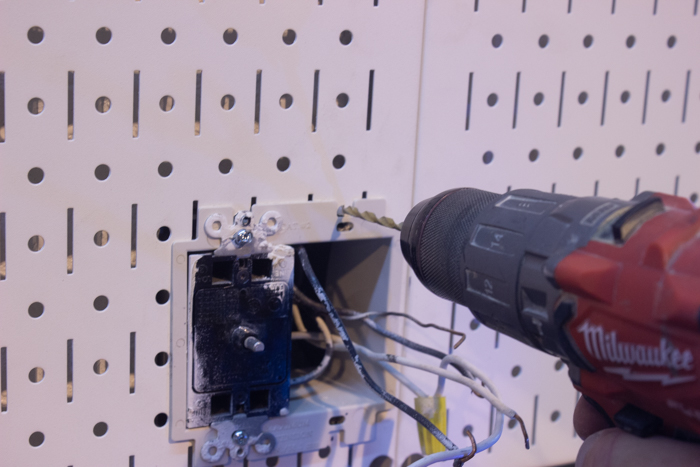
With your outlet extender installed your can reinstall the outlet/switch and cover plate. You can now turn the power back on.
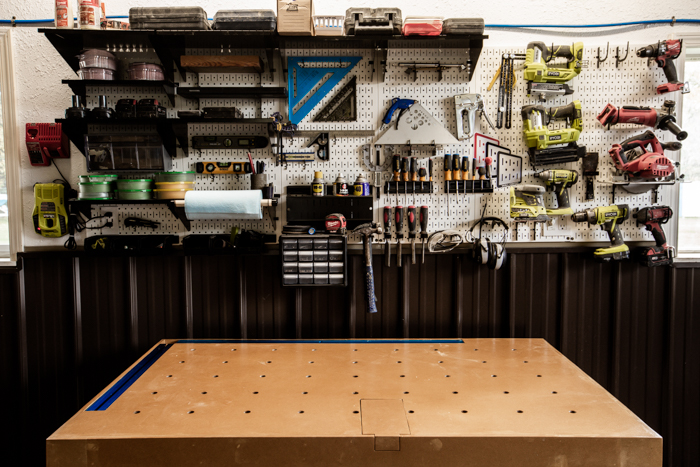
Now install the rest of your Wall Control Metal Pegboard and Wall Control Hardware and accessories and enjoy! I honestly spent the whole afternoon “working” and setting up the pegboard, it was great because you can test and layout to how you want to hang everything and adjust as required to fit everything you want to hang.
Our Final Wall Control Metal Pegboard Review
I couldn’t be happier with the Wall Control metal pegboard system, its great because you can easily move the hardware and accessories around, there are loads of options on their website and the Wall Control metal pegboard panel is over 10 times stronger than conventional pegboard! I can’t wait to put it into use and I can definitely see myself wanting more in the future. As a side bonus Lindi also thinks it looks great so it’s win-win :)
If you are from Canada and want to check out where to purchase from check the links below:
If you are from the United States head to Wall Control‘s website, its quick and easy to order directly from them to your door. Or you can also purchase on Amazon.com and may other great online distributors
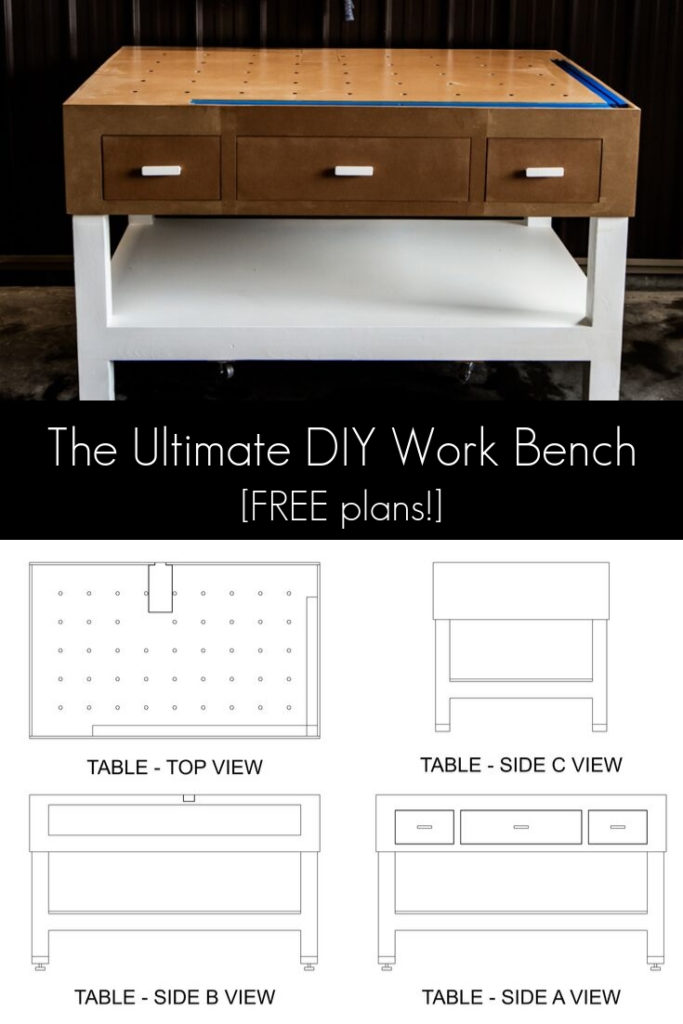
If you want to see another great improvement to any shop you should check out the work bench I just finished below:


SumasMasonry
Friday 18th of June 2021
Hello guys! I just want to thank you for this post as it really drives across the importance of using proper safety measures. I hope to read the step-by-step process of how you made the extension. The design of the product by itself looks really well thought out and simple enough for everyone to understand. The images were really clear as well, which makes everything so much easier to understand as well. I am glad that you used your post to inform people not only on how to make the product but also on safety tips on working with metal and tools. Great job!
Tom
Tuesday 12th of November 2019
This is very helpful. Thank you. Looking through your steps, I was curious if your outlet boxes were already nailed to the stud, and if you moved them away from the stud to give yourself more space to cut the panels?
I ask that because the edge of each panel wraps around to give you a surface to screw to the stud.
Also curious on how you determined exactly how large to cut the box. Did you sketch the shape & size of the box on the tape when you held it up to the wall?
Lindi
Tuesday 12th of November 2019
Hey! Glad it was helpful! Yes, the box was already on the stud. That lip from the panel didn't conflict with where the box hole needed to be. I used an outlet extender. To locate the hole I measured from the bottom of the panel to the bottom of the electrical box and then did the same thing on the side of the wall control panel, then I used the outlet extender as a reference for where to cut. I sketched this all out on the tape on the wall control panel before I started cutting, and then double checked the measurements a few times before cutting. Hope that all makes sense!
Cheryl
Thursday 17th of October 2019
Thanks for sharing! While it's not a typical before and after space makeover, I'm sure it has made such a difference in how you guys work!