
*This post was sponsored by Graham & Brown. As always, opinions are 100% my own. For more information, please read my disclosure policy.*
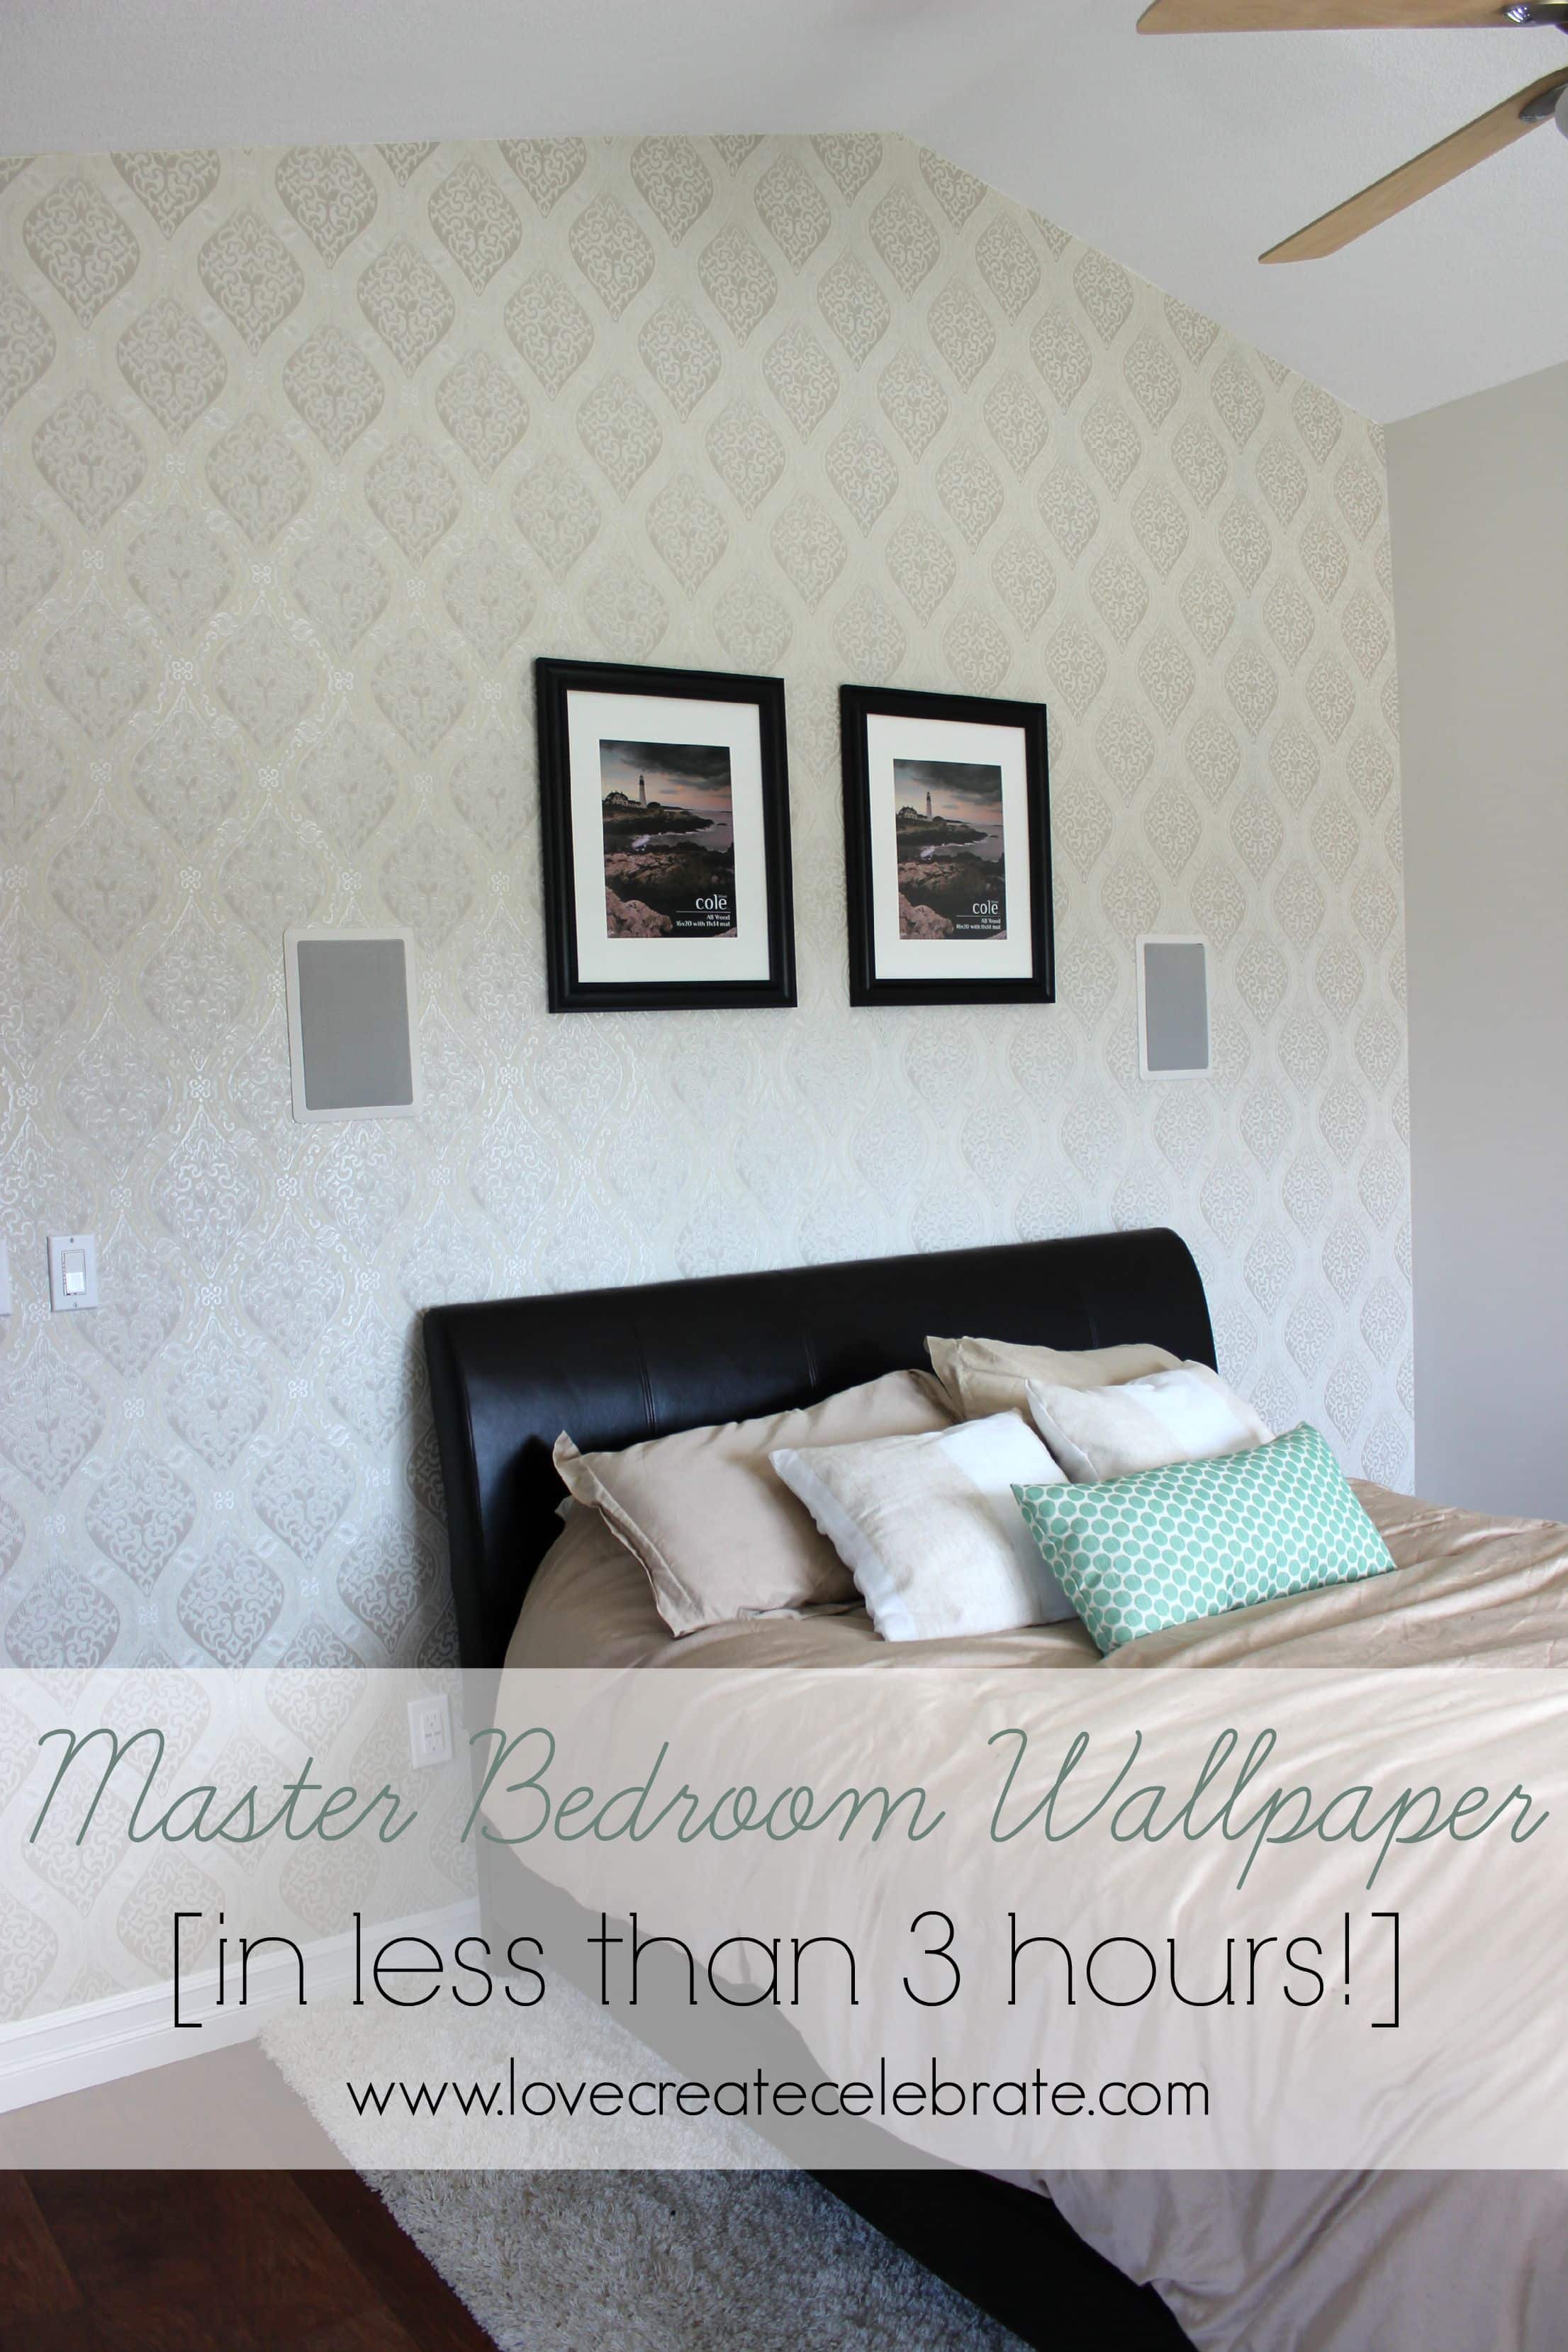
I know what you’re thinking. It’s the same thing I was thinking when I first thought about wallpapering my master bedroom. Really? People still do that? I know how much work that is going to be…. but honestly, you are in for a HUGE surprise. This my friends, is the future of wallpaper! We hung our Master Bedroom Wallpaper along the entire looooong wall with vaulted ceilings while my daughter napped!! Seriously! The entire process took 2.5 hours, and I’ll tell you how we did it…
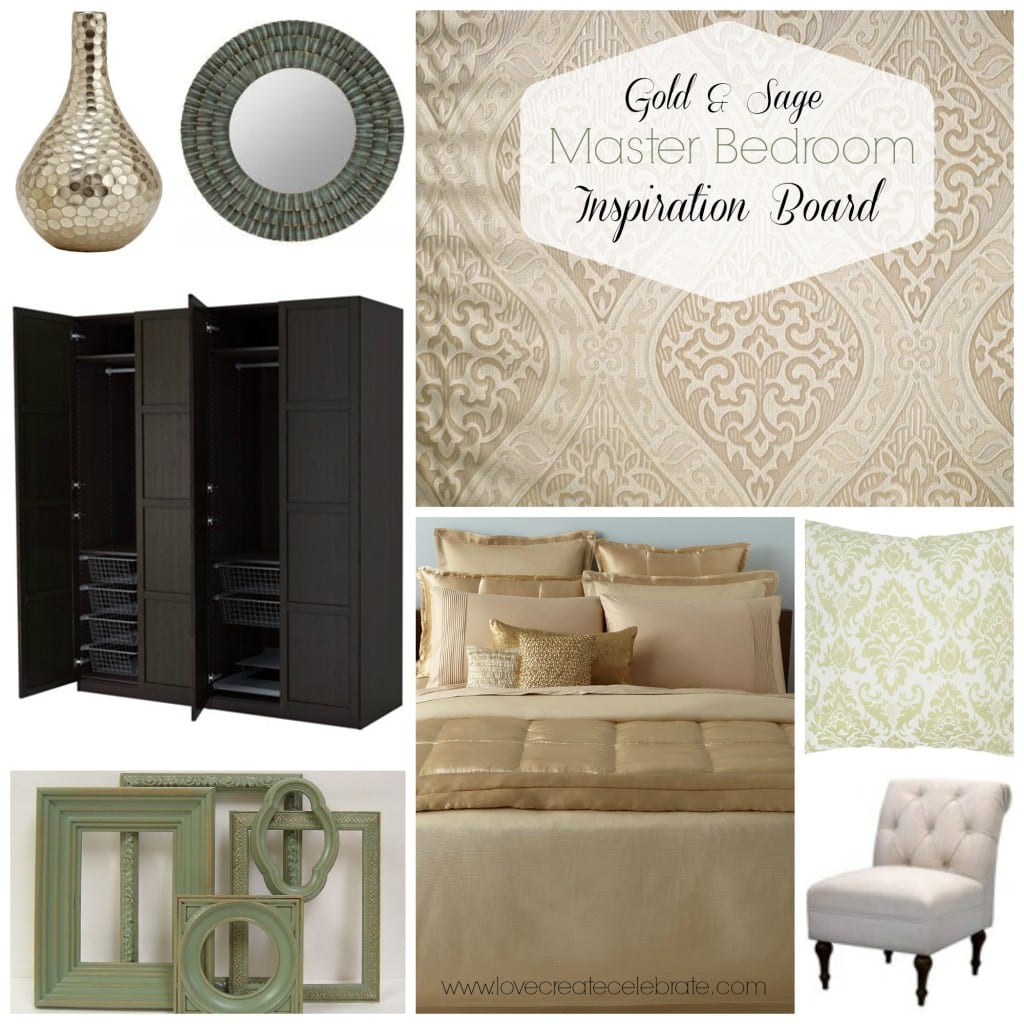
We started with stunning wallpaper that we found from Graham & Brown called Labyrinth Cream/Gold to match our master bedroom inspiration and plans (see the inspiration board here).
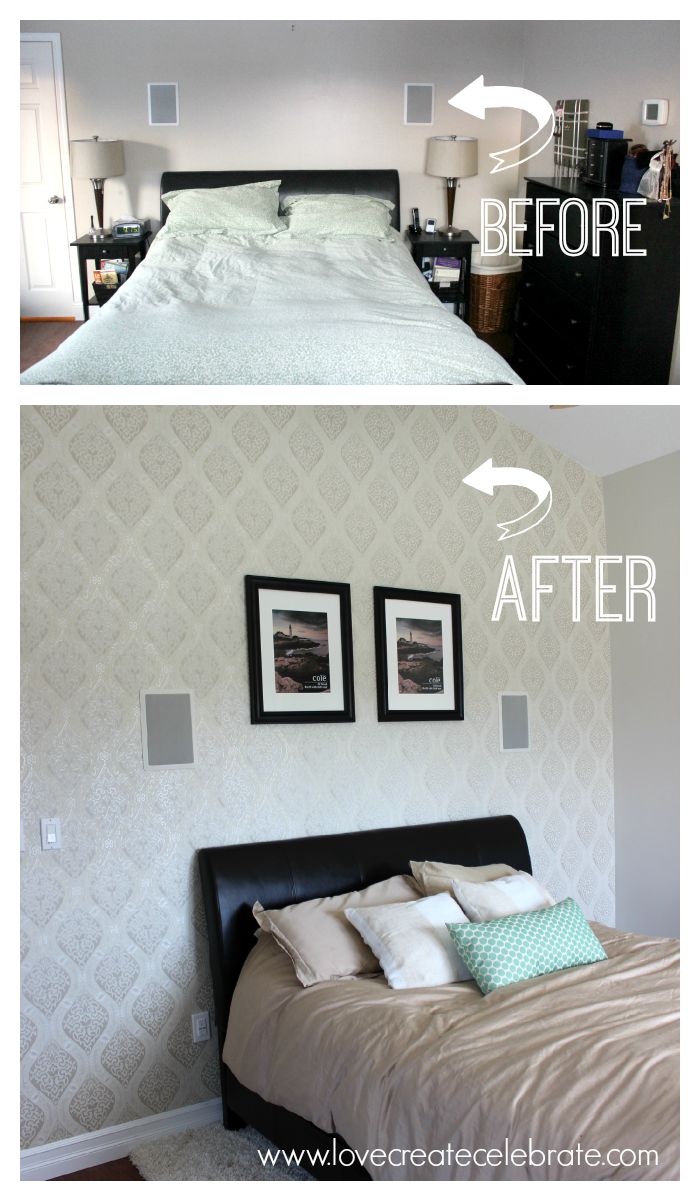
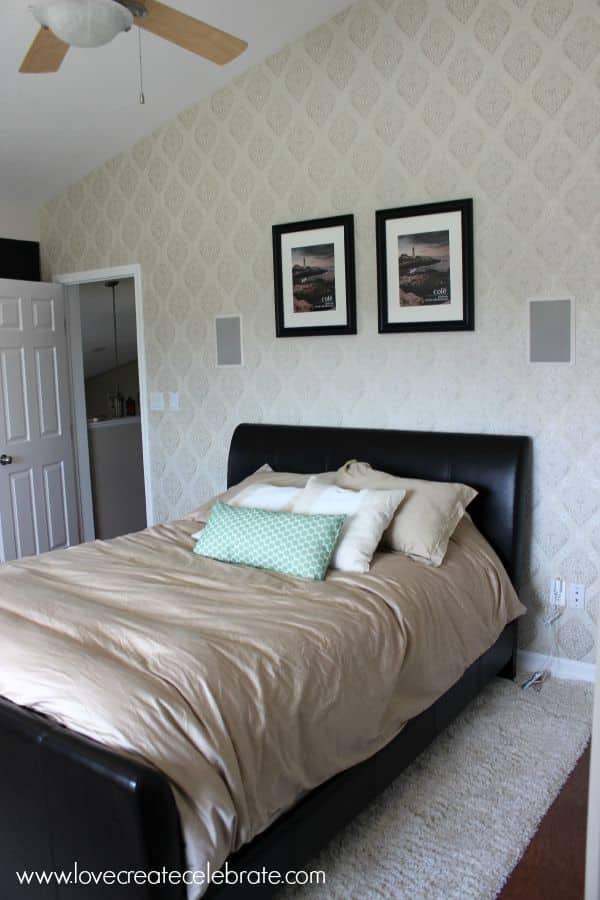
You can see below where we started… we had just finished freshly painting ceilings, baseboards, and walls (except the feature wall). Isn’t it incredible how lighter the paint makes the room look already?!
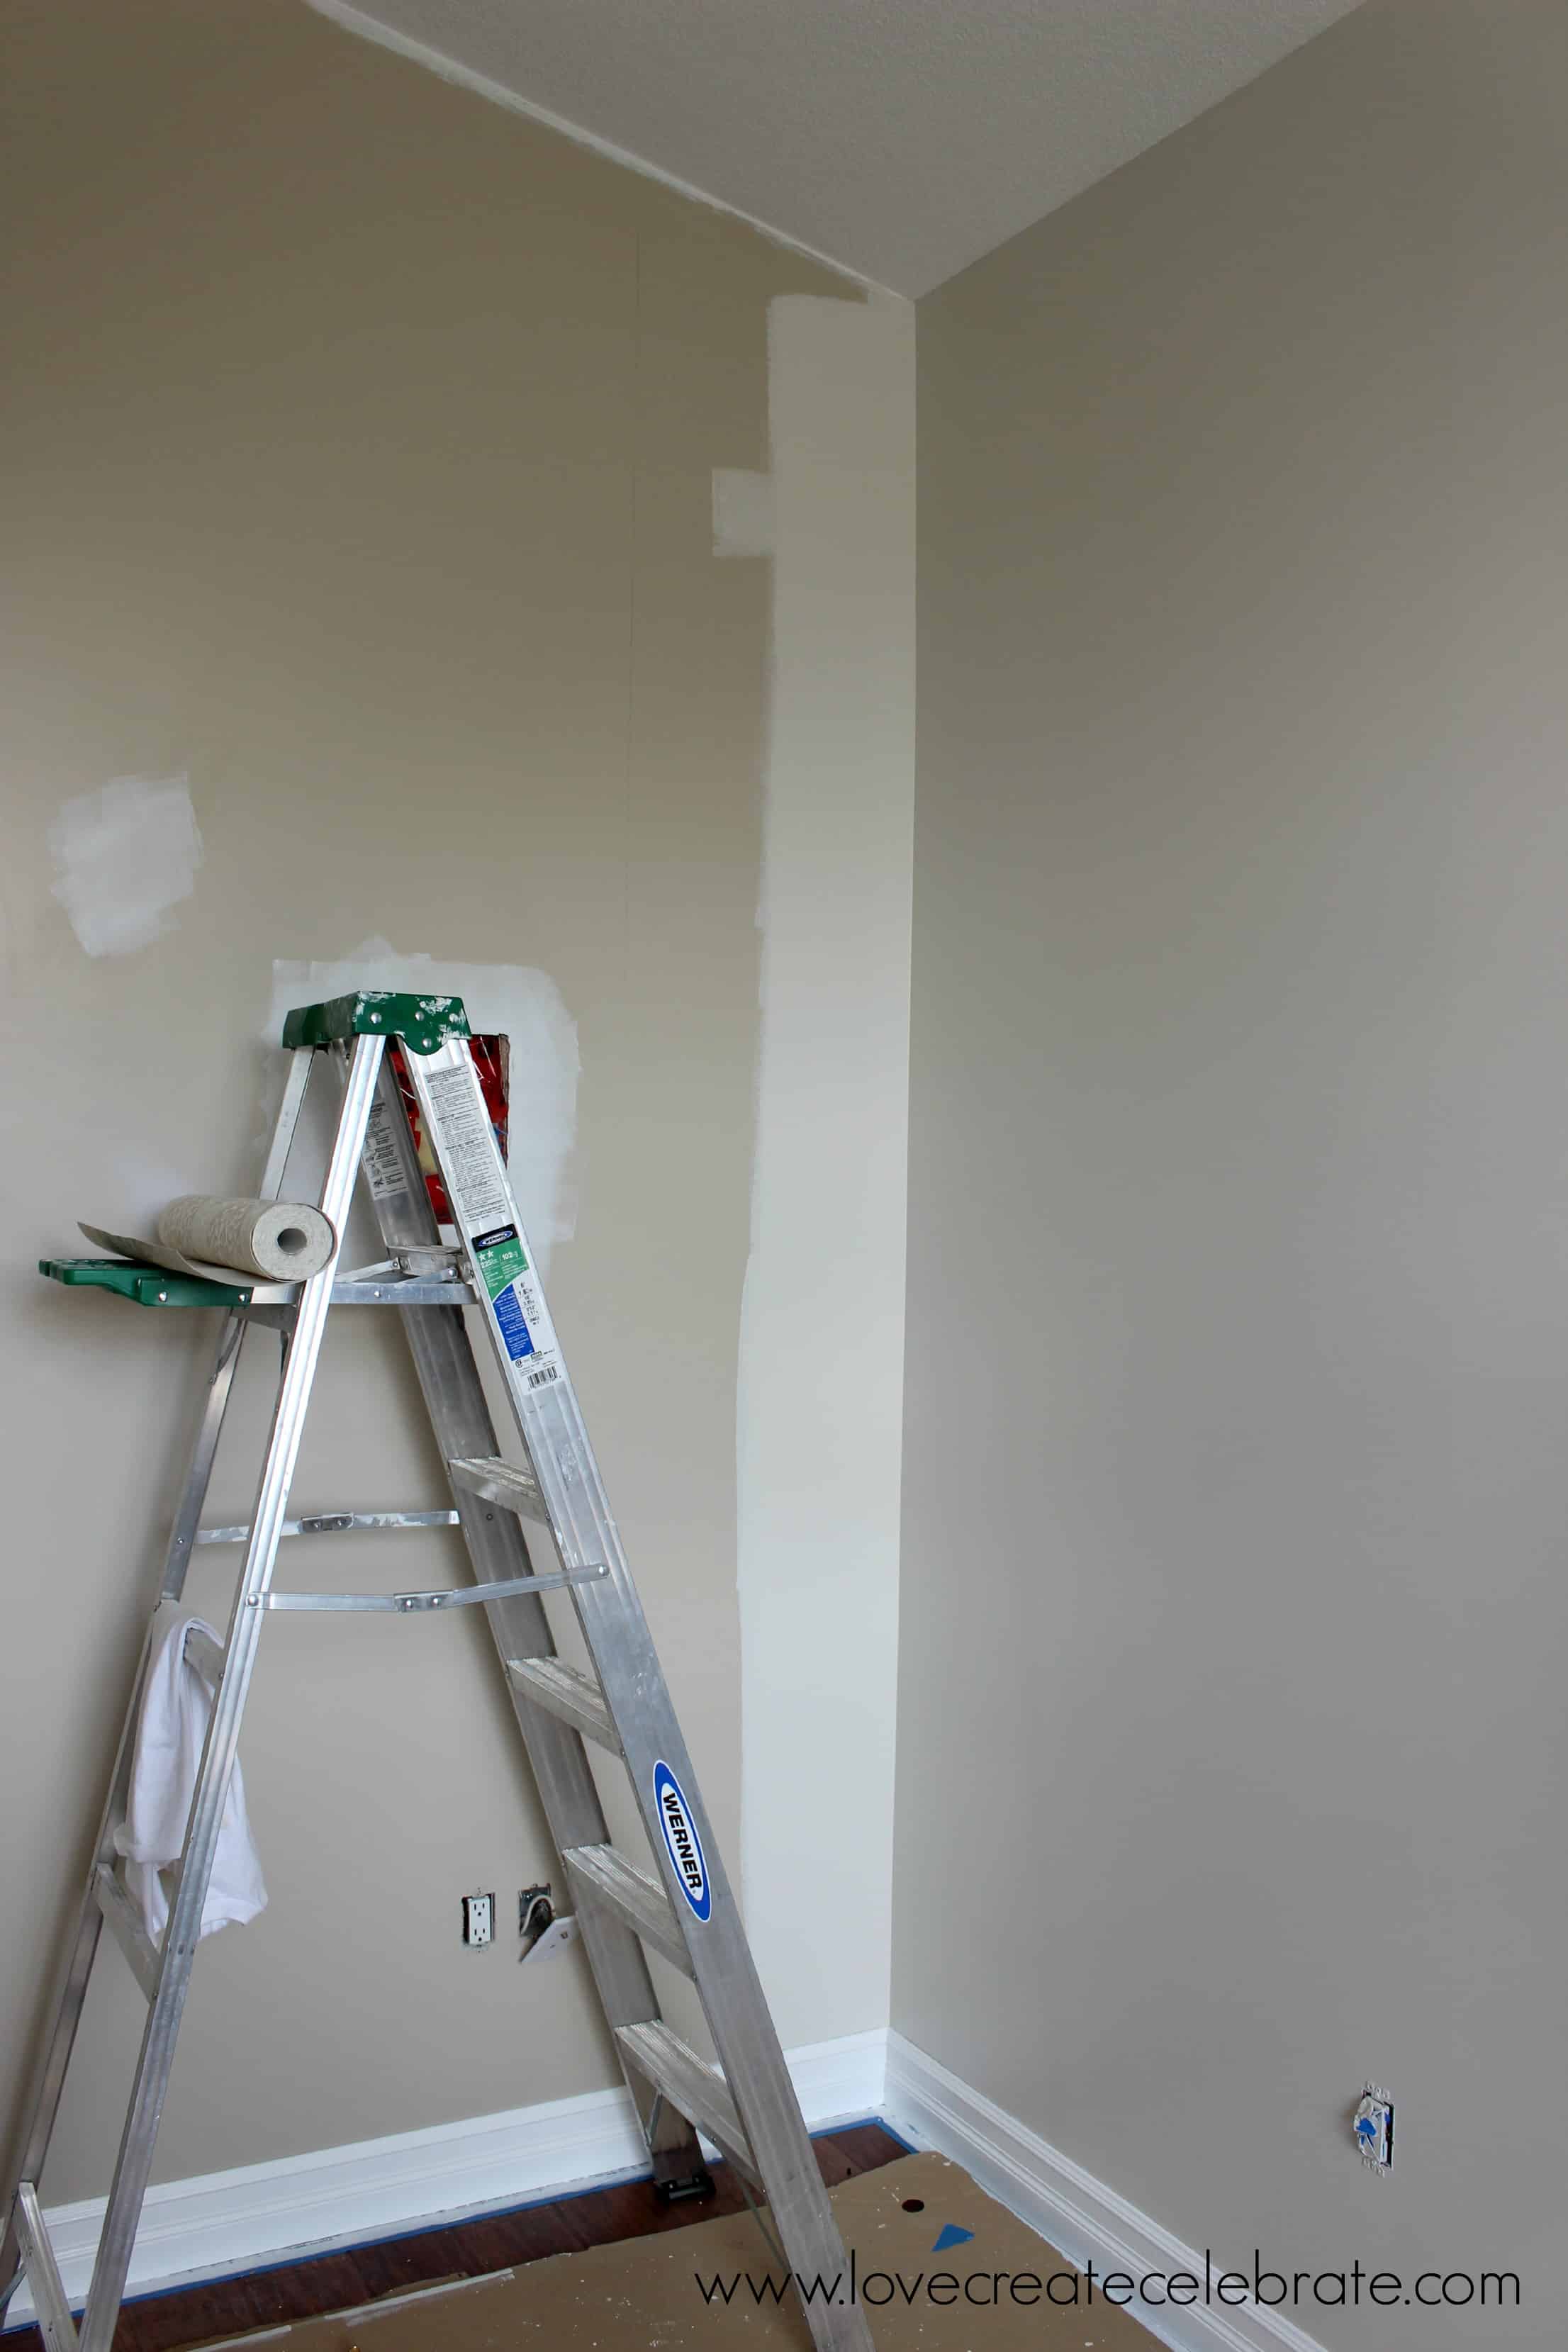
To begin, you want to measure out a distance smaller than the width of your wallpaper sheet. You want the wallpaper to extend past the corner so that if the corner wall is not perfectly straight or level (which they never are!), you have some extra wallpaper to work with. Our wallpaper width was 20″, therefore we started 18″ from the corner, and dropped our Plumb Bob from the ceiling to create a level vertical line. This is where we lined up our first sheet of wallpaper.

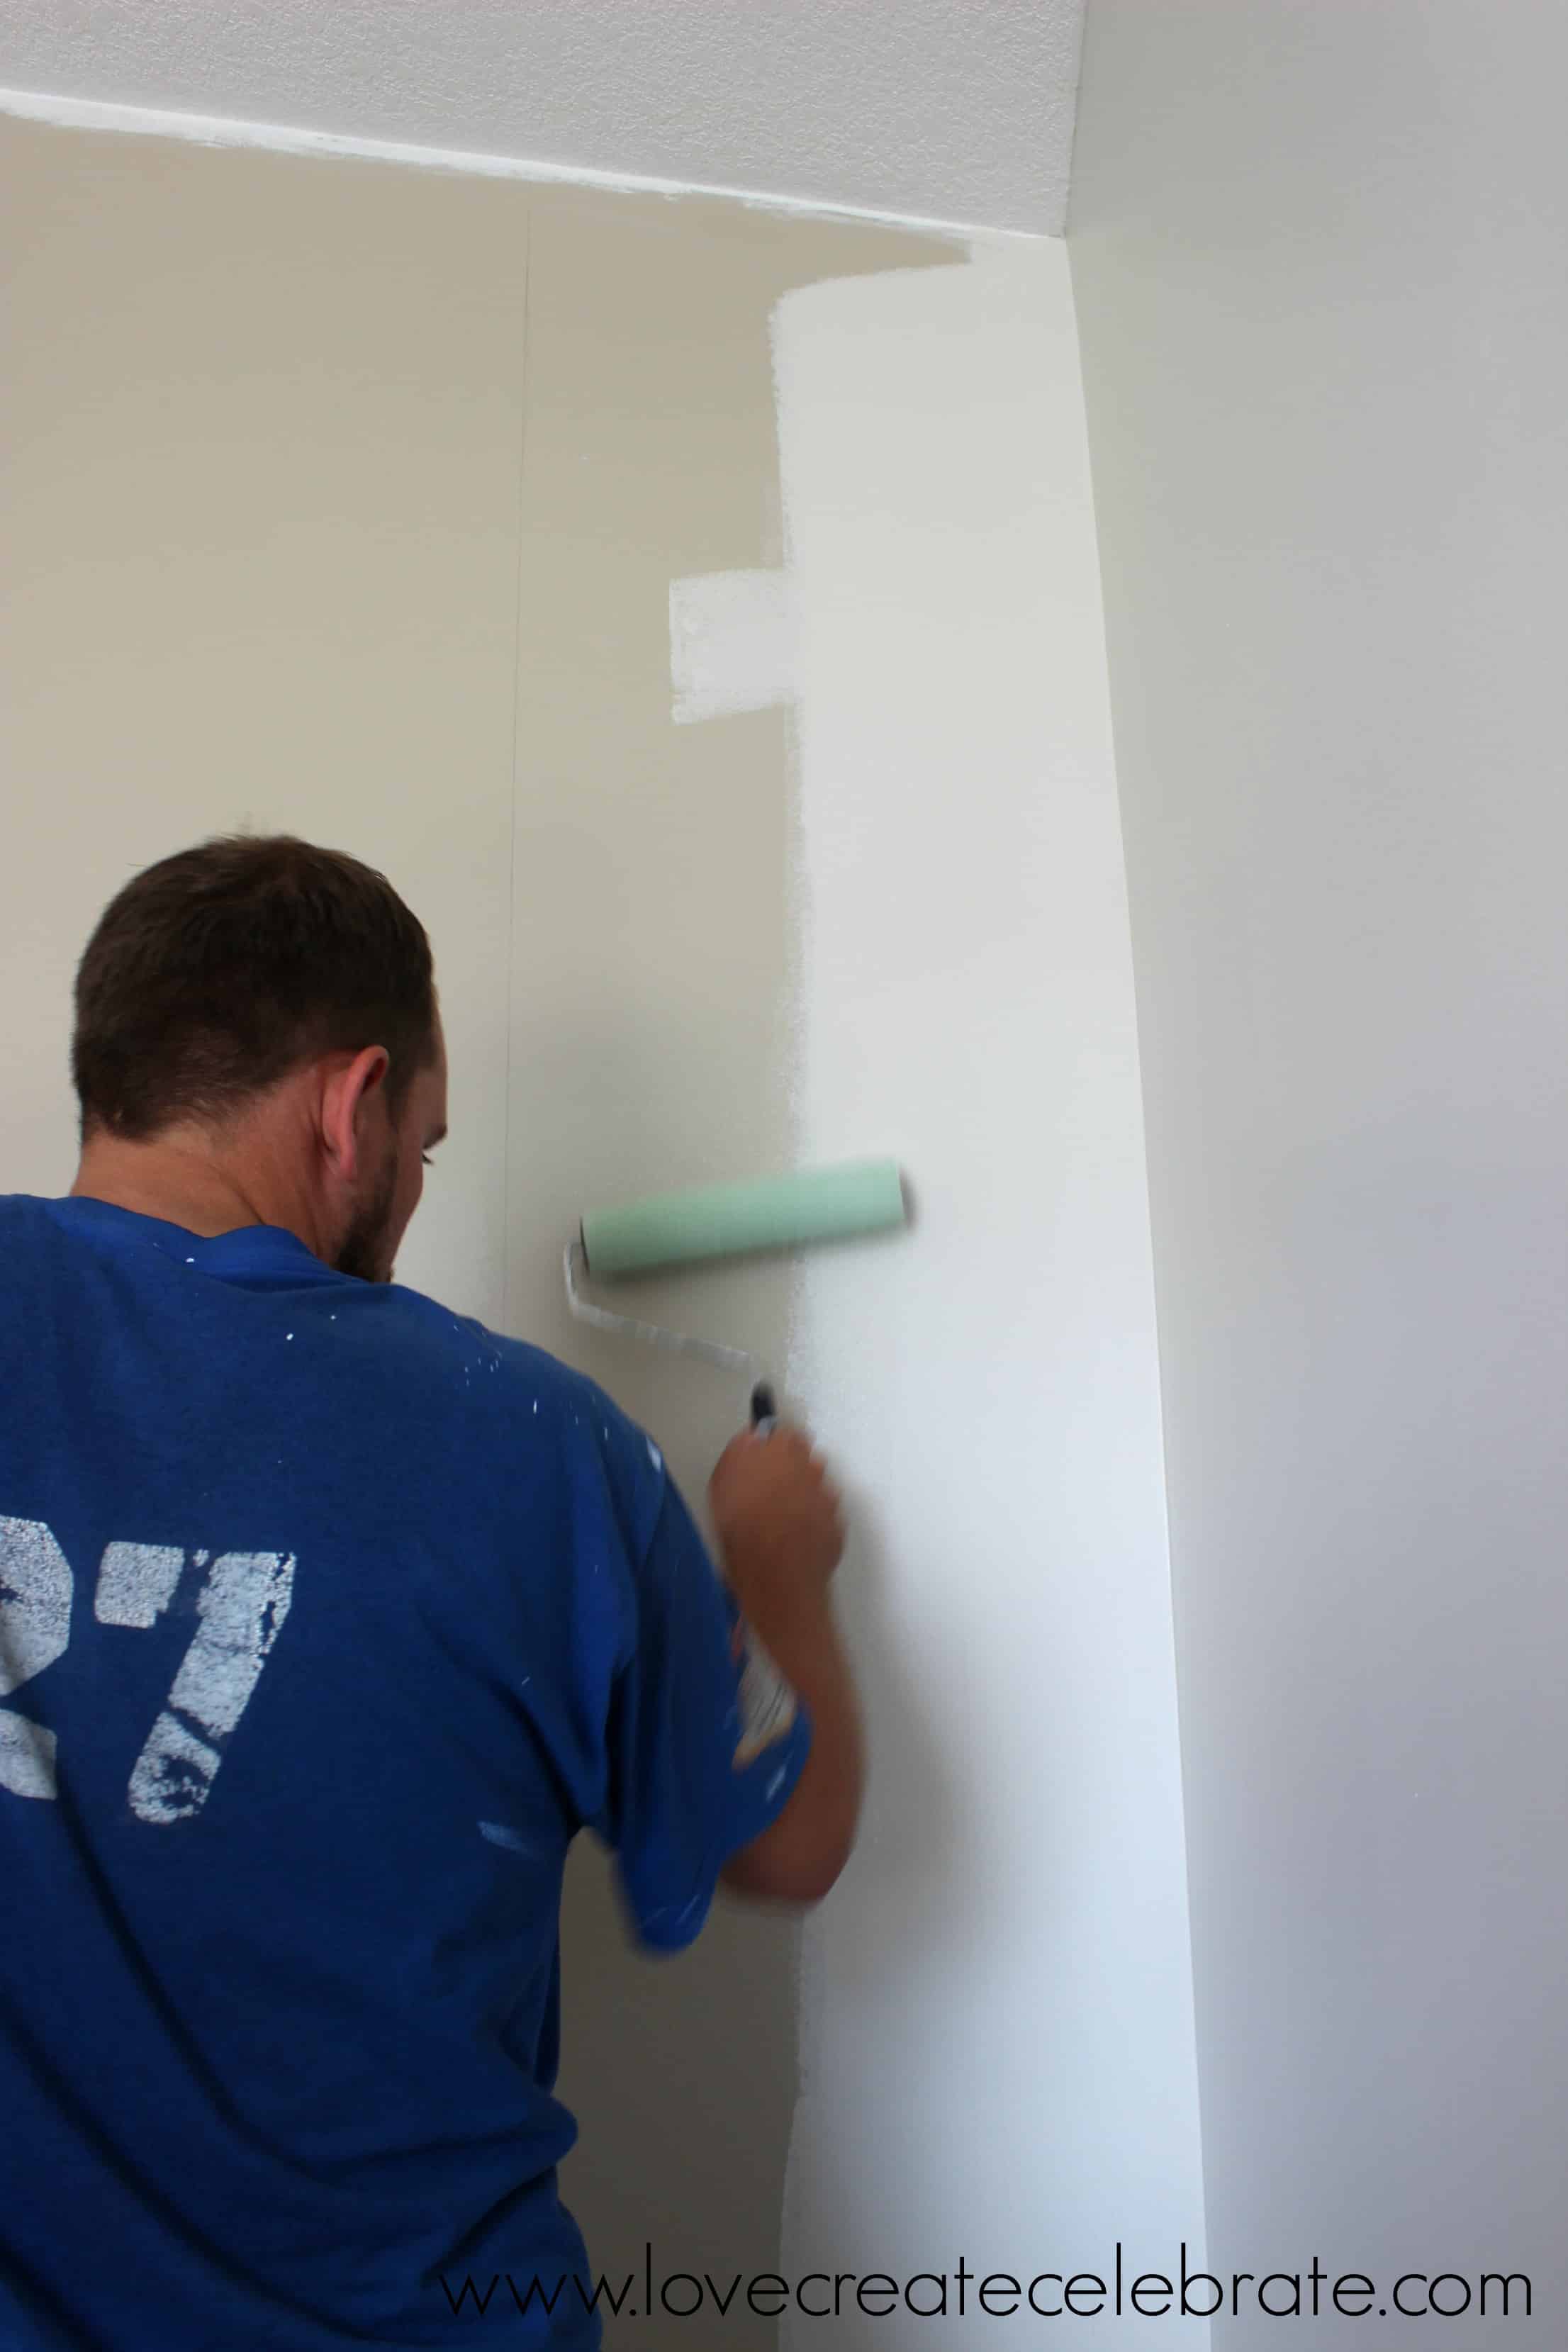
Next, we bought a generic wallpaper paste from Home Depot and an extra fluffy wallpaper roller. We used that roller to roll on paste from the line to the corner.
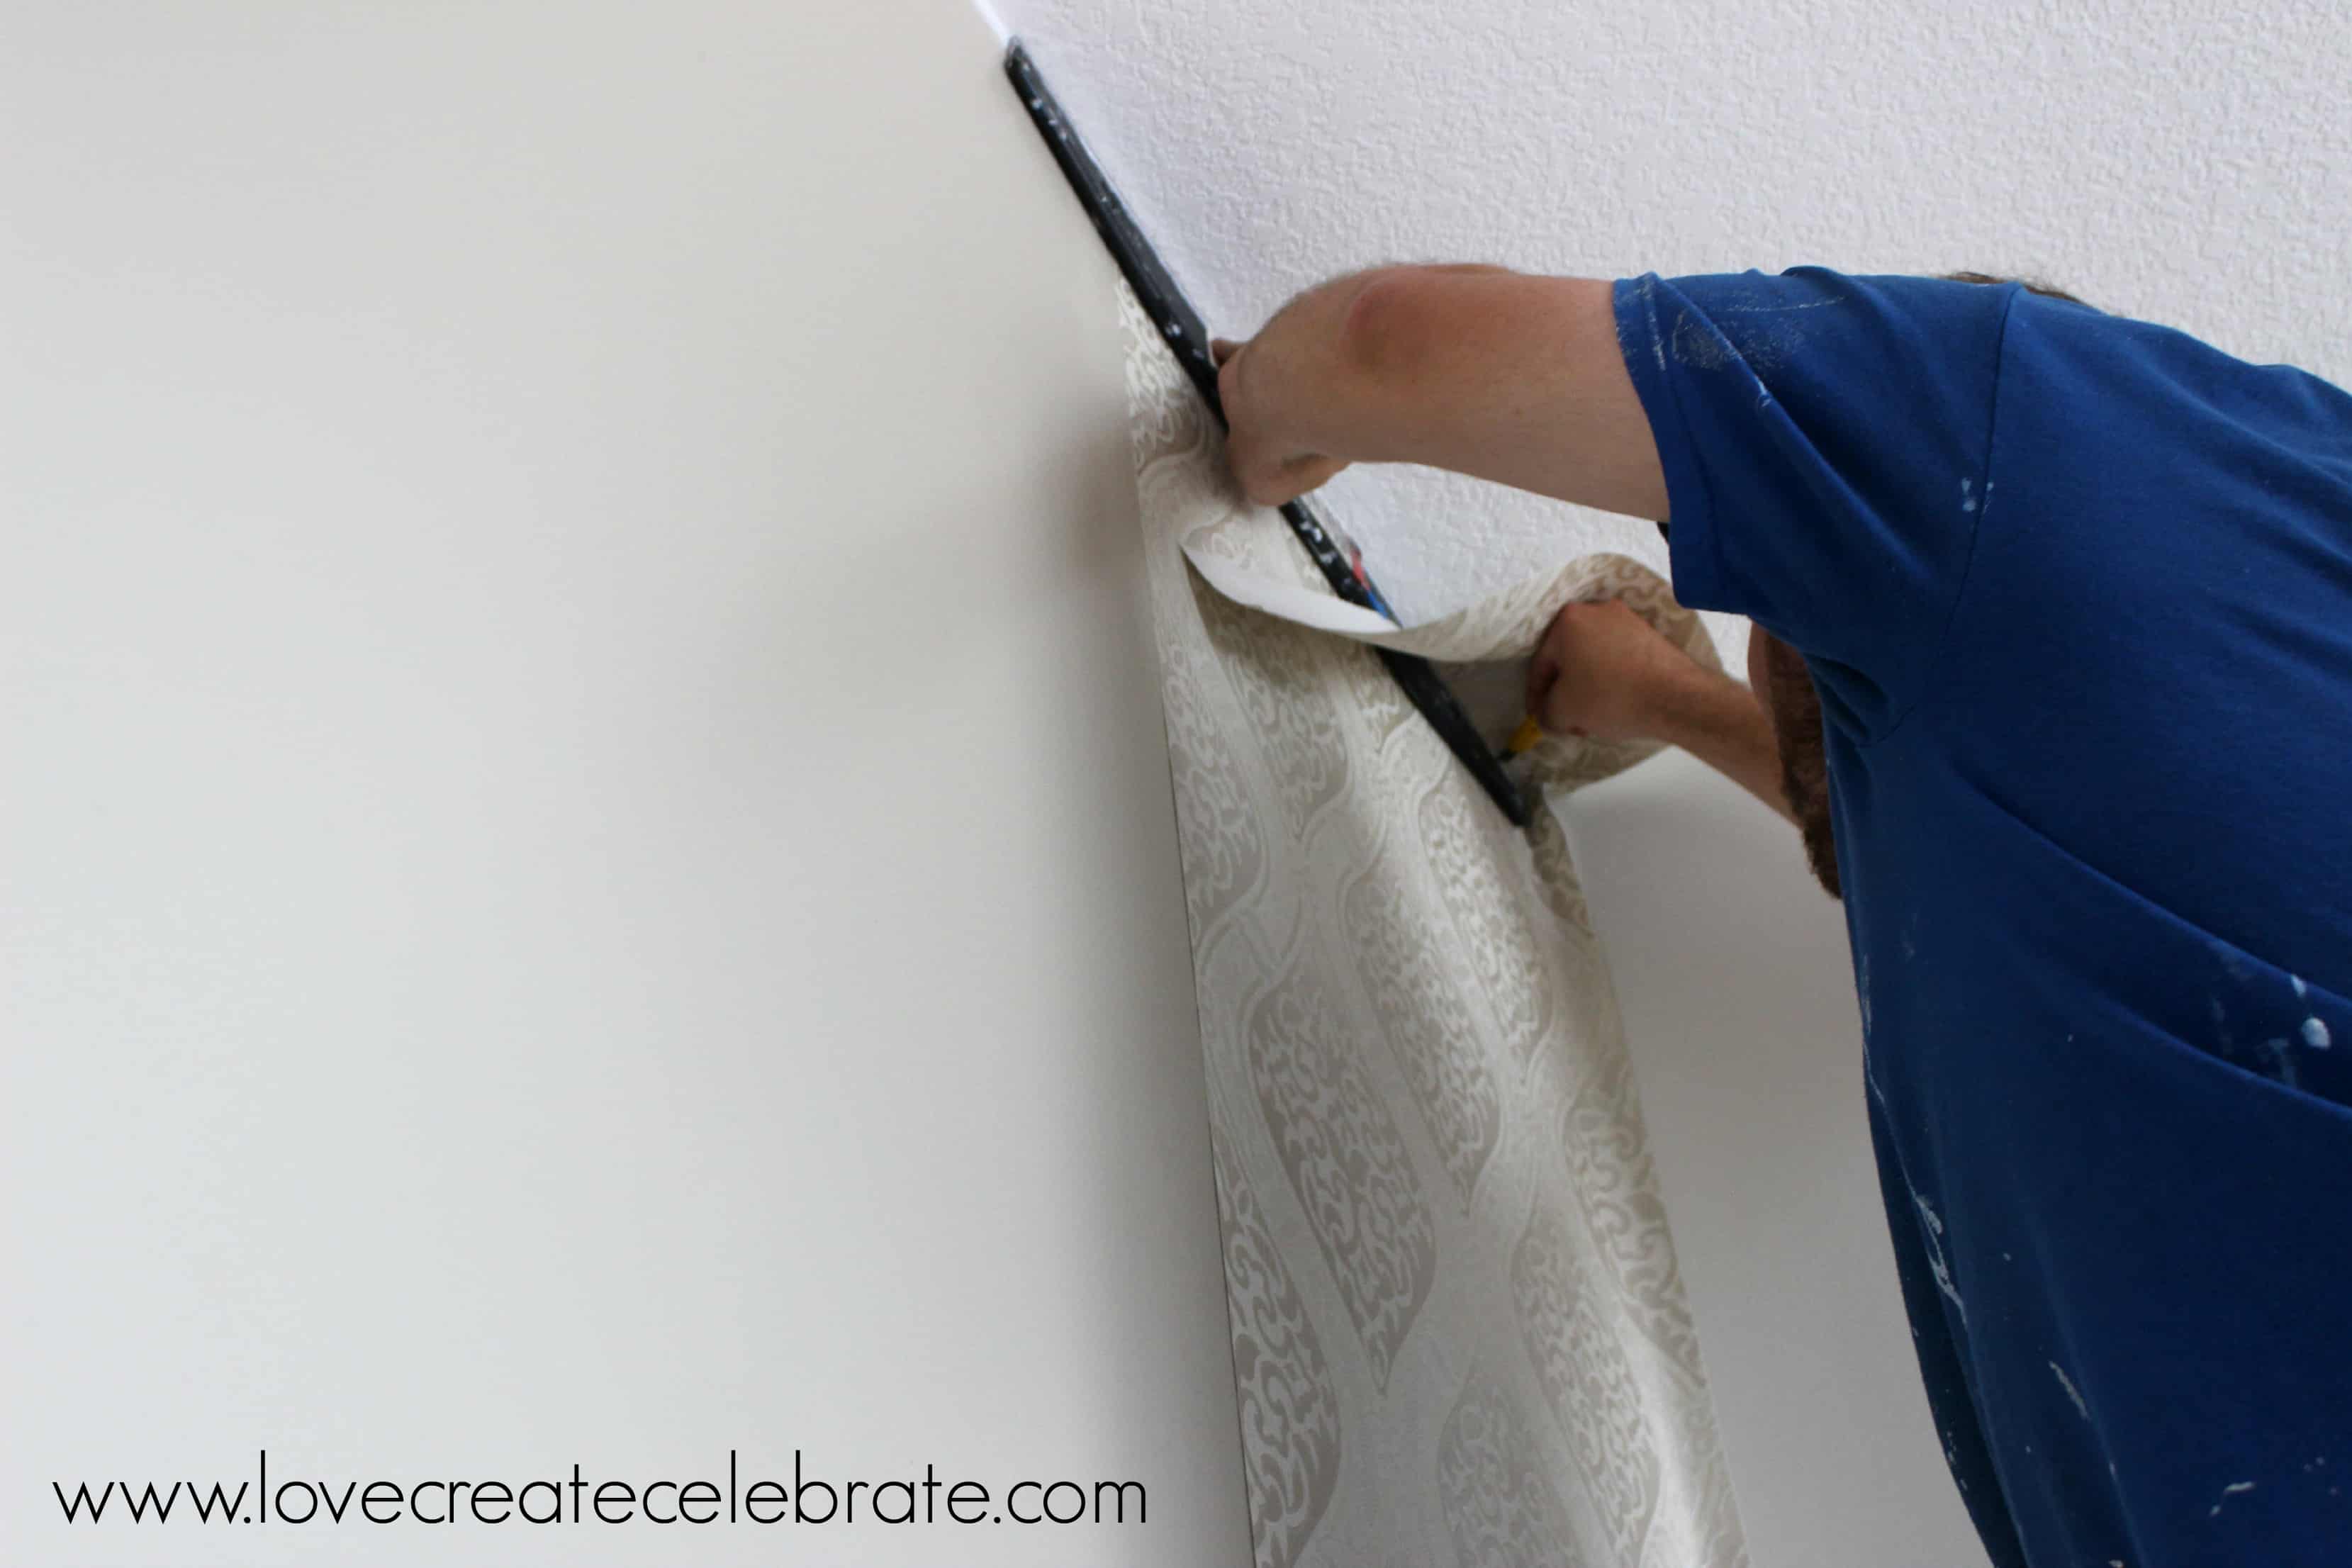
Next, we lined up the wallpaper with the line drawn from our Plumb Bob, from the very top to the bottom. Our very vaulted bedroom ceilings required us to climb a few steps up the ladder to adhere the wallpaper to the top! then we used a long scrapper that we had, and an x-acto knife to cut the extra wallpaper from the top and bottom.
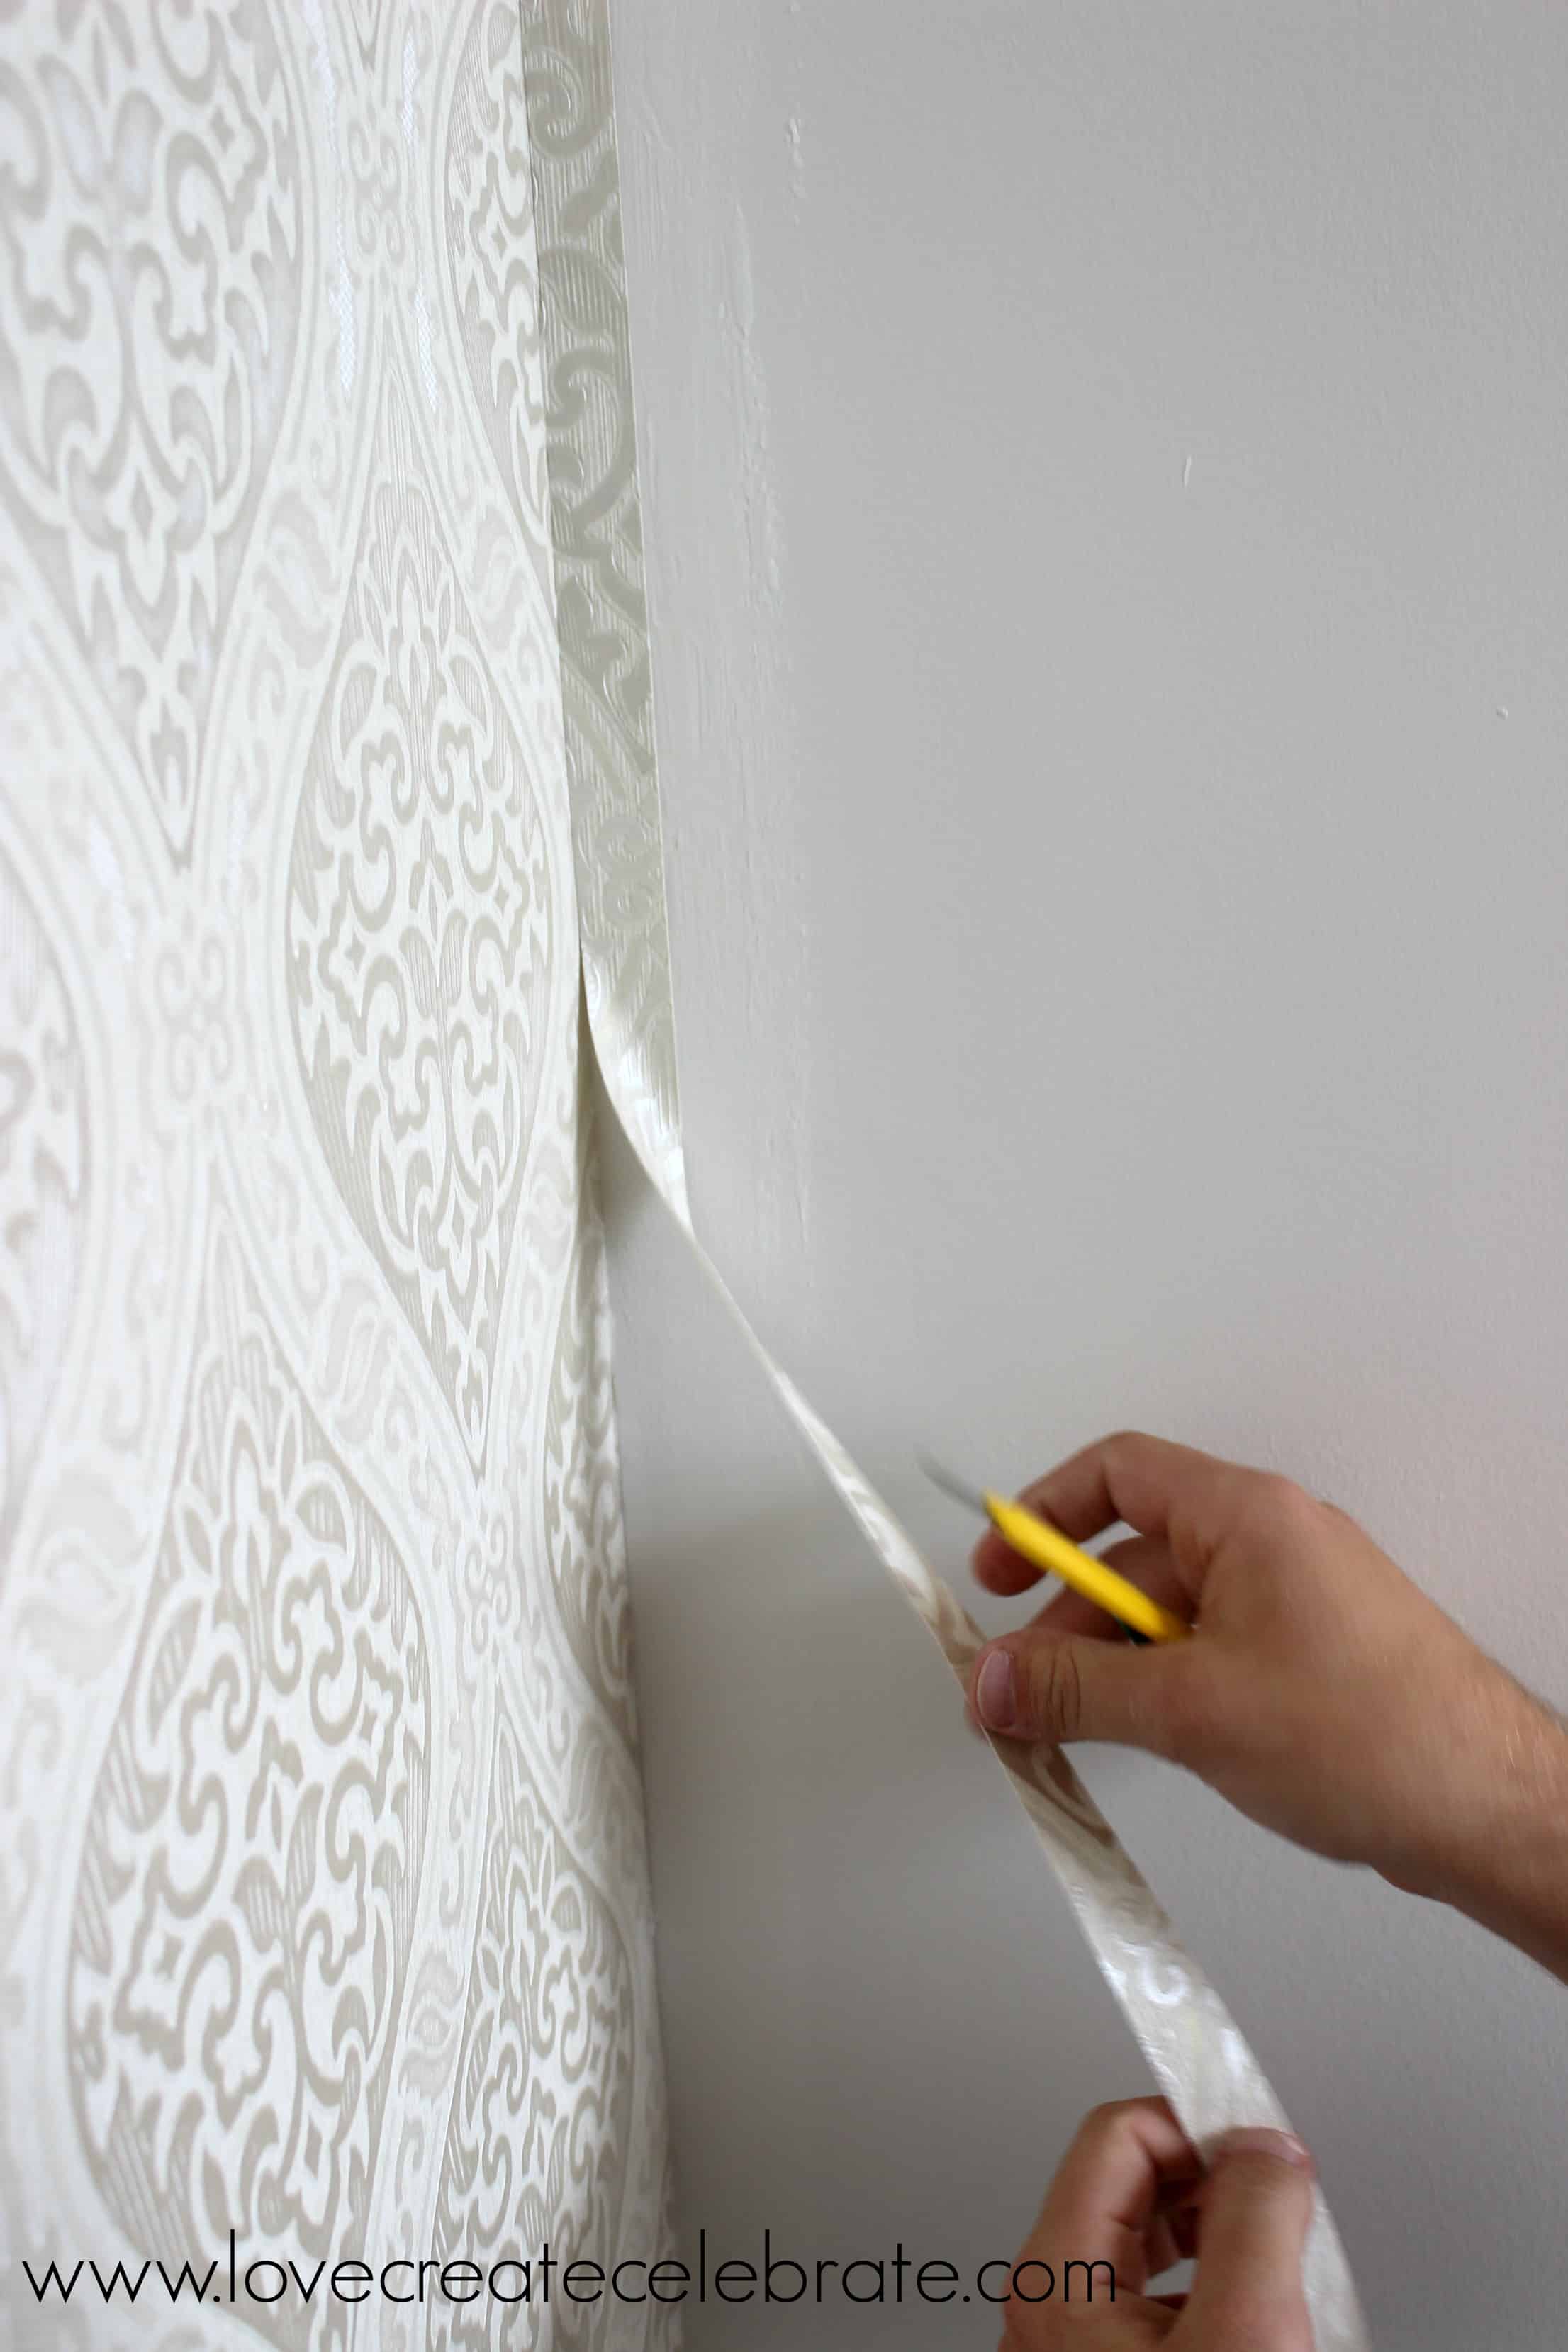
After the wallpaper was all smoothed out (with a sponge and a tiny roller) we used the scrapper and x-acto knife again to cut the wallpaper that overlapped onto the next wall.
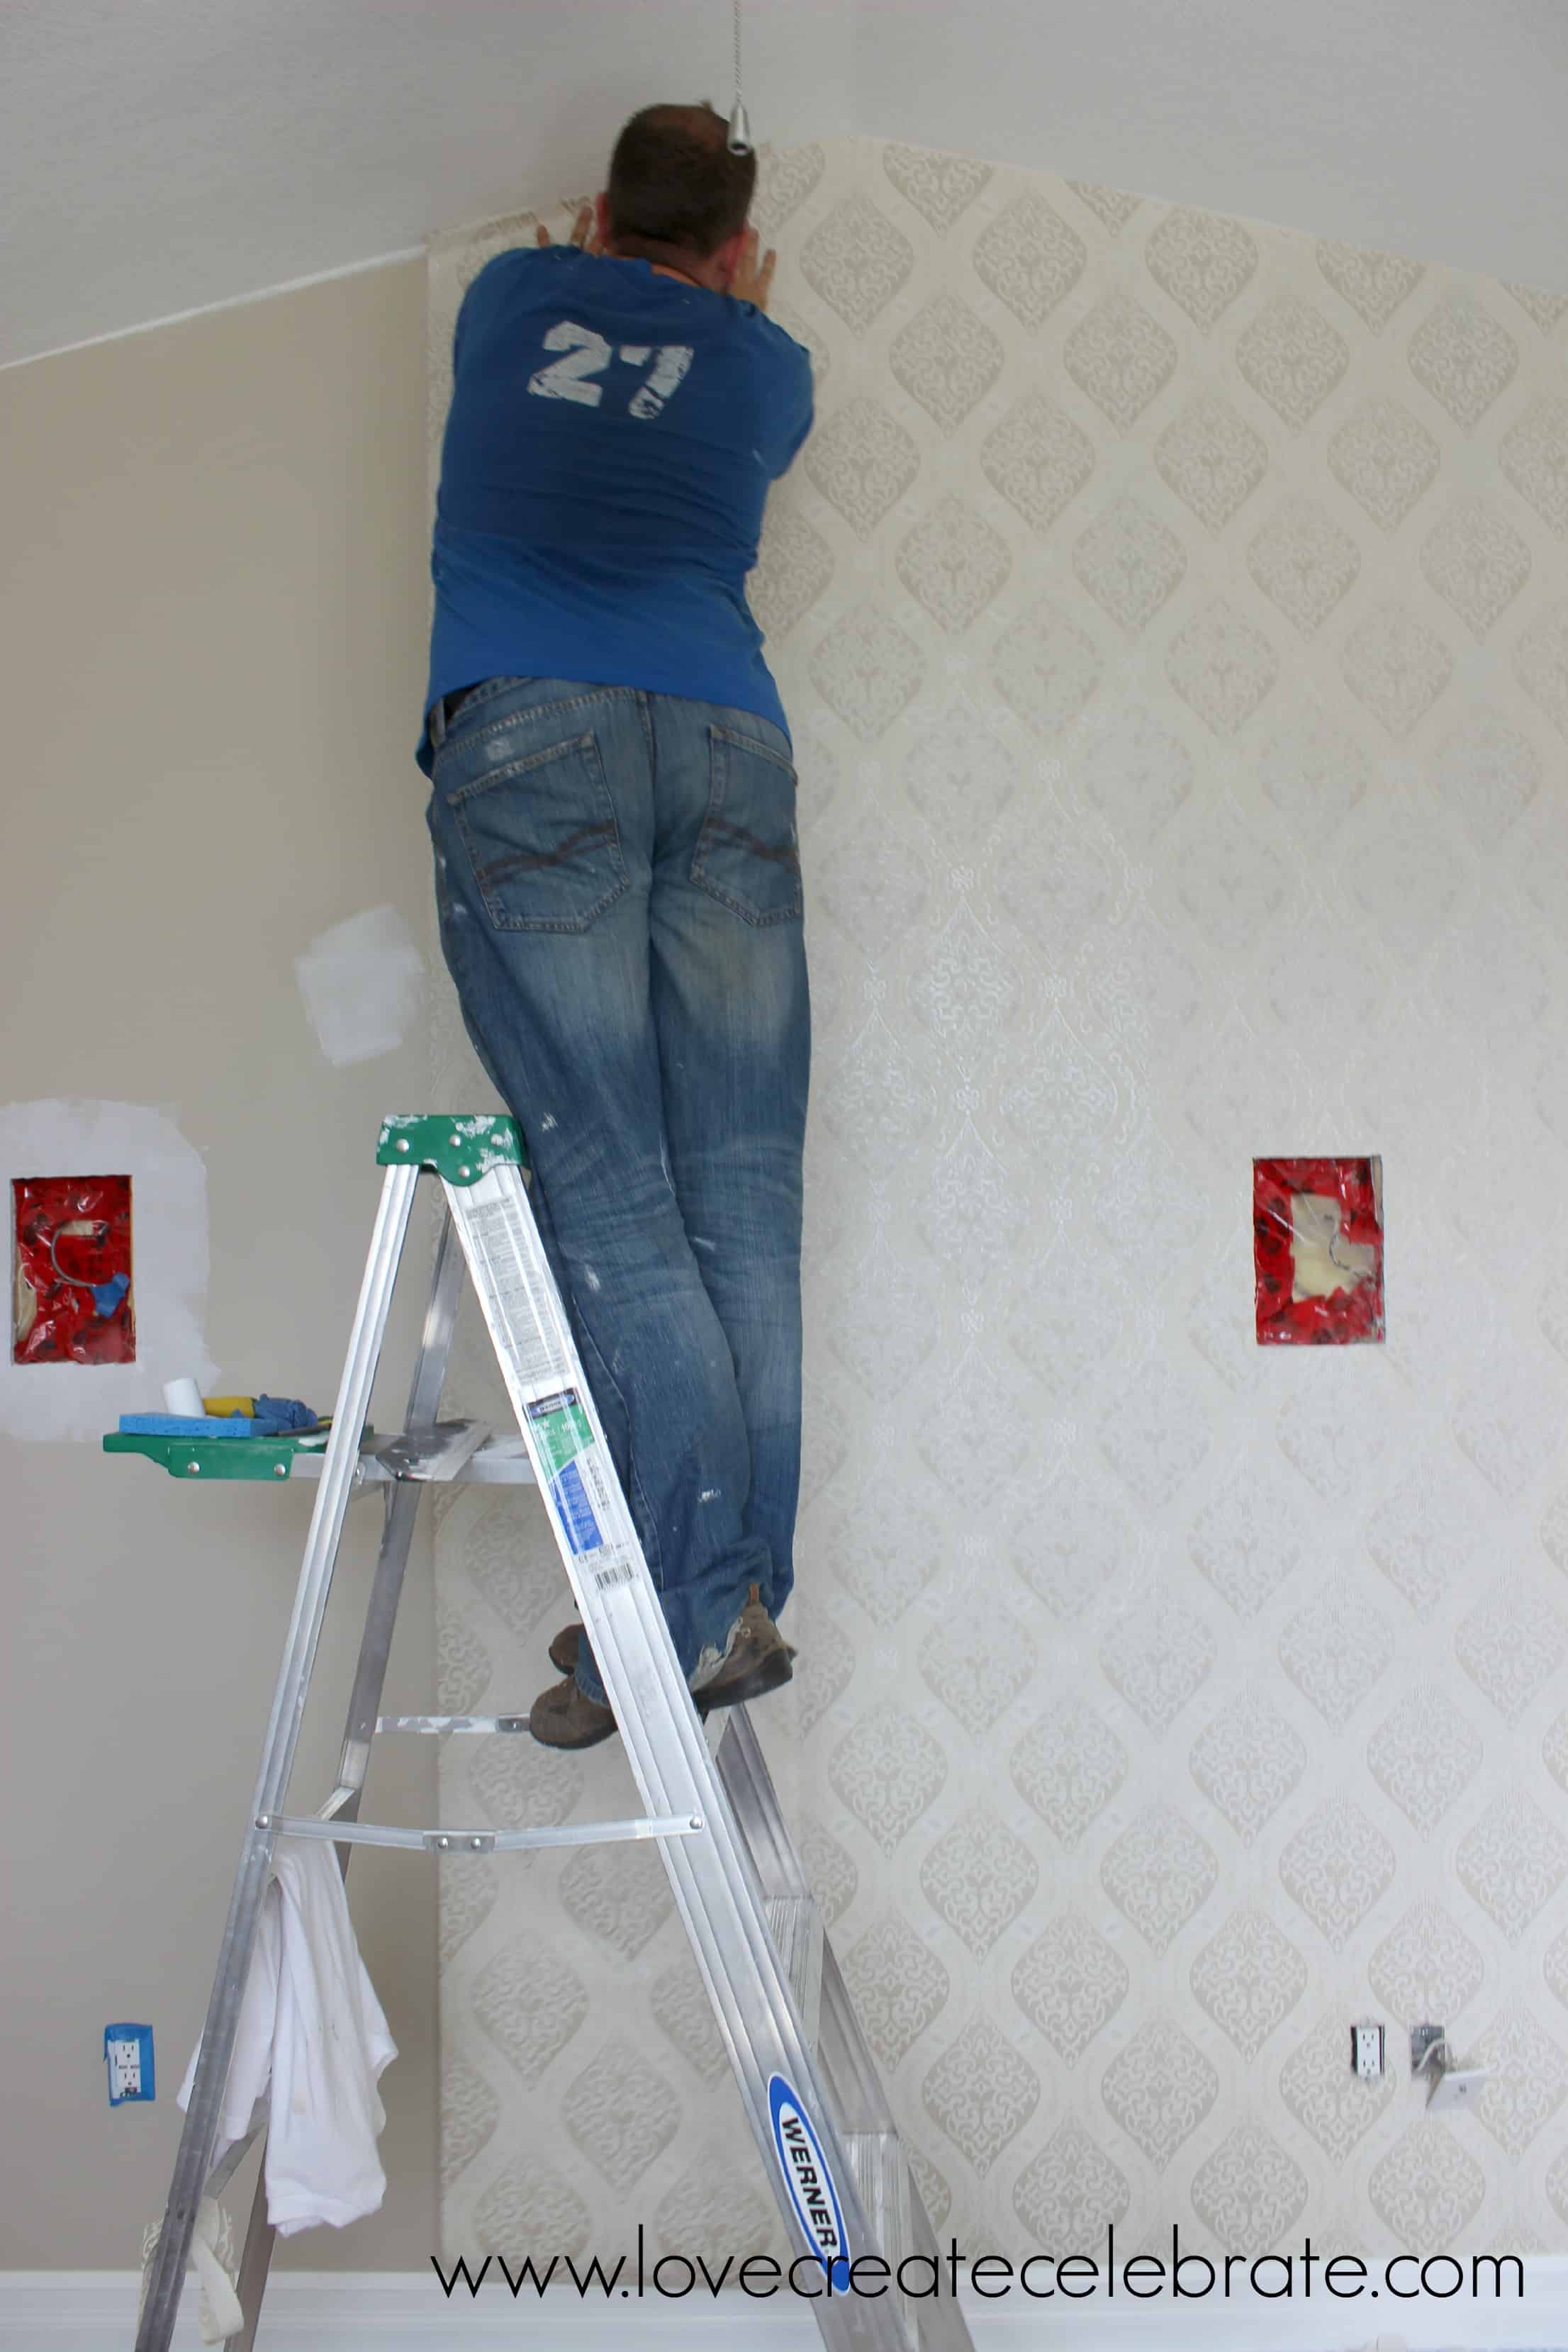
Phew! Now that the first section is done… it’s smooth sailing! Just follow the same steps, matching the pattern edges of the wallpaper panels, smoothing out the paper, and cutting off the top and bottom.
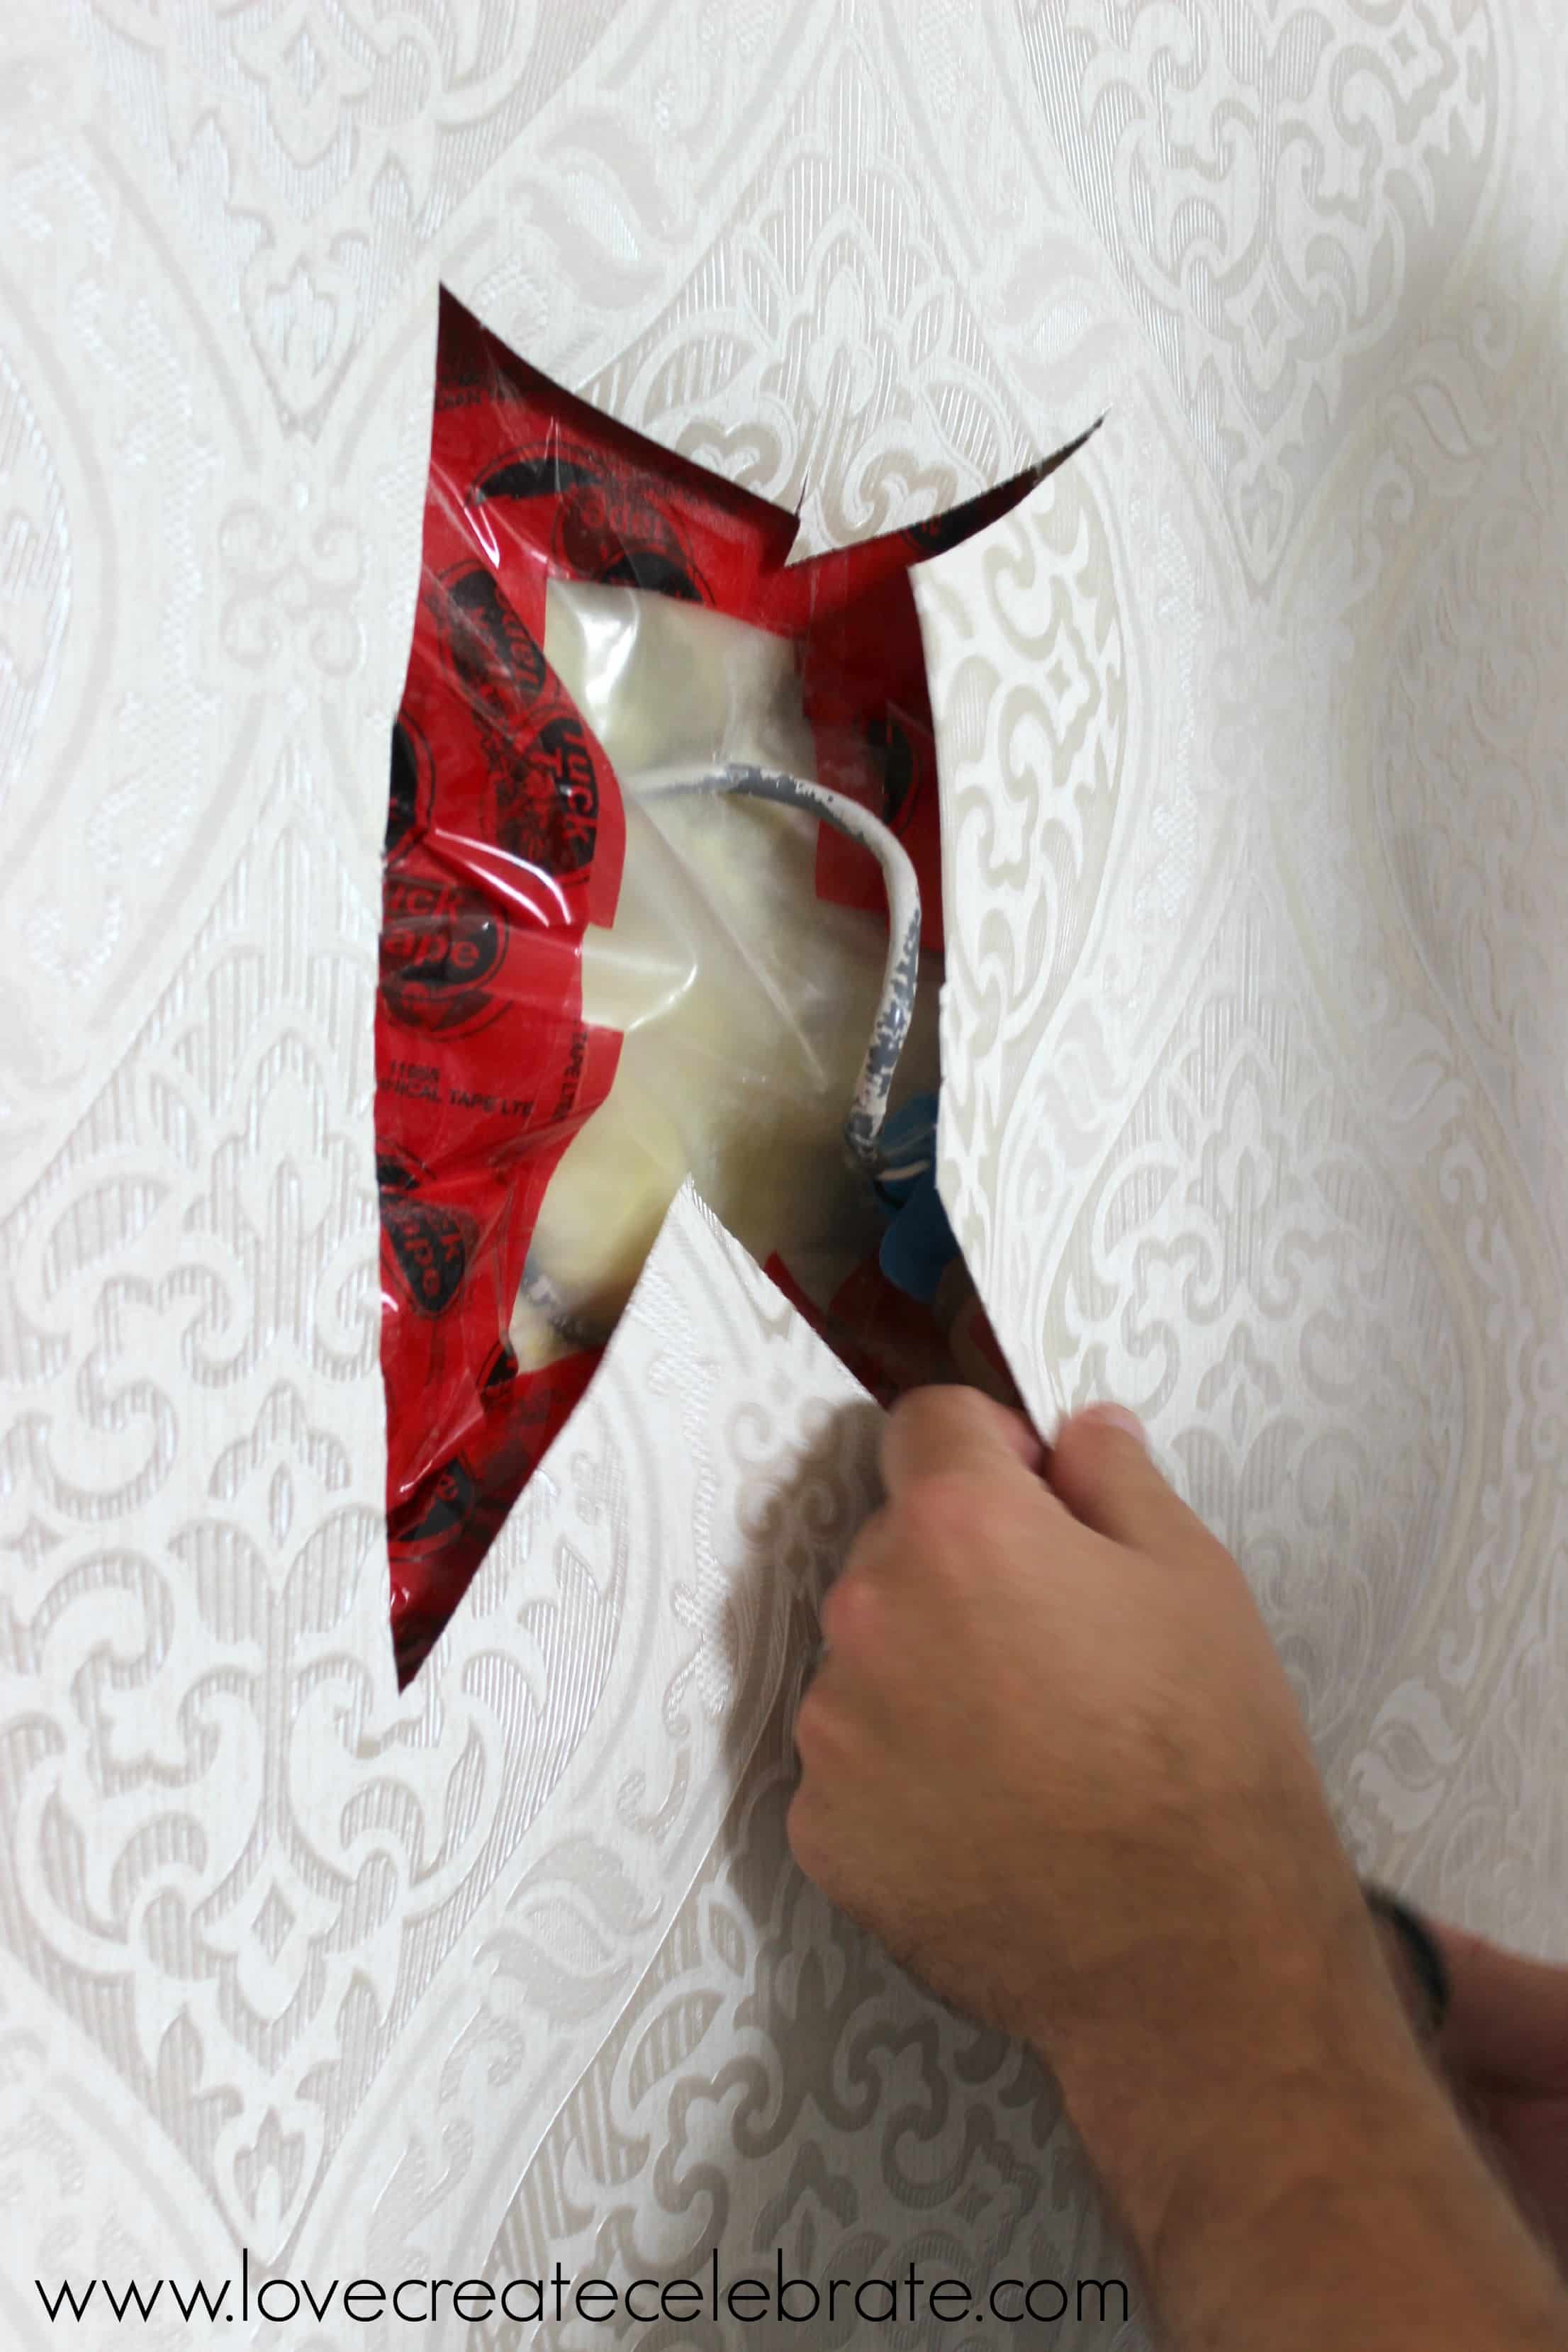
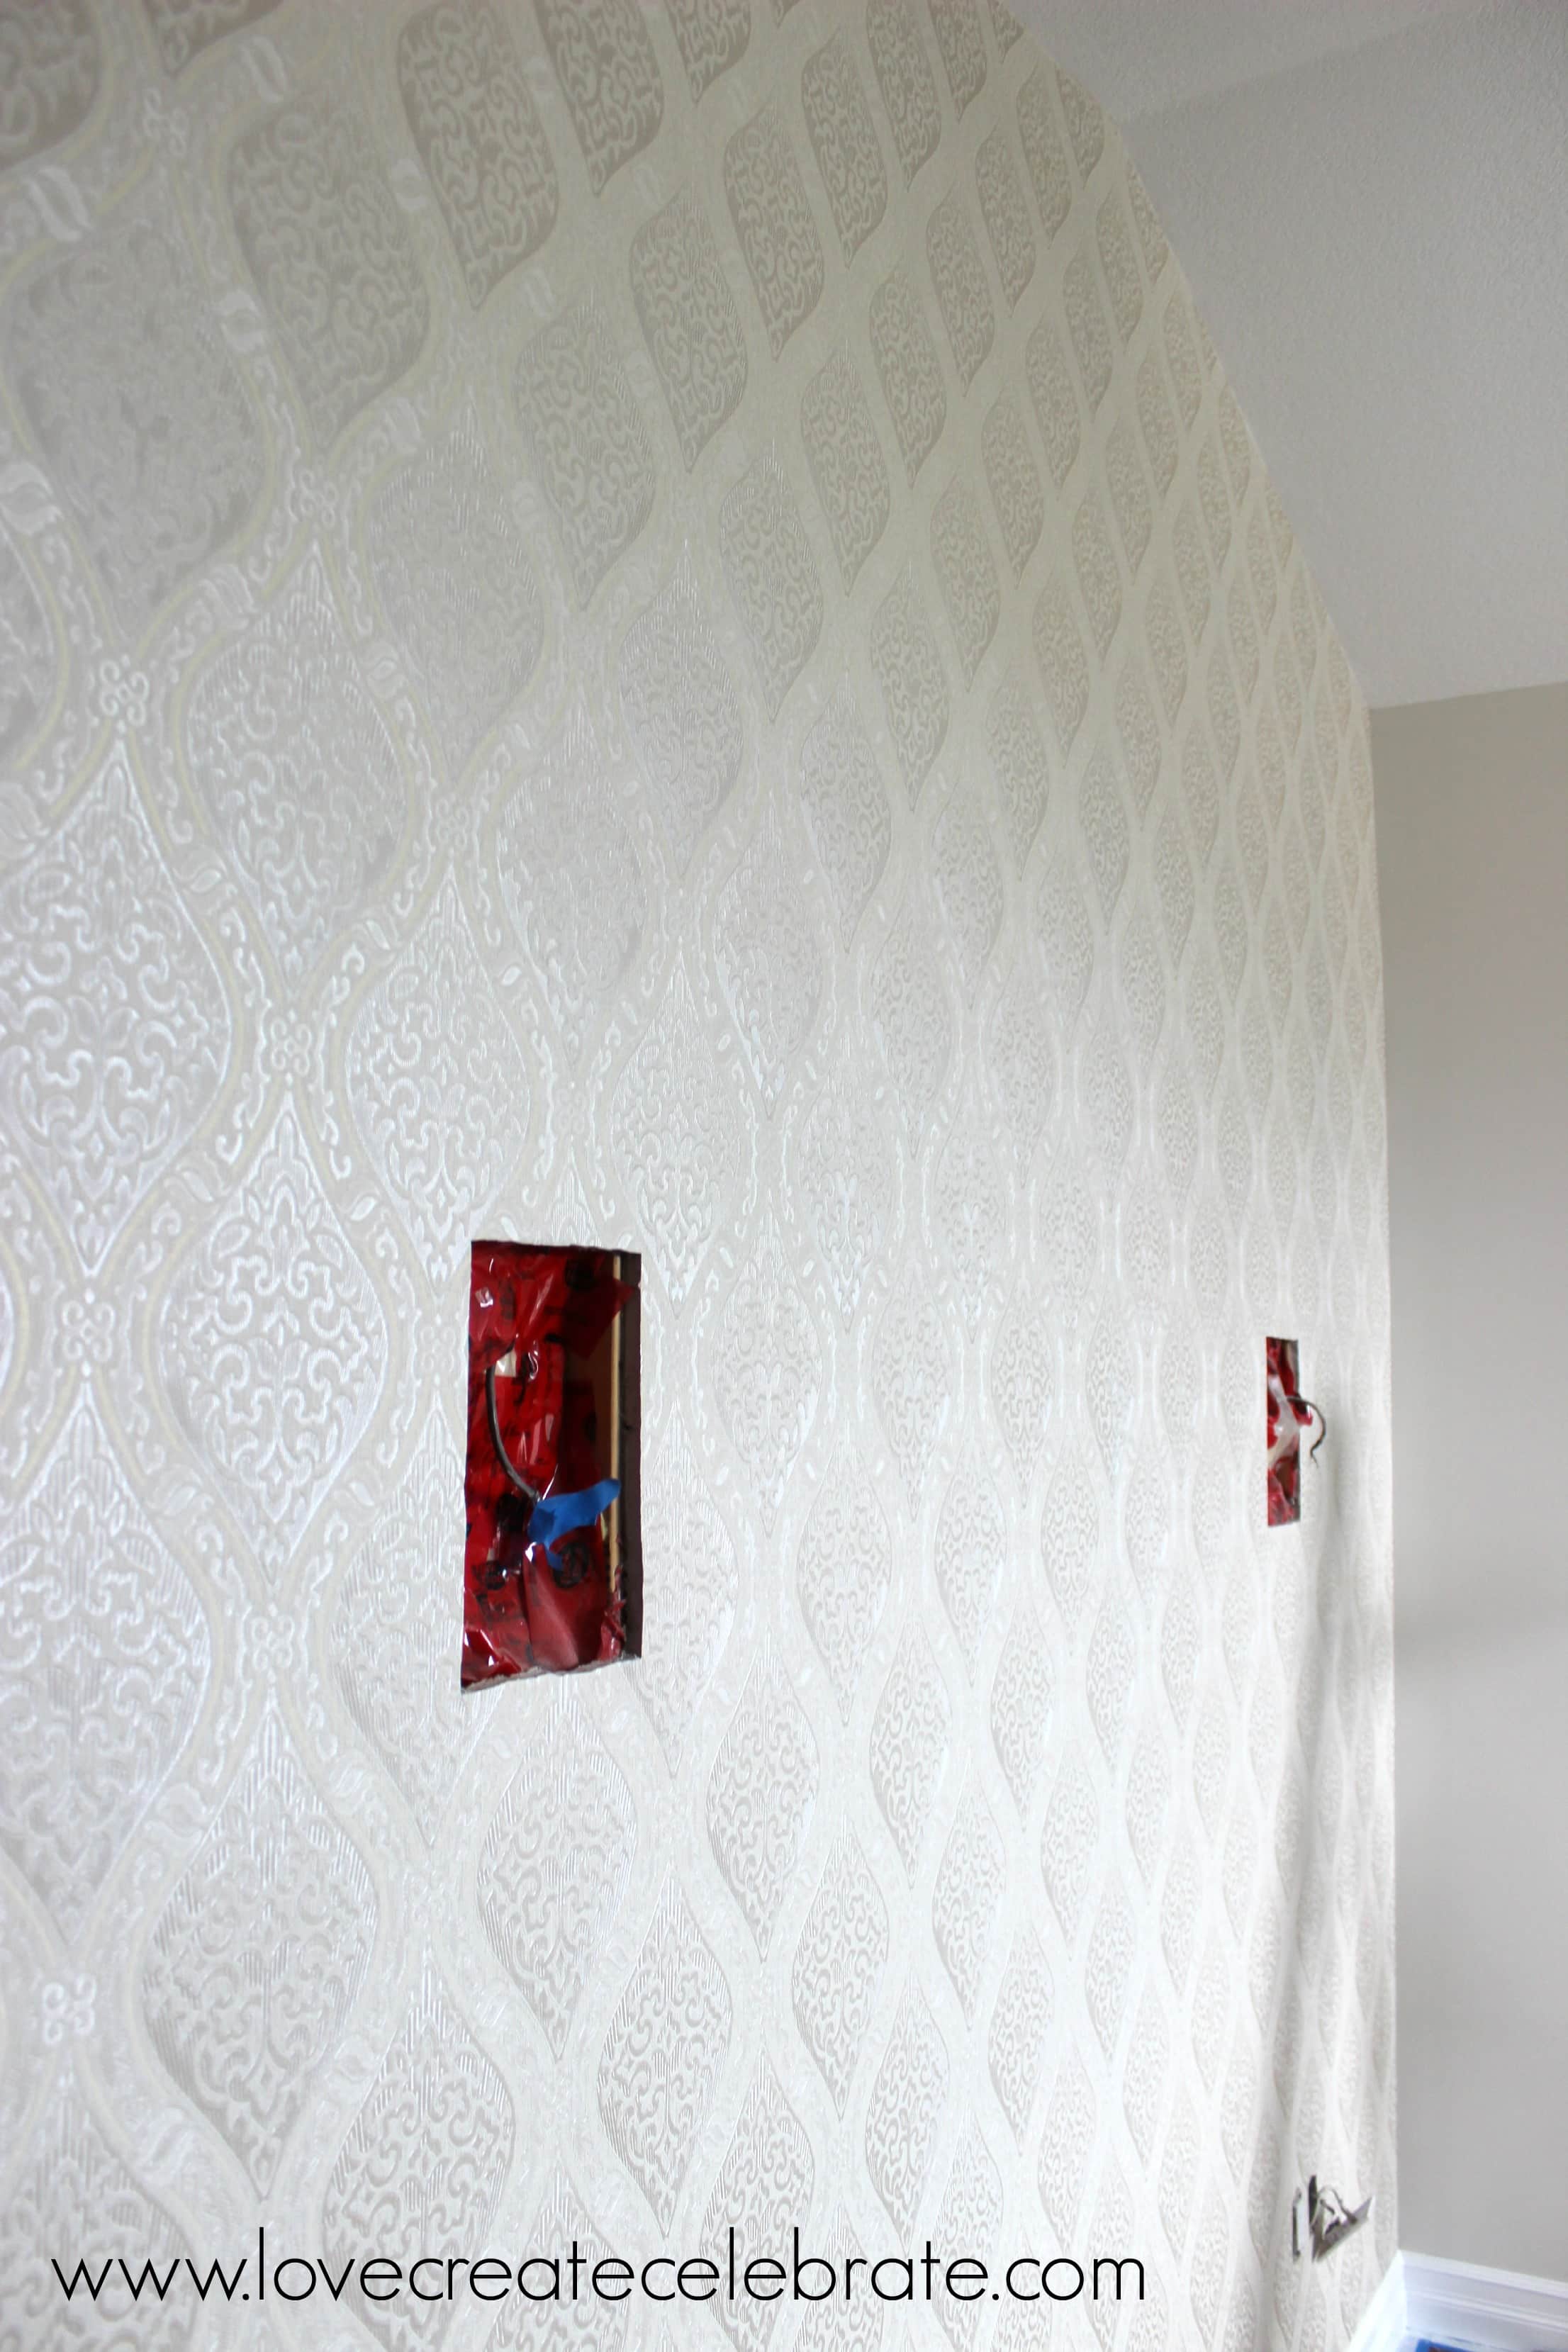
Well… there could be one or two other hiccups along the way if you happen to have any electrical outlets on your feature wall (or speakers!) like we do! Simply apply the paste and wallpaper the way you usually would. Then find the hole for your outlet and cut a small straight incision right into the centre. From that centre cut, make four diagonal cuts – one into each corner of the outlet. You should end up with four bendable pieces that are easy to cut off. Your lines don’t have to be 100% perfect because the edges will be covered up by the outlets anyway :)
Between each panel [below] you want to make sure that you use your roller and sponge to make sure the edges are perfect, and to soak up any excess paste that might of seeped out while you were smoothing out the paper.

That’s it! Such a HUGE transformation in such a short amount of time!! This Graham & Brown wallpaper really means you don’t have to soak the paper like you did in the old days. Just paste the wall and stick!

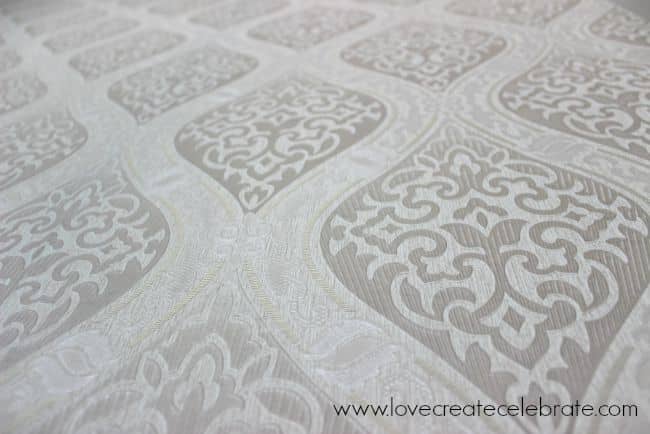
There were soooo many gorgeous options to chose from when it came to the wallpaper, but I LOVE the texture, and the shine that this Labyrinth Cream/Gold pattern has.
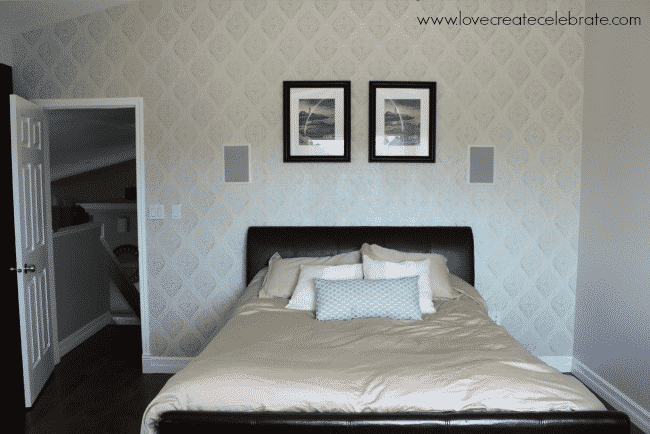
Just look at that difference!!!
Below, I did my best to take a picture of the seam in between the wallpaper panels, but now I can’t even see it anymore! The patterns fit like a glove :)

For more inspirational wallpaper ideas, visit Graham & Brown :)
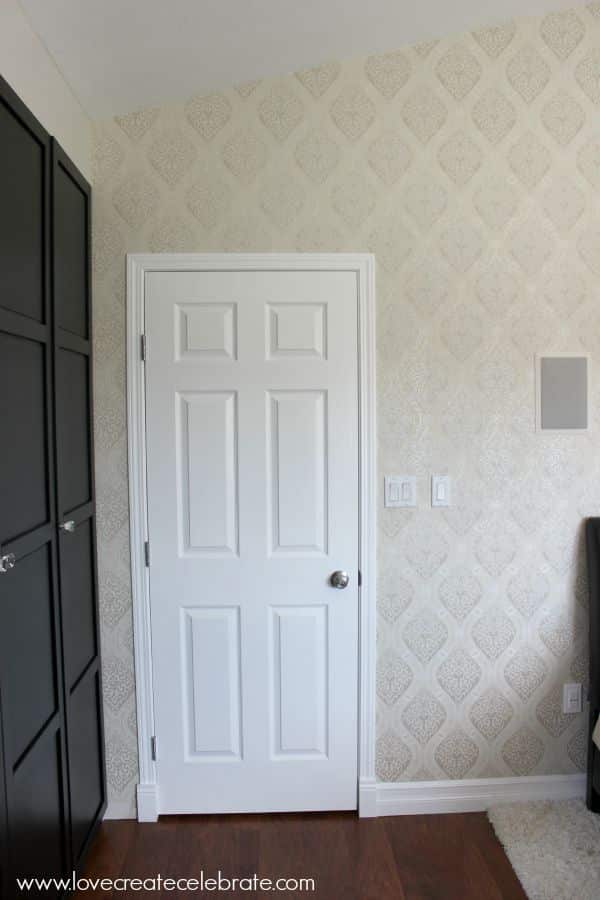
You can see from the photos, and the empty photo frames, that our bedroom isn’t exactly finished yet. Read all about our Master Bedroom Plans here.
And read about our progress here!
{xoxo}
Amanda @ Dwelling in Happiness
Friday 4th of September 2015
Lindi, you did such a great job, it looks amazing!! I love the end result, and that wallpaper is so pretty!! I'm featuring it on Sunday at The Creative Corner! :)
Lindivs
Friday 4th of September 2015
Thanks so much for your kind words Amanda!! I'm so thrilled!! Can't wait to see the feature :)
Trish @ Candle Junkies
Thursday 3rd of September 2015
That's some great looking wallpaper! Thanks for sharing this on Merry Monday, glad I found it :)
Lindivs
Friday 4th of September 2015
Thank you for stopping by! Always happy to share my ideas at your party :)
Christine | Where The Smiles Have Been
Tuesday 25th of August 2015
That wallpaper is just lovely! It looks so chic and high-end, and what a transformation of the space. Great tutorial for how to install it too....you make it look so easy! Thanks so much for sharing this with us at Merry Monday! :)
Cat @ pocketful of Posies
Sunday 23rd of August 2015
Lindi,
Your master bedroom wallpaper looks great! I'm so impressed you got all that done in 3 hours! thank you for sharing at Dream. Create. Inspire. Link! I hope we'll see you there again next week!
Cat
Lindivs
Sunday 23rd of August 2015
I know!! Seems so unreal, but it honestly was the easiest process! And I promise neither my husband or I had wallpapered before! Lol. Thanks for stopping by!
Alyssa
Saturday 22nd of August 2015
Great work guys! It looks amazing!!
Lindivs
Saturday 22nd of August 2015
Thanks :) We're super happy about the progress!