
Hey everyone, I’m back! And I’m super excited to share what I’ve put together for the #12MonthsofDIY challenge! If you’re not familiar with it already, the #12MonthsofDIY challenge is 12 Canadian bloggers all using the same item or theme to create something completely unique every month. It’s a great challenge for me to be a part of because not only do I get to connect with new bloggers and see what they transform, but I am compelled to work out of my comfort zone and with items I usually wouldn’t.
For example, last month the challenge was to use wood and paint together. I created an Industrial Side Table and it turned out to be one of FAV projects! Be sure to check it out.
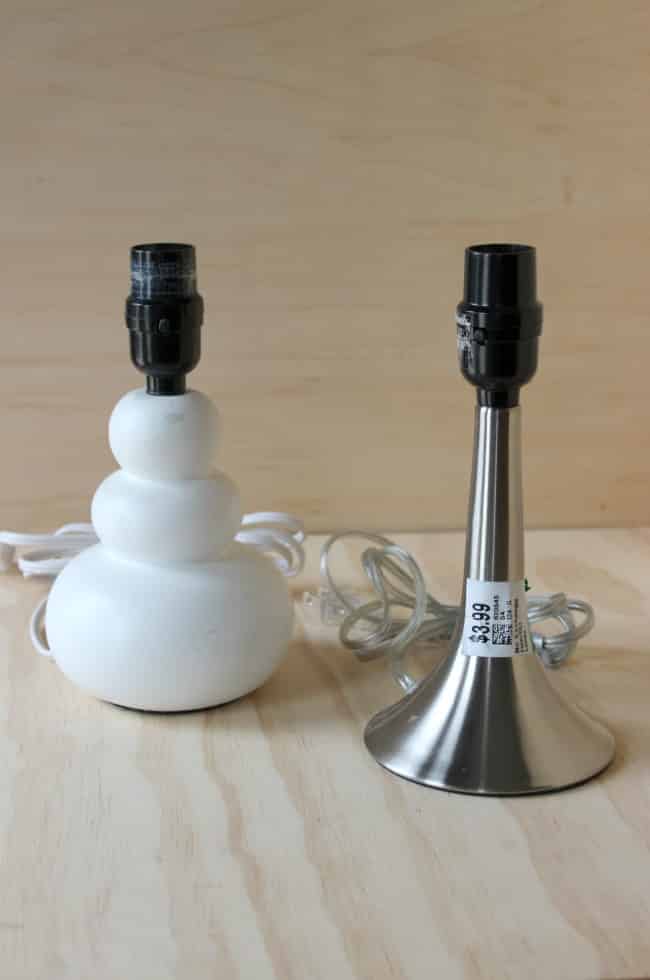
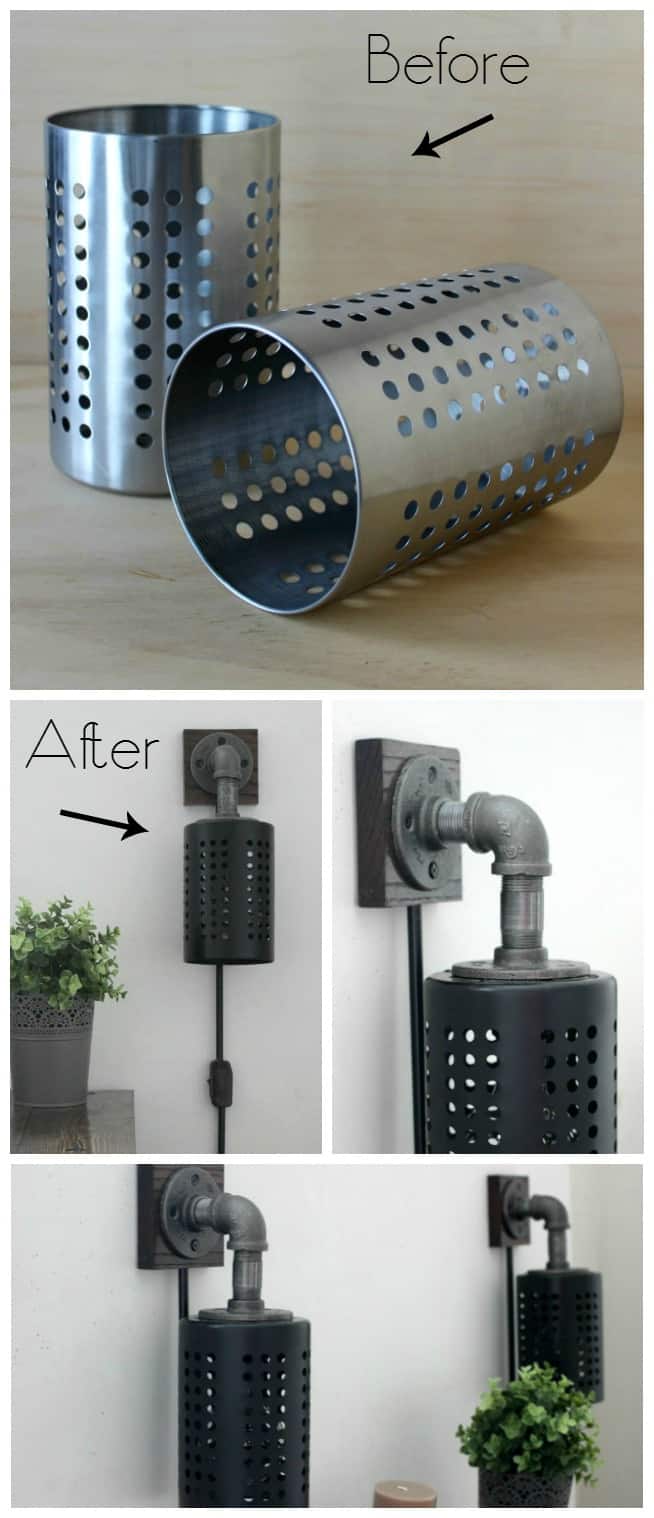
This theme for this month’s challenge was to use a thrifted item and revamp it. April was the perfect month for this challenge, since it was Earth Day on April 22 and reducing waste and going green is already on our minds. I love that Value Village’s #RethinkReuse campaign focuses on this! Second hand shopping is a perfect way to go green and the shelves in my local store were full of potential. I had so much fun finding items for this challenge. As soon as I saw old lamps in the aisles, I knew what I was going to do. I thought the guts from these old lamps would be perfect for new DIY industrial sconces!
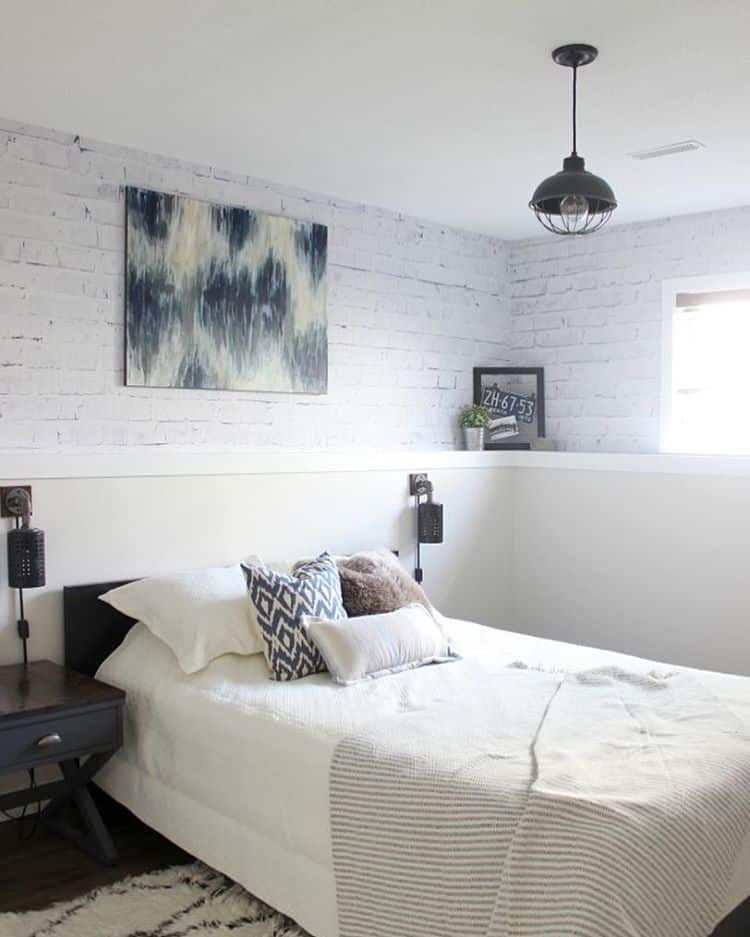
Because my life has been taken over these past few weeks by the One Room Challenge, where I’m transforming my guest bedroom into a new industrial-styled space, I decided to make DIY industrial sconces with old lamps from Value Village for the wall for our new bedroom!
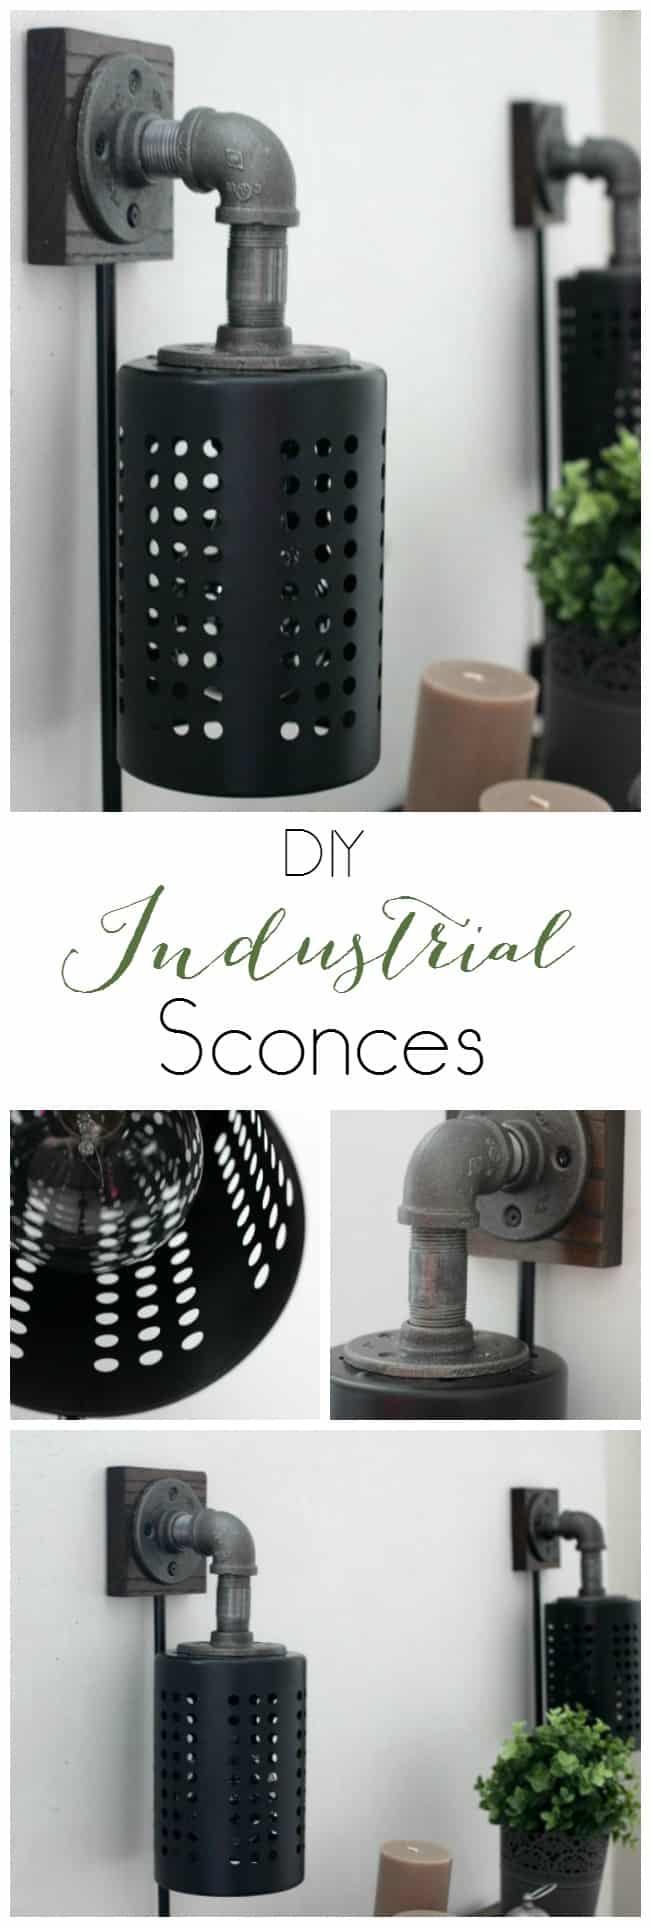
Industrial sconces are super trendy right now, but I think they never go out of style. At first glance, they appear simple and basic but bring just a touch of modern finishing to a functional piece of lighting. Even though I’ve chosen the make them for our guest bedroom, lighting from industrial sconces is perfect for almost any room, from the basement to the bathrooms – and even the garage! They can be found at most home stores, but they can get pricey.
I’ve always loved the look of industrial sconces and their lighting can really make a room come together. I haven’t found much information out there about how to make your own sconce, so after following this post I hope that learning how to make your own sconce is as simple for you as it was for me!
Materials and Tools you will need:
Materials (for two industrial sconces):
- Two thrifted lamps
- Two Ikea canisters
- Two 4″ x 4″ x 3/4″ thick piece of oak (this is what we had – other types of wood can be used)
- Four black steel flanges
- Two 1.5″ black steel pipes
- Two 2.5″ black steel pipes
- Two black steel elbows
(All steel is 3/4″ diameter) - Matte black spray paint
- Varnish
- Clear matte sealer
- Screws
- Lamp Light switch (optional)
- 8′ of 3/8″ diameter tubing (optional)
- Two plug ends for cords
- Epoxy
Tools:
- Drill
- Saw
- Step bit for the drill
- Drill bits
- Dremel
- Router
- Speed Square (measuring)
- Metal saw or grinder to cut tubing (optional)
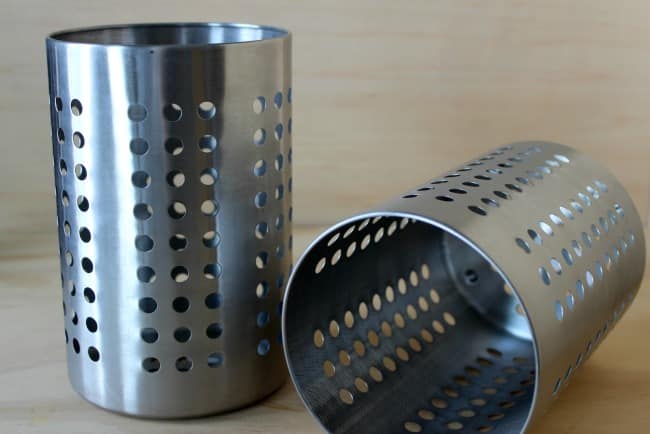
Here are the Ikea Utensil Holders that we got for $7 each.
How to Make Your Own Industrial Sconce:
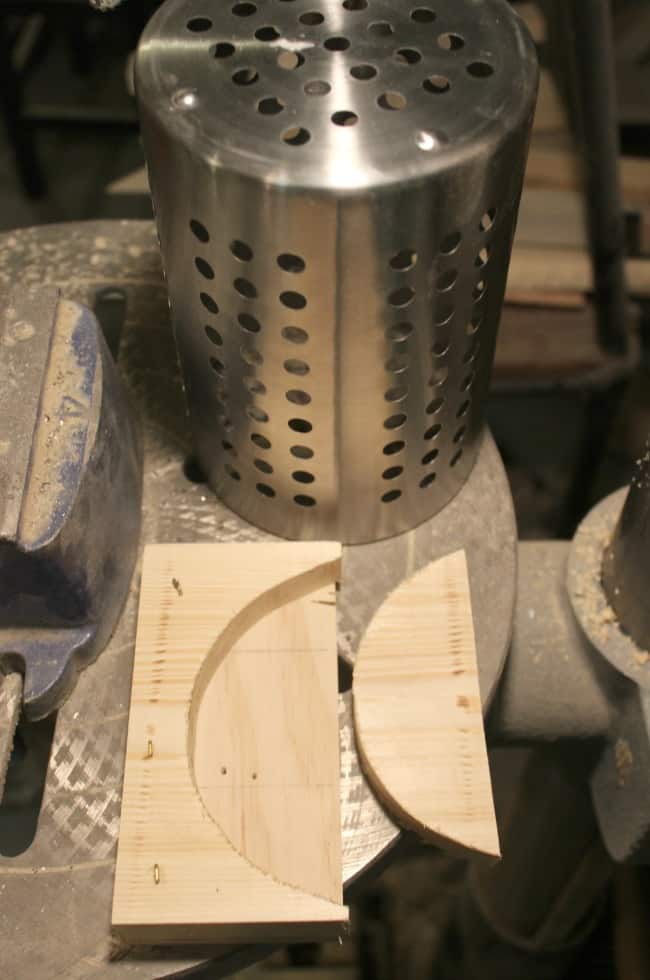
I started by making this quick holder for the canisters. I wanted to make sure that the canisters wouldn’t shift around while we were drilling in to the top of them. You could also cut a piece of wood to sit across the diameter. We made the ones shown, by tracing the inner and outer circles of the canister onto scrap wood.
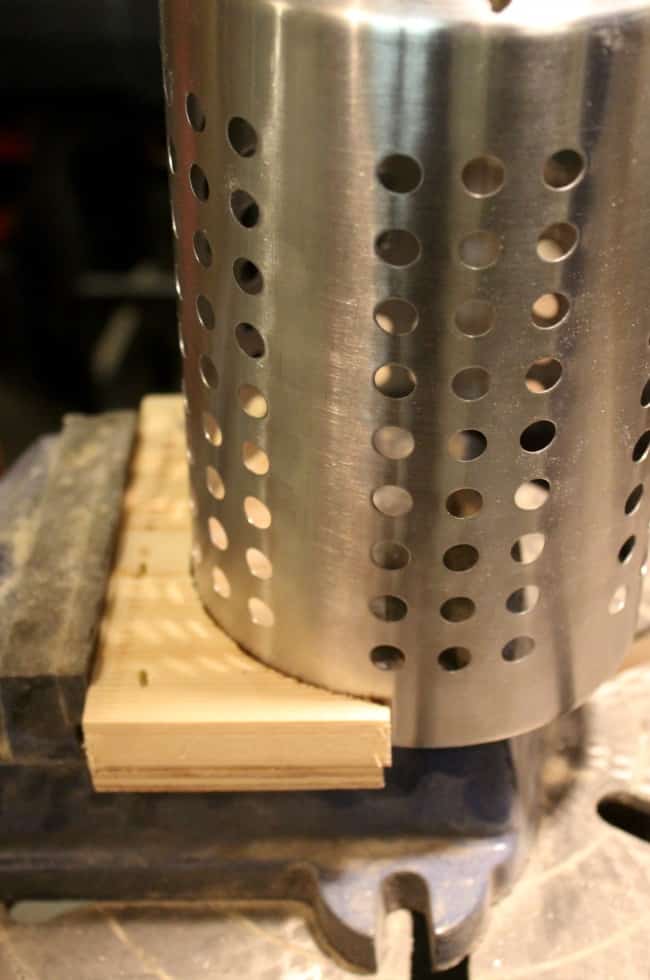

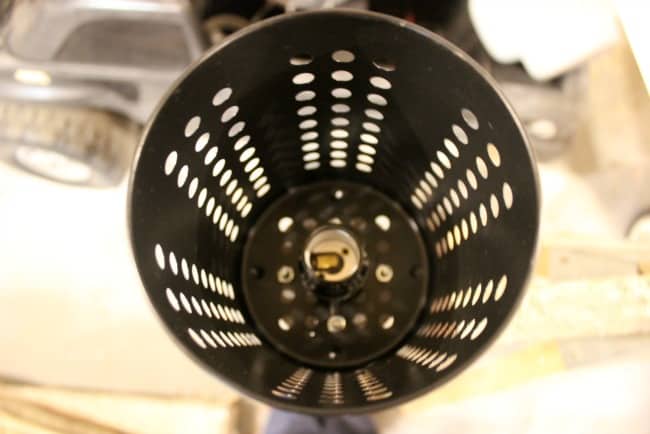
We had to use a step bit to cut the metal utensil holders.
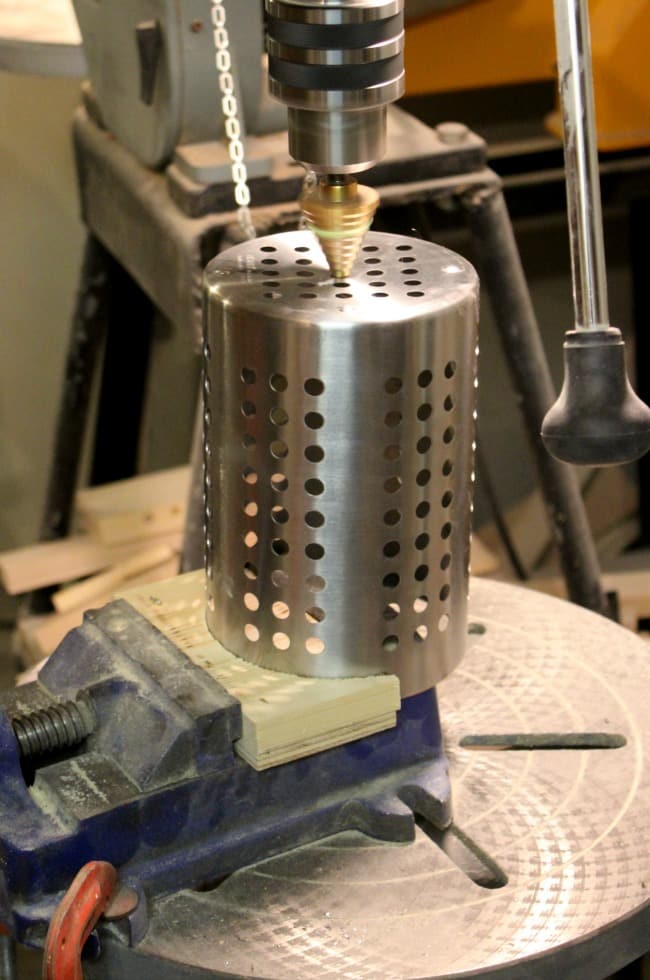
We drilled directly into the centre of the container, about seven levels down to the same diameter of the socket – so that they socket from the lamps would fit perfectly inside. Do this step, and all the following steps twice (if you are making two industrial sconces!).

Next, we used a dremel to clean up the edges a bit. It won’t look too pretty, but it’ll be completely covered up by the black steel flange of the industrial sconce in a minute, so it won’t matter :)
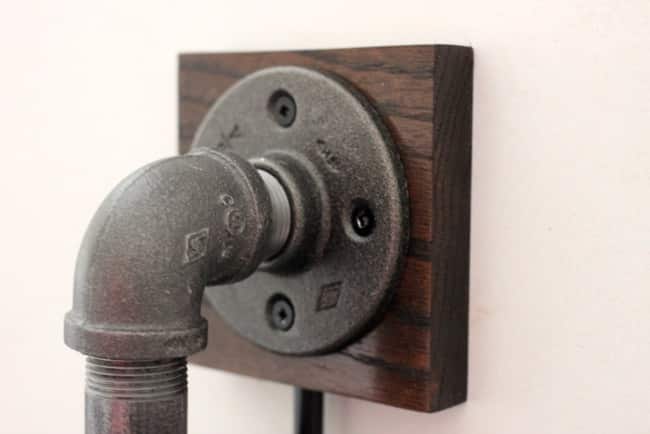
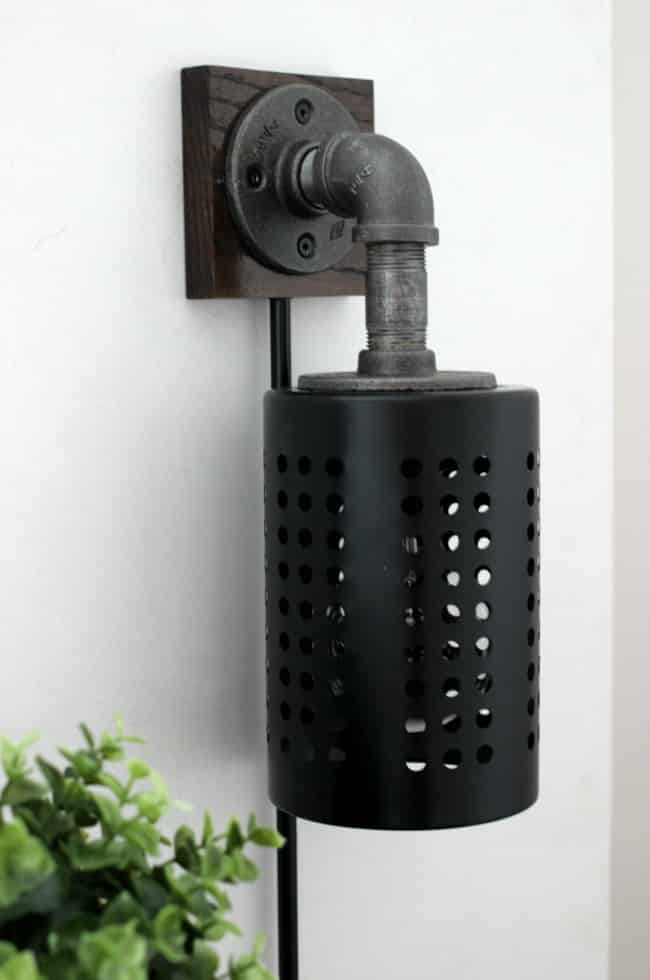
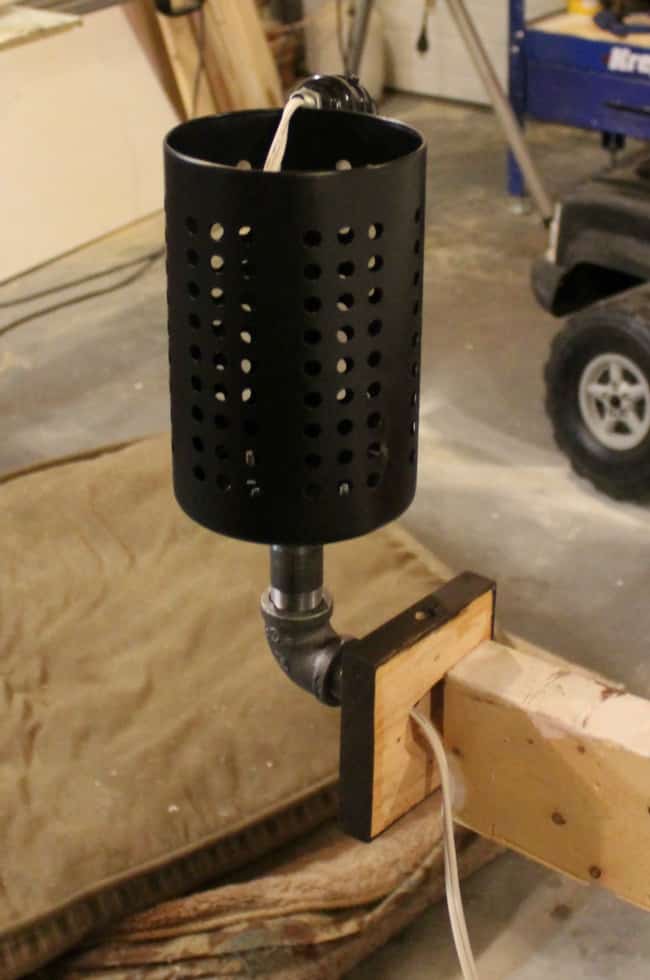
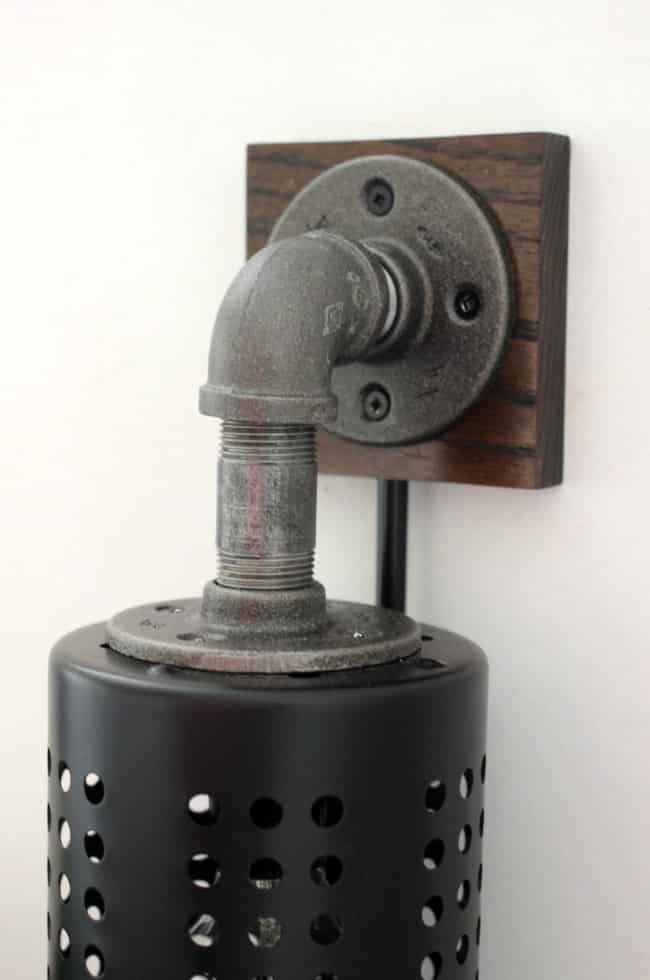
I don’t have a picture of the black steel assembly, so I’ll just show you this finished DIY wall industrial sconce above. It should be attached: flange – 1.5″ pipe – elbow – 2.5″ pipe – flange.
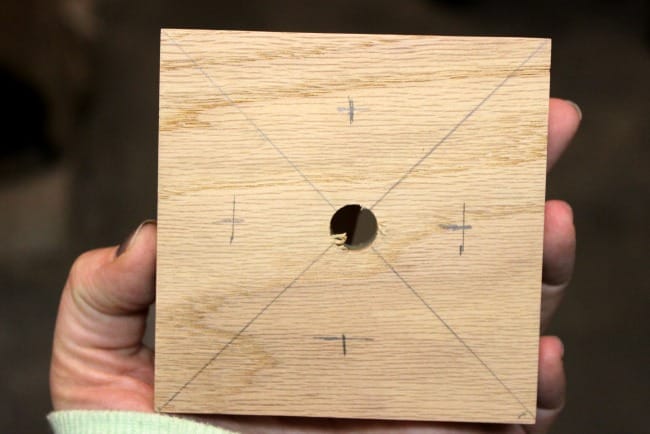
Next, grab your wood. We used oak because we had some scrap pieces cut to 4″ squares (3/4″ thick), but you can use any wood. Find your centre and drill into it. Wide enough for cords to fit through. Then, you want mark four spots for your screws that will hold the flange of your industrial sconce in place. I measured the distance of the screw holes from the centre of the flange, and measured out using my speed square (or measuring tape).
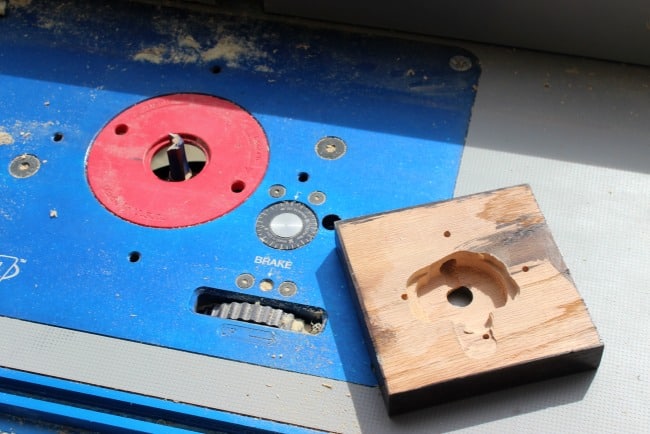
Then, using your router, router out a space in the back, big enough for your electric connectors to sit in. Stain your piece any colour you desire.
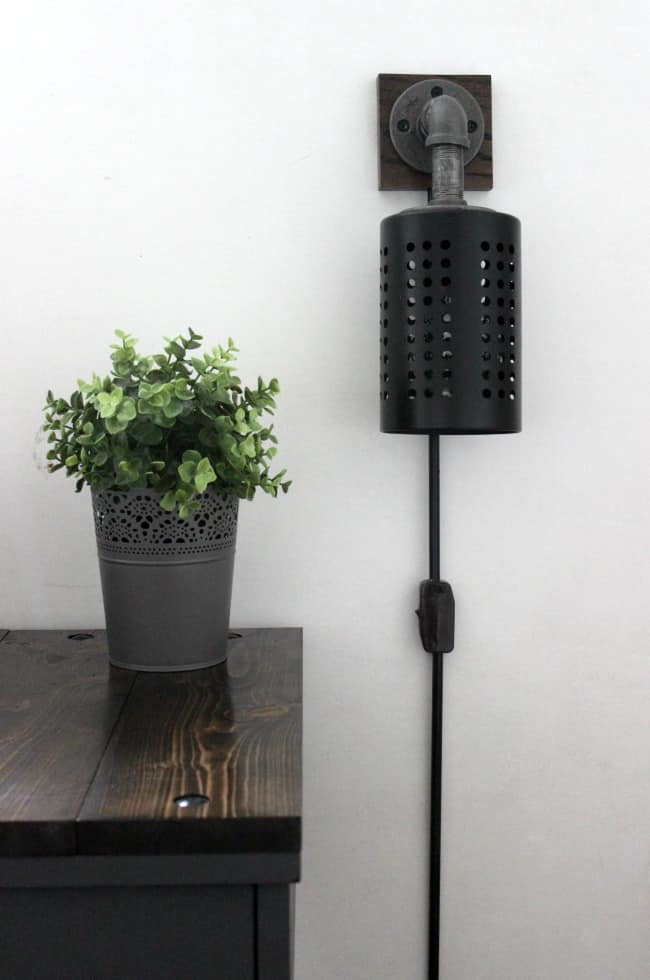
You can let the cord from your lamp guts hang down the wall and it will look beautiful.
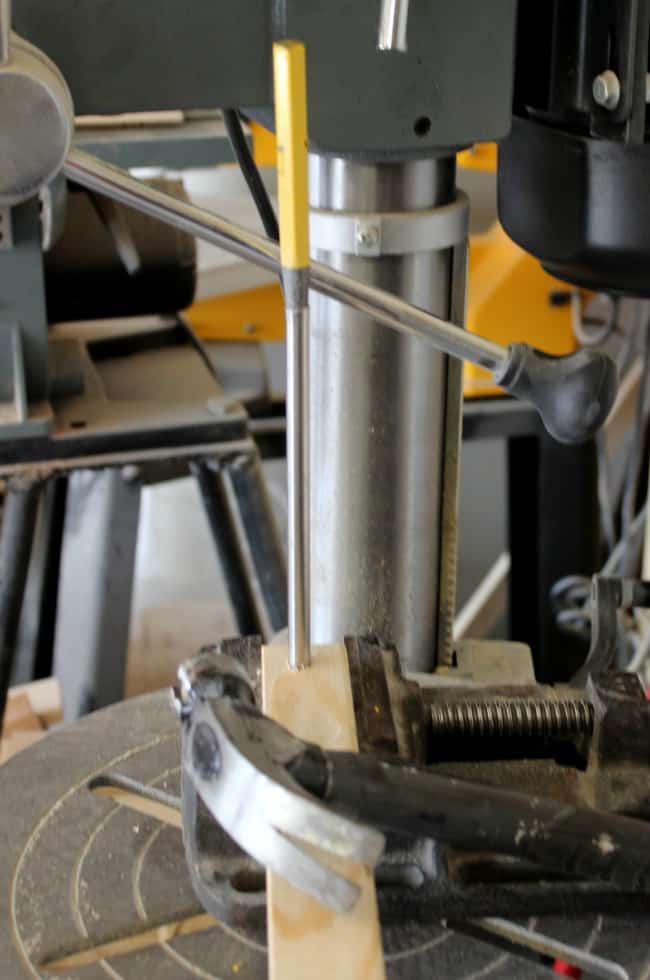
Because we are perfectionists, we used 3/8″ diameter industrial piping to hide the cord as it came down the wall, and to make a nice straight line. We just hammered into the top of the pipe to flare the edges and then used the dremel to make sure that the holes on our switch would be wide enough (below). I would never have done these steps on my own! I would’ve just let the cord hang down, and used the same plug from the thrifted lamps in the wall. But this was my husbands’ doing and I have to admit that it looks beautiful!
Next, glue the light socket in place. Note the Ikea holder is bolted to the steel flange.
If you want to spray paint your Ikea holder, don’t forget to do so before everything is glued in place! You can also wipe down the pipe of your industrial sconce with acetone (wearing gloves) and spray it with a clear sealer to protect it. Run your cords through and attach the Ikea holder, black steel, and wood together by screwing everything in place.
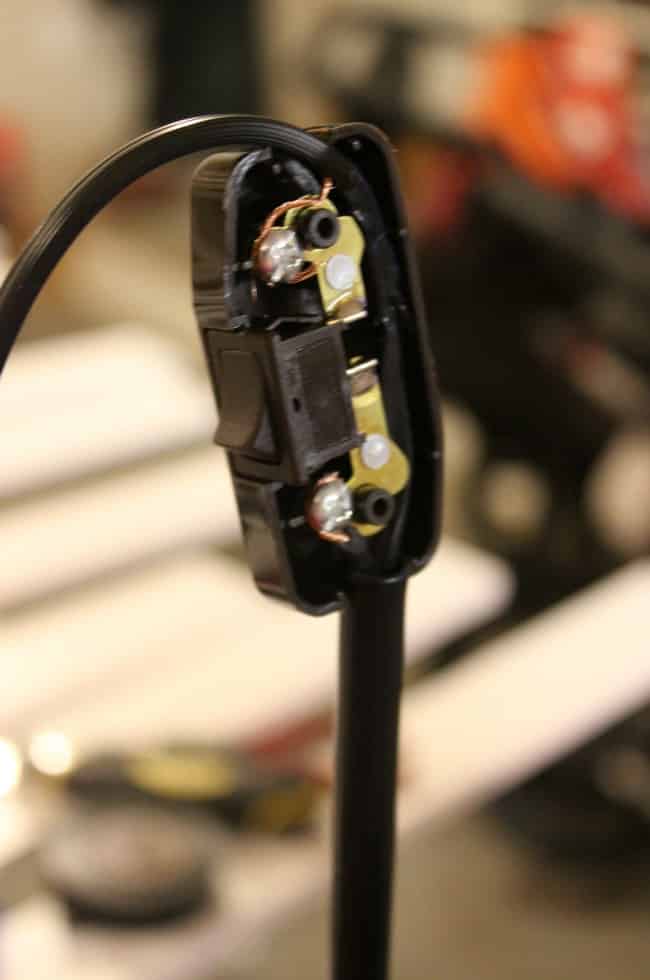
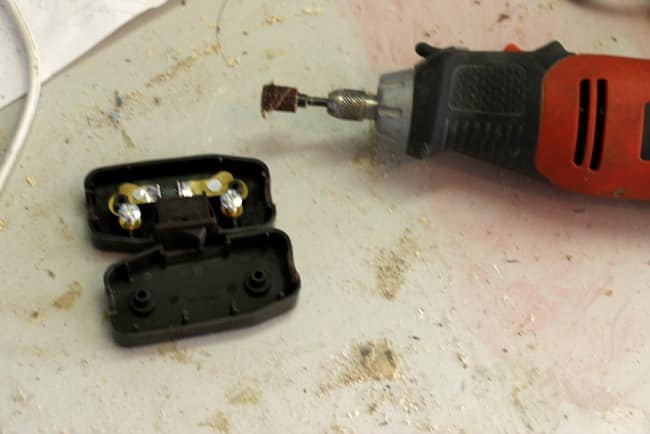
This is a close-up of the switch we added – this step is completely optional! If you need more details on this please just e-mail me directly at: [email protected].
Now you mount your industrial sconce on the wall and you’re done!
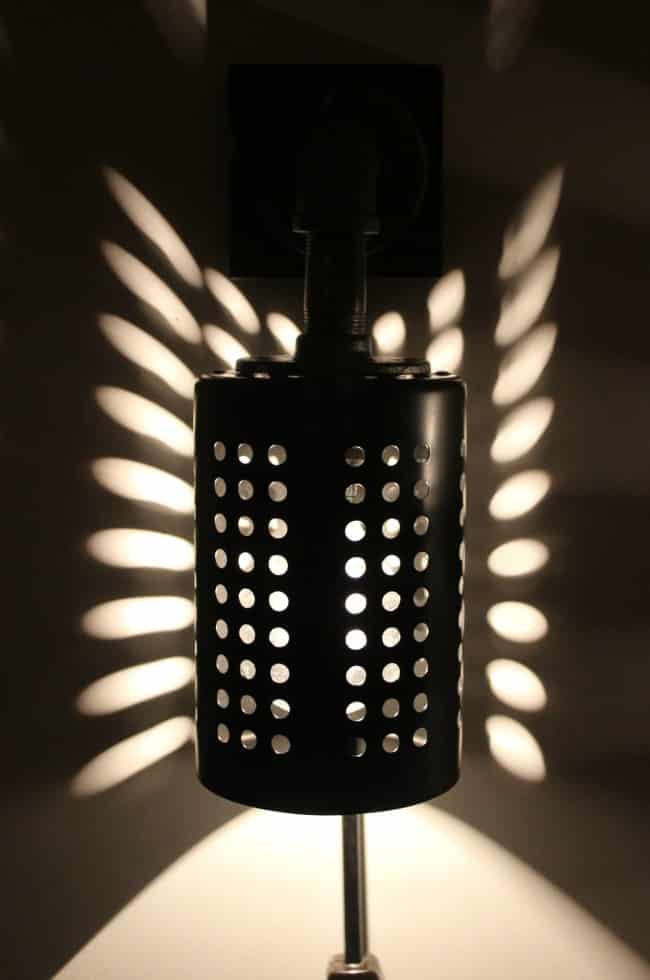
I think the industrial sconces look amazing in our Industrial Guest Bedroom! I love the light it gives off at night. It’s such a fun pattern on the wall!
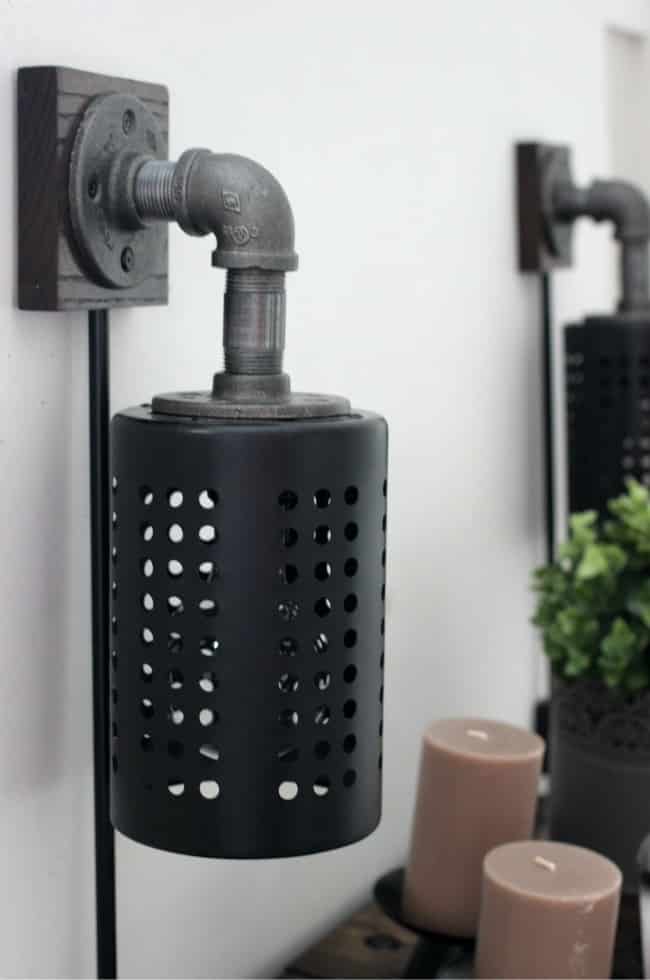

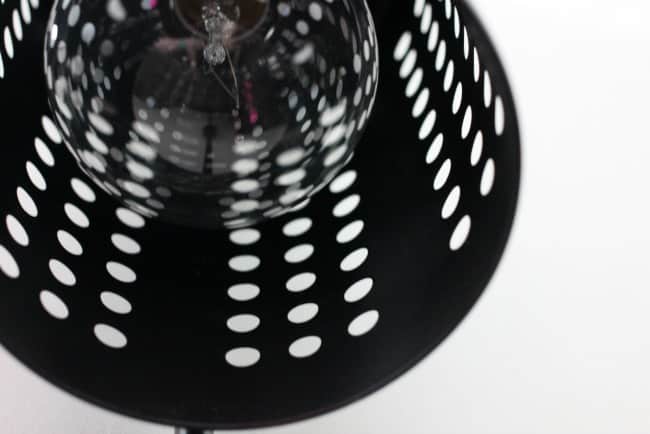
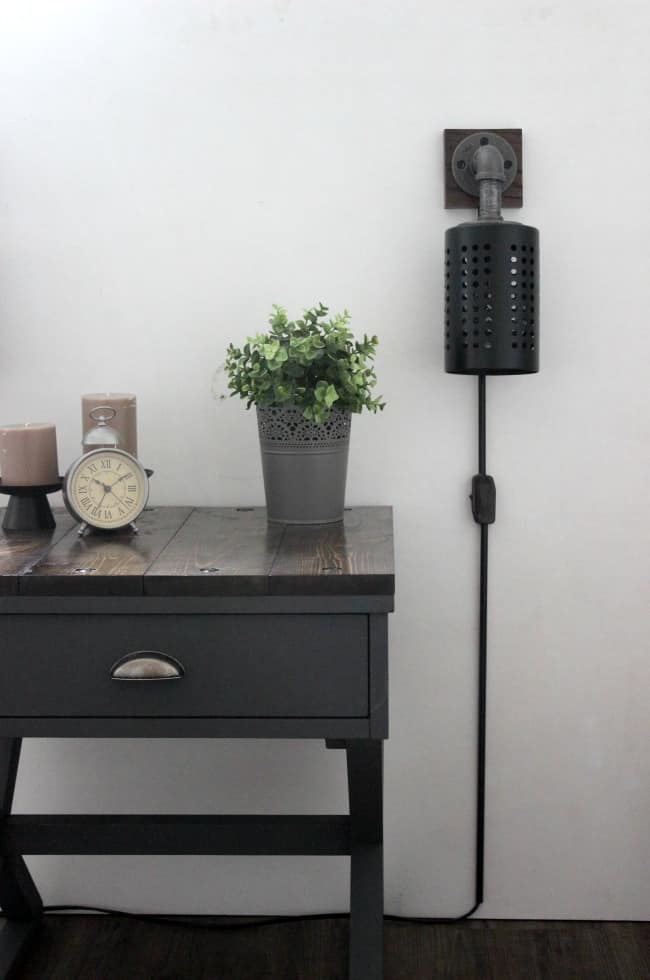
I love the light it gives off at night! Such a fun pattern on the wall!
What do you think?! Do you think you’ll make your own sconce? Or have you already?
I’d love to hear from you.
Now it’s time to see the rest of the DIY thrifted project ideas from my Canadian blogging friends.
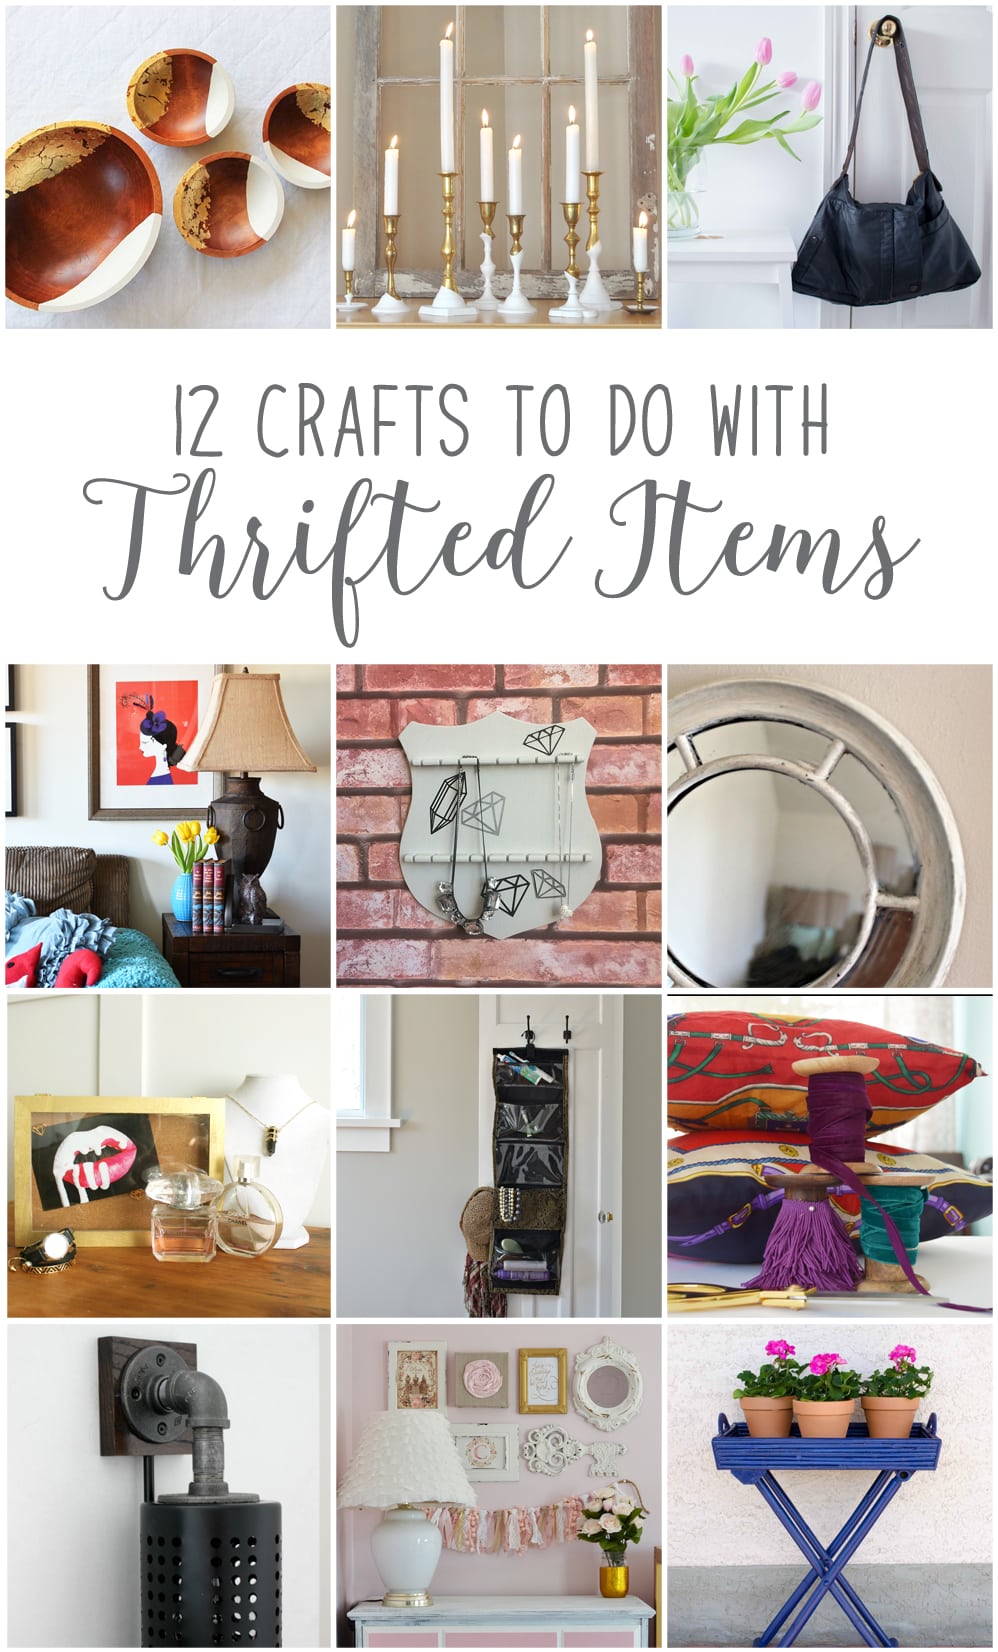
From the top left, they are:
Upcycling Wood Bowls from Fresh Crush
Paint Dipped Brass Candle Holders from Life is a Party
Upcycling a thrift store leather coat into a DIY handbag from Sustain My Craft Habit
Pottery Barn Inspired Burlap Lamp Shade & Owl Bookends from Woman in Real Life
Thrifted DIY Jewelry Holder from Brooklyn Berry Designs
Upcycled Thrifted Mirror from New House New Home
Gold Wooden Treasure Box from Mommyzoid
DIY Roll-N-Go Travel Bag from Vin’yet Etc.
Scarf Throw Pillows from PMQ for Two
DIY Industrial Pendant Light from Love Create Celebrate
A Thrifted Shabby Chic Gallery Wall and Lamp Makeover from The DIY Mommy
Thrift Store Patio Table Tray Makeover from Time With Thea
If you need more Industrial inspiration, check out all of the great DIYs in my Guest Bedroom!
If you love DIY Industrial ideas, don’t forget to read how you can make ANY table into an industrial table!
 *This post was sponsored by Value Village. As always, opinions are one hundred per cent my own. For more information, please read my disclosure policy.*

17 Ikea Hacks That Caught Our Attention This Year - james and catrin
Monday 9th of December 2019
[…] DIY Industrial Wall Sconce Lighting […]
20 Industrial Style DIY Ideas For Home – Azan DIY Ideas and Plans.
Thursday 14th of November 2019
[…] Source:lovecreatecelebrate […]
How To Make Your Own DIY Industrial Light Fixtures Right Now – Home Inspiration Ideas
Monday 10th of June 2019
[…] is a DIY industrial sconce with a rather chic and dashing design. It’s something that we found on lovecreatecelebrate. You can make two matching sconces to frame a door, a mirror or simply to create a symmetrical room […]
How To Make Your Own DIY Industrial Light Fixtures Right Now – Shawnee KS Homes and Lifestyle
Monday 10th of June 2019
[…] is a DIY industrial sconce with a rather chic and dashing design. It’s something that we found on lovecreatecelebrate. You can make two matching sconces to frame a door, a mirror or simply to create a symmetrical room […]
How To Make Your Own DIY Industrial Light Fixtures Right Now - Trend Gut
Monday 10th of June 2019
[…] industrial sconce with a fairly stylish and dashing design. It’s one thing that we discovered on lovecreatecelebrate. You could make two matching sconces to border a door, a mirror or just to create a symmetrical […]