Laundry room makeover on a budget! See the transformation from unorganized and outdated, to a beautiful organized, modern laundry room!
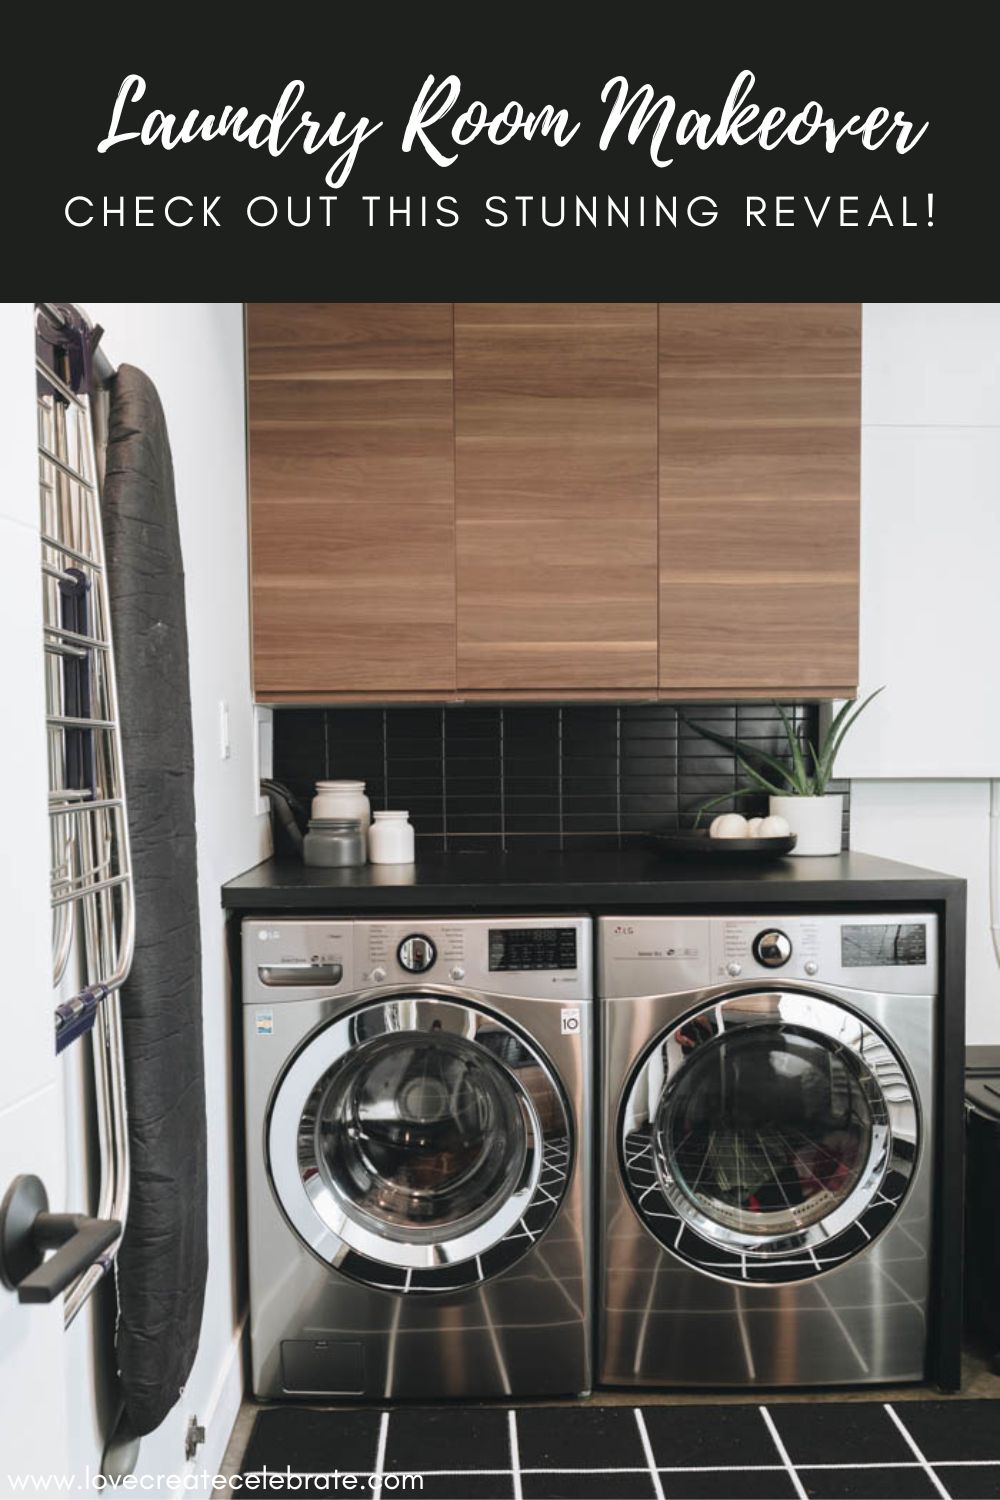
Today we are showing off the results of our modern laundry room makeover. We’ve been living with a messy and unorganized laundry room for a very long time, so we’re very happy that we’ve been able to transform this space, making it a little bit more functional while sticking to a budget.
It’s still not perfect because we can’t hide like the furnace and the water heater completely without spending a lot of money. But we’re at least we put some functional storage in here, made the sink look nicer, and improved the actual laundry space, and it all made a huge difference.
We were able to save a bit of money because we miraculously found all of the IKEA pieces we needed at one store. It happened to be at a store that involved 14 hours of driving, round trip, but picking the items up was still a lot cheaper than delivery! We shared the entire budget in our video for this post, but for now, let’s show you how we did our Laundry Room Makeover!
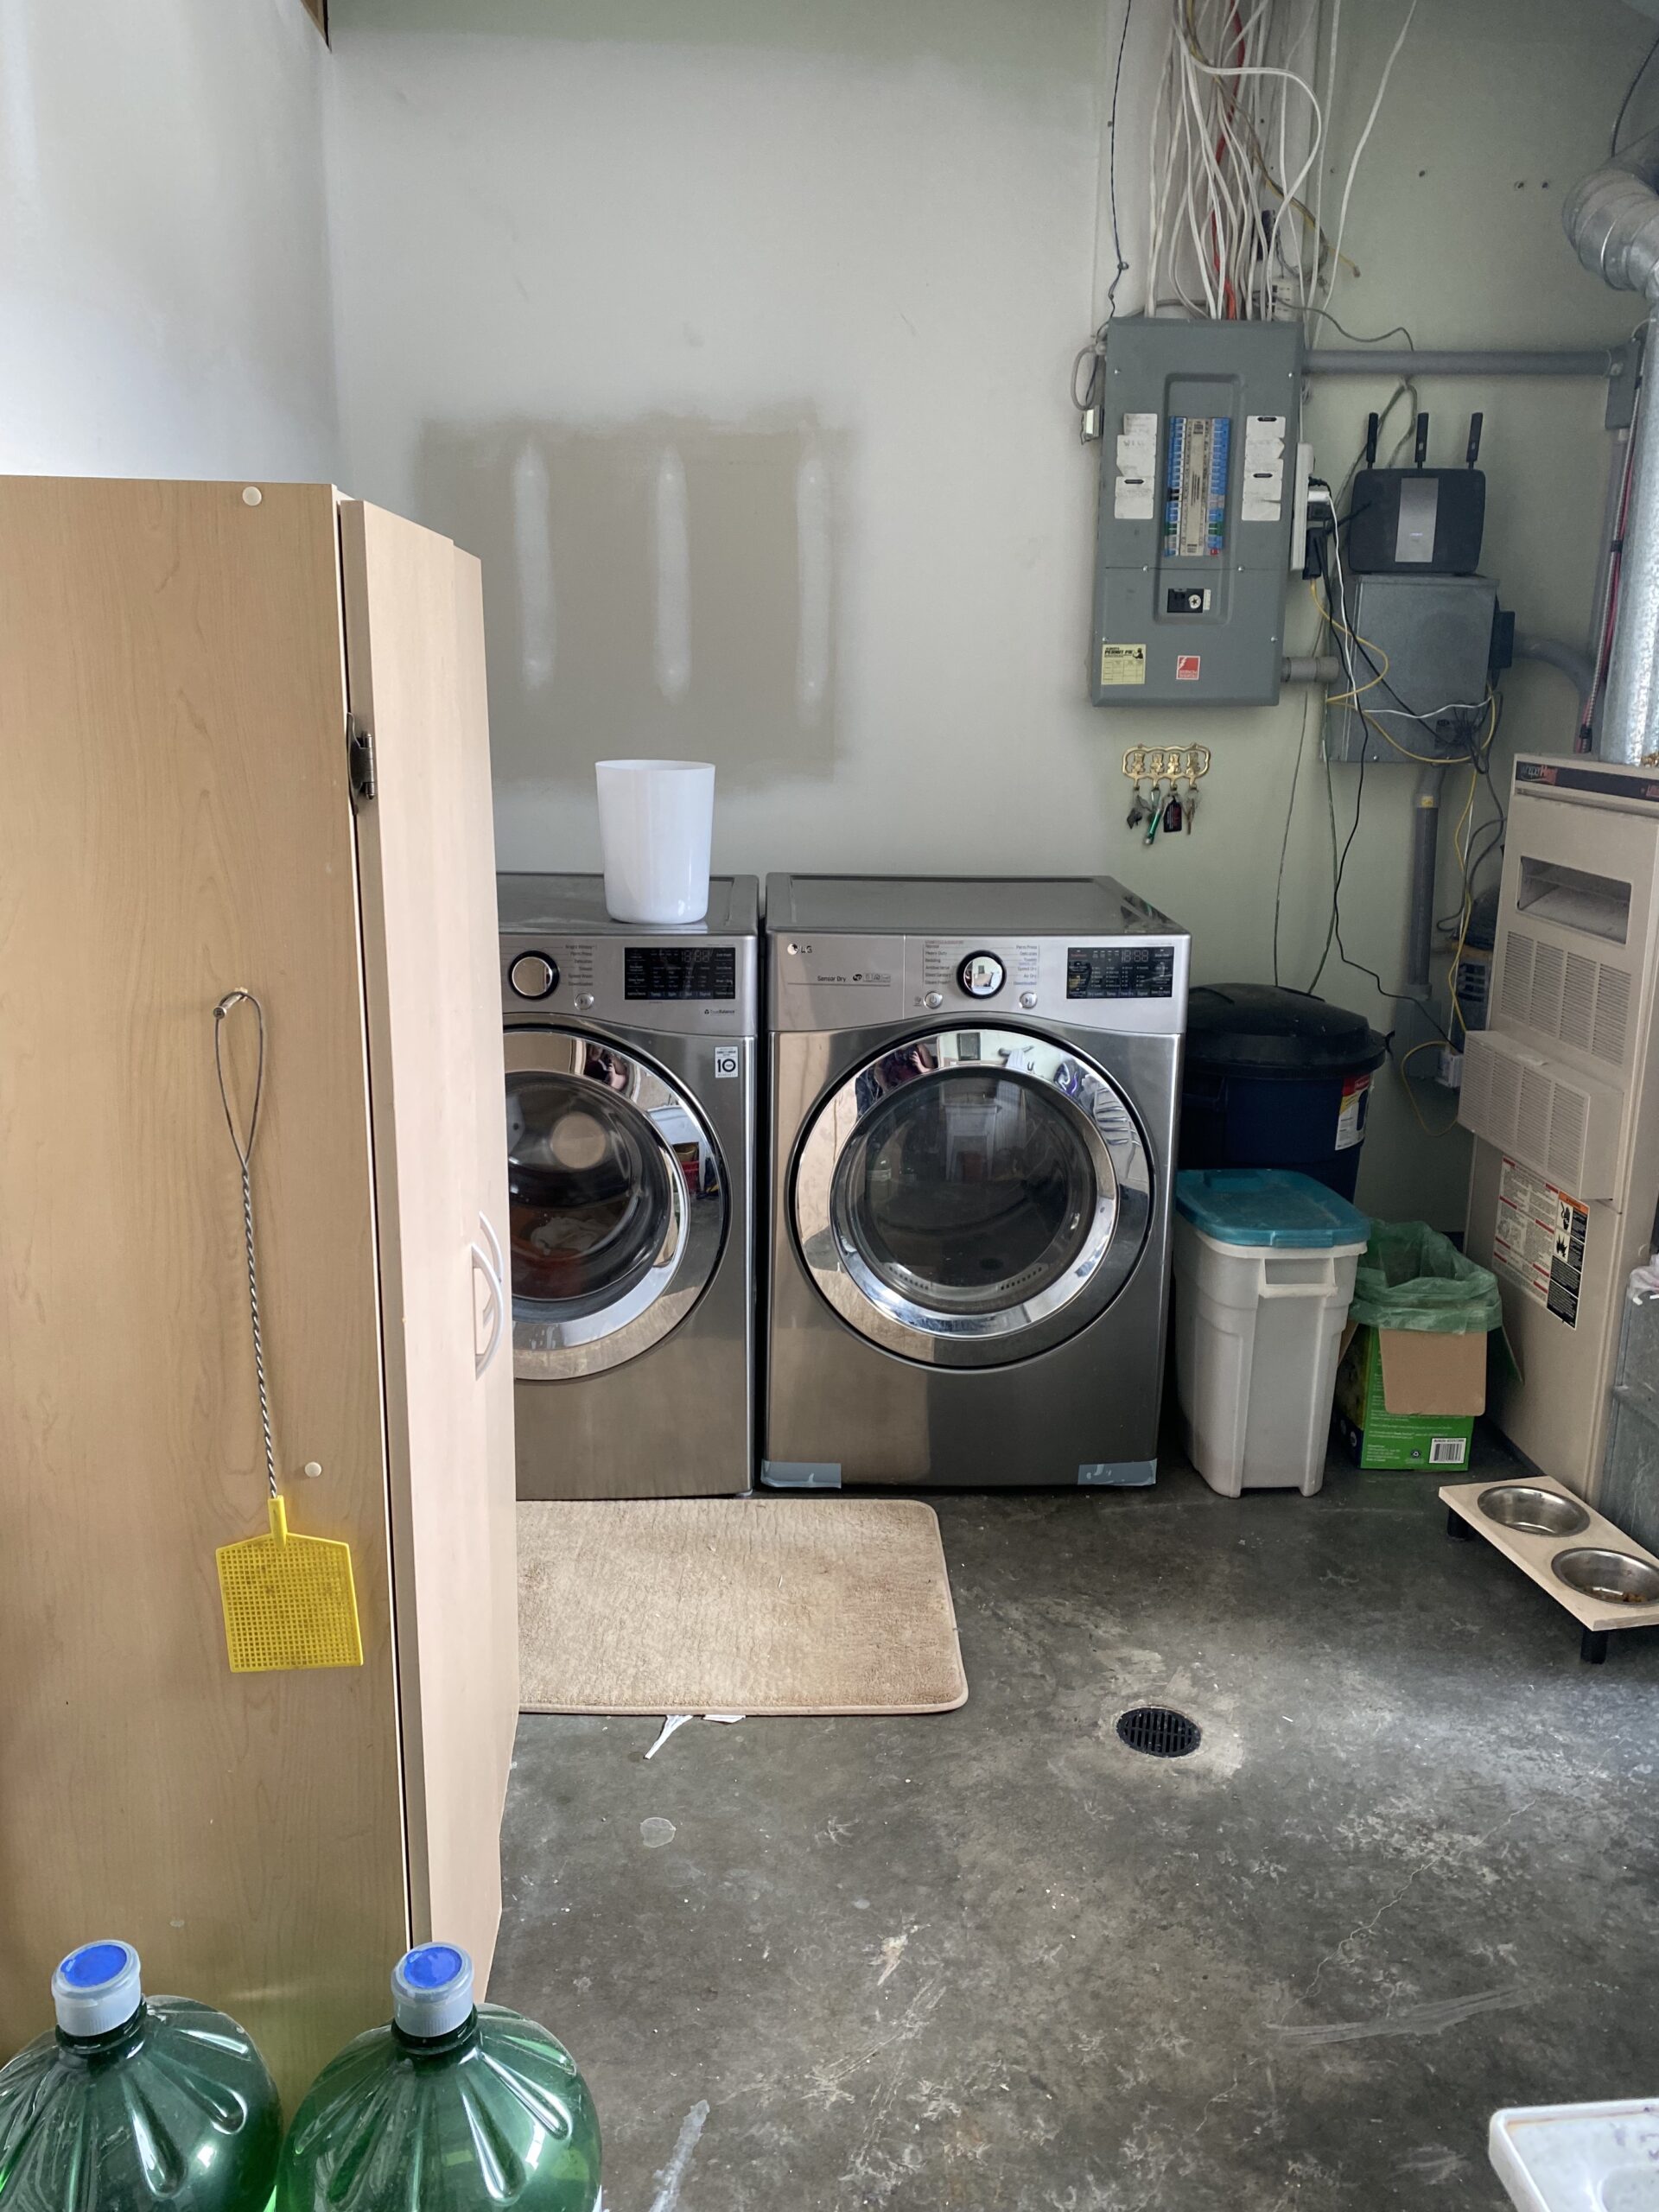
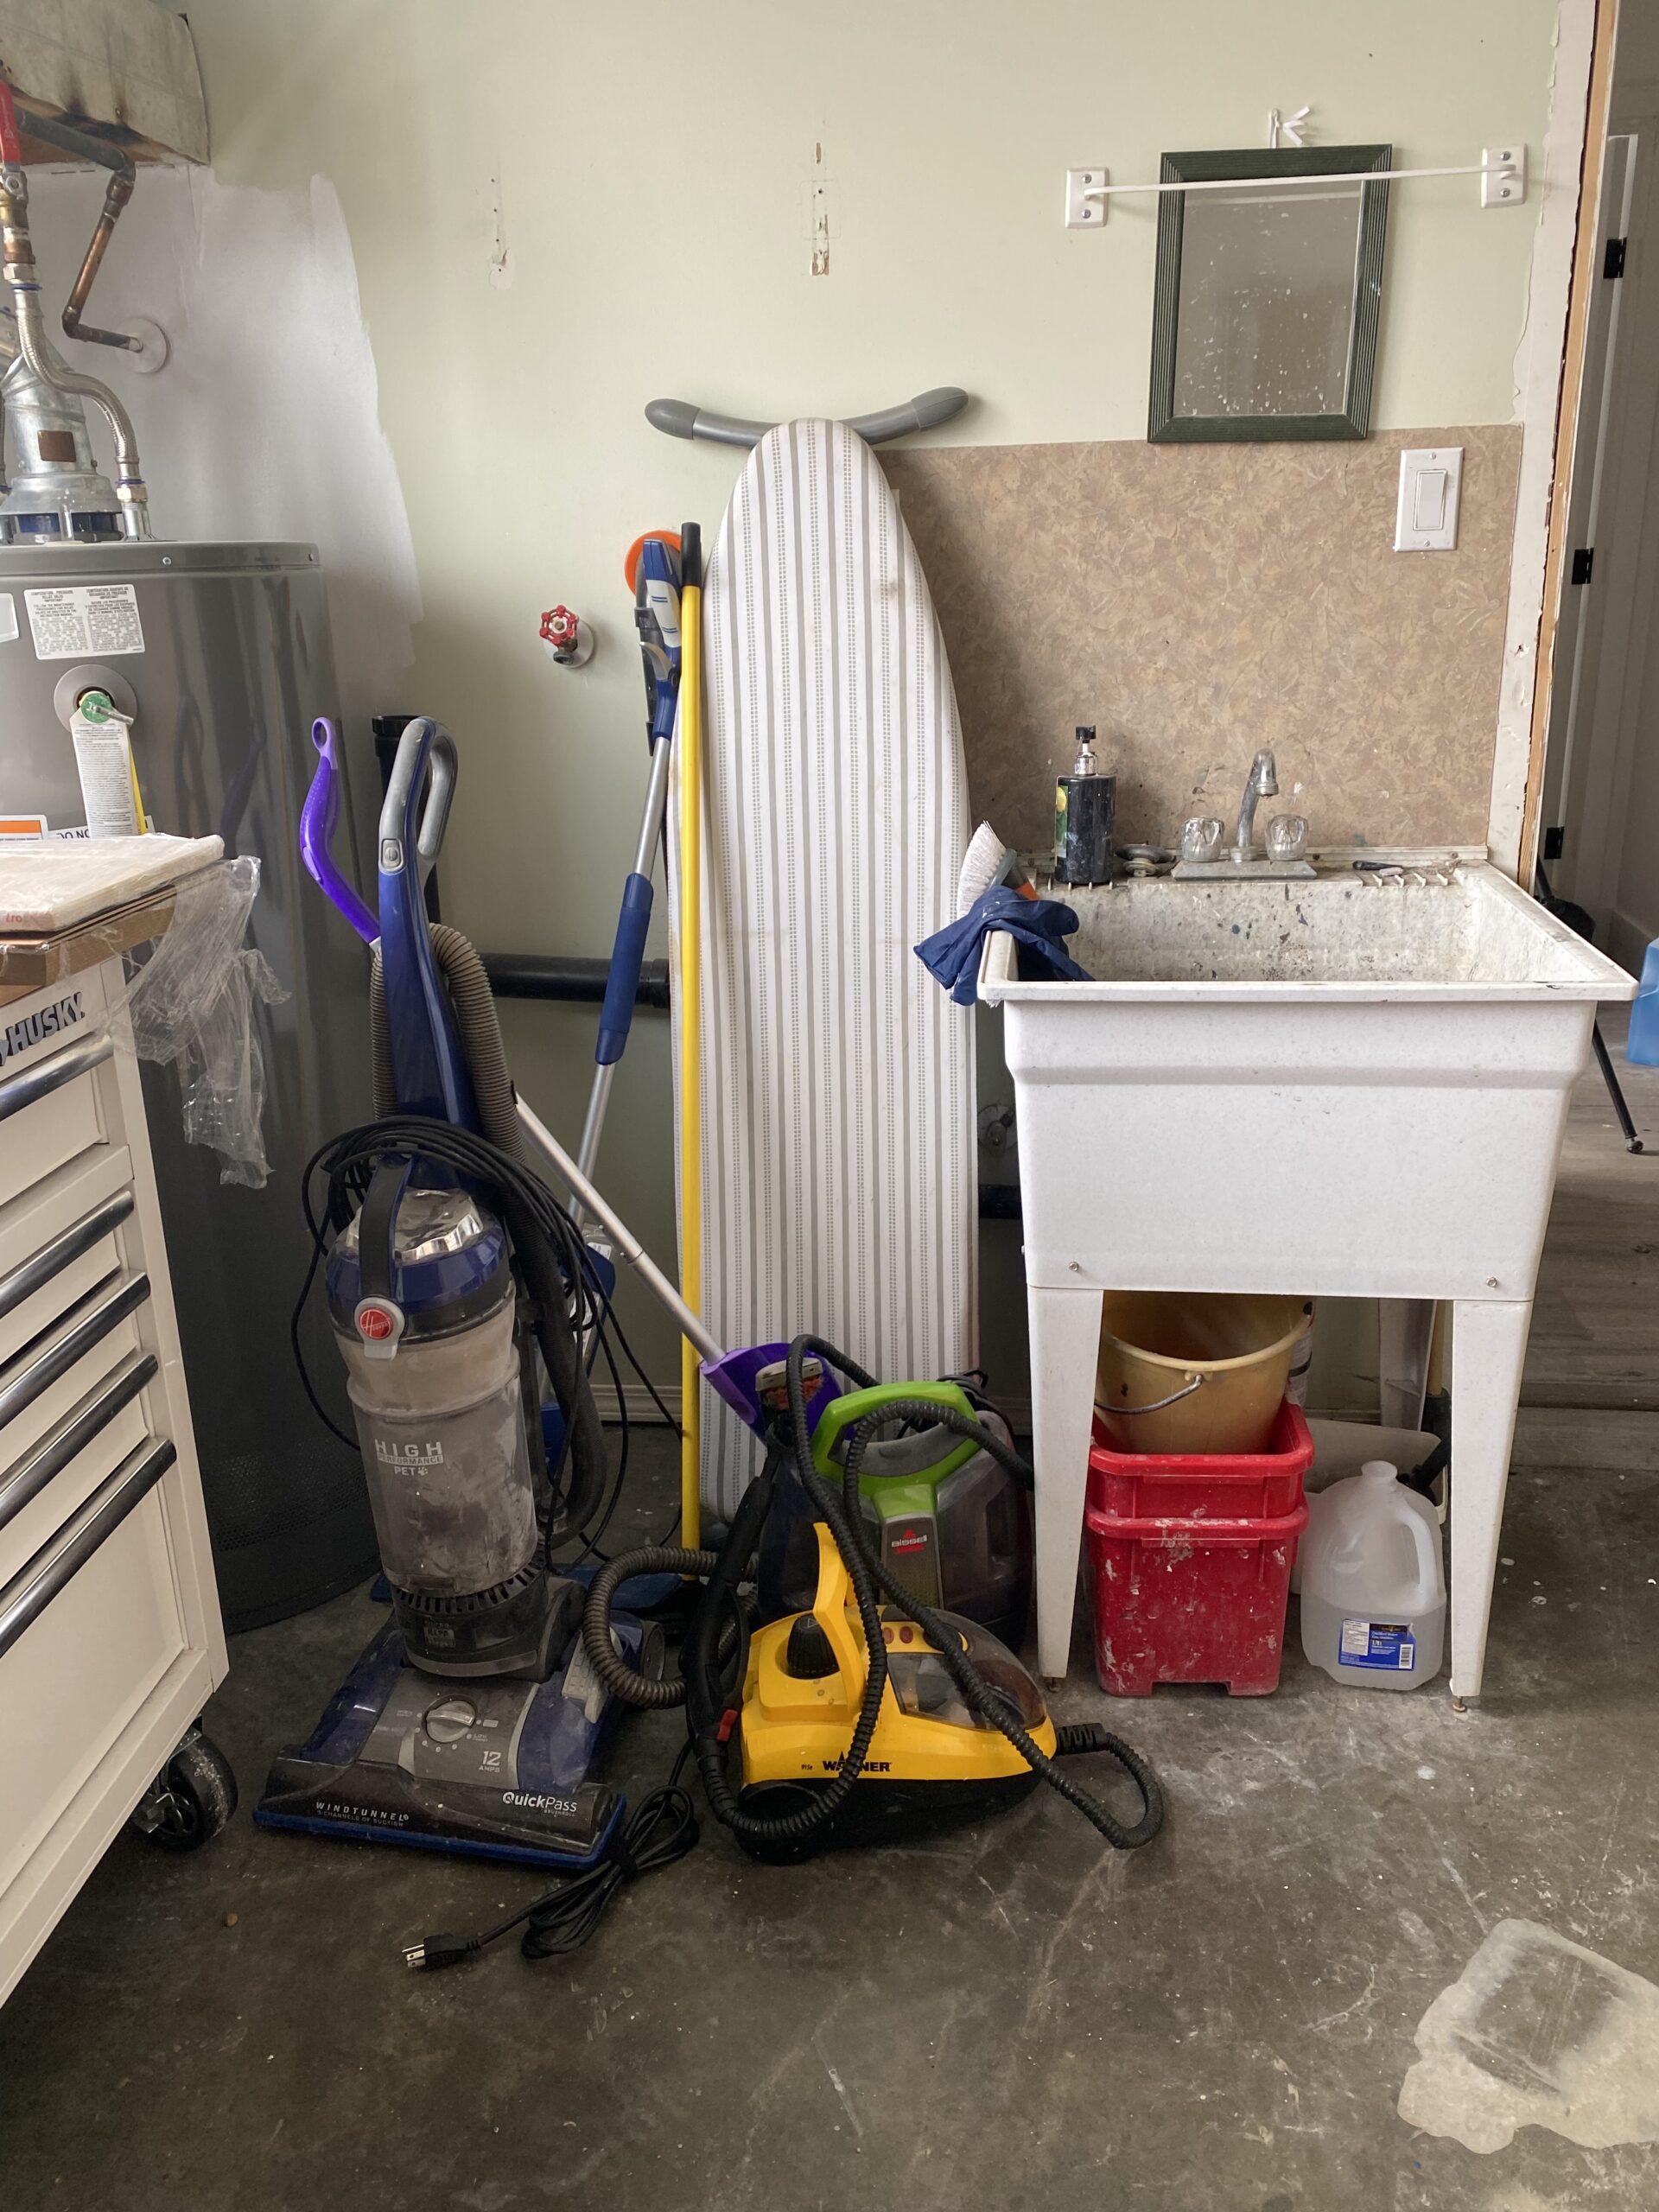
Laundry Room Before Photos
As embarrassing as it is to show off these “before” pics, here are the photos of our crazy disorganized laundry room space! We used it like this for years, and although it functioned ok, it definitely didn’t provide any practical storage, and wasn’t a pretty space!
Here’s a few of the things we wanted to update:
- New, functional cabinetry – including a tall cabinet for cleaning supplies
- A counter to fold on
- A large sink for cleaning supplies and laundry
- All of the supplies, etc. hidden away
- Something to cover the concrete floor
Our Modern Laundry Room Makeover
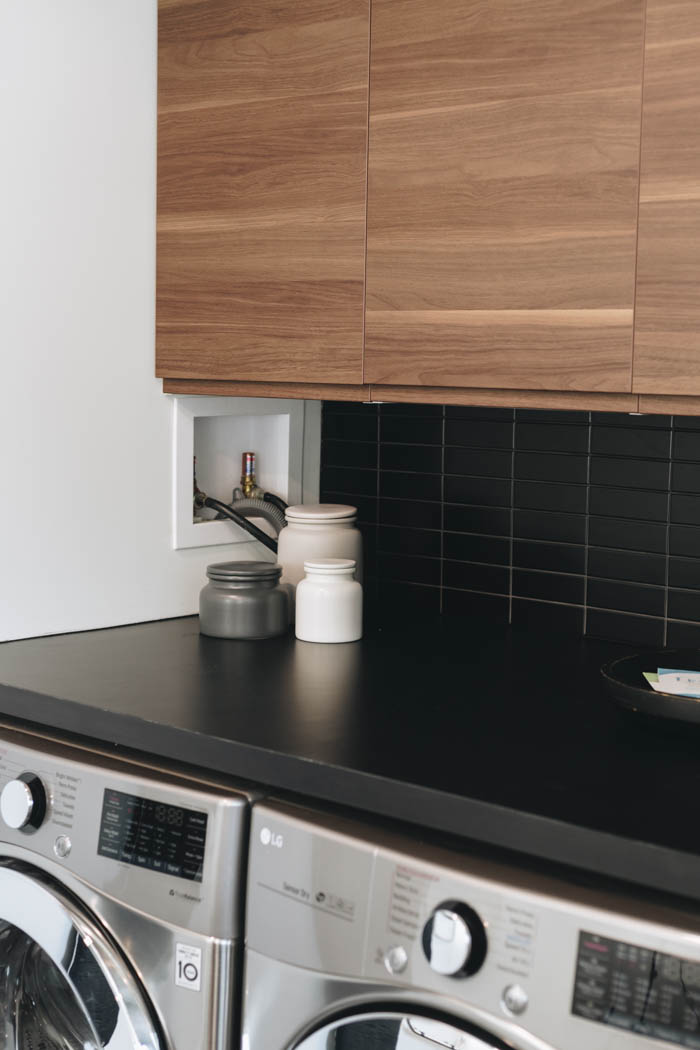
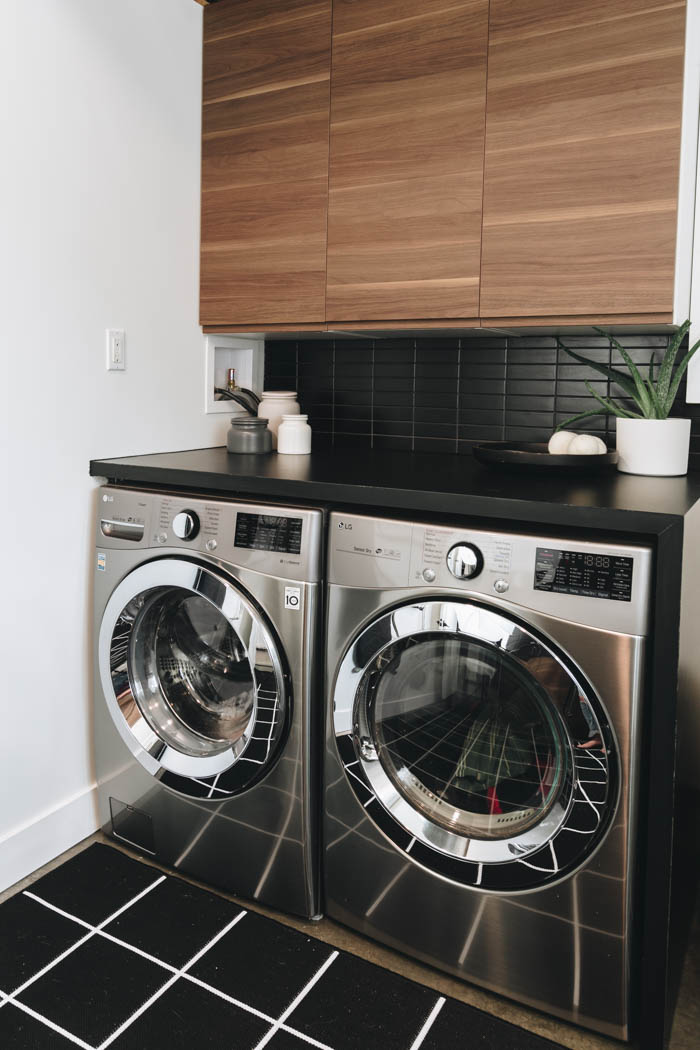
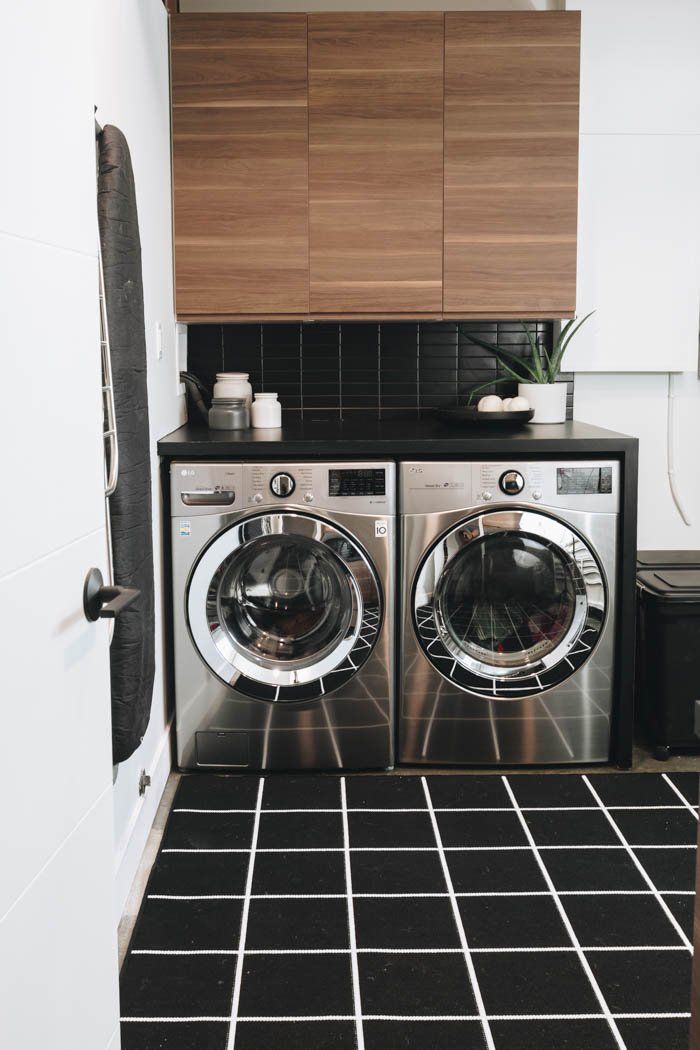
Once we knew for sure what cabinets we were getting, we were able to finalize some design decisions for this space. The bulk of our budget was on cabinetry from IKEA that could be added as storage above this washer and dryer unit, as well as above and beside the counter with the sink.
Then we also had to deal with this electrical panel, and although it’s safe, it was a bit of an eye sore, so we needed to make some kind of cover for it.
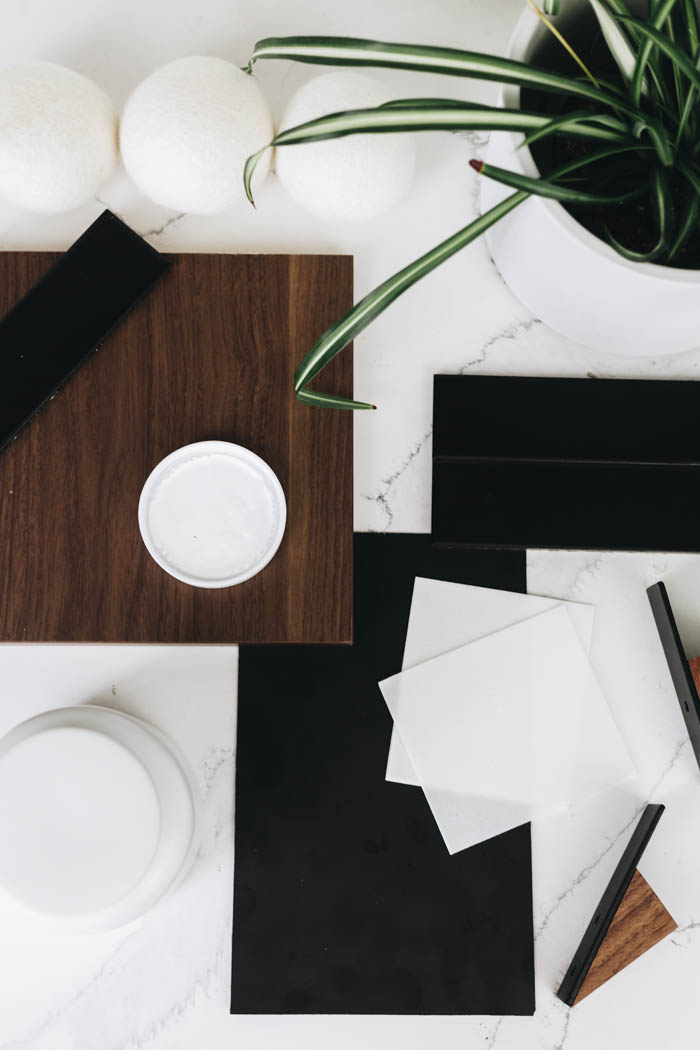
Materials
Originally I was thinking of doing white cabinets for this laundry room makeover to keep it fresh and clean, but when these a walnut finish cabinets were all available at Ikea we just jumped on that idea and I built our mood board around the walnut.
To keep costs down we’re using some leftover black tile from a previous project and we’re going to be building our own laminate countertops with this thin laminate material. And because we always have sustainability in mind we’re also including some eco-friendly laundry products.
Electrical Panel Cover
The first thing we did to start fresh was completely clear out this room and paint all of the walls white, and you can see that Russel covered that electrical panel with a simple, white panelled box.

Installing the Cabinets
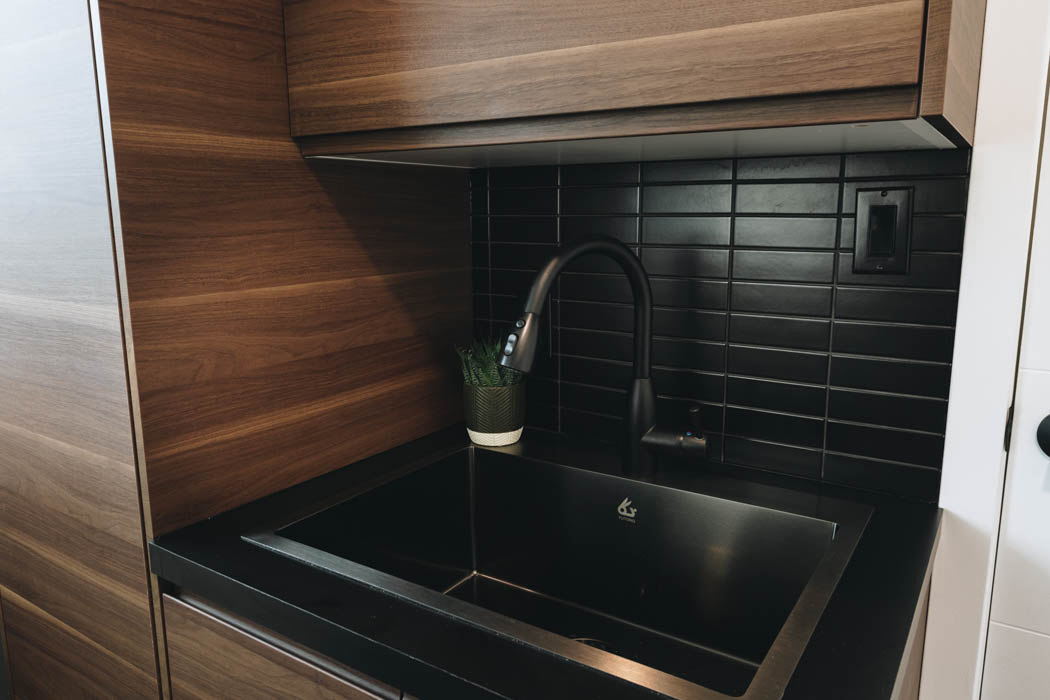
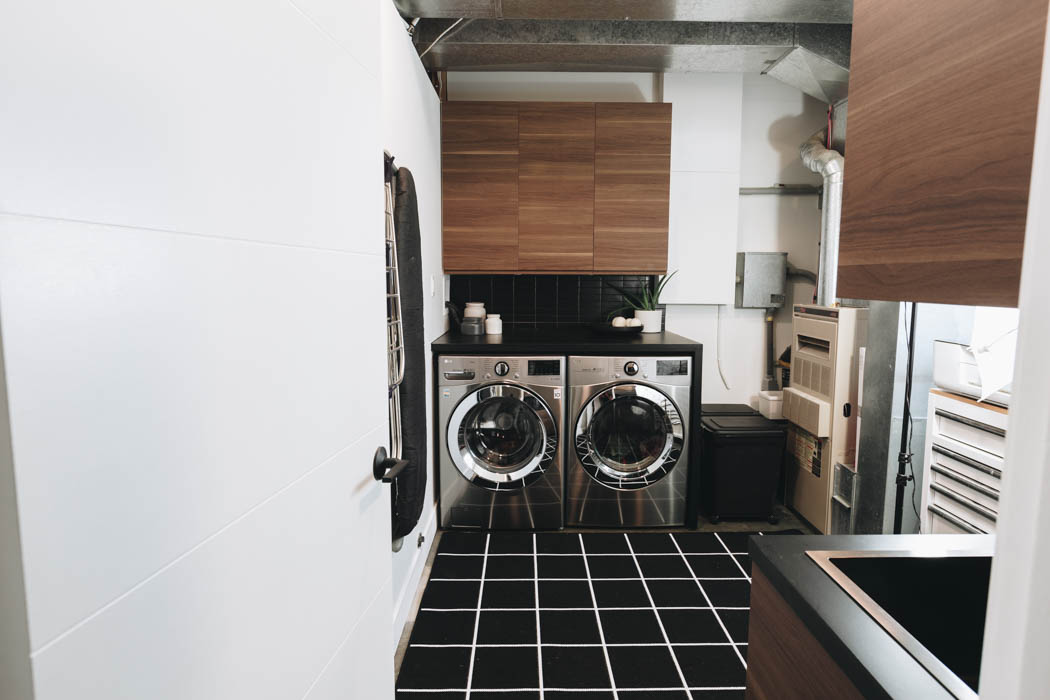
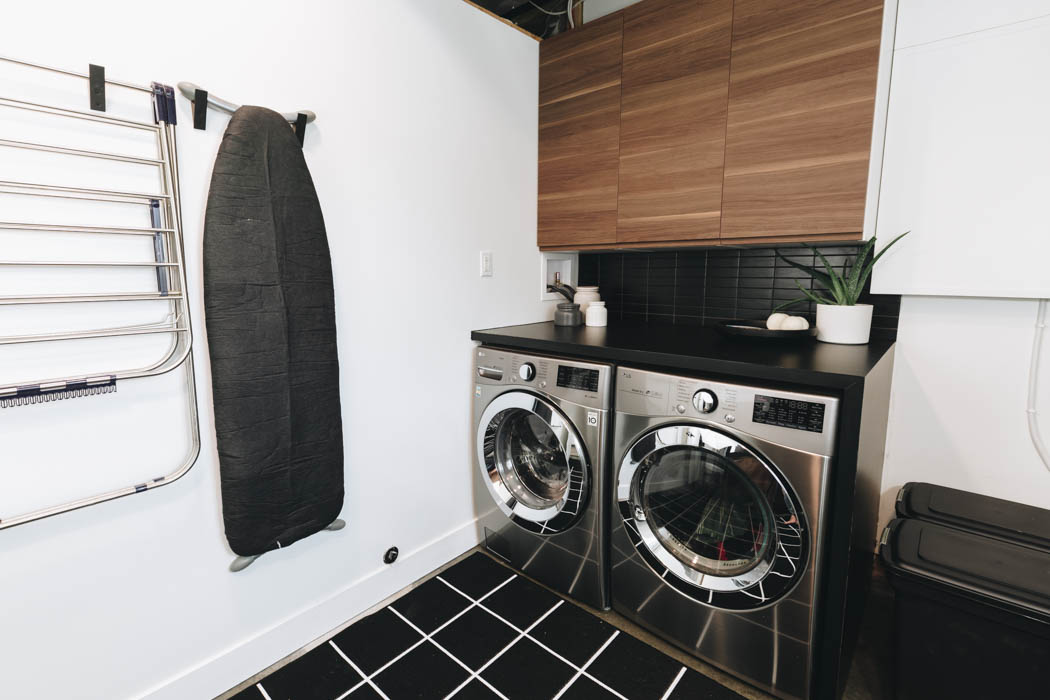
We got these cabinets installed hon both sides of the laundry room. There was five cabinets on this side including the pantry unit, these two above the sink that have the doors that open up, and then the lower cabinet for our sink.
The other side had three more cabinets above the washer and dryer. After we installed the cover panels and we were able to start doing countertops and then finally backsplashes.

Building the Countertops
For this laundry room makeover project, we installed our own laminate countertops. Countertops can be really expensive and even laminate for this space would be upwards of twelve hundred dollars, so we knew we could do a lot cheaper and we decided to try and DIY it ourselves.
We used sheets of three quarter inch MDF glued on top of each other for the countertop, and then wrapped everything in laminate sheets.
If you want to see how we cut and installed the laminate, you can see it all in the video below!
Installing the Backsplash
So the next step in our laundry room makeover is doing this backsplash. Is that what you call it when it’s a laundry room? Anyway, we decided to use the same tile that we used in our playhouse a couple of years ago. We wanted to the tiles horizontally up the wall, and to do that, instead of using thinset we are using musselbound adhesive roll to attach everything.
It’s essentially just really a sticky sheet that will go on the wall and the tile just sticks right on there. Finally, we used a black grout to keep everything cohesive.

We took some time with that first tile and the first row to make sure everything was going to be nice and level going forward, and then it all went very quickly. We use the wet saw outside to cut any tiles to go around walls or outlets and made sure those tiles were completely dry because wet tiles do not stick to the musselbound.
Video Tour of Our Laundry Room Makeover
If you’d like to see how this laundry room makeover happened, from start to finish, check out the video below for the whole DIY transformation!
The Finished Laundry Room Makeover
Here’s our finished laundry room! I honestly love every single detail, and can’t believe how well we were able to transform this space on our budget. Do I wish the furnace was covered too? Yes, definitely. But maybe that’s a project for another day and another budget, lol.
Some of the laundry room products we love:
- TruEarth eco-friendly laundry detergent
- Wool dryer balls
- Storage Containers (also a stylish way to collect dryer lint)
- Countertop Bowl (also a stylish, convenient way to store dryer balls)
- Broom Holders (or dusters, or mops, etc.)
- Wall Hooks
I wish we would have done this years ago. I love the functional storage!
I hope you enjoyed our budget friendly laundry room makeover!
More Stunning Room Makeovers!
Check out this post for a makeover of our master bedroom! Here’s a video showing the extreme transformation as well!
Don’t forget to subscribe to our YouTube channel for more great home makeovers!!
For another stunning household space makeover, check out this modern dining room reveal!