
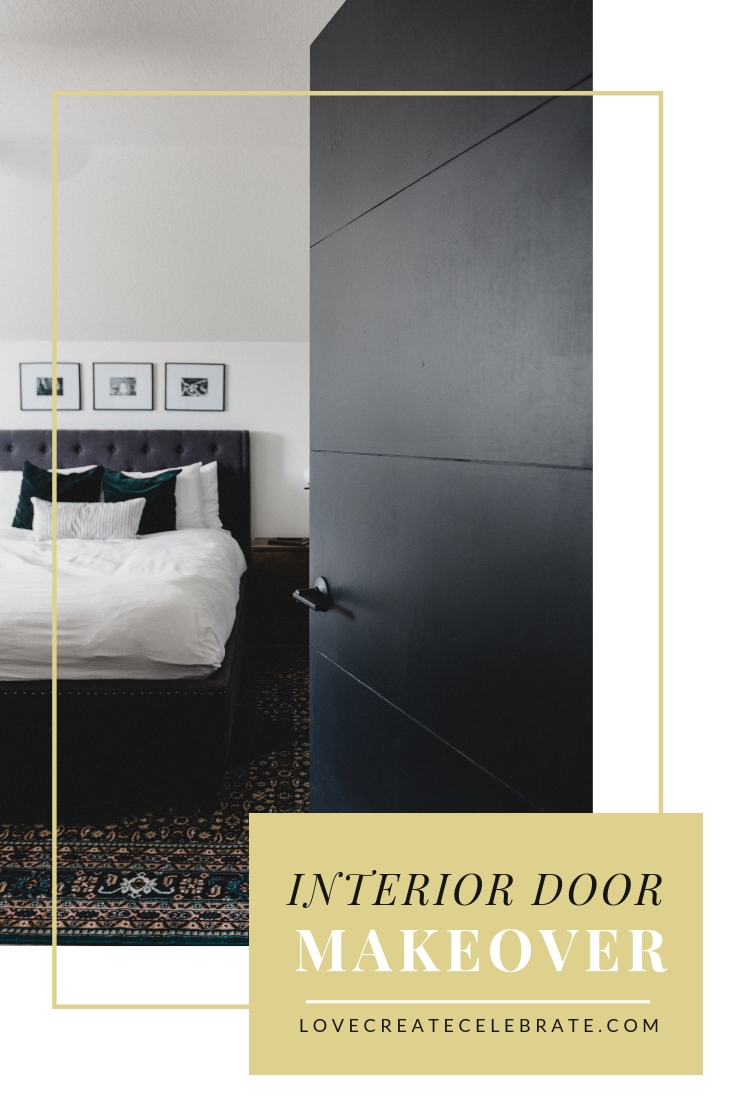
Quick and easy hollow core door makeover on a budget! Use trim, paint, and new hardware to create a new modern interior door design!
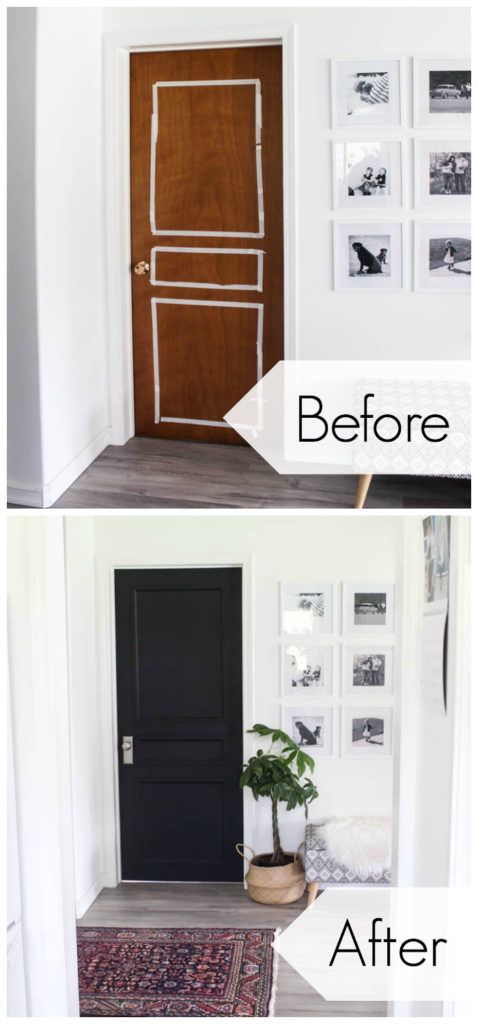
Have you ever worked on a space, and worked, and worked some more, only to feel like there was still something wrong with it. In our case, it it meant that it was finally time to tackle that Hollow Core Door Makeover!
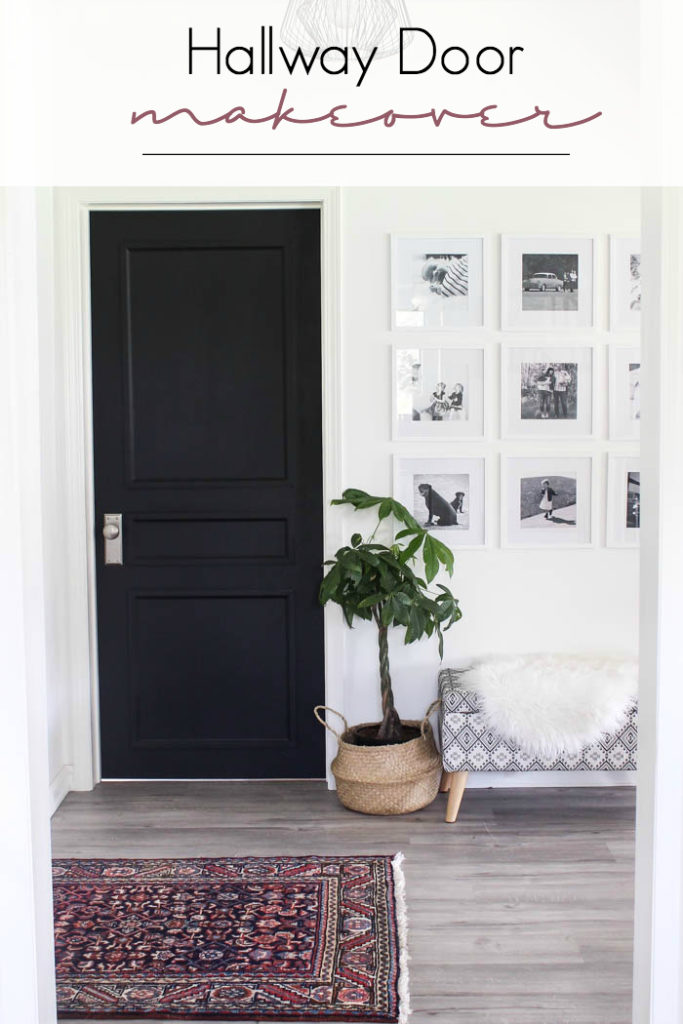
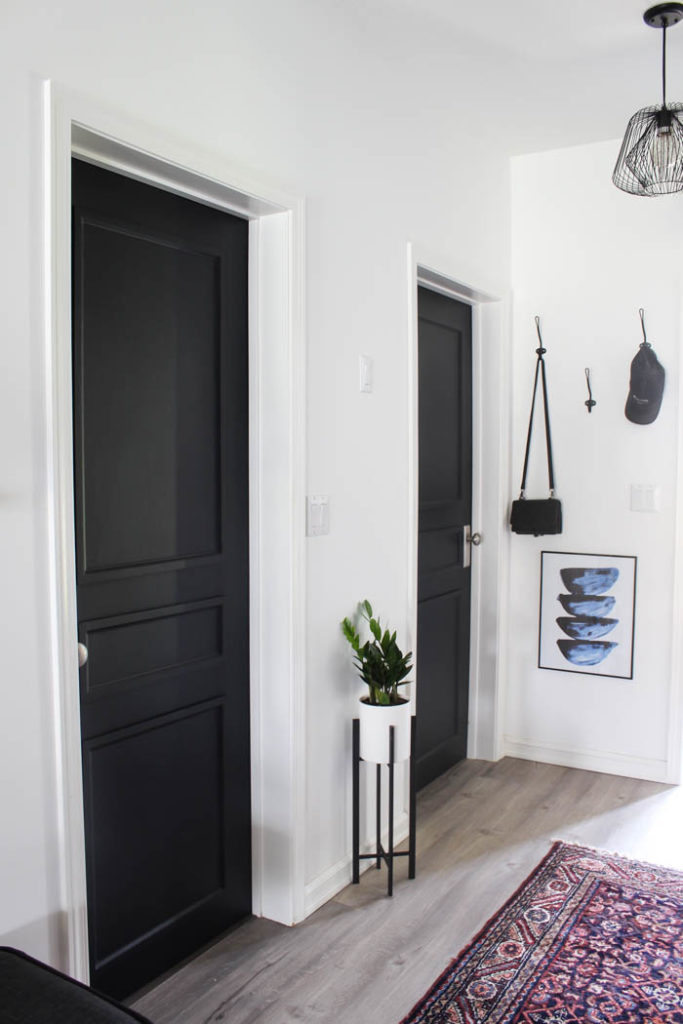
Making over a space takes a long time. One year we paint, next we add new window coverings, next we finally save up for that dream couch. We add one piece at a time until the room is finally finished. Well… I’m happy to say that my hallway is finally complete. The last piece of the puzzle was changing the interior door design – and it was probably one of the easiest changes in the space!
*This post was sponsored by Nostalgic Hardware. It may contain affiliate links for your convenience! As always, opinions are 100% my own. For more information, please see my disclosure page.*
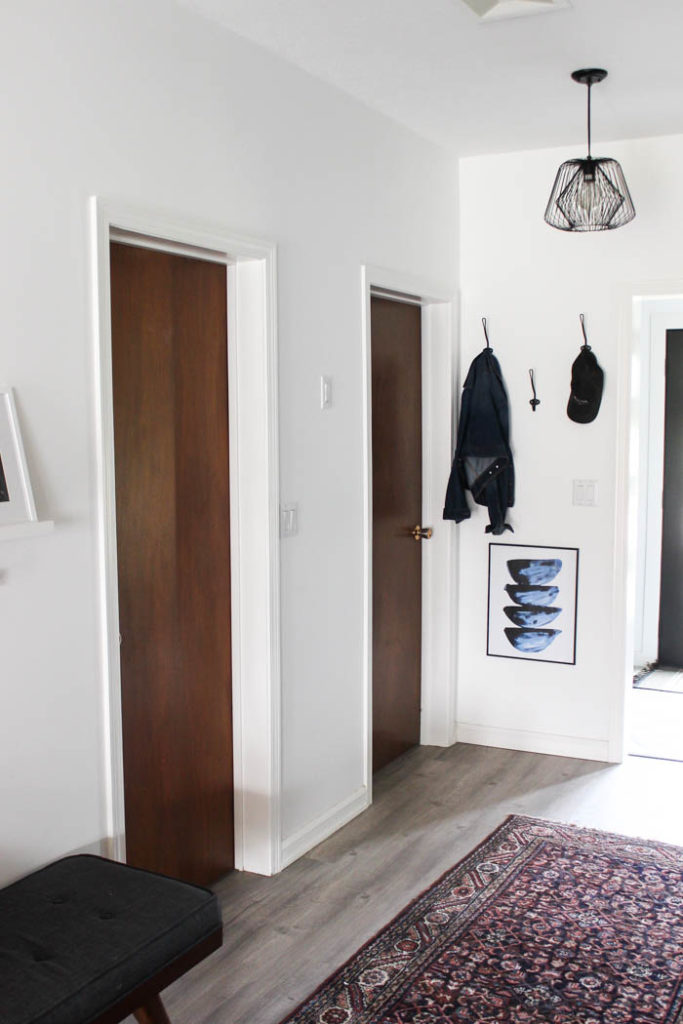
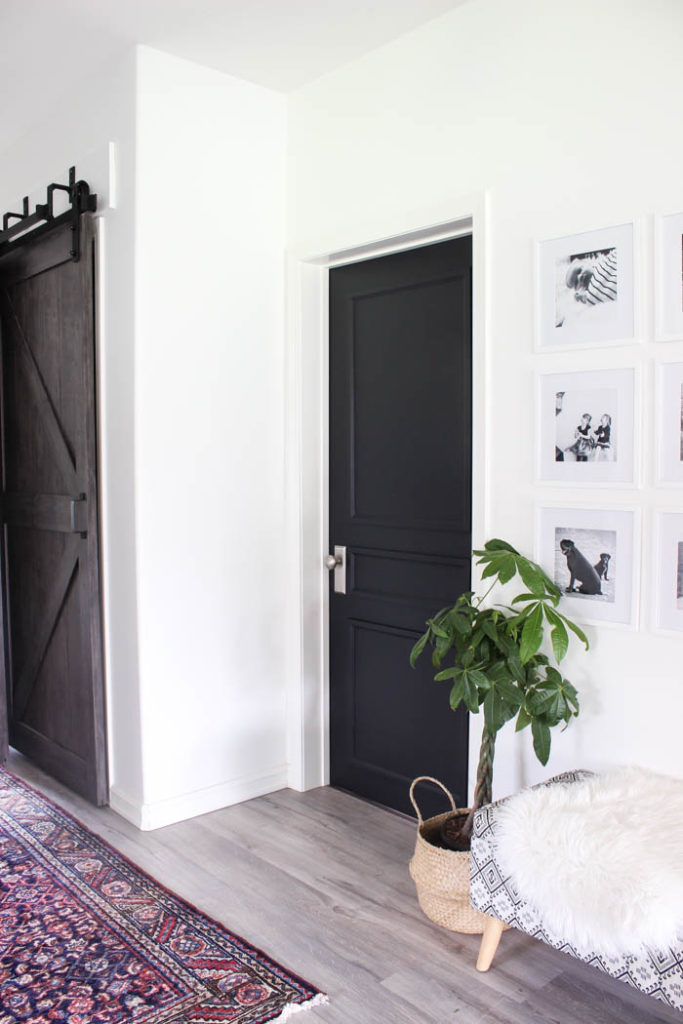
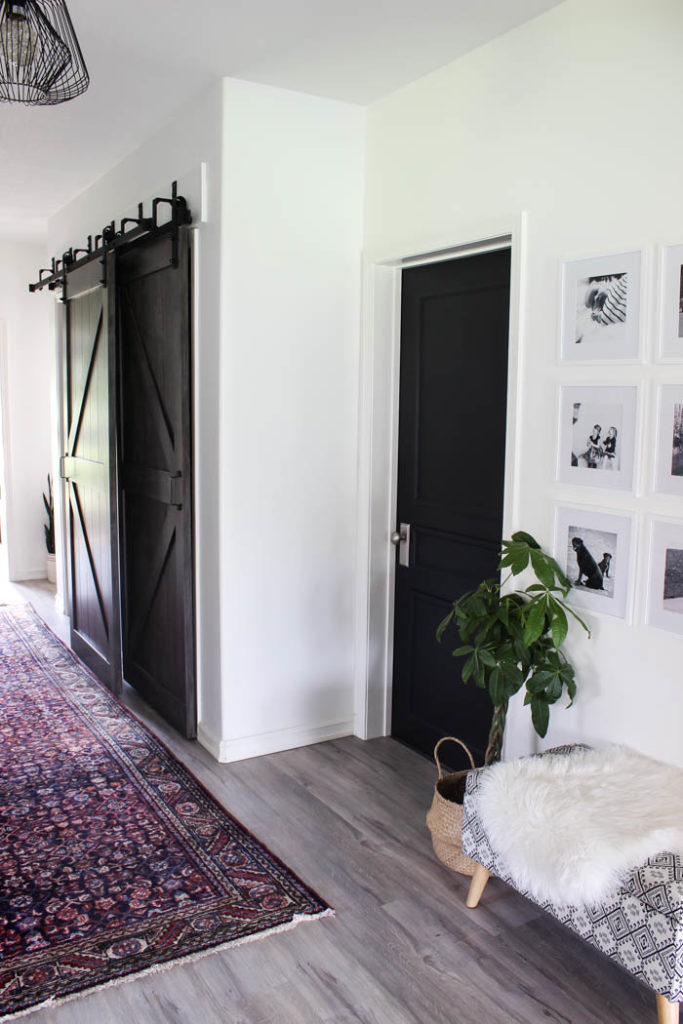
When we revealed our hallway decor early this year, did you notice that there weren’t many pictures with doors showing? lol. I was very strategic about my photo taking (which is hard considering there are three doors!). I loved the new decor, but I didn’t love the way it jived with the outdated wood doors throughout the hallway.
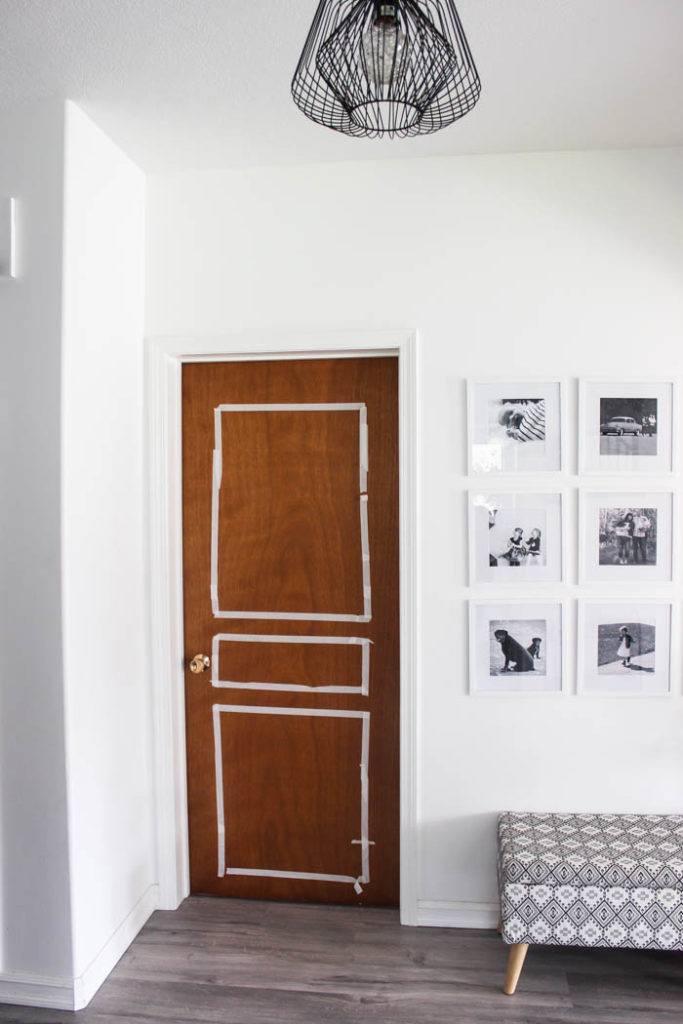
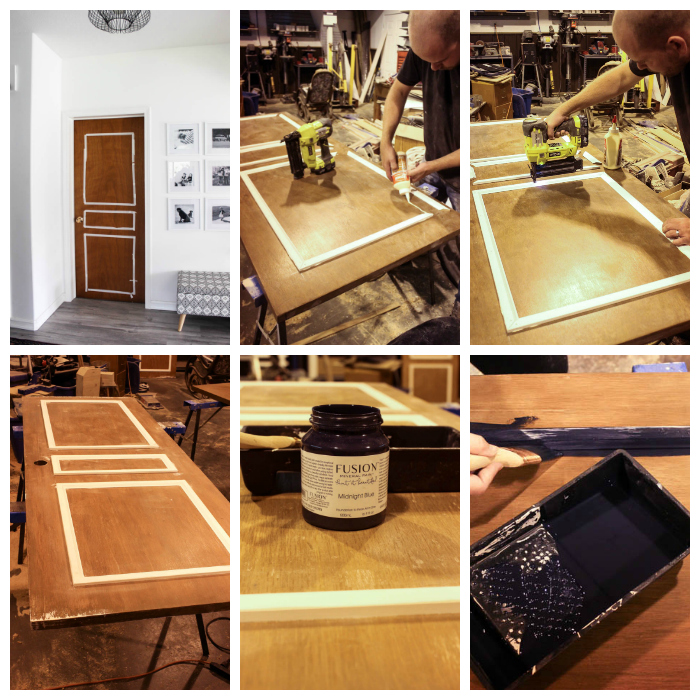
So I came up with a three step plan: Trim. Paint. Hardware. Pretty easy right? It really was! Above is the picture of my husband and I putting a rudimentary pattern on the doors. We had to test it out with masking tape before we bought the trim to see if we were going to like it or not!
How do you know your door is hollow core?
Before we get started, it’s important to know if your doors are hollow core! You can often just tap on the door to see if it sounds hollow or solid. However, this isn’t always the case.
The more reliable method is to remove the door from the frame and if it’s easy to lift, then it’s likely a hollow core door, since hollow doors are much lighter than solid doors. Although, if you have solid wood doors, you can also easily do this project on wood doors too.
Hollow Core Door Makeover Tutorial
This door makeover was fast and easy to do, and only requires two tools. Here’s a step-by-step guide to making your own.
Plan Trim Location
Measure out where you want your trim and draw the outline right onto your doors. Our doors were actually all different sizes – and the knobs were at different heights! lol. But in general, we tried to line up the middle box with our new hardware, and we left a 4.5″ perimeter on all outer edges, and a 3.5″ space between the trim boxes.
Cut Trim Pieces
Once you have the design, cut your trim pieces at the right lengths and at 45 degree mitred angles at the corners to make the boxes.
Attach Trim
Attach your trim to the door with wood glue and a nail gun. Carefully wipe away any glue that seeps out with a damp paper towel.
Paint Doors
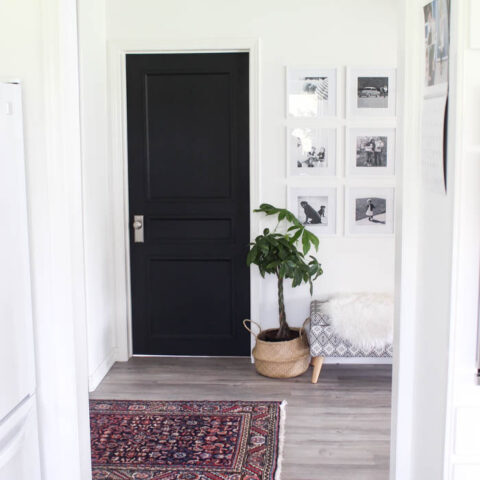
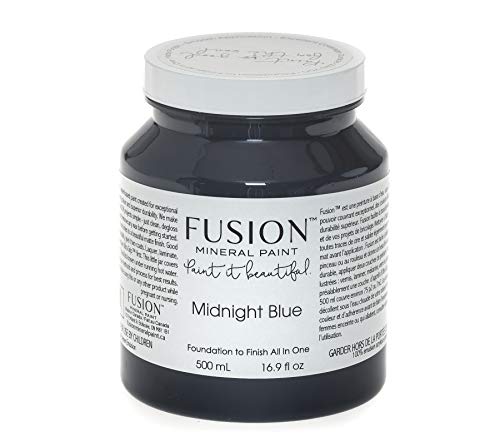
You all know how much I love Fusion Mineral Paint – so that’s what I used on these doors. They didn’t have the exact colour that I wanted, so I decided to mix colours a bit. I added 3 Midnight Blues and 2 Coal Blacks to create the perfect moody navy, almost black colour.
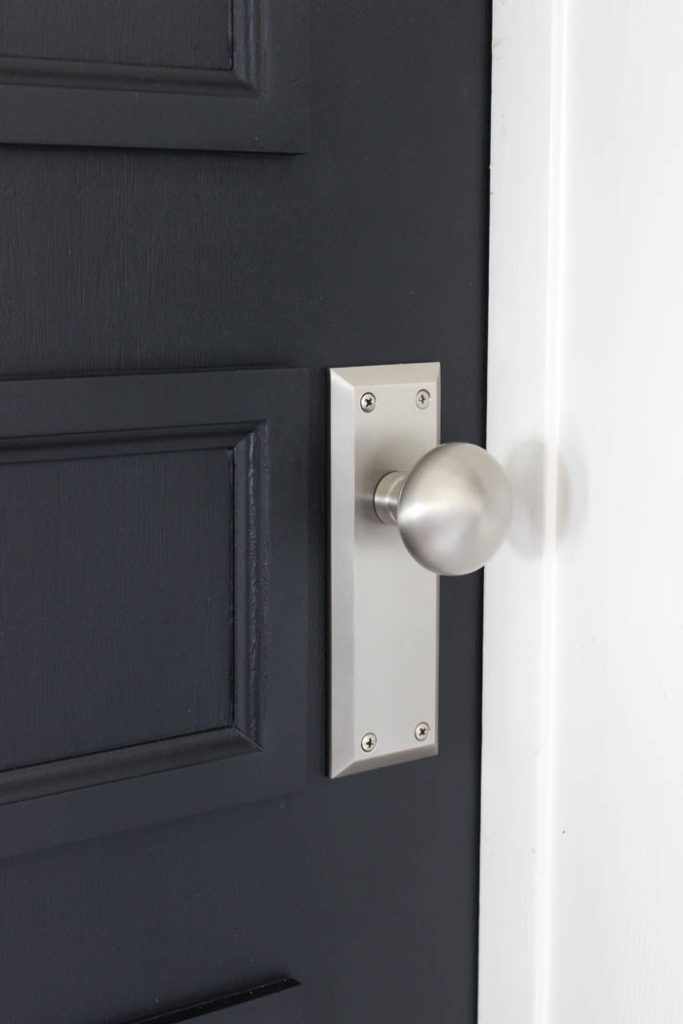
Add Hardware
I got these knobs and long plates from Nostalgic Hardware. They are part of the Fifth Avenue collection, and guys… look at the impact that new hardware can make! I mean… seriously gorgeous stuff!

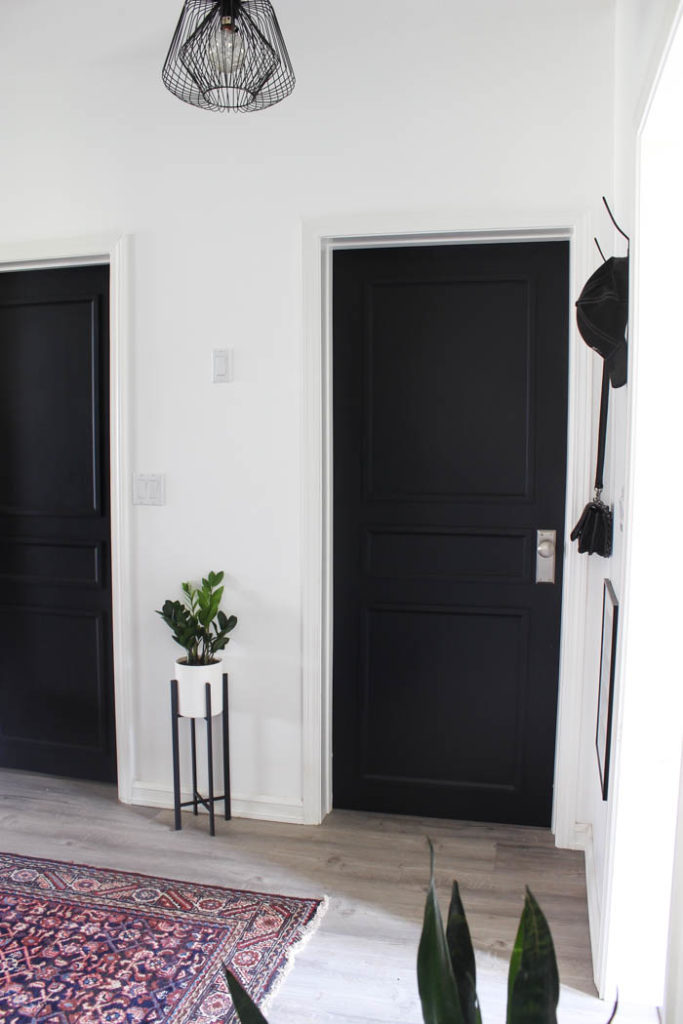
Baaaahhhh! Look how different they are! All of the sudden my hallway looks finished and put together! I LOVE what the new and improved doors add to our space!
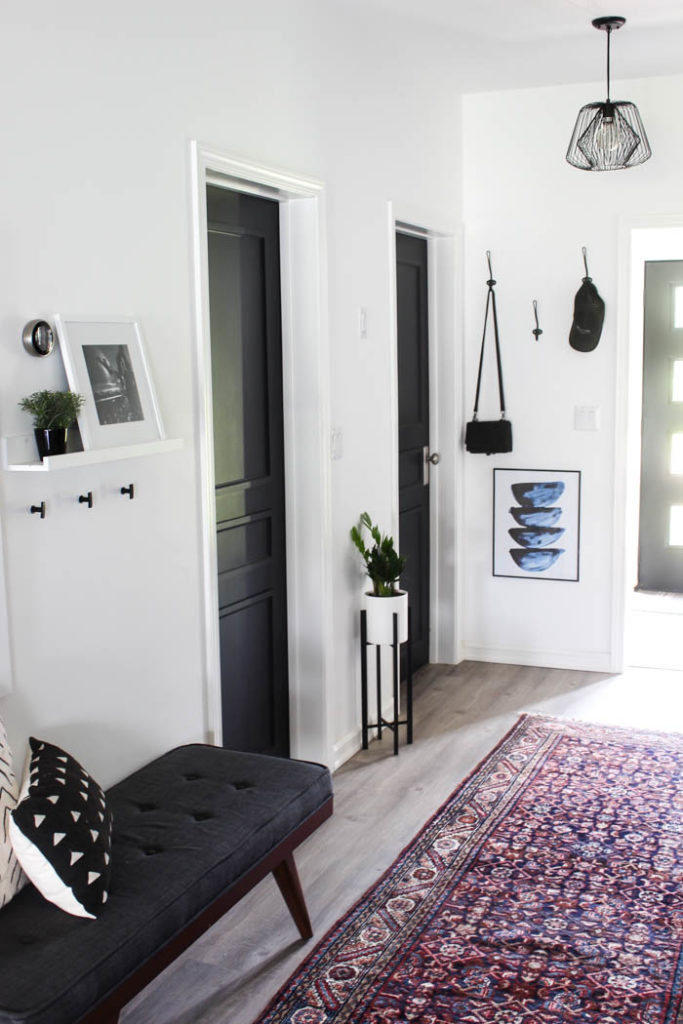
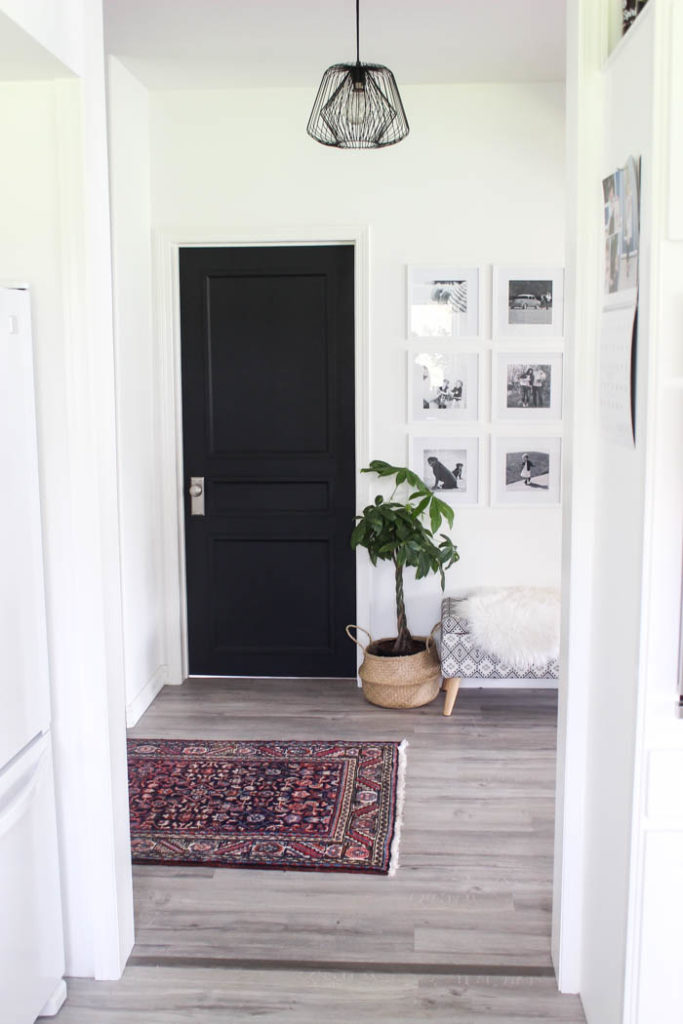
I can’t officially say the hallway is done because it will likely go through a few more transformations, but I’m so happy with how it looks right now! One more room down… a whole bunch more to go! lol.
More Hollow Core Door Makeover Ideas
I always think the best, most eco-friendly thing to do is work with what you already have! If you have hollow care doors and are looking for more ideas, here are my 5 favourite transformations:
- Adding trim (like this tutorial!) is a great way to give new life to your hollow core doors, as this article showed.
- Cutting grooves – I love the modern look of adding shallow grooves to the hollow core doors.
- Adding wood overlays – Attaching wood panels in a unique pattern makes a stunning improvement.
- Using antiquing glaze – This makeover gives rustic barn door effect.
- Vertical plywood panels – gluing plywood planks is an inexpensive way to modernize your hollow core doors.
I’m not the only one showing off this beautiful hardware! Check out what my Modern Blogging Friends did to update their homes!

The Sweetest Digs
The Learner Observer
Lemon Thistle
Harlow and Thistle
Looking for another Interior Door Makeover Idea? I LOVE the addition of the grooves to these hollow core doors too!

DIY Hollow Core Door Makeover
Quick and easy hollow core door makeover on a budget! Use trim, paint, and new hardware to create a new modern interior door design!
Materials
- Hollow core door
- 1" trim pieces
- Masking tape
- Paint
- Hardware
- Wood glue
Tools
- Cordless Nail Gun
- Circular Saw
Instructions
- Test trim design using masking tape, then use this design to determine the exact measurements you want to use.
- Cut trim pieces to length
- Mitre corners of trim using a circular saw
- Apply wood glue and nail into place
- Paint doors
- Add hardware
Recommended Products
As an Amazon Associate and member of other affiliate programs, I earn from qualifying purchases.


Sheena
Saturday 20th of November 2021
Absolutely beautiful! Everything goes together perfectly. May I ask where you found the hanging light and the gallery wall frames?
Lindi
Wednesday 1st of December 2021
It came from HomeSense!
Hen
Wednesday 25th of August 2021
I’d love to know where you got your rug.
Lindi
Friday 27th of August 2021
We actually ordered the rug from Etsy :) The same one isn't there, but there are other options!
ChelsKan
Thursday 4th of February 2021
These look amazing! Did you have to sand the doors down before adding the molding and painting? How many coats of paint did the doors take?
Lindi
Saturday 6th of February 2021
Yes, I would give them a light sand first, so that the paint will adhere better. I think we just did two coats of paint!
16 Flat Panel Door Makeover Ideas {Boring to Beautiful}
Thursday 23rd of January 2020
[…] HALLWAY DOOR MAKEOVER BY LOVE CREATE […]
Ani
Thursday 7th of November 2019
Hey there, your projects look great - thanks so much for sharing. I was wondering if you could please tell me more about your sliding door und how you attached it to the wall? Is that a DIY project as well? I'm still looking for a solution for our storeroom door.
Lindi
Saturday 9th of November 2019
Those are barn doors. They come in a kit with the hinges and bars. You can find them from Renin, or at Lowe’s, or sometimes at Costco!