
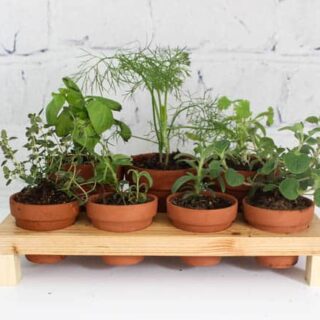
Simple and stylish indoor herb garden DIY! Use Terra Cotta pots to keep your herbs close by all summer long! Includes the FREE build plans.

Building an indoor herb garden DIY has been on my to-do list for approximately 365 days. Last year I tried to grow the herbs from seeds and that was a colossal failure. This year, I went a safer route and bought some greenhouse herbs. I’m already using them in my cooking! There really is nothing better than leaning over and cutting off fresh greens while you’re making pasta sauce. Something so domestic about it. Of course, my herbs needed a nice home if they were going to permanently live on my counter. This wooden herb garden is what I came up with.
Why an Indoor Herb Garden DIY?
We’ve always wanted to have an indoor herb garden, and once you’ve seen how easy it is you’ll wonder why it took you so long to build one yourself! We’ve been cooking a lot more at home, and there’s nothing better than having your own fresh herbs in your own kitchen!
The plans below are for small pots, which give us enough to use for our family, but the designs below can easily be scaled up if you wanted to use larger pots.
*This post may contain affiliate links for your convenience. Tools in this post were provided by Ryobi. As always, opinions are 100% my own. For more information, please read my disclosure policy*
FREE Downloadable Build Plans
The hardest part about building this little herb stand, is knowing where to drill the holes. It took us a while to figure out all of the measurements to make it balanced. Good news is, we did all of the hard work for you! You can download the FREE plans and measure it out perfectly without thinking:
You are also agreeing to our Privacy Policy.
What You’ll Need:
Materials:
Terra Cotta Pots (4 small, 3 medium)
1 x 8 board
1 3/4 x 3/4 board
Natural stain
Tools:
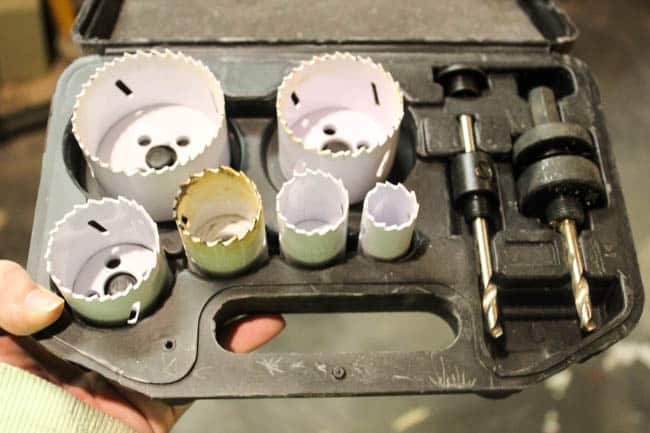
2 1/8″ hole saw
2 1/2″ hole saw
Wood glue
Clamps
Mitre saw
Table saw
Instructions:
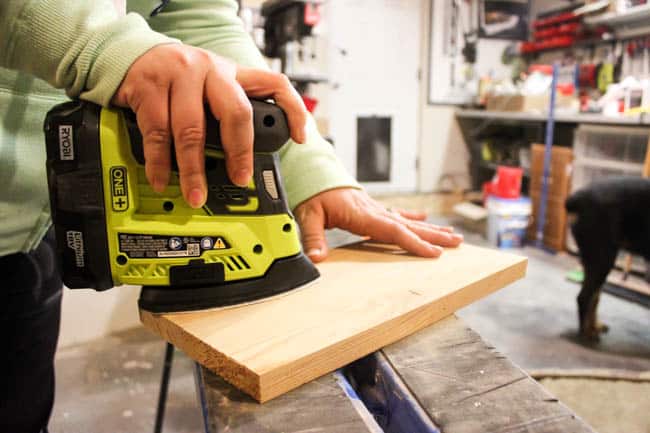
Cutting and Sanding the Boards
The first step is to cut your boards according to the attached design plans. I used my Ryobi Sander to sand all of the boards down in no time!
Side note: The RYOBI 18V ONE+ System has more than 70 tools that work with the same battery, so you can use the same battery and charger to power all of your RYOBI tools. You can also buy bare tools so there’s no need to spend additional money on batteries and chargers every time you buy a new tool! LOVE it!
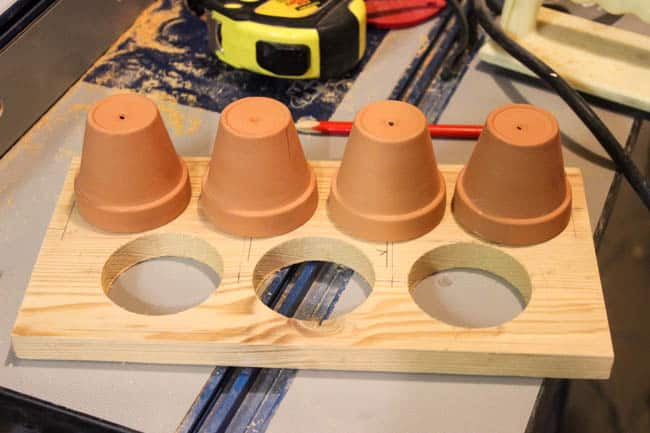
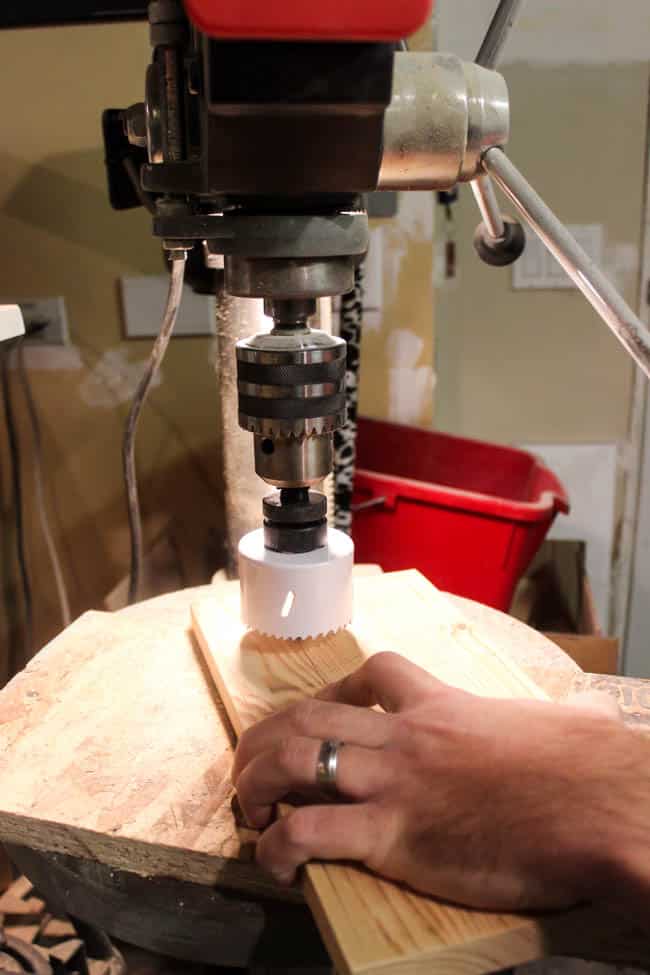
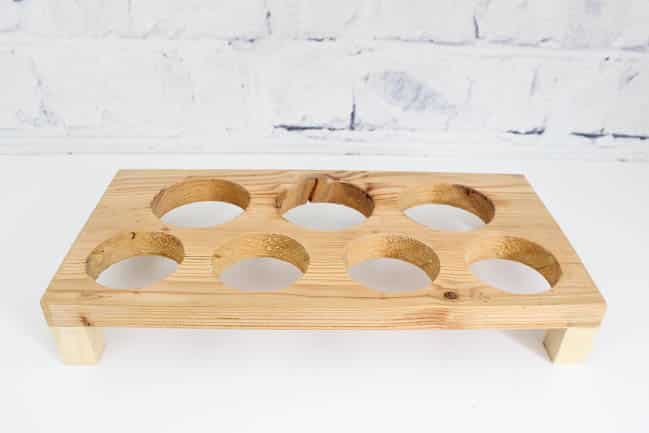
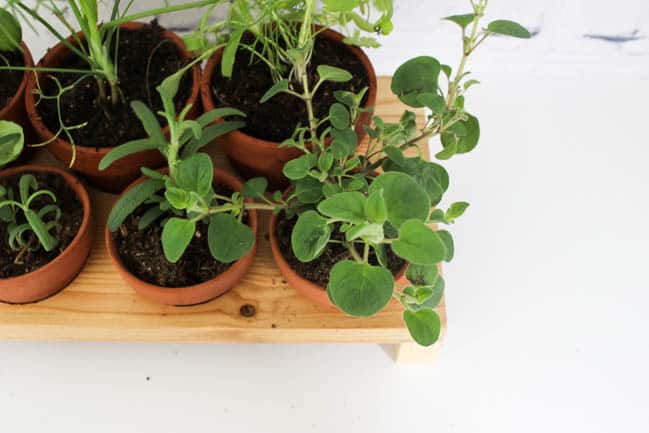
Drill Holes for the Pots
Next, use your hole saws to cut the perfect sized holes for your terra cotta pots. Use the attached plans to measure exactly where to drill. If you’ve never used a hole saw, check out this tutorial.
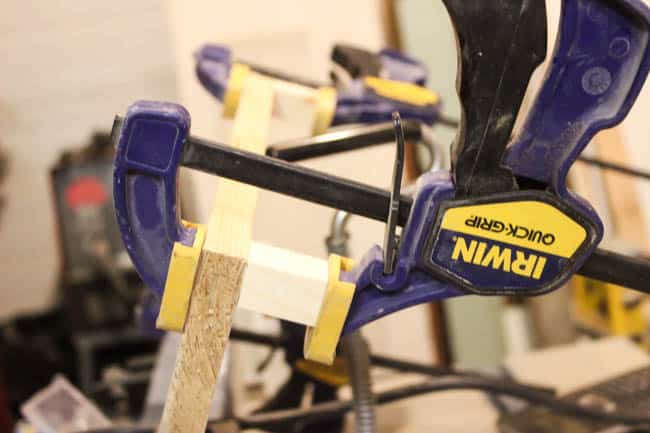
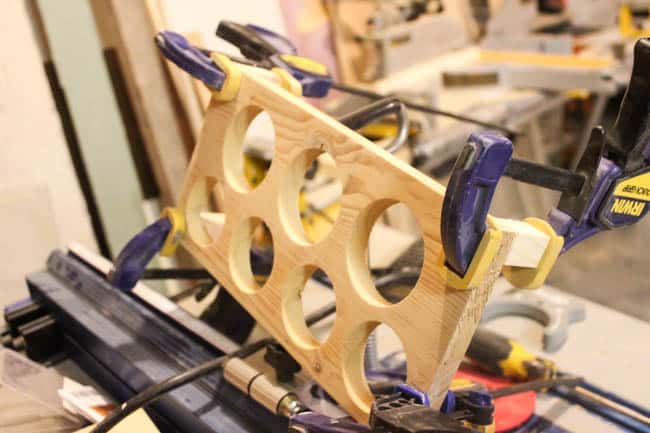
Attach the Feet
The last step is to attach the tiny feet so that your herbs stand up off the counter. Glue and clamp them into place
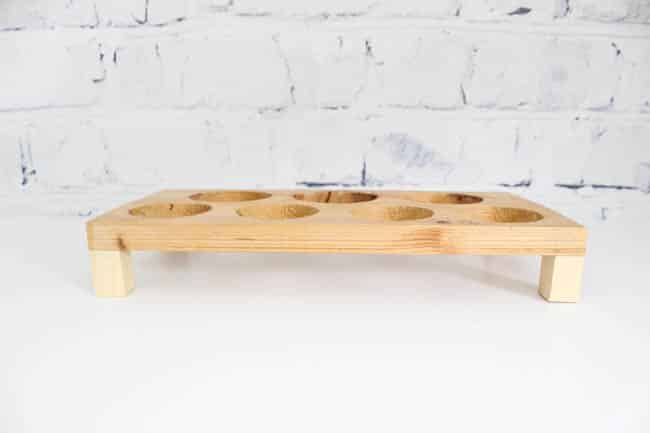
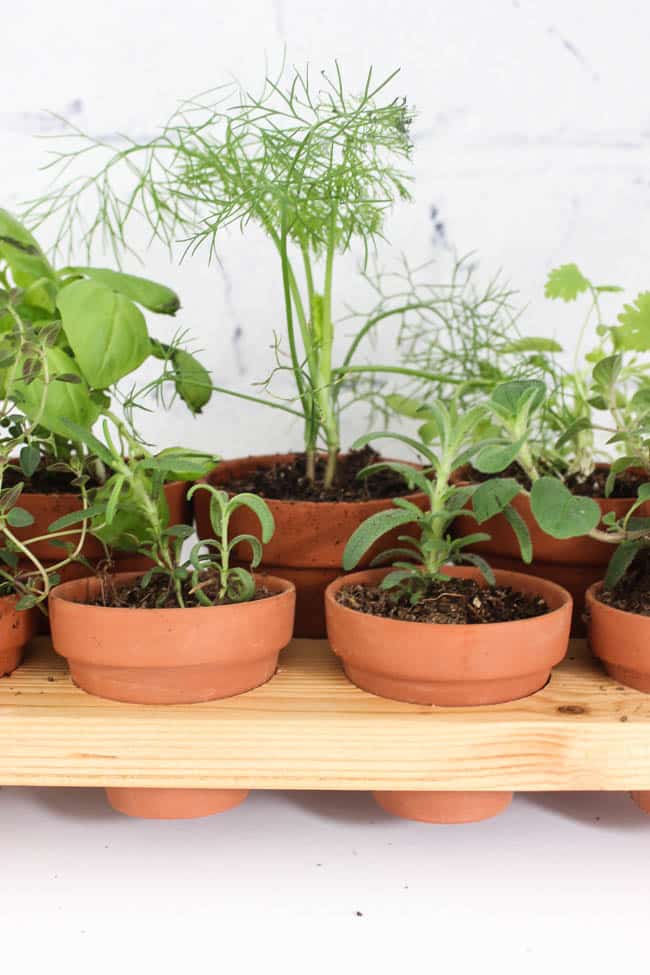
Stain the Finished Product
When the glue was dried, I stained the piece in my favourite natural stain.
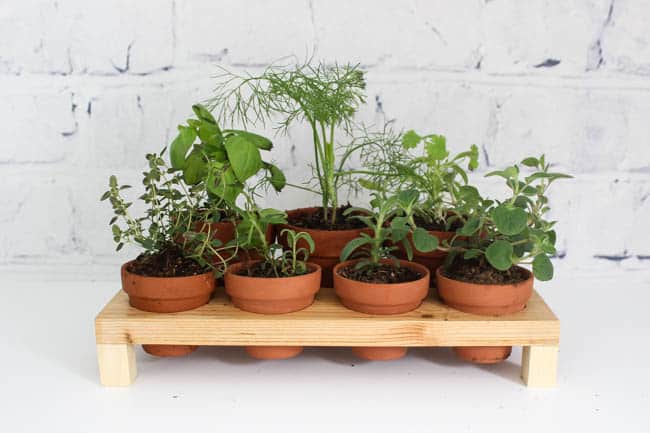
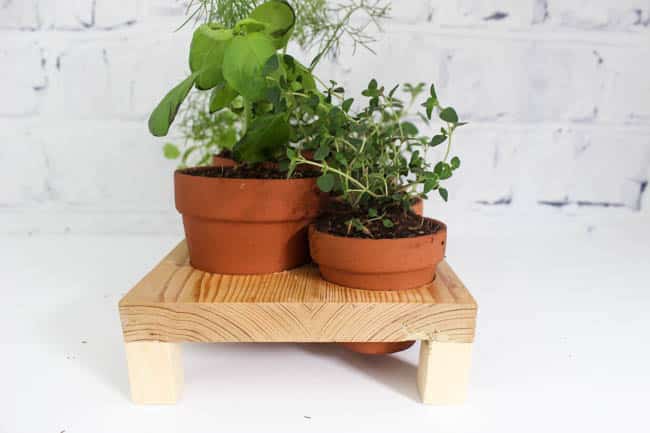
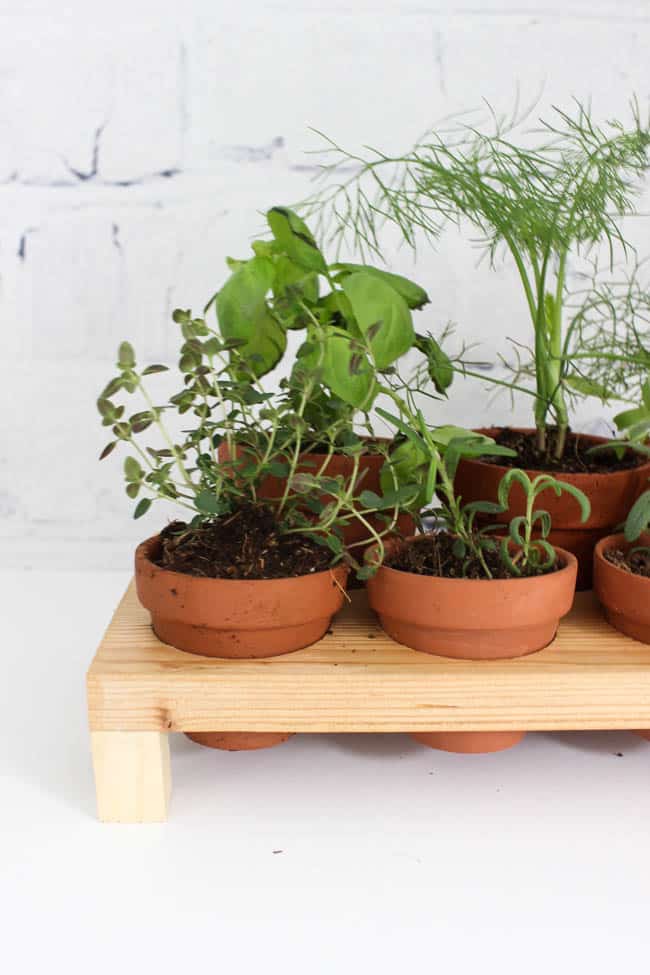
Add the Potted Plants to your Indoor Herb Garden DIY!
LOVE love this planter.
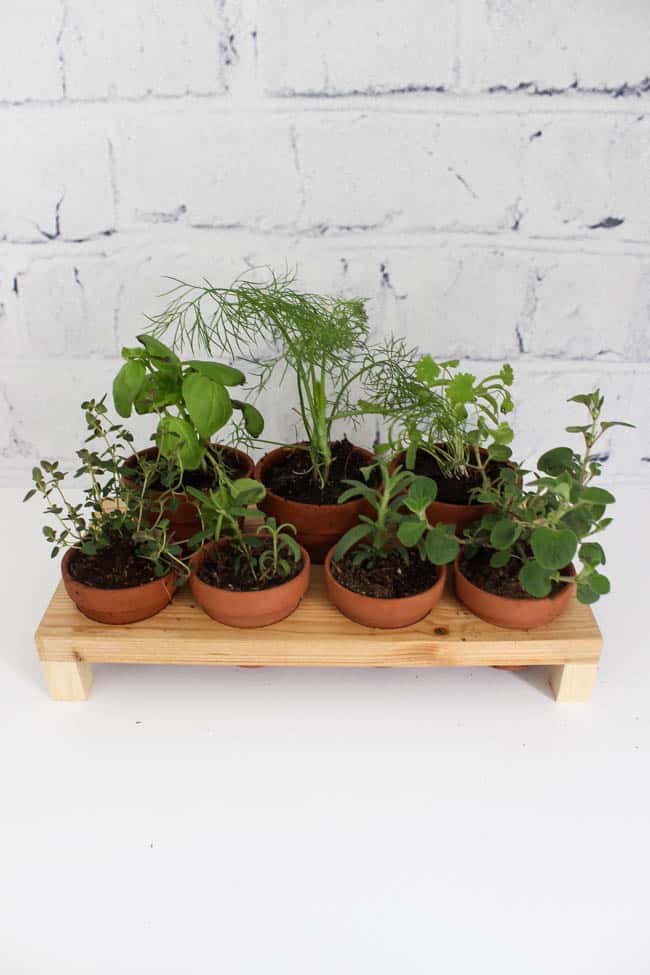
It sits on my windowsill in the sun and the herbs are growing beautifully. Herbs like to drink water from their feet, so I do pop of the pots out of the tray every couple of days. I just place them on a flat plate to soak up some water from the bottom and put them back in the tray when they are done :)
My dream of fresh herbs in the kitchen has finally come true! Try your own indoor herb garden DIY and let us know in the comments how it came out!
What Kind of Herbs to Include in your Indoor Herb Garden DIY?
It’s up to you! We typically use rosemary, thyme, basil, parsley and dill. Here’s a nice summary of how to care for and harvest some common herbs.
Tips for Growing Herbs Indoors
Use Terra Cotta pots, or other pots with a drainage hole, as the herbs will suffocate without proper drainage
Use a good potting soil from any garden store
Ensure your herbs have enough light. The more light the better, so placing your DIY herb garden in front of a bright, sunny window would be perfect.
Don’t overwater them! Two to three times a week should be enough. If the top of the soil feels dry you can water it, but make sure to water it slowly to allow the plants to absorb the water.
More DIY planting ideas!
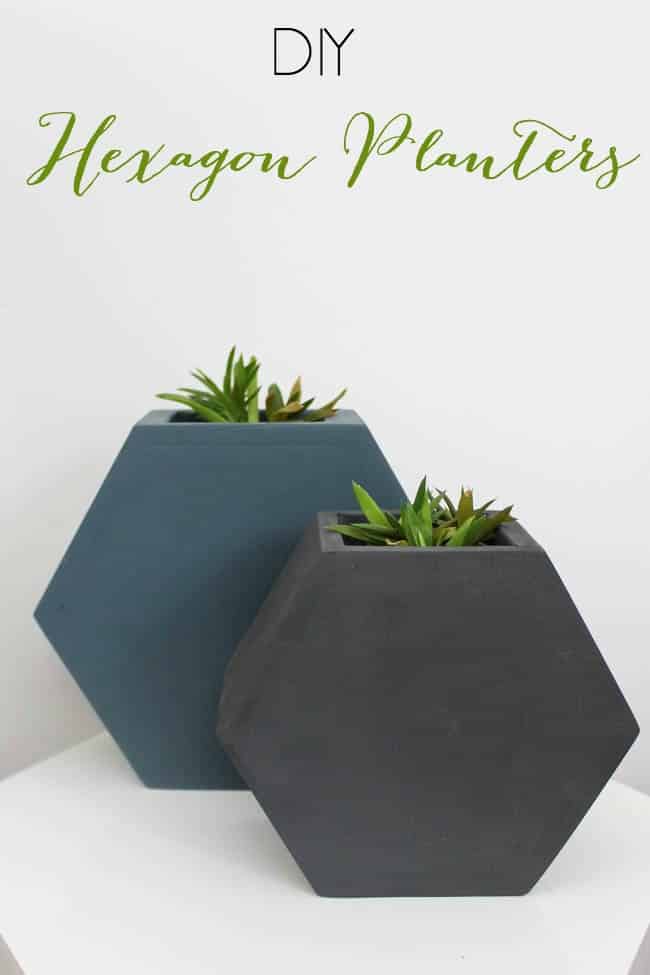
If you like planters, you might like these simple Hexagon Wall Planters.
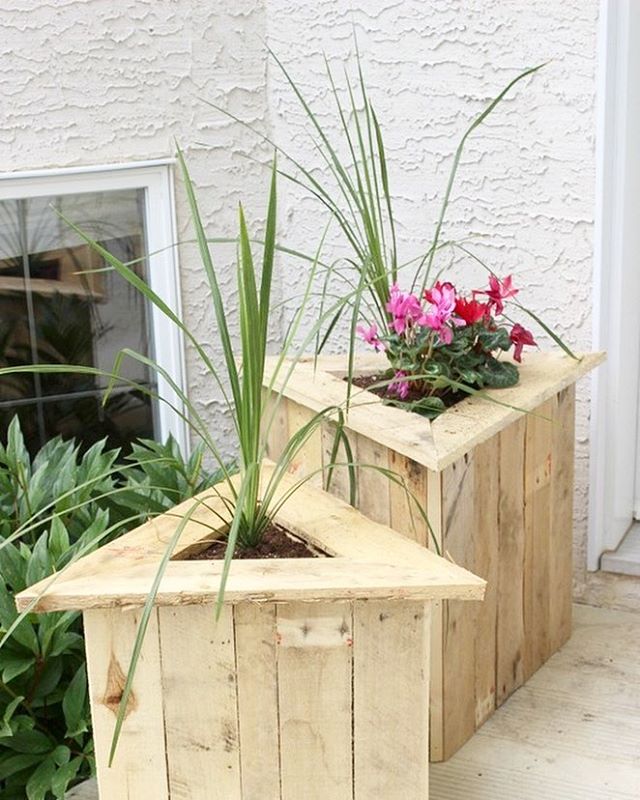
Or these Triangle Pallet Planters!

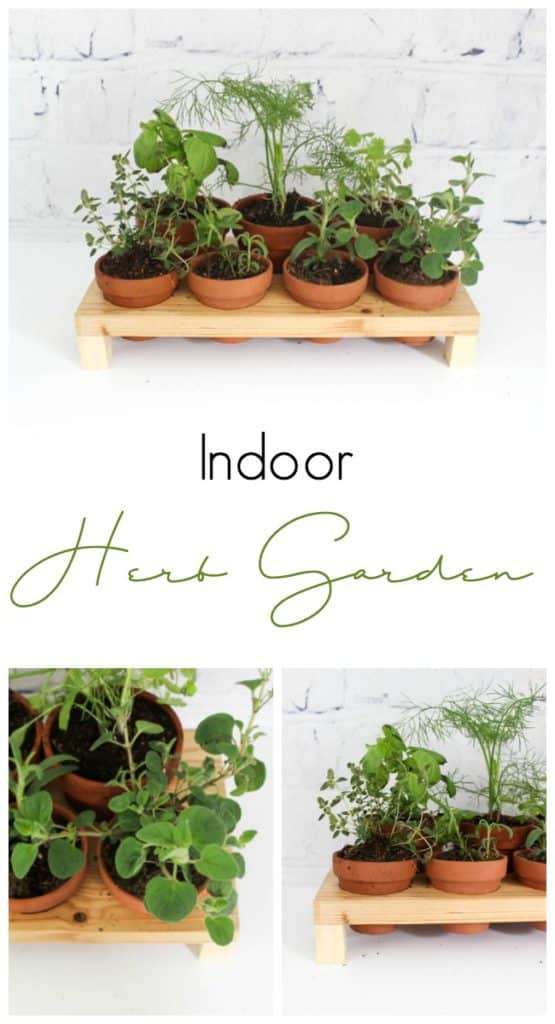
Indoor Herb Garden DIY
Make your own indoor herb garden! Use Terra Cotta pots to keep your herbs close by all summer long! Includes the FREE build plans.
Materials
- Terra Cotta Pots (4 small, 3 medium)
- 1 x 8 board
- 1 3/4 x 3/4 board
- Natural Stain
Tools
- 2 1/8" hole saw
- 2 1/2" hole saw
- Wood glue
- Clamps
- Mitre saw
- Table saw
Instructions
- Cut boards according to the design plans
- Sand wooden boards
- Cut holes for Terra Cotta pots
- Glue and clamp feet onto wooden board
- Stain the finished product
- Insert potted plants
Recommended Products
As an Amazon Associate and member of other affiliate programs, I earn from qualifying purchases.


46 Indoor Herb Garden Ideas That Will Inspire You to Start Planting - Homesteading Alliance
Sunday 25th of November 2018
[…] cute herb table makes it easy to transport all your herbaceous friends from one place to […]
DIY Indoor Herb Garden – Marco‘s Projects
Tuesday 5th of December 2017
[…] was greatly inspired by this article about a beautiful indoor herb garden I found on Pinterest and started gathering the […]
A Moore
Tuesday 5th of September 2017
So where is the water draining to from the pots if this is sitting in your kitchen window?
Lindivs
Tuesday 5th of September 2017
I usually put a plate under them when I water them. Or I take them out and place them on a plate since the herbs like to drink from their roots :) I would do this in the morning once every couple of days and just put them back in when they've soaked up the water.