
The best IKEA Pax Hack! Learn how to turn pax wardrobes into built-ins, including installing units on a sloped ceiling.
We love a good IKEA hack! We have used IKEA Pax wardrobes several times over the years to create custom closets, and we have always been happy with the price, and how easy it is to customize them. Today we are walking through our favourite IKEA Pax Hack and sharing how to turn Pax wardrobes into Built-Ins.
*This post was sponsored by DAP Canada and may contain affiliate links. When you buy a product through one of our links, we get a commission at no cost to you! Thank you for supporting our blog so that we can continue to bring you posts like these. For more information, please see our disclosure page.*
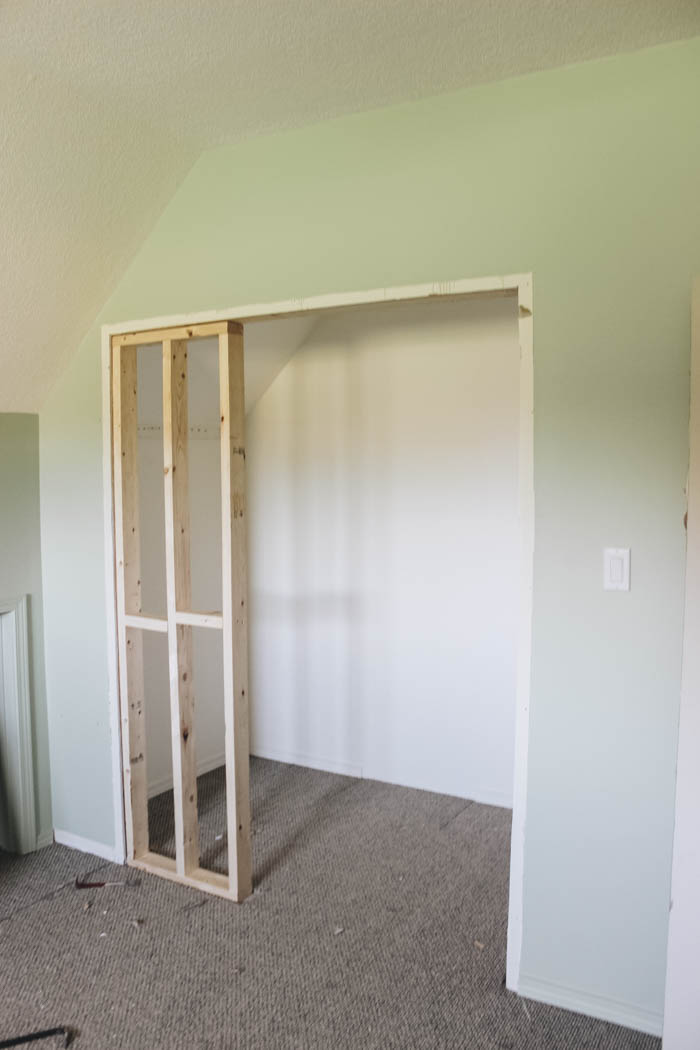
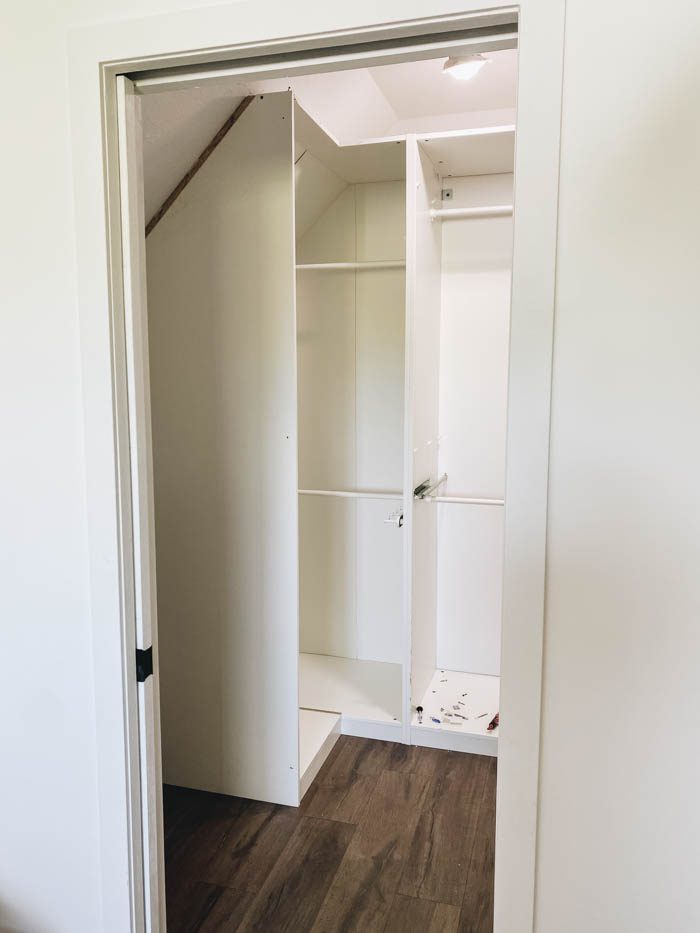
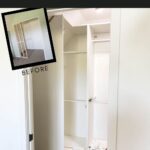
Our Closet Before
Our closet has gone through a number of changes over the years. The first thing we did was add a few custom Pax wardrobes, and narrow the opening, so that the pax wardrobes were completely hidden behind the wall. We did a whole post on it here.
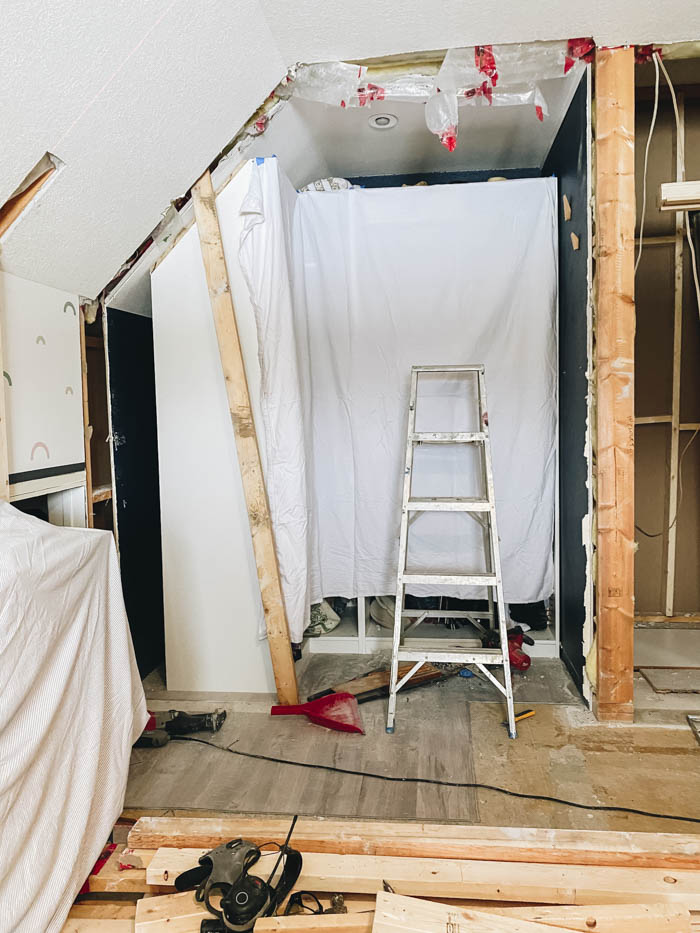
The closet stayed in that configuration for a long time, until we did some BIG renovations to the bedroom this year. We actually took space from the hallway, and the bedroom to add a new ensuite. To add the ensuite, we brought the entire wall forward, including the closet wall, and then we added pocket doors for both the bathroom, and the closet.
Our Closet Layout
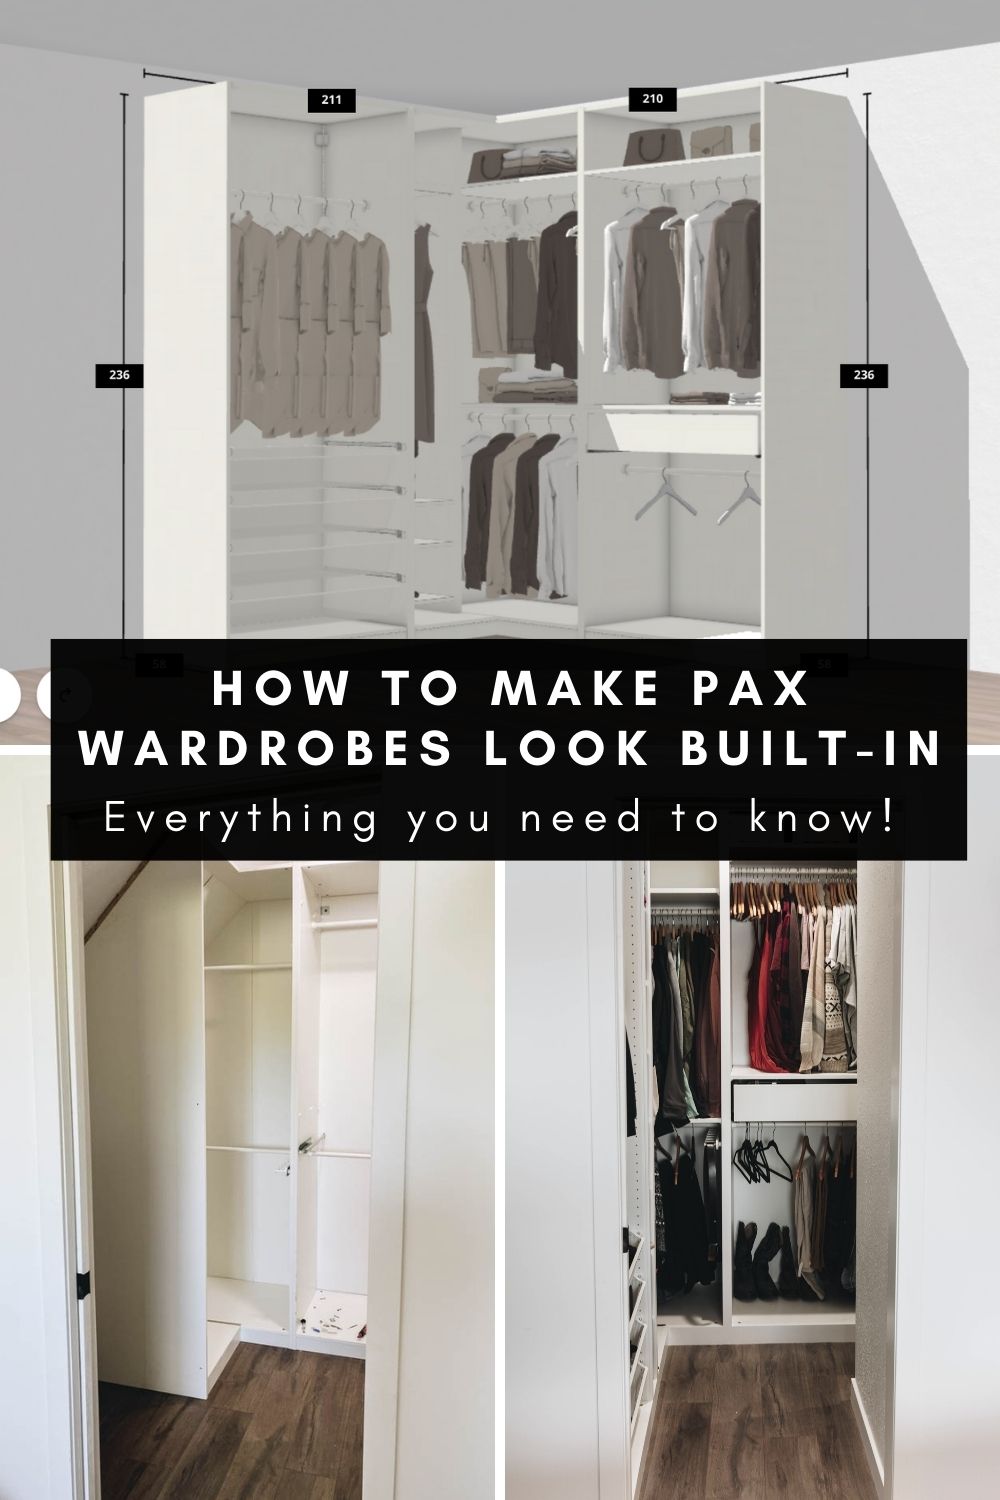
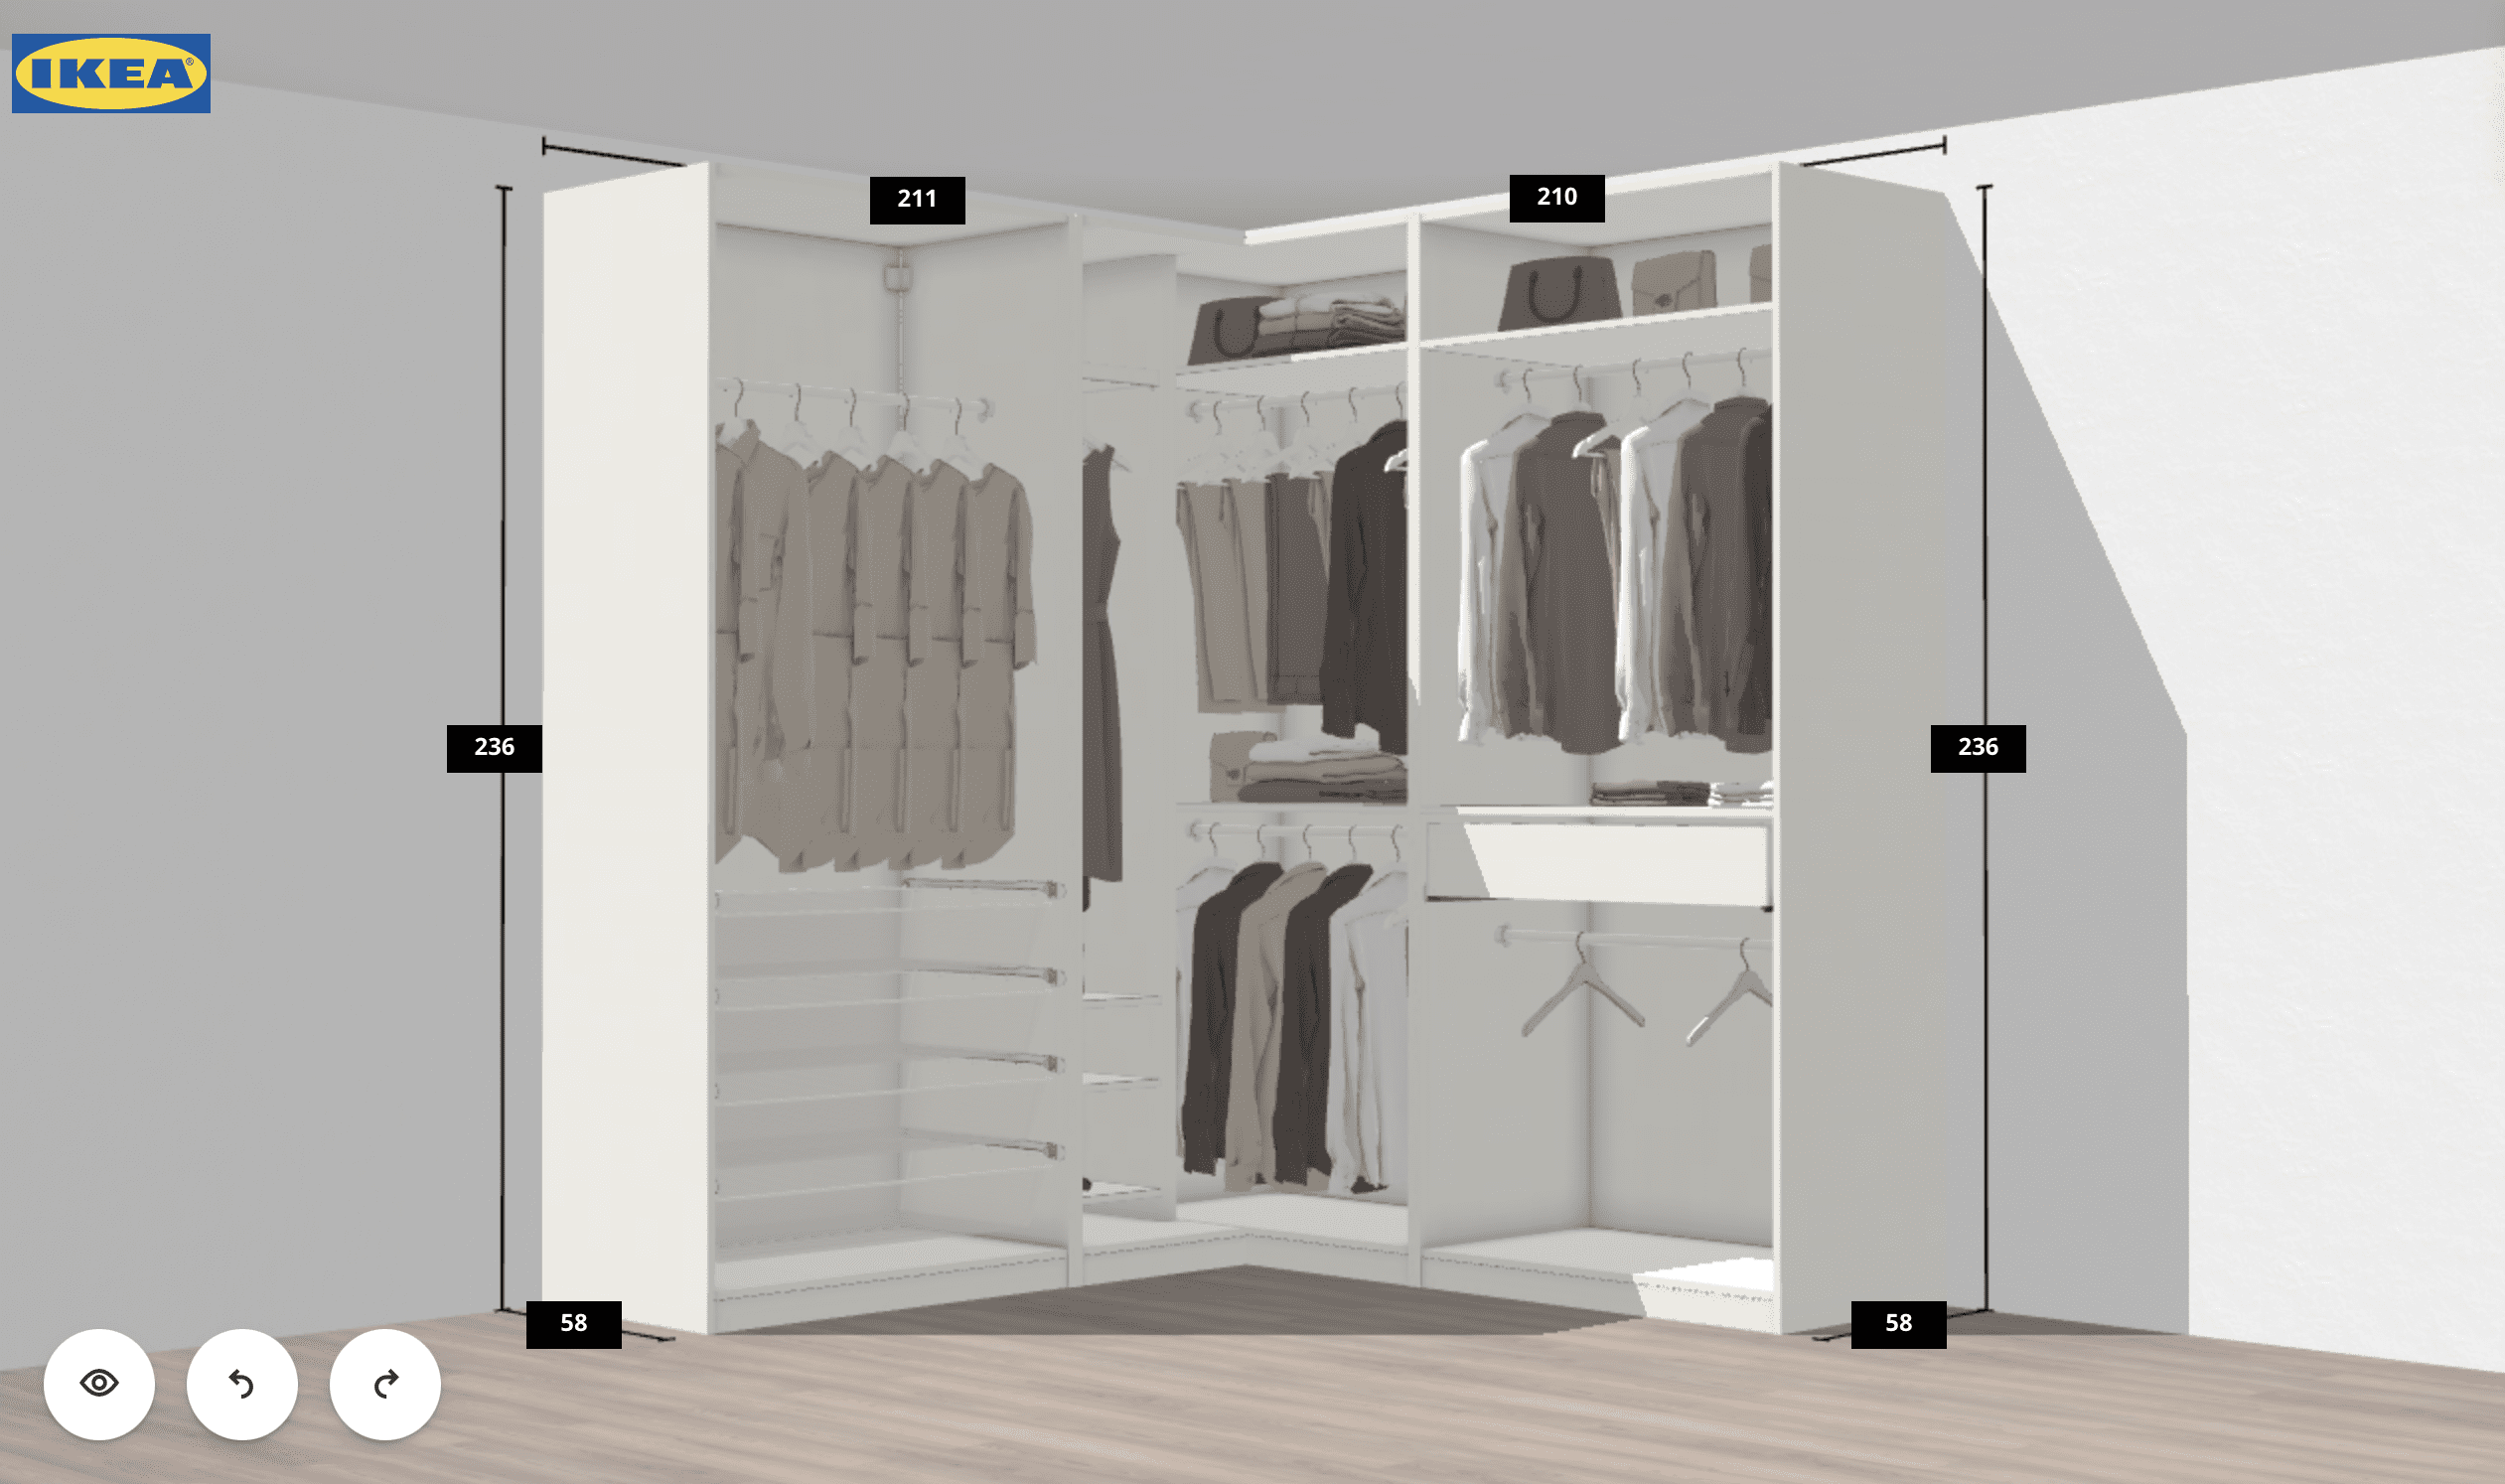
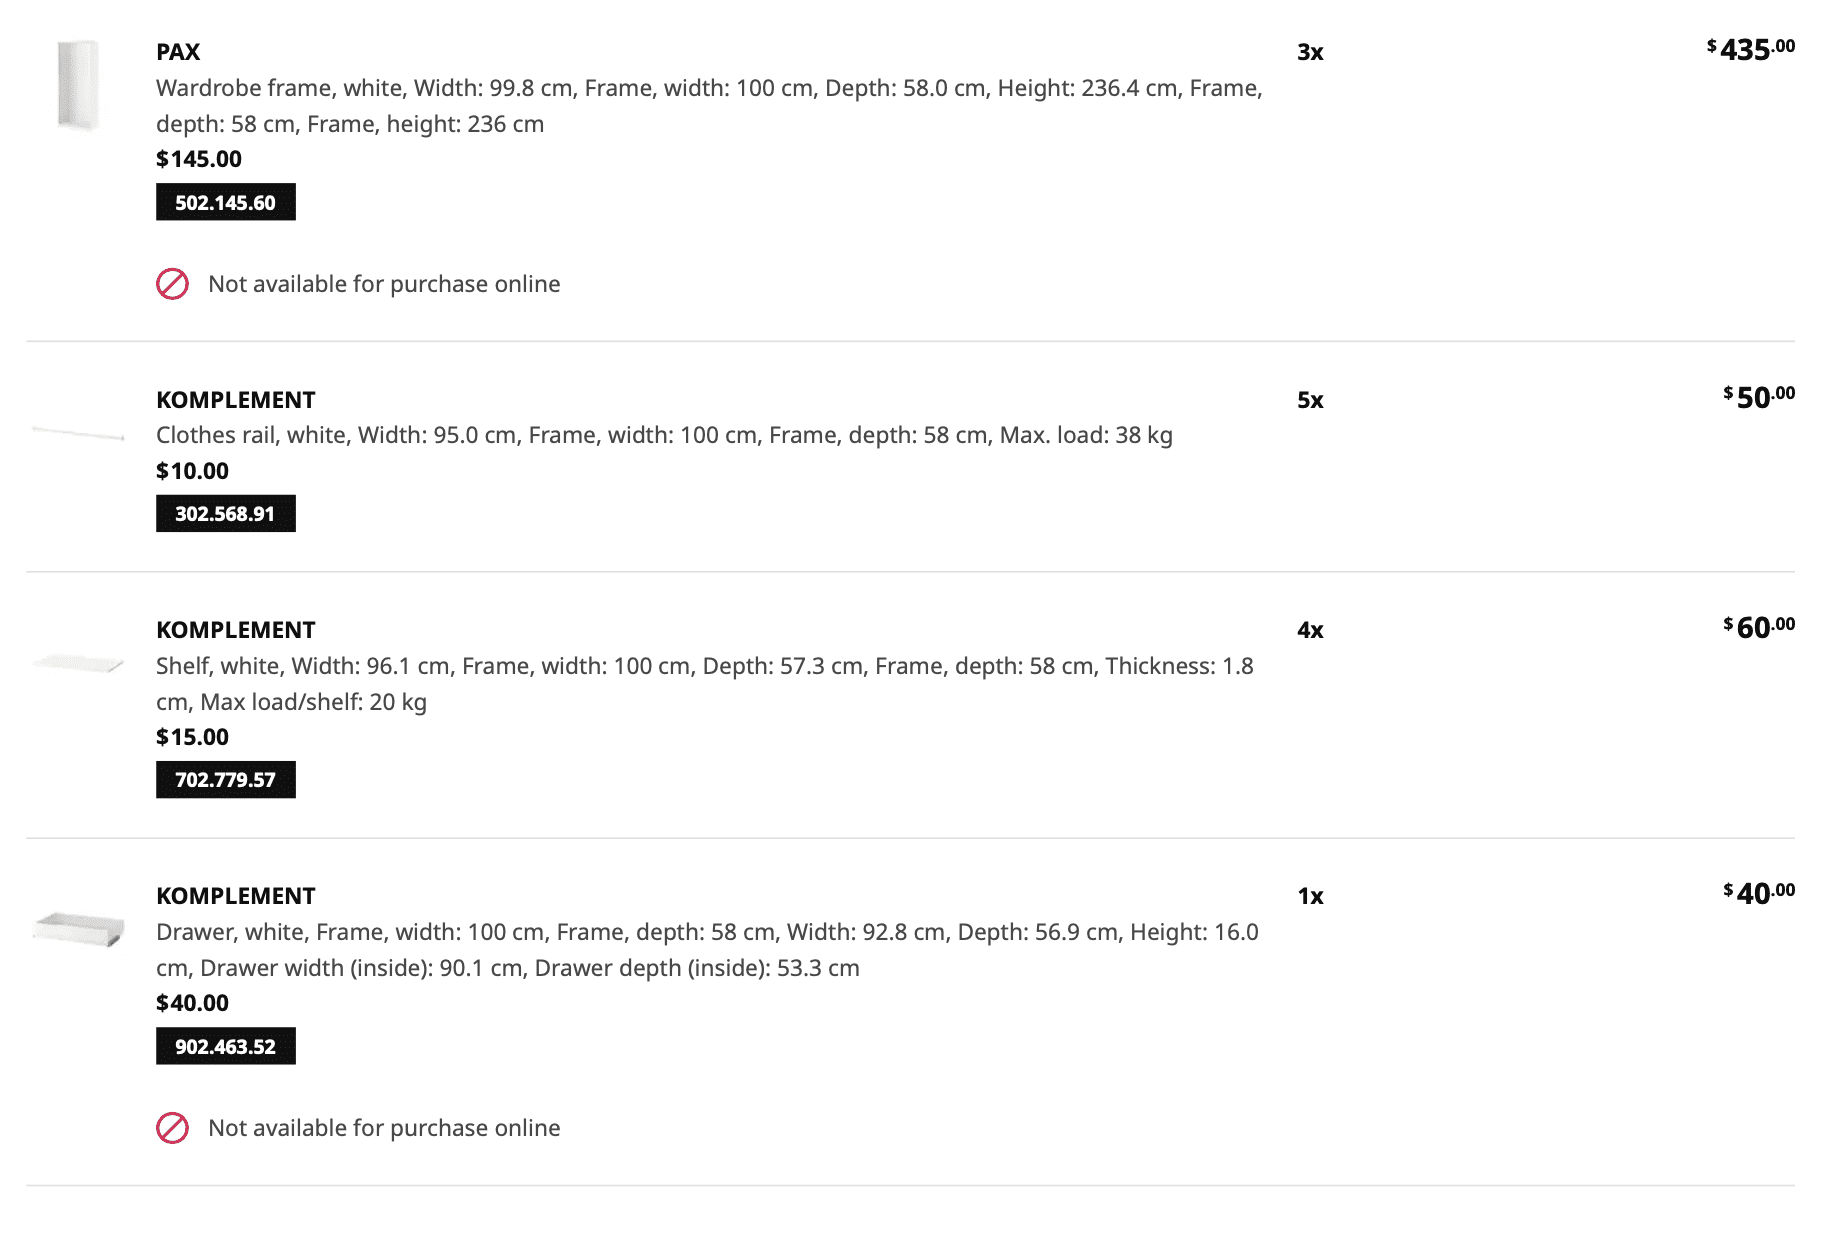
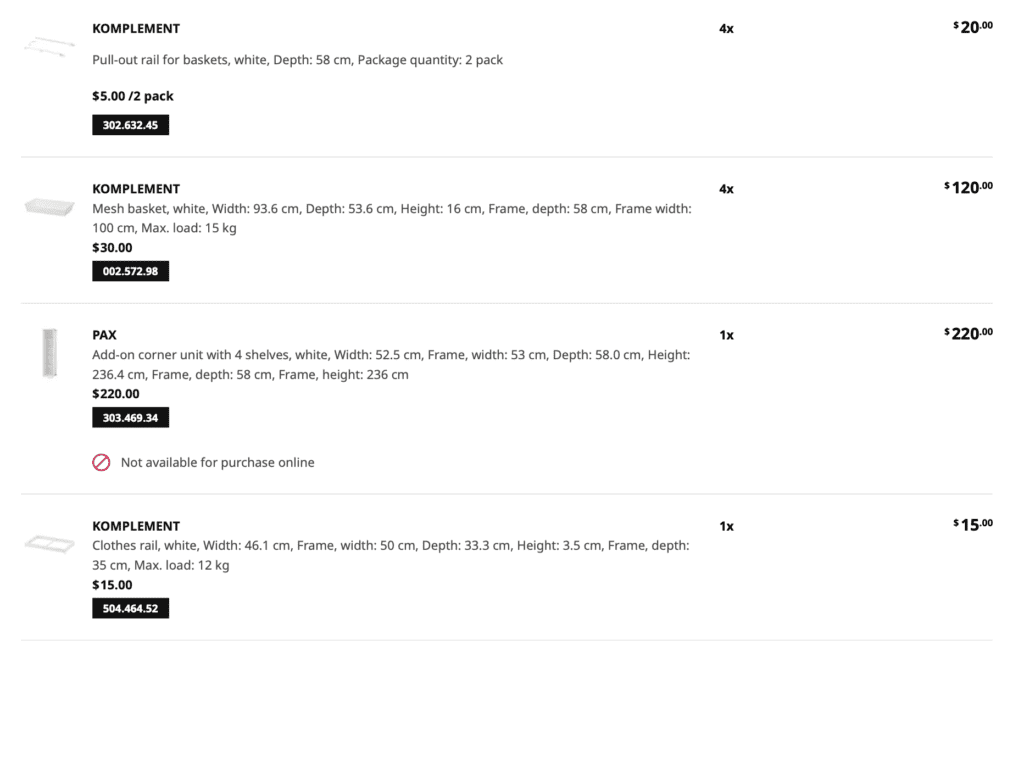
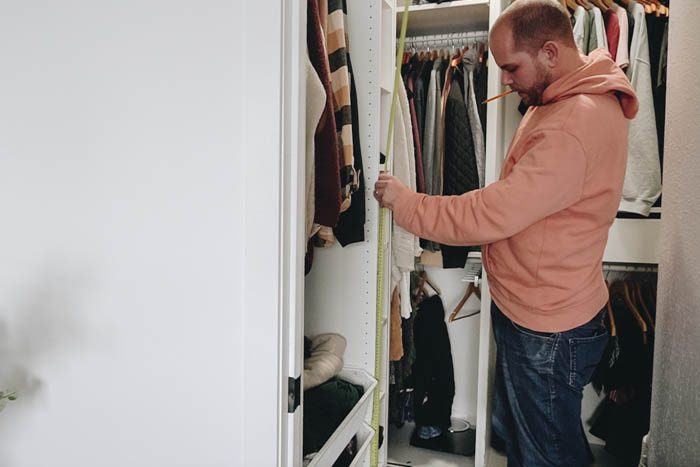
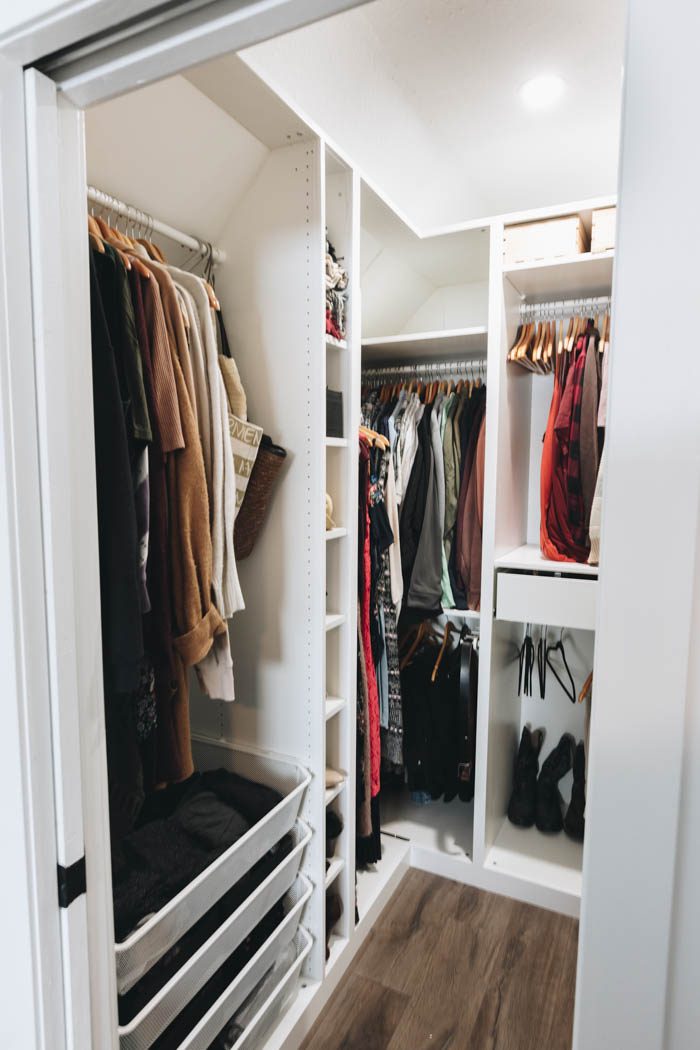
Once the renovations were done, we had extra space in our closet, that could fit another entire pax wardrobe. Here’s the layout of the IKEA pieces we ended up with. The total cost of these wardrobes and all of the accessories was just under $1000 CDN.
Here’s a list of the pieces that we used to build our IKEA closet:
How to Install Pax Wardrobes on a Sloped Ceiling
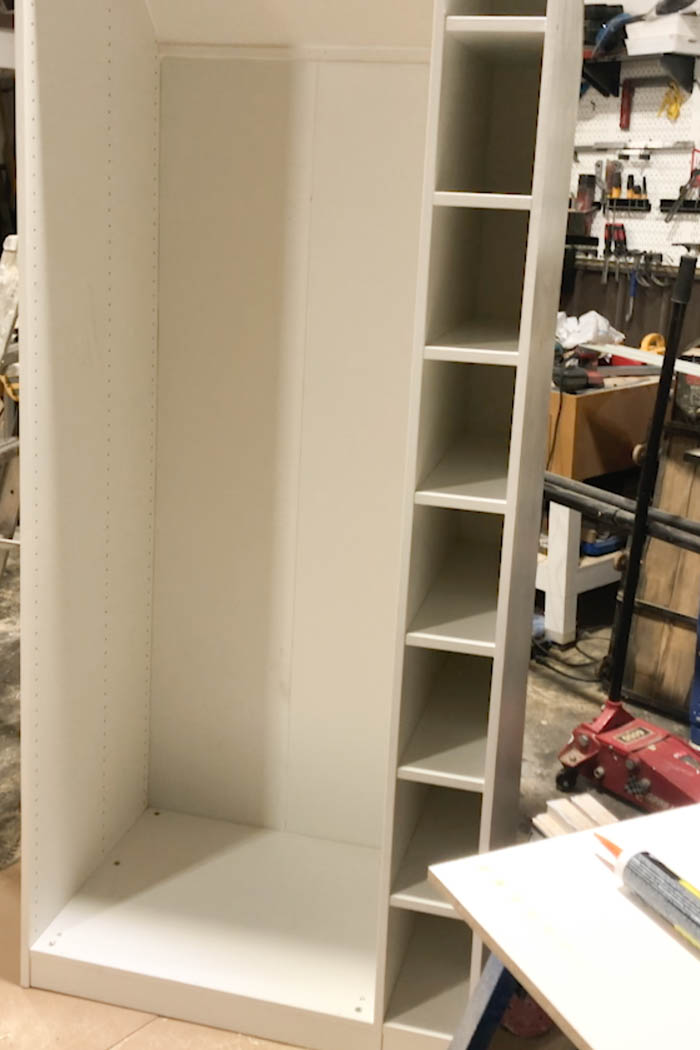
One of the problems we faced with adding pax wardrobes to our closet was that we had a sloped ceiling, as you can see in the photos above. The wardrobes are big rectangles, and if we just butt them up against the sloped ceiling, we lose a lot of valuable space.

Our solution was to cut a large triangle out of the back of the units, using our track saw. We cut one side, then the opposite side, and then the back. We covered the back with white melamine board (which exactly matches the wardrobes). The board was screwed into the pax unit to keep everything sturdy. Then you can install them exactly how you would, with any pax wardrobe.
Why Turn PAX Wardrobes into Built-ins?
IKEA pax wardrobes are great for many reasons. They look good when they are built, they come with a ton of options for customizing the layouts, and organization within the cabinets, and they are far more affordable than custom cabinetry.
Installing trim, baseboards, and filler pieces to make your pax wardrobes look built-in, will take these wardrobes to the next level, and give that feel of a custom, high-end finish, without the hefty price tag of custom work.
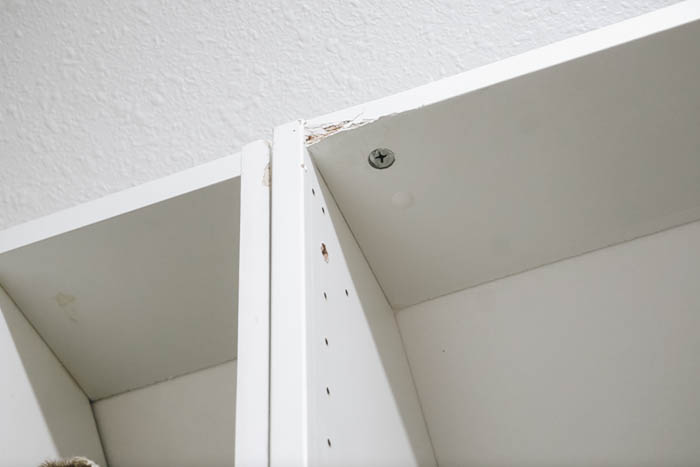
The two “before” photos above highlight some of the things that are upgraded, by adding the trim. The gaps between the cabinets and the walls will be filled, as well as the gaps between the cabinets that will be covered. Any damage from renovations or installation (we had a small damaged spot at the top) will be covered, and the entire front of the wardrobe will look seemless. Finally, the bottom of the cabinets will match the baseboards throughout the space, and everything will be even and flush.
These are small details, but these improvements are what take your pax wardrobes from IKEA to custom.
IKEA PAX Hack: How to Turn Pax Wardrobes into Built-Ins
Pax wardrobes look amazing on their own, but the difference between an ordinary and a high-end finish lies in the details that you add to make your wardrobe look built-in.
Materials Needed
Here’s everything we used to finish our IKEA pax hack:
DAP Products:
Tools:
Miscellaneous:
- MDF mouldings
- White Melamine boards
- Bullseye 1-2-3 primer
- Your trim paint
Remove Baseboards Behind and Beside Wardrobes
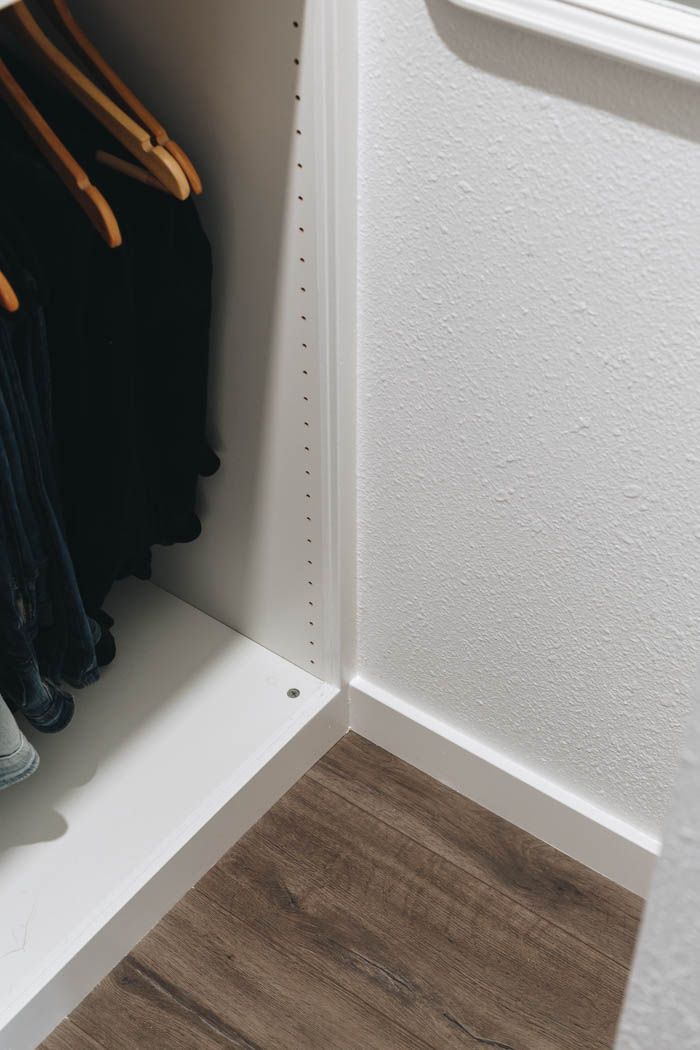
If you are adding your wardrobes to an open space, you will want to remove any baseboards that touch the pax wardrobes, either behind or at the side. This allows the wardrobes butt up against the walls and look built in.
We did that in this wardrobe, inside the closet, but you can also see in in one of our previous pax wardrobes when we added them to an open wall in our bedroom.
Cut or Build Filler Pieces
Finishing the Sides
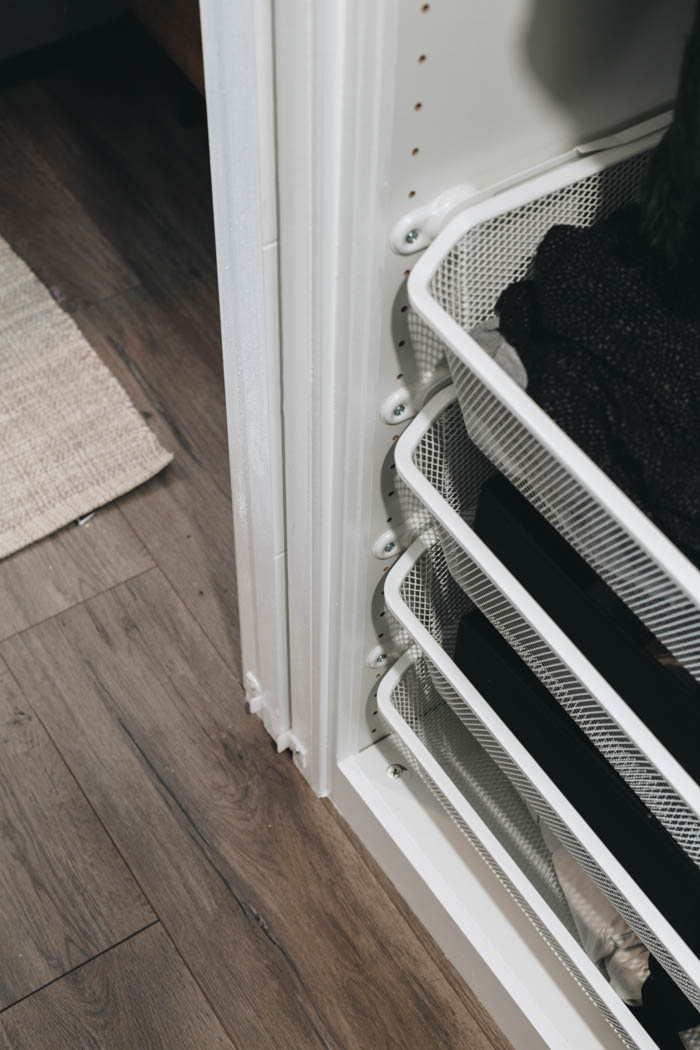
Since the pax wardrobes come in very specific sizes, you may not be able to perfectly fill your closet or wall with the units for this IKEA Pax Hack. If you have a few inches of unused space, you can purchase one additional panel or use white melamine board to fill that space, to help give the appearance that it is custom fit for the space.
This is really easy to do. These panes will generally match your cabinets colour and come in various sizes. We used one of these (cut in half and to size) to fill in the sides of both cabinets. To attach the cover panels we placed screws from the inside of the cabinets into the panel. A wood strip was first installed behind the cover panel and was secured to the drywall. This let us secure the end opposite (from the cabinet) of the cover panel to this with construction adhesive so we didn’t have any nail/screw holes. You can see the finished look here on our office.
Finishing the Top
Depending on the height of your ceiling, you may also choose to add a filler panel between the top of the pax units and the ceiling (or crown molding). To do this you will need to build a frame above your pax units that you can nail the filler panels or crown molding into. If you want to do this, here’s a great tutorial.
Adding a Custom Built-in
Maximizing the space the best we could with our IKEA layout above, we still had 6″ of space at the side of our unit. We had two options to maintain a built-in look. One was to add a “filler” piece on the side. We did this with the black IKEA cabinets when we built my office, as you can see in the flat full length pieces on the side of the office cabinets below.
Our other option, and the one we opted for, was to utilize the space and build custom shelving to match the rest of our IKEA wardrobes.
We build all of the additional custom shelving with melamine particle board. We made them the same width as the pax wardrobes, and used pocket holes on the underside of the shelves to attach them to the wardrobe and to a full length piece of melamine board on the other side. This quick addition to utilize that extra space is one of my favourite parts of this IKEA pax hack!
It was a bit of a challenge actually getting the units into the closet, so you may need to plan that out! But the good news is that if you do end up with some damage (like we did on the outside.. whoops!), we’re about to cover all of that up with trim.
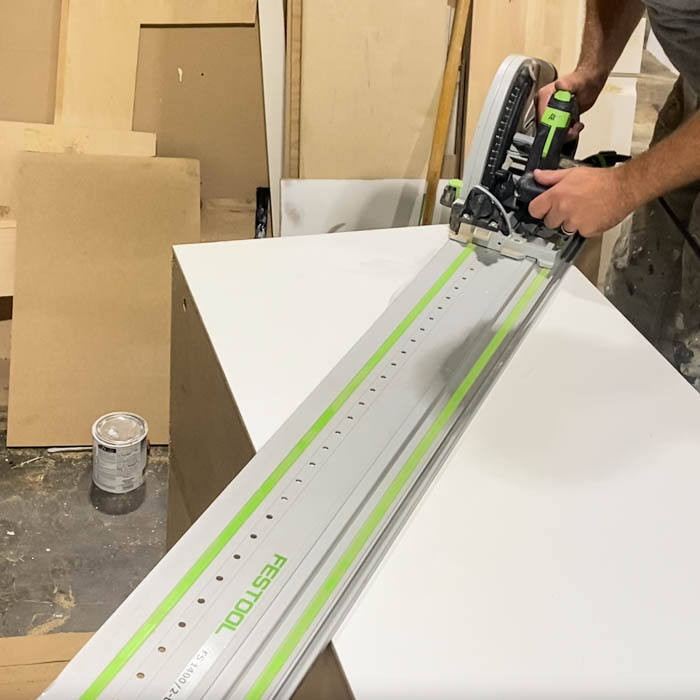
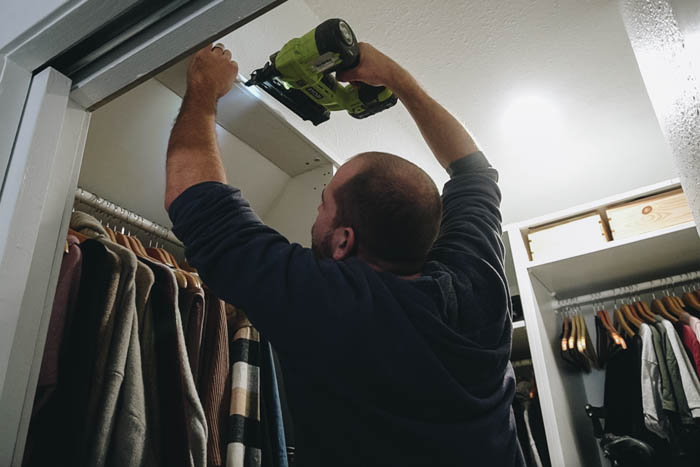
Add trim, baseboards, and crown moldings
To get the built-in feel, you need to take the time to add mouldings that hide all of the seams, and inconsistent edges. We added a trim piece to the front edges of the pax wardrobes, wide enough to cover the edges of both units that are beside one another.
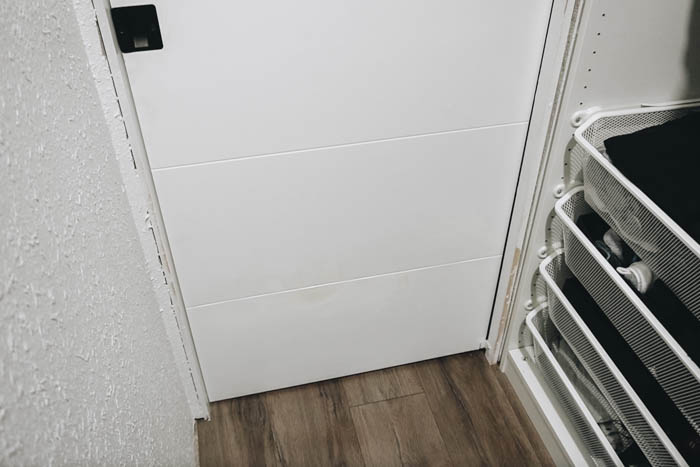
For the bottom, we added a baseboard across the entire pax wardrobe. Because it was in a confined closet, we matched that same height for all of the baseboards in the closet so that it all looked seamless and continuous.
For the top of the units, we added a trim piece similar in width to the ones on the front edges. You can add a crown moulding here too, but we chose a narrow trim to keep everything simple and minimal.
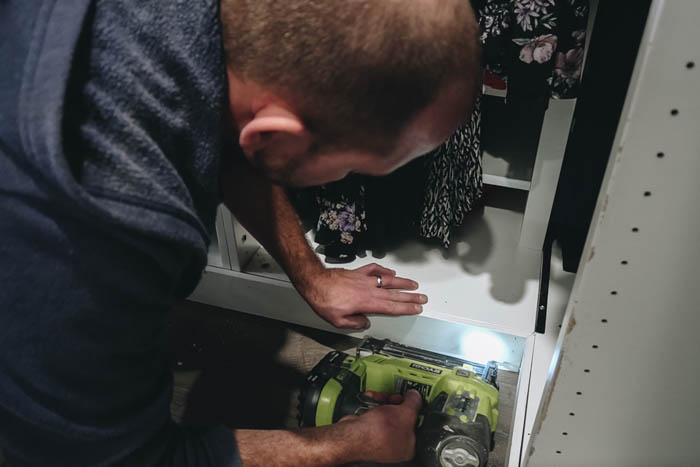
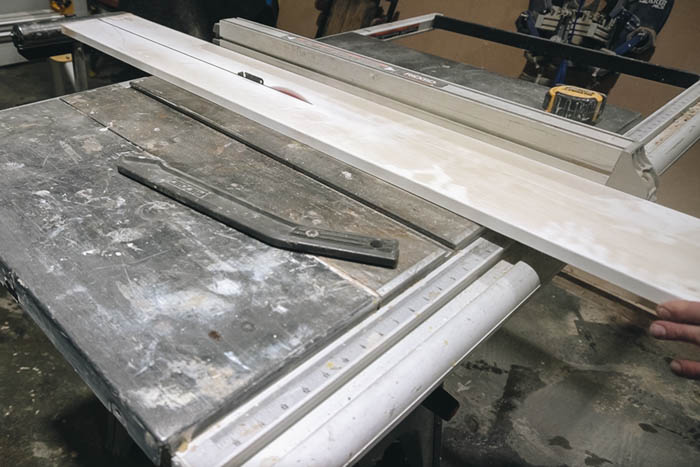
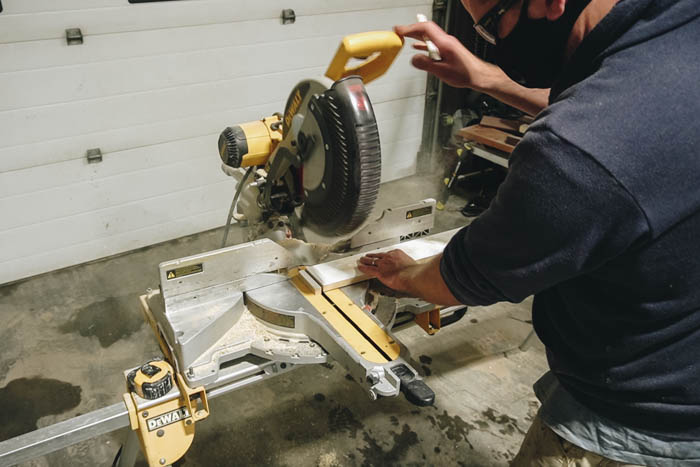
You can easily cut all of the trim with a mitre saw, and attach it all to the pax wardrobes with construction adhesive and a cordless brad nail gun.
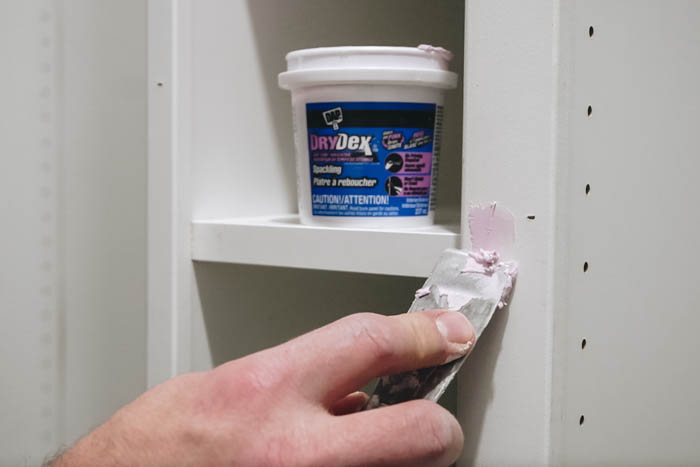
Fill Nail Holes
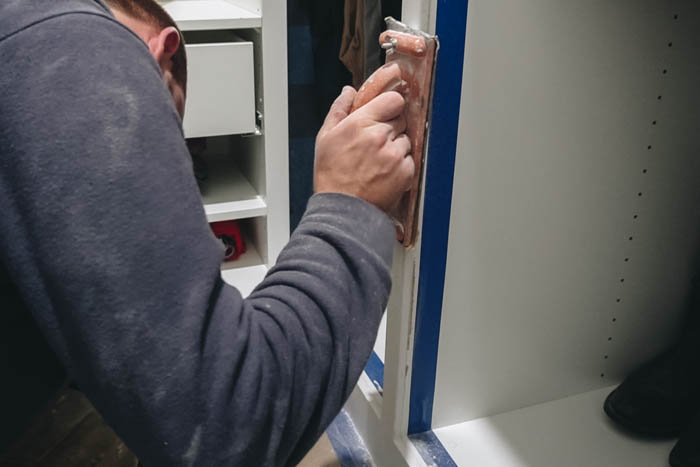
When all of the trim pieces are attached, you can fill all of the holes with spackling. We used DAP’s Drydex Spackling which goes on pink, dries quickly. It then turns white when it’s dry so that you know when you can sand it. You can also sand any spots where you spliced or joined boards together. Sand when ready to get a nice smooth finish.
Extreme Stretch Premium Caulking
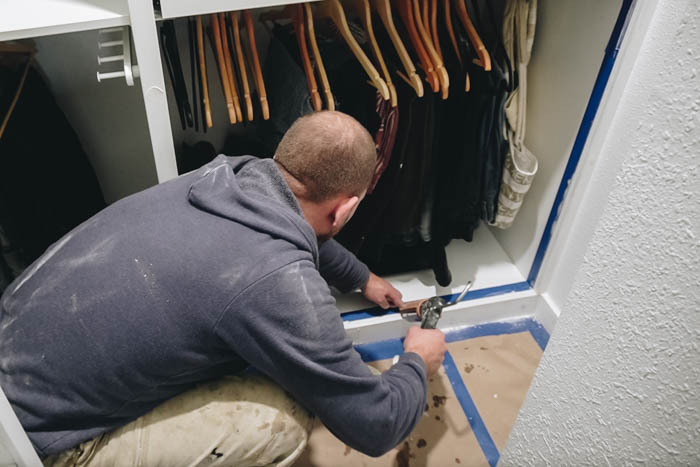
Fill any gaps between the wardrobes and your wall, and along the seams where you added trim to the walls and pax units. We used DAP’s Extreme Stretch Premium Caulking which is paintable, and works perfectly to give a beautiful finish.
The best trick to apply caulking is to bring a small bowl of water, dip your finger into the water, and run it along the caulking gun as you apply the caulk. This will give you a nice, smooth finish.
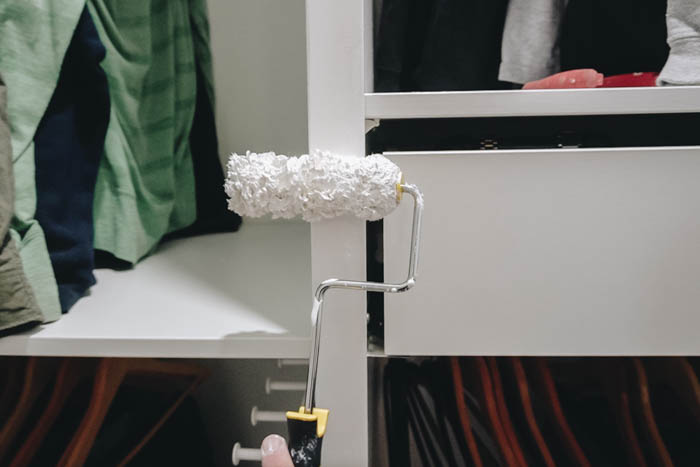
Paint Trim
The final step is to prime and paint all of the trim. We used our favourite primer, Bullseye 1-2-3, for this. When the primer is dry, apply a couple of coats of paint. You can use painters tape to paint off the pax units so that you don’t get paint on them.
We used the same paint that we used on our baseboards everywhere else in the bedroom, which was Ultra White by Valspar in a semi-gloss finish. You can use a brush to apply paint to the sides, and a small foam roller to roll paint along the front of the trim pieces.
Total Cost and Budget for our Closet
Here’s a total breakdown of the budget for our IKEA pax hack.
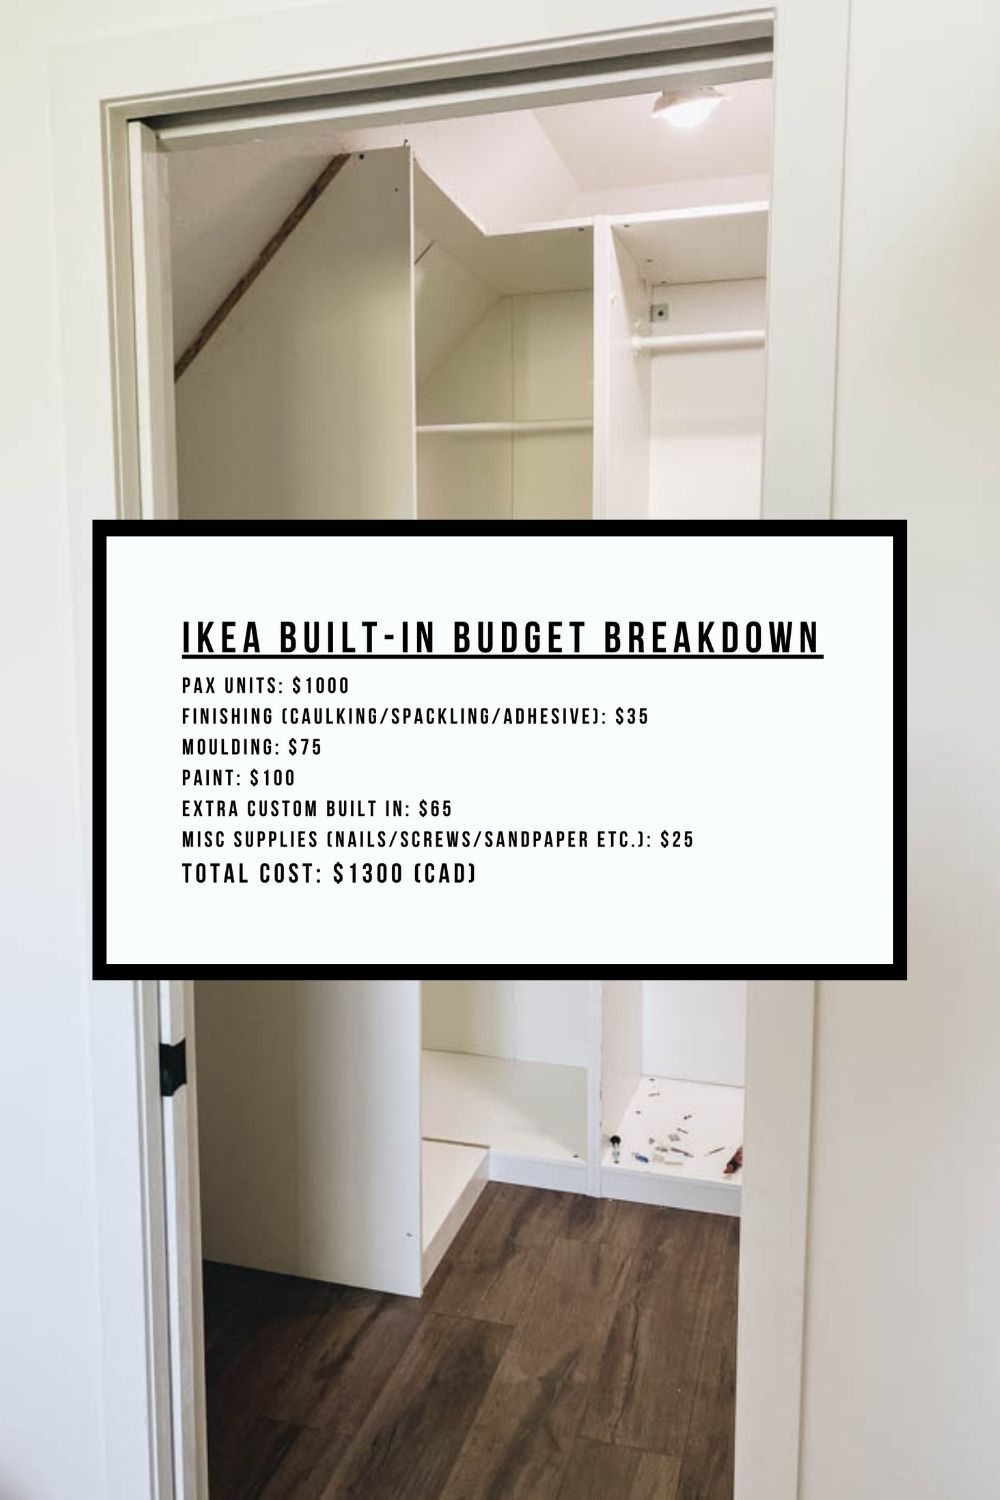
This was such an affordable project considering the visual impact on the space. Buying custom cabinetry can easily cost 2-3 times more than this, and gives a very similar end result.
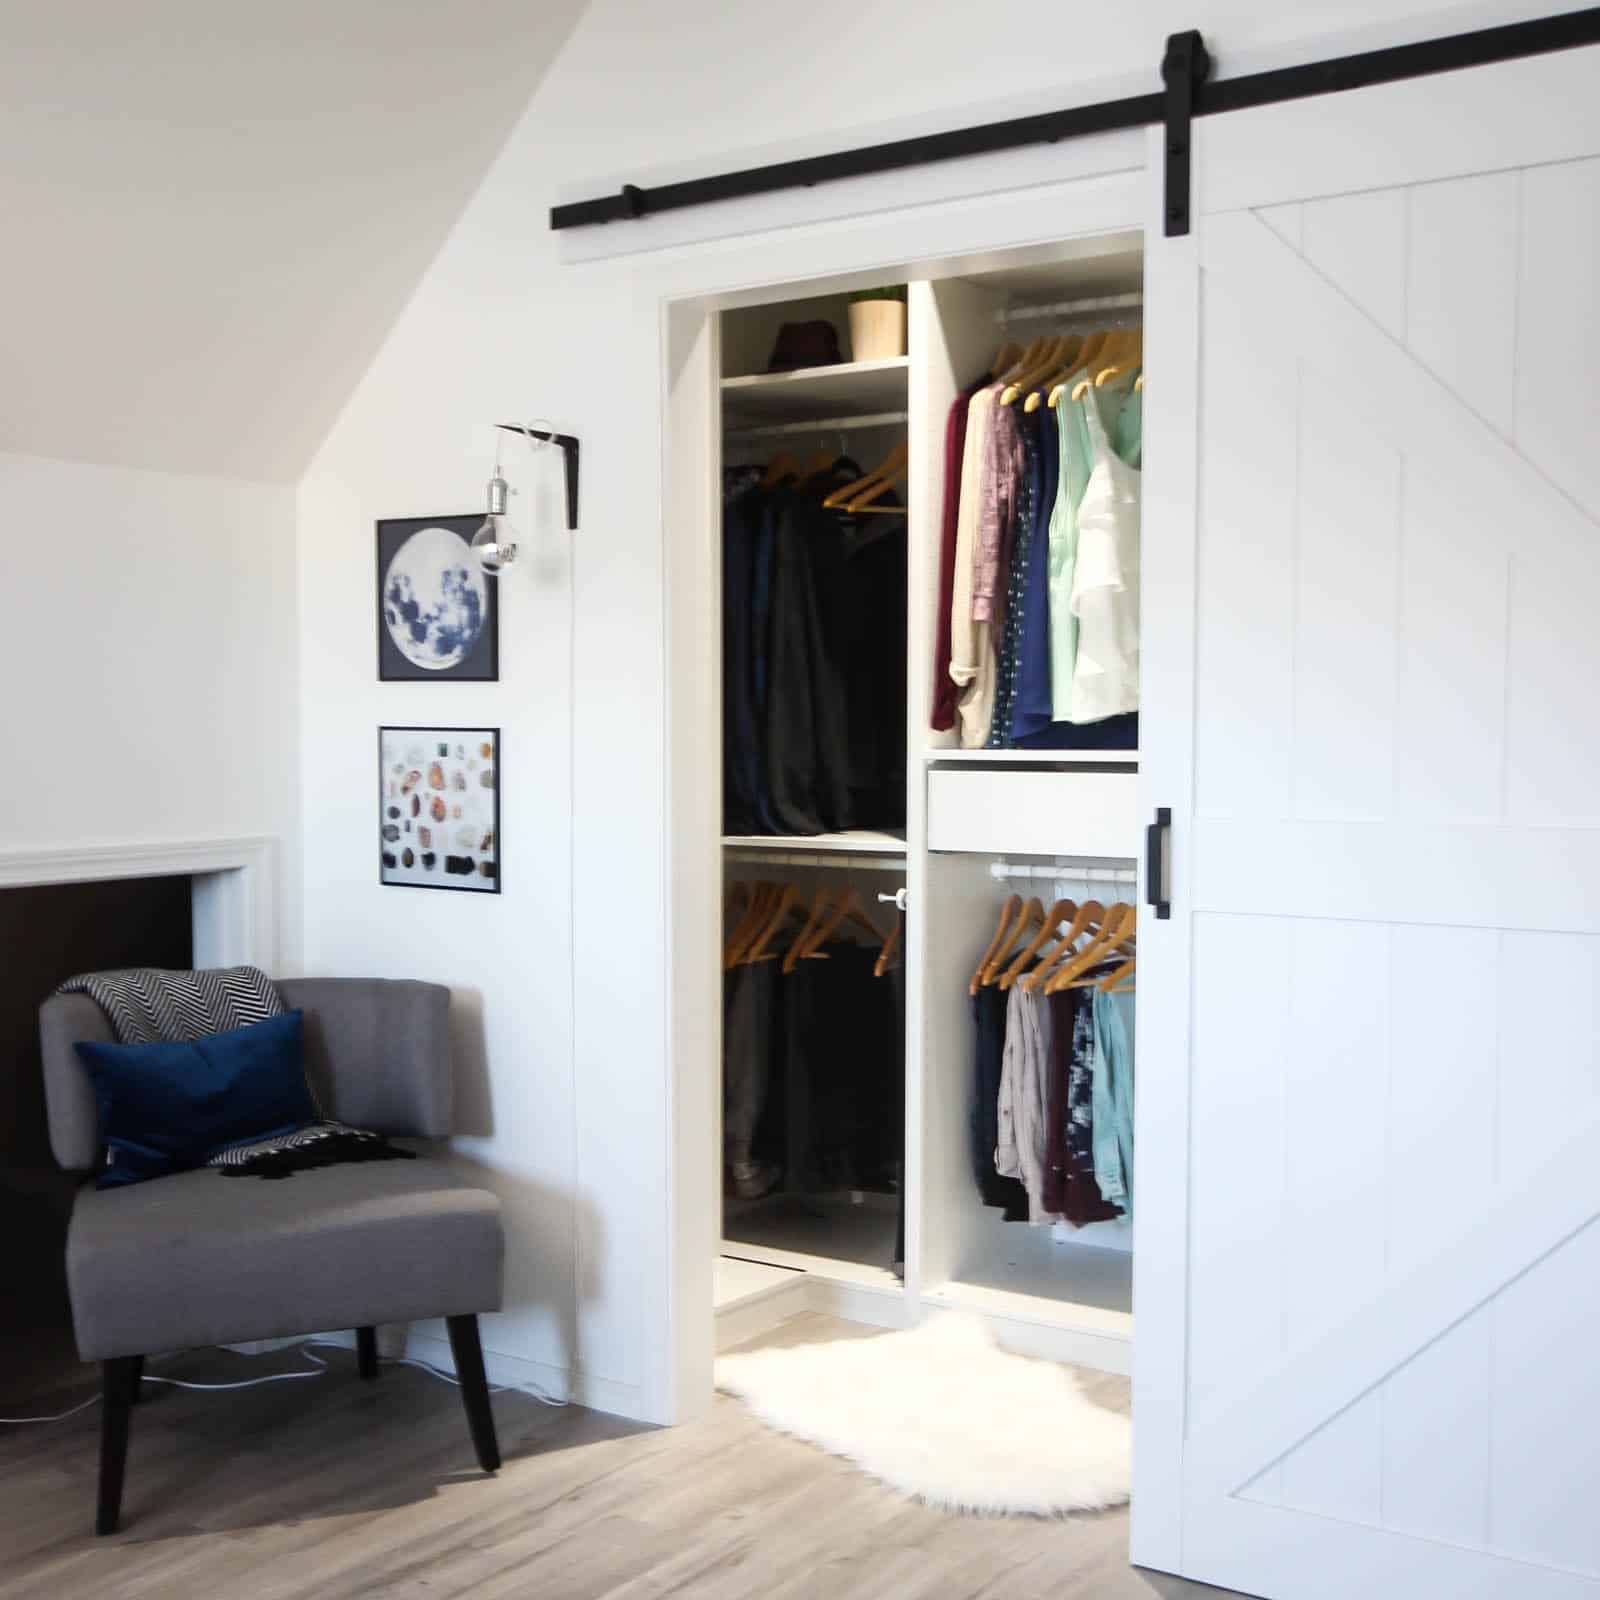
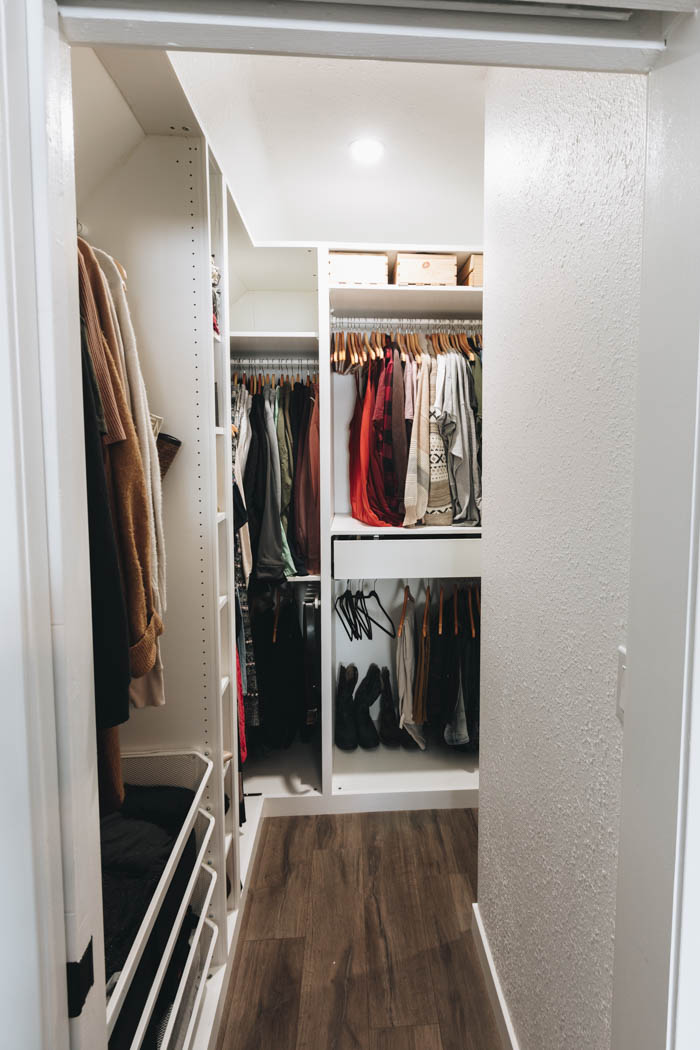
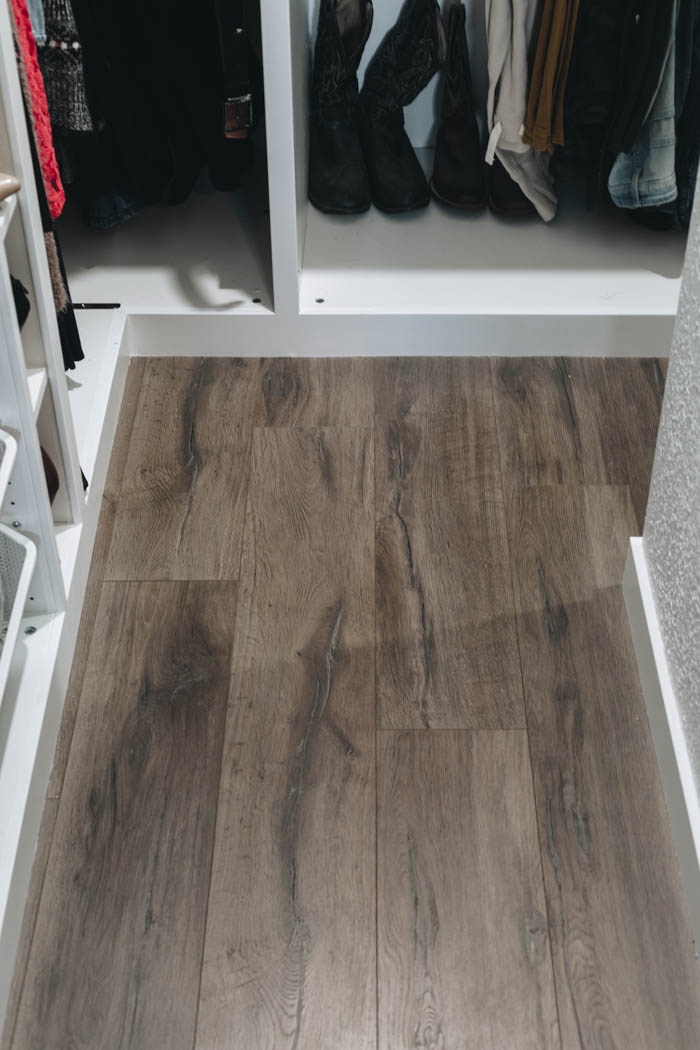
Our Finished IKEA PAX Hack Closet
Here’s what our finished primary bedroom closet looked like when we were done. We’re so happy with this finished space. Everything came together beautifully to create a high-end feel, on a budget.
How to Make Pax Wardrobes Look Built-In Video Tutorial
Here’s a great tutorial for the entire process of this IKEA PAX hack. See the full before and after of this small closet makeover.
If you like budget-friendly projects, check out these other amazing DIY projects for under $100!


Shreya @ The Creatives Hour
Thursday 3rd of February 2022
This looks Amazing! So impressive! Thanks for the great ideas.