
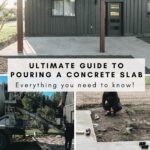
How to pour a concrete slab. Everything you need to know from the ground prep, to rebar, forms, and pouring concrete, we cover it all.
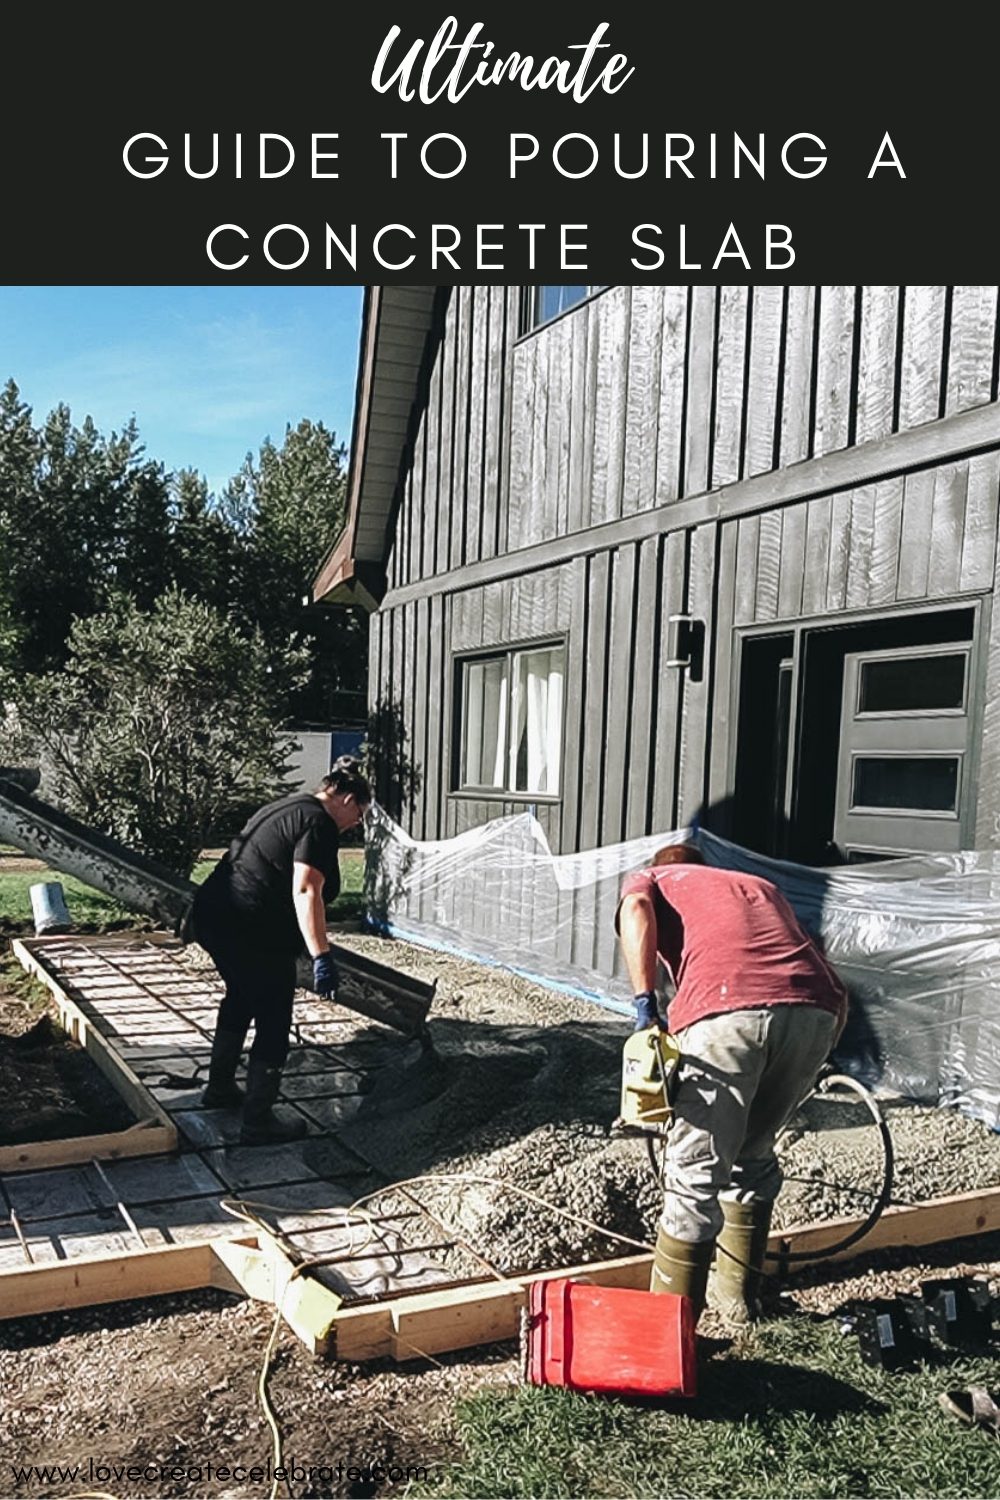
I am not going to lie, concrete work isn’t easy. But with the right tools (rented and owned), a bit of manpower, planning, and some hard work you can definitely do it yourself. We will break it all down in this post on how to pour a concrete slab, the do’s and don’ts, what to watch for and the tools required.
That being said before you jump into a larger scale project I would recommend trying out a smaller area first (under the 50 ft2) to get a feel for finishing and levelling before tackling a larger pour. Or even trying some small DIYs, like DIY concrete planters, to get a feel for using concrete.
The front of our home always lacked any wow factor or curb appeal. It had been on the on our wish list to complete but never a priority, until now. This year we updated our entire exterior siding, painted our window frames, and added new patio doors.
When we first moved in we switched out the front door, but even with all that our entry was still missing something. So we went to the drawing board and came up with a plan to add a pergola and sitting area to give the front of our home the curb appeal it was missing. But before we could build a pergola we needed to pour a new concrete slab first.
I dealt with concrete a lot in my previous career (on the supervision side) so I felt comfortable with tackling this project myself. I used the knowledge I obtained through by 12 plus years in bridge industry and transferred that knowledge into this project.
That being said location, climate, and intended use can all affect your end design of your own concrete slab. If you have any questions/concerns with your concrete slab I would recommend having it reviewed/checked by a structural engineer or contractor who deals with this on a daily basis local to your area.
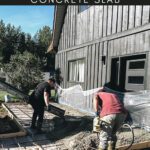
Video on How to Pour a Concrete Slab
Here is the video that shows the entire process on how we built and poured the slab and pergola (post on that here) above it.
*This post may contain affiliate links. When you buy a product through one of our links, we get a commission at no cost to you! Thank you for supporting our blog so that we can continue to bring you posts like these. For more information, please see our disclosure page.*
This post jumps into a lot of detail about everything needed to successfully pour your own concrete slab. Here is a breakdown of the main subjects:
- How to start – Planning/Design of your concrete slab
- Tools and Specialty Tools used for pouring concrete
- How to Pour a concrete slab
- excavation
- grading
- gravel
- post holes
- form work
- rebar
- pouring concrete
- finishing
- curing
- form remove/backfill
- sealing
- How much does it cost to pour a concrete slab
How to start – Planning/Design of your Concrete Slab
First we completed a utility locate to ensure no gas lines, power lines, or telecommunication lines were buried where we wanted to dig or place holes. This is a step that shouldn’t be skipped if you plan to complete any excavation or auguring. We ended up have a gasline in the area, but it was roughly 3′ deep and out of the areas where we wanted to drill holes for our posts so it was a non-issue.
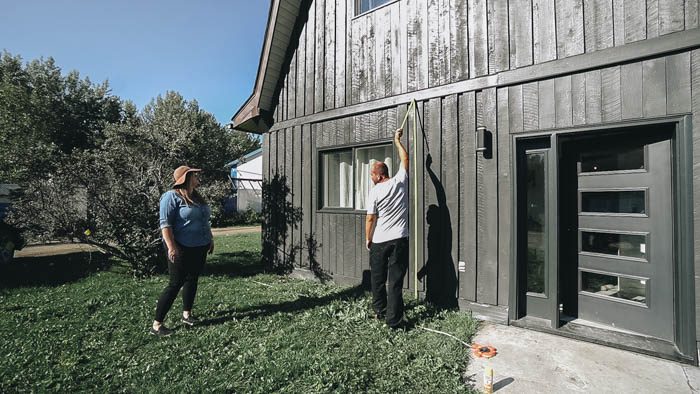
The next step was to layout and mark the area with stakes and string lines to visual the size of the slab, plan for grading, and to see what slope would be possible. This allowed us to see the design in real space, plan the walkway, square up the slab to the house and determine the amount of dirt work required to place the concrete slab. The rough area we ended up marking out for our concrete slab was 250 ft2.
Don’t be afraid of trying several configurations as concrete is a pretty permanent addition to a space. Consider how you walk into and out of your home, what you want to do with the space for furniture or plants, and what function you want the space to provide.
Depending where you are located you may need a permit to pour a concrete slab. Contact your local town/city/municipality to find out what is required for your area.
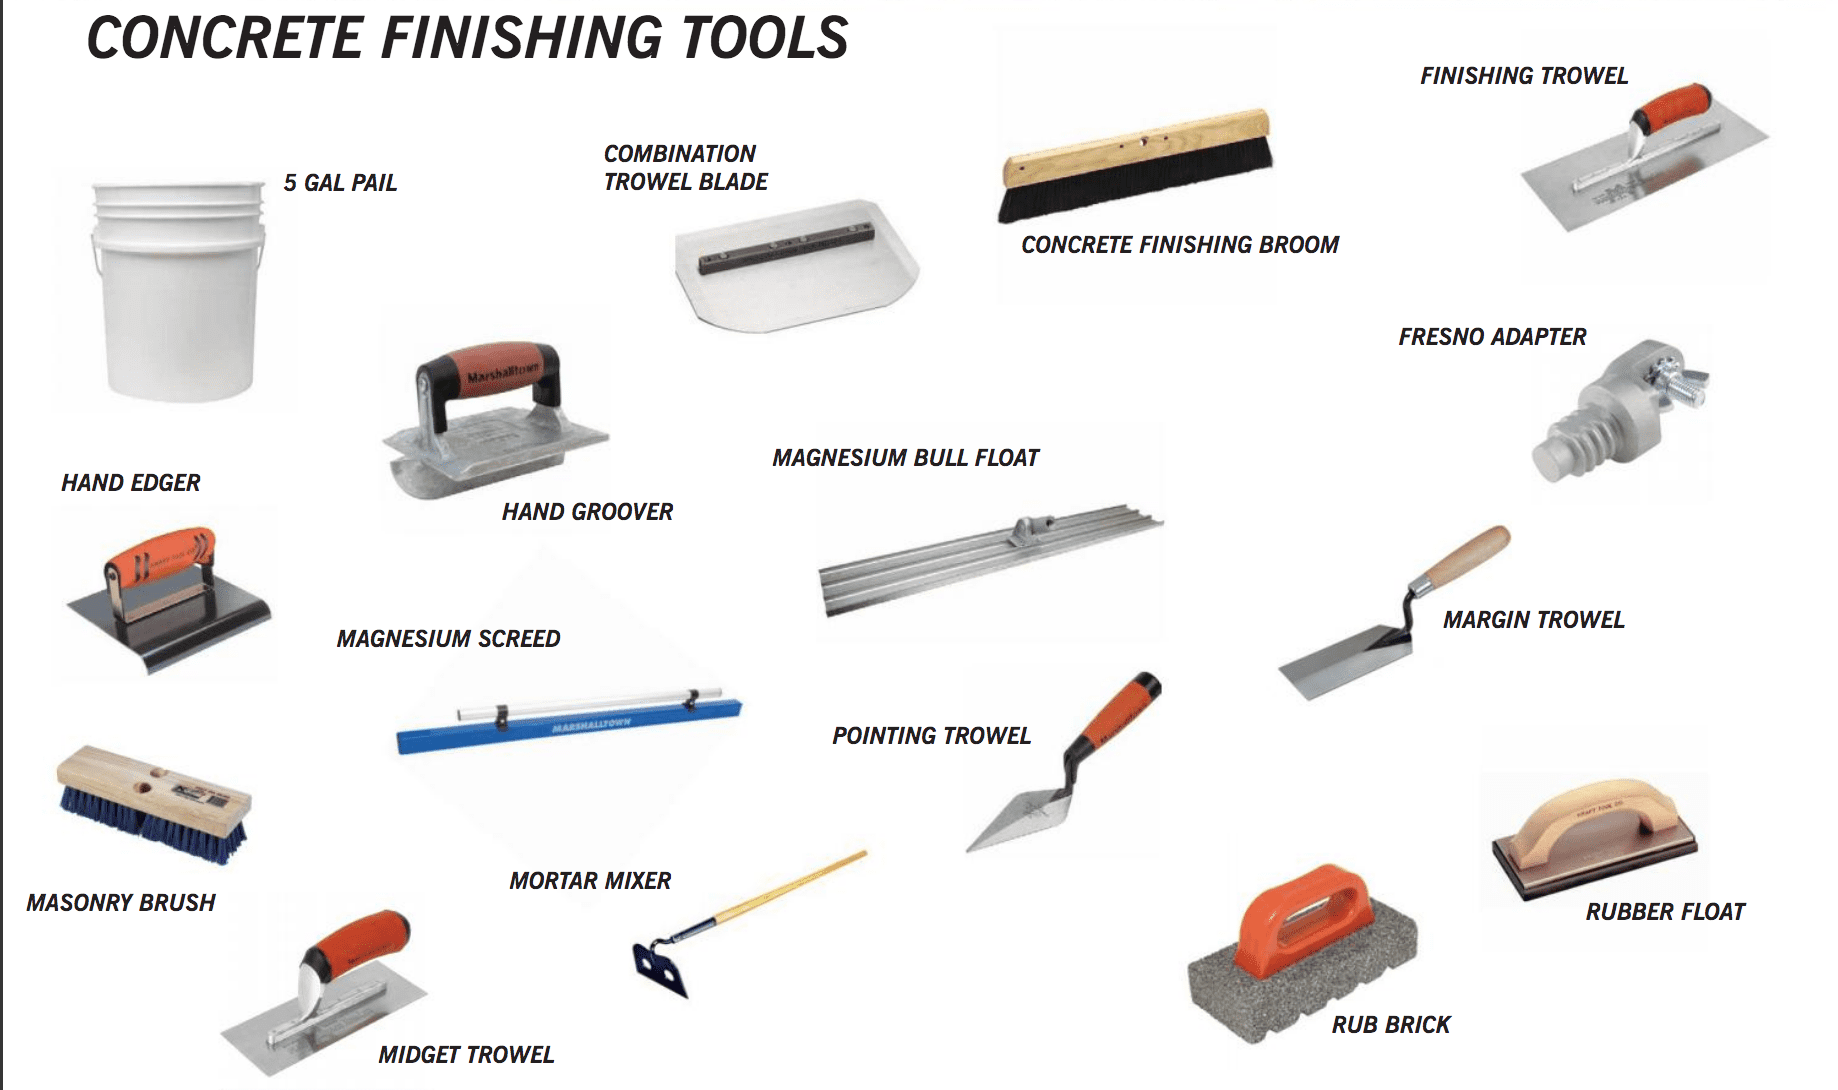
Tools and Specialty Tools used for Pouring Concrete:
There are several tools that you will need for this project. I ended up renting several of the tools as I only needed them for a specific task and a short period of time. Check out your local rental store or hardware stores for rental options as they can be fairly economical.
Demolition (if required)
- Chipping hammer and chisel bit
Excavation/Grading
- You are going to want to use a tractor, skid steer, or something similar to remove dirt, grade, and add gravel (you could use a shovel but on a bigger project it is going to be a big task). If its a smaller pad (under the 50ft2 mark) you may get away with shovels and rakes but it is going to be a good work out.
- Post hole auger
- Plate tamper
- String line
- Line level
- Landscaping rake
Concrete
- Concrete Vibrator
- Bull Float
- long straight edge – we used a 12′ 2×6
- Concrete finishing brush
- Trowels
- Rebar Wire Twister
- Grinder with metal cutoff blade or metal cutoff saw
- Tie Wire Pliers
- Concrete form stakes or similar
Hired Trades/Contractors
- Due to the volume of concrete (around 3.6m3 or 4.7 cubic yards for our project) we decided to have the concrete supplied from a local mix plant and delivered to us via concrete truck. If your are only pouring a smaller pad you can also buy bagged concrete and rent a small concrete mixer to complete the task.
- You will likely need to have a gravel truck haul in some gravel for your project. I ended using a dump trailer and my 3/4 ton pickup to haul in a load of gravel for my project. Again with a smaller project you might be able to get a small truck load or buy bagged gravel, but this isn’t economical or practical for larger scale projects.
Materials
- Rebar – we used 20′ lengths of 15m bar for reinforcement in our concrete slab
- Concrete – we used a 32 MPa mix from a local concrete plant
- 3/4 crush gravel
- Vapour Barrier
- 2×6 for form work
- 8″ diameter form tubes
- Concrete Chairs
- Rebar quick ties
- rebar tie wire
- Saddle brackets
How to Pour a Concrete Slab
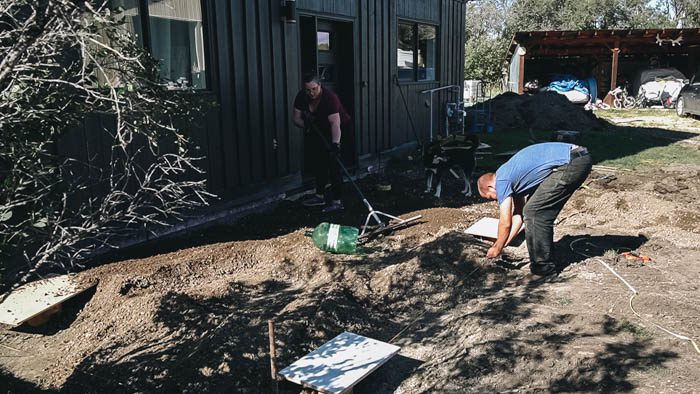
Demolition and Removing Dirt
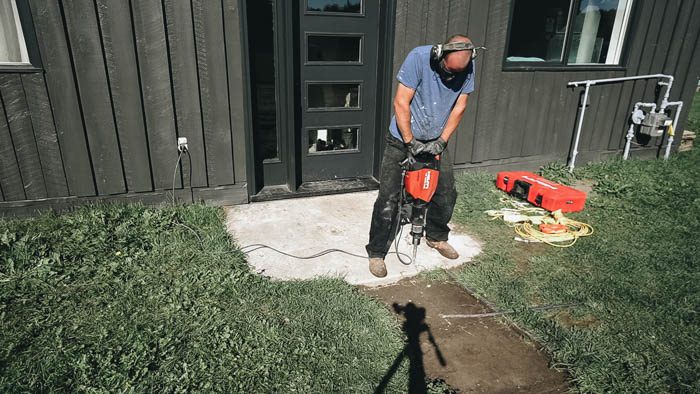
The first step is to remove any old structures or concrete that may be in the way of your new concrete slab. We had a small concrete slab (roughly 4′ x 6′) in front of our door and several patio pavers that made our original walkway. We broke up the concrete pad with a rented chipping hammer and hauled all the concrete debris away. You could use a sledge hammer but we opted for the chipping hammer to expedite the process. We than pried the patio pavers up from the ground and hauled them away as they might be handy for a future project.
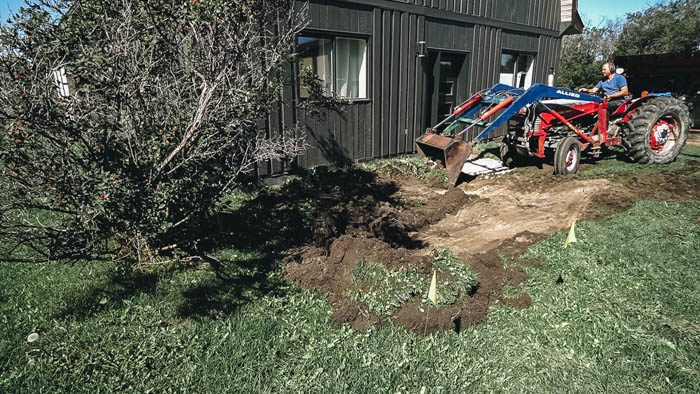
With all the concrete gone we began removing the topsoil. We dug down approximately 9″, this allowed for a 4″ base of packed gravel and a 5″ deep concrete slab. We over dug the area slightly so that we would have room to build forms when it came to prep for the concrete slab.
Grading
Sloping is a very important step to pouring a concrete slab. You want to ensure that water flows AWAY from your home. You start this process with the dirt work. Once we had all the dirt removed we began sloping the dirt base. To check for slope and levels we used stakes along the perimeter of our slab and string lines. We bought 2 types of line levels, one for checking the level across the concrete slab (parallel to our home) and one to check slope (perpendicular to our home). We sloped the pad approximately 1/4″ of height for every 12″ of distance away from the house. This will allow water to drain and collect away from our home.
With our rental plate compactor we compacted any of the un-compacted dirt. You want to take multiple passes to ensure you get full compaction. If you leave un-compacted dirt you may have issues with settlement or cracking in your concrete slab in the future.

We had a relatively small about of dirt to compact. If you are compacting large amounts of dirt/clay fill (in excess of 1-2 feet) you may want to get a sheep foot compactor as they are better designed to compact clay fill. When compacting materials you want to work in 4-6″ lifts to ensure all the material is being properly compacted. If the amount of material placed to too think, you won’t be able to compact it properly.
Auguring Post Holes

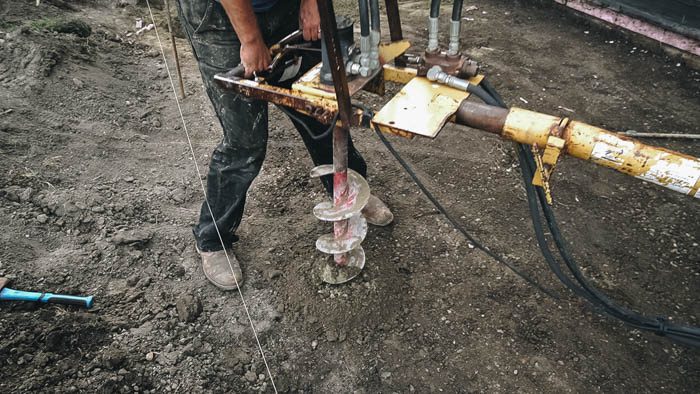
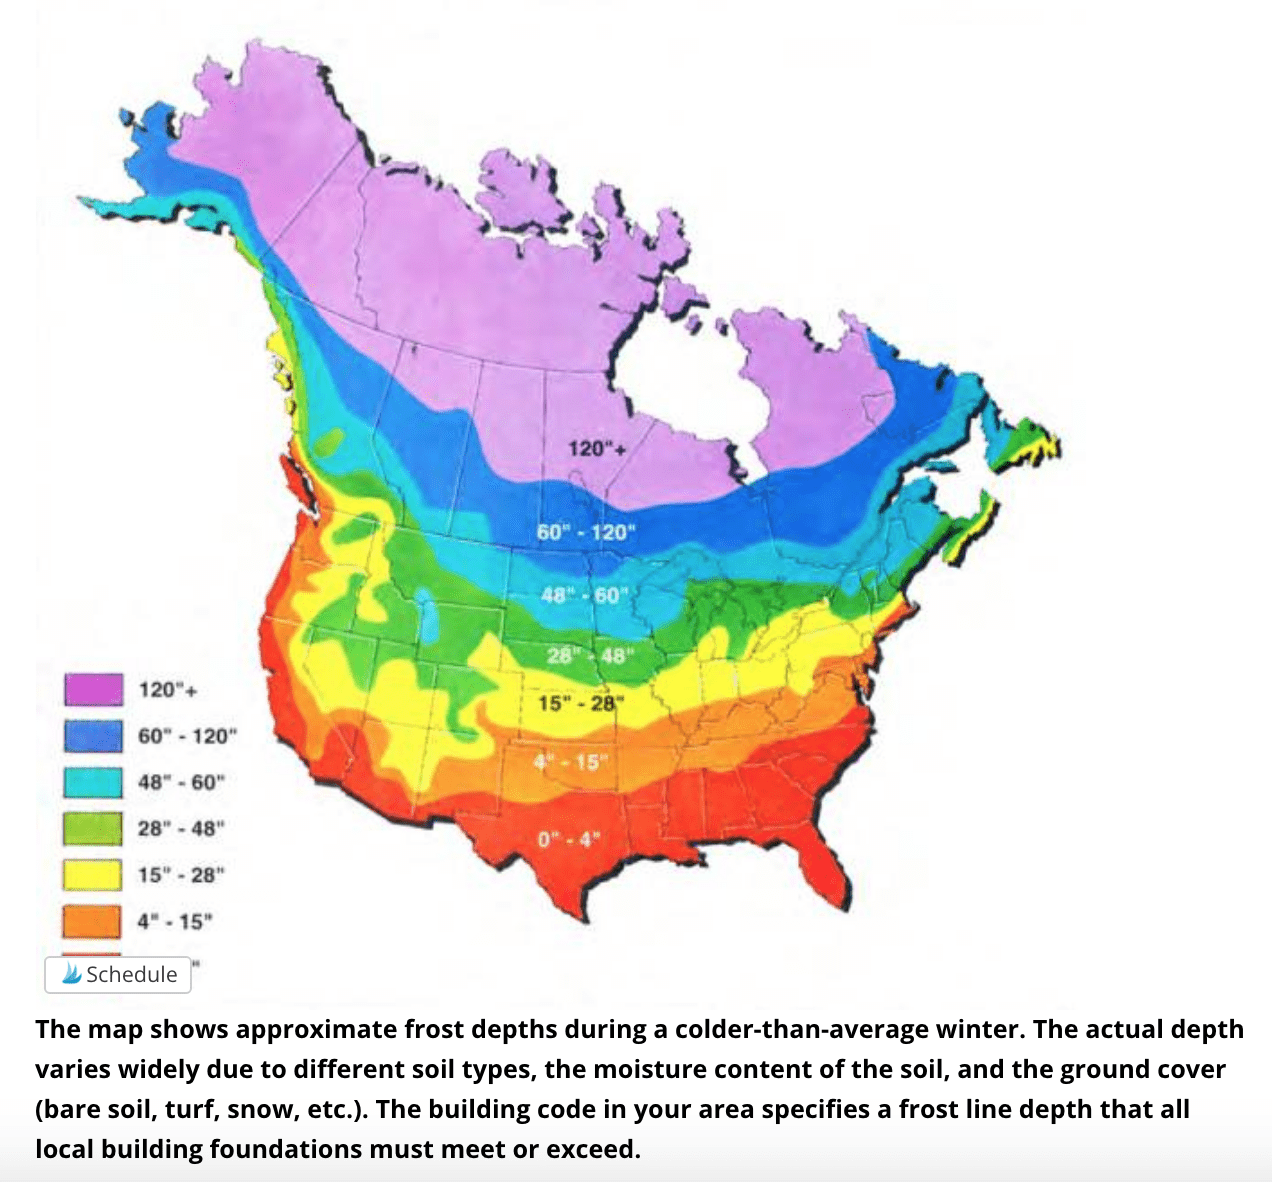
When you go to pour a concrete slab you will to plan for any structures you want to build on top of it. As we were adding two posts to the hold up the end of the pergola we needed to add extra foundation to prevent future heaving or settlement. Depending on where you live you will have a frost line. You want to ensure you dig your post holes a minimum 6″ past this point. There are some great resources online to check for frost lines in Canada and the United States. I would recommend looking into frost depths in your area to ensure you auger your posts holes/foundation piles deep enough.
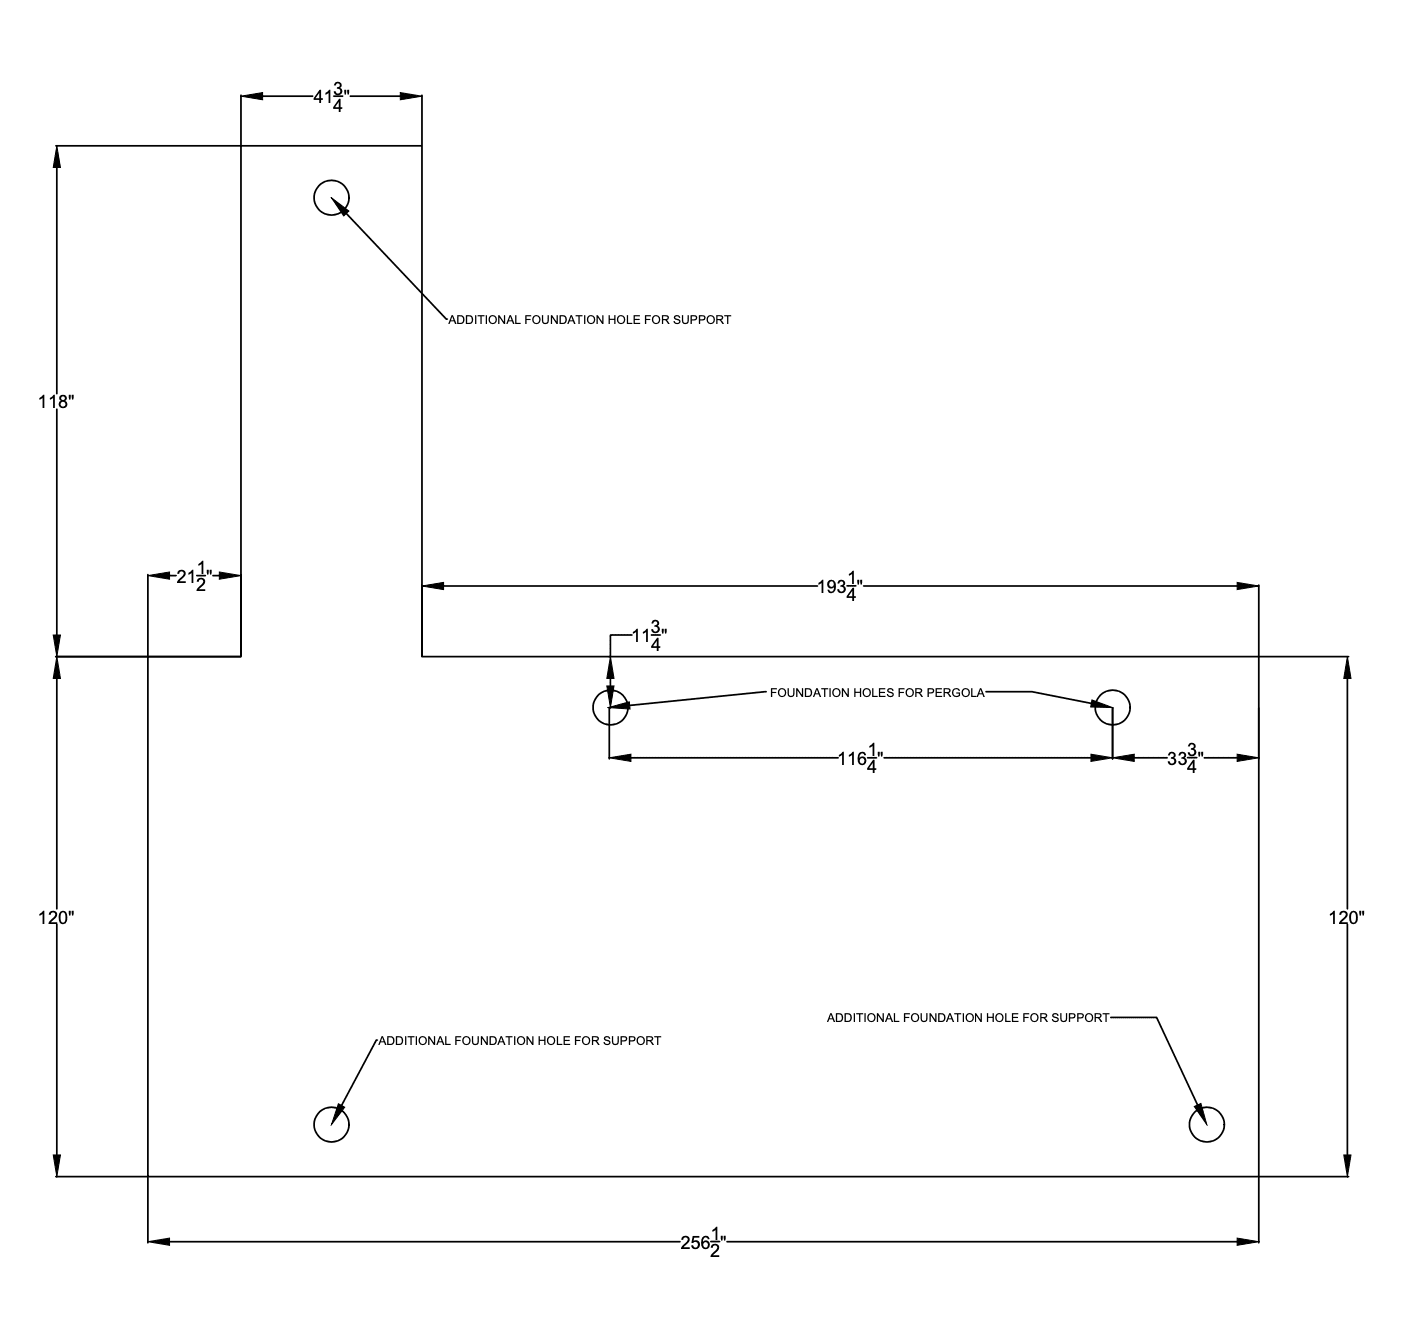
We Augered 8″ diameter holes under the pergola posts locations. We also added 3 additional foundation pilings in the corners and ends of the concrete slabs to help minimize movement and settlement.
Installing Form Tubes
We added form tubes to all the augured holes. We did this so we could fill in the gravel without it spilling into the augured holes. Our ground material was relatively stable (the natural ground held the shape of the augured hole). But you can also use form tubes to help prevent dirt from falling in you augured holes if you are auguring through sandy or gravel materials. We used about 3-4′ of form tube per hole, leaving about 10-12″ sticking above the dirt.
Adding Gravel
Why add Gravel
We added 3/4″ crush gravel under our concrete slab for the following reasons:
- to easily get our concrete slab perfectly levelled and sloped
- to allow for any water under the concrete slab to drain away from under the slab
- create a barrier between the dirt and underside of the concrete slab
Type of Gravel to use
I elected to use a 3/4″ crush that had some fines in it as I planned to use a vapour barrier over the gravel. I find that this type of gravel compacts better. But you can also used a washed and screened gravel. Ultimately you want to minimize the amount of moisture that can seep up from the ground into your concrete slab.
Levelling Gravel
We placed, levelled, sloped, and compacted a 4″ thick layer of gravel. We used our tractor to place all the gravel, being careful to not fill the augured holes. Using a Landscaping rake and shovel to spread and level the gravel out. Using our string lines, line levels (for slopes and straight levels) to ensure everything matched our design slopes.
Compaction
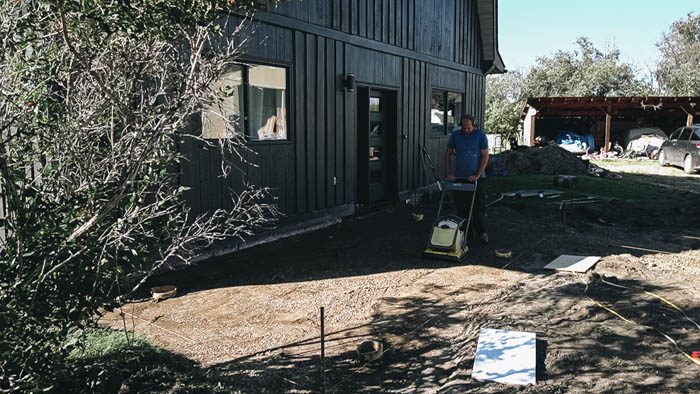
Again with our rental plate compactor we compacted the gravel. You want to take multiple passes to ensure you get full compaction. Most compactors also have a water tank that add weight and slowly add water to the surface as you compact. We went over the entire area about 4-5 times. We added a light mist of water in between passes to assist in compacting the gravel.
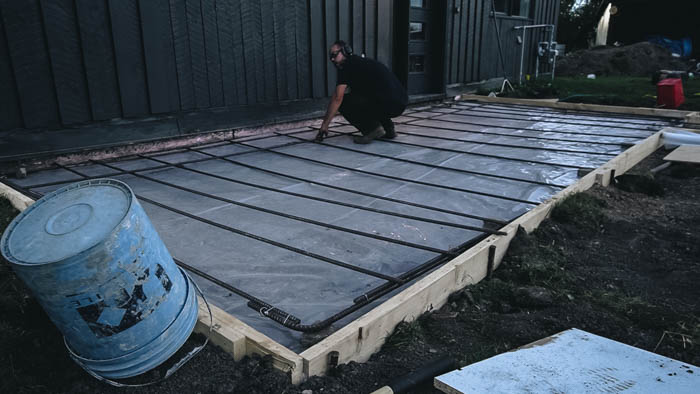
Vapour Barrier
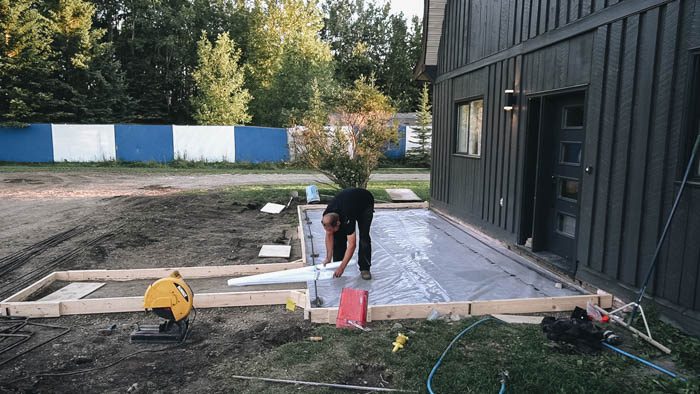
Once my gravel was compacted I cut all the tops of my form tubes to the height of the gravel and added a layer of vapour barrier. The vapour barrier will help the life span and durability of the concrete as it will minimize the amount of moisture that can seep up into the slab from the ground underneath. Moisture can slowly deteriorate concrete overtime, by allowing rebar to rust, cracking, and or spalling. As this was a outdoor slab this might be a bit overkill but it won’t hurt anything and plastic is cheap.
Formwork
Adding Forms
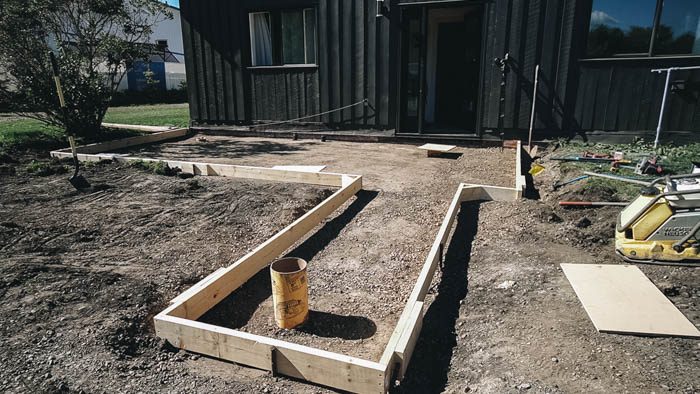
Our pad was going to be 5″ thick. I used 2×6 boards to create a form. This worked great because the bottoms were set into the gravel to prevent/minimize any concrete from spilling from the bottom of the forms. This also added some structure/strength to the forms. I spent a bunch of time levelling and squaring up the from work to the house. I wanted to make sure visually everything looked correct and was square. We placed the walkway square to out front entry. You will want to pull diagonal measurements from corner to corner of your boxes.
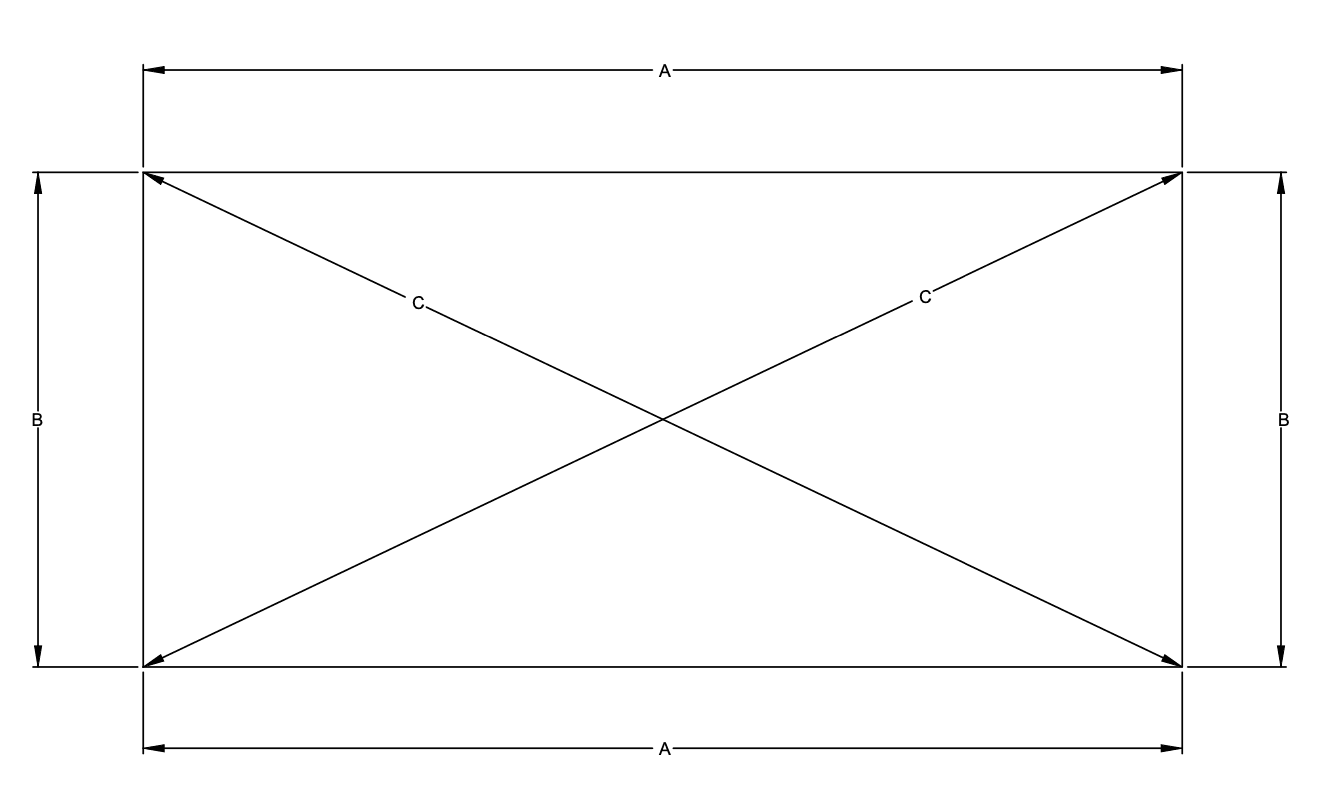
If your sides (B-B and A-A) are the same lengths and your diagonal measurement (C-C) are equal you will have a square box/rectangle.
I set the top of the forms to my pour height. This way I could run a straight edge along the top of my forms when levelling my concrete. This is way to have everything levelled/sloped properly.
Bracing Forms
I used concrete form stakes to brace my forms on all corners and roughly 4′ spacing and driven under the height of the top of forms. You can also use wooded stakes for the same job. Again I spent a bunch of time ensure all the forms were levelled and sloped correctly as they would ultimately determine the level and slope of my concrete slab.
Concrete Volume Calculation
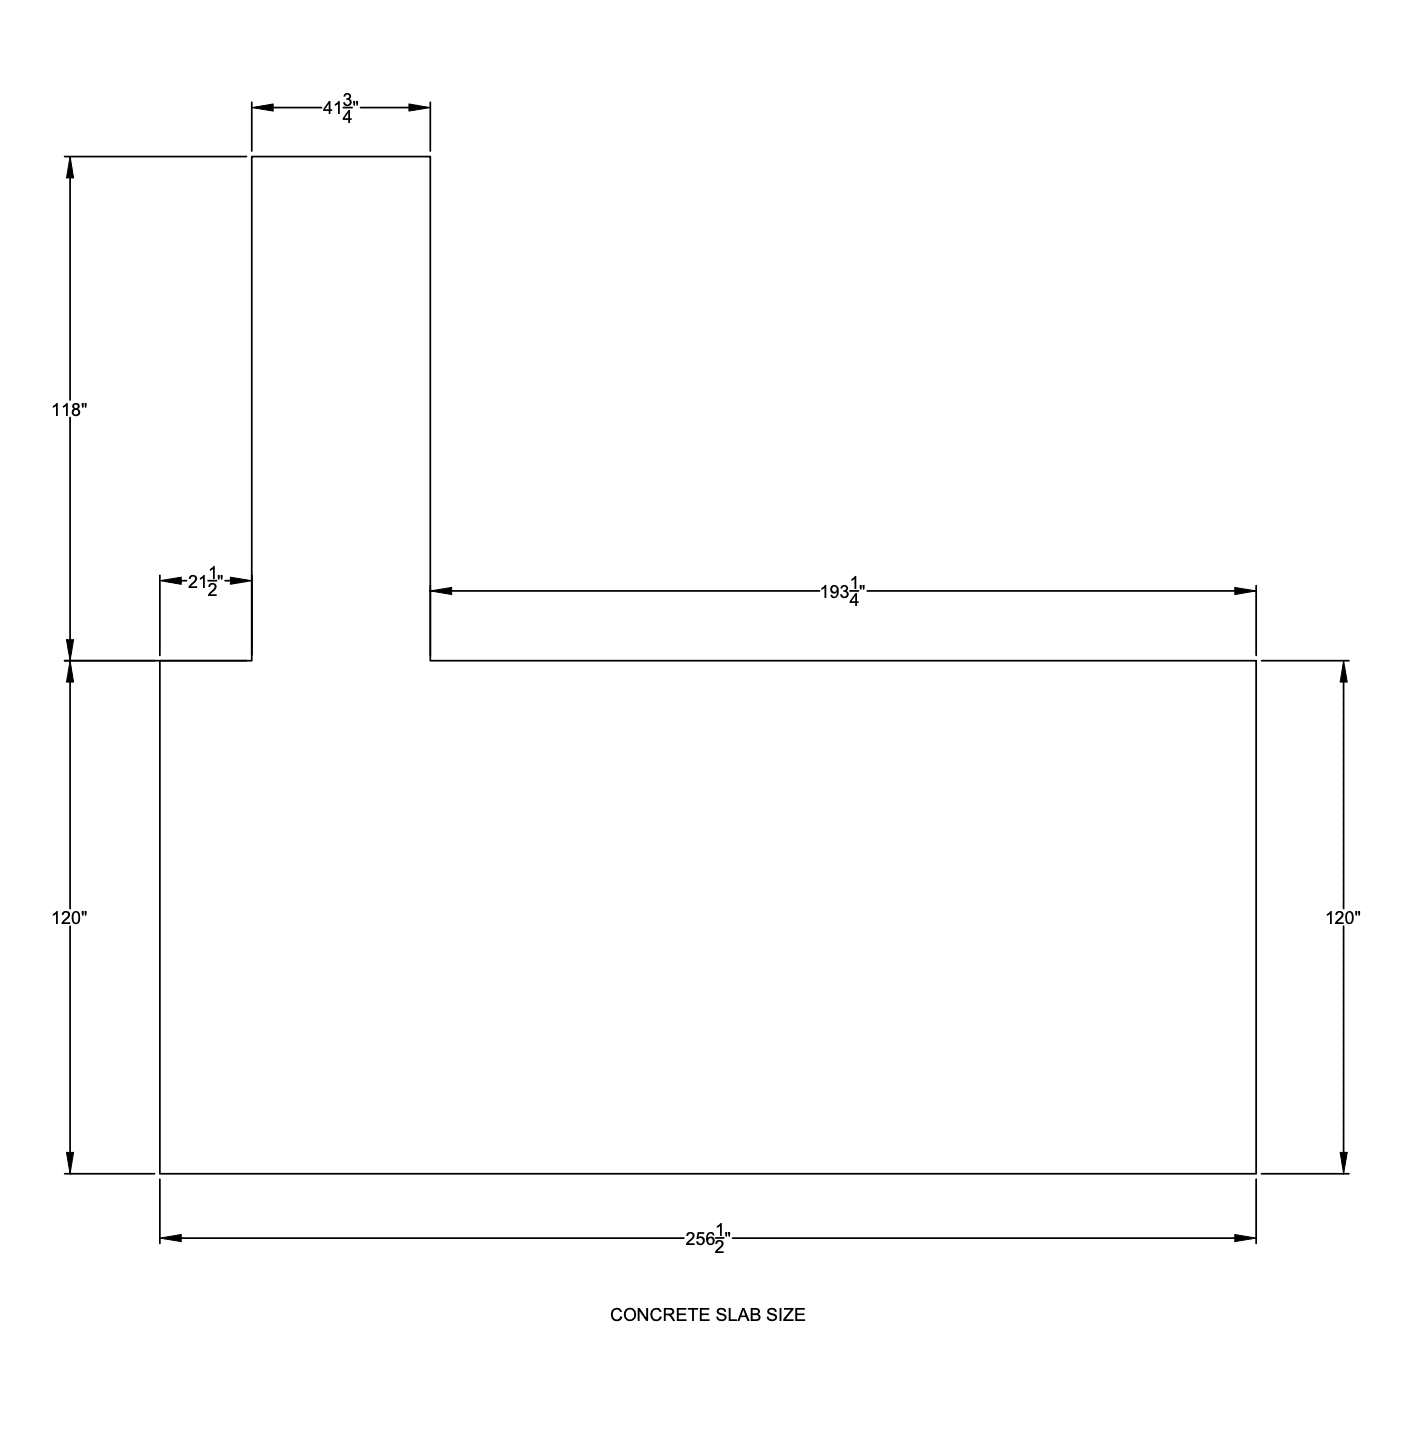
Once your forms are complete you can do a volume calculation to determine how much concrete you will need. I like to break up my pour area into shapes. In my scenario I had the following:
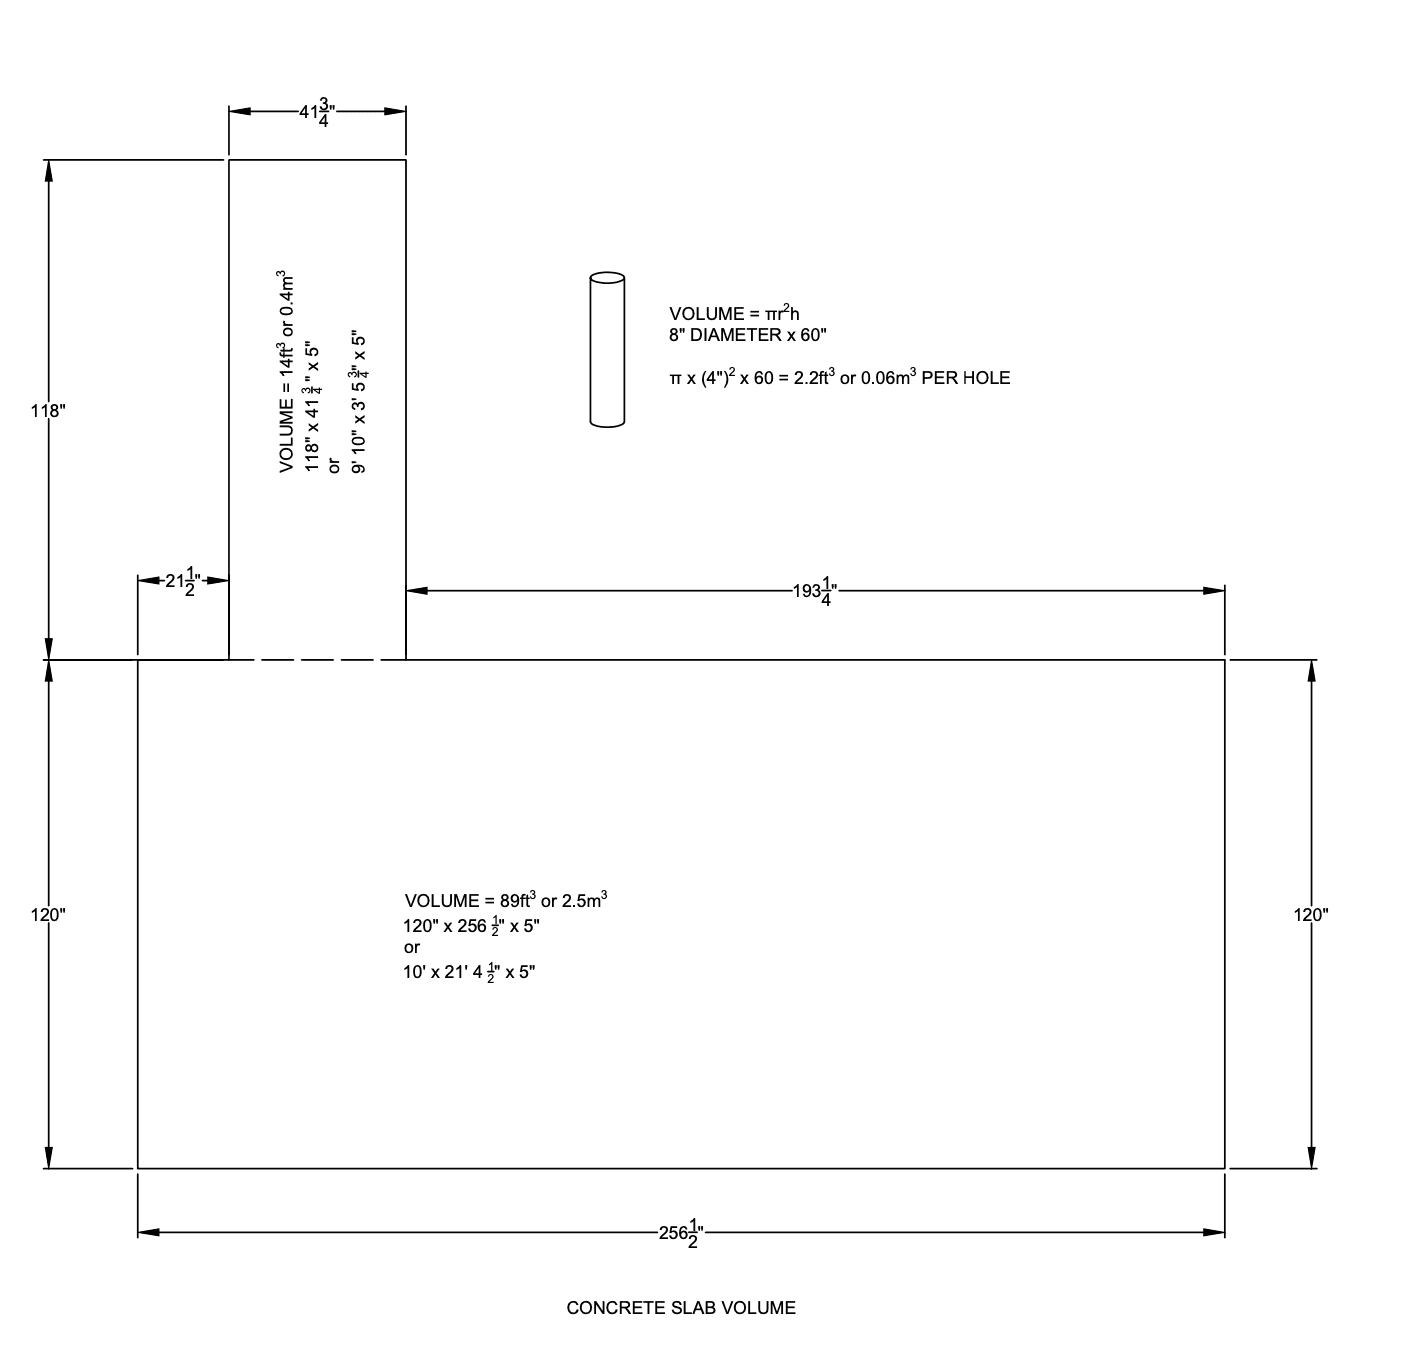
- One rectangle 21′ 4 1/2″ by 10′ by 5″ deep or approx. 89 ft3
- One rectangle 3′ 6″ by 9′ 10″ by 5″ deep or 14 ft3
- Five augured holes 8″ diameter by 5′ deep or 2.2 ft3 per hole or 11ft3 total
This was a total area of 3.2 m3 or 4.2 yards. I then added a buffer and ended ordering 3.5m3 of concrete just to be safe. Your volume calculations will likely be on the higher side due to the rebar. But the last thing you want to have happen is to run out of concrete mid way through a pour.
Rebar
Reinforcement Types
You have two typical options when you go to add reinforcement to your concrete slab:
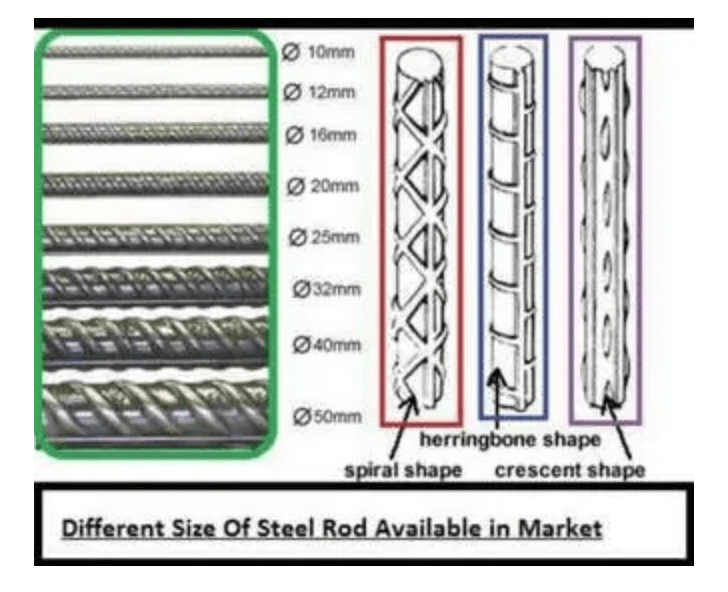
Steel Rebar/Deformed Rebar
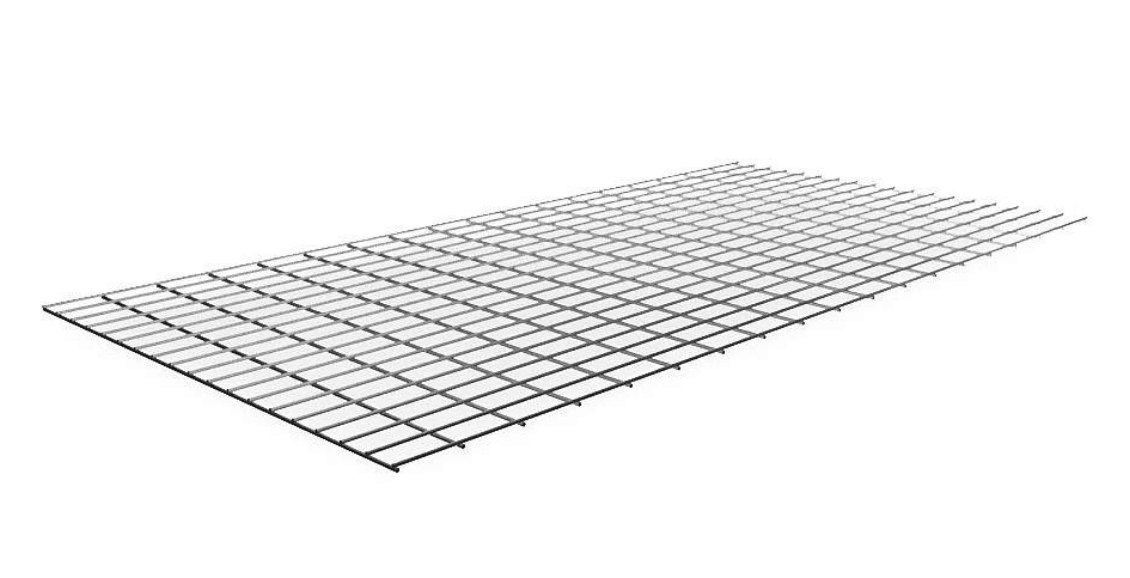
Reinforced Wire Mesh
Why Reinforcement
We used 15M and 20M steel rebar for our concrete slab as we had extra left over from another job. This was overkill for our project but was free to us so it worked. A job like this could have definitely been completed with the wire mesh which is cheaper but doesn’t provide the same level of reinforcement or strength. As we live in a northern climate with frost we knew we needed some kind of reinforcement.
Concrete is great in compression but poor in tension so if you have any movement in your ground underneath the slab this movement can cause cracks. Reinforcement will help minimize movement in the slab and keep your slab together if you do have some cracking.
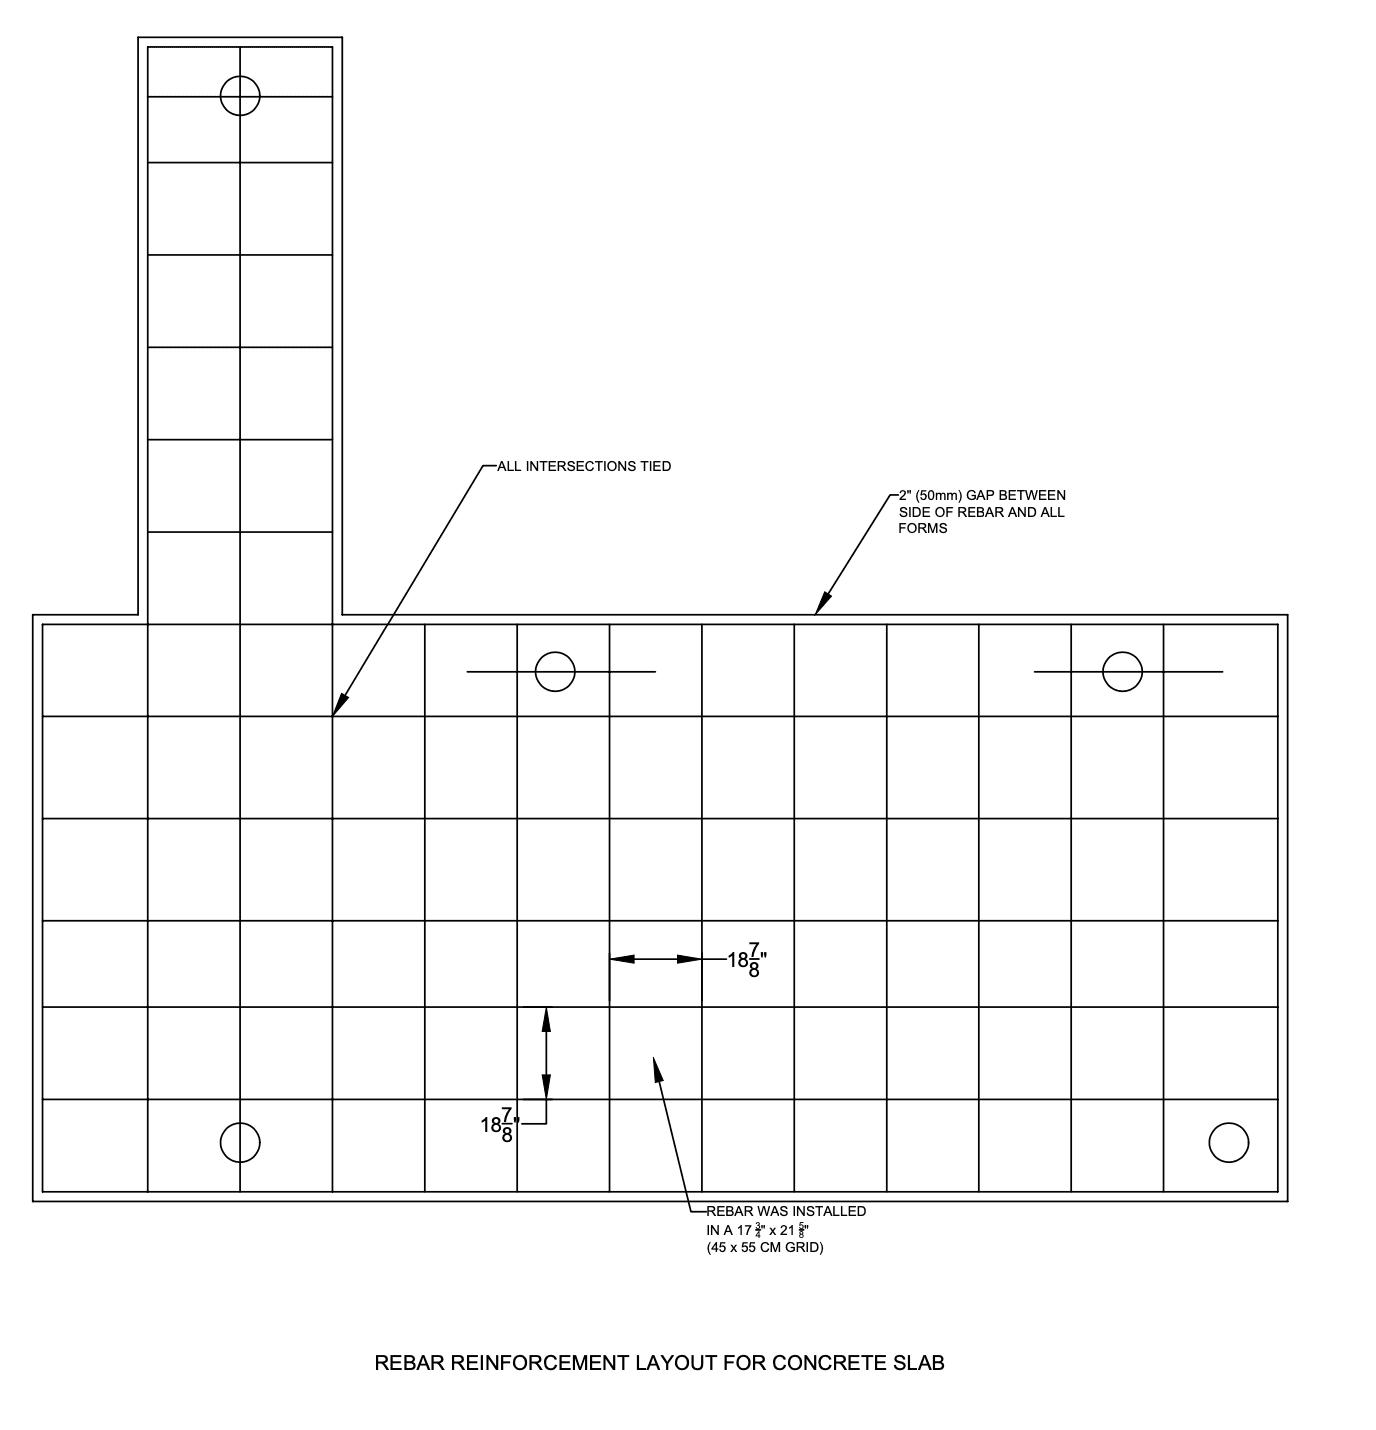
Rebar Placement and Spacing
Rebar Grid
We made a 45- 55cm (17 3/4″ to 21 1/2″) grid tying every intersection with rebar ties and a rebar wire twister tool. You can also use rebar wire and tie pliers but it can just take a bit longer. If you bar isn’t long enough you will need to create a lap splice (where one bar overlaps another), a good rule of thumb is to have at least 60cm or 24″ of length where the bars overlap and are tied together.
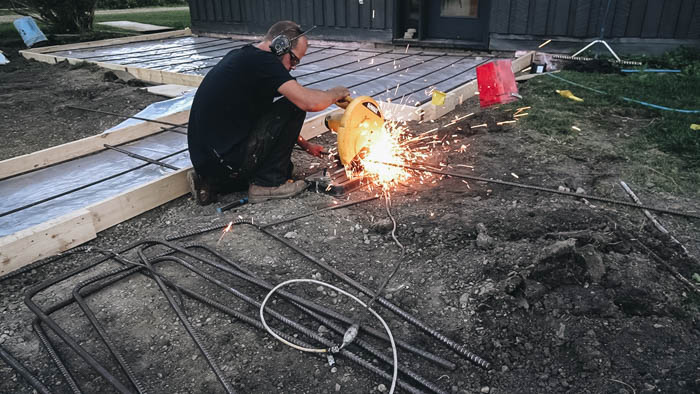
We cut out rebar to length using a metal chop saw and a grinder with a metal cutting disk.
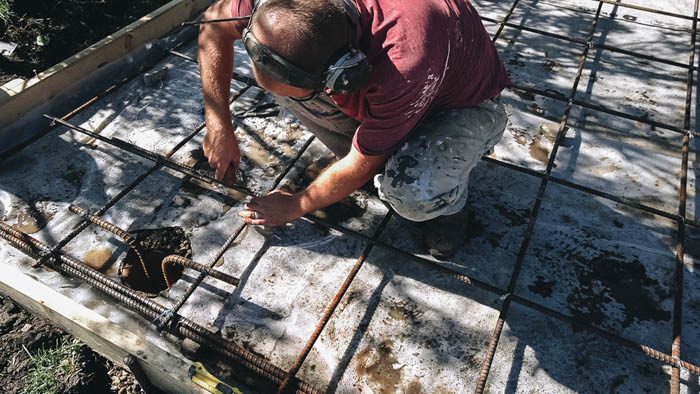
Setting Rebar Mat

Once your rebar grid is tied you will want to suspend it above the ground. You can use concrete chairs but we elected to use pieces from a broken patio paver (approximately 40mm or 1 1/2″ thick). The concrete should be able “wrap around” the rebar to fully encase it.
Rebar Cover
You also want to ensure you have enough cover on the top/bottom sides to prevent moisture from getting and starting the rebar rusting. We had about 60 mm (2 3/8″) of cover over the top, 40mm (1 1/2″) on the bottom and 50mm (2″) on all the edges/sides. You can see the pattern we did for our pad below.
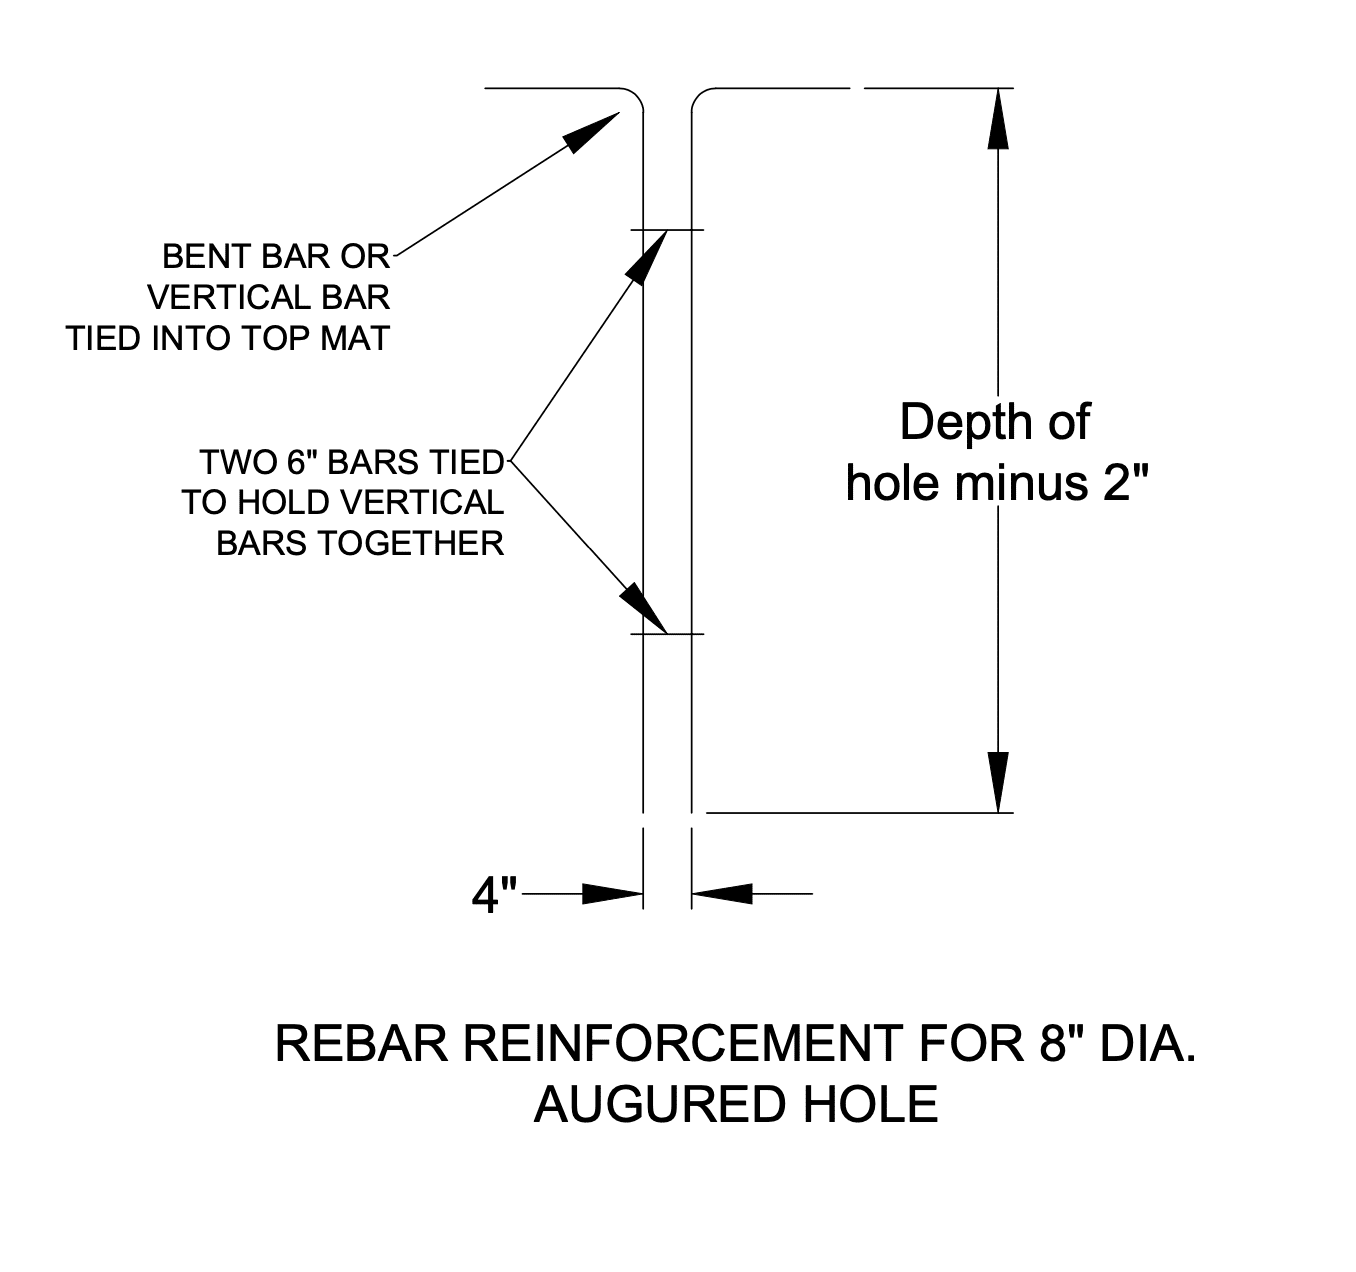
We also added some “L” bar cages (shown below) to the holes we augured to tie the rebar mat in pile foundations. This might of been over kill but I already had 90 deg bent bars and it was easy to do. You could also add some vertical straight bars and just tie them to the mat to achieve the same thing.
You may want to check you local code but for our area we needed a 45-60cm rebar grid with min 60mm of cover for residential concrete flat work, so we checked all the boxes.
Expansion Joint
If you are pouring a pad against a house (or similar hard set in place object) you need to allow for expansion and contraction. I added a piece of asphalt impregnated board between the areas where the new concrete would be in contact with our house’s foundation. This board allows for expansion and prevents your new concrete pad from cracks or spalling.
Concrete
When it comes to the actual pour you are going to want a couple of people. Lindi and I actually did this whole job ourselves but probably could of use 1-2 extra hands at a couple of the steps.
Pouring a Concrete Slab
Concrete – Mixing your own or Having Supplied
One of the first choices when it comes to your concrete pour is where is the concrete going to come from. Due to pour size (3.6m3) we had our concrete mixed at a plant and trucked to our house. We order a 32 MPa concrete after discussing use and function with the concrete plant. The mix design was for the local city sidewalk standard.
For a smaller projects you can mix you own concrete. You can buy bags of concrete from the hardware store and mix them with water at your home. For really small pours you can mix with a shovel/rake in a wheelbarrow or plastic mixing tub. For slightly larger pours you can rent a drum mixer and mix onsite. When mixing your own concrete be careful to follow mix directions. Especially when it comes to the amount of water to add. Adding too much water will reduce the water-cement ratio and reduce the strength and durability of your concrete.
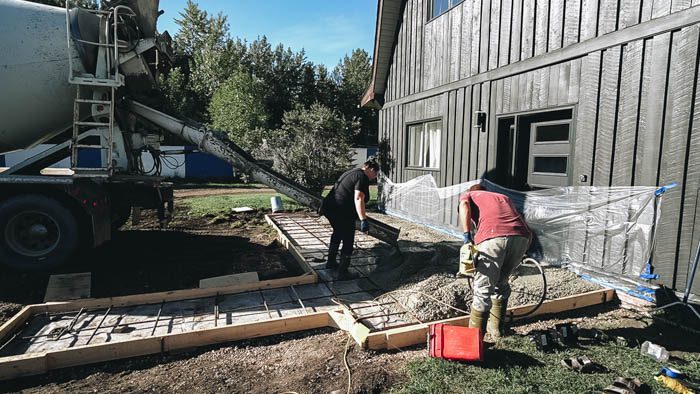
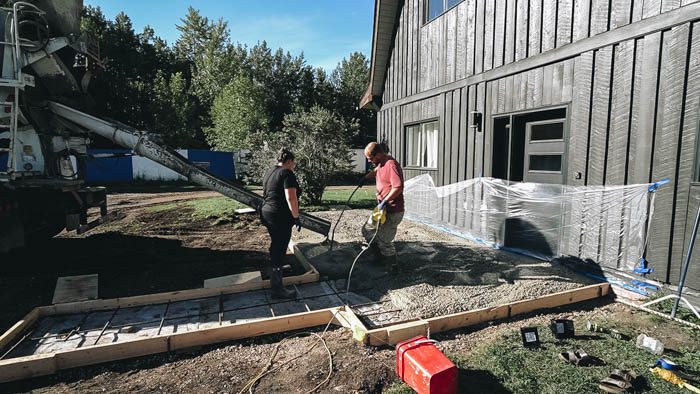
Concrete Placement
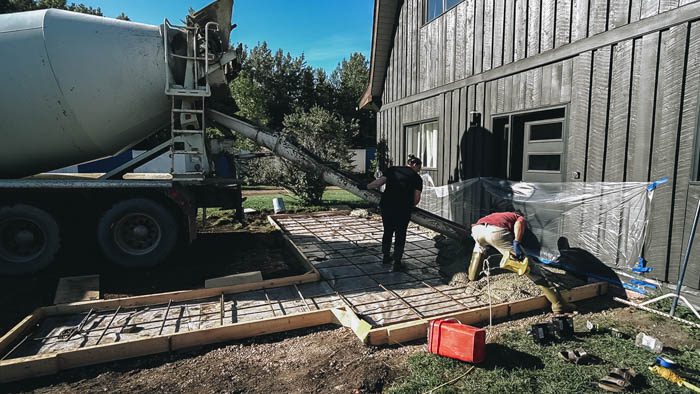
Because we had a concrete truck we added enough cutes to the end to reach the house. If you are using a concrete mixer onsite you can move the concrete around with wheel barrows. If you are doing a huge job or a project behind you house you could use a concrete pump truck. However that can get expensive and is more complicated so I won’t touch on that in this post.
Concrete Consistency
When going to pour you want to look at your concrete’s consistency or slump (measured in height). You don’t want it so thick that it isn’t workable (or this may be a sign that it the concrete has started to set). At the same time you don’t want it so runny that it may assert extra strain on your forms (or it may be a sign of too much water in the mix).
Ultimately I like to aim for a slump of 100-120mm (4-5″). I would be very hesitant on adding extra water to a concrete mix (when supplied in a truck) as the water to cement ratio is what determines your final concrete strength. usually they Set the these mixes at the plant. There are chemicals to modify this but that is more technical than I want to jump into on this post.
Air entrainment can also affect concrete’s workability and end strengths. Air content in concrete has a bunch of variables which I won’t get into in this post due to their technical nature and minimal control from a DIY’er completing this job.
Where to Start
To pour a concrete slab we started from the far corner and worked our way towards the start of the walkway. As you pour you want to have a bit of extra concrete to allow you to level it afterwards. But be careful, because if you have too much you will have to get rid of all the excess as you level the pad (by shovelling and racking it).
You need to move fast because concrete sets fast, especially if it is warm on windy. Generally if you can pour on a morning on a cloudy day you will have the most time to work with the concrete (but you can’t control weather). You do want to make sure you don’t pour concrete while it raining or if there are chances of rain. Rain during your concrete pour will have negative effects on its end strength and durability.
Vibrating/Consolidating the Concrete
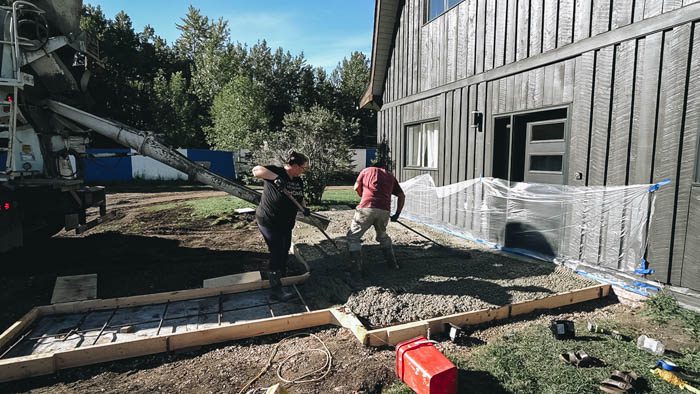
As you place the concrete you want to have some one with a concrete vibrator follow behind. What this does is removes the excess and trapped air from the concrete and ensures it gets into all the areas of your pour.
You want to make sure to not over vibrate the concrete. Excess vibration can cause the aggregate in the concrete to segregate to the bottom. Generally you just want to vibrate an area for a couple of seconds and move in a grid like pattern along your pour. As you vibrate you will see air bubbles rise to the top and thats normal. You also want to vibrate areas like augured holes or areas that air could get trapped to ensure the concrete reaches all corners and doesn’t trap any air and create voids or honeycombing.
Leveling Concrete
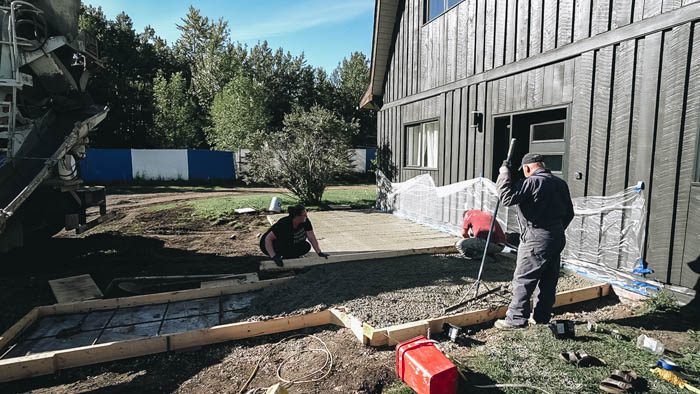
Once all the concrete is placed and vibrated you are going to need to level it to the top of your intended pour height. In our case was the top of the forms. We had also ran a string line run along the house to act as a visual aid for the height of concrete. We took a trowel and levelled the concrete to height there this first.
With a straight edge (we used a 12′ 2×6) we ran the one end of the board on the form and other end on the levelled concrete against the house. We than started pulling the concrete perpendicularly to the house towards the opposite side.
This is probably a job for 3 people, 2 people on the straight edge and one person on a rake pulling back the excess concrete or filling low areas. Watch our video for the best idea of what we did on our pour.
Finishing
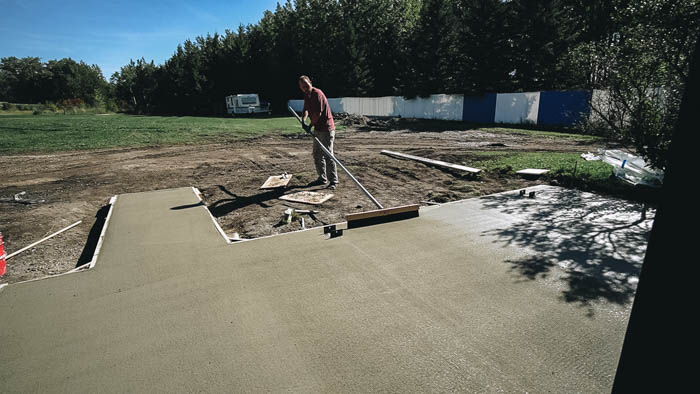
Bullfloat
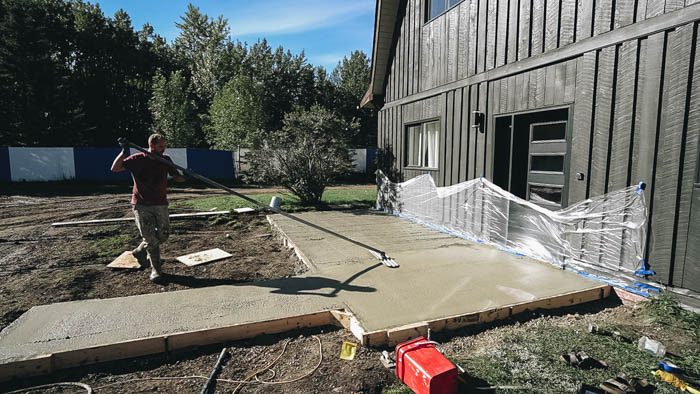
Once you get your concrete slab levelled you can work on your finish. You should wait for excess water (bleed water) to rise to the top of the concrete before you move on to the next step in levelling out the concrete. The bleed water will evaporate, but how long it takes will depend on the qualities and type of the concrete and environmental conditions (wind, temperature, sun exposure, etc). You risk running into problems like dusting, scaling, and delamination in the future if you don’t wait for the bleed water to evaporate fully
Once bleed water is gone you can run your bull float along the top of the concrete. Pushing and pulling it at a slight angle as you go. I would recommend watching some videos as its not something I can easily describe and just got a feel for it as I used if for my concrete slab.
I would recommend not using additional water (spraying onto concrete surface) to assist the bull floating process. This can cause the surface to breakdown at a faster rate due to water down the cement/water ratio of the original mix.
Saw Cuts/Crack Control/Control Joints
There are a bunch of options creating lines in your pad as well. Ultimately you will have to decide what look you are going for and go from there. We wanted the pad to look like one big unit. So we did one pour and will add saw cuts for crack control latter on once the concrete has cured.
A General rule of thumb for saw cuts are to space them at 24 to 36 times the slab thickness. If you are concerned with cracking and crack control you could also have your design reviewed/confirmed by a structural engineer (at a cost).
Saw Cuts/Crack Control/Control Joints are important because they control where a concrete slab will crack if movement occurs. Its better to have a crack run along a controlled path than weave randomly along your newly poured slab.
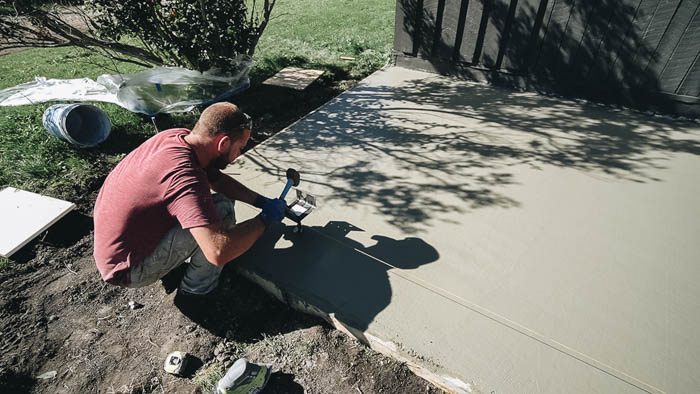
Edging/Final Finishing
There are different tools many different tools for finishing. We used a magnesium trowel (smoothing concrete prior to final finishing), bull float (flattening entire slab), steel trowel (trowel work after the bull float), and a broom to add a textured finish our concrete.
Depending on the look you are going for you can also add a edge profile or grooves to your concrete slab. We elected not to do this and just ensured that any excess concrete was removed from the top of our forms to ensure a nice clean edge once the forms were removed.
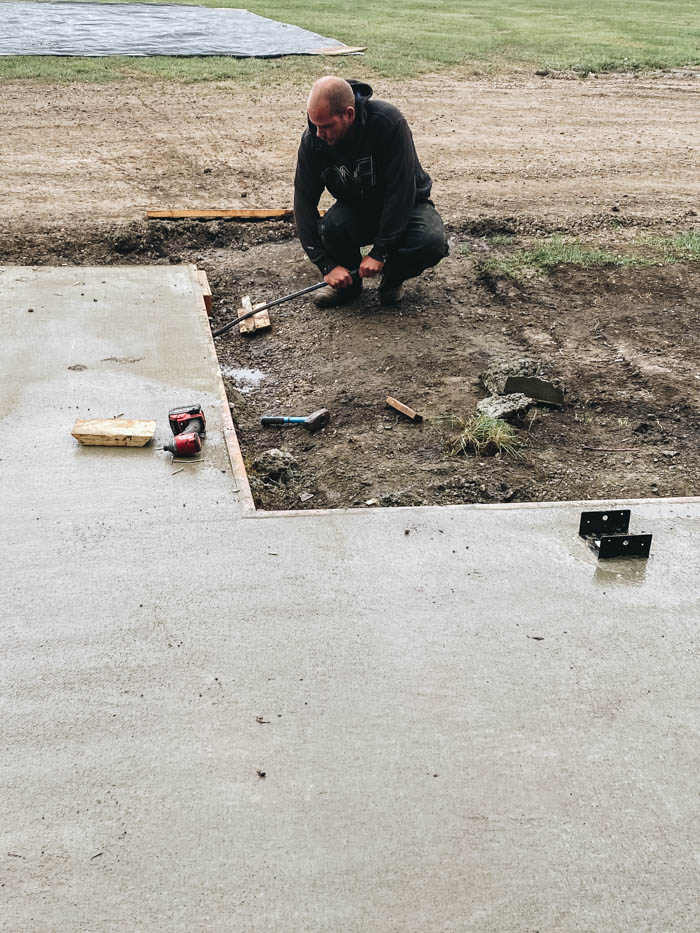
Adding Brackets
As we were planning to build a pergola over part of the concrete pad we needed to add some brackets to attach the posts to. We had placed two of the augured holes under the location of the pergola posts. We took measurements so we could reference these locations once the pad was filled with concrete.
Once we had the concrete levelled we installed the two saddle brackets. We used a hammer to tap them into place and used a trowel to touch up the concrete surface around the brackets.
You can also add the brackets afterwards, once the concrete has set. You will need to drill holes with a concrete drill and concrete bit and that set the saddle brackets into place with a concrete epoxy adhesive.
Broom Finish
Adding the broom finish is a bit of a time game. You need to wait for the concrete to set enough to not mar the surface too deep when going over it with the broom. But also not set so much that the broom doesn’t dig into the concrete. I kept testing a corner of the pad until I got the profile I wanted (very shallow). If I didn’t like the test area because it was too deep or messy I would just go over and level it again and wait for the concrete to set further.
Wetcure
To ensure the best lifespan of your concrete slab you should wet cure your concrete. Concrete’s strength is heavily dependant on its curing environment in its first 7-14 days. Concrete generally doesn’t reach its full strength until 28 days. Concrete’s final strength is dependent on how the concrete hydrates while its curing, not enough moisture with negatively impact the final strengths/durability.
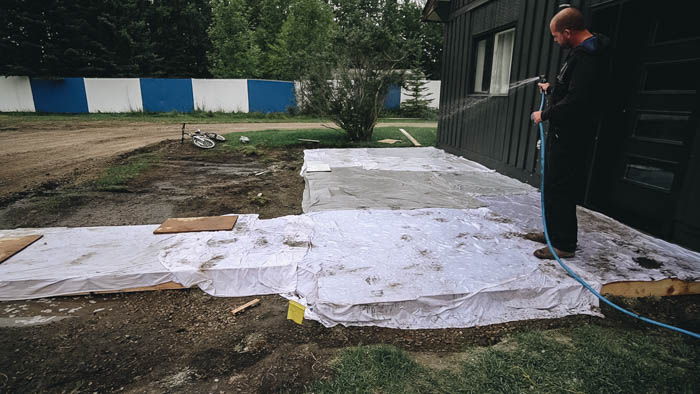
We used soaked blankets place on our concrete over a 7 day period for our wet cure. Soaking the blankets and pad down several times a day. You can first place the blankets on the slab once you can walk on the slab without marring the surface.
Hoarding
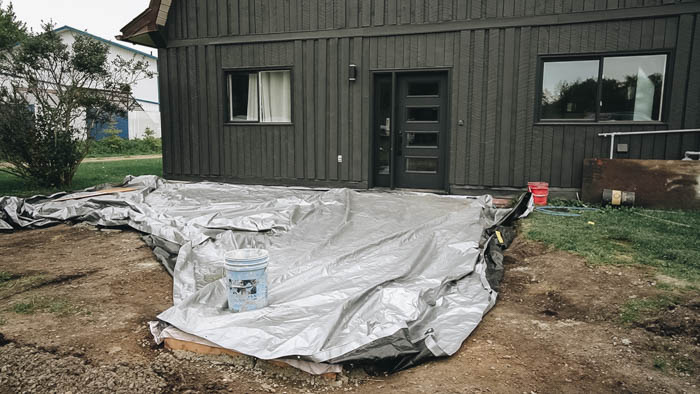
Depending on where you are located on the time of year you may need to protect your concrete from freezing temperatures. If you let your concrete freeze during its curing period of 28 days you will negatively affect its final strength and durability. We had some minor risk of +5 to 0°C so we covered the pad with a tarp. For temperatures below 0°C you may need to add heat and a cover structure to allow your concrete to properly cure.
Removing Forms and Backfilling
After 3-4 days you can remove your formwork. Be careful when taking the forms off. The concrete is still “green”/not fully cured and excess hammer or prying on the new concrete may cause the concrete to chip or spall.
Dirt can be backfilled/replaced around your concrete once your forms are removed. However be careful with equipment around the new concrete. Any impacts may damaged your concrete as its not fully cured until after 28-30 days.
Sealing
Once you concrete has cured and dried out you may want to add a sealer. The sealer will help:
- repel moisture
- minimize colour fading
- resists stains
- minimize chlorides being absorbed into your concrete (from salt use)
- add a custom tint to the top of your concrete
You want to make sure your concrete is fully cured (wait at least 30 days), clean, and dry before adding your sealer.
If you poured your concrete against a house you may also want to apply a some speciality concrete caulking (like SikaFlex) to prevent water from getting in between the house and concrete pad.
How Much Does it Cost to Pour Concrete
- Gravel: $160
- Concrete: $940
- Tool rentals: $250
- Rebar: It was left over from another job but would have cost around $800 for everything I used for this project
- Forms: $85
- Saddle Brackets: $30
- Concrete Finish Broom: $45
- Misc Supplies: Plastic, screws, etc ~$50
So the Grand total came to $2,360 CAD. Now this doesn’t include costs for the dirt work with my tractor as I already owned it. So if you don’t have access to a tractor or something/someone to complete this task for your project you will need to budget for it.
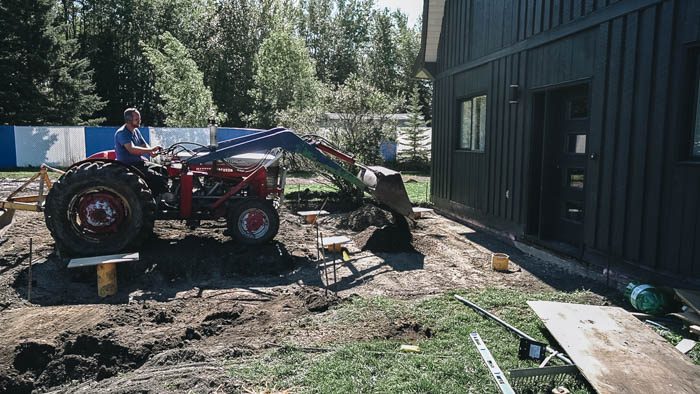
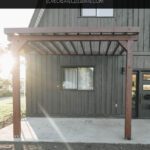
Our Finished DIY Concrete Slab
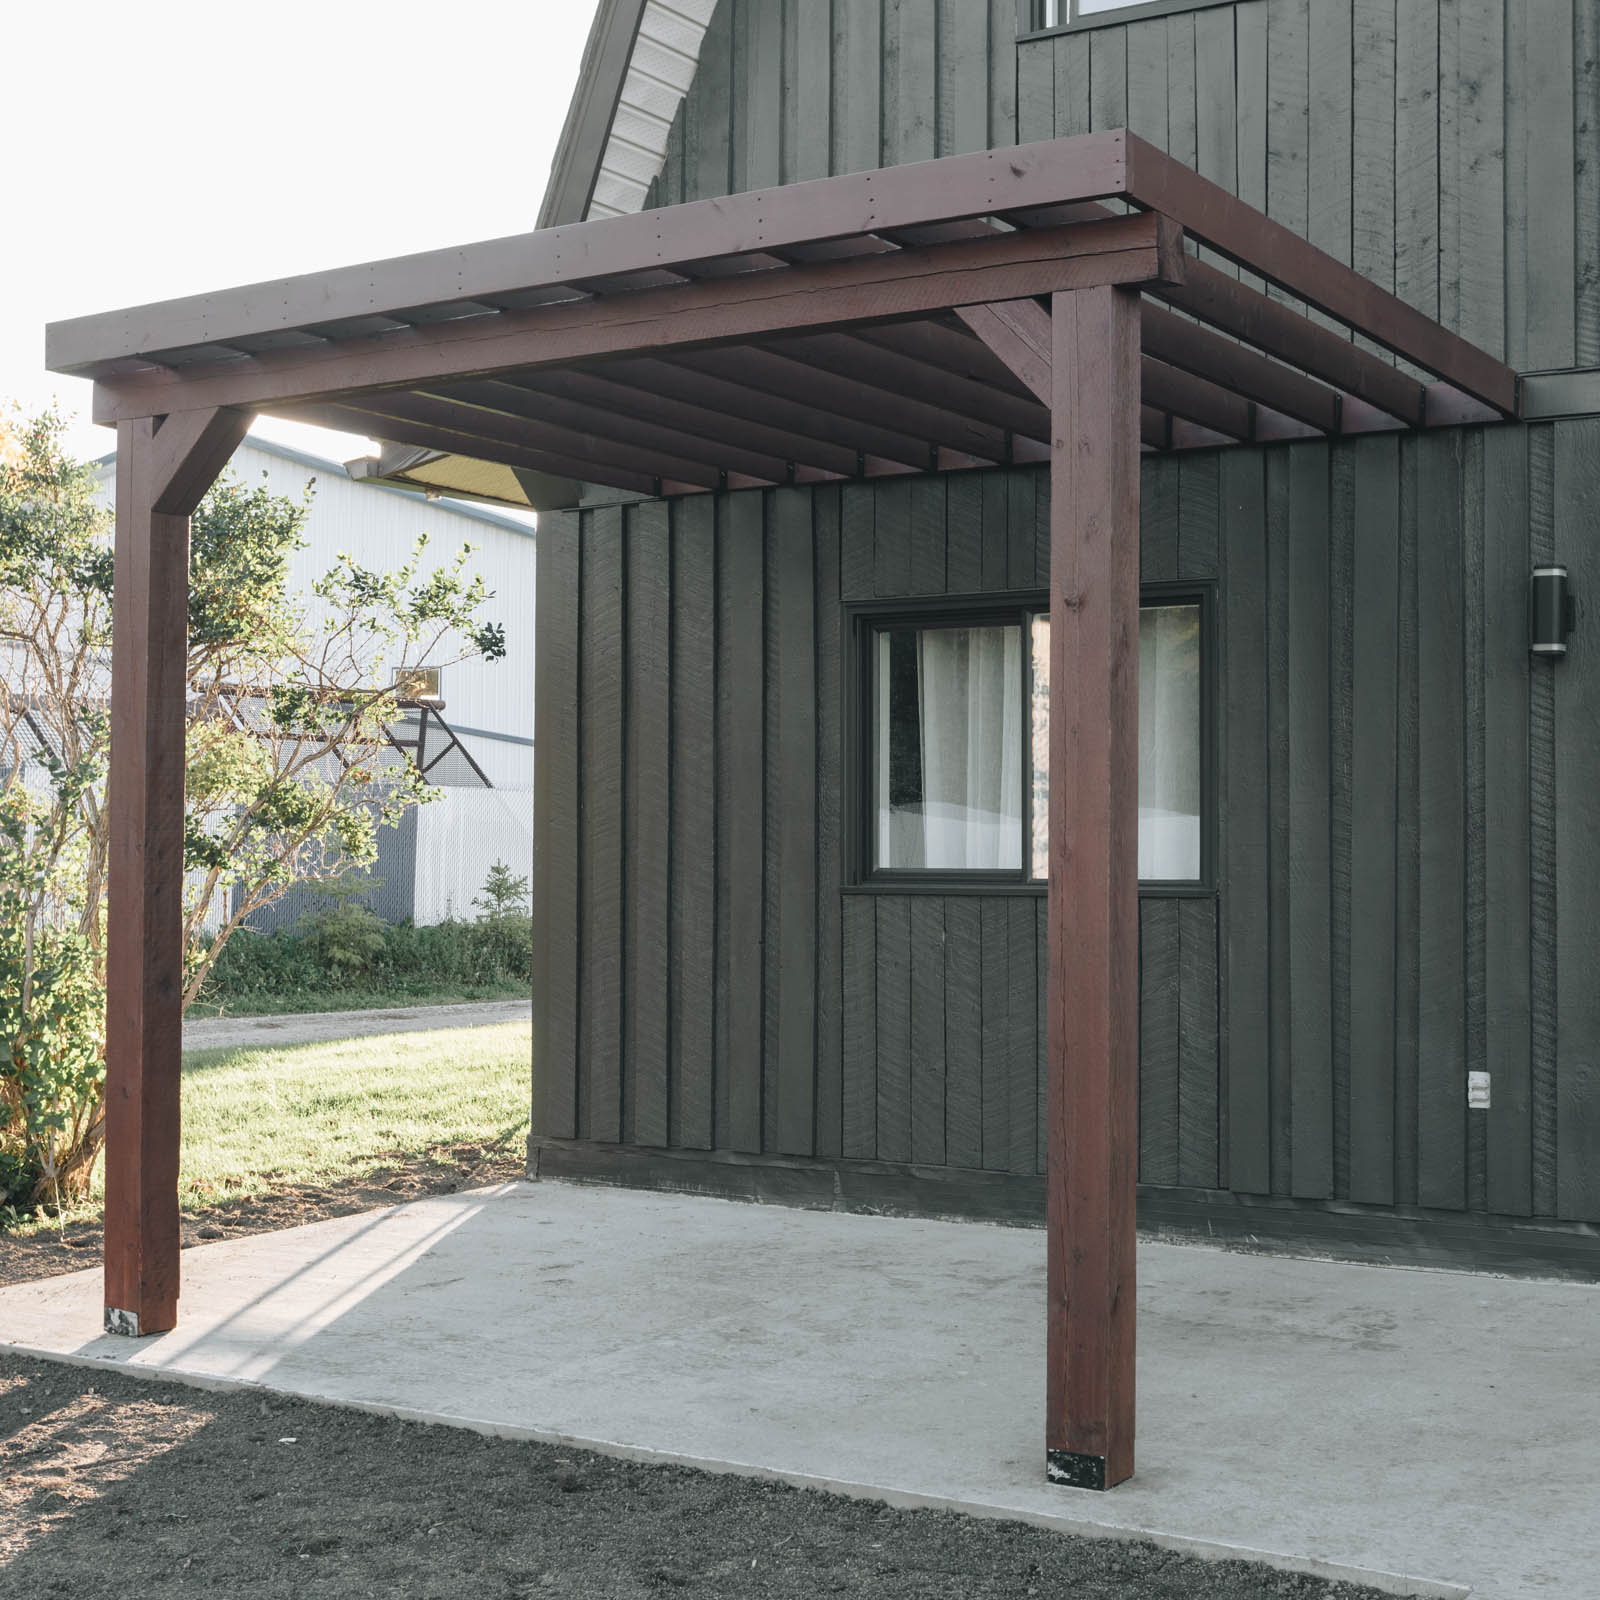
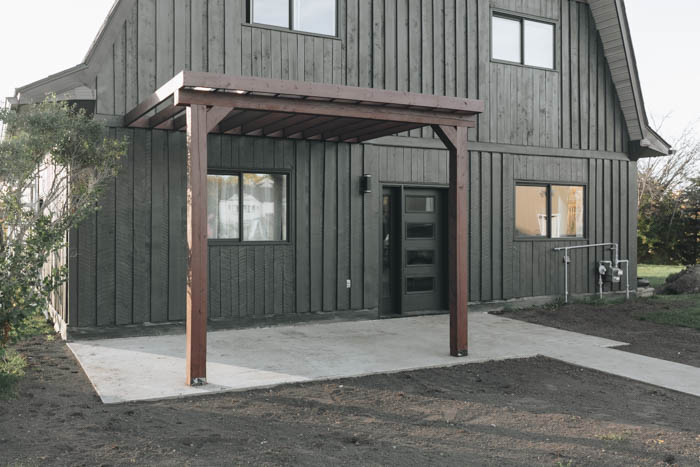
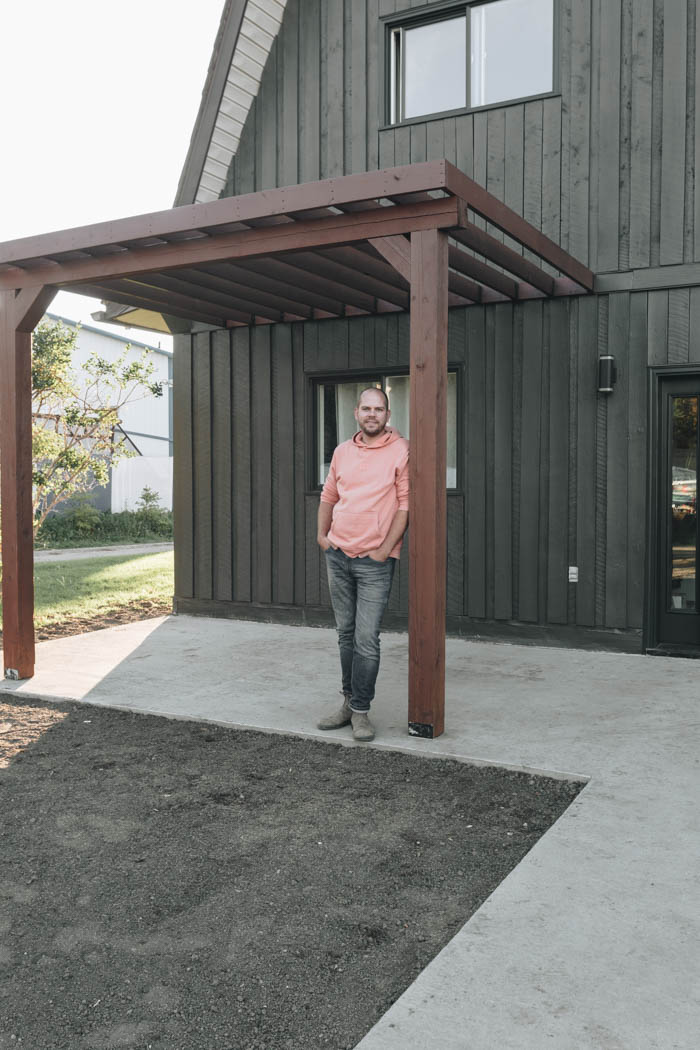
We were very happy with what we got for this price, it definitely adds that much value to our house and now lets us prepare for the Pergola! Be sure to check out this post to see how we built the Pergola!


Megan Powell
Monday 4th of October 2021
Hey! I'm super curious about what made you both choose the concrete route vs. paver stones?
Lindi
Wednesday 6th of October 2021
Russel did paver stones at his previous house and wasn't a huge fan. It was a bunch of work and was prone to settlement. We wanted a monolithic slab for the look and also for maintenance (snow removal).