
Hey everyone! A LOT has changed since you were last here! If you are new to our Master Bathroom Renovations, start here! If you’ve been following along, you’re probably itching for an update! Last week I took a hiatus from reno updates to share my favourite tips for choosing the PERFECT bathroom tile, but I’m back and so eager to show you the progress we’ve made!
Week 1 / Week 2 / Week 3 / Week 4
Week 5 / Week 6 / Week 7 / Week 8
Week 9 / Week 10 (Final Reveal!)
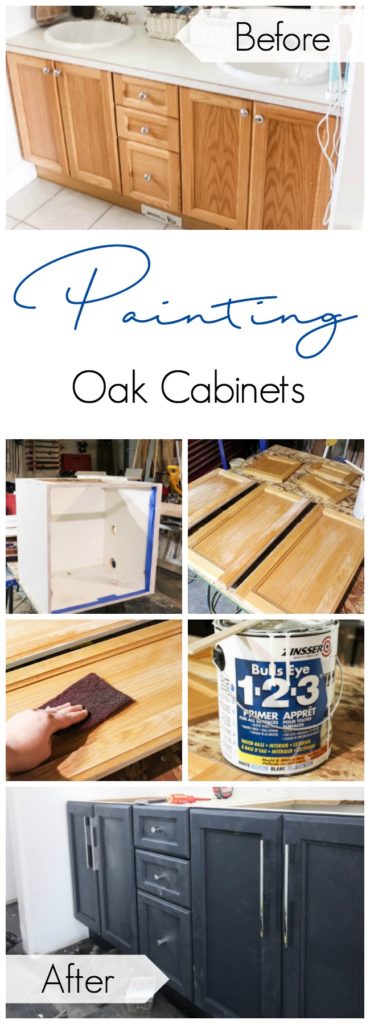
The two main things that have transformed are the shower and the cabinets. Eek! SUCH a huge difference!
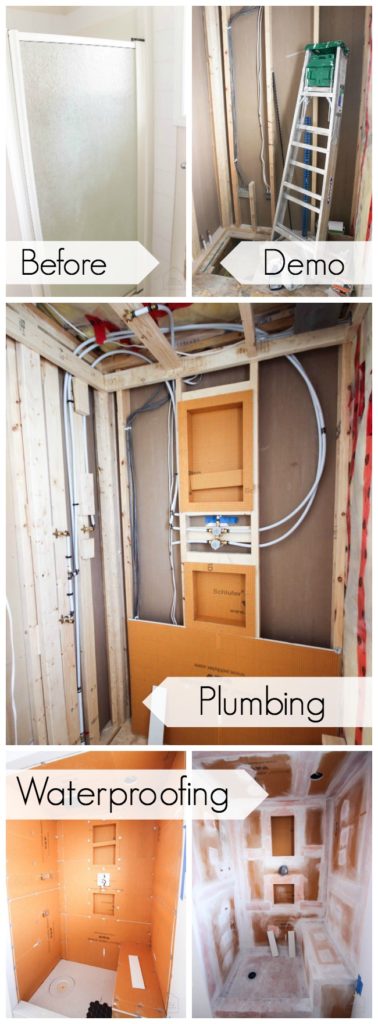
Yep… that top left picture is the before pic. I hardly even remember that space! After we completed all of the demolition, we moved on to the plumbing. My husband did an AMAZING job moving all of the plumbing lines around #soblessedtohaveahandyhusband.
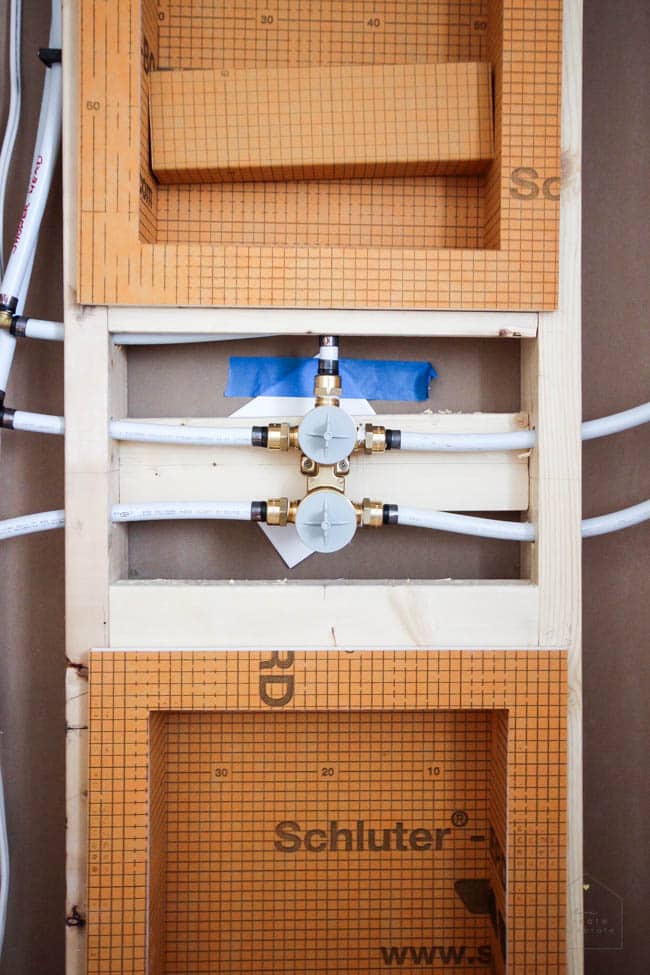
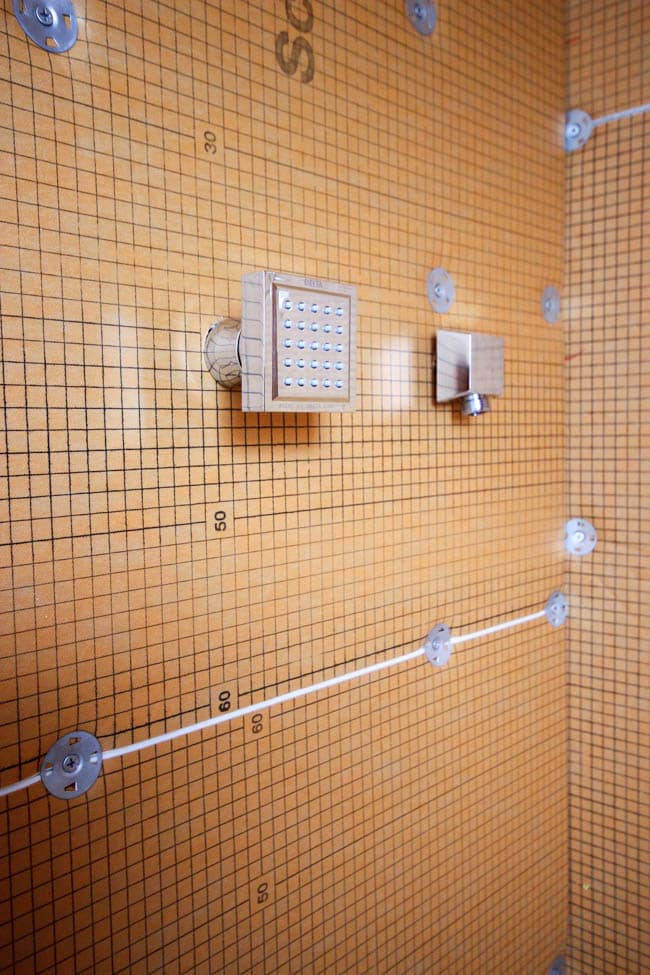
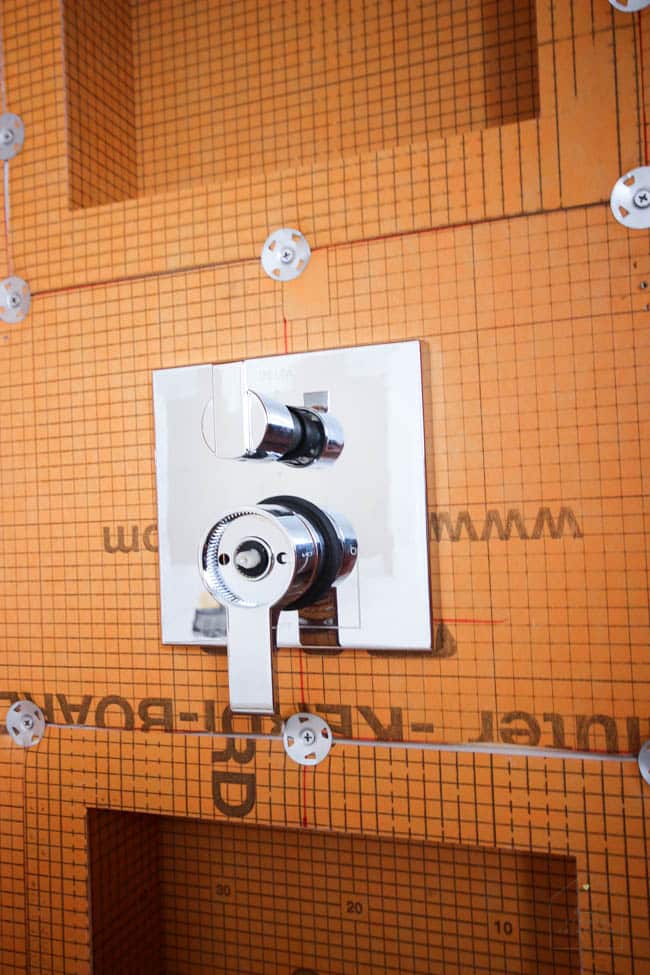
We have a beautiful chrome diverter that we are using so that we can have one or two of our three options on at any time (body jets, rain head, and/or shower head).
Here’s a closer look at the plumbing for the diverter (above) and for the hot & cold water (below):
I couldn’t wait. I HAD to see what the rain head, body jets and diverter were going to look like in place, so I popped them on, just to see :)
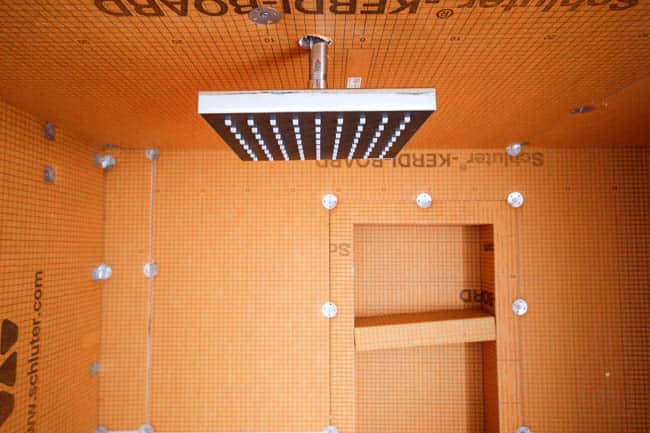

We finished off the waterproofing by tapping all of the seams in the waterproofing system.
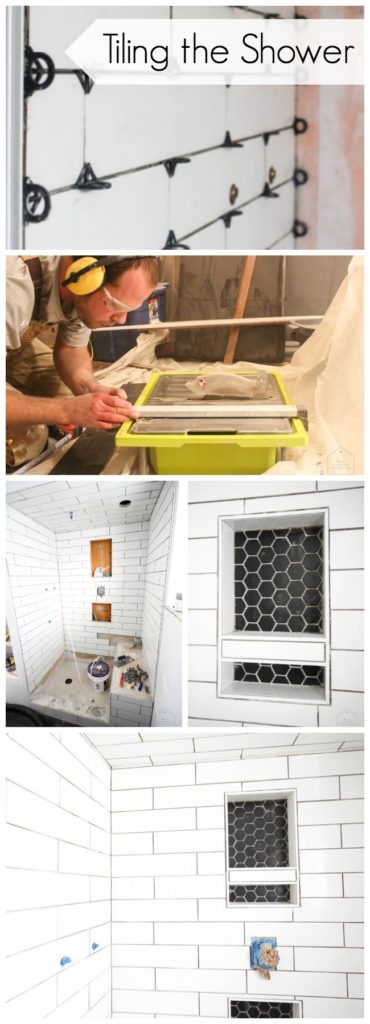
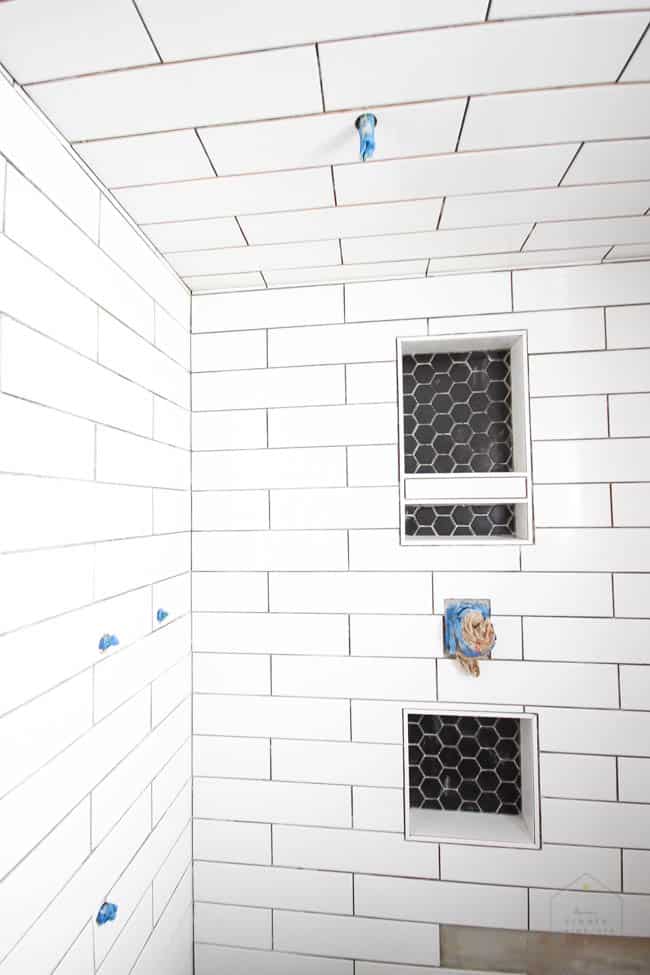
Then we moved on to tiling the shower – which in my opinion was the MOST exciting step yet! We our tiles were 4″ x 16″ – larger than the average subway tile, but OH MAN, does that tiling take a looooong time. It is tedious work, and we had two people working together! SO proud of how it turned out.
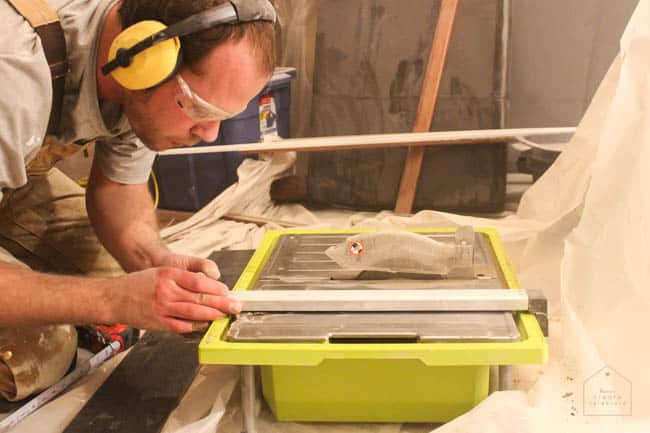
We used our Ryobi wet saw for our tile cuts. Here my husband is cutting floor tile, but it’s all the same! lol. We didn’t have a table upstairs, and we really didn’t want to have to go back and forth to the garage between each cut, so we laid down a huge waterproof tarp and cut on the floor of the bathroom. It worked great! LOVED using the Ryobi tile saw – that’s right… don’t think my husband got to have all the fun!

And our second BIG transformation of the week….
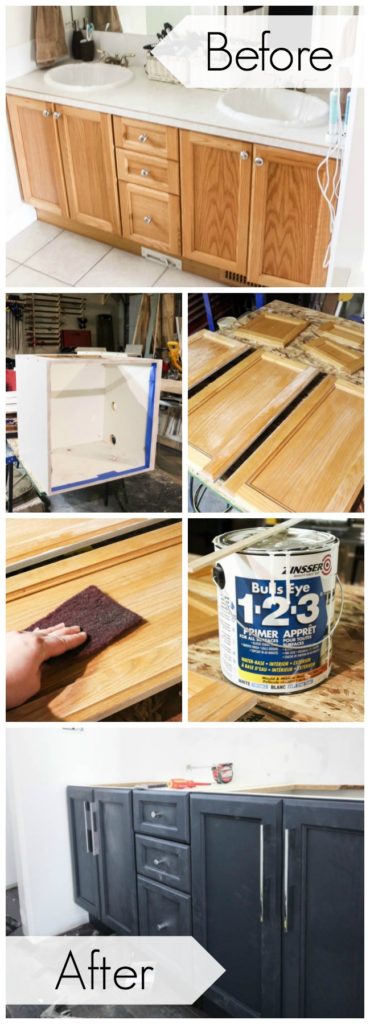
I painted the oak cabinets!! Woodworkers everywhere are cringing right now… including my husband. I think I actually caused him physical pain when I insisted on painted the beautiful oak, but come’on. It reaaaally wasn’t going to fit my aesthetic. We couldn’t afford to buy new cabinets, so painting finally won him over.
Our simple steps to painting the oak cabinets:
- Remove cabinets from the room.
- Take doors off cabinets and remove any hardware, hinges, etc.
- Clean doors. We usually use TSP
to wipe everything down.
- Scuff doors using an abrasive pad. This will help the primer stick better.
- Prime cabinets. Our absolute favourite primer in this house is Bullseye 1-2-3.
- PAINT! I used Midnight Blue from Fusion Mineral Paint because I’m currently obsessed with the beautiful colour!
- Re-assemble. [Optional: beautiful new hardware!]
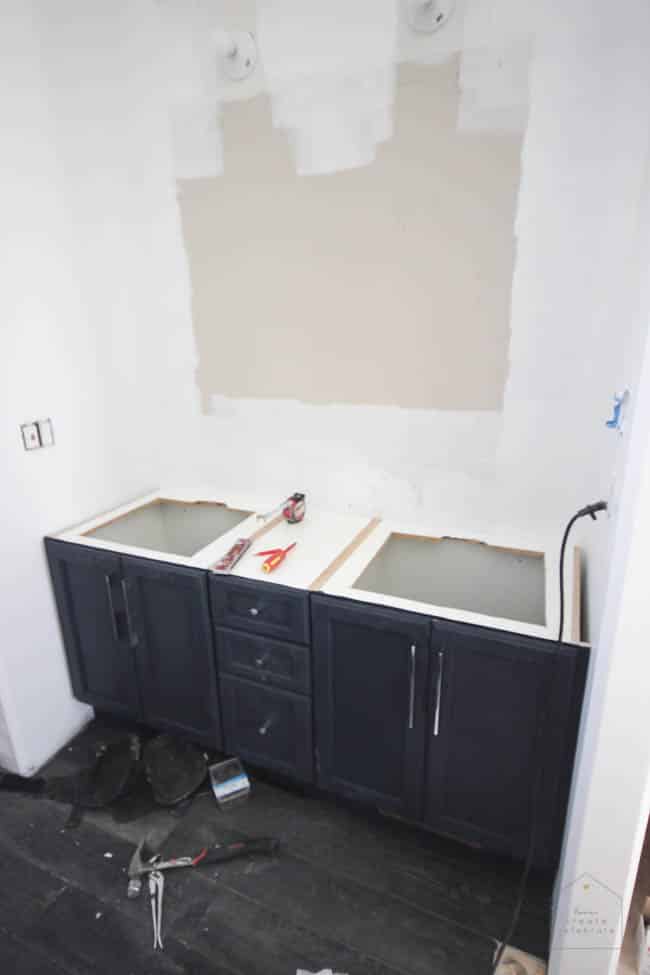
The cabinets are covered in dust and we don’t have a countertop yet, but you get the idea…

So… thoughts?! Let me know what you think in the comments! One step closer to getting my bathroom back!


*This renovation was sponsored by The Home Depot Canada and Delta Canada. This post may contain affiliate links for your convenience. For more information, please read my disclosure policy*
Jennifer
Wednesday 9th of December 2020
Hi Lindi! I'm curious about the fusion paint on the cabinets. How have they held up? Would you recommend for my oak kitchen cabinets?
Katie
Thursday 1st of November 2018
Can you comment on the tile used for the niches?
Lindivs
Thursday 1st of November 2018
Yes! It was just a 2” black hexagon sheet. Same thing we used on the floor :)
Adrian at ninjaDIY
Thursday 28th of December 2017
Hey Lindi, just found your post ... it's excellent, congrats!
I love to see before and after pictures of projects but because I am a DIY lover and construction pro ... I love to see jobs well done just in between of the before and after ... the quality of the plumbing and the waterproofing it looks amazing, I love to see that!
I bet you know enjoy that beautiful ceiling shower :)
Thanks for sharing!
Jessica @ HomeAddons
Monday 10th of July 2017
Hey Lindi,
The new tile in the shower looks great! And what you've done with the cabinets brings more tone to the space. I don't think the raw wood look matches that new tile you put in, so the dark color is great!
I look forward to seeing the bathroom totally renovated and decorated, I'm sure it will be awesome!
Thanks for sharing this,
Jessica
Karla
Friday 24th of March 2017
Looks great! We are in the middle of a bathroom renovation too. I just painted an old dated vanity as well!
Lindivs
Saturday 25th of March 2017
Oh! So exciting isn't it! It's one of my favourite parts of the transformation!