
Make your own DIY wood slat accent wall with this easy video tutorial. You can modify the design for horizontal, vertical, painted or stained slats.
I am always trying to push my designs to the next level. When we renovated our kids’ bedroom in the fall, I wanted to add a fun wooden feature wall, and my husband’s response was, “because it’s not just enough to add a million stencils”, lol. We did add stencil walls, and they look amazing, but the DIY Wood Slat Accent wall that we did, added something special to the room, and defined it’s own little reading nook for them.
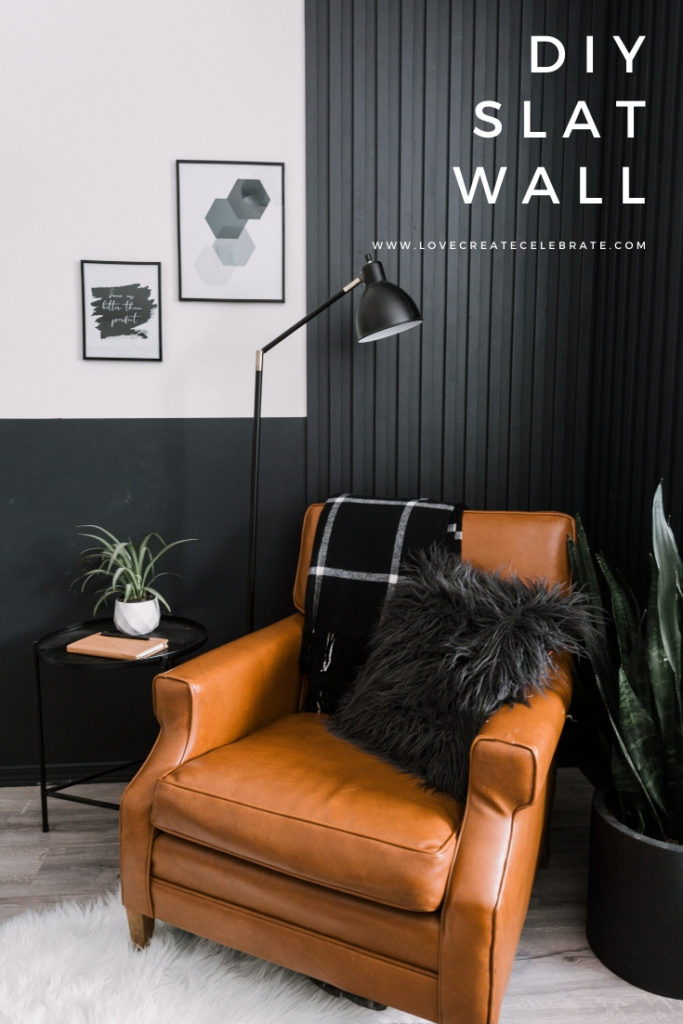
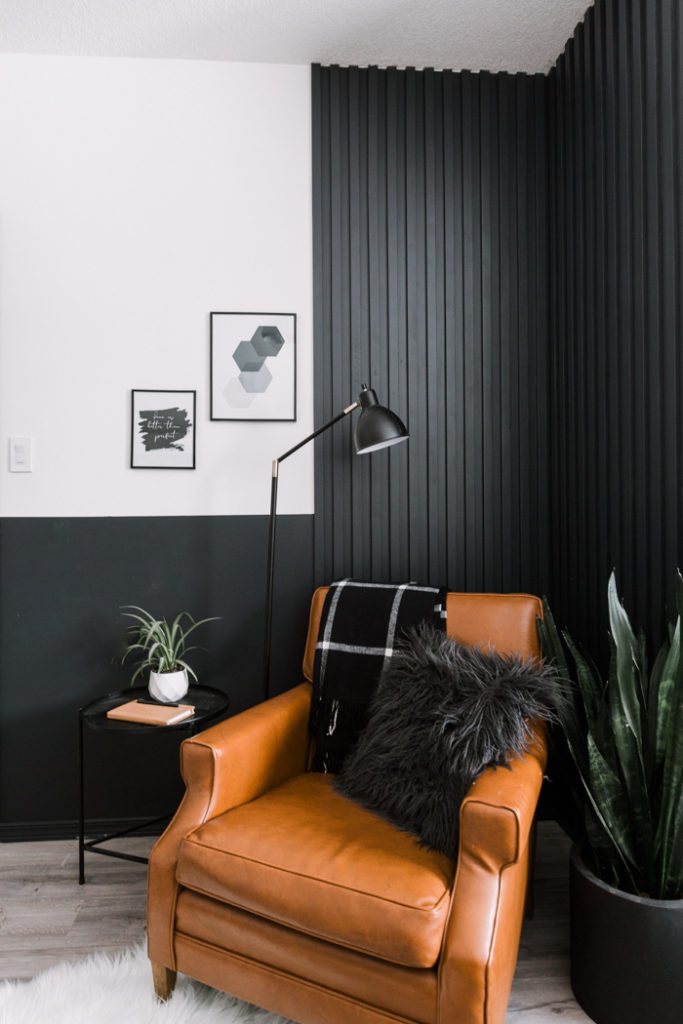
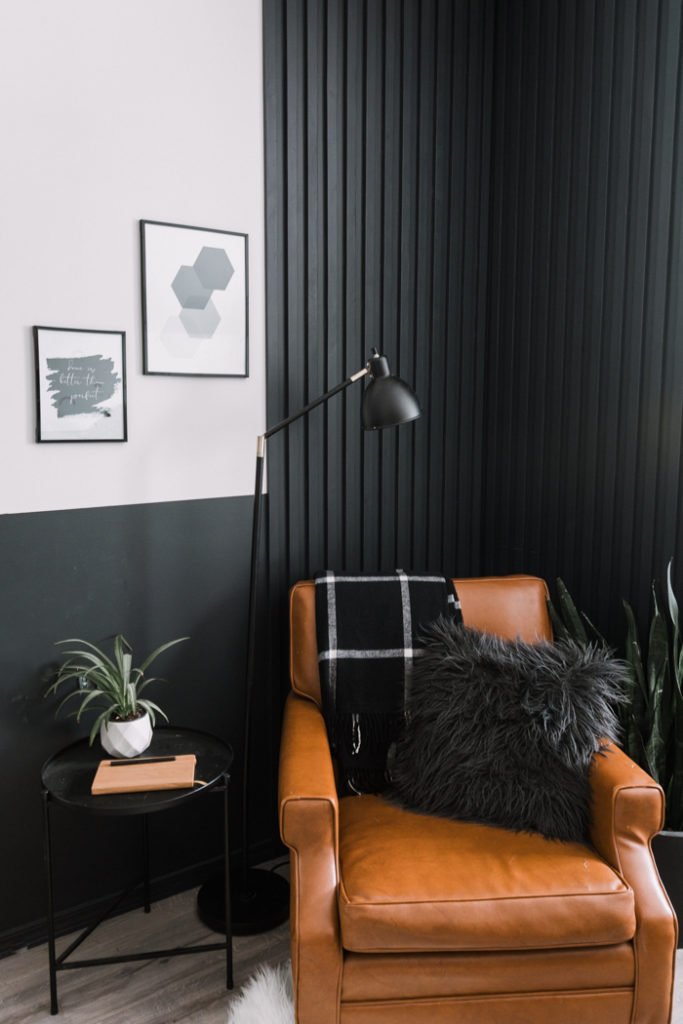
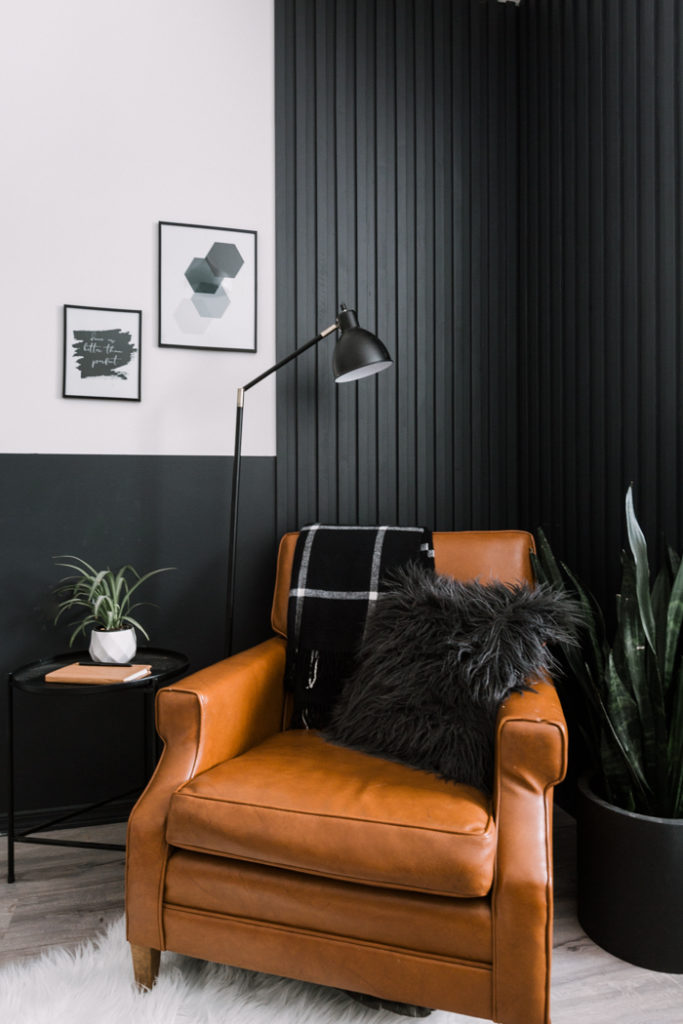
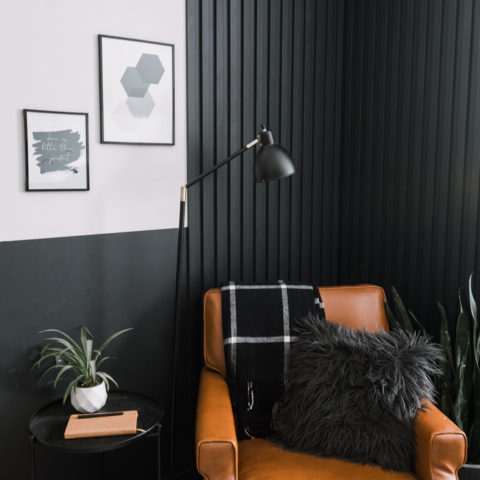
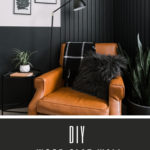
Slat walls like these are gaining popularity, and I love it! You can do horizontal versions, vertical ones, painted ones, or stained ones. So far, I haven’t seen one that I didn’t like! So I decided to try something new, and paint one black on black. The results look amazing as part of our kids’ bedroom, and as part of my staged adult reading nook.
Video Tutorial for a Wood Slat Accent Wall
If you want to try to make your own, I’m sharing all of the written instructions below, but here is a video tutorial to help supplement all of the instructions as well. Watch how the whole wall came together in just a couple of days.
How to Make Your Own Wood Slat Wall
Materials Needed:
- Wood Boards or MDF (1/2″ thick)
- Construction Adhesive
- Wood Filler
- Paint or stain
Tools Needed:
Instructions:
This project was so fun, and so easy. We built our slat wall as part of a weekend renovation of our kids’ room (where we renovate an entire room in our home in just one weekend). We built this accent wall along with stencil walls, painting, building a little play house, and assembling furniture.
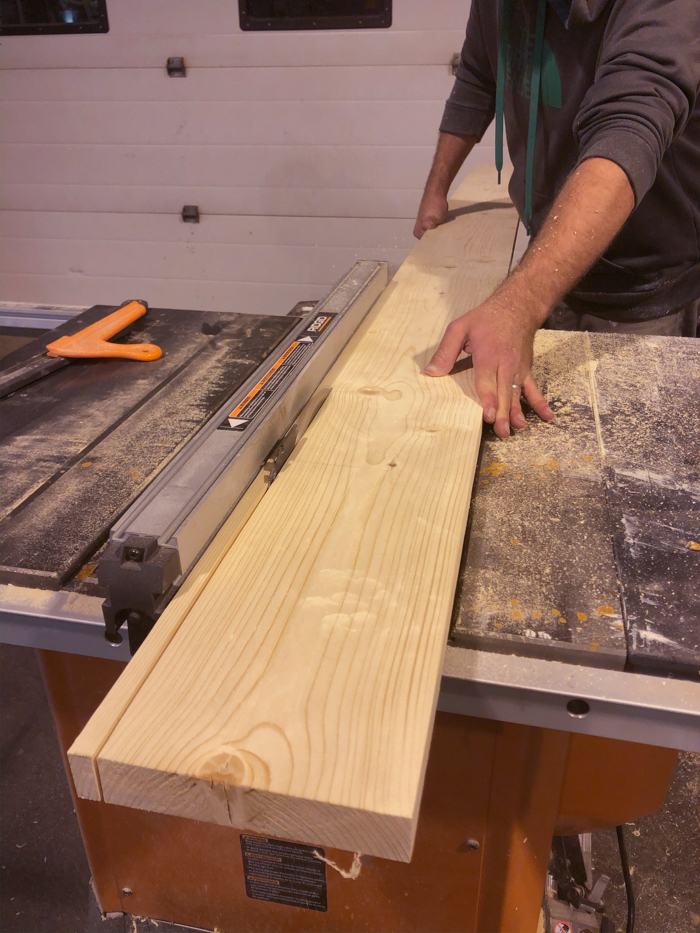
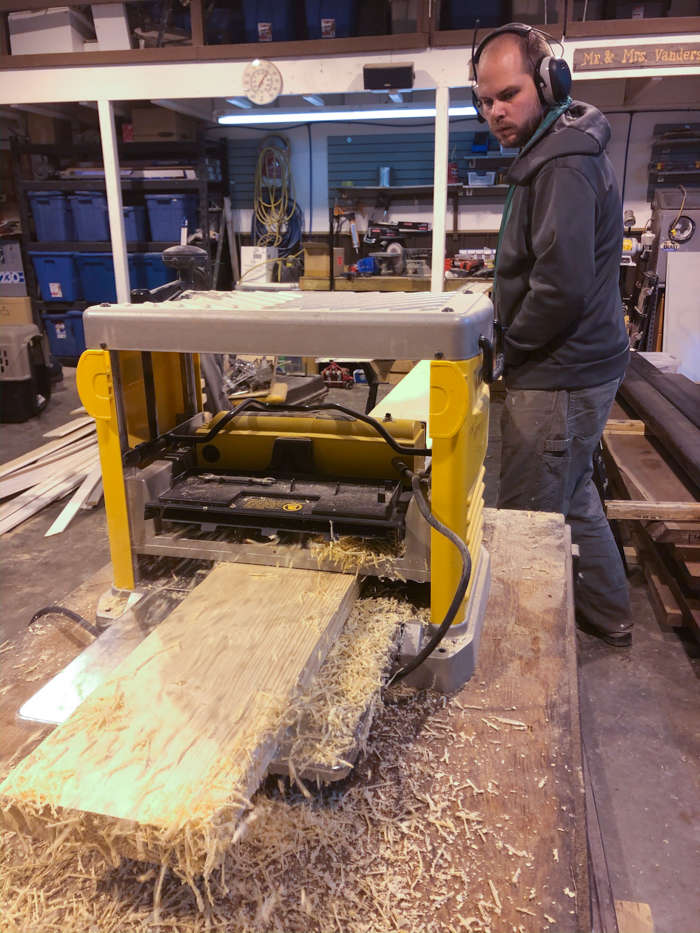
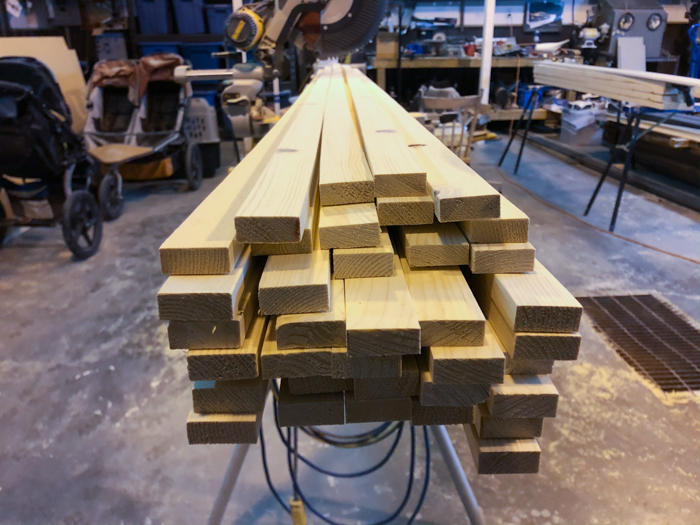
We planed the boards smooth, cut them to length, and cut all of our boards into slats.
When the slats were ready, we sanded down the fronts and edges, and then gave them one coat of paint before putting them up on the wall. We also gave one coat of paint to the wall that the slats were going to go up on.
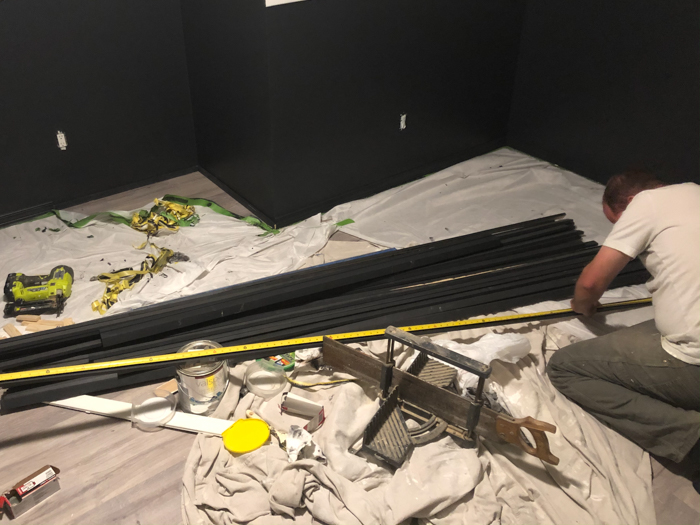
Finally, we brought the slats to the room, cut them down to size, and attached them to the wall with construction adhesive and a nail gun.
Once everything was attached, we filled all of the nail holes, and then sanded them down and did one last coat of paint.
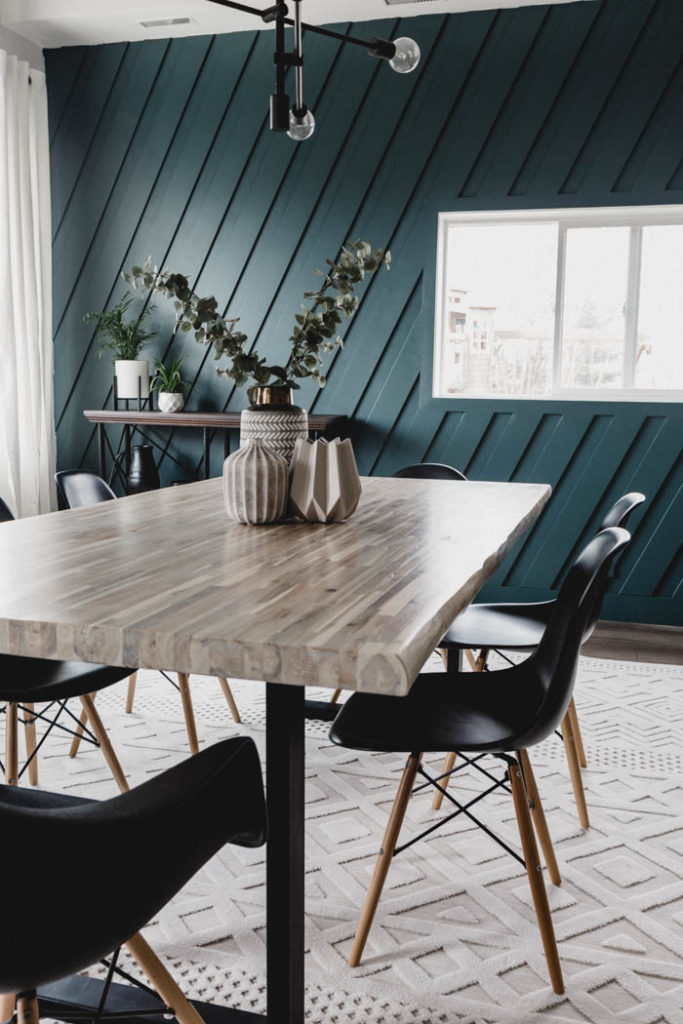
Our Finished Wood Slat Accent Wall
This wall was originally created for our children’s bedroom. It is a beautiful, modern backdrop to their reading nook and their cute indoor playhouse.

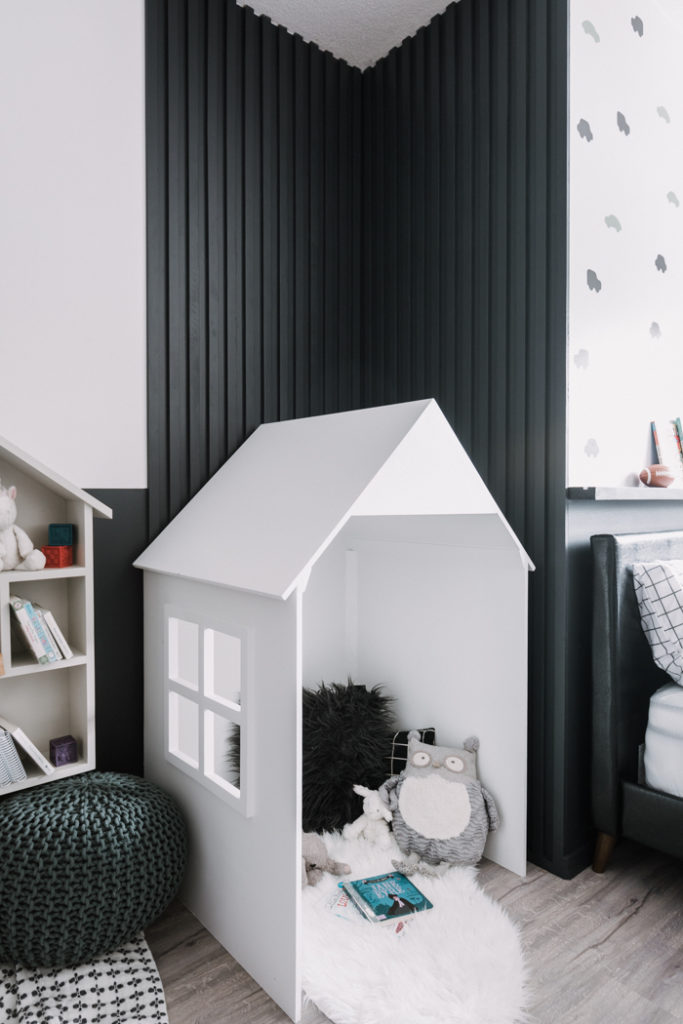
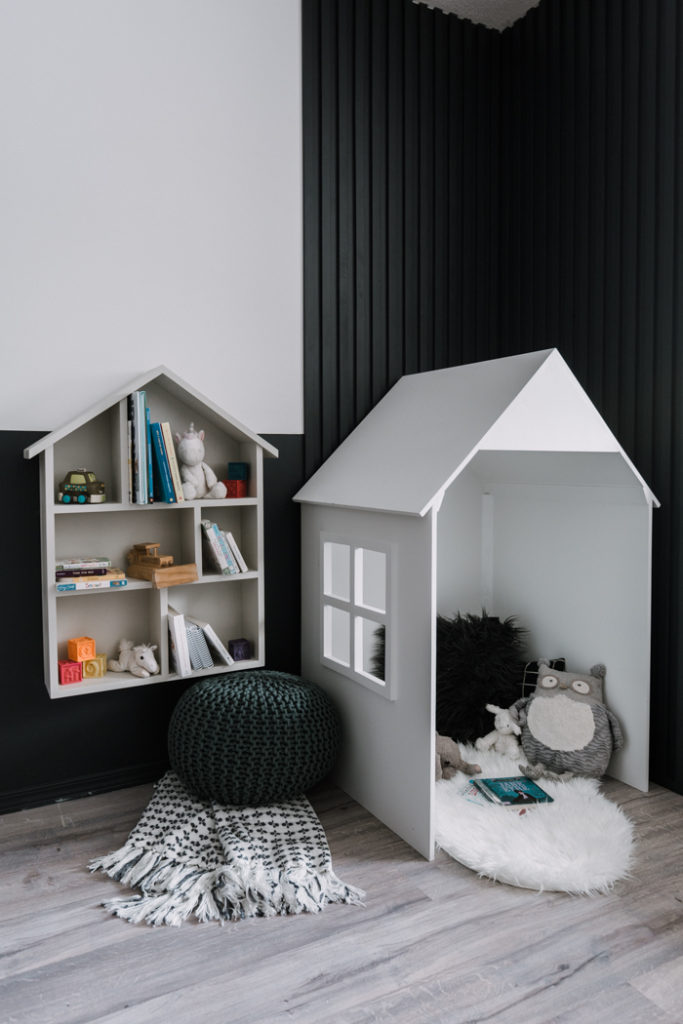
I wanted everyone to get an idea of how this room would look in an adult space too, so I briefly removed all of the furniture and staged an adult reading nook. One day I’ll take this bedroom back for myself and actually get to use this little reading spot.
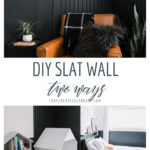
How to Make a Wood Slat Accent Wall
Make your own DIY wood slat accent wall with this easy video tutorial. You can modify the design for horizontal, vertical, painted or stained slats.
Materials
- Wood Boards or MDF (1/2" thick)
- Construction Adhesive
- Wood Filler
- Paint or stain
Tools
- Planer
- Mitre Saw
- Table Saw
- Nail Gun
- Measuring Tape or Laser
- Level
Instructions
- Use a planer to smooth out the surfaces of your 2x6 boards prior. We planed our boards down to just over 1 1/4" thick. (see notes if you are using MDF)
- Using a mitre saw, cut the length of your boards. Measure your wall height, and add an inch or two so that you can make adjustments when you are in the space and get exact measurements.
- Using your table saw, cut your boards into 1/2" strips. We needed approx. 30 slats for our wall.
- Sand down the front surface of your boards, and use 200 grit sandpaper to sand down the edges lightly.
- Give your slats one coat of paint on the sides and front, and give the wall they are going on, one coat of paint. Or you can do one coat of stain if you are staining.
- When the paint is dry, bring the boards to your room, along with a saw to get ready to put them up. Measure the height of the room where you are putting the first board up and cut the board down to the correct size.
- Put construction adhesive on the back, and make sure the board is level before nailing it to the wall with the nail gun.
- Use a scrap slat board as a spacer, and put the boards up one at a time until the feature wall is complete.
- Use wood filler to fill in any of the nail holes
- When the wood filler has dried, sand down the putty, and put a final coat of paint over everything.
Notes
These instructions are specifically for using wood as your slats. If you know that you want to paint, you can cut a 1/2" sheets of MDF. Using MDF, you would not have to plane your boards, or sand all of the surfaces (just a light sand on the edges).
Recommended Products
As an Amazon Associate and member of other affiliate programs, I earn from qualifying purchases.


Want to Learn More about Accent Walls? Here’s a complete guide to where and how to include them!

If you love the look of modern feature walls, you should definitely check out our Modern Moulding Feature Wall tutorial too!


Chelsie
Monday 18th of March 2024
Hi! How wide of a spacer did you use between spacers? Yours looks like the perfect distance apart!
Lindi
Friday 5th of April 2024
We used a spacer that was the same width as our slats :)
Nick
Saturday 29th of January 2022
How did you handle the spacing of the slats in the corner? I can't really tell from the picture. Does one slat get butted up against the corner completely while the other is space off of it?
Lindi
Saturday 29th of January 2022
There's actually a space on both sides when they come to the corner - not the full width of a slat. Honestly, I think we just measured off the wall and let it stop where it wanted, lol. You could go right into the corner on one side like you suggested too.
Melissa
Friday 5th of November 2021
Hi - I really love the wall. I was thinking of doing something similar however with some floating shelves. Do you think it would be okay to have floating shelves directly on the slats?
Lindi
Wednesday 1st of December 2021
As long as you had some structure to tie the shelfs into. Our floating shelfs over our coffee bar were installed over our moulding feature wall.
Colleen
Sunday 20th of June 2021
We recently had to re-plumb our whole house and I want to do this process to cover up all of the drywall repairs. I don’t want to use nails since the new plumbing is in that wall. Do you think construction adhesive will be good enough to hold it up?
Lindi
Monday 12th of July 2021
You might be able to make it work! You just need to make sure that the boards are all held tightly in place until the construction adhesive sets.
Anusha
Wednesday 19th of May 2021
This wall looks amazing. For a rookie like myself, do you think i will find the board at local Home Depot and have them cut it for me into slats
Lindi
Monday 24th of May 2021
Yes! You can do this! I think you have to pay per cut, but it's definitely a possibility!