
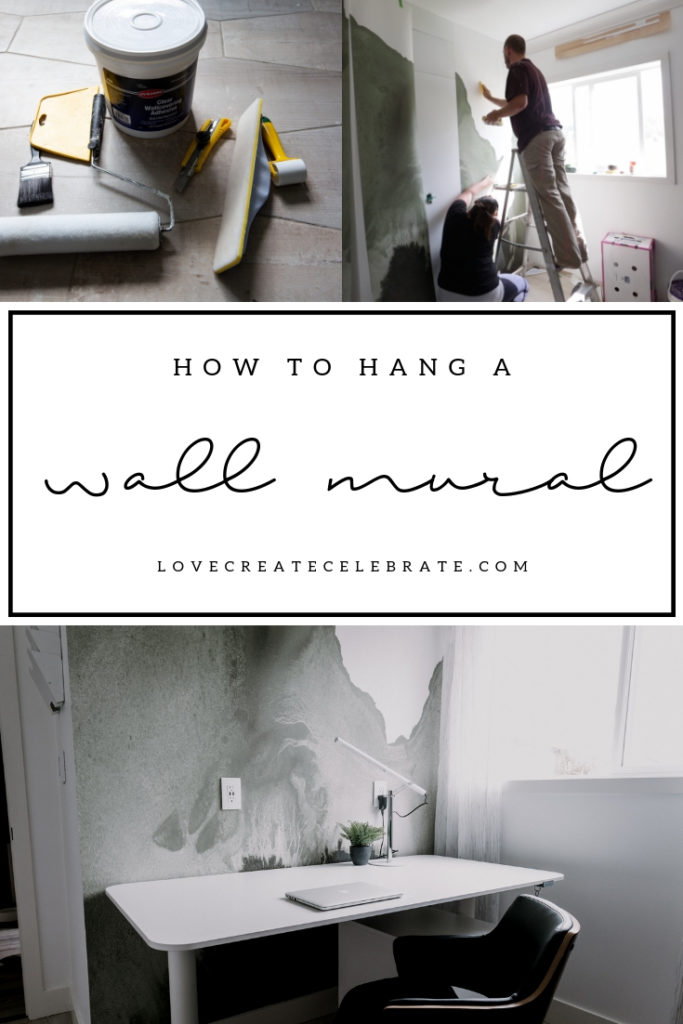
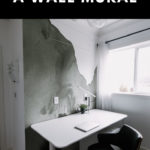
Give your home a beautiful, bold accent wall with wall mural wallpaper! Learn how to hang a mural wall with this simple tutorial!
When people say the word “wall mural” I assume I’m going to need to have some painting talent… or at least I used to assume that. I do not consider myself to be talented with a paint brush, but when I would wall mural wallpaper, I was one hundred percent sold! I put this wallpaper up in my new home office and was shocked that it only took a couple of hours. I’ll show you exactly how to hang a wall mural with ease!
*The mural in this post was provided by Murals Wallpaper. This post may contain affiliate links. When you buy a product through one of my links, I get a commission at no cost to you! For more info, please see my disclosure page.*
Whenever I design a space for my home, I try to push myself to do something I’ve never done before. When I was designing this office, I really wanted to bring some art into the space that would inspire and motivate me, but I couldn’t find anything I wanted.
I had thought about putting up wallpaper on all of the walls (except the cabinet wall), but thought that the space was too small to handle it. That’s when I came across some beautiful mural designs. THIS was perfect. These murals are essentially giant pieces of artwork, except I don’t need to have the skills to paint it myself – perfect.
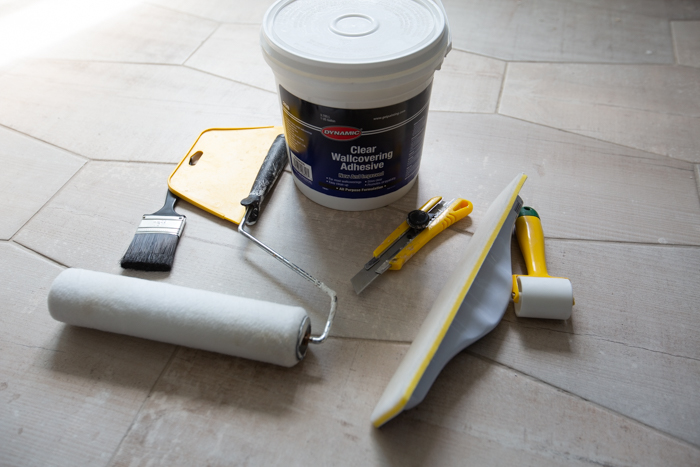
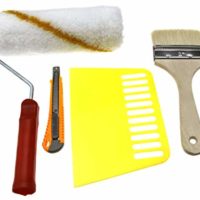
Tools and Materials Needed to Hang a Wall Mural
Wallpaper has come so far from the sticky, messy days. And you really only need a couple of supplies to get it done in a couple of hours:
- Wallpaper – Pseudo Sage (sized to your wall)
- Pre-Mixed Wallpaper Adhesive
- Paint brush and/or roller
- Squeegee
- Laser Level
- Plumb Bob
Video Tutorial: How to Hang a Wall Mural
Want to see us put up our mural at “super speed” (as my kids would say, lol), then give the video below a watch! You’ll also see us giving instructions as we share our process in real-time, and giving some behind-the-scenes tips.
How to Hang A Wall Mural
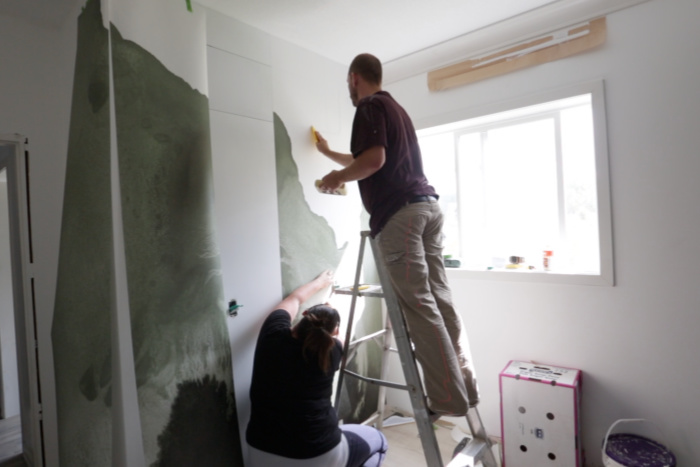
With two people, we were able to put the entire wall mural up in just two hours.
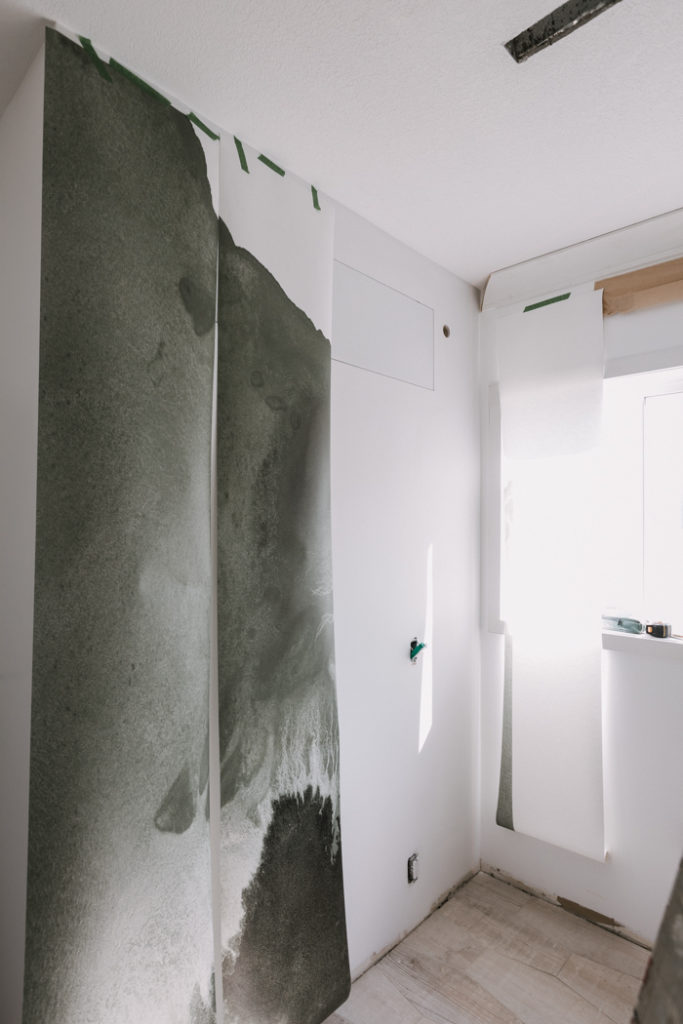
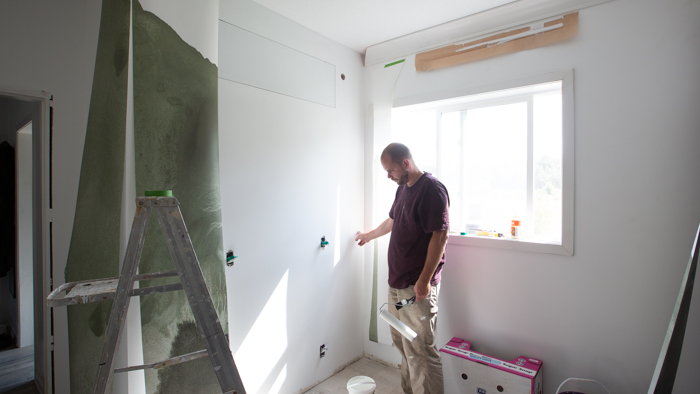
Prepping Your Wall Mural Wallpaper
Before you hang any panels, you need to take them all out the the package. It will likely come as one very long printed strip, so you need to cut each panel at the top and bottom.
Once they are cut, set them up on the wall or on the floor to make sure that they are in the correct order. We just used frog tape to temporarily hang them onto the wall so that we could see the full design.
Typically the murals will come printed a bit larger than the actual size of your wall. So you will have a bit of room to play, with a bit of extra design at the top, bottom, and one the sides.
Hanging Your First Panel
Your first panel will start on one edge of your wall, likely in a corner. Your first step getting ready for this is to make a straight line on your wall, using a laser level or plumb bob (as you can see in the video). This line should be slightly smaller than the width of your first panel. For example, if your first panel is 12″, draw your straight line at 11.5″ so that you have some room in case you corners are not true (or perfectly straight), which they rarely are.
Once you have a straight line drawn, that’s where you will line up the edge of your first panel. Add adhesive to the wall using a brush or roller, and press the panel on against your straight line.
When the panel is straight, use a soft brush or a wallpaper squeegee to flatten any bumps, remove any bubbles, and remove any excess glue.
You should have some extra paper on the edge of your corner now. Use a flat edge to push your wallpaper into the corner of the wall, and use a utility knife to cut along that straight edge.
Hang the rest of your wallpaper mural
The first panel is always the hardest! Once you have your first panel in, you can easily add the next ones, following the same steps above. Just add adhesive to the wall, line up your next panel visually, and put it up against the previous panel.
You can use a slightly damp cloth to clean off any glue that comes out at the seams.
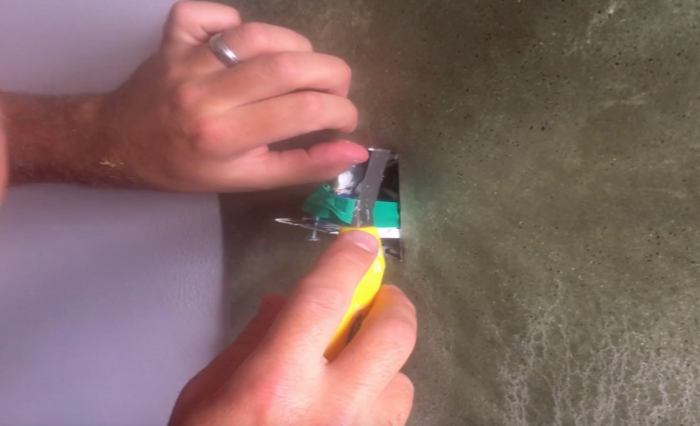
How to Cut Around Outlets, Switches, and Holes
If you have any outlets, switches or holes to cut around, your first steps will be to shut off your power to those locations at the breaker, and then remove the cover plate.
You want to make sure your mural is in place, and lines up correctly. When you know it is lined up, use a utility knife to cut a small “x” or “+” right by the outlet. Then, make tiny cuts until your outlet can come through the hole. Once it’s through, you can make more accurate cuts around the box. You will be putting the cover plate back on, so these cuts don’t have to be perfect.
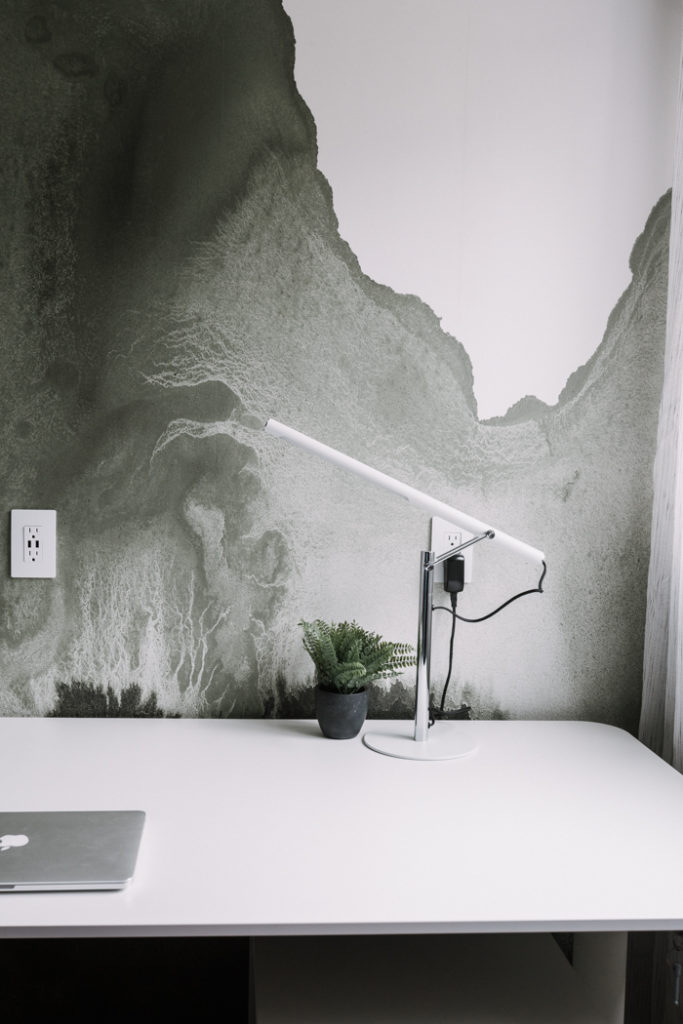
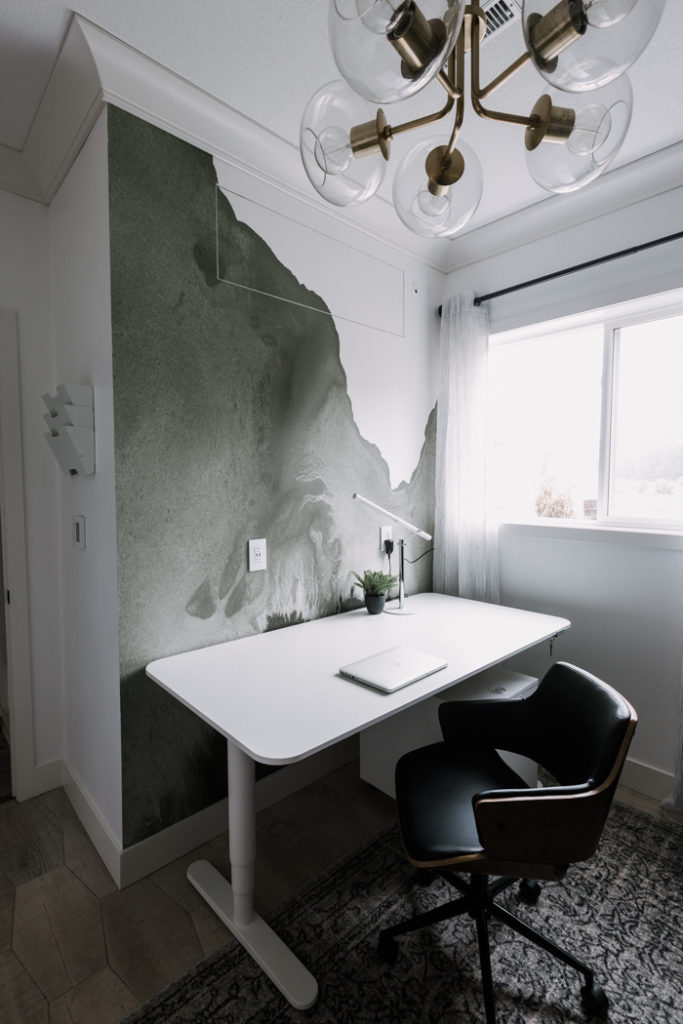
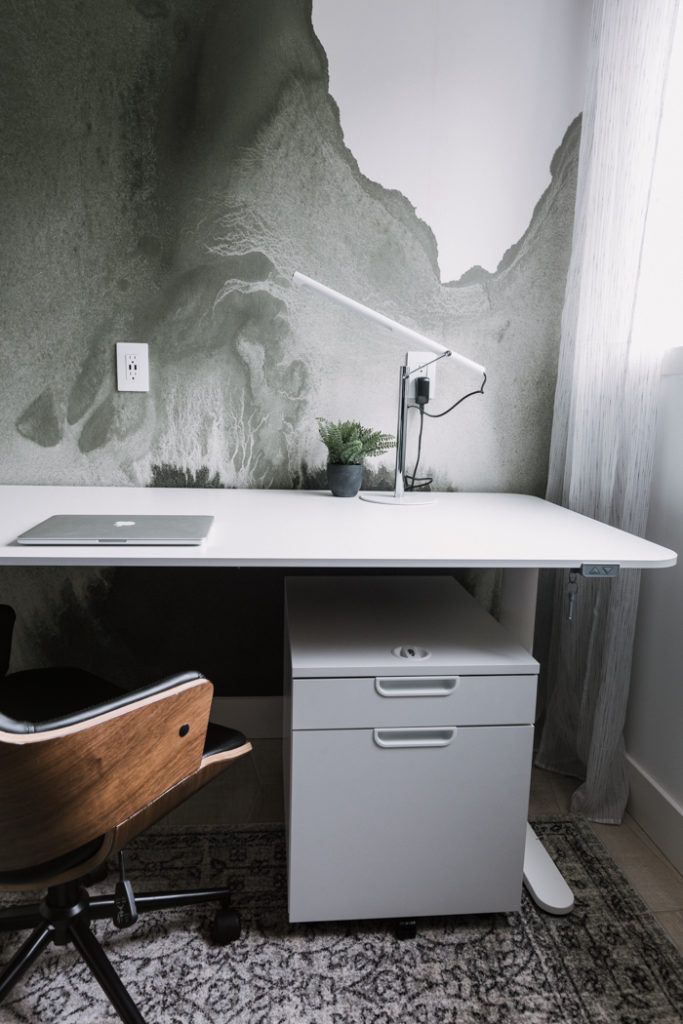
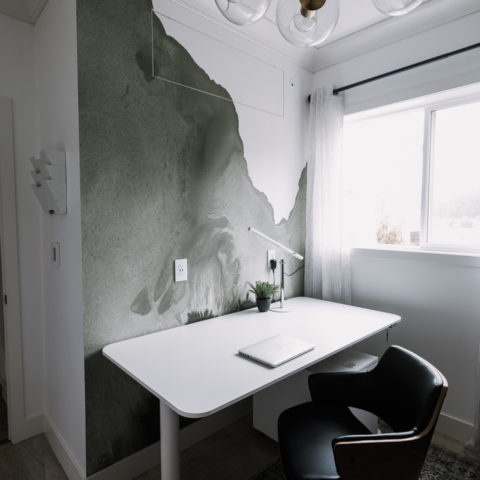
Our Finished Wall Mural
I’m so beyond happy with the finished mural! I absolutely love how it looks in the office. It adds so much character to the space. And the beautiful green watercolour is exactly my style.
How to Hang a Wall Mural
Give your home a beautiful, bold accent wall with wall mural wallpaper! Learn how to hang a mural wall with this simple tutorial!
Materials
- Mural Wallpaper
- Pre-Mixed Wallpaper Adhesive
- Paint Brush and/or roller
- Soft Brush
- Wallpaper Squeegee
Tools
- Laser Level
- Plumb Bob
Instructions
- Pull wallpaper out of package and separate panels. Make sure they are in the correct order before pasting to wall
- Make a straight edge with your plumb bob or laser level. The line should be about 1/2" closer distance from your corner compared to the amount of wallpaper on your panel. For example, if your panel has 6" of design, your line should be at 5 1/2" from the corner.
- Line up your first panel with the line (some will overlap the corner).
- Cover the wall in wallpaper adhesive and attach your first panel.
- Use the soft brush and squeegee to even out the panel and remove any lumps or air bubbles.
- Use a utility knife and a straight edge to carefully cut off the part of the mural that goes past your corner.
- Hang your next panel, by lining it up visually with the previous panel, and paste it onto the wall with your wall adhesive. Use soft brush and squeegee as above.
- Continue above directions until your wall is complete.
- Refer to the blog post for any specific directions related to cutting around outlets, holes, or edges.
Recommended Products
As an Amazon Associate and member of other affiliate programs, I earn from qualifying purchases.
Don’t forget to check out the full Home Office Reveal


Tranh tường Hồng Thanh
Tuesday 2nd of June 2020
Thank you for sharing