
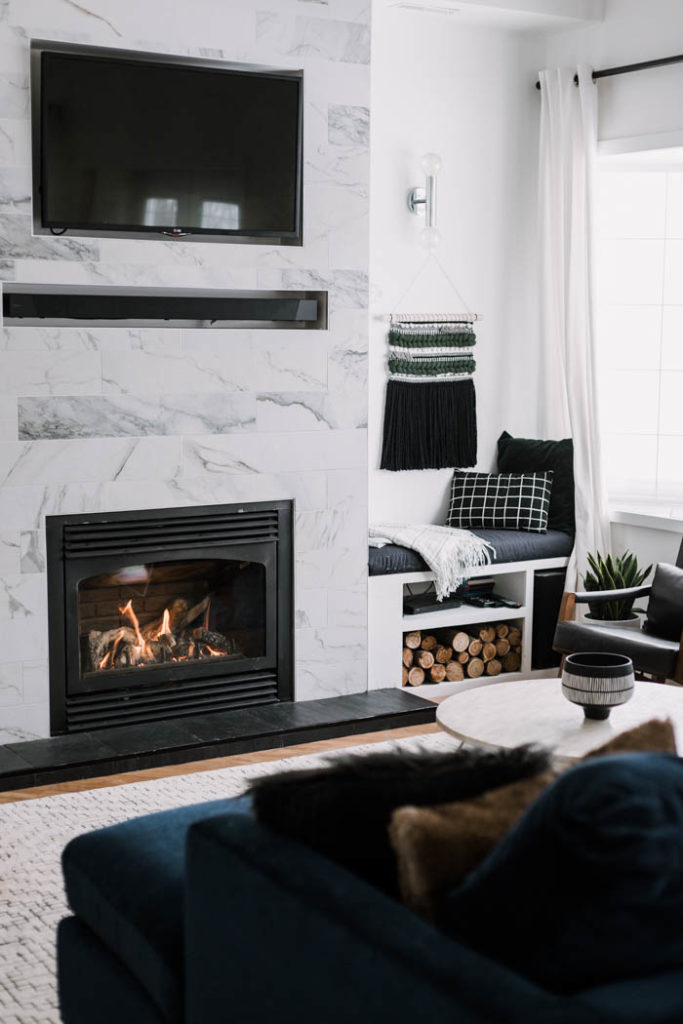
By now, most of you know that our room renovations are packed with DIYs – we DIY so that we don’t have to spend as much, lol. I try my best to share all of those projects with you here, but honestly, I fail hard on that front! There are quite a few projects that I’ve never gotten around to sharing. Some because I was never 100% happy with the results (i.e. too ashamed to share them, lol), and some because life just got too busy! Our fireplace surround is one of the projects that we just didn’t make time to share, but lately I’ve been asked a few times how we were able to hide TV wires and build the fireplace up, so I thought we’d finally share the plans.

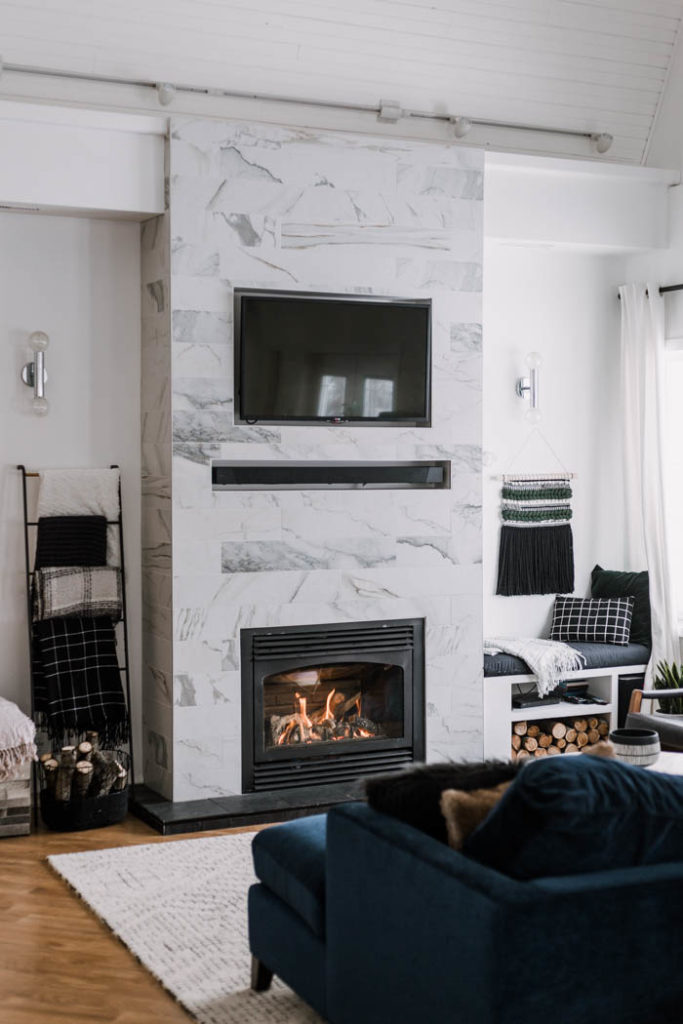
This was our living room before we renovated anything. It didn’t suit our style at all. One of the first things I wanted to do was build a huge fireplace surround all the way up to that ceiling! This was the first renovation that we took on in our new home and I’m so glad we tackled it because it’s easily the most used room in the home.
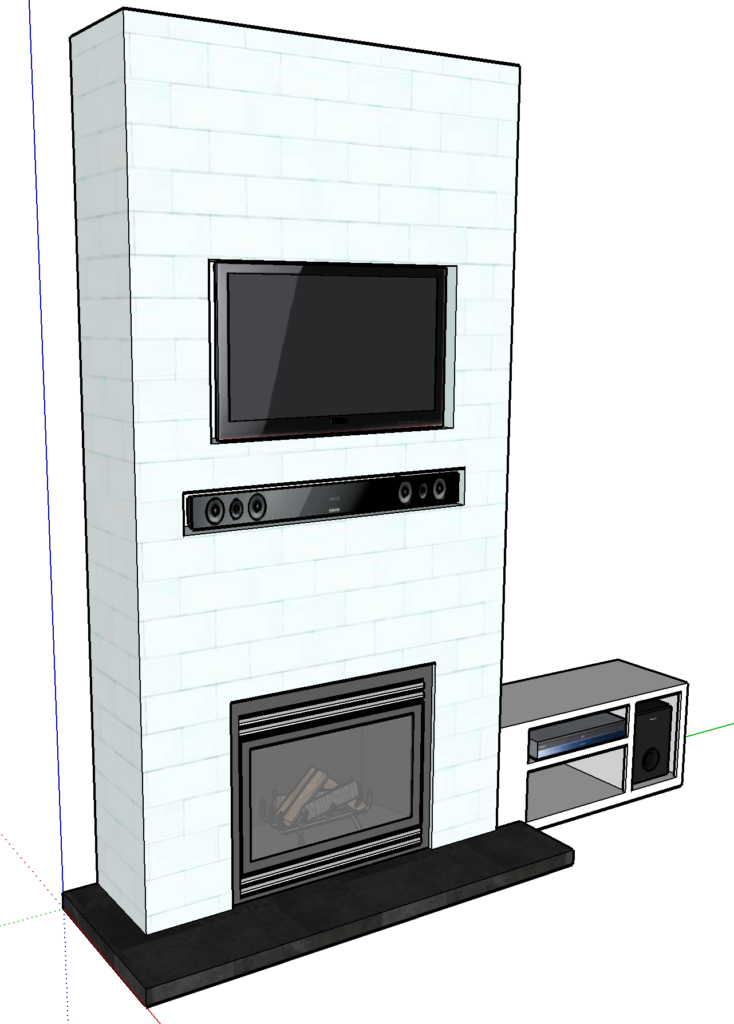
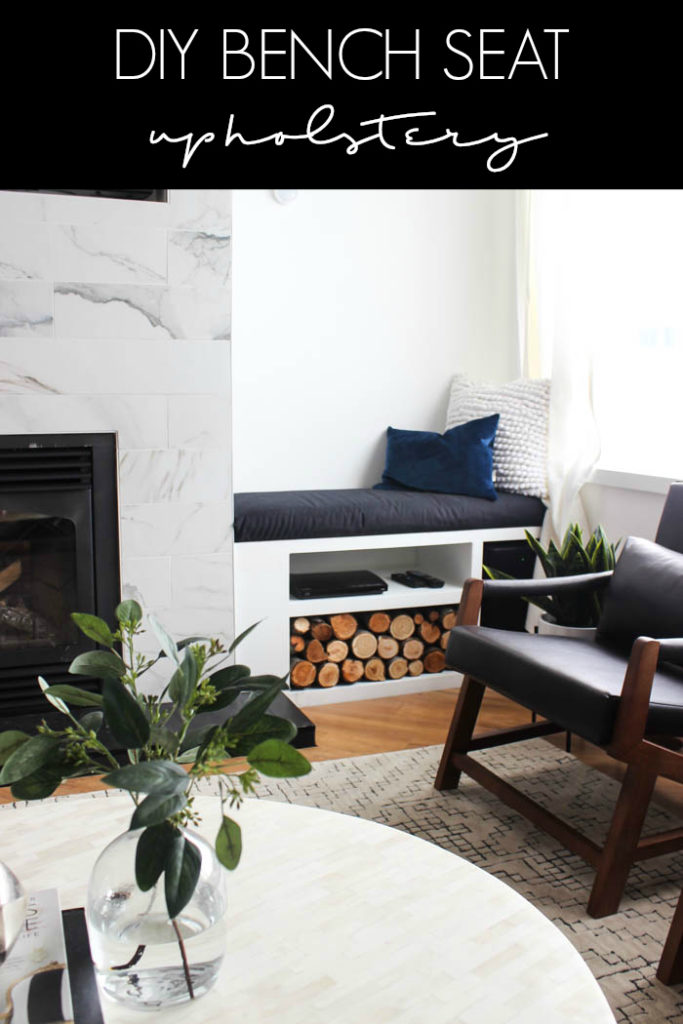
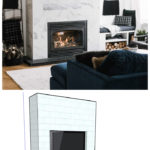
When we dreamed up our fireplace surround there were only a few criteria. We wanted it to be tiled all the way up to the ceiling and we wanted all of our TV wires to be hidden. The best way to hide TV wires and electronic wires (sound bar, DVD player and speaker) was to build a bench beside the fireplace that had specific homes for each piece of equipment. The fireplace was also designed to fit the TV, fireplace, and sound bar exactly. The sizes of the openings would likely change for you if you are hoping to do the same, depending on the size of your electronics.
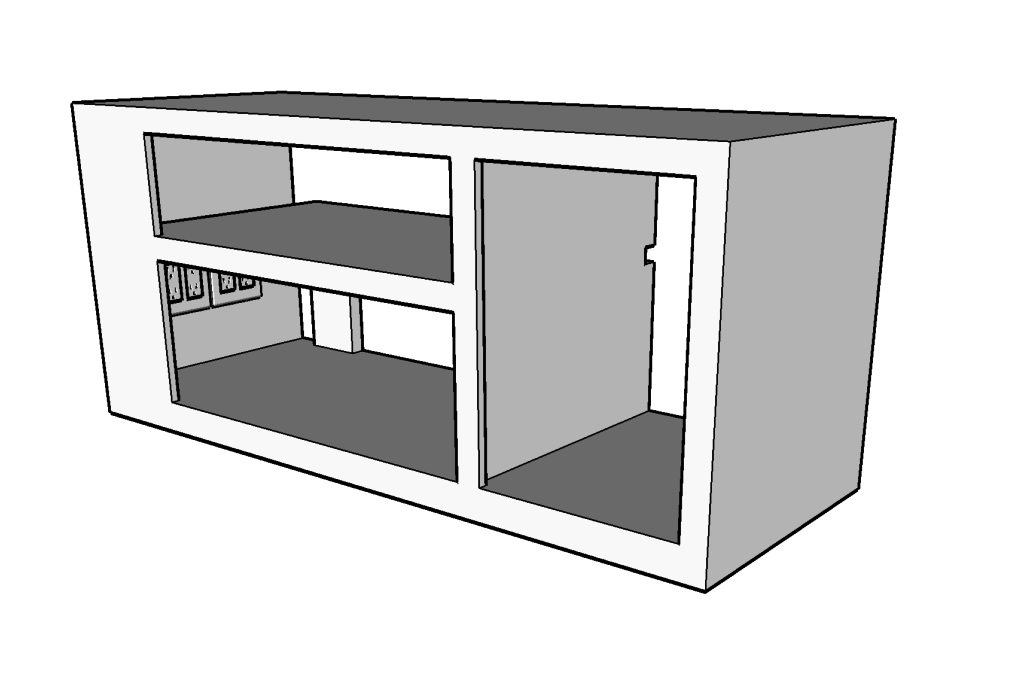
You can see in the photo above that we added outlets inside of the fireplace bench. One was for plugs and one was for HDMI cords. The best way to see how we hide everything is to peak into the back side of the fireplace framing.
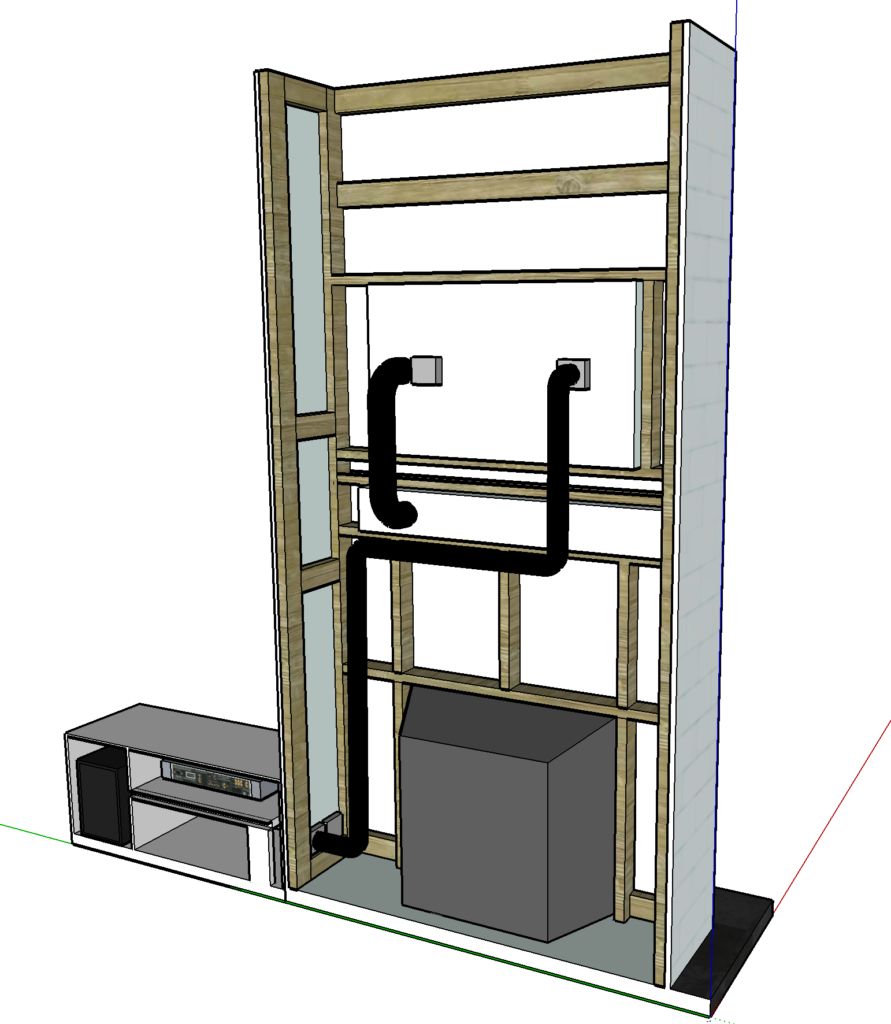
We hid all of the TV and sound bar wires by running ABS piping between all of the units. One from the television to the outlet in the bench, and one between the TV and the sound bar. ABS is perfect for this because it has all of the connections available and its easy and fast to work with. The piping makes it easy to run all your cords through without them getting stuck on anything. We’ve already had to pull out the sound bar and this definitely made it easily to thread all of the cords back in.
When you build your fireplace surround, your measurements will be specific to your own home, ceiling heights, and space, but we wanted to share our own measurements to give you a good idea of the dimensions that we used in building ours.
We used Ingo Flooring’s Scot Porcelain Tile. It is a 35″ x 6″ plank tile with a faux marble finish.
Plans to Build Your Own Fireplace Surround [& Hide TV Wires]:

Here’s the back of the fireplace surround as well.
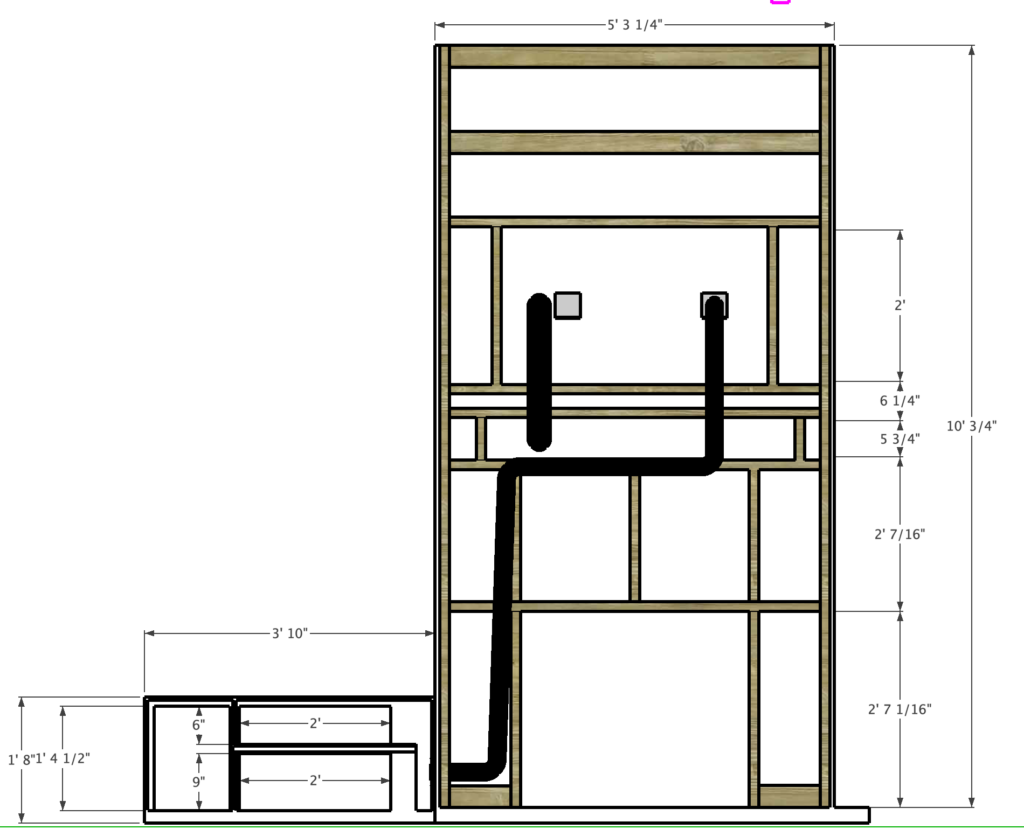
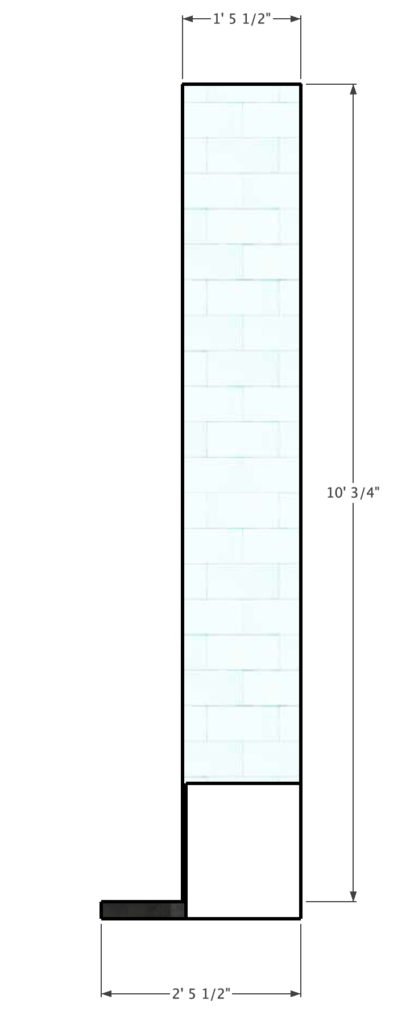
And the side view to show you how deep we made our fireplace surround to fit everything behind the tile.
One last thing that you can’t see very easily from any of the images above, is how we ran some of the wires behind the bench. We actually routered a groove right into the back so that the speaker cables could go over to the outlets without being visible. Everything is expertly hidden, but still easy to access if you need to make any changes, add electronics, or remove electronics.
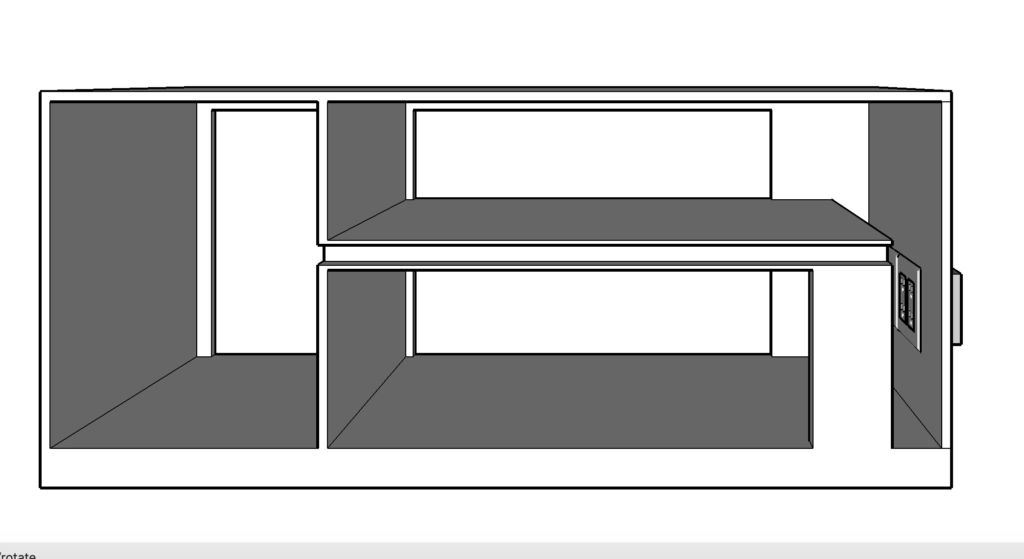
The space in the built-in bench that houses all of my firewood wasn’t necessary. In fact, originally my husband was going to close off that section, but I asked him to keep it open because I love the look of the firewood sitting there beside the fireplace – it takes your eye away from the electronics and you don’t even notice them!
That’s everything we did! Hopefully it helps you when it comes to your own build plans. If you have any questions at all, please feel free to reach out!
If you’re curious, check out How we Upholstered that Bench Seat.
We also filled our living room with High Tech Amenities! Check out all of the High Tech Features Here!


Lee Karcher
Saturday 6th of November 2021
What tile type and size did you use? Also the grout joint size and color? Thanks!
Lindi
Wednesday 1st of December 2021
Tile was from Ingo Floor, it was 35"x6". Grout joint size was 1/8". Grout colour was the while from the Kinsel Line.
5 Ways to Update Your Fireplace -
Monday 1st of July 2019
[…] let's add some tile! […]