
DIY Faux Black Marble Thrift store flips! Video tutorial and write up on how to create your own faux black marble finish!
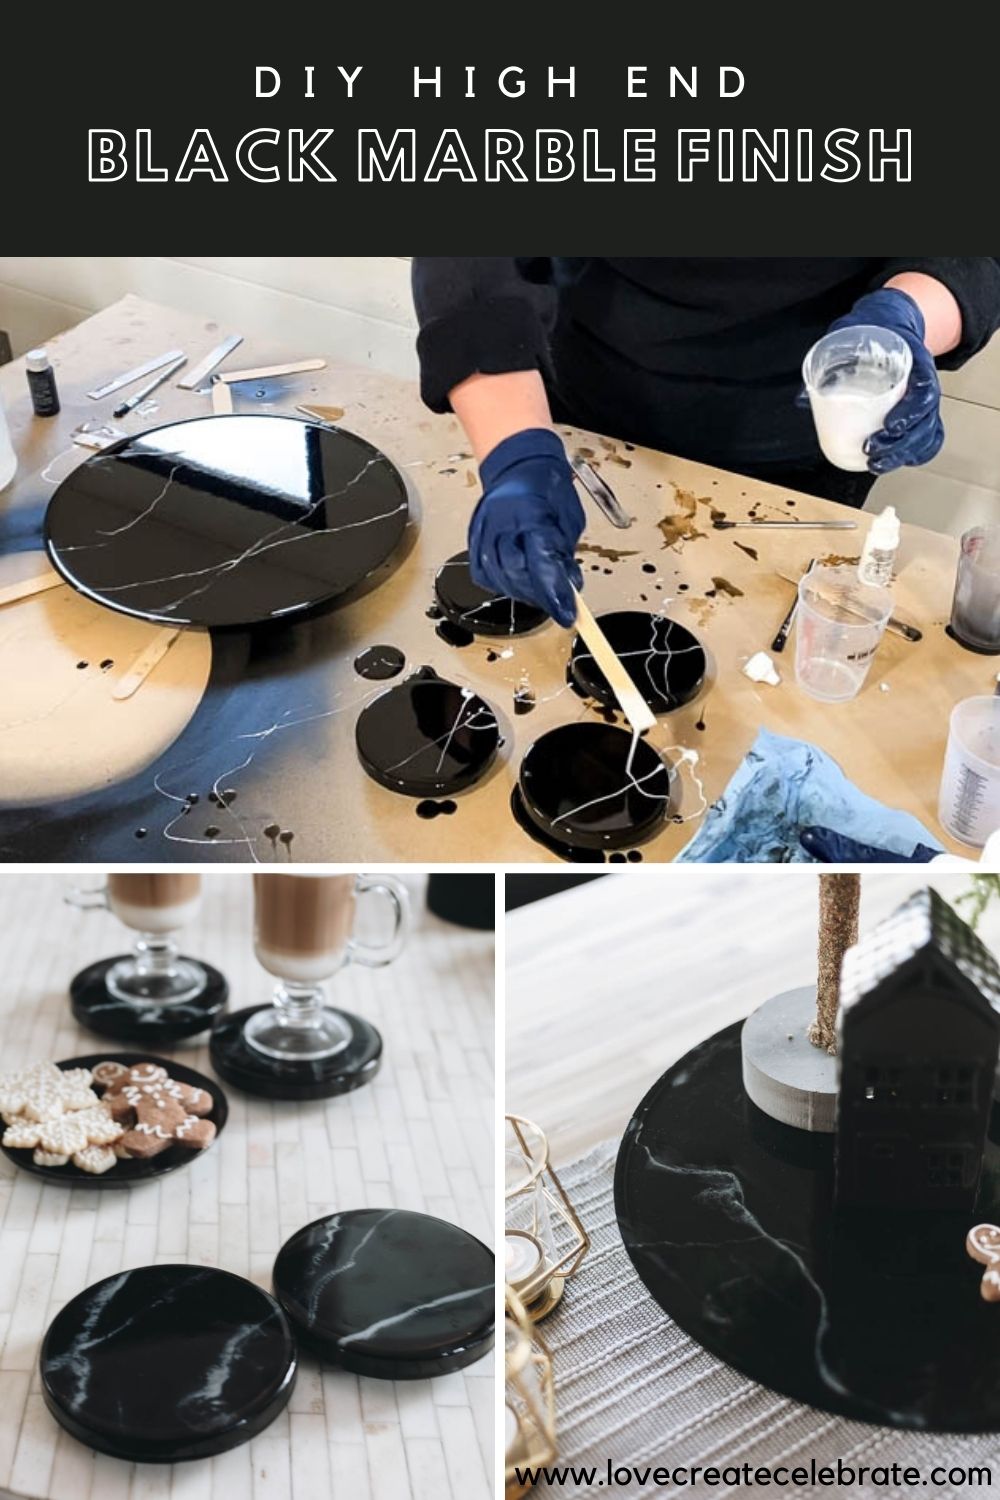
We first got the idea of a stone lazy susan when picking out counter tops for our primary bedroom ensuite. We loved the look but not so much the price (about $400-$500). When I found this wooden lay susan at the thrift store along with these coasters, I immediately thought we could up-cycle them into pieces that would perfect fit our home! We had some epoxy resin left over from our primary bedroom vanity countertop and knew a faux black marble look would look amazing on the coasters and lazy susan. This post will cover how to complete your own faux black marble finish!
*This post was sponsored by ETI and may contain affiliate links. When you buy a product through one of our links, we get a commission at no cost to you! Thank you for supporting our blog so that we can continue to bring you posts like these. For more information, please see our disclosure page.*
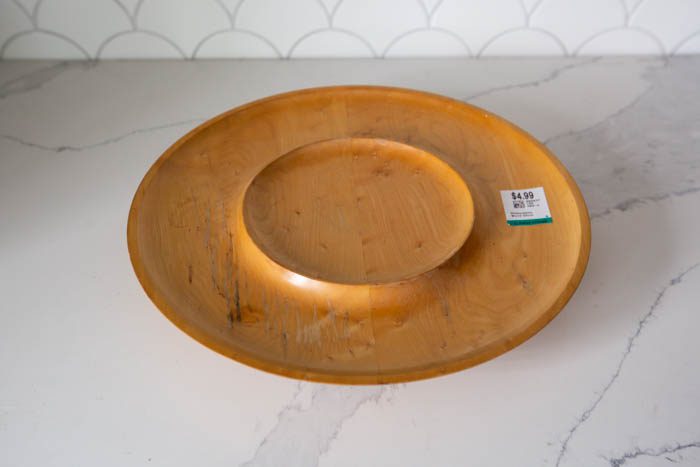
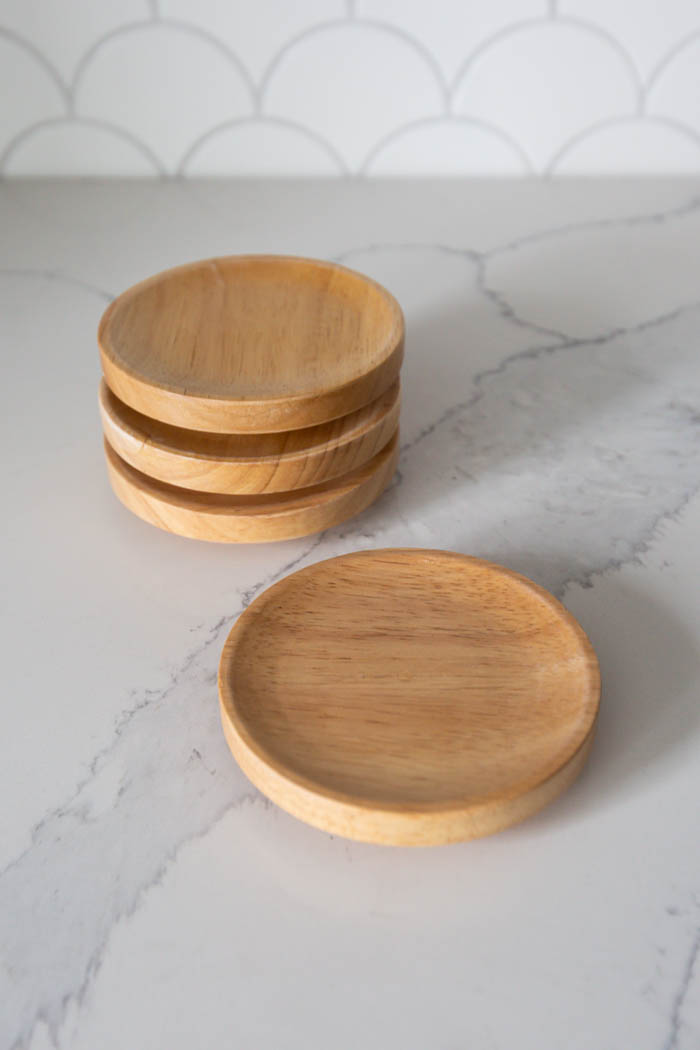
The above pictures are what we started with. We found the lazy susan for $4.99 and the coaster set for $3.99 at our local thrift store. With both pieces being solid wood we knew we could easily up-cycle them into something amazing!
Everything You Need for a DIY Black Faux Marble look!
You can do an easy faux black marble finish with epoxy resin because it’s quick, durable, and fairly inexpensive. Here’s a list of everything we used.
Materials
- Envirotex Lite Epoxy
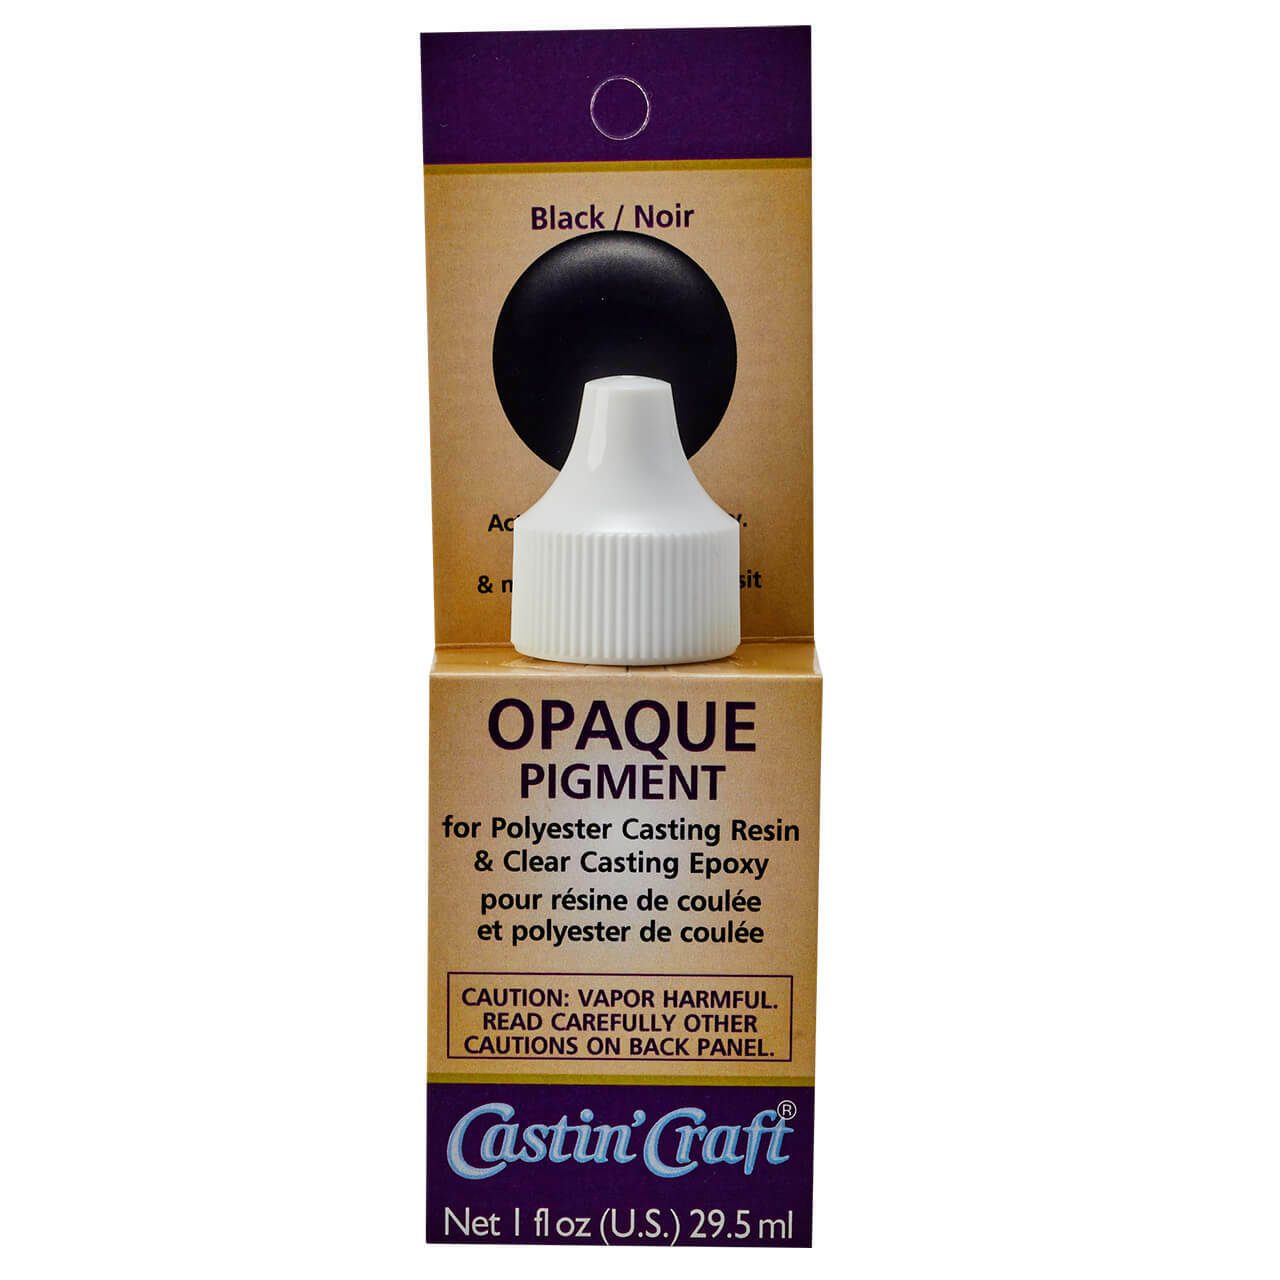
- Opaque Pigment Black
- Opaque Pigment White
- Orbital Sander
- Sanding Pads
- Acetone
- Mixing Containers
- Gloves
- Mixing sticks
- Brushes
- Plastic film to protect surfaces
- Painting triangles
- Level
- Mixing bit for drill
- Black spray paint or black paint
- Torch
How to Prep Wood for Your Faux Black Marbling
First step was to remove the price labels and give all the pieces a light sand. You want to make sure the paint bonds well to the wood surfaces. Sanding is very important (and filling any imperfections with putty if you have them), because you don’t want to see the resin settling into the imperfections or highlighting them as it sets. We used 160 grit sandpaper to sand all the surfaces.
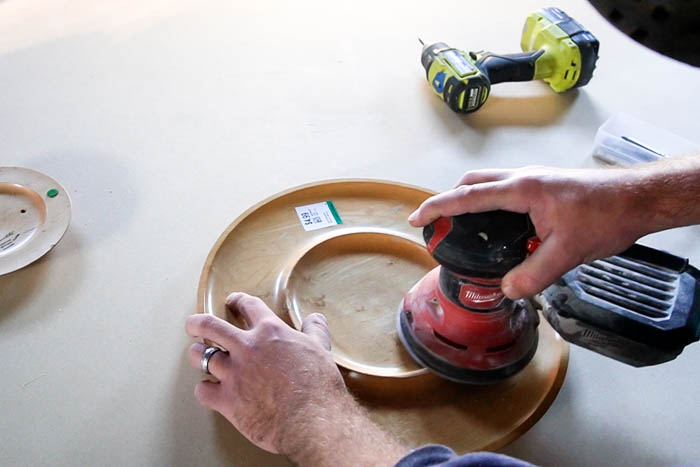
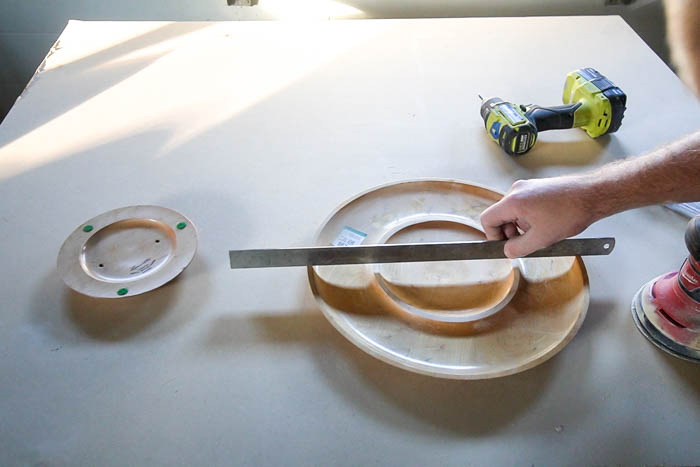
For the lazy susan we had a ridge in the middle that we want to remove/not be visible once we poured the epoxy. We used our orbital sander with 60 grit sand paper to knock that ridge down. We used a straight edge to check and sanded until we had 1/8″ to 1/4″ of clearance from the top of epoxy (estimated).
Once everything was sanded we wiped everything down with acetone to remove and dust/debris/grease. This ensured the spray paint having a good bond with the wood.
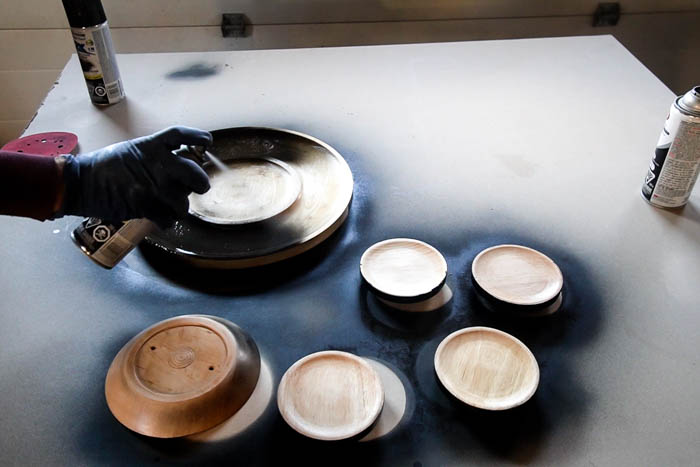
We planned to pour black resin and wanted the piece to be a deep black colour. To make sure we didn’t see any wood grain or the wood colouring we used some black spray paint we had lying around to give all the pieces and sides a couple coats of paint.
Finally take time to properly level your surface you are working on. A level surface will allow the epoxy mixture to pour over all of the edges of the piece evenly while it cures.
How to Measure and Mix Resin
The epoxy resin that we used was called Envirotex Lite. When you buy the epoxy, it’s a two part epoxy that needs to be mixed together to activate and harden correctly. It has a working time of up to 30 minutes, so once you start mixing and pouring, you only have so much time to work with the resin. Although the 30 minutes was much more than enough time for our project!)
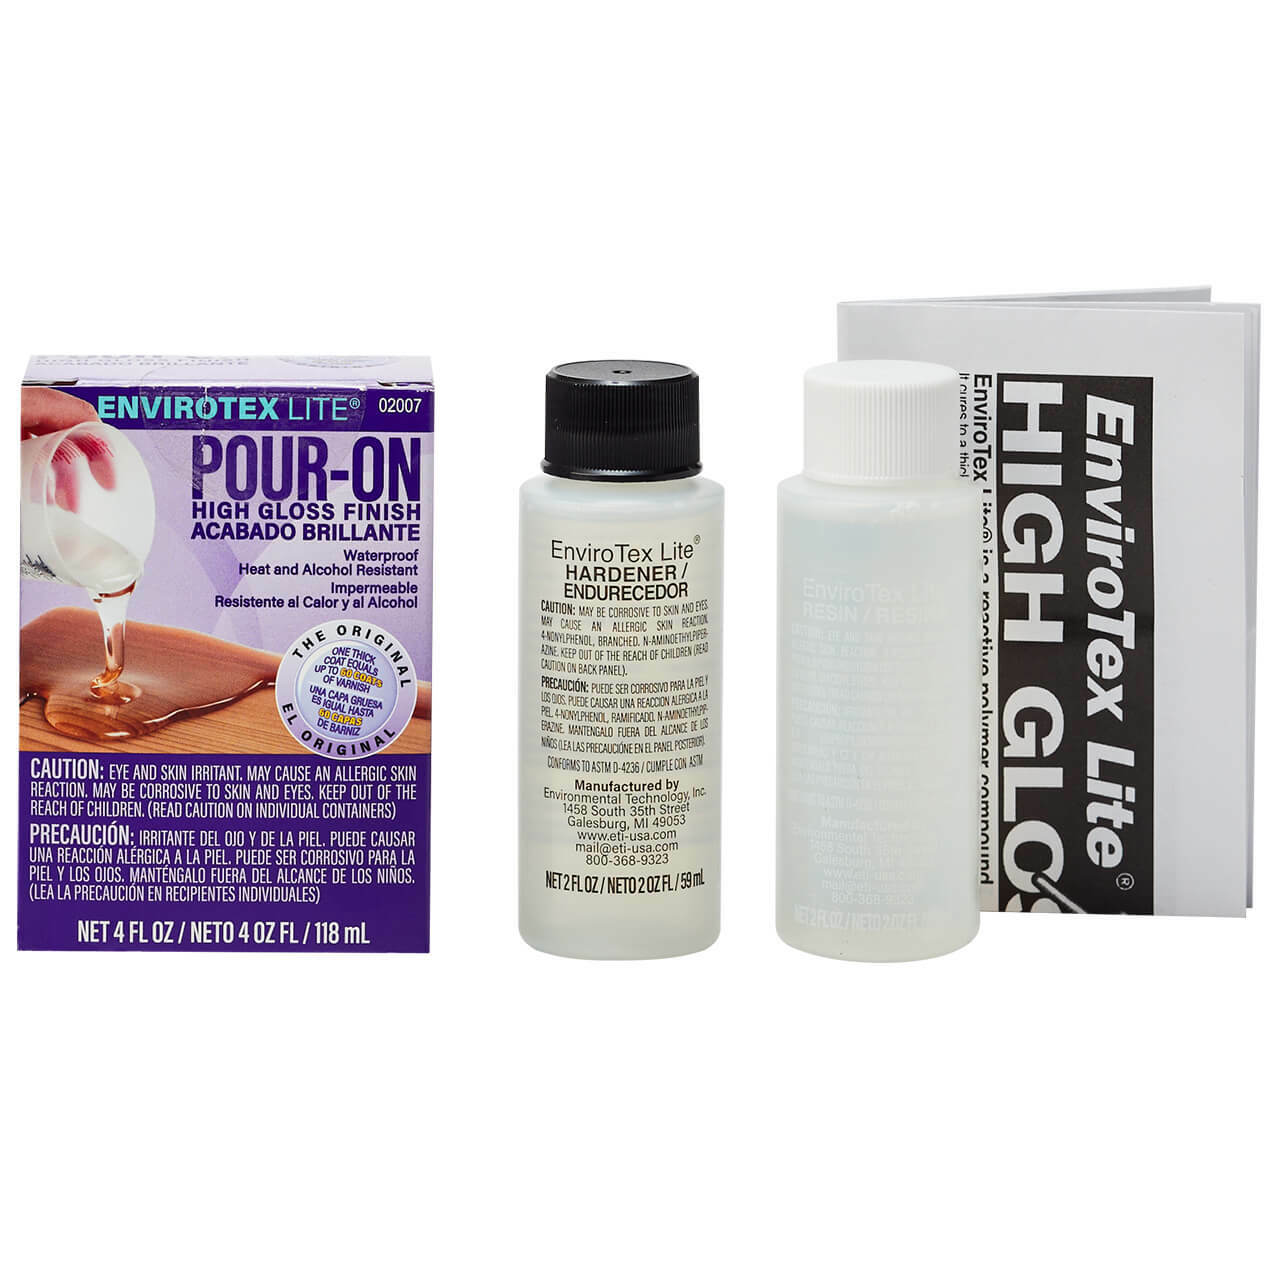
All of the mixing and calculating information is on the box (to calculate how much you need), so be sure to read the instructions carefully. It general it’s a very easy to calculate and mix because it’s a 1:1 ratio of each of the two parts.
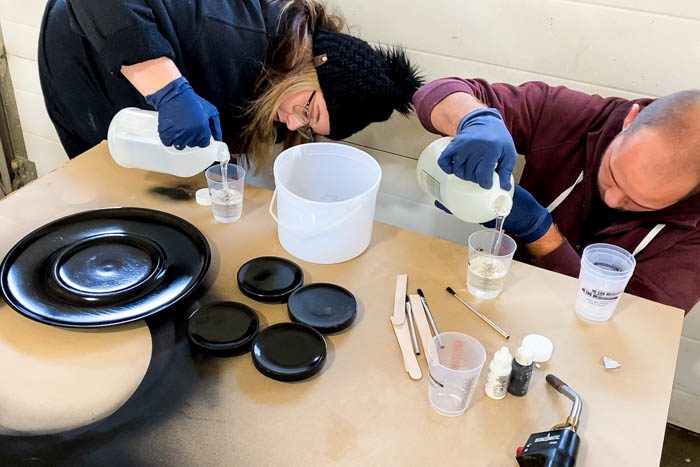
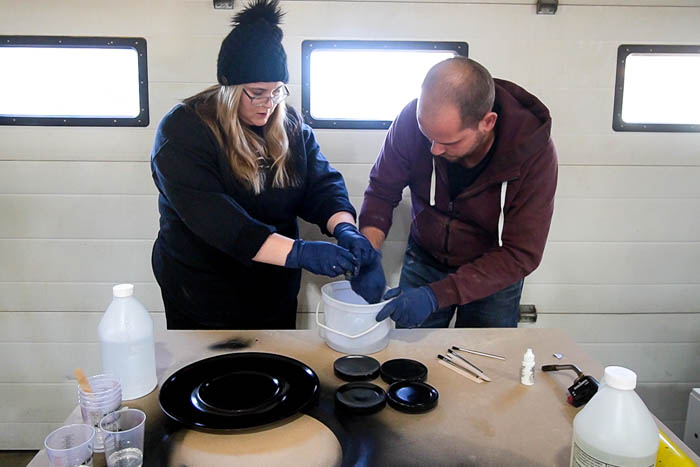
As we just mixed a small amount of resin we use a mixing stick to mix all of the resin and then added some of the black opaque pigment until we had the colour we wanted. Slowly add the black pigment until you get the desired look you are going for (being careful to not exceed the ratio of pigment vs epoxy resin as noted on the directions on the back of the bottles). As we were working with odd sizes we just did a rough calculation for epoxy resin needed, but ended up needing to mix a bit extra to finish off the pour. If you end up doing this be careful to match you colours to prevent a “swirl” look in your epoxy.
How to Pour First Layer of Resin
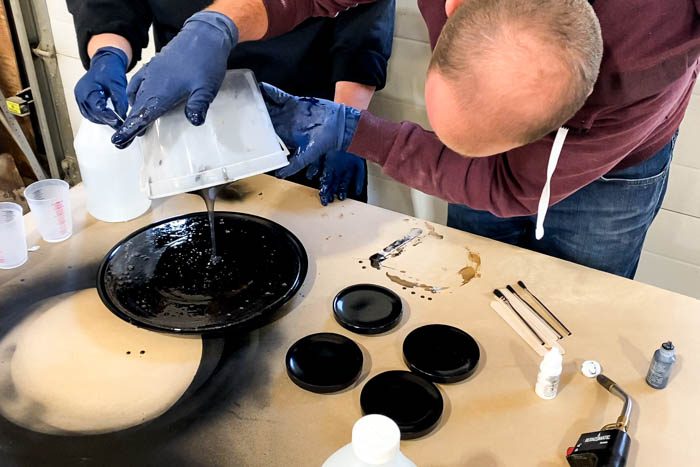
Once everything is mixed, you can pour the base layer to start your faux black marble finish. We poured primarily in the center of the piece and moved outwards. We used a small paint brush and mixing stick, and then we let the resin self-level on it’s own. Work in small pours, as any excess will just pour off the edge and may cause uneven “drips” to form as the epoxy cures.
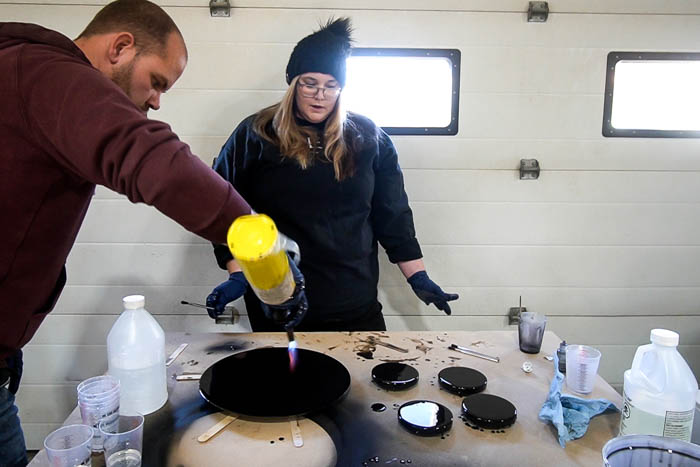
After your first coat is poured, let the resin self-level for a few minutes, and then use a torch to run lightly across the surface and release any trapped air or bubbles. You will be able to see this work as you run the torch across the countertop.
How to Get a Faux Black Marble Finish with Resin
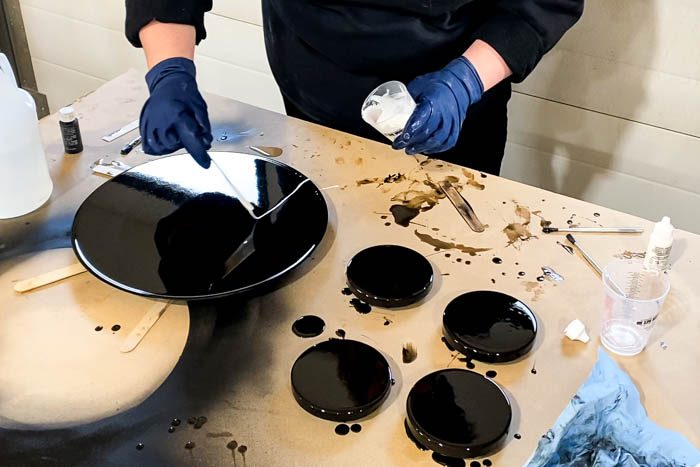
If you want to do a faux black marble finish, the first thing you need to do is mix the white epoxy resin while the black base coat is setting. We mixed a small amount (around 50 ml) the Envirotex Lite epoxy mixture in the same way as before and added white pigment until we were happy with the colour.
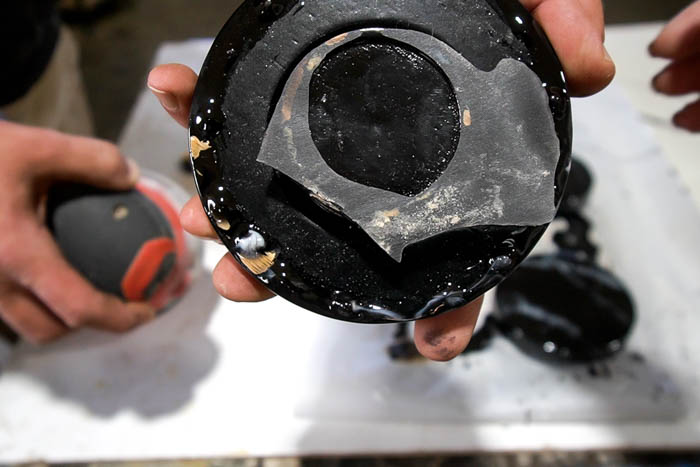
PAINT THE FAUX BLACK MARBLE “VEINS”
We gave the black base layer 20 minutes to set a bit first because we didn’t want the white to just completely blend in right away, and then we started adding lines of white colour.
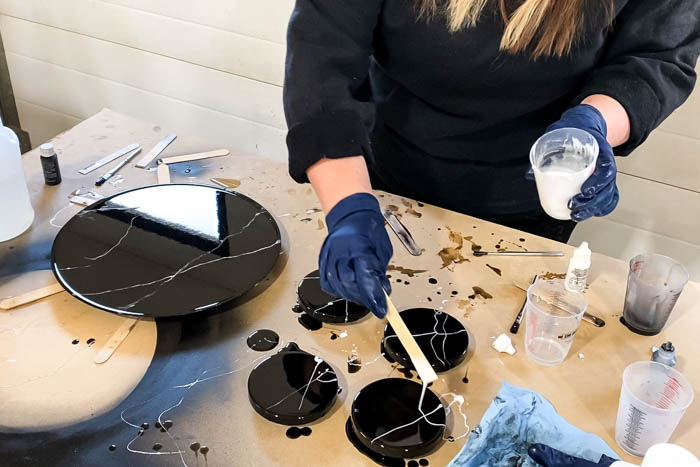
The trick to this is to just let your colour flow naturally. We used a stir stick with white on the end to lead the colour from one end of the piece or one spot, to another. You don’t have to worry too much about what the lines look like (you can manipulate that a bit with the stir stick after if needed), because you want them to flow in a natural way.
We wanted a more minimal look (maybe more like quartz actually), so we kept our lines to a minimum and tried not to overlap them, but you can look at any marble photo and try to mimic a different, more saturated look if you want to.
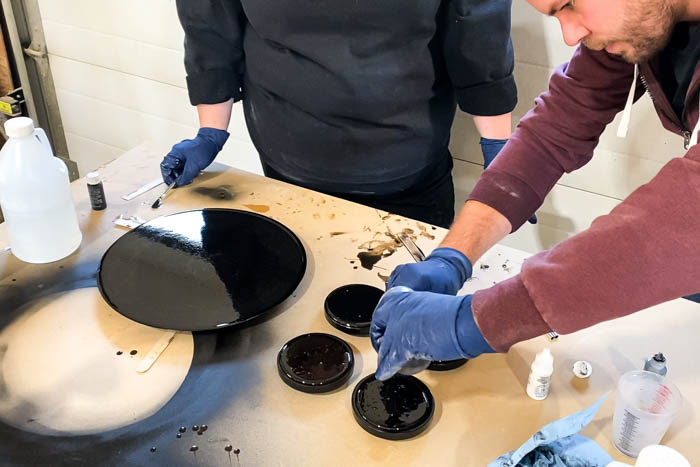
BLEND THE FAUX BLACK MARBLE “VEINS”
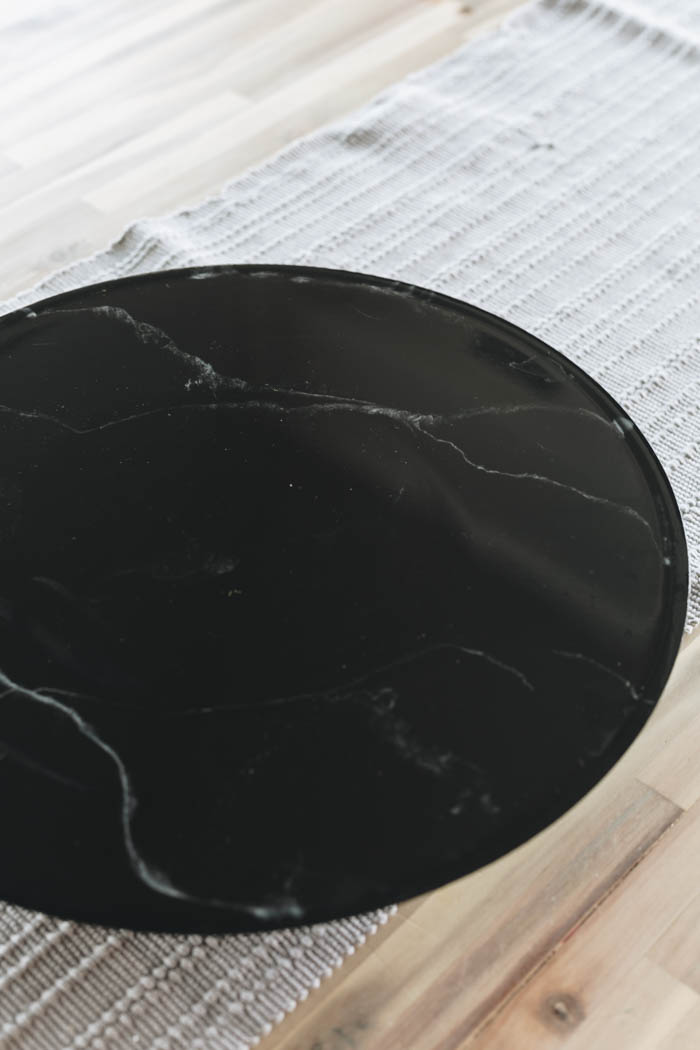
Once the white lines are down, use a stir stick, to spread the colour on either side of the line. We followed the line, going back and forth along the line to pull the white into the black. Then, as the colour self-levelled, it looked like very natural veining from a marble slab.
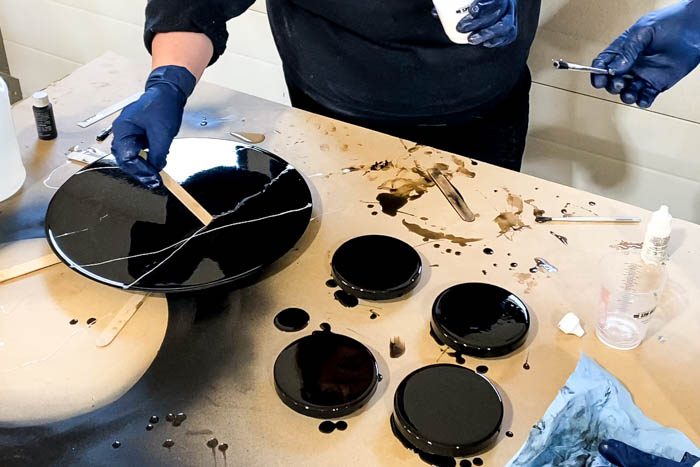
As you go, make sure that you add white lines to the sides of your counter as well, especially in spots where the white “veins” would naturally continue. Make sure to use a brush on these sides as well to help mix the white into the black naturally.
The white on the sides of the piece may get diluted a bit as more white resin pours over. You can go back and add a small amount of white again if you’d like to emphasize those spots more. For any spots on the sides that appear to not be filled (slight dimples, etc. in the resin), you can use a small brush to gently fill them.

Finally, as the resin pours over, there will be some peaks of resin that form underneath the edge, much the same way that water looks when it drips out of a faucet. We went back and fixed these small peaks every 20 minutes with a small brush until they were no longer appearing.
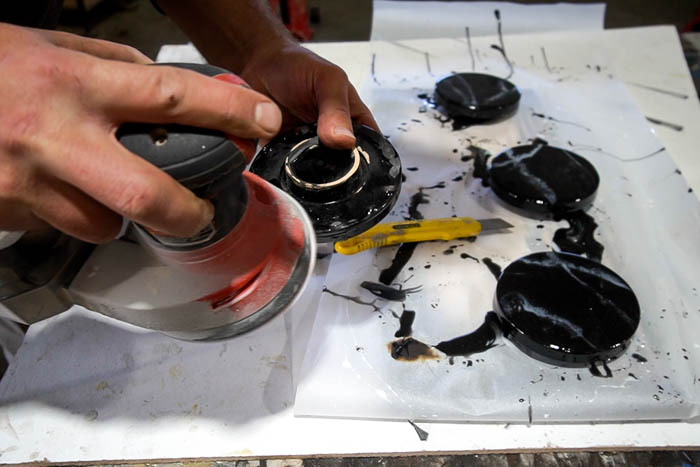
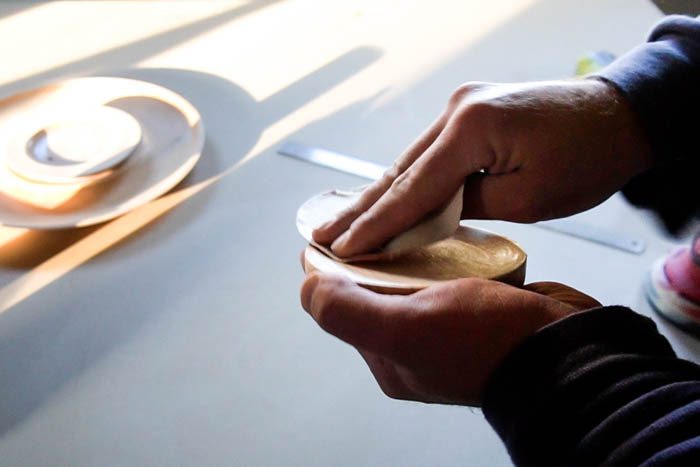
You must let your resin set for 48 hrs at least before you handle or move it. Once it is set, you can sand down any bumps or imperfections. I ended up touch up the under side with some black paint.
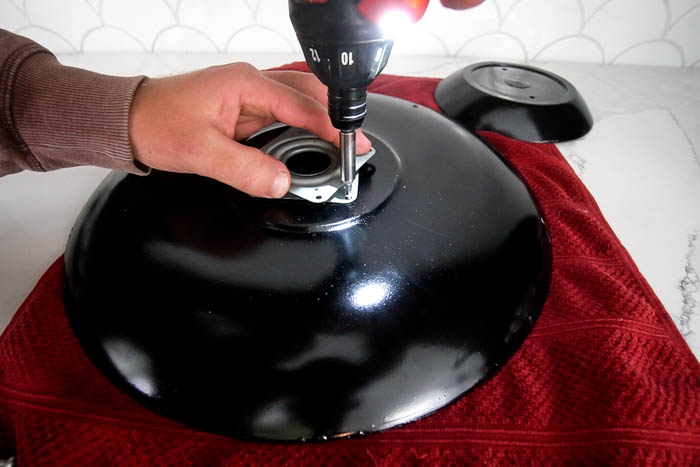
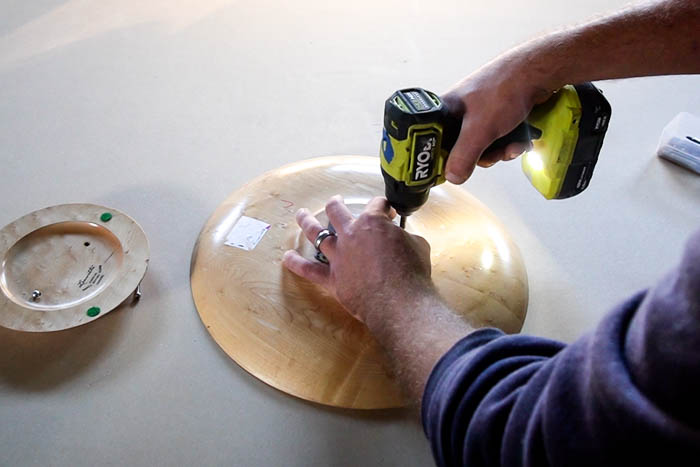
Once I was happy with the finish I added the hardware back to the lazy susan.
Faux Black Marble Video
Be sure to check out the entire process on the above you tube video. It goes through all the steps one by one! You can see how easy it really is to complete a black faux marble finish with epoxy resin.
This method could easily be used on a counter top or larger scale project. Check out this blog post and this video to see us do a white and grey faux counter top for Lindi’s make up vanity in our primary bedroom!
Our Finished Faux Black Marble Lazy Susan and Coasters


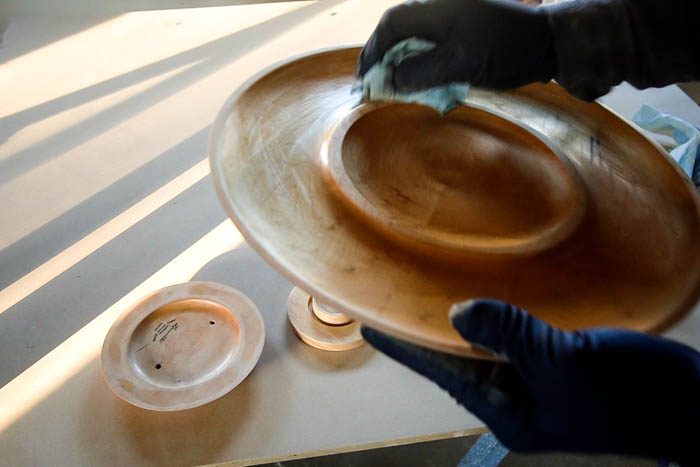
Here’s our completed faux black marble lazy susan and coaster set. Honestly, we couldn’t be happier with how these pieces transformed – its hard to believe we got these from the thrift store! It only took 30 minutes to do the entire piece, plus a few seconds here and there to check on the finish and roll the underside.
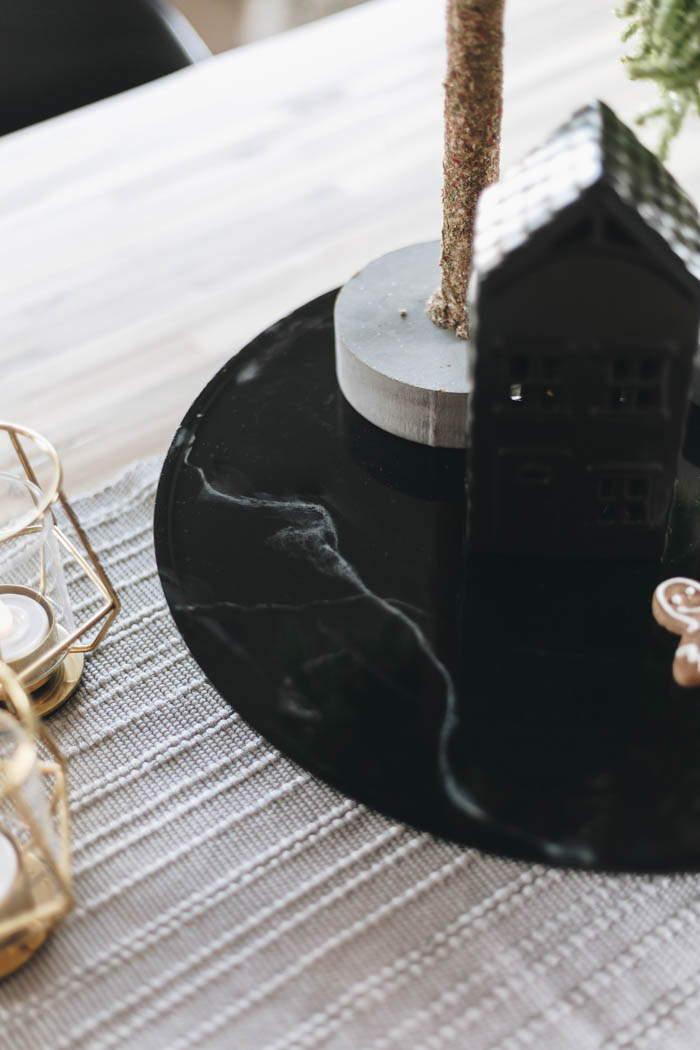
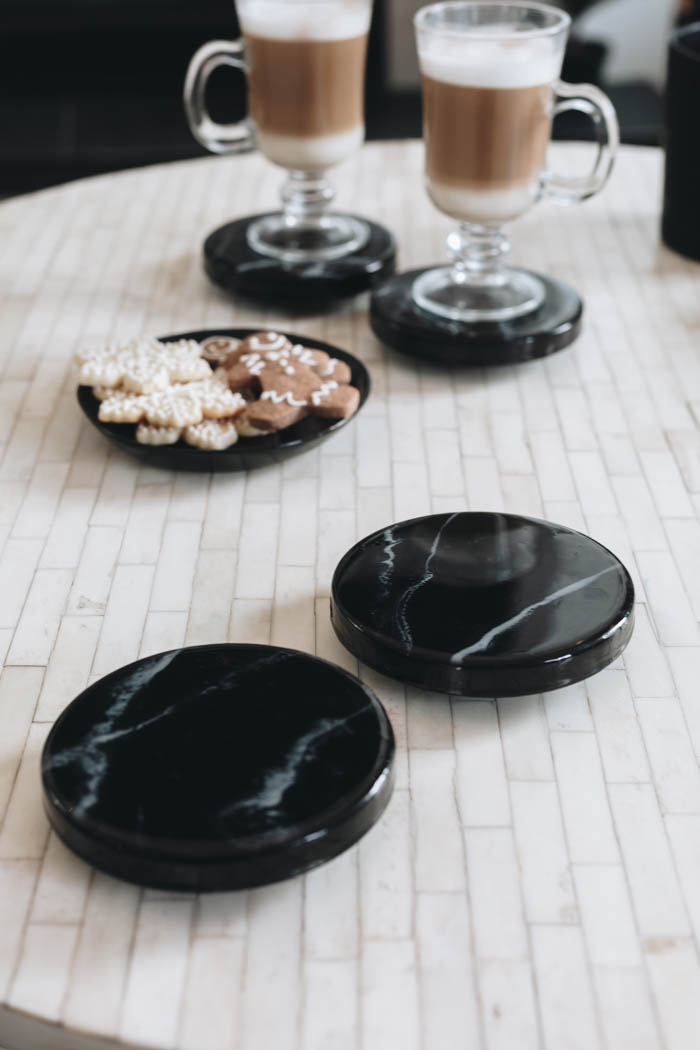
The finish is smooth and glossy, and the white veins are absolutely perfect! I really could not believe how nice they turned out – it looks so much like the real thing. The white that pours over the edges as though the vein is continuing organically is my favourite part.
How to Get a Faux Black Marble Finish
DIY Faux Black Marble Thrift store flips! Video tutorial and write up on how to create your own faux black marble finish!
Materials
Tools
Instructions
- Prep your piece (sand/degrease/remove hardware)
- Paint your piece black
- Mix epoxy resin according to package quantities
- Add black opaque pigment
- Pour black base coat
- Mix epoxy for veins and add white opaque pigment
- Make faux marble veins
- Use a squeegee or stir stick to naturally spread white "veins" into white
- Check edges, white space, and touch-up spots
- Return every 20 minutes (for 1-2 hours) to roll the bottom and remove any unwanted epoxy that dripped over the edge
- Let cure for 48 hours
Notes
https://youtu.be/gK8-cSkNFlA
Recommended Products
As an Amazon Associate and member of other affiliate programs, I earn from qualifying purchases.


Neha
Monday 24th of January 2022
Wow! This faux black marble looks really cool. Thanks for sharing;)