
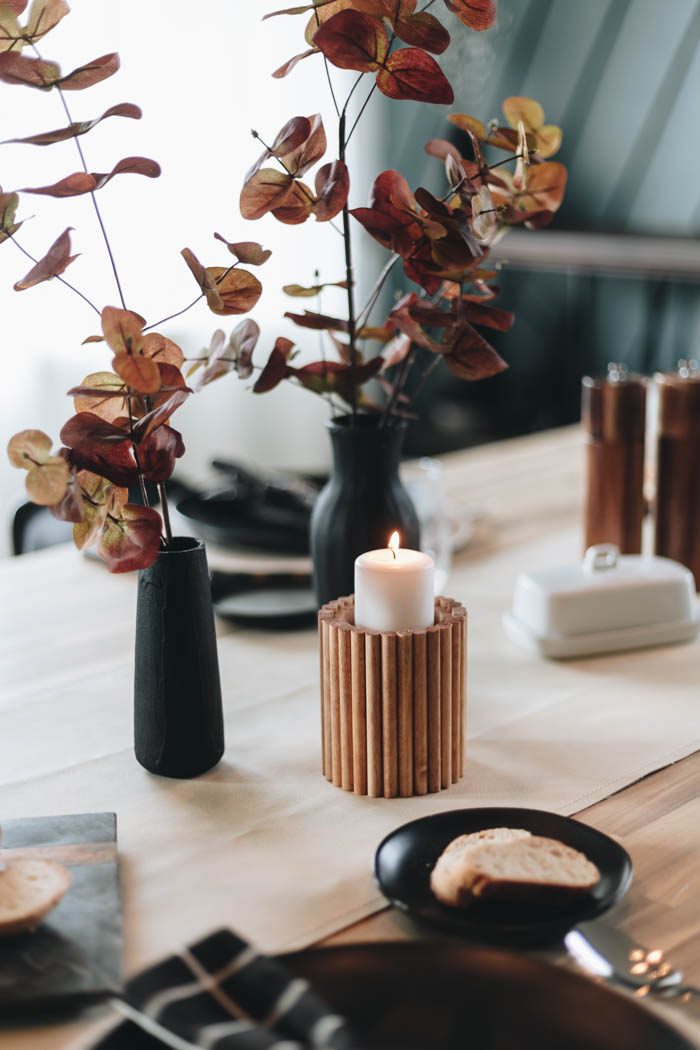
I love this easy to make DIY dollar tree candle holder! A beautiful wooden candle holder that you can make for less!
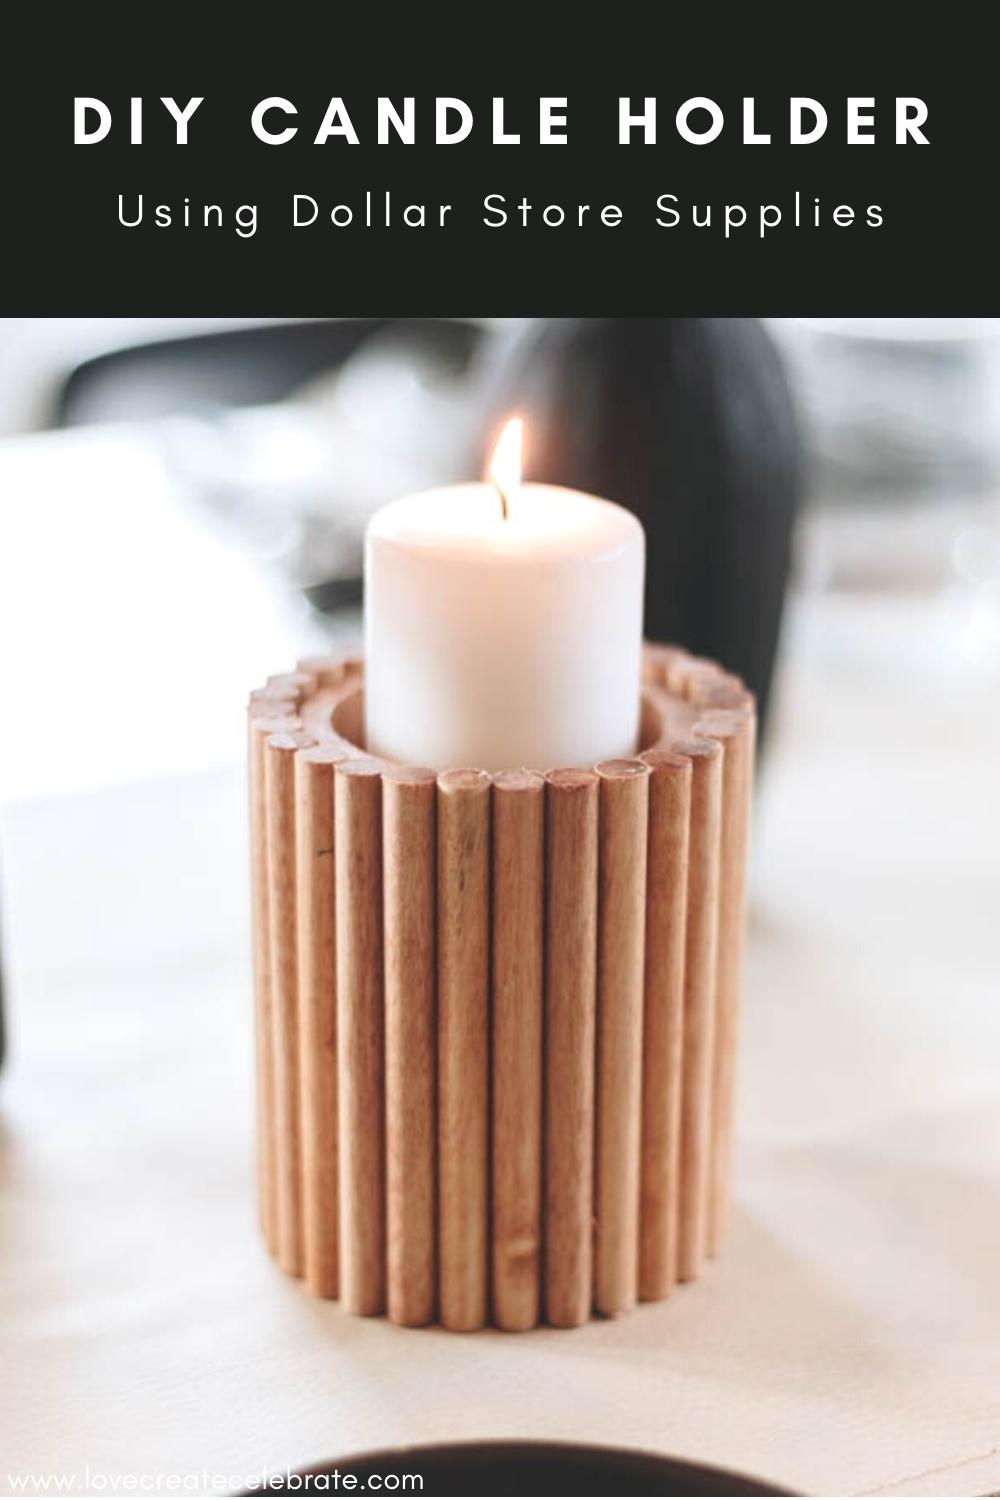
I’m so EXCITED to start decorating for the holiday season! Thanksgiving is right around the corner and I’m super excited to share what I have made for our Thanksgiving tablescape. This DIY Dollar Tree Candle Holder was really easy to make and I know you’re going to want to make your own.
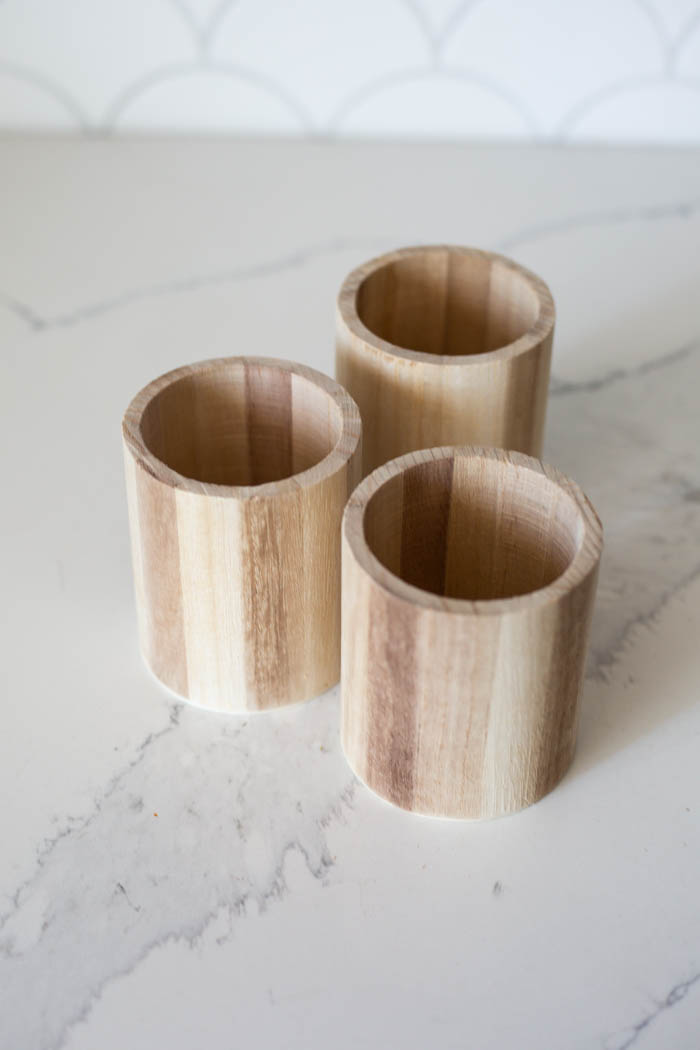
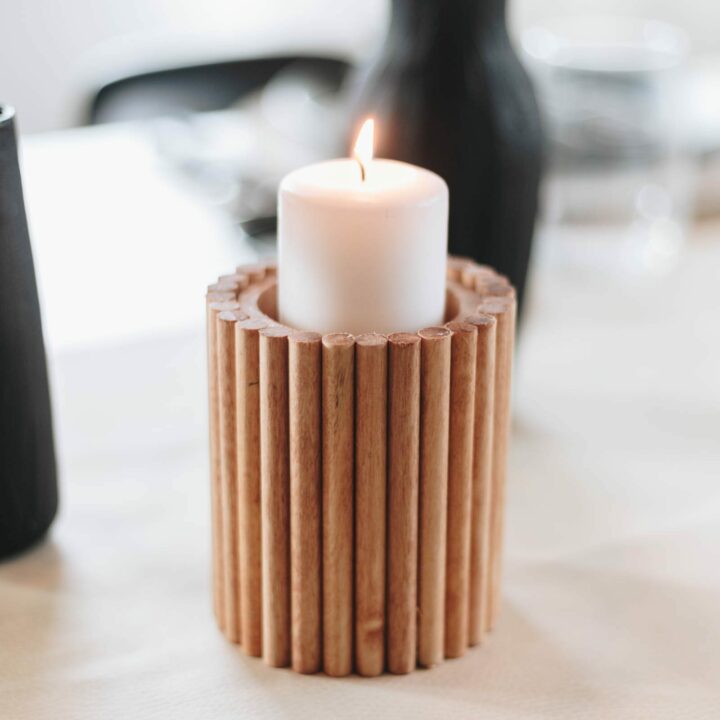
I loved the pillar candle holders I made so much, that I decided to use the same wooden cups to make candle holders with some texture using wooden dowels that I also picked up at the dollar store to create that fluted look.
*This post may contain affiliate links. When you buy a product through one of our links, we get a commission at no cost to you! Thank you for supporting our blog so that we can continue to bring you posts like these. For more information, please see our disclosure page.*
How to Make a Dollar Tree Candle Holder
Supplies
- Dollar Tree wooden cups
- Best craft glue
- Wood dowels
- Walnut stain
- Spray on clear coat
Step-by-Step Instructions
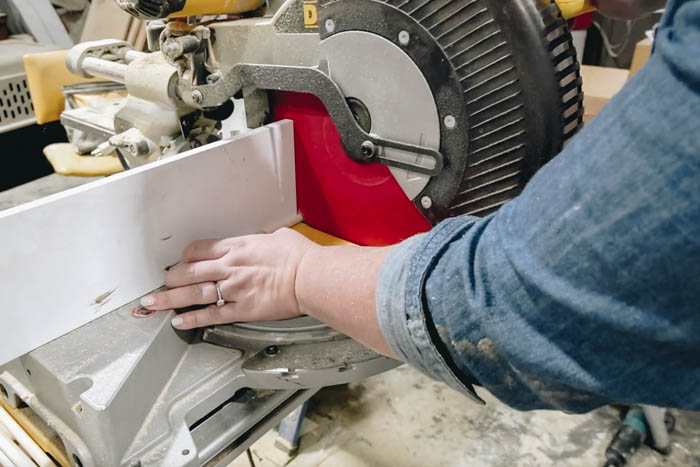
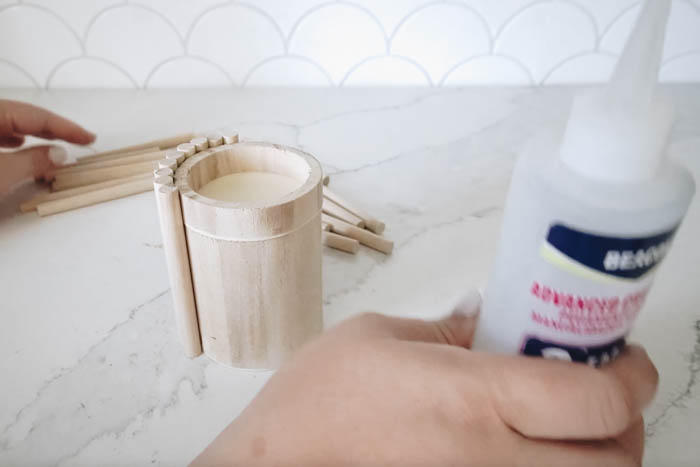
I measured the length I needed to cover the cup and the little holder for the candle at the top. The holder for the candle was the bottom of the cups I cut off for a set of pillar candlesticks I made. Then I added a block to my miter saw at the exact distance I wanted to cut so that I could just slide the dowels in and cut them without having to measure each one. I cut 28 of those little dowels to go around my entire candle.
Once I had them all cut, I used my favorite craft glue and started gluing them to the candleholder.

I started by gluing one dowel in place and giving it five minutes to set. I made sure that it was nice and level and made sure that it was set before I started gluing all of the other pieces on.
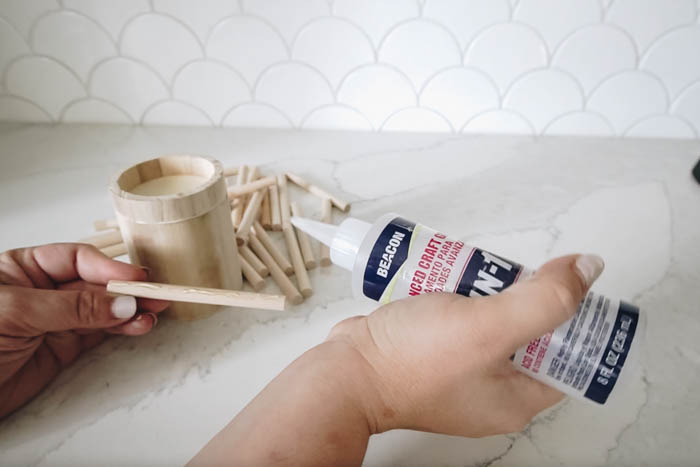
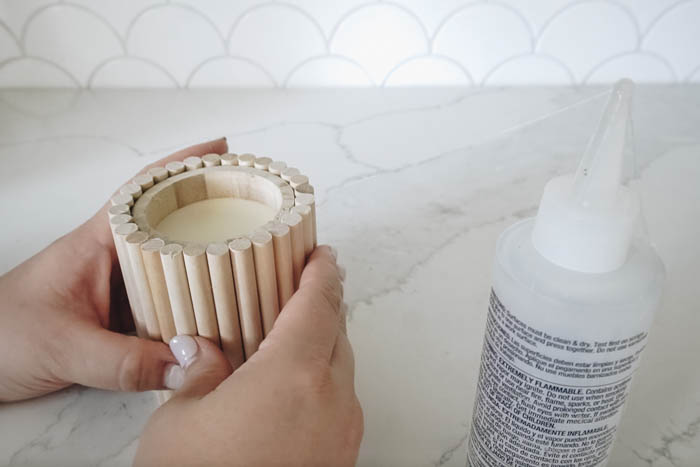
I got really lucky with this one because when the final dowel went on, it literally was the exact right size to cover that wooden cup. I also had to be really careful with the glue since I was going to be staining it. Glue won’t let the stain show or stick properly, so make sure to wipe off any excess glue.
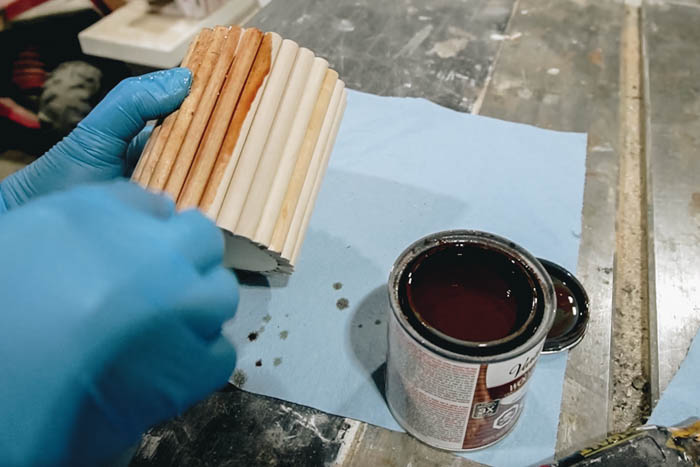
I used American Walnut stain and was really careful to get inside of all the cracks as I went.
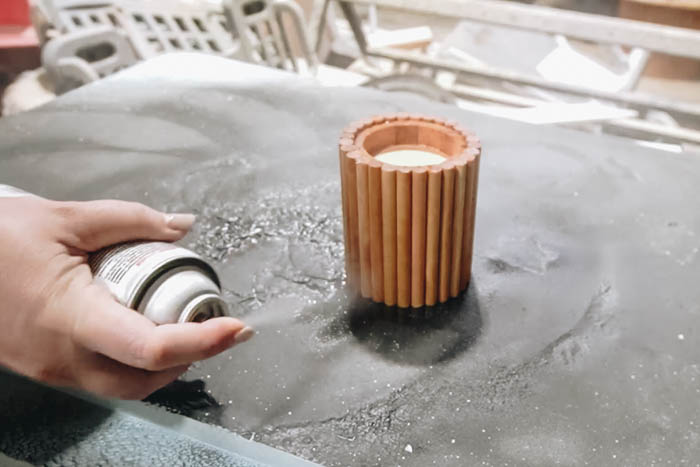
Finally, I sprayed on a clear coat to protect the finish, added my candle and it was done! I love how it turned out! I know you’re probably thinking, “Lindi, you say that about all your Dollar Store projects “, and you’re right I do. But I really do love them all!! Making home decor that looks expensive, but isn’t, is very satisfying.
Finished Dollar Tree Candle Holder
Here’s how it turned out. It’s the perfect addition to our Thanksgiving tablescape!

When I do Dollar Store DIYs, I always do a bunch at once. You can see me make this fluted candleholder along with Pillar Candlesticks, Autumn Gnomes, Table Setting Chargers, and Napkin Holders in the video below.
Print out the instructions to make your own DIY fluted candleholder.
DIY Fluted Candleholder
Make your own DIY fluted candleholder using Dollar Store supplies. It's the perfect decor piece to add to your fall tablescape.
Materials
- Dollar Tree wooden cups
- Best craft glue
- Wood dowels
- Walnut stain
- Spray on clear coat
Tools
- Miter Saw
Instructions
- Measure the length of the cup and cut dowels to length
- Use craft glue to add the first dowel. Make sure it set and level before adding the rest of the dowels.
- Add the remaining dowels all the way around the candleholder.
- Stain and apply spray on clear coat.
- Add a candle and it's done!
