Beautiful DIY wooden chain links! Learn how to make your own easy wooden chains with dollar store supplies!
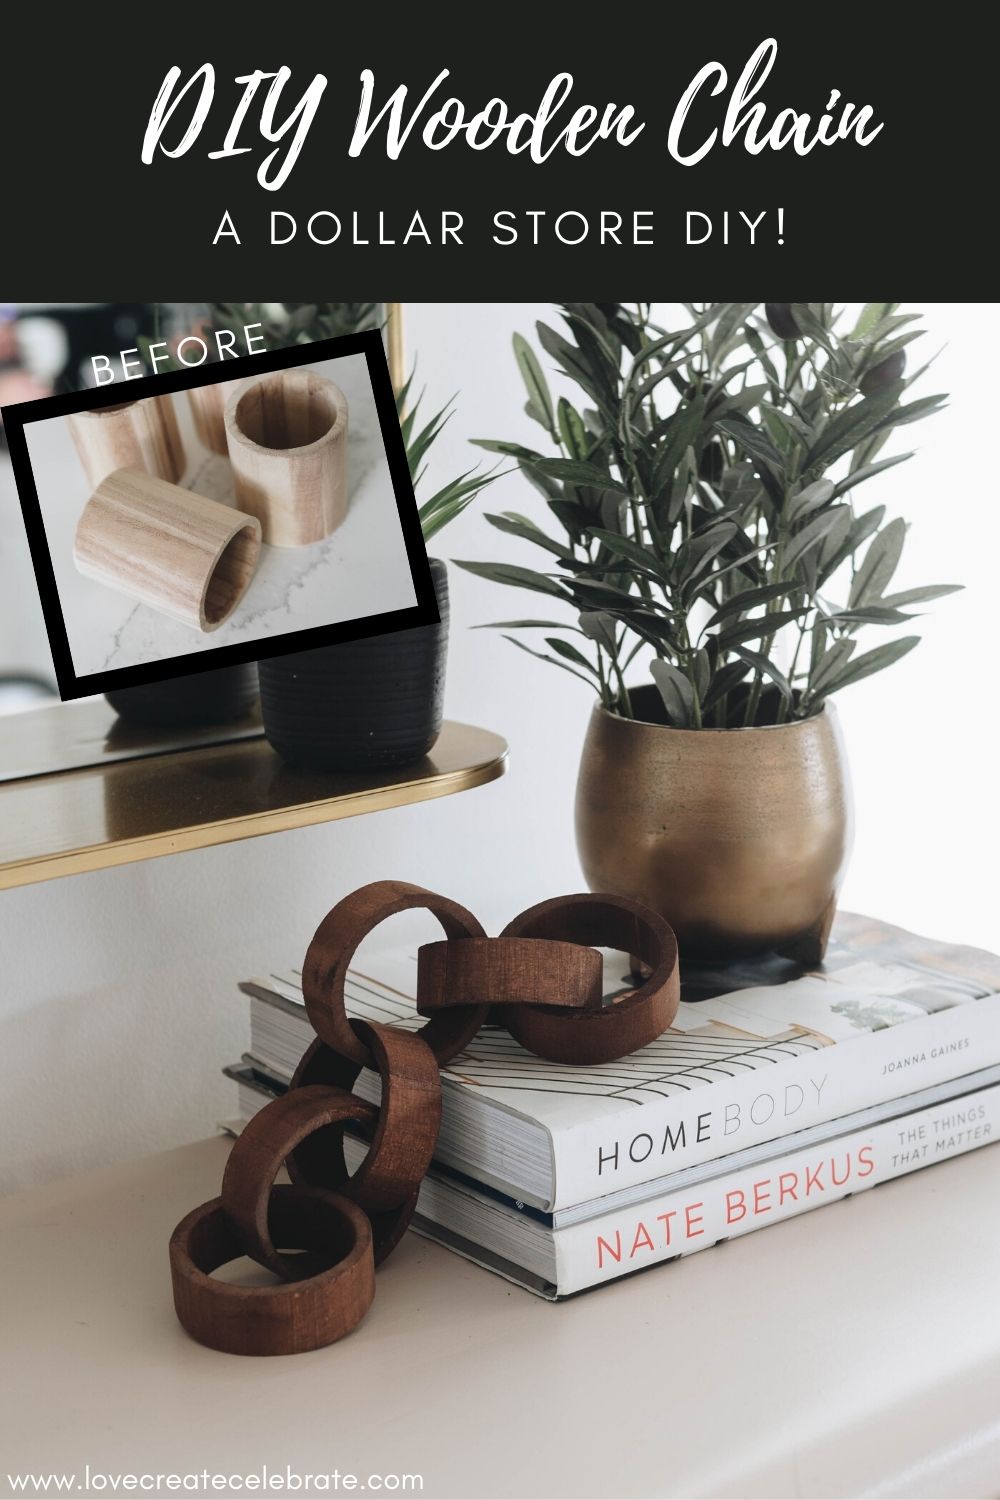
Have you seen decorative wooden chains before? They’re everywhere! Styling book shelves and cabinets. I wasn’t willing to fork over the money to buy them, but when I saw these wooden cups at out local dollar tree, I knew I could make my own DIY wooden chain links for a fraction of the cost!
DIY Wooden Chain Link Video
I love sharing dollar store DIYs and transforming affordable pieces into beautiful home decor, so I shared my newest wood chain DIY idea, plus three other, easy and affordable DIY ideas!
See how we did all of the dollar store DIYs here:
Don’t forget to subscribe to our YouTube channel for more!
How to Make Wooden Chains
These chains are super quick and easy to make! You could easily make a whole set in just an hour or two. Here’s everything you need:
Materials Needed
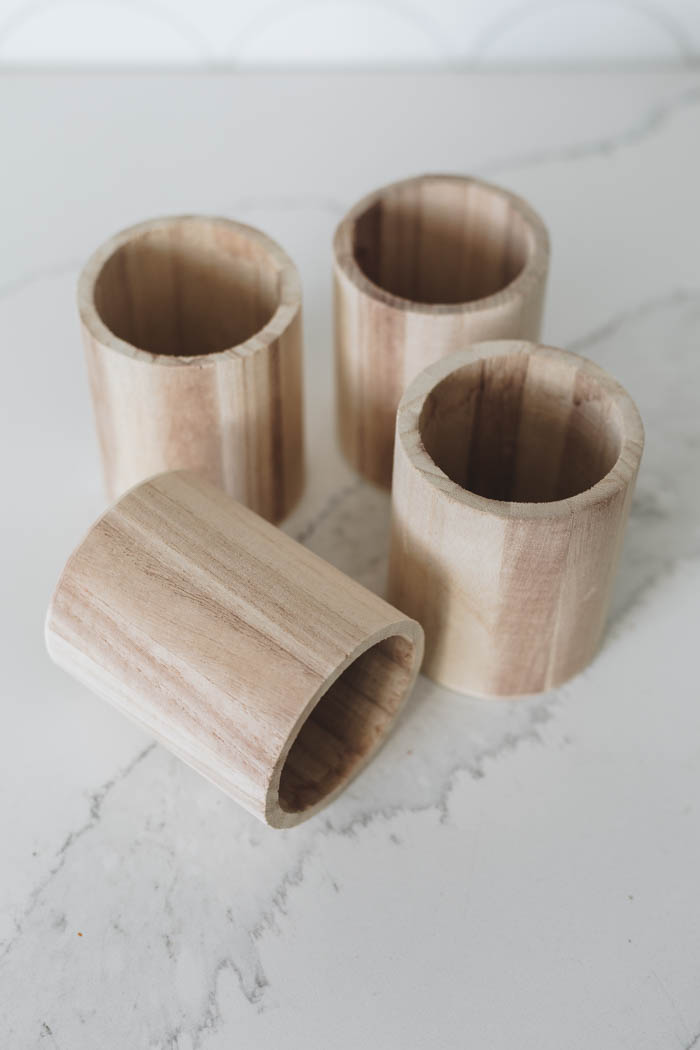
- Wooden Cups (these ones were from the dollar tree)
- Sand paper
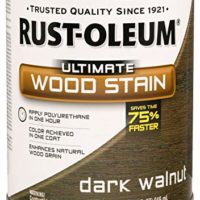
- Wood stain
- E6000 adhesive
Tools Needed
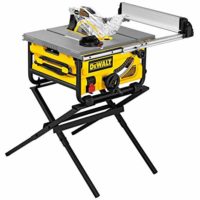
- Table Saw or Hand Saw
- Scroll Saw or Hand Saw
There are only two tools involved in this build, but if you don’t have either of those, or aren’t comfortable using them, then a hand saw could also be used!
Instructions for DIY Chain Links
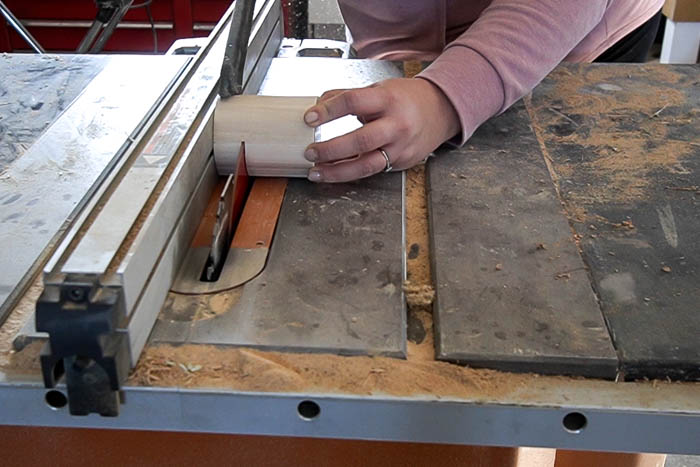
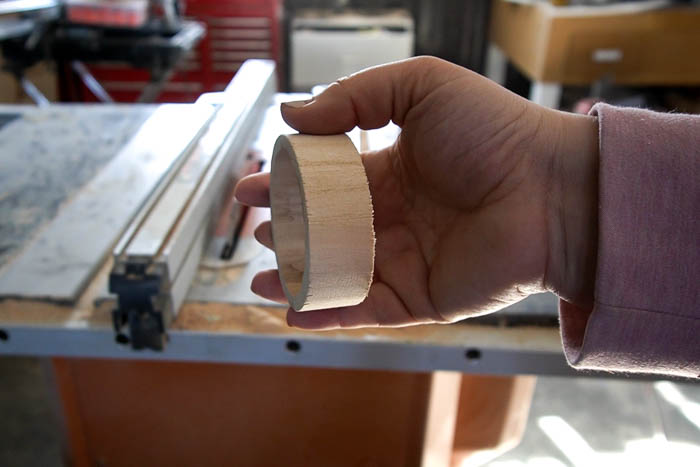
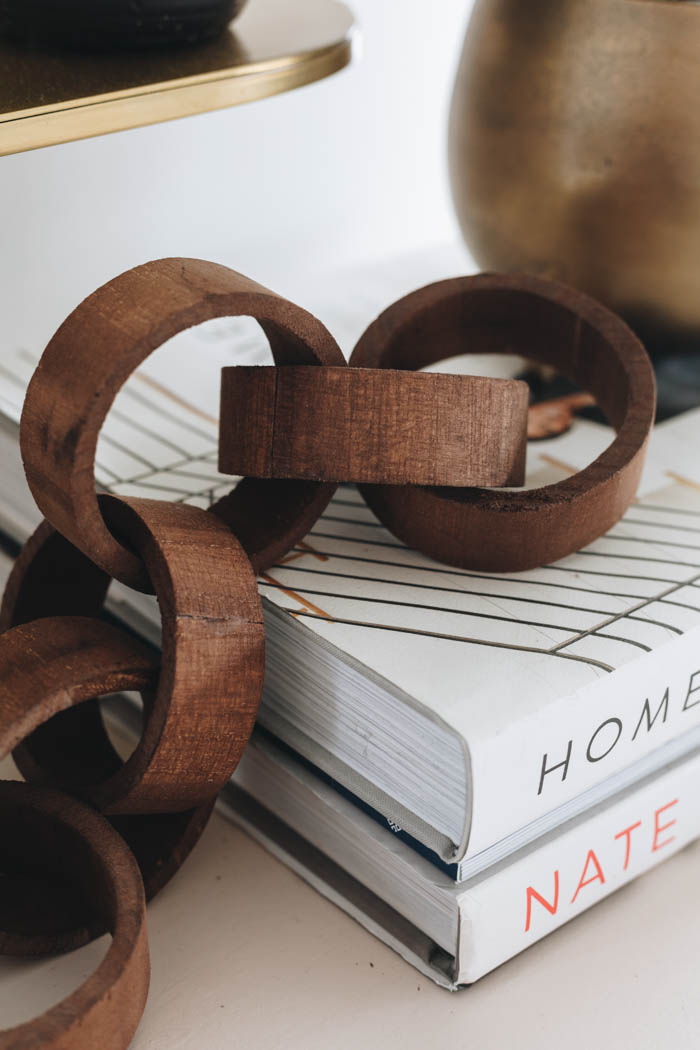
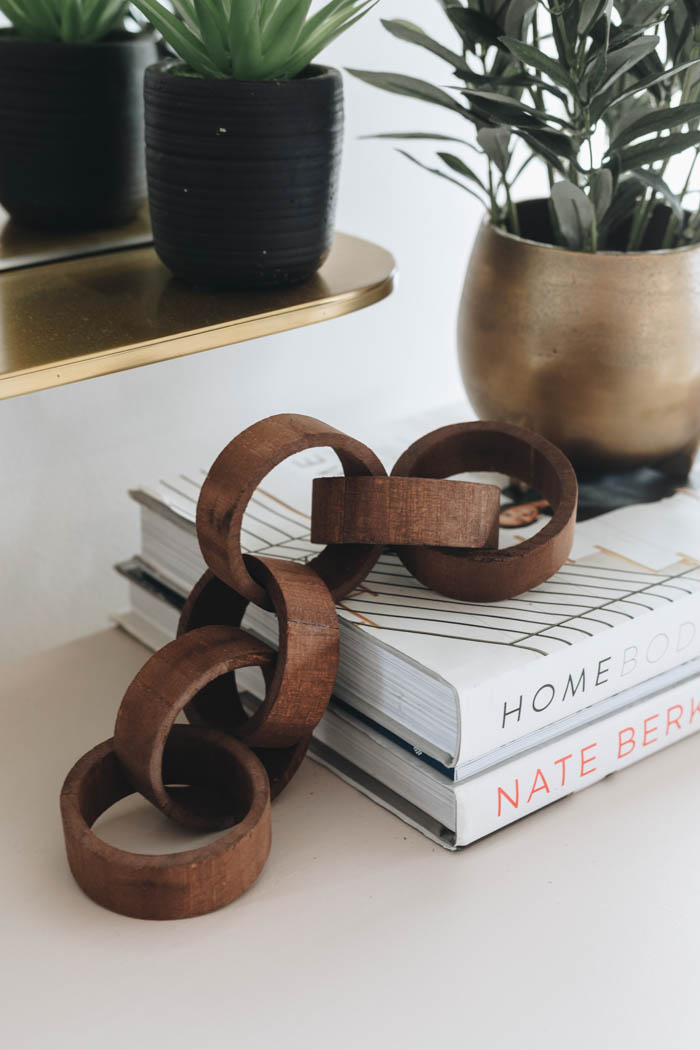
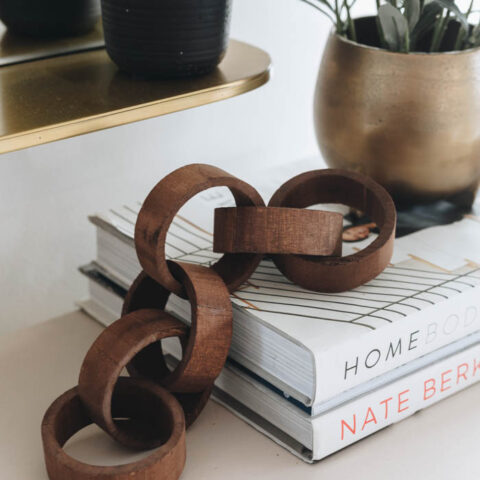
The first step is to cut the wooden circles from the top of the cups. I cut 1″ rings off using the table saw. I went slowly and carefully, because I’m always extra cautious when using a table saw.
Do this with each of your 6 wooden cups.
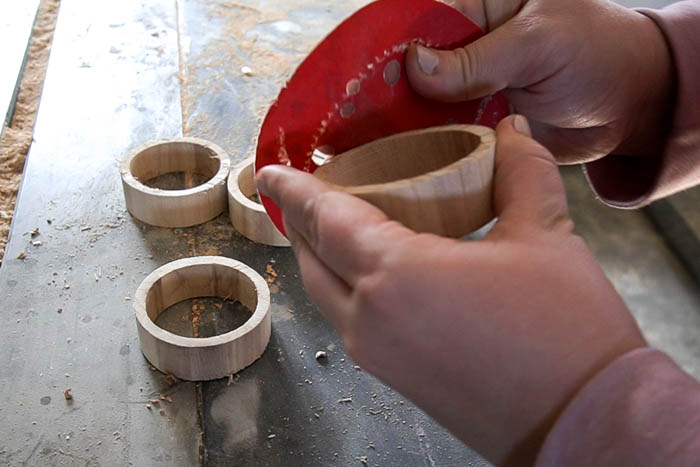
You might find there is a bit of tear out of the sides of the rings, or a bit of an unfinished raw edge. I just lightly sanded all of the cut edges and ended up with a beautiful finish.
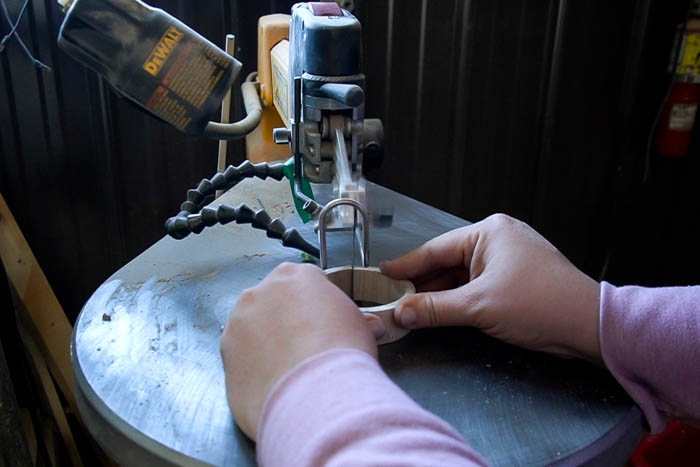
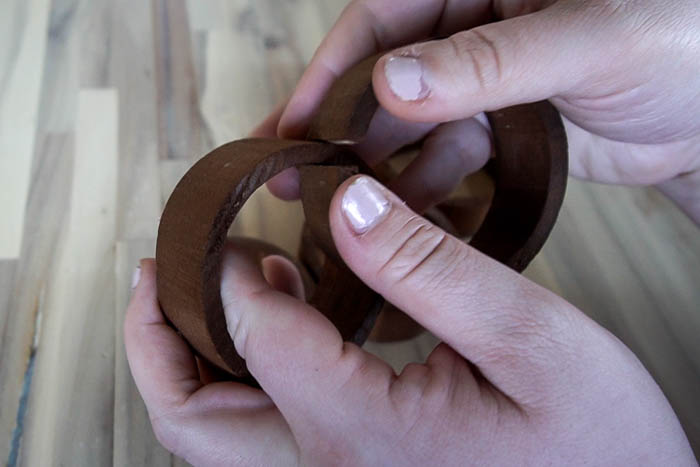
Next you need to cut a slit into at least three of the rings so that you can link the rings together. I used our scroll saw to cut a small line because I knew there would be minimal waste that way!
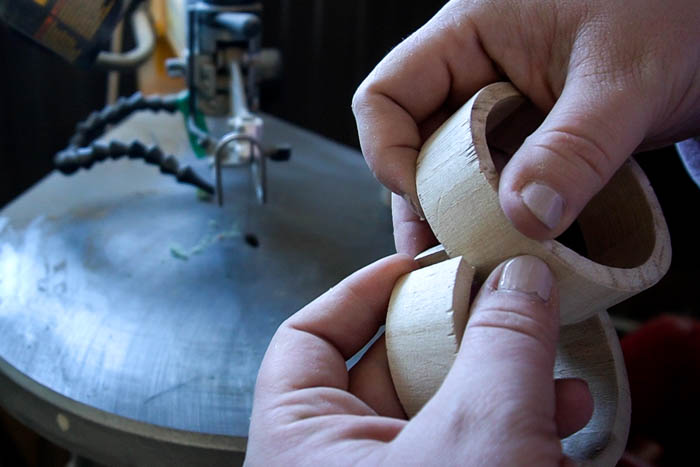
Then I gently tested the rings by sliding them into one another, to make sure that they would attach nicely to form a chain. Once I knew it worked, I was ready to stain the wood.
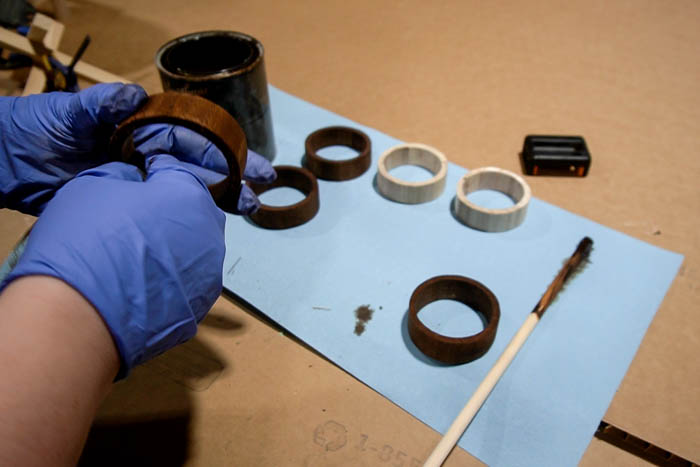
If you prefer the raw, unfinished colour, you could leave them and not stain them at all! I wanted a darker wood stain on ours, so I used dark walnut to stain all sides.
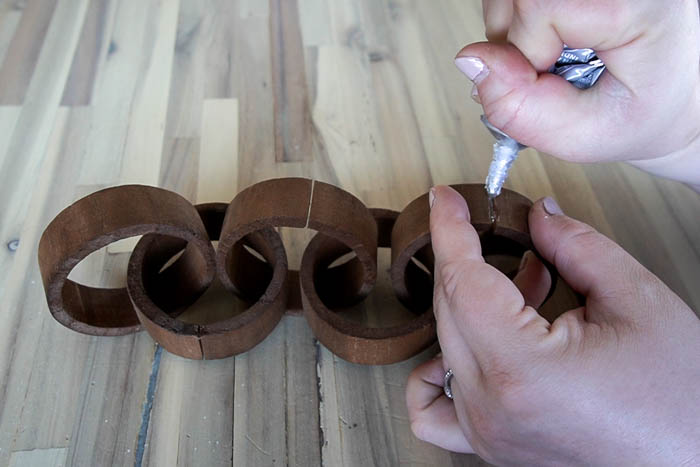
Finally, hook all of rings together to form your chain, and then glue the open links together with a strong craft glue.Make sure to wipe away any excess glue immediately so that the seam completely disappears and is unnoticeable.
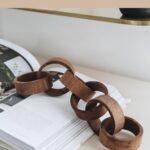
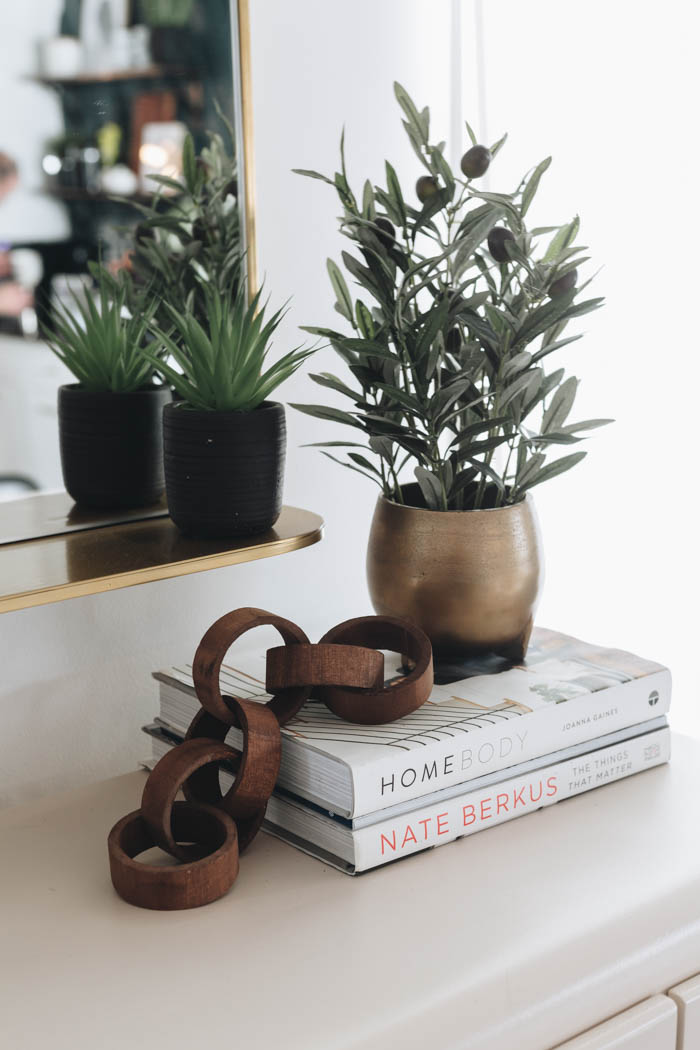
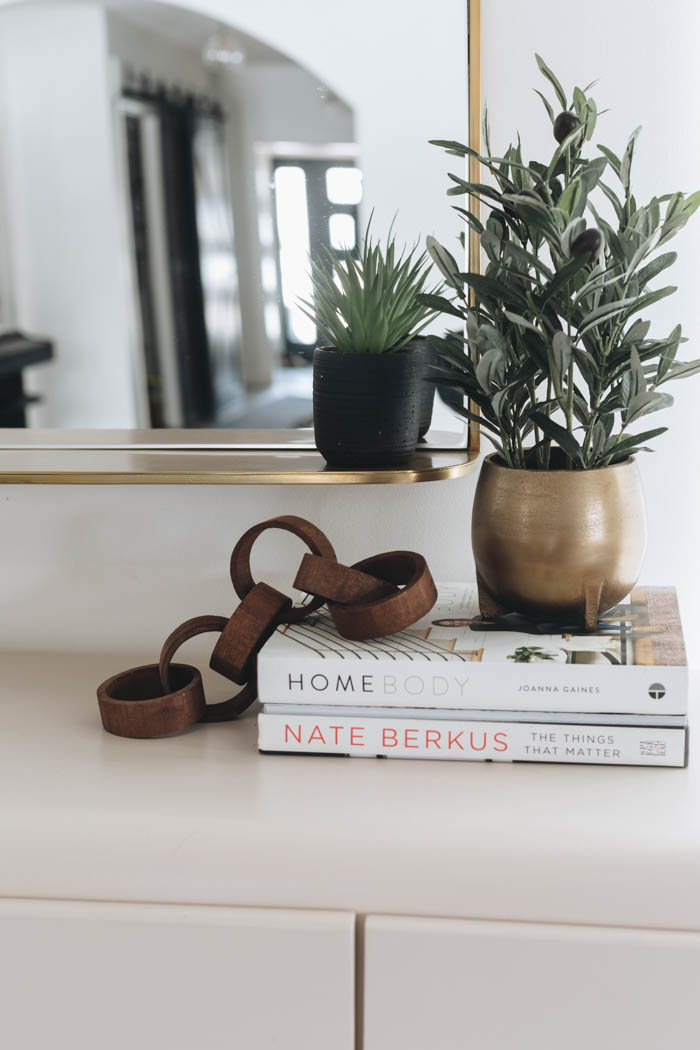
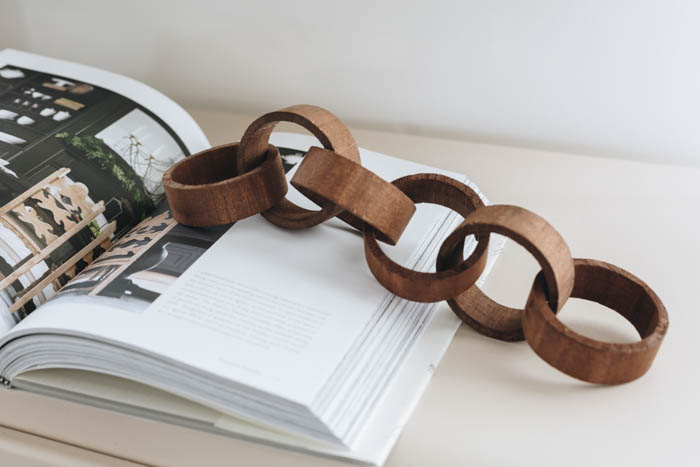
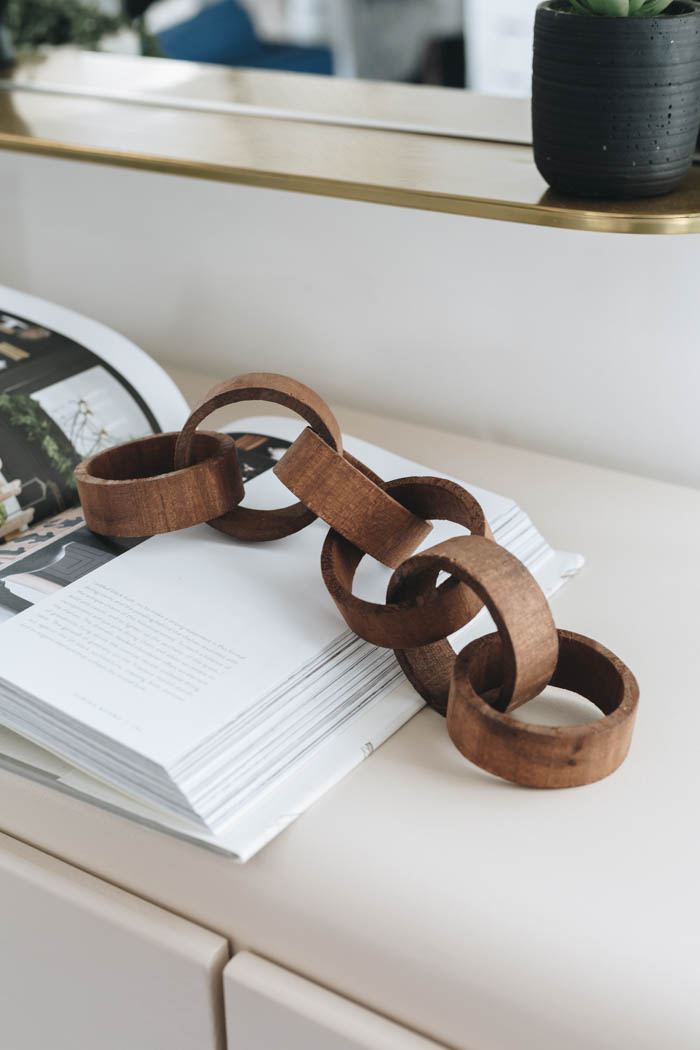
Finished DIY Wooden Chain Links
I’m so proud of how these chain links look! They look just as amazing as the store bough versions, but for a fraction of the cost.
DIY Wooden Chain Links
Materials
- 6 Wooden Cups
- Sand paper
- Wood Stain
- E6000 Glue
Tools
- Table Saw or hand saw
- Scroll saw or hand saw
Instructions
- Use a table saw or hand saw to cut 1" rings off the top of your wooden cups (found at Dollar Tree)
- Sand the edges of your cups
- Use a scroll saw to cut a tiny slit into 3 of the rings
- Stain the rings in the colour of your choice
- Hook the rings into each other, using the rings with slits to wrap around the whole circles (see video)
- Use E6000 to glue the rings back together and remove any excess glue
Recommended Products
As an Amazon Associate and member of other affiliate programs, I earn from qualifying purchases.


If you liked this home decor project, you might like some of these amazing Scrap Wood Home Decor ideas!