Learn how to make custom DIY wood filler with this easy tutorial. Making your own colour-matched wood filler allows you to easily fill holes and imperfections in your woodworking projects.
If you’re enjoy woodworking, then you probably already know the frustration of creating something beautiful, and then not having the right wood filler to fill those gaps and imperfections. The wrong colour of wood filler can absolutely stand out in all the wrong ways. The best way to avoid this is to learn how to quickly and easily make your own wood filler, rather than relying on store-bought colour matching.
*This post may contain affiliate links. When you buy a product through one of our links, we get a commission at no cost to you! Thank you for supporting our blog so that we can continue to bring you posts like these. For more information, please see our disclosure page.*
Wood filler vs wood putty, what’s the difference?
You may think wood filler and wood putty are the same thing, but they aren’t. Each has a specific use and will work better for certain types of applications.
Wood filler is used to repair small holes, cracks, or imperfections in your woodworking project. It fills the space and hardens to protect the piece.
Wood putty is often used to cover up holes made with nails or screws so that you can’t see them in the finished piece.
Both wood filler and wood putty can be painted or stained, but wood filler will absorb it better. You may have to sand wood putty more to get paint or stain to stick to it.
Benefits of making your own DIY custom wood filler
We love making our own wood filler for a few reasons. One, it saves us money since we don’t have to buy the pre-made versions. Two, when you make your own wood filler, the colour can be customized to each piece so that it blends in beautifully and can takes stain easily and seemlessly.
Third, it’s an eco-friendly hack since it is made from the sawdust of the current project we’re working on and doesn’t require any waste packaging. Last, but not least, there is almost zero waste since we only make what we need. We don’t have to keep a container of pre-made and run the risk of it drying out.
Video Tutorial of How to Make Wood Filler
In the video below we completed a project using the edges of plywood (an affordable table or desktop design!) which had many holes and gaps to fill on the surface. Watch the video below to see how we mixed our DIY wood filler colour.
The wood filler tutorial occurs at 5:43 minutes in the video.
How to Make DIY Wood Filler
Here are the written instructions for mixing your own filler as well.
Supplies needed
- Sawdust from your sander
- Wood glue
- Water
- piece of glass or plastic to mix it on
Step-By-Step Tutorial
When working on a new project, use the material and dust collected in your sander. Using the sawdust material from your piece will ensure a match to the wood.
If you think you may need to make custom filler at some point, a good practice to get into is emptying your sander before you start sanding a new project. If your sander is full of sand from a previous project with a different type of wood, the colour match won’t be as good.
Most woodworking projects require several sands, which can add up to give you a good amount of wood filler, but if you are doing a large amount, be aware that you may not have enough in just one sander. If you’re really looking to be more eco-friendly, you can also begin saving sawdust in labelled containers for the type of wood you were sanding, so that you have extra when your supply doesn’t quite go far enough.
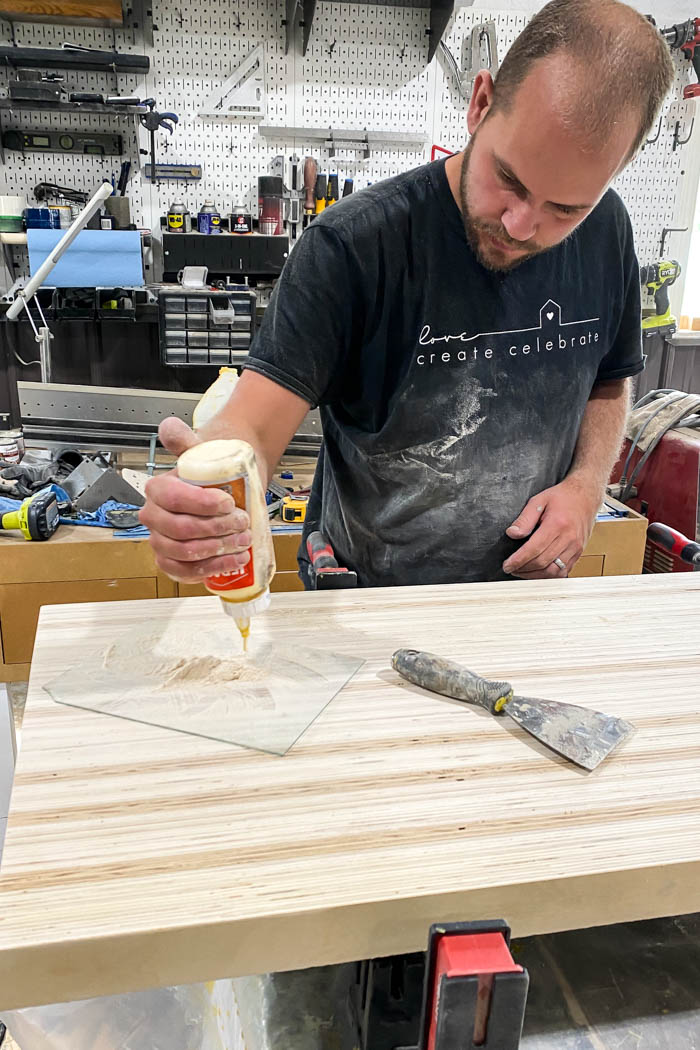
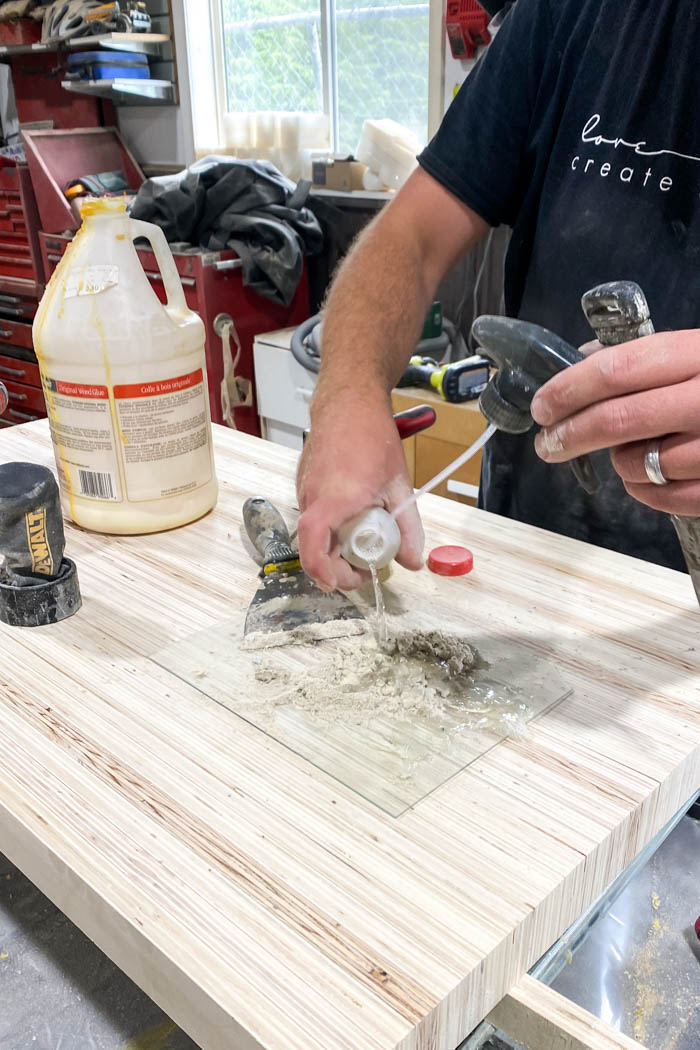
Mix wood glue and water with the sawdust to form the wood filler. There is no exact ratio to measure, as the consistency depends on the project.
When you’re filling large gaps, you’ll want your wood filler to be stiffer, but when it comes to small gaps, or plywood end grain like we did with this table, a wetter consistency will work better. Ultimately the consistency is similar to the wood filler you would buy at a store.
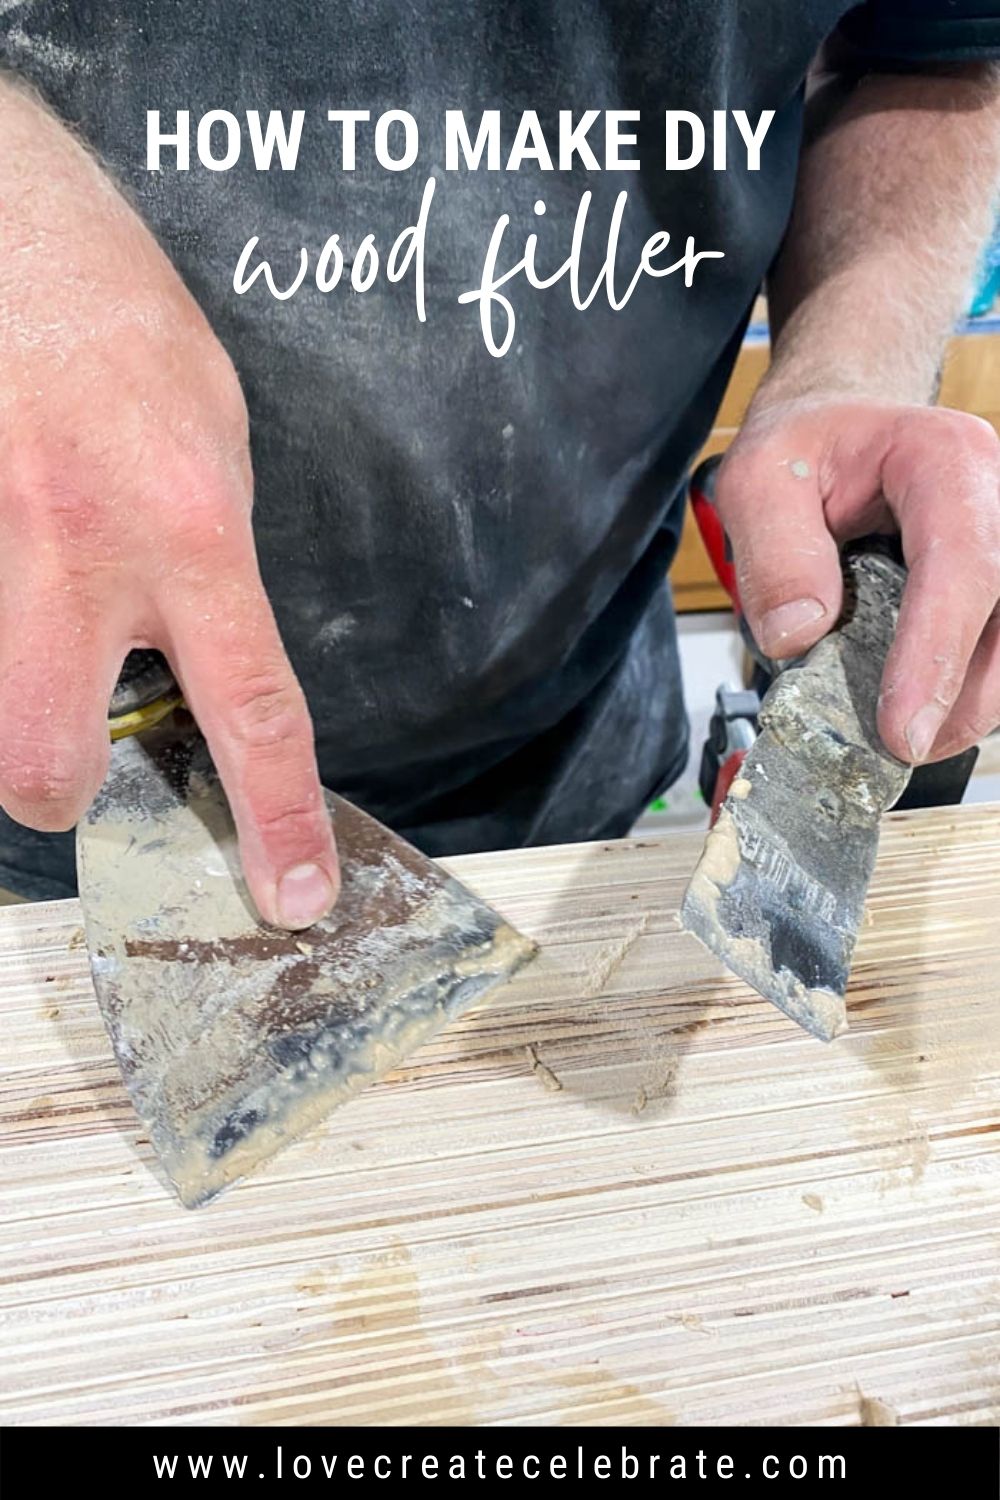
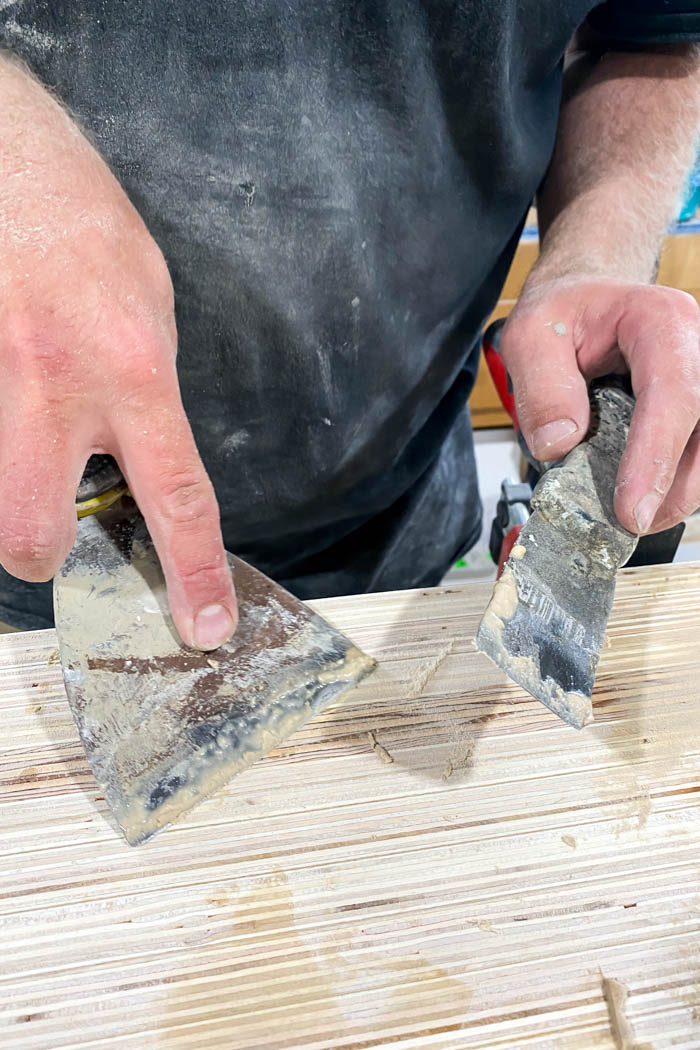
We did our mixture on a scrap piece of plexiglass. You need to make sure to mix on a surface that won’t absorb any of the water or wood filler, and that allows you to easily scrap the DIY wood filler from the surface.
Once you have the DIY custom wood filler mixed to the desired consistency, apply to the holes and cracks. We typically use putty knives for this, as it’s an easy tool to mix with, and spread with.
Allow it to dry and then sand it smooth, as you would with any wood filler.
Then apply the stain and finish of your choice. The wood filler will absorb the stain more evenly and it will blend in with the rest of the stain on the piece because it is the closest colour match to the original wood.
Examples of Custom Wood Filler
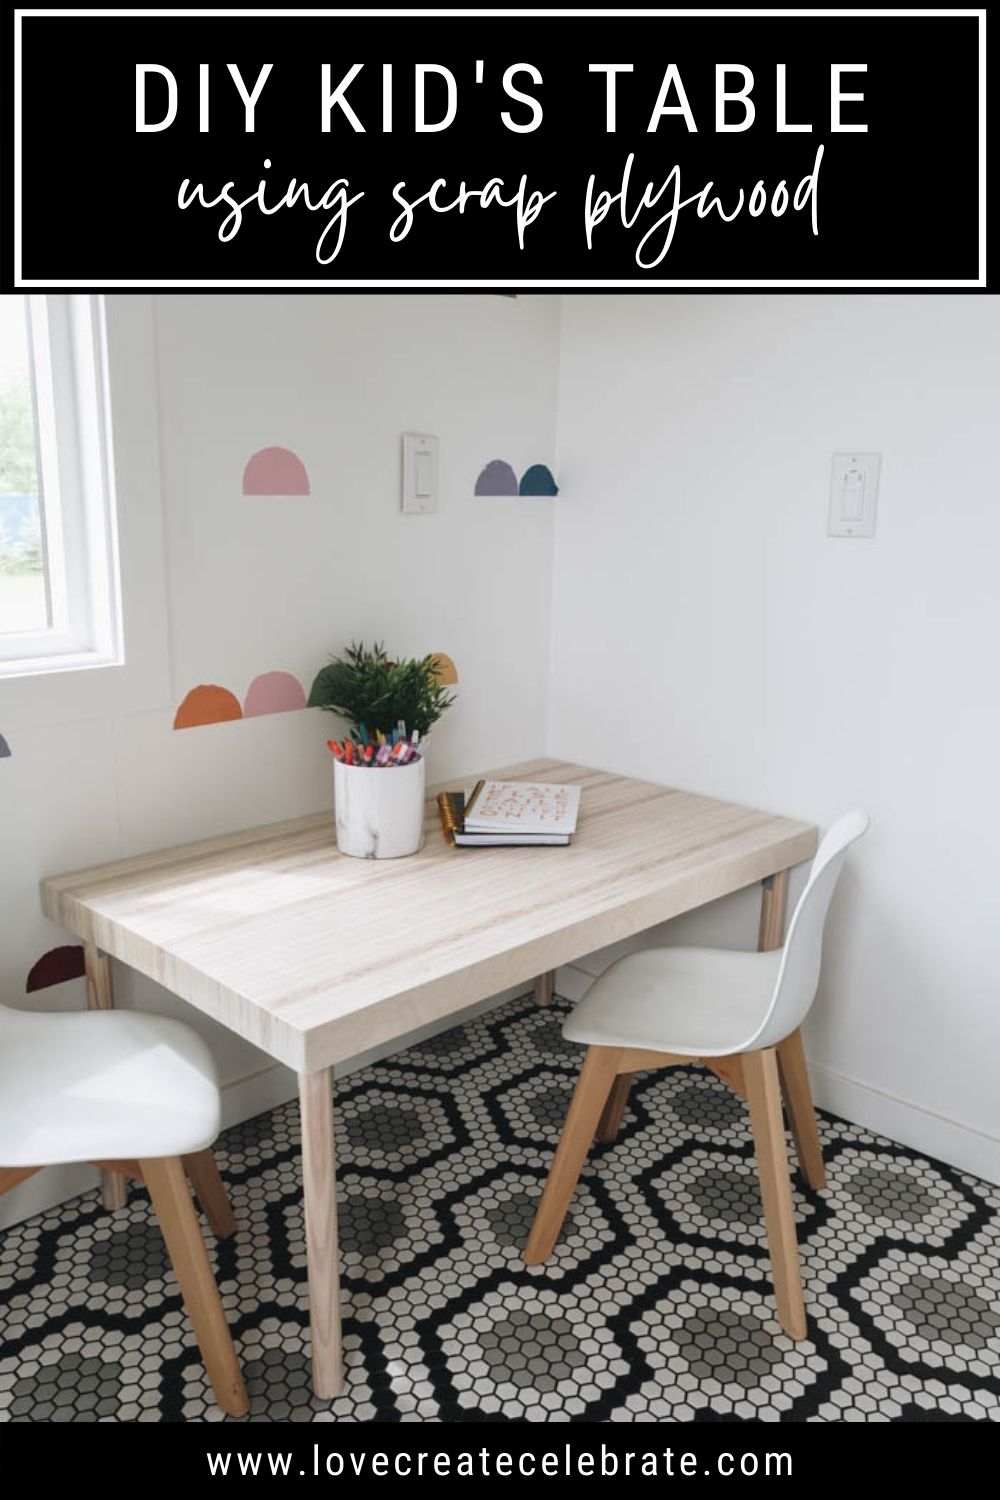
Here are two similar projects in which we recently used this technique to fill our gaps and match the wood tones. The first is this DIY Kids table, which we gave a very light-coloured stain to.
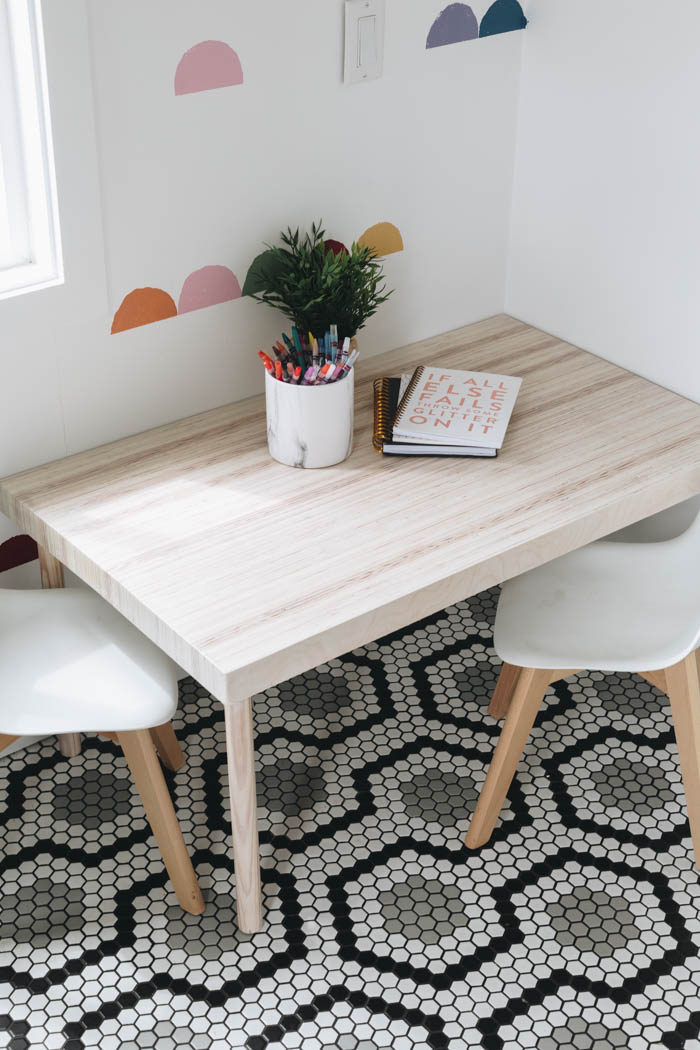
The wood filler really blended in beautifully. You can see the lines in the edges of the wood grain, and the wood filler doesn’t take any of that away, just beautifully filled the gaps to create a smooth surface.

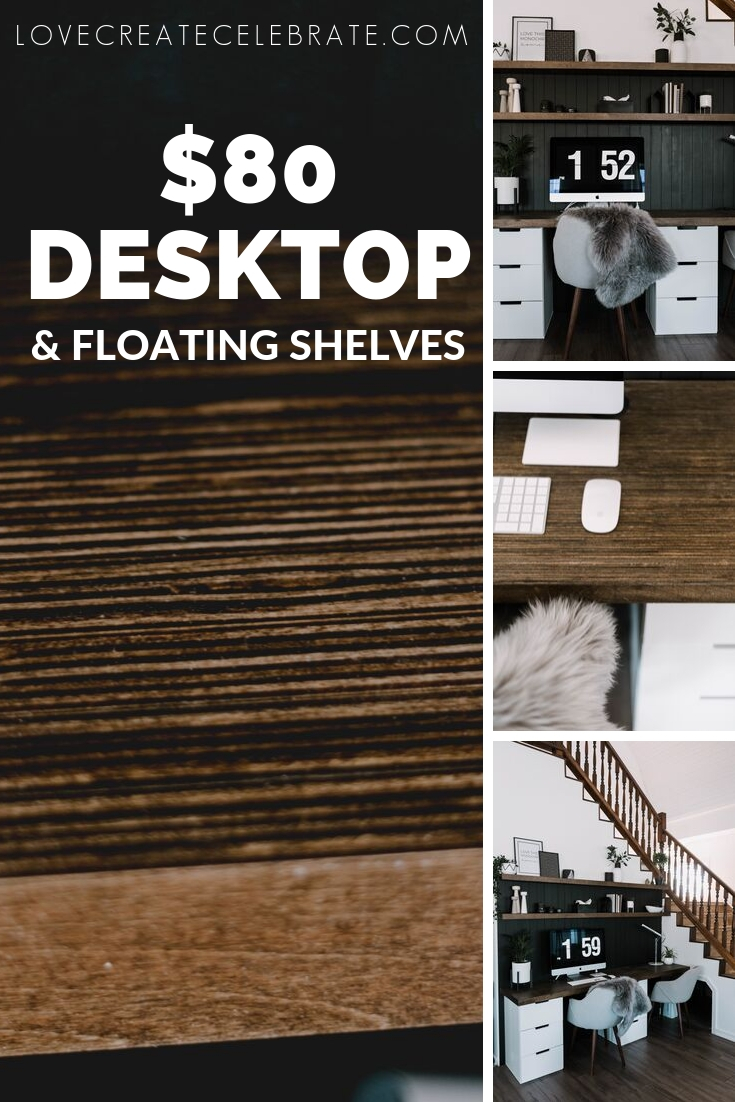
It doesn’t matter if it’s light or dark either! We also used the wood filler on our DIY Desktop. It uses the same plywood end grain to build the table, but with a dark stain.


Making your own DIY custom wood filler is easy to do, saves you money, and makes your woodworking piece look great no matter what colour finish you decide to use.

See our DIY custom wood filler in action
$40 DIY Wood Desktop [& Matching Floating Shelves]
DIY Kid’s table