
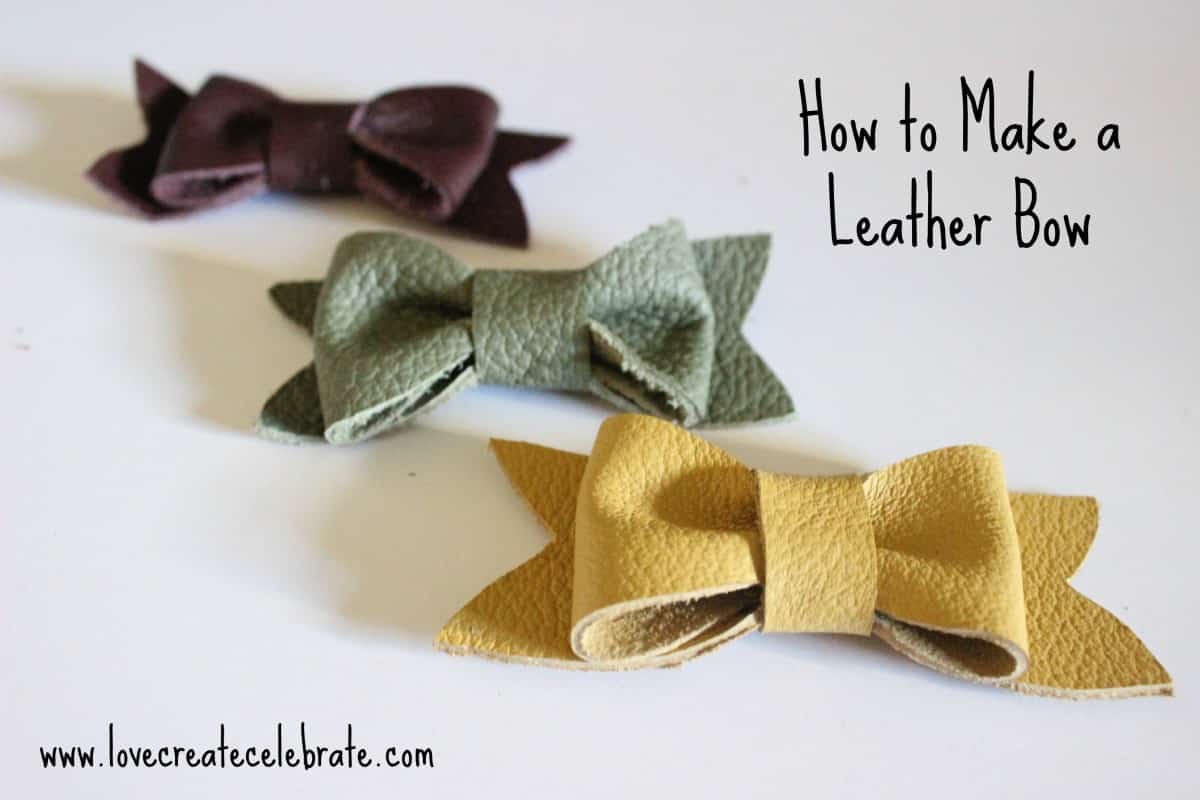
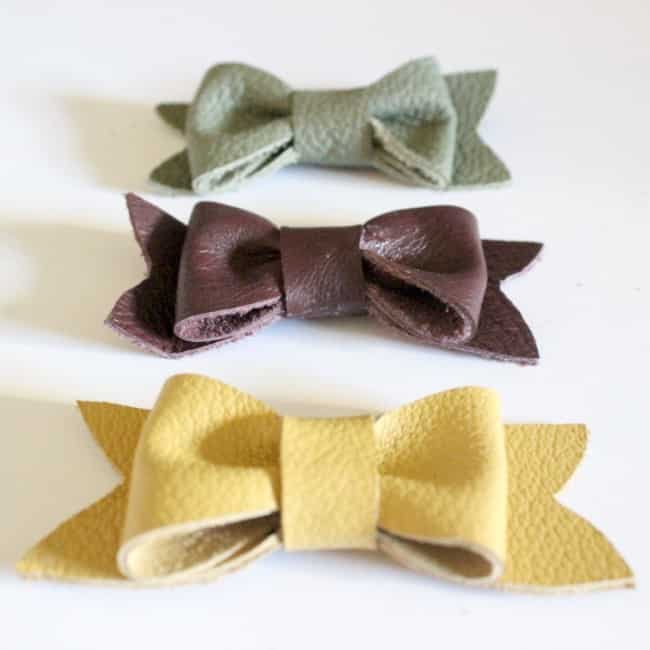
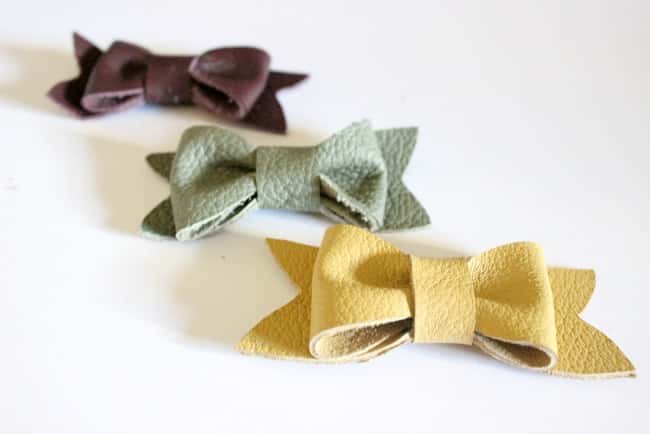
I recently came upon some colourful leather scraps at a discount store, and I couldn’t wait to buy some and start working with it!
I’ve never done anything with leather before, so I was starting from scratch!
But if you have some good fabric scissors, strong thread, leather sewing needles, and strong glue, you can do virtually anything with it! Luckily you don’t need all of that for this project…
If you have some leather scraps lying around, or you can get a hold of some, these leather bows are the perfect project.
Materials:
Leather pieces
Strong fabric scissors
Strong glue (I recommend E6000)
Popsicle stick (to spread glue)
Fabric pen/chalk
Start by downloading the template below to trace onto your leather:
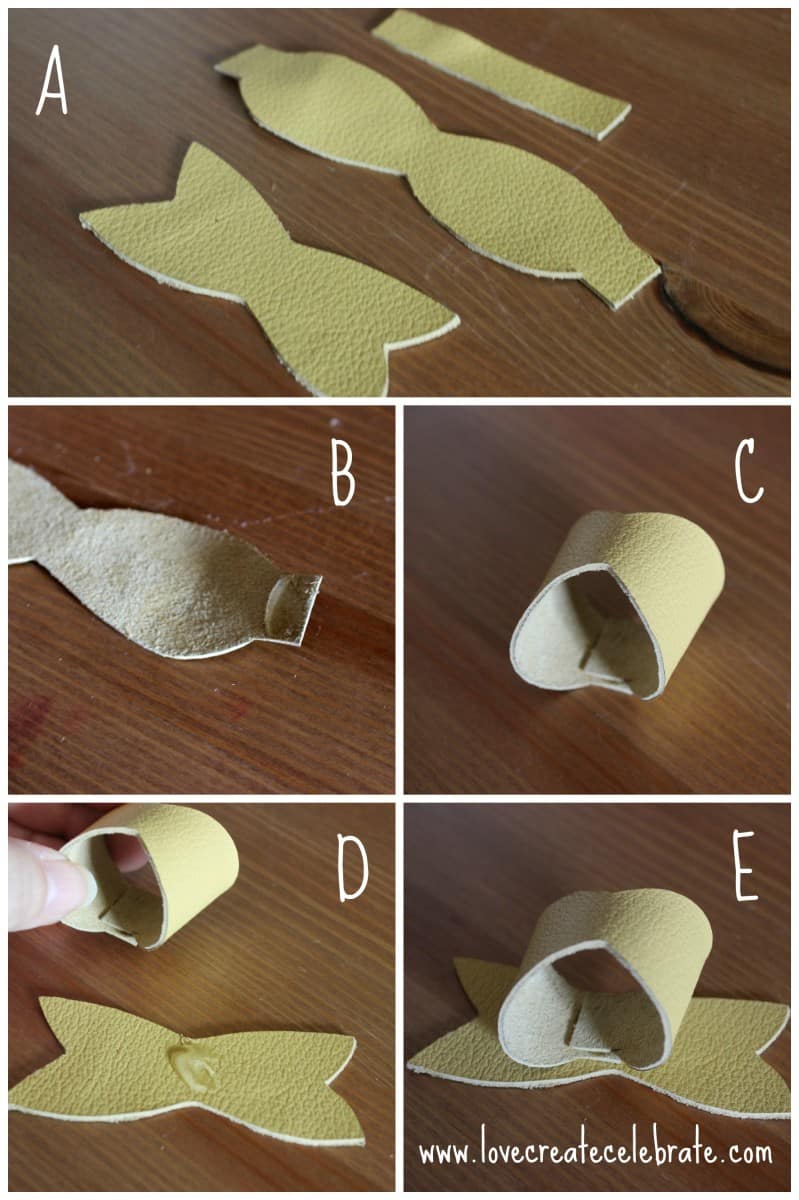
A – Trace template onto leather using a fabric pen or chalk and cut out all three pieces
B & C – Put glue on one edge of the “main bow” piece, and press ends together to create a loop. I recommend a popsicle stick, or something similar, to apply glue because it is very sticky! The glue sets fairly quick, so you don’t have to worry about waiting between steps.
D & E – Place glue in the centre of the bow “tails” piece (on the good side of the leather). Press the bow circle from the previous step into the glue on the tails (glued ends down).
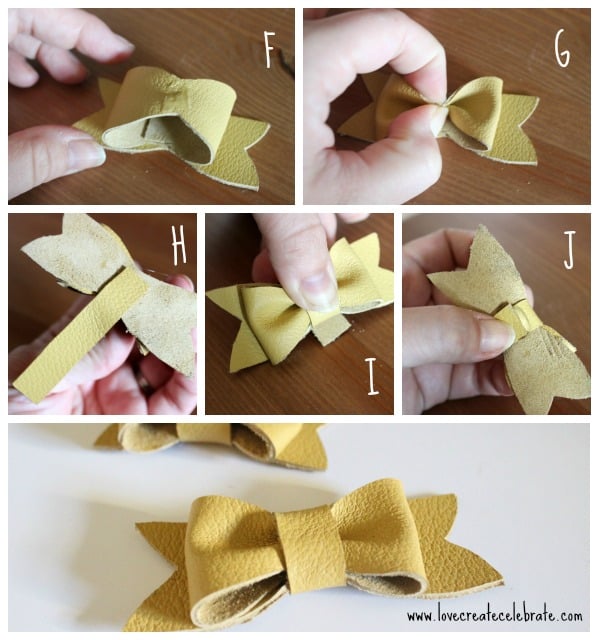
F – Put a dab of glue on the centre of the bow circle.
G – Pinch the centre of the circle together to create the bow shape. This may come loose when you let go, but thats ok – the correct creases will be in place for the next step. The thinner and softer leathers will be easier to bend/mold. Thicker leathers will still work, but require a bit more attention to get the correct bow shape.
H – Put a dab of glue on the back of the bow structure, and attach one end of the centre bow strap, with the rough sides glued together.
I & J – Wrap the bow strap around the bow, making sure the bow is nicely cinched. There may be a bit of excess leather that you can snip off with your scissors. Glue the second end of the strap and hold in place for a few seconds to let everything set.
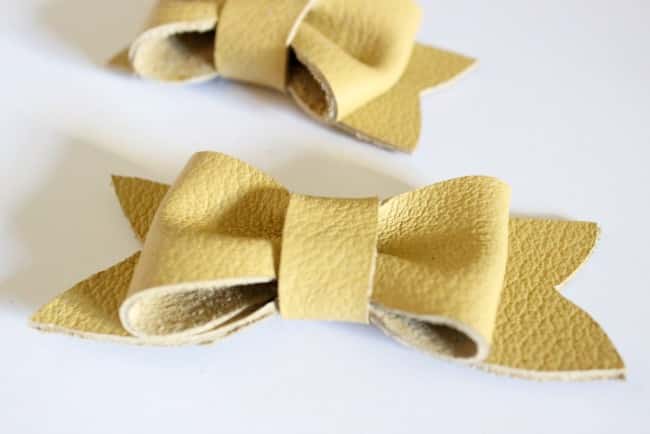
And Voilà!
A leather bow masterpiece.
Stay tuned for projects that incorporate these lovely bows :)
{xoxo}
Suzanna
Saturday 17th of February 2024
What glue do you prefer or did you use?
Michayla
Saturday 12th of November 2016
Do you happen to know your measurements? :)
Lindivs
Sunday 13th of November 2016
You can take the measurements from the printable template :) Sorry, I don't know them off hand!
Gail @Purple Hues and Me
Monday 2nd of May 2016
Your leather bows are adorable!
Lindivs
Monday 2nd of May 2016
Aww! Thank you Gail!!
Clarsa
Friday 5th of June 2015
What leather do you use
Lindivs
Saturday 6th of June 2015
The thin leather cuts easier on the cricut. I just get leather scraps at a discount store in Canada :)