
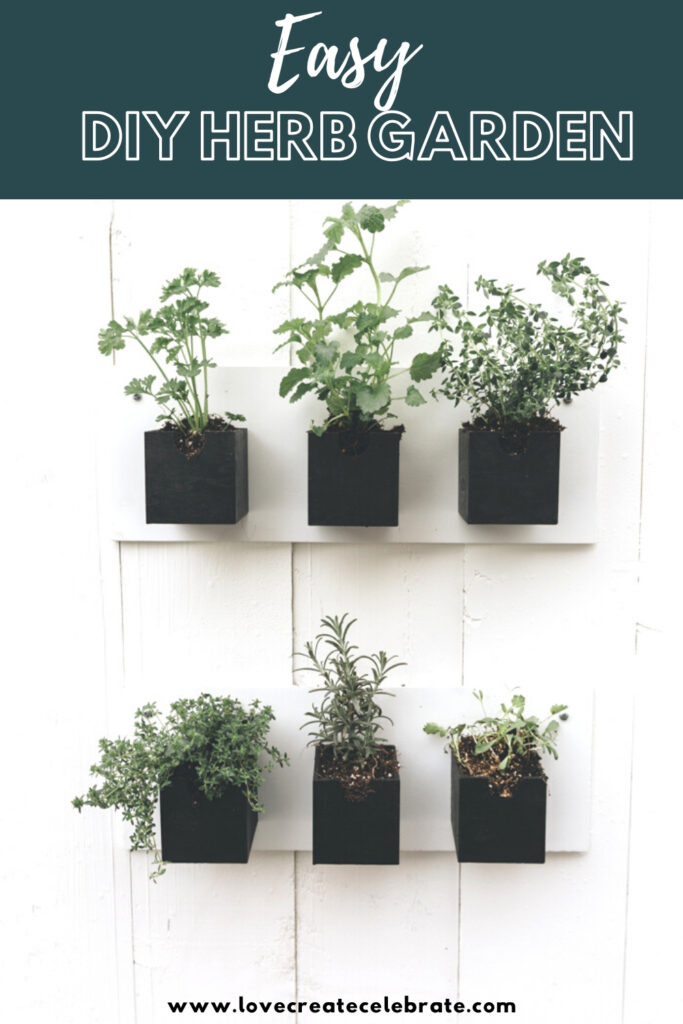
Beautiful DIY Hanging Herb Garden! Make these beautiful DIY herb planters for the indoors or outdoors using dollar store supplies.
I’m not a huge gardener. I consider myself to have a black thumb most of the time, lol. But there are a few plants I love to grow every year, and herbs are one of them! I love throwing fresh herbs in my food in the summer. Last year I put some herbs in a hanging planter I made, but this year I decided to make an easy DIY hanging herb garden.
*This post may contain affiliate links. When you buy a product through one of our links, we get a commission at no cost to you! Thank you for supporting our blog so that we can continue to bring you posts like these. For more information, please see our disclosure page.*
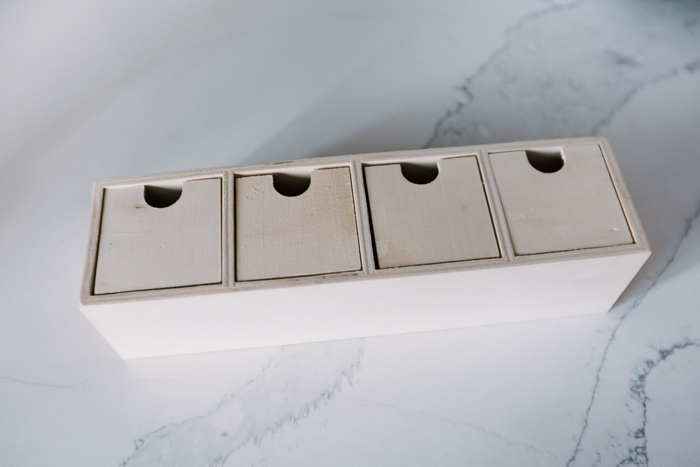
To be honest, this DIY was completely last minute! Most seasons I love to make some dollar store DIY projects, and this summer almost went by without any, but I decided to search through my craft stash and see what I could come up with.
When I found the little organization boxes above, and took the boxes out, I immediately had an idea for some kind of outdoor planter! I had two of those wooden organizers, but only wanted 6 boxes, so I’ll save the rest for another DIY.
How to Make an Easy DIY Hanging Herb Garden
This project was super easy to make. Anyone can do it in only a few steps. The longest part is waiting for the stain and varnish to set so that you can move onto the next step!
Materials Needed for the Hanging Herb Garden
- Dollar store organizer (or similar boxes)
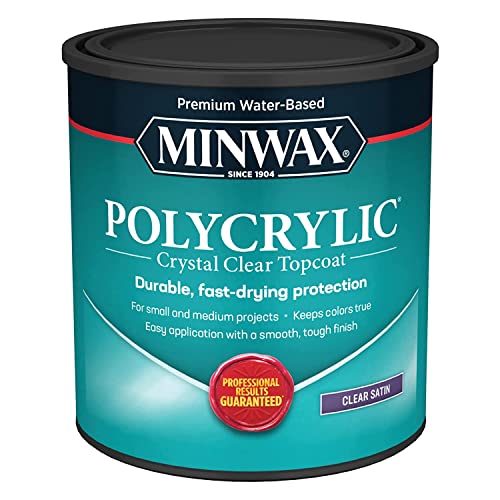
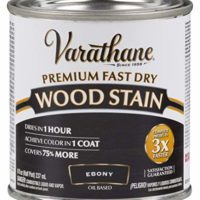
- Wood Stain
- Clear Coat Finish
- Spray Paint
- Construction adhesive
- 1/4″ Plywood
Tools Needed to Make a Hanging Herb Garden
- Drill
- Saw (I used a table saw, but any type would work)
Instructions for Making Your DIY Hanging Herb Garden
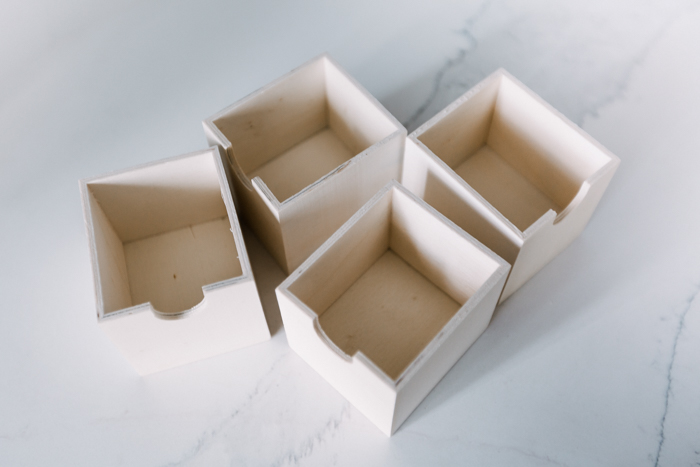
Pull out six of these little dollar store boxes to start. You can do any layout you want for your planters, including hanging them all on one big board, or hanging them on one thin vertical board.
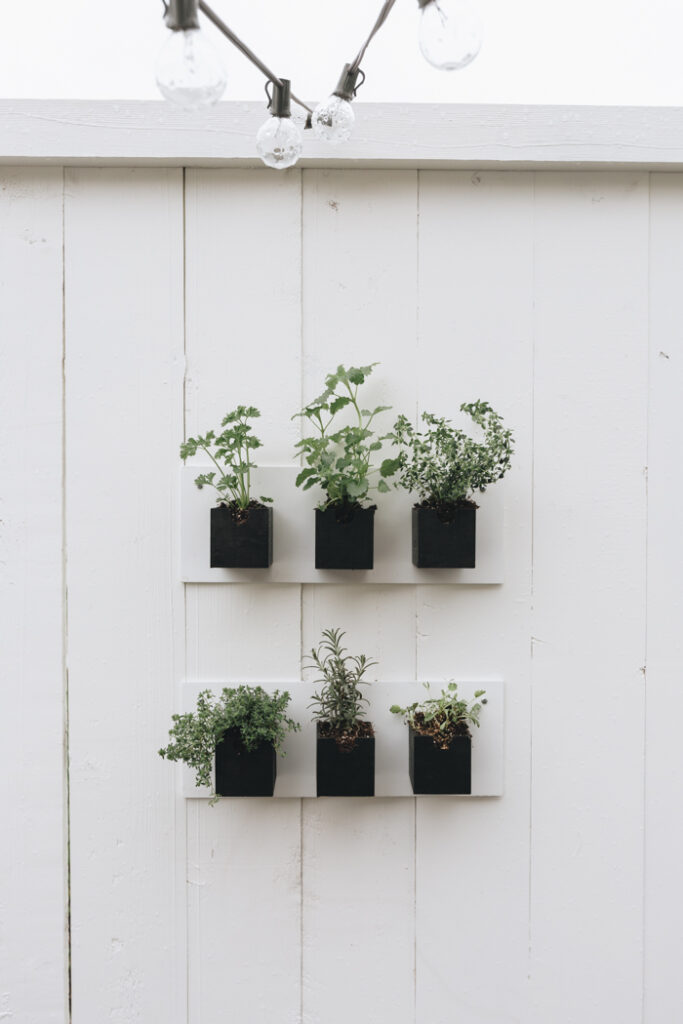
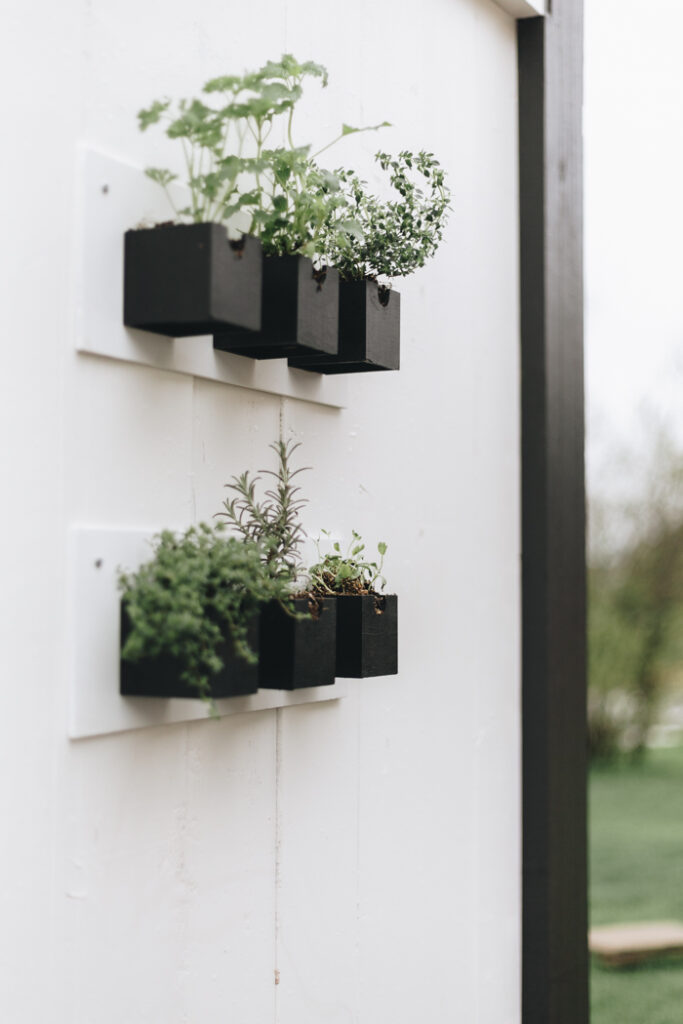
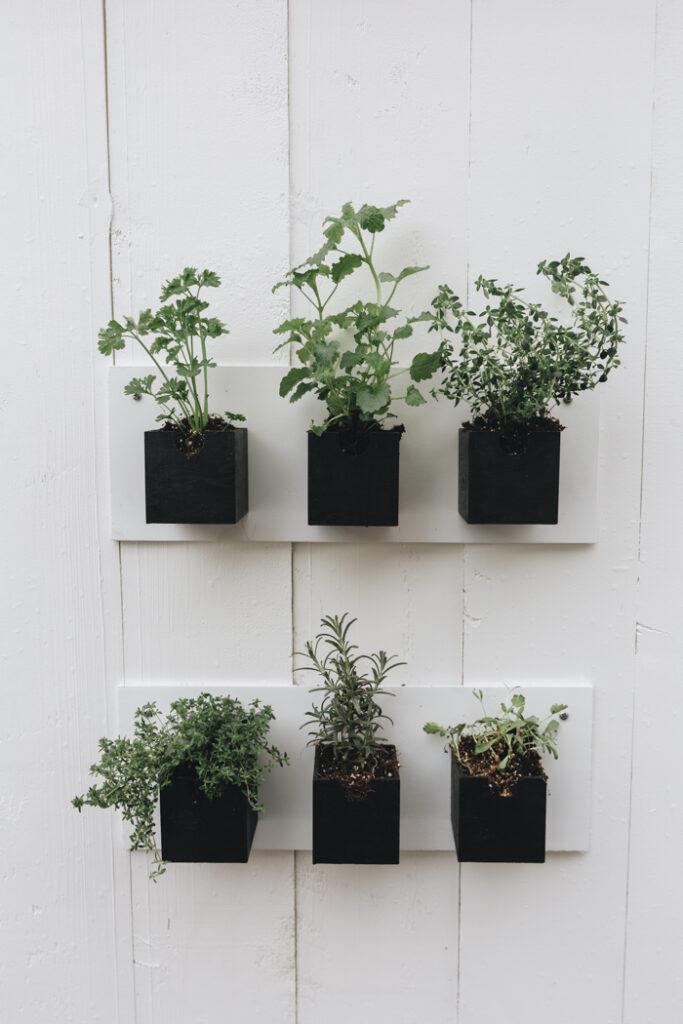
I chose to do two small boards with three boxes each, one board on top of the other.
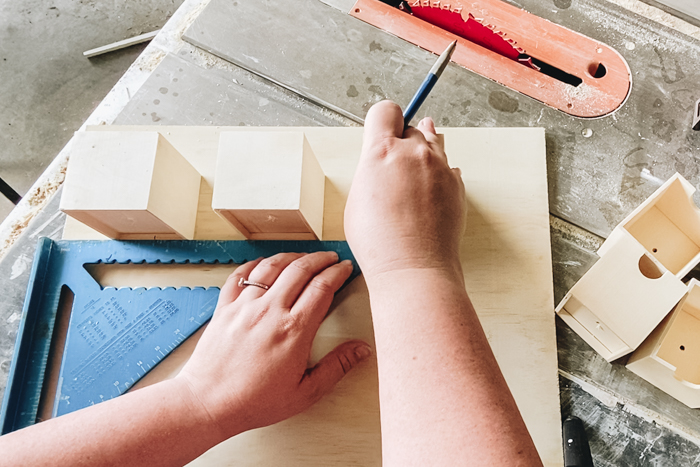
I started by determining the spacing I wanted. I made my boards 6″ by 16″, which allowed for two inches above each boxes and on each side. The space underneath the boards was less, but it still appears balanced because of the plants that go inside after.
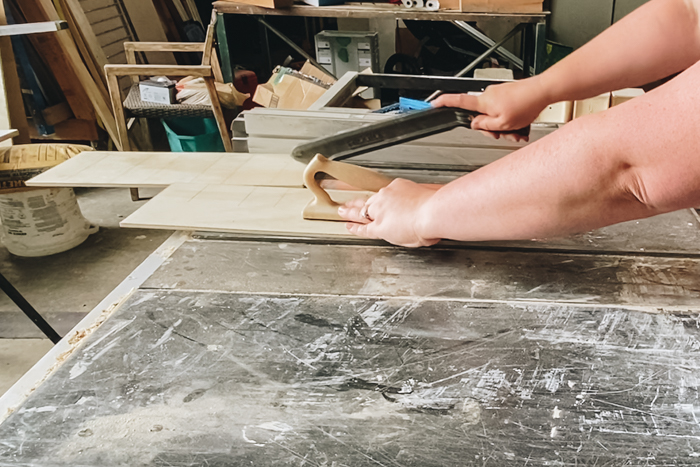
Once you know the side of the boards you want, you can cut your 1/4″ plywood into two pieces using a tablesaw.
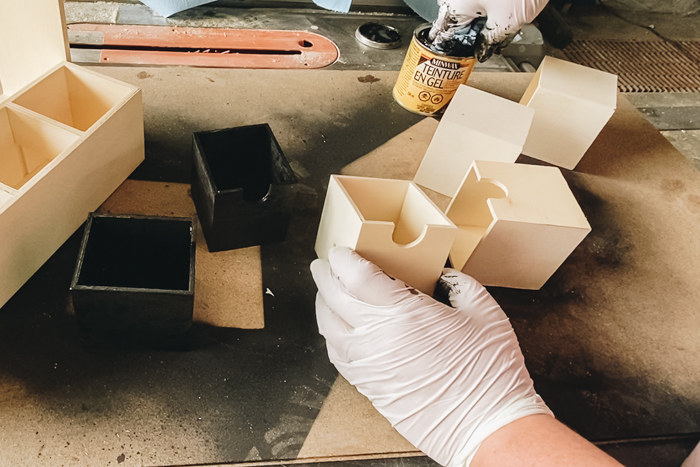
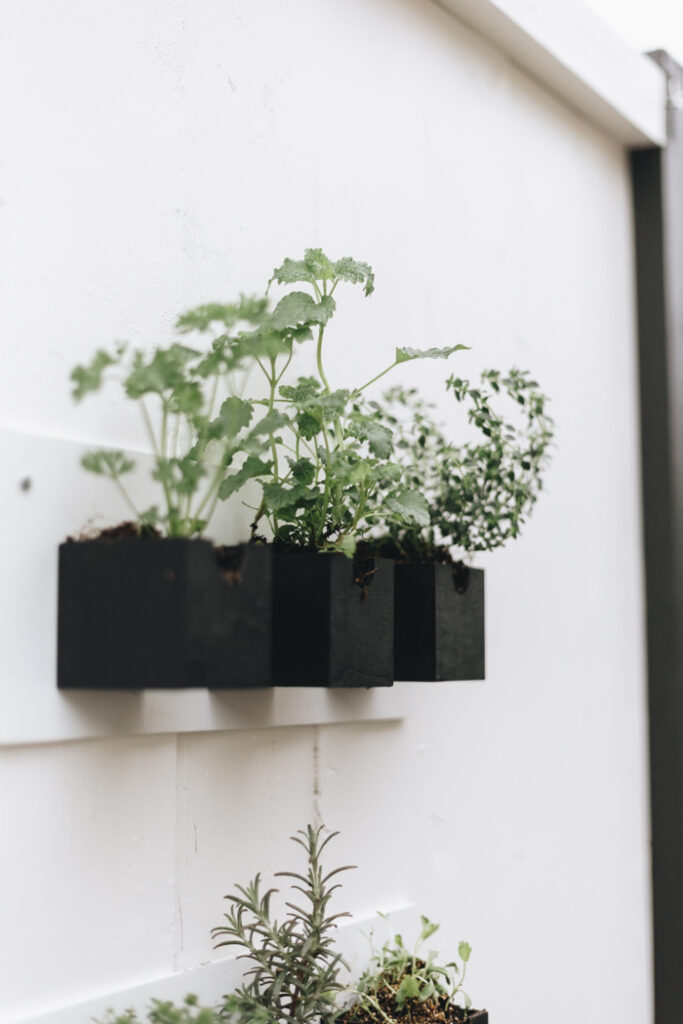
Next, I drilled holes in the bottom of all of the boxes (to allow drainage when they are full of plants later on) and then stained all of my boxes, inside and out, with my favourite black stain.

After the stain was set, I protected the boxes with multiple coats of polycrylic. You need to wait a couple of hours between coats, and then wait 24 costs after the final coat before using the boxes.

For the plywood boards behind my herb boxes, I decided to go with a white finish. I used an outdoor safe white primer for this (because that’s what we had on hand!), but any outdoor safe spray paint or paint will work too.
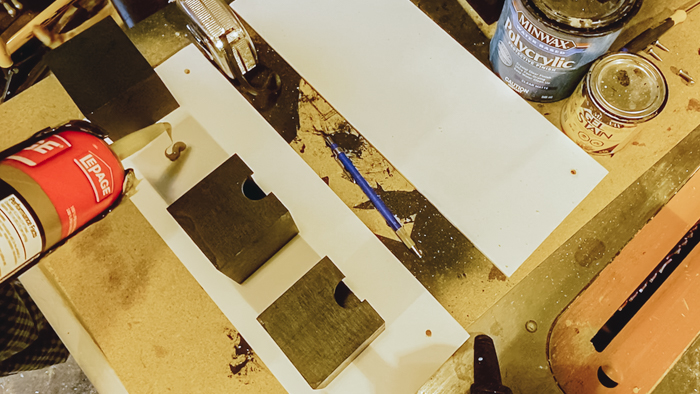
The final step was to attach the boxes to my board. Because my backing board was so thin, I wasn’t able to screw the herb boxes onto the boards. If you used a 2×4 backing board or something thicker, you could screw right into it instead.
I used a strong construction adhesive to adhere my boxes to the back board. I just needed a little bit and let it sit overnight before hanging them up.
I also drilled holes into the top corners of the backing boards – 1 inch from each corner, so that I was ready to hang the boards after everything was set. When they are ready, you can screw your herb planters to any fence or wooden wall outside.
DIY Hanging Planters Video Tutorial
Want to see a few more summer dollar store DIY projects? See the full tutorial for how I made these dollar store planters, plus a few other fun and affordable projects!
Our finished DIY Hanging Herb Garden
We have our herb garden hanging outside on our privacy wall, and I couldn’t be happier to look out at it every day!
And bonus, we’ve already had wonderful fresh herbs for our meals.

Hanging Herb Garden
Materials
- Dollar store organizer (or similar boxes)
- Wood Stain
- Clear Coat Finish
- Spray Paint
- Construction adhesive
- 1/4" Plywood
Tools
- Drill
- Saw
Instructions
- Determine the spacing you want for your boxes on your plywood and cut your plywood to size using a saw
- Prep the boxes by drilling a hole in them (for later drainage), staining then, and coating them with polycrylic
- Protect your backing board by painting or staining/protecting them, in the colours you want.
- When everything is dry, attach the boxes to your backing boards with construction adhesive.
- Hang your DIY hanging herb garden up outdoors on a fence or privacy wall.
Recommended Products
As an Amazon Associate and member of other affiliate programs, I earn from qualifying purchases.


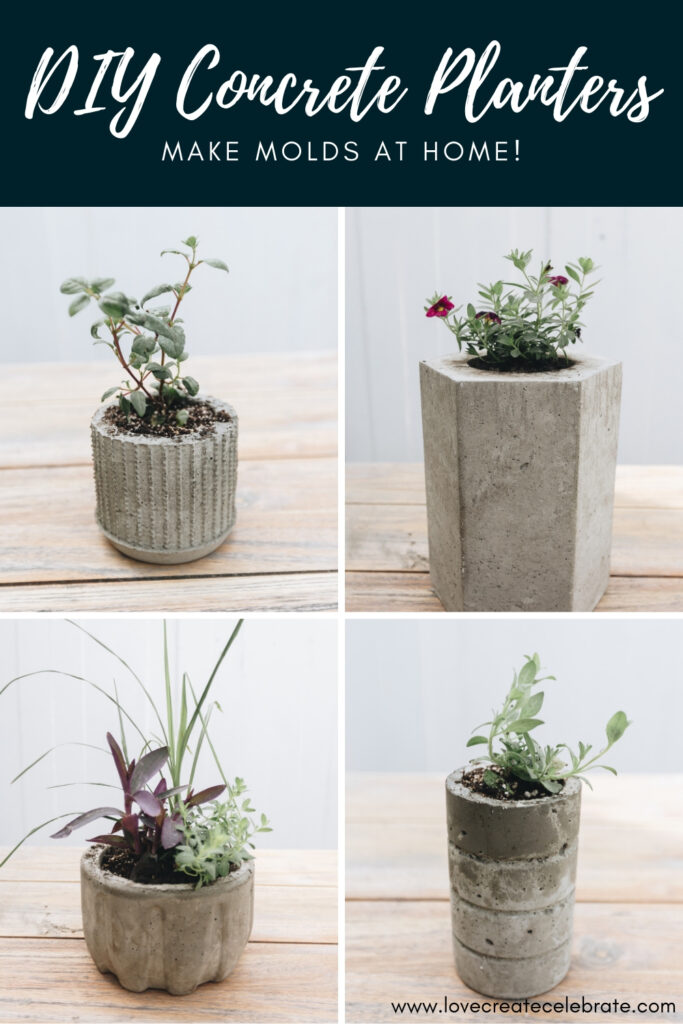
If you’re looking for more great summer ideas, here’s are some outdoor concrete planters that you can make at home!

Shreya @ The Creatives Hour
Friday 10th of December 2021
This is a brilliant idea! I will definitely make one for my apartment. Thanks for the post;)