
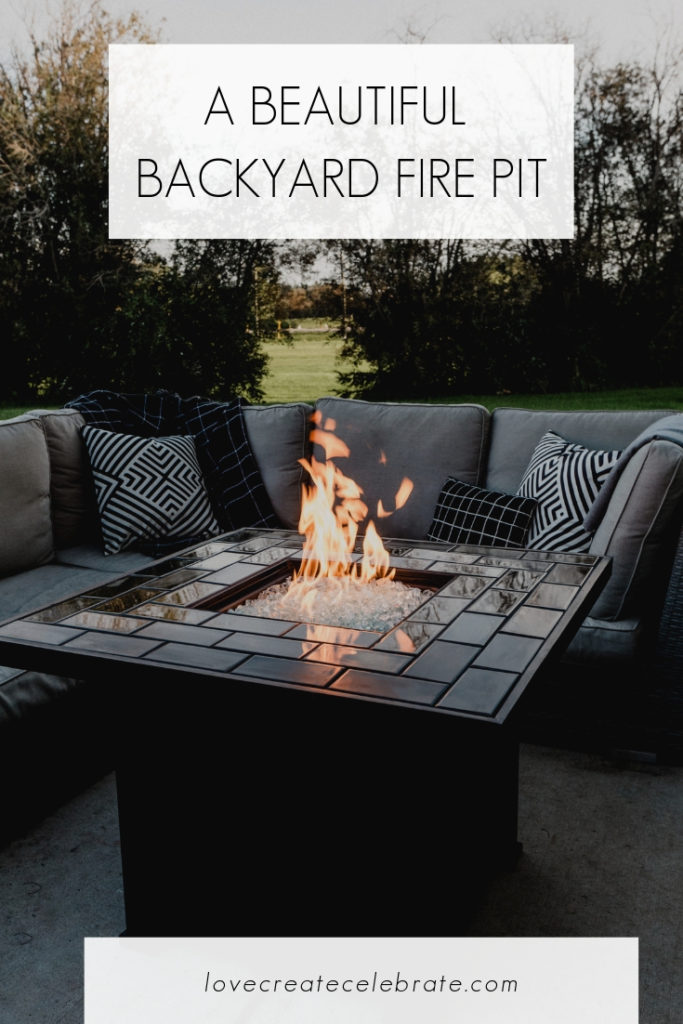
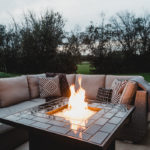
A beautiful DIY fire pit for any outdoor space or backyard oasis! Update an old propane fire table with this easy tutorial!
Buying a fire pit table can get expensive, but we all want one, don’t we?! That’s why when we we found this old fire table for next to nothing, we bought it! We knew that we could make this into a beautiful DIY Fire Pit table for a lot less than buying a nice new modern one.
Weather wise, this has been one of our worst summers. It’s been soooo rainy. Clouds in the sky, kids stuck inside, lawn needing to be mowed every week. We had grand plans for getting some amazing summer projects done, but our weather stopped us from getting most of our plans done.
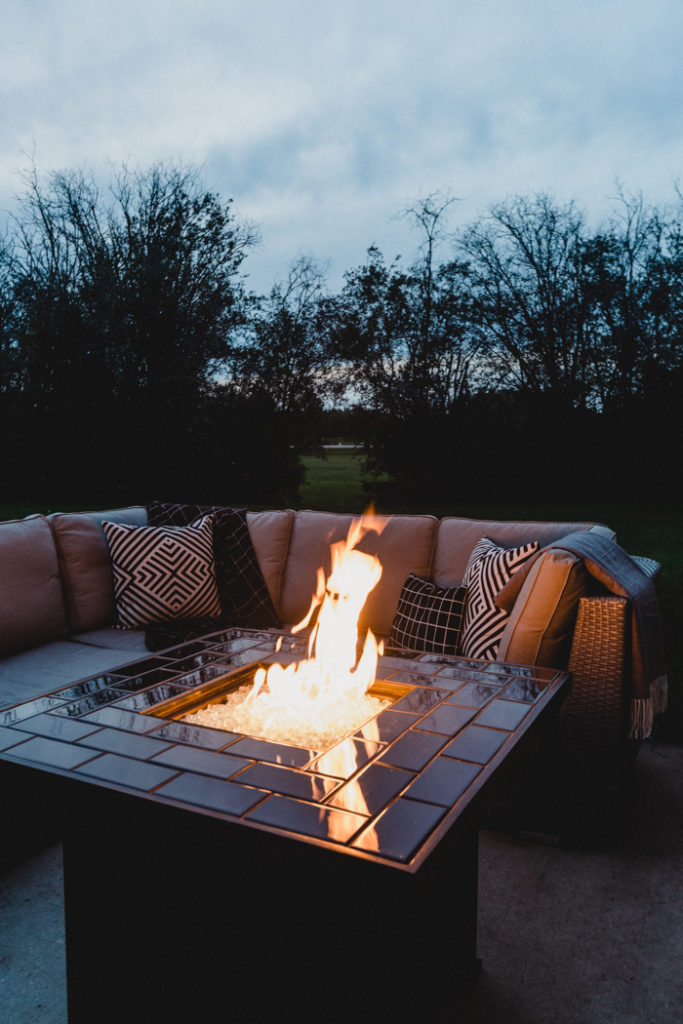
The night that this fire pit was ready was honestly the first night that really felt like summer. It had finally been dry enough for our outdoor cushions to dry off, we poured some wine, and we sat by our outdoor fire, soaking up the evening. You can have a beautiful DIY Fire Pit too – it’s easy, and you won’t regret it!
*This post was sponsored by Jeffrey Court Home Depot. As always, opinions are 100% my own. For more information, please see my disclosure page.*
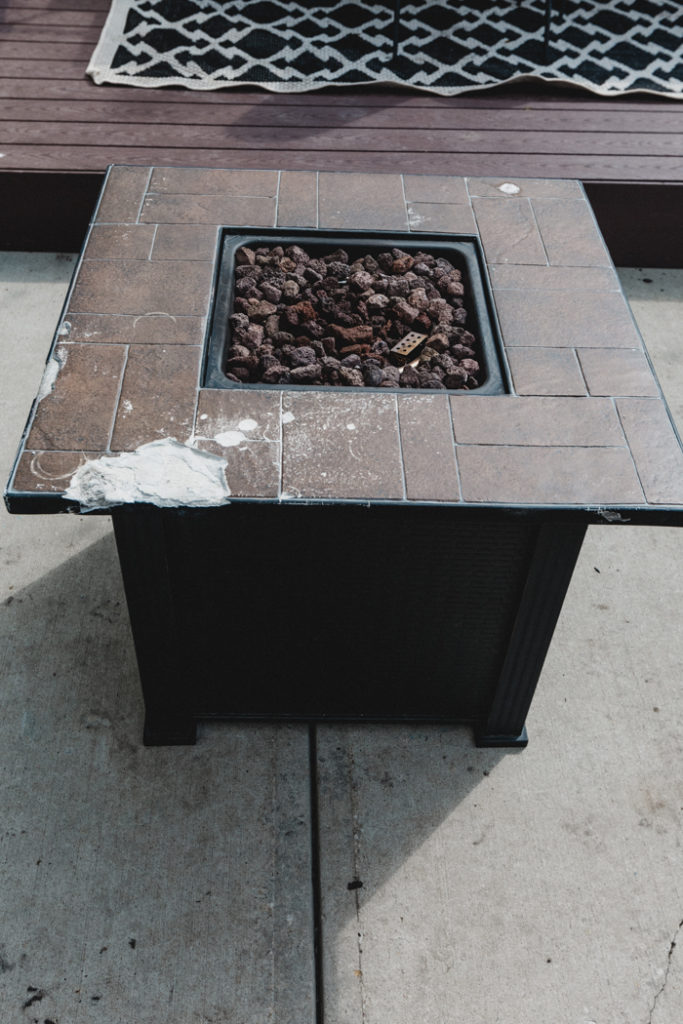
This is the piece that sparked the whole project. If you look, you’ll always find people selling perfectly good things, for a lot less! Especially on Kijiji or Craigslist. This table was in great working order – it just had some damage to the top of it.
When we bought it, we only saw photos online, so we actually thought that the material on top was broken tile. Or plan was to remove and replace the tile. As it turned out, the top was not tile at all, so we came up with a plan B.
Plan B was to tile overtop of the existing fire pit tabletop. All of the “holes” would be filled with thinset as we tiled.
How to Build a Fire Pit Table
If you had the right size of tile, you could easily tile right over the fire table with some edge banding and be done in no time! We had some black tile already that we wanted to use, so we built a frame that would fit the tile exactly, and it was definitely worth the extra effort.
Materials Required
- Old Propane Fire Pit
- Thinset
- Black Tile
- Black Grout
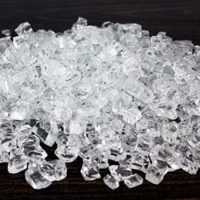
- Clear Fire Glass
- Black Tile Edging
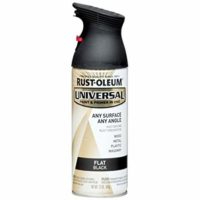
- Black Spray Paint
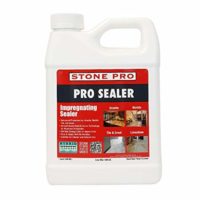
- Tile Sealer
Tools Required
- Trowels for Tiling
- Mitre Saw
- Wet Saw (possibly)
- Drill
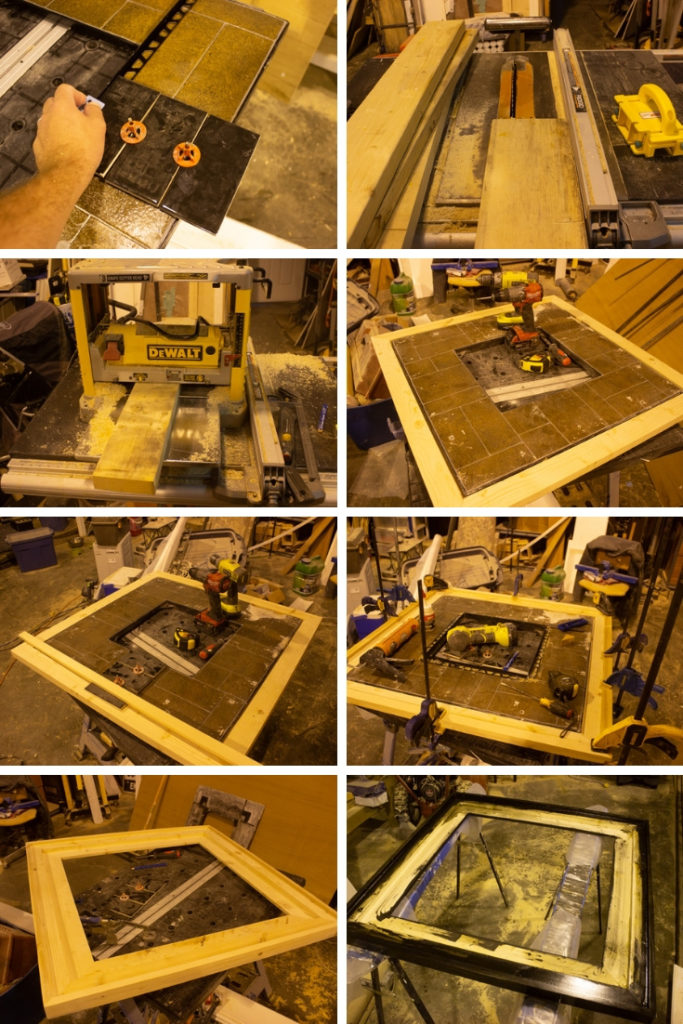
Building a Frame For your DIY Fire Pit
The first thing we did was build a new frame for our fire pit. This step is completely optional. If you look at the first photo in the collage above, you can see that out currently tabletop was not wide enough for three full rows of tiles.
As I said above, you can find tiles that will fit exactly, or you can easily use a wet saw to cut down your tiles too, which will make the transformation that much easier!
For the frame, we cut down 2x4s. We measured the exact width we needed to add a third row of tiles (plus 1/8″ spacing between each tile). If you want your table to be the same width as your tabletop, you can plane the boards down to size with a planer, as we did here. That way we could add tiles across the frame and current tabletop and they would be the same height.
Next, we added an edge to hide any imperfections on the side of the fire pit tabletop, and then we stained the whole frame with a black Ebony stain, and then protected it with a polyeurethane (to protect for outdoor use).
Finally, when we were ready, we used construction adhesive to adhere the tabletop to the frame.
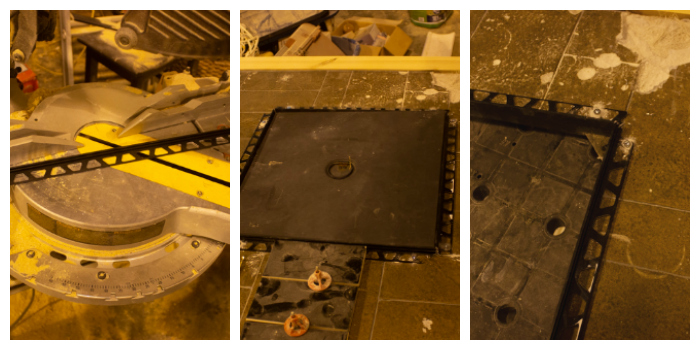
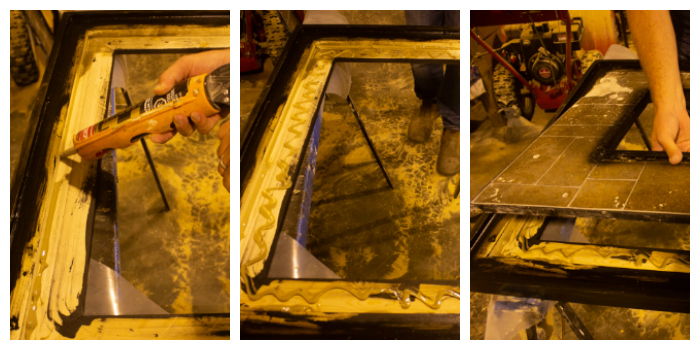
Adding Edging to Your DIY Fire Pit
The way to get the best look on any tile job is to add beautiful edging pieces. You can buy black tile edging at your local tile store or spray paint the colour your store has available.
We bought enough for the inside edge of our DIY fire pit tabletop, and didn’t add it to the outside because we had added the wooden trim edge. But if you are not making a frame, you will also need enough for the outside edge.
Cut your edging to the same length of each of your edges, and cut straight on the inside edges, but make 45 degree mitre cuts on your mitre saw for the outside edge if you need them.
To a dry fit to make sure that your edging pieces all fit, and then use a drill and screw right into the tabletop to hold them in place, or attach thenm with thinset while you are tiling (below).
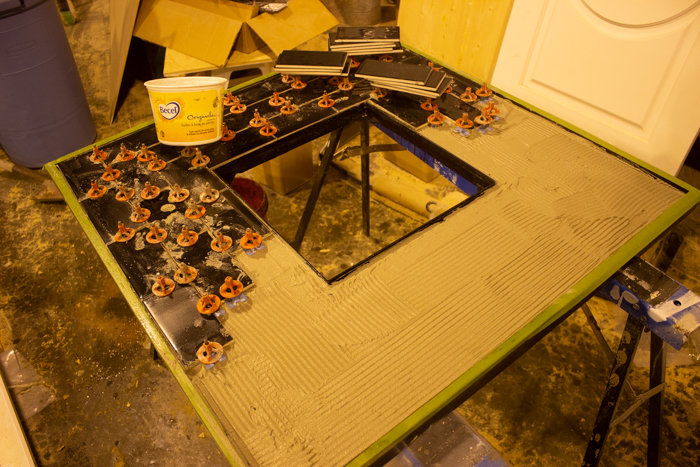
Tiling Your Backyard Fire Table
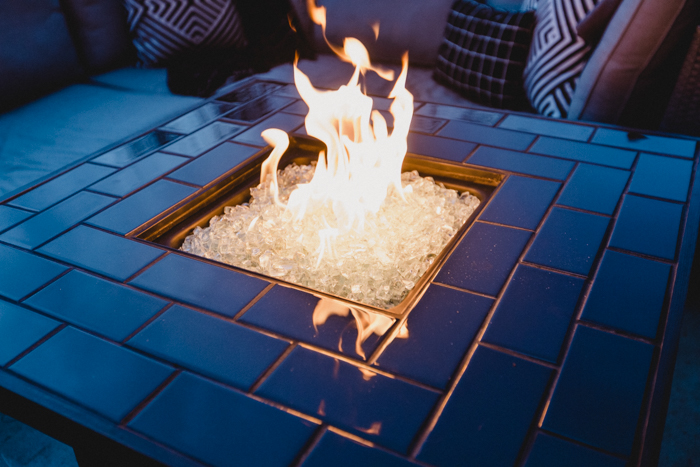
The final step is to tile and grout your table. We used this beautiful glossy black tile for our tabletop, and added a black grout to complete the modern look.
Add thin set to the entire tabletop and to the backs of your tiles as you place them. The glossy tiles can be easily scratched, so use a soft spacer, or be careful not to tighten the tops of your spacers too much or they may scratch your tile surface.
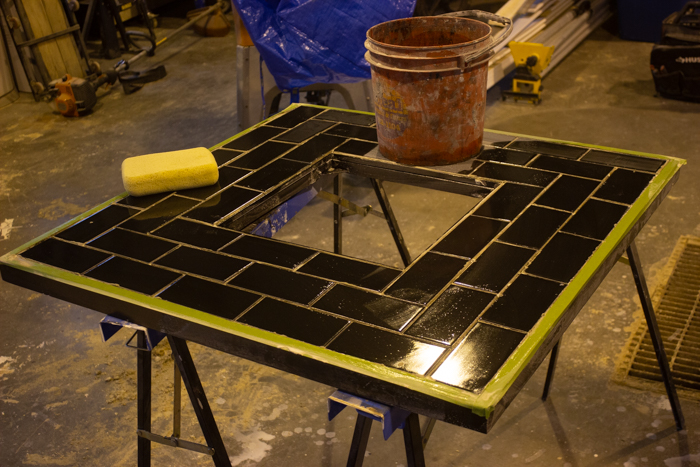
When the entire table is tiled, let it rest for 24 hours so that everything can set properly. The next day, clean the dried thin set off of the surface and then mix your black grout.
Add grout between all of your tiles. Make sure to wipe off your tiles and grout before it sets or it will be very difficult to remove later. There should just be a hazy film of grout left on the tiles when you leave it for the night. You can remove the hazy film the next day.
If you’ve never installed tile before, here’s a good video to show you the basics. You can also watch us to DIY tile installations on our Love Create Celebrate Instagram page (check the highlight bubbles!).
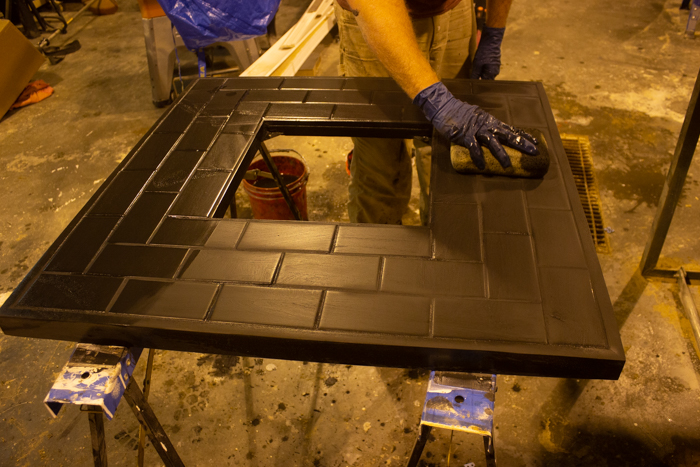
The final step is to seal your tabletop. Since this is going to be an outdoor table, and take a lot of wear and tear, you need to make sure that you protect it properly.
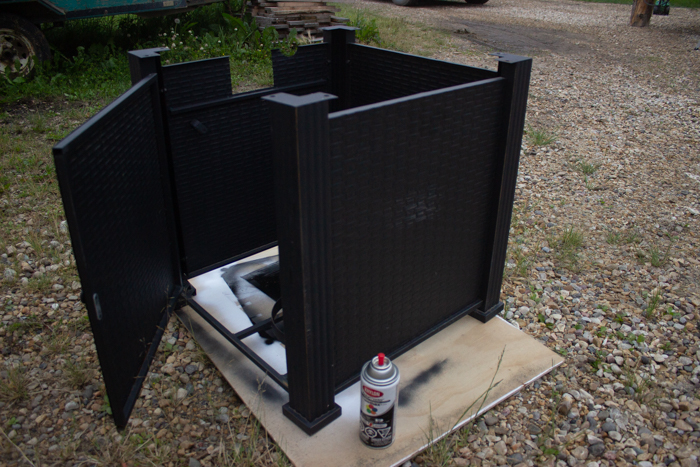
The final step, which you actually can do anytime at all! Is to spray paint your base. Your base may not need to be freshened up. Ours had a bit fo a rustic look to it, with a mix of brown and grey, and I wanted to spray paint it to make it look black, and as fresh as the rest of the fire pit.
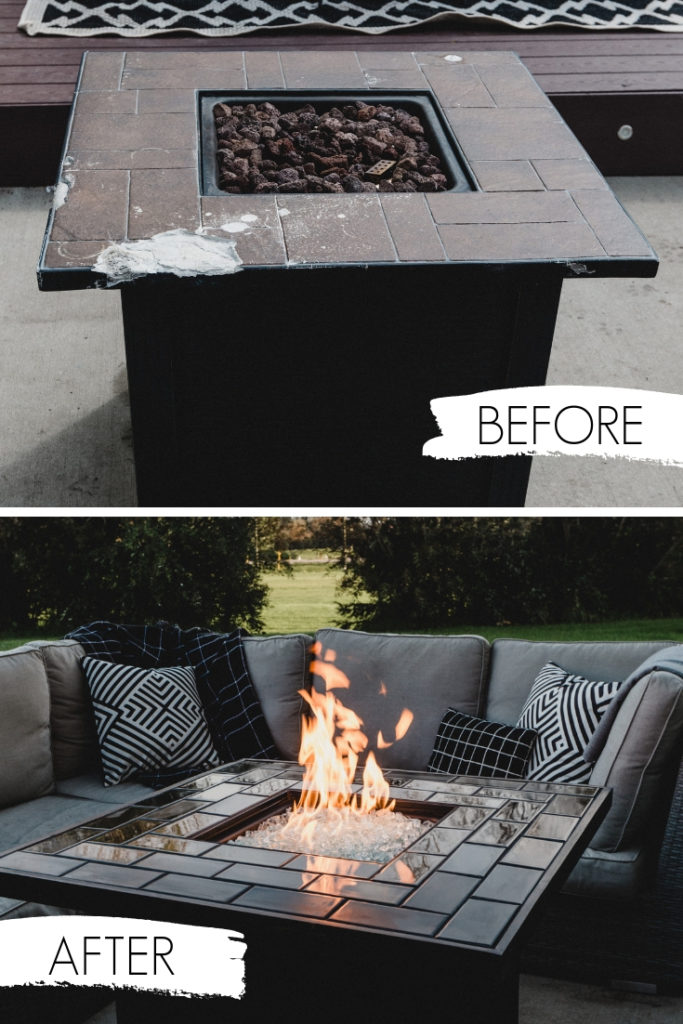
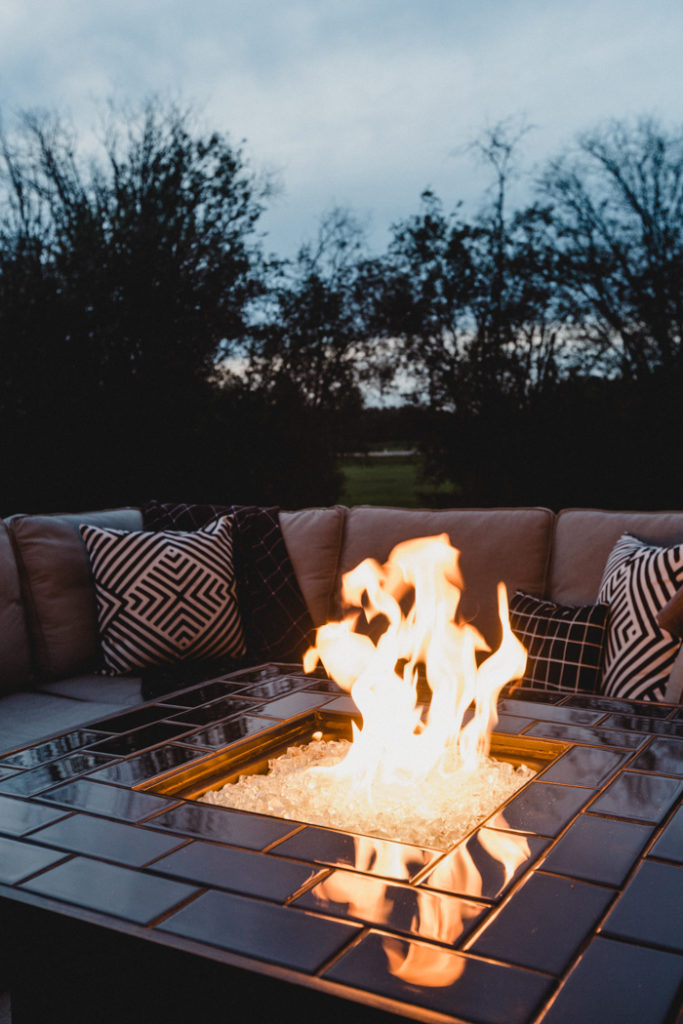
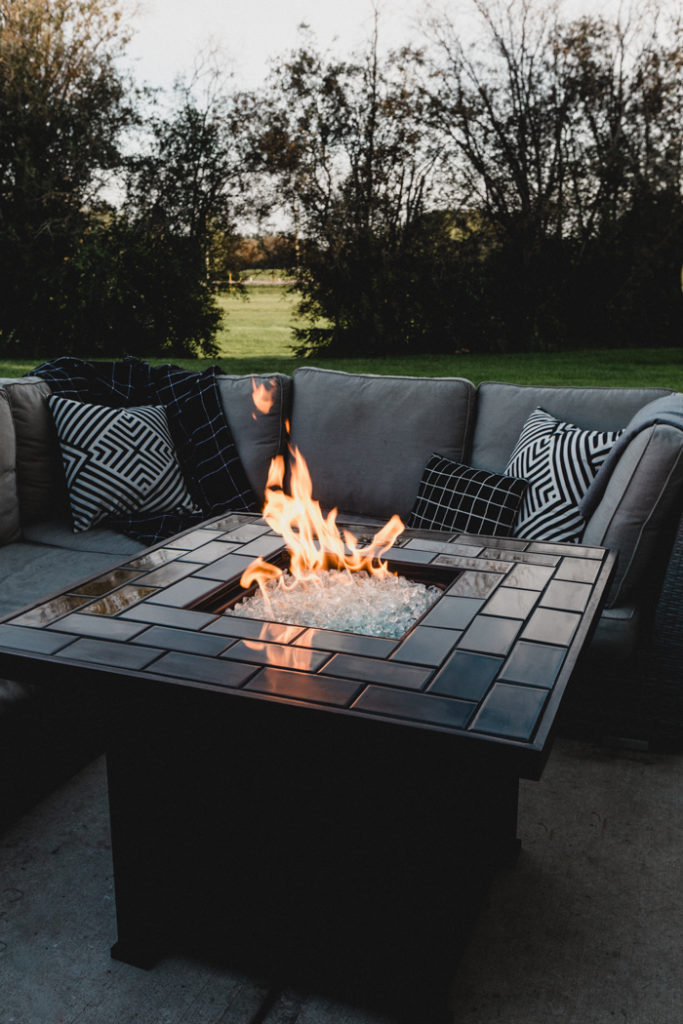
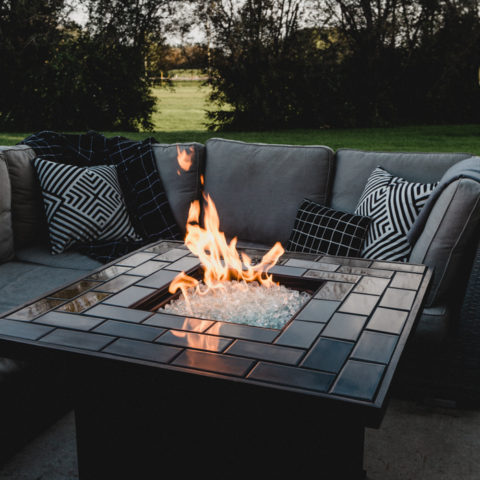
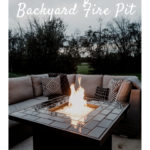
Here is the before and after of the fire pit! when you see them side by side, you can really see the difference that the glossy black tile makes! It reflects the fire so beautifully!
Our Finished Backyard Fire Pit
Bahhhhh!! I could not love this more! I cannot even express how much this simple piece transformed our backyard. The fire pit looked pretty rough when we first got it, and we completely transformed it into something modern & beautiful!

The white glass against the black tile is stunning! I’m so glad that we went with black tile and black grout.
DIY Fire Pit
A beautiful DIY fire pit for any outdoor space or backyard oasis! Update an old propane fire table with this easy tutorial!
Materials
- Old Propane Fire Pit
- Thinset
- Black Tile
- Black Grout
- White Fire Glass
- Black Tile Edging
- Black Spray Paint
- Tile Sealer
Tools
- Trowels for Tiling
- Mitre Saw
- Wet Saw (possibly)
- Drill
Instructions
Start by removing any existing fire rocks/glass, disassembling the fire pit and removing the tabletop from the base so that you can easily work on the piece.
Add Edging
- Cut tile edging with a mitre saw so that it fits on the edges of your fire pit tabletop.
- Use a drill to secure the edging to the table
Tile the Tabletop
- Add tile to the tabletop using thinset.
- Use the wet-saw to cut tiles as needed.
- Allow 24 hours for thinset to set.
- Grout the spaces between the tiles after tiles are set.
- Allow grout to set for 24 hours.
- Seal grout lines (as this will be an outdoor table).
Fix Base
- If your base needs it, you may choose to spray paint the metal with a fresh coat.
Reassemble
- Attach the base of your fire pit to the newly tiled tabletop.
- Test to make sure that they fire pit is still working correctly.
- Add clear fire glass to the centre of the fire pit.
Notes
Re-framing the Fire Pit
As noted in the post above, we re-framed the tabletop before we tiled it so that we would have the look of three full rows of tiles and not have to cut any tiles.
This step was only personal preference, and is not needed for the project to be completed.
Recommended Products
As an Amazon Associate and member of other affiliate programs, I earn from qualifying purchases.
If you’re looking for beautiful outdoor projects, try these Modern Summer Dollar Store DIYs!


Val
Wednesday 14th of April 2021
Great idea!! Love the look. Did you use porcelain tile or ceramic tiles? I want to resurface my fire table which deteriorated this past winter. I heard that porcelain should be used for exterior projects because frost won't penetrate it, but I'm having trouble finding the right color/size so I don't have to do any cutting. Mosaic tiles seem to be the way to go at this point. Also, could I just use landscape glue to glue down the tiles instead of thinset and then grout the tiles? Thanks for your article.
Lindi
Saturday 17th of April 2021
Hey! Our tiles were ceramic and they have held up really well! If you use an epoxy grout, they are better at keeping everything sealed and should protect your tiles, etc. I think you could use the landscape glue, but you need to make sure you don't have any air pockets, because that's where water can seep in and pop off your tile.
Jamie
Saturday 27th of March 2021
Your firepit looks gorgeous! Changing out the top and making the surface bigger is exactly what I want to do. I have some leftover cement tiles that would be perfect for the project. Can you explain how you resized the firepit top? I have one that I'm ready to refresh and I want to make it about 6" bigger all around. How did you attach the 2x4's to the existing frame? Did you fill in the extra space with tileboard or did you use something else? This will be my springtime project so I'm excited to get started. Any info/help you have is appreciated. Thank you!
Lindi
Tuesday 13th of April 2021
We made a boarded trim and attached it to the existing frame, but we only added a inch or two including the edge trim. Six inches might be a bit much for the weight of the tile, unless you are adding in some structure somehow as well. For example if you tried to lift it on those edges if may not hold without more structure. Maybe you can remove a row of tiles so it will fit better? Hope that helps!
Rob
Monday 22nd of March 2021
Curious how this is holding up a year and a half later. I’m looking to do the same thing, love the look of yours! Did the heat mess with the thinset at all? Or the grout?
Thanks! Rob
Lindi
Monday 22nd of March 2021
Hey! It's holding up really well actually! The only thing that we noted was a bit of cracking on the wood trim on the outside. Just make sure you use an outdoor glue, cause we weren't 100% sure that we did. The thinset and grout looks great still.
Zara
Wednesday 13th of January 2021
Do you happen to know the name of your outdoor couch? We have been searching high and low for something just like it!
Lindi
Wednesday 13th of January 2021
I don't have a name unfortunately :( We bought it at Costco years ago!
Kristen C
Sunday 3rd of May 2020
Where is your outdoor furniture from? Any recommendations for quantity and reasonable price.
Lindi
Sunday 3rd of May 2020
The couch in this photo is from Costco actually and the quality is amazing! We've had it for five years and it still looks new! We also have outdoor dining furniture from Article that we love :)