
Want to create your own custom wood signs for the holidays? Follow these steps to create your own, reversible autumn wood signs and holiday wood signs.
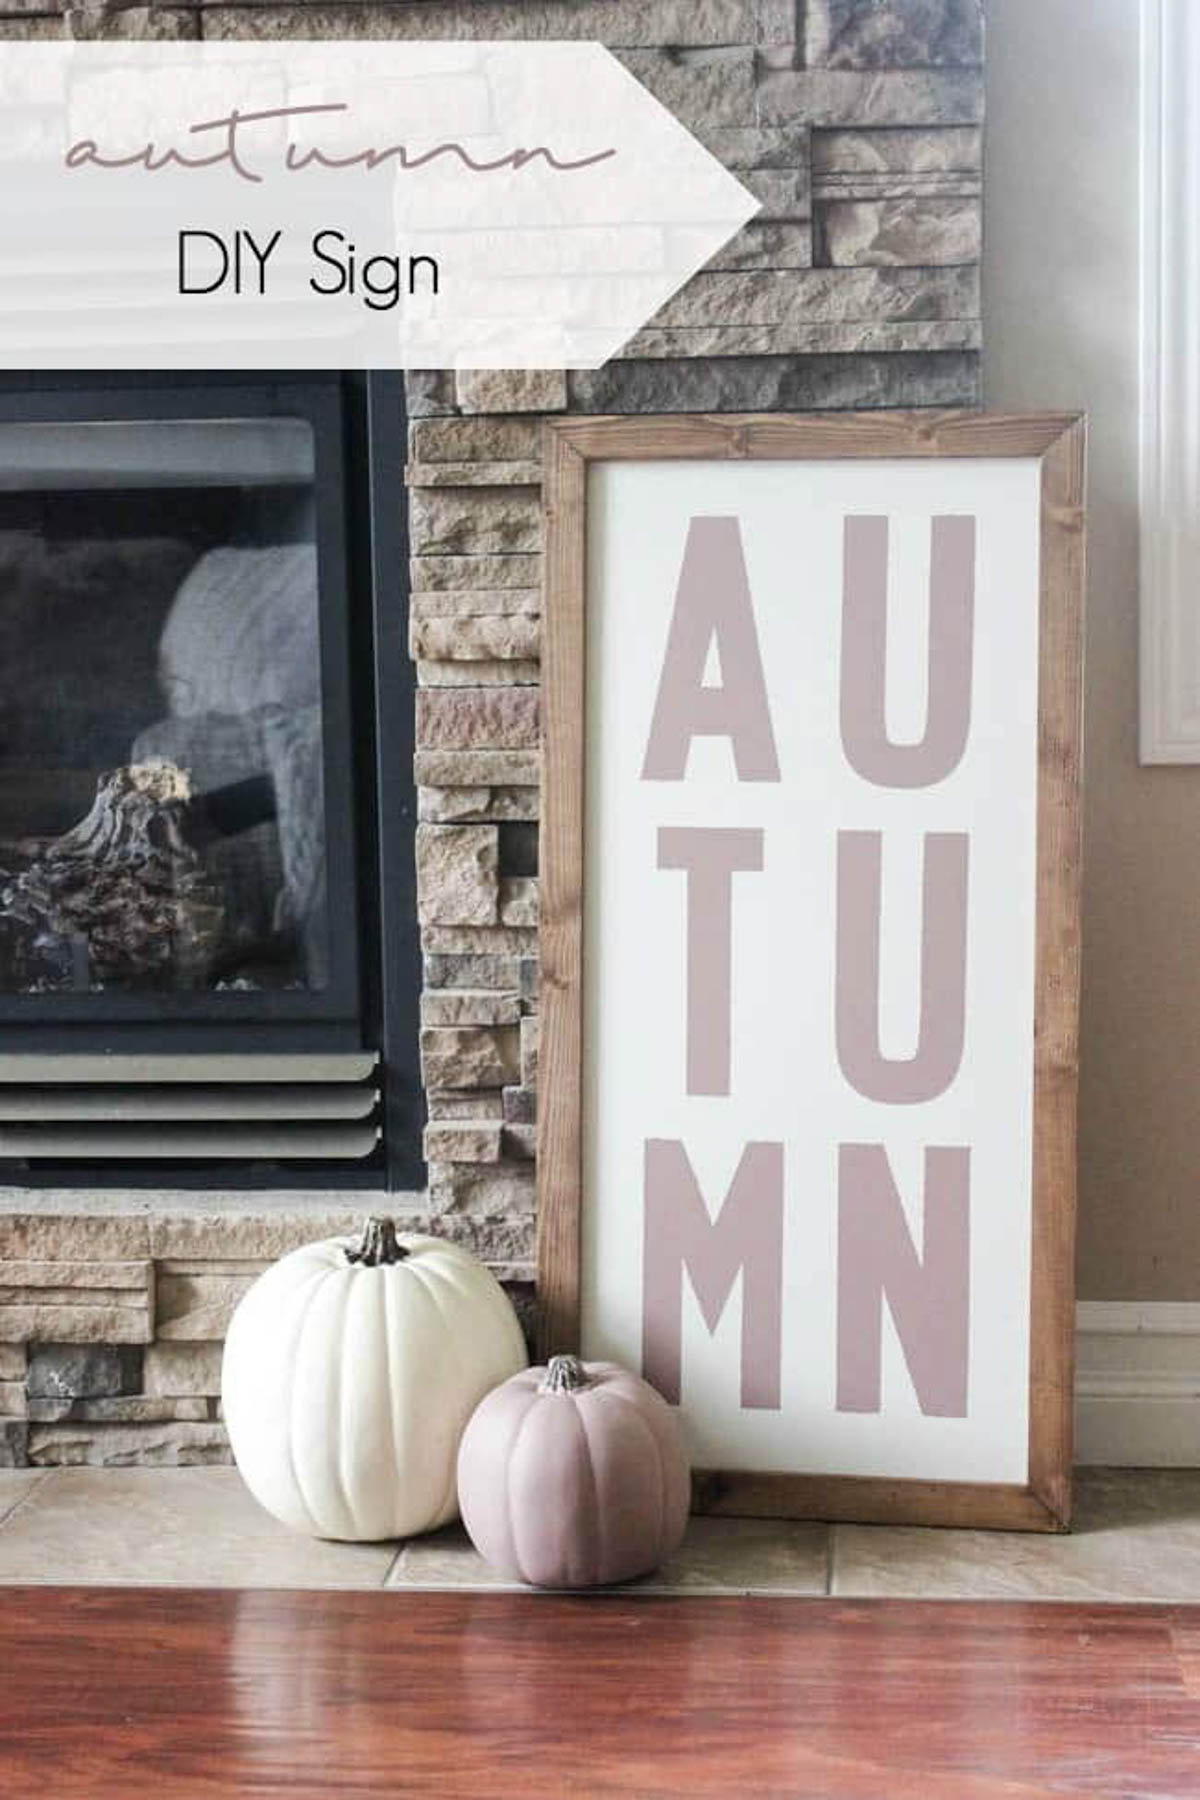
You know when you have those awkward spots in your home that you just can’t seem to find the right decorations for? My fireplace is one of those awkward spots that I was struggling to style nicely. There is a fairly thin space of brick on either side, and a window on either side of that. I was struggling with how to decorate so that I would bring visual interest to the base of my fireplace during the holidays and nothing I had in my decor stash that worked.
I scoured stores too, but nothing seemed to fit the space. So I decided that I would make my own custom wood signs. Since I made these Autumn wood signs last year, I have had countless e-mails asking me to share the tutorial— the day has come at last! Lol.
*This post may contain affiliate links for your convenience. For more information, please read my disclosure policy*
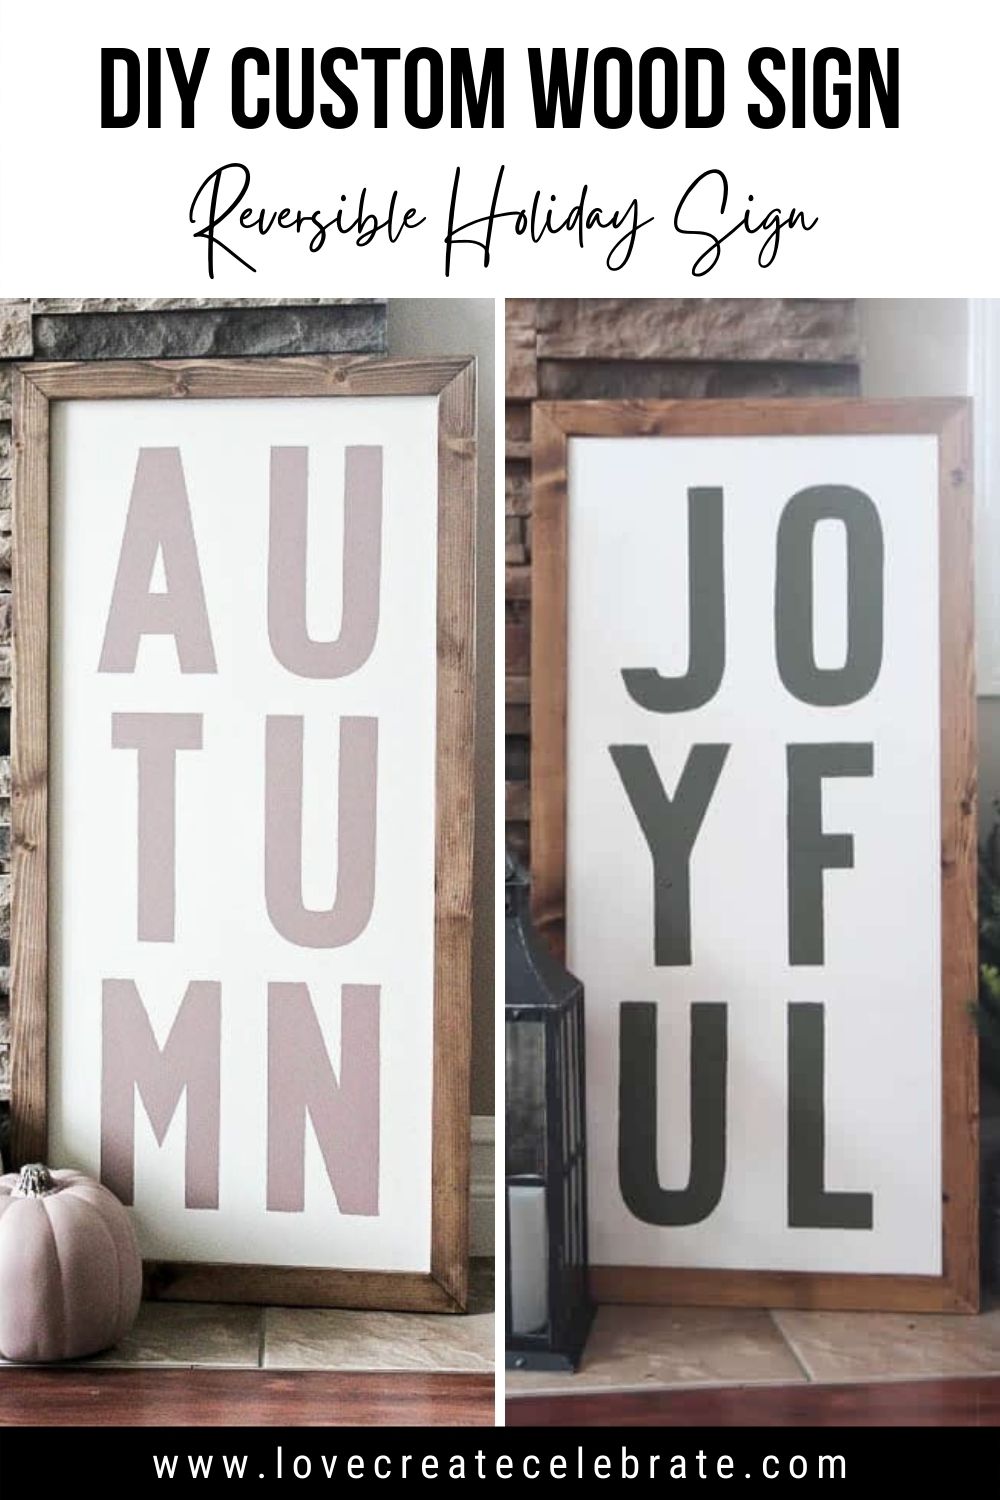
The real genius of these DIY autumn signs are that they are reversible. We made the frame in such a way that you can decorate either side of the sign without either side looking like a “back”. Most of the time, when you make signs like these, you’re only showing one side at a time anyway, and now you only have to store one seasonal sign instead of two!
How to make your own Custom Wood Signs?
If you have some basic woodworking skills and a Cricut machine of any type you can easily make these signs! You don’t even need a Cricut machine, if you are good with a paint brush or have the right stencils!
Here’s everything you need to make your own reversible autumn wood signs:
Materials
Paint (I used Fusion Mineral Paint)
1/4″ Plywood
3/4″ Pine board
Wood glue
Vinyl
Tools
Saw
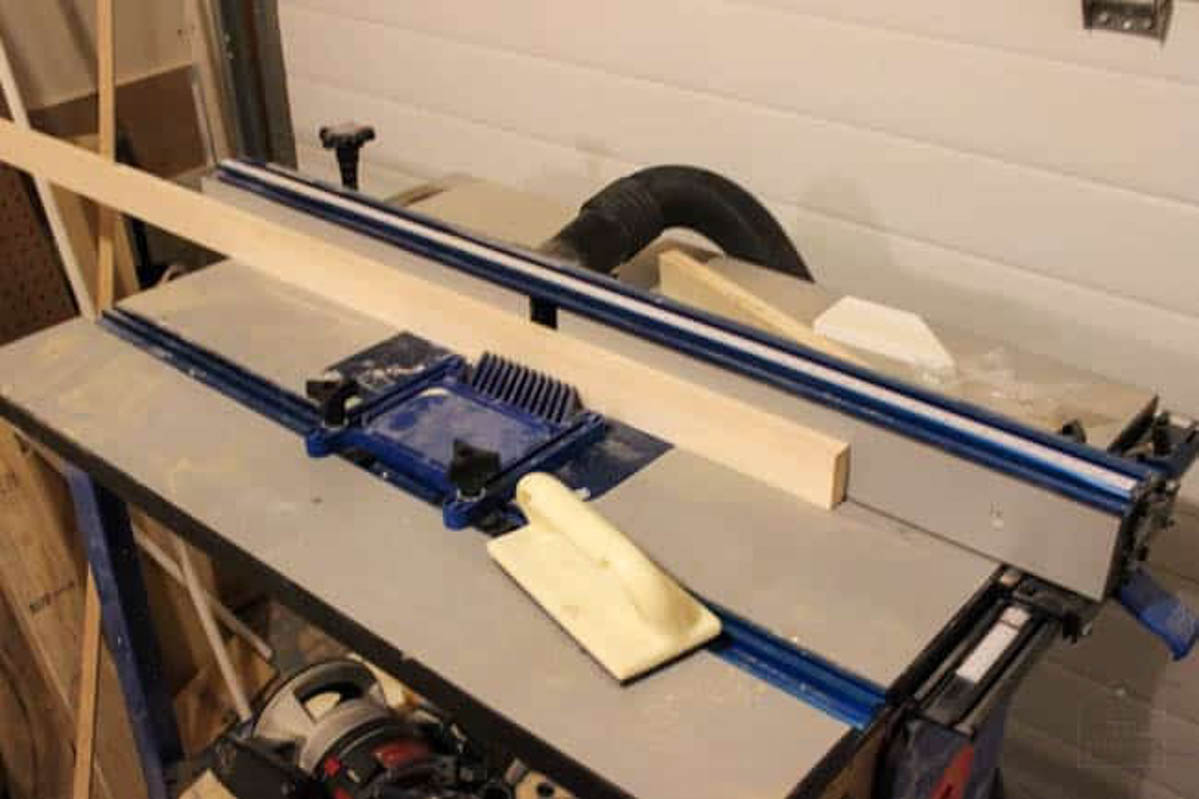
Router Table or Table Saw (if you want a reversible frame)
Nail gun
Dimensions
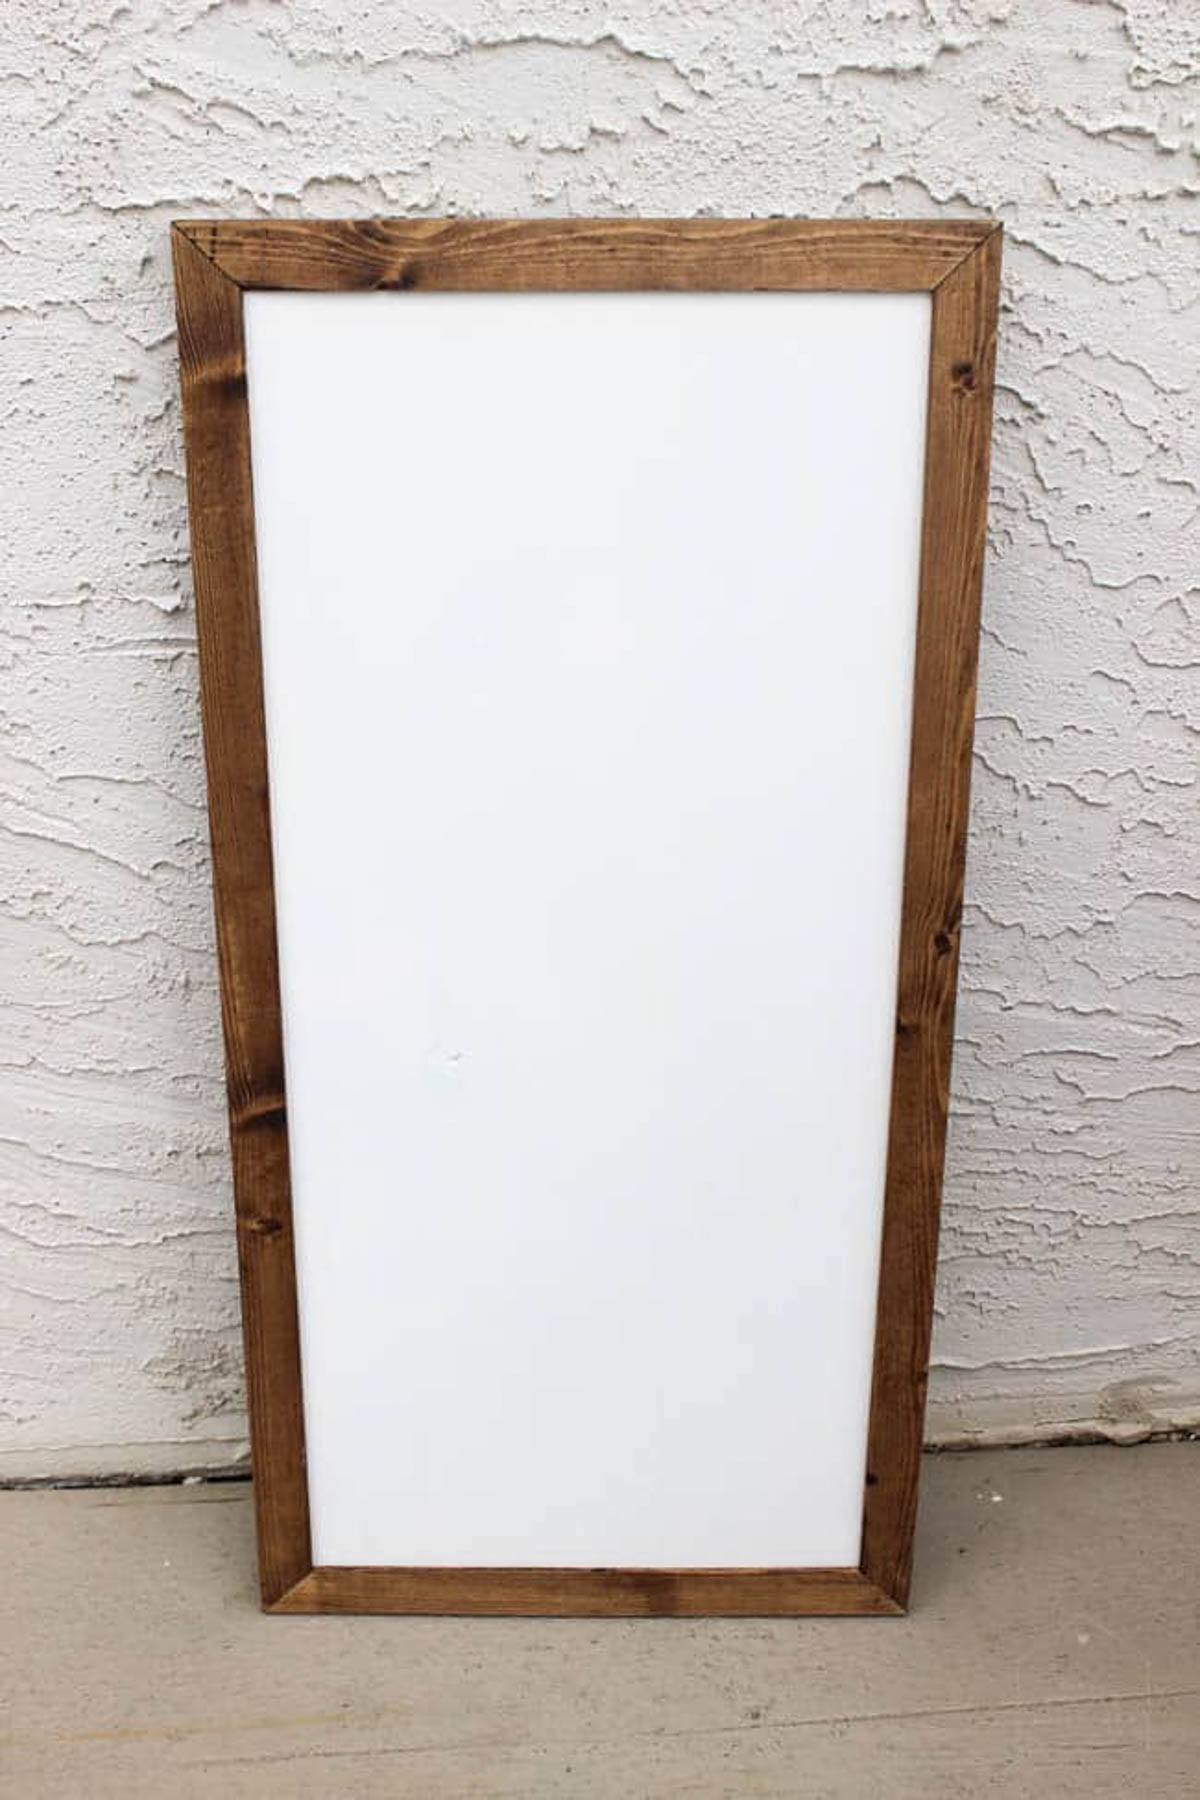
The overall dimensions for the plywood board are 14″ by 30″, with the frame on, it was 15.5″ by 31.5″.
If you want to make your frame reversible, you need a table saw or a router table. For ours, we used our router table, which is easier, and what we would recommend if you have that option. You need to use your saw to cut your frame pieces into the proper length and width for your sign. Ours were 1.5″ wide x 3/4″ thick.
Once you have your frame pieces cut, use your router table to cut a 1/4″ groove in the centre of the frame, leaving a 1/4″ of wood frame on either side.
[Note: depending on how you are joining your frame, you may not want to router through the ends or the seams could show when you attach them! We mitered our corners so it was fine for us to go all the way through]
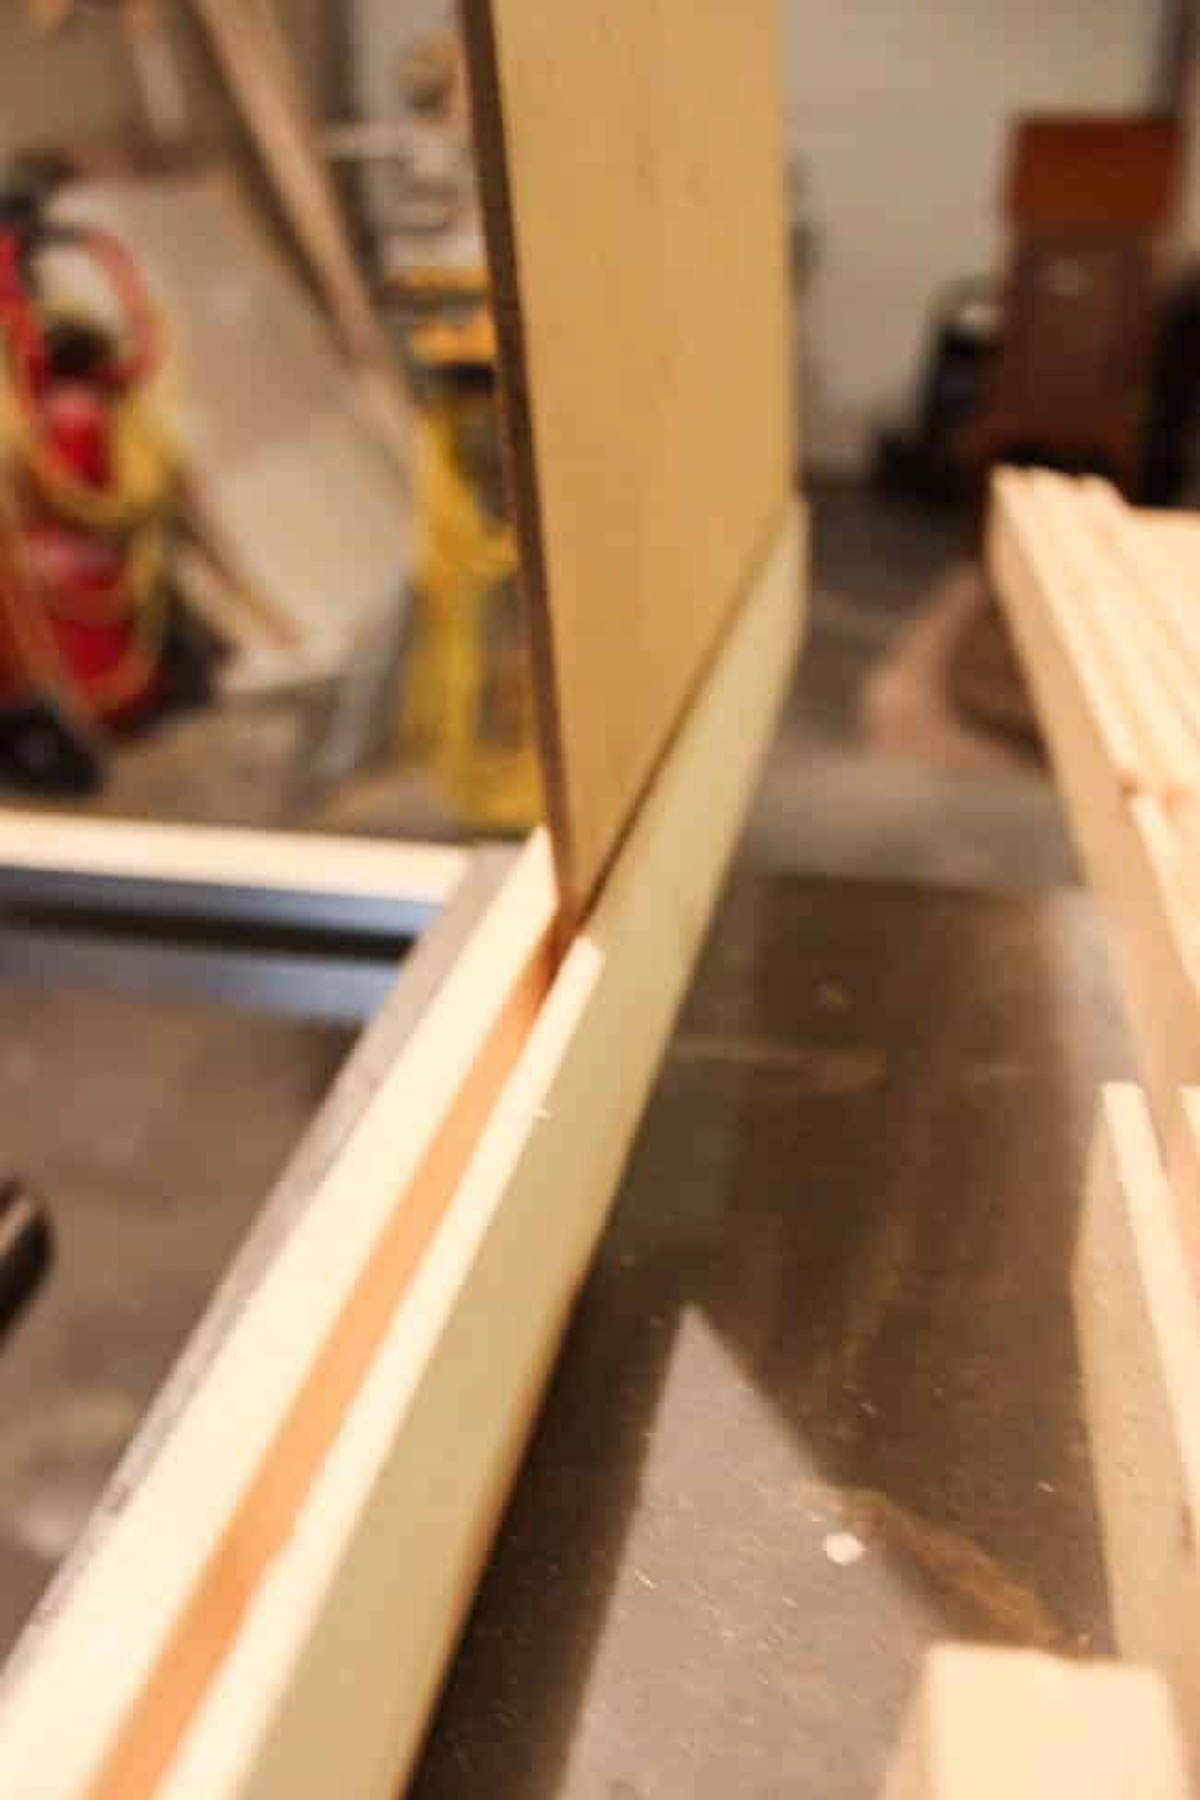
Your plywood should slide snuggly into the new frame you’ve made.

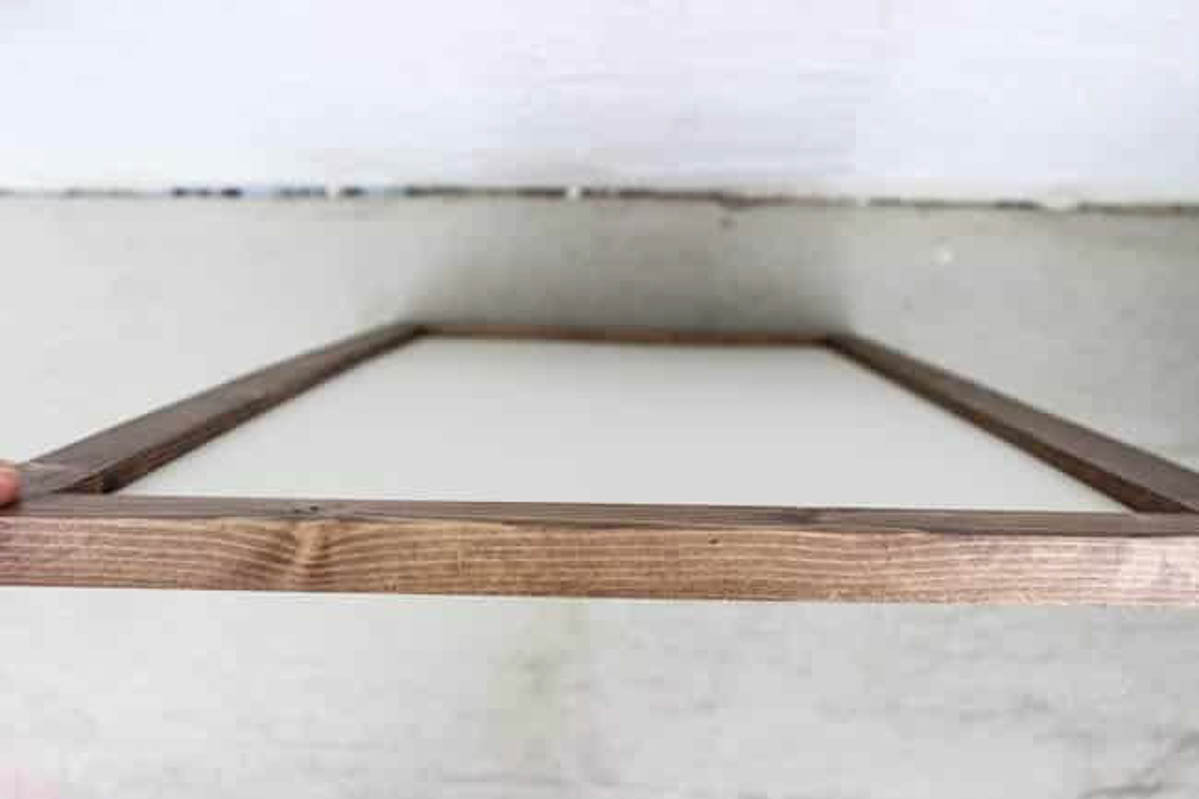
If you have mitered all of your edges like we did (meaning we cut all 45 degree cuts in the corners), then you should be able to fit your plywood board right inside of the frame.
Once you know that everything is aligned and fits well, use wood glue to attach your frame, and a nail gun to nail all of your frame pieces together.
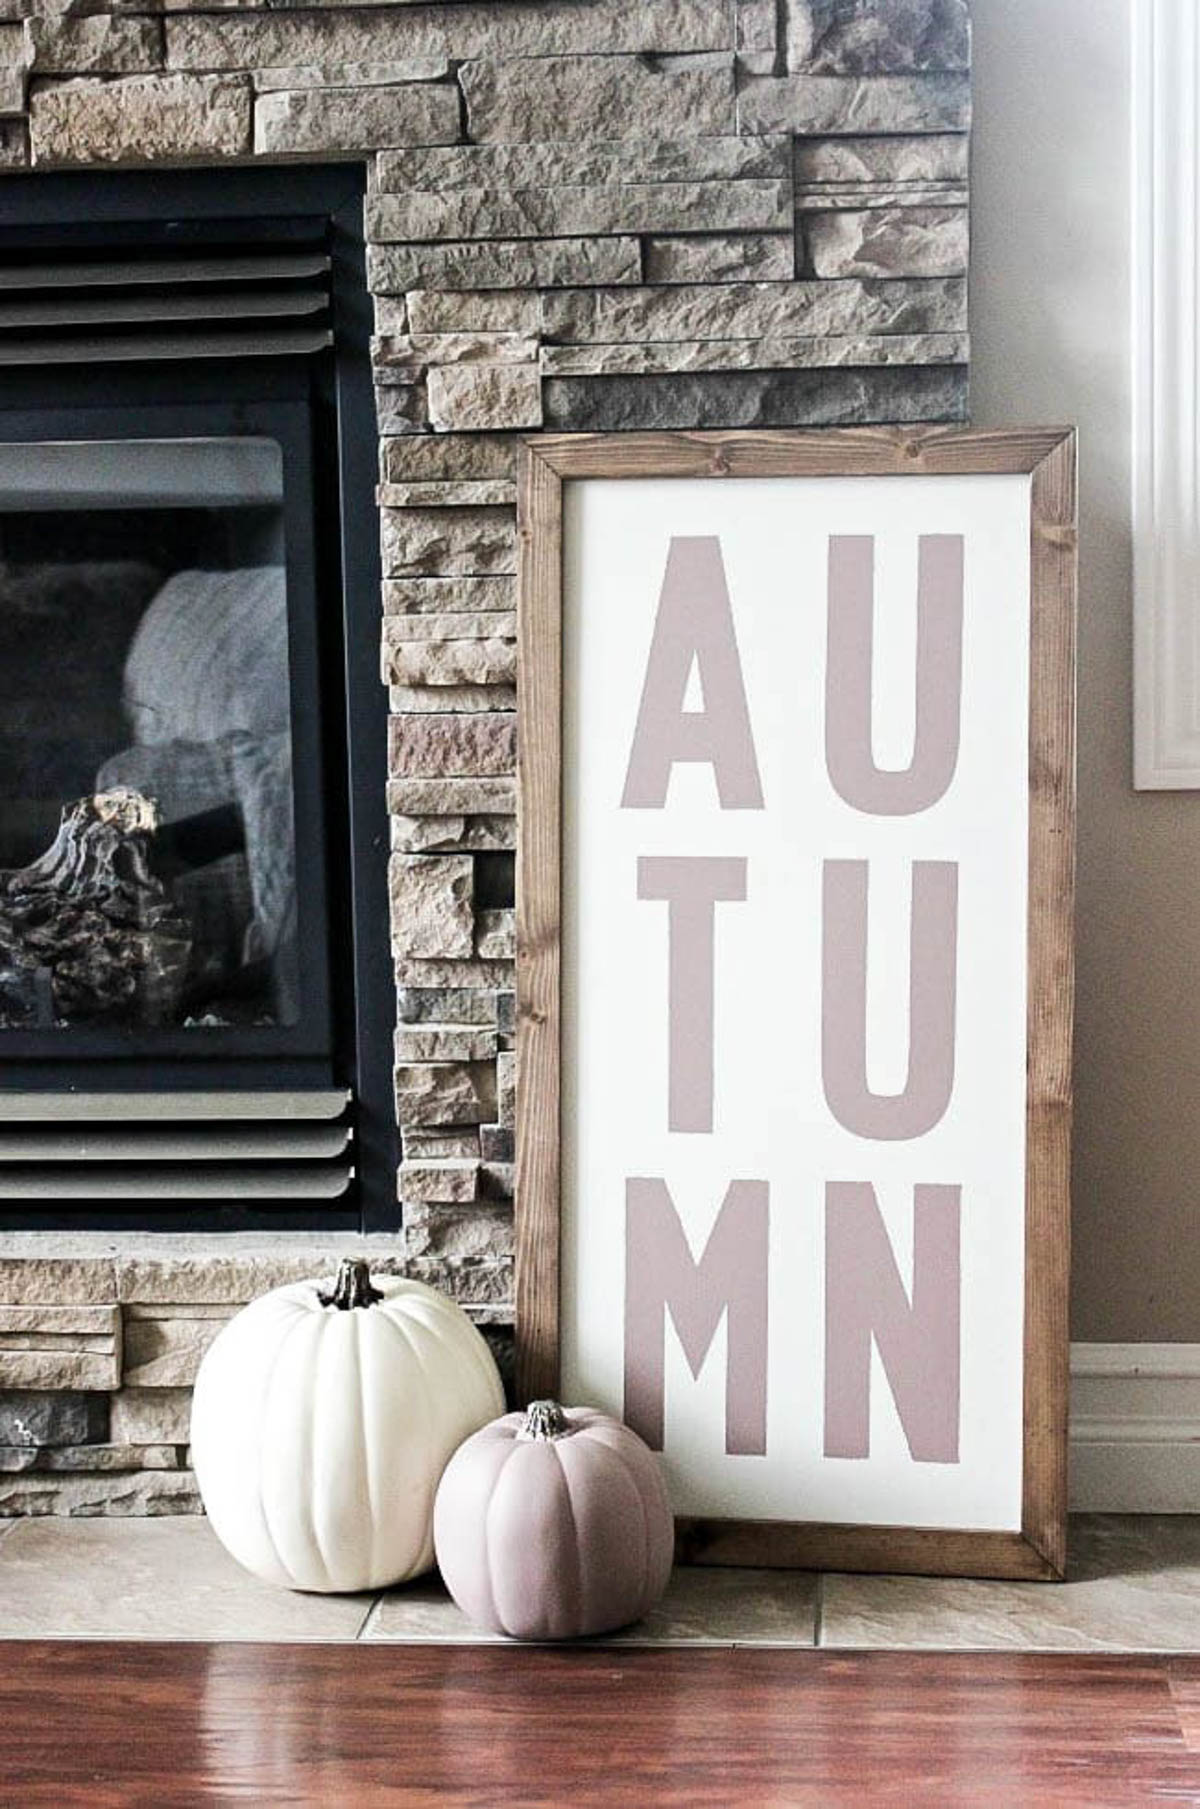
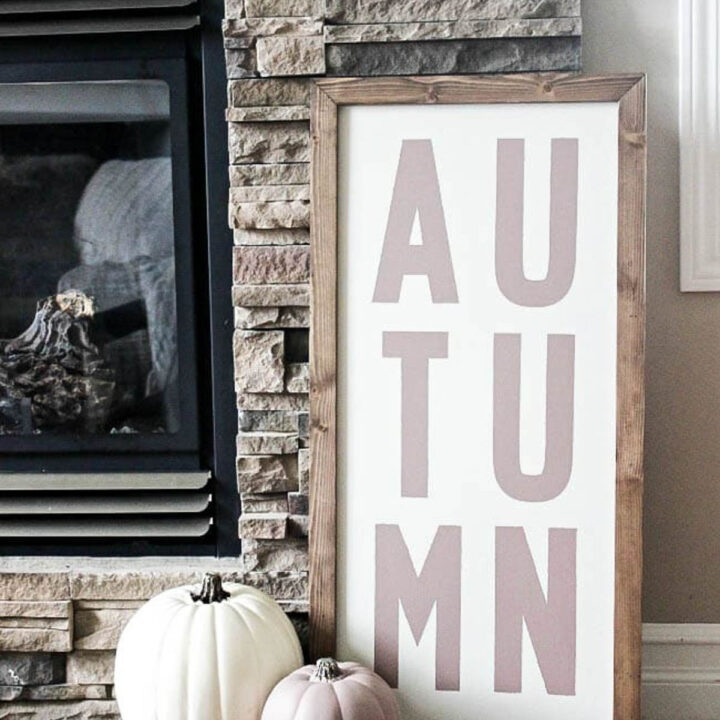
Paint your background and stain your wood in whatever colour you chose. I used Fusion Mineral Paint on my plywood. I painted one side in Casement and one side in Raw Silk.
Adding the Custom Lettering
The next step is to paint your letters on! You can print and cut your own letters, or you can use your Cricut Cutting Machine to cut your stencils onto vinyl, with my FREE cut file here (you are also agreeing to our Privacy Policy):
[P.S. Here are some other great things the Cricut Machine can do!]
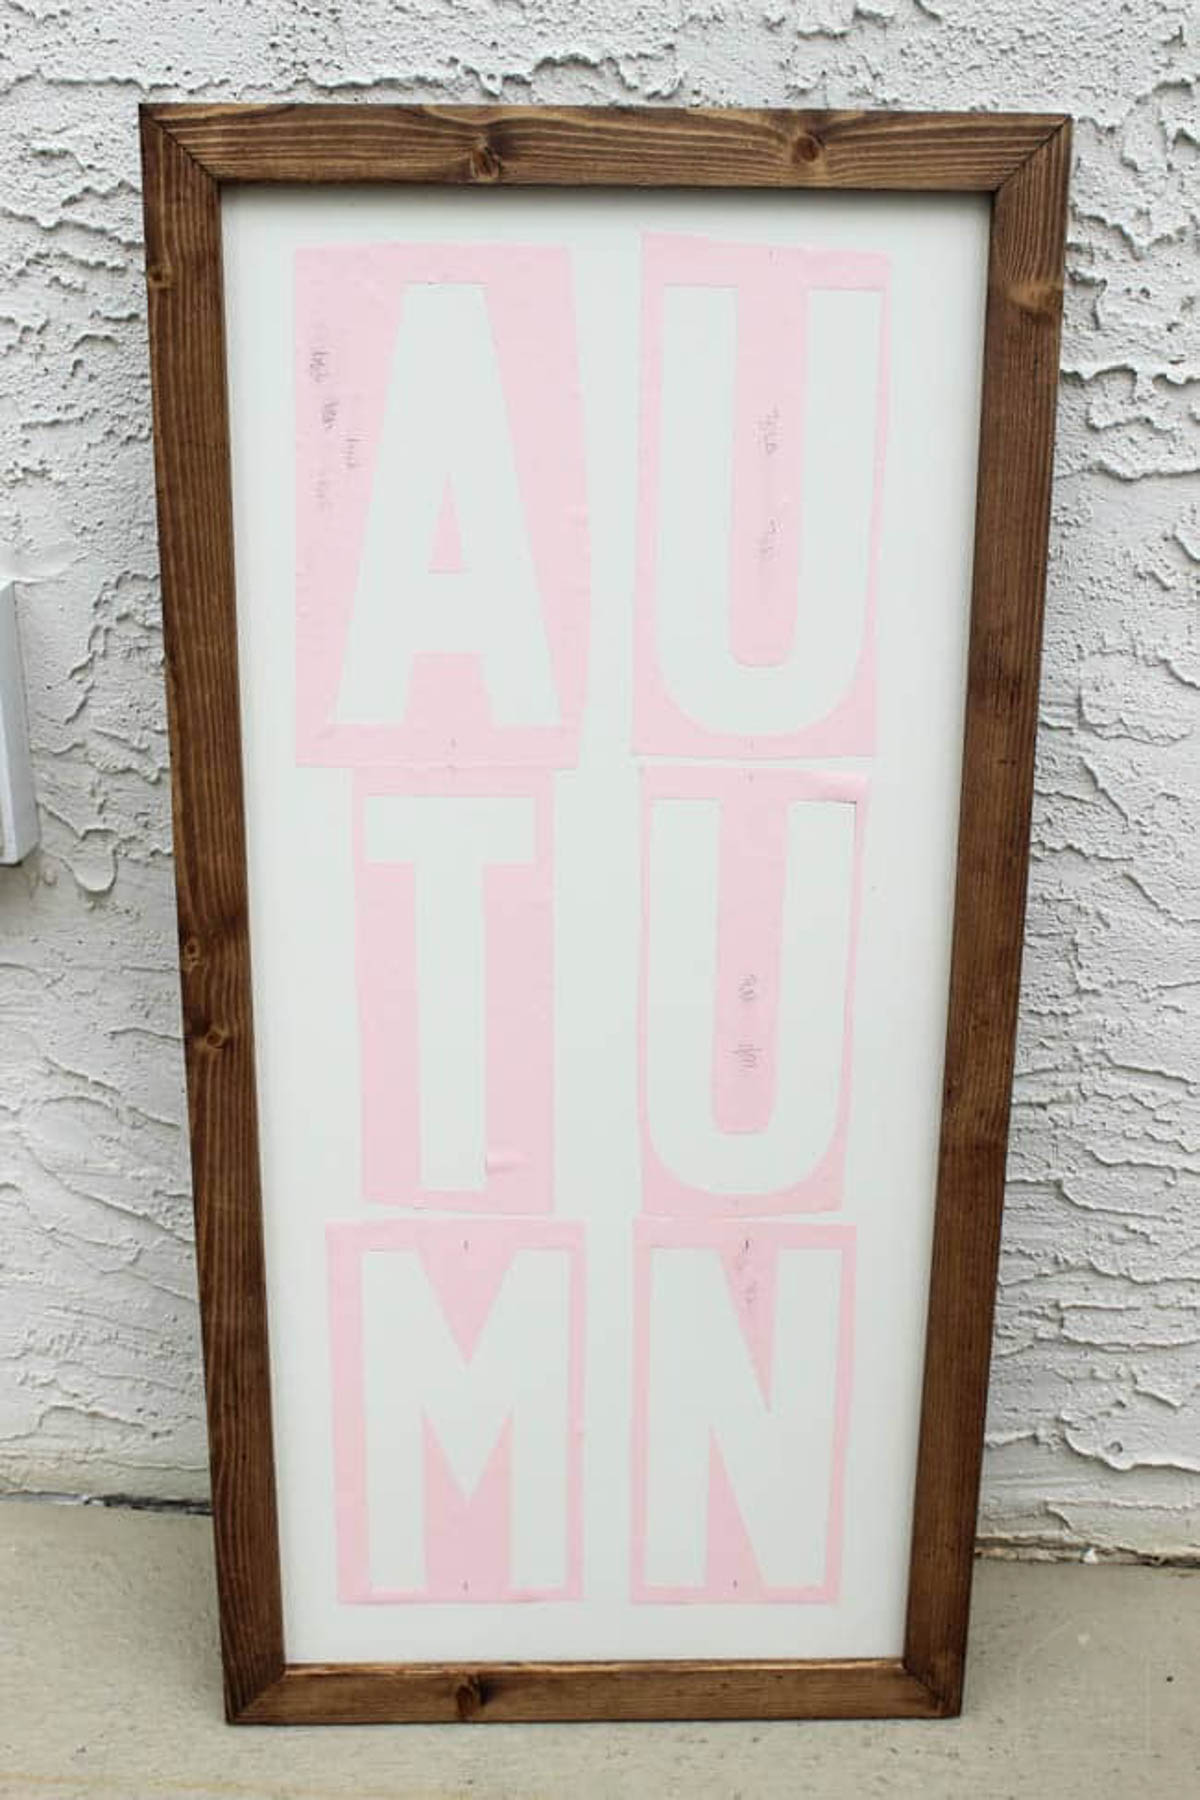
Once you have your letters cut out of vinyl, use a measuring tape or a ruler to find the center points and approximate where you want your letters to sit.
I was pretty obsessive about getting my pieces in the right places, so it took me a little while to line everything up properly! I wanted equal spacing between every letter, and wrote out some math equations on the vinyl while I was working to make sure I was getting it right, but it was totally worth the extra effort.
Once the vinyl is in place, use a foam brush with a small amount of paint on it to fill in the letters. Make sure to dab around the vinyl edges first so that the paint doesn’t seep under the vinyl, and to help secure the vinyl to the wood before you paint the rest of the letters. You will likely need a couple of coats. That beautiful soft pink I used? It was called Damask by Fusion Mineral Paint.
Our Finished Autumn Wood Signs
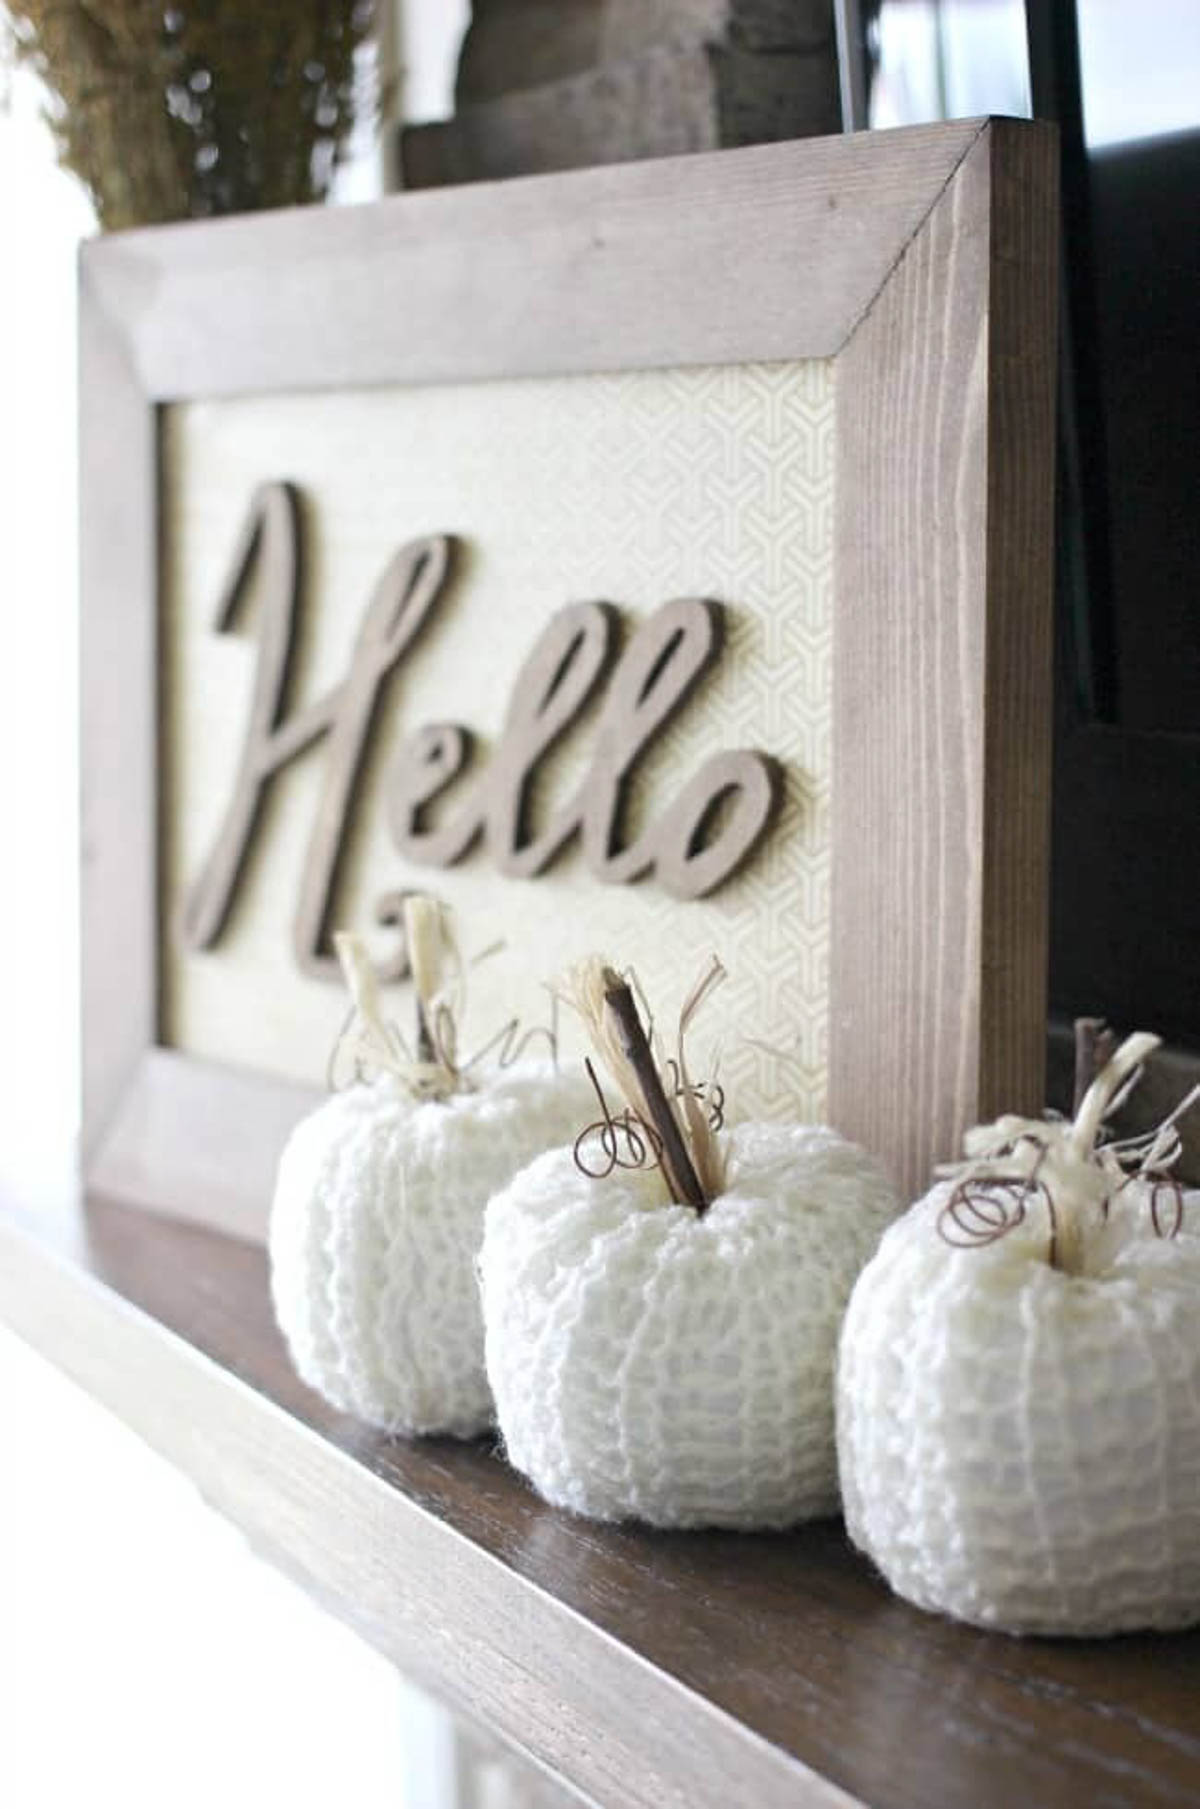
I was so happy with the wood signs when they were done! Doesn’t the sign look amazing when surrounded by all of the beautiful fall decor? I love the height that it brings!
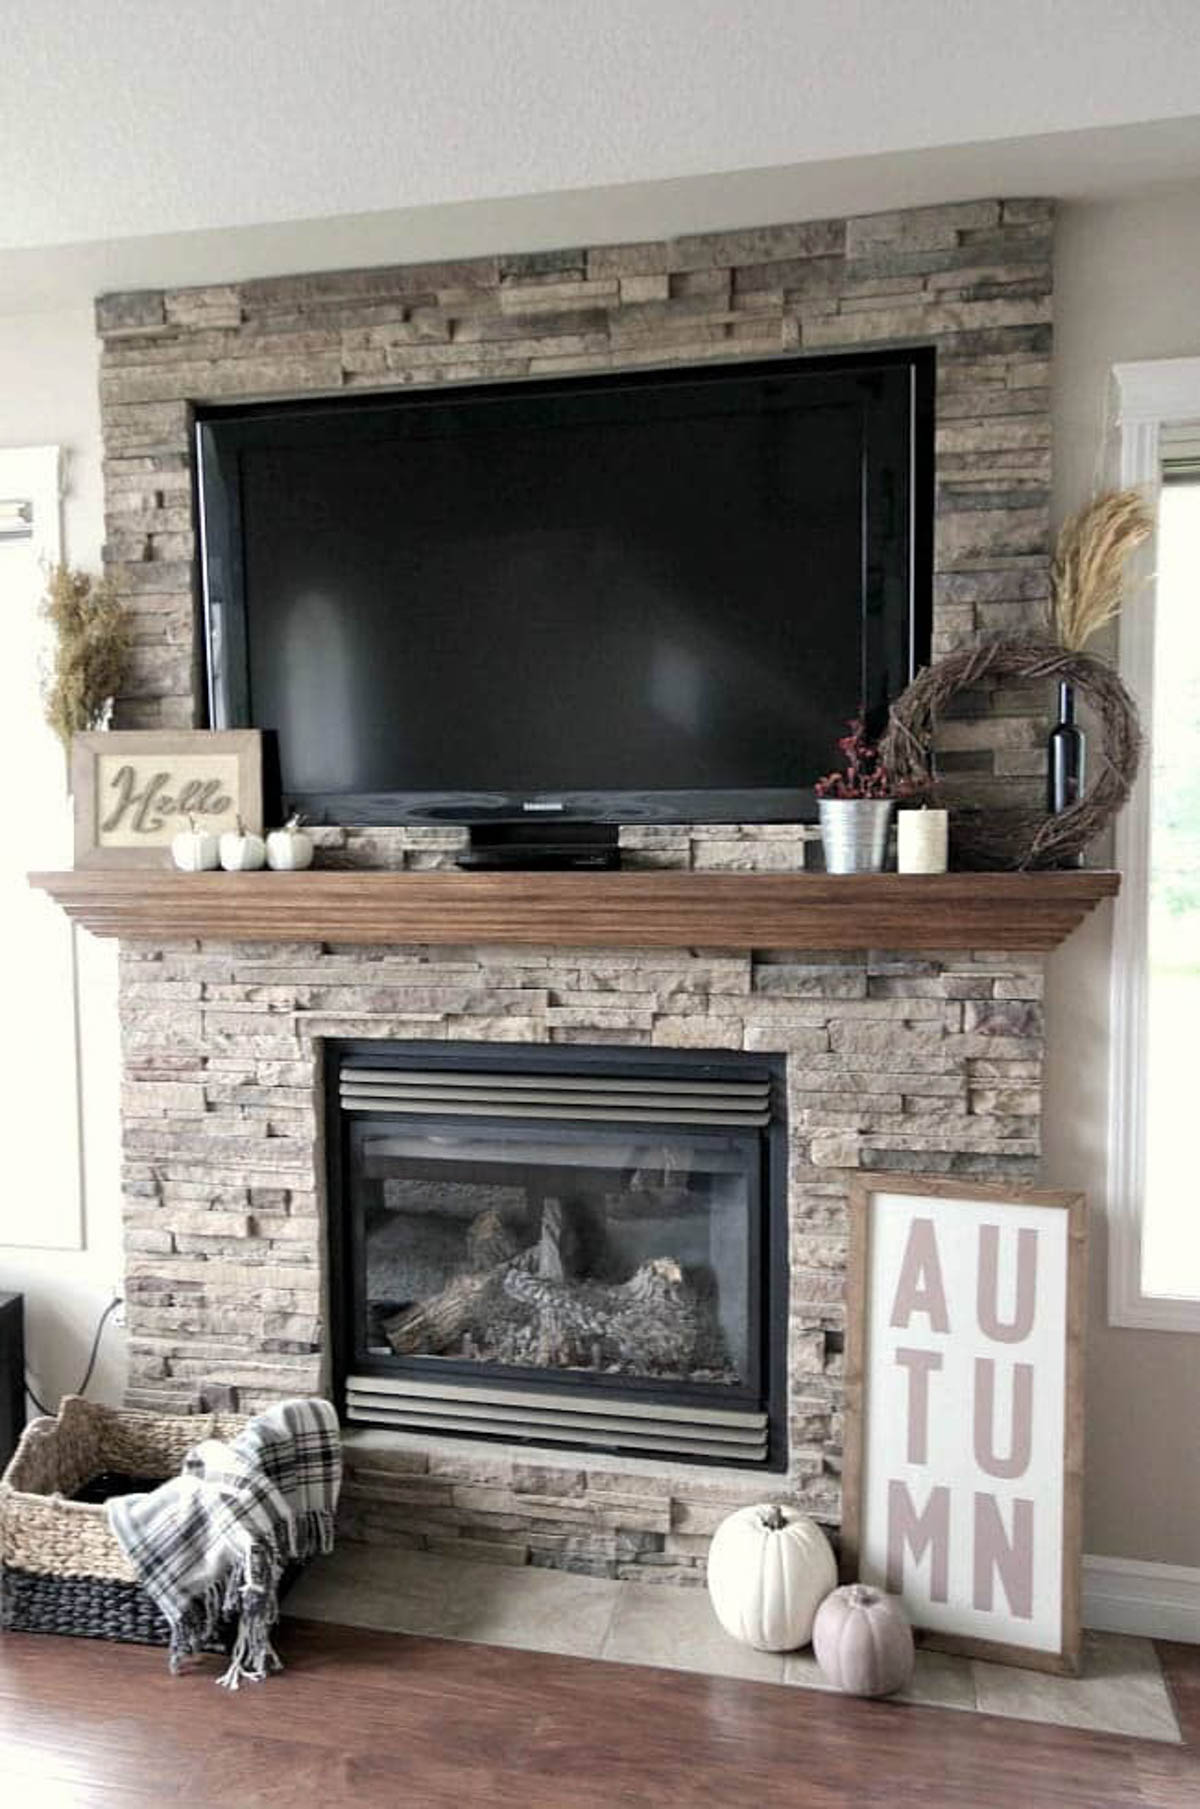
I’m also extremely glad that I decided to go with the soft pink colour for fall. It’s such an unusual choice for autumn, but it looks perfect next to our brick fireplace.
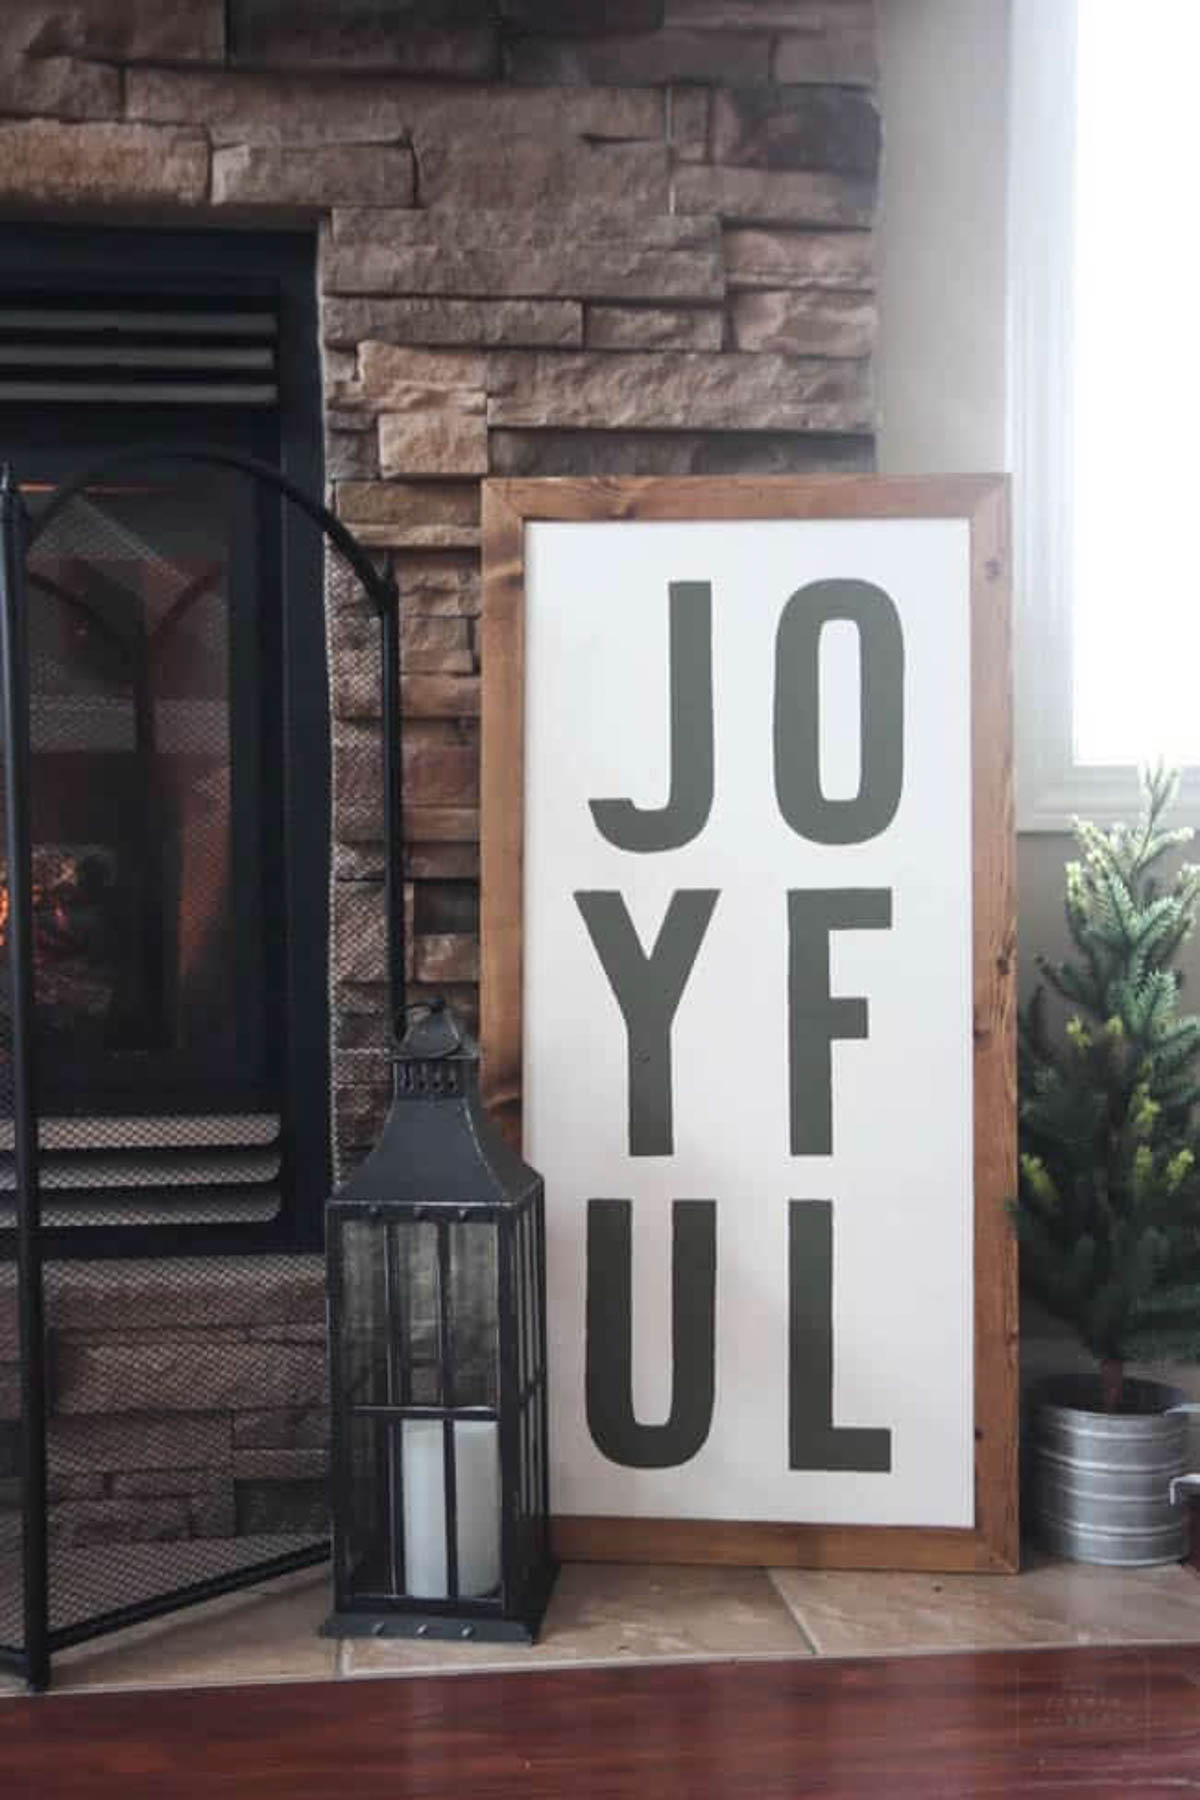
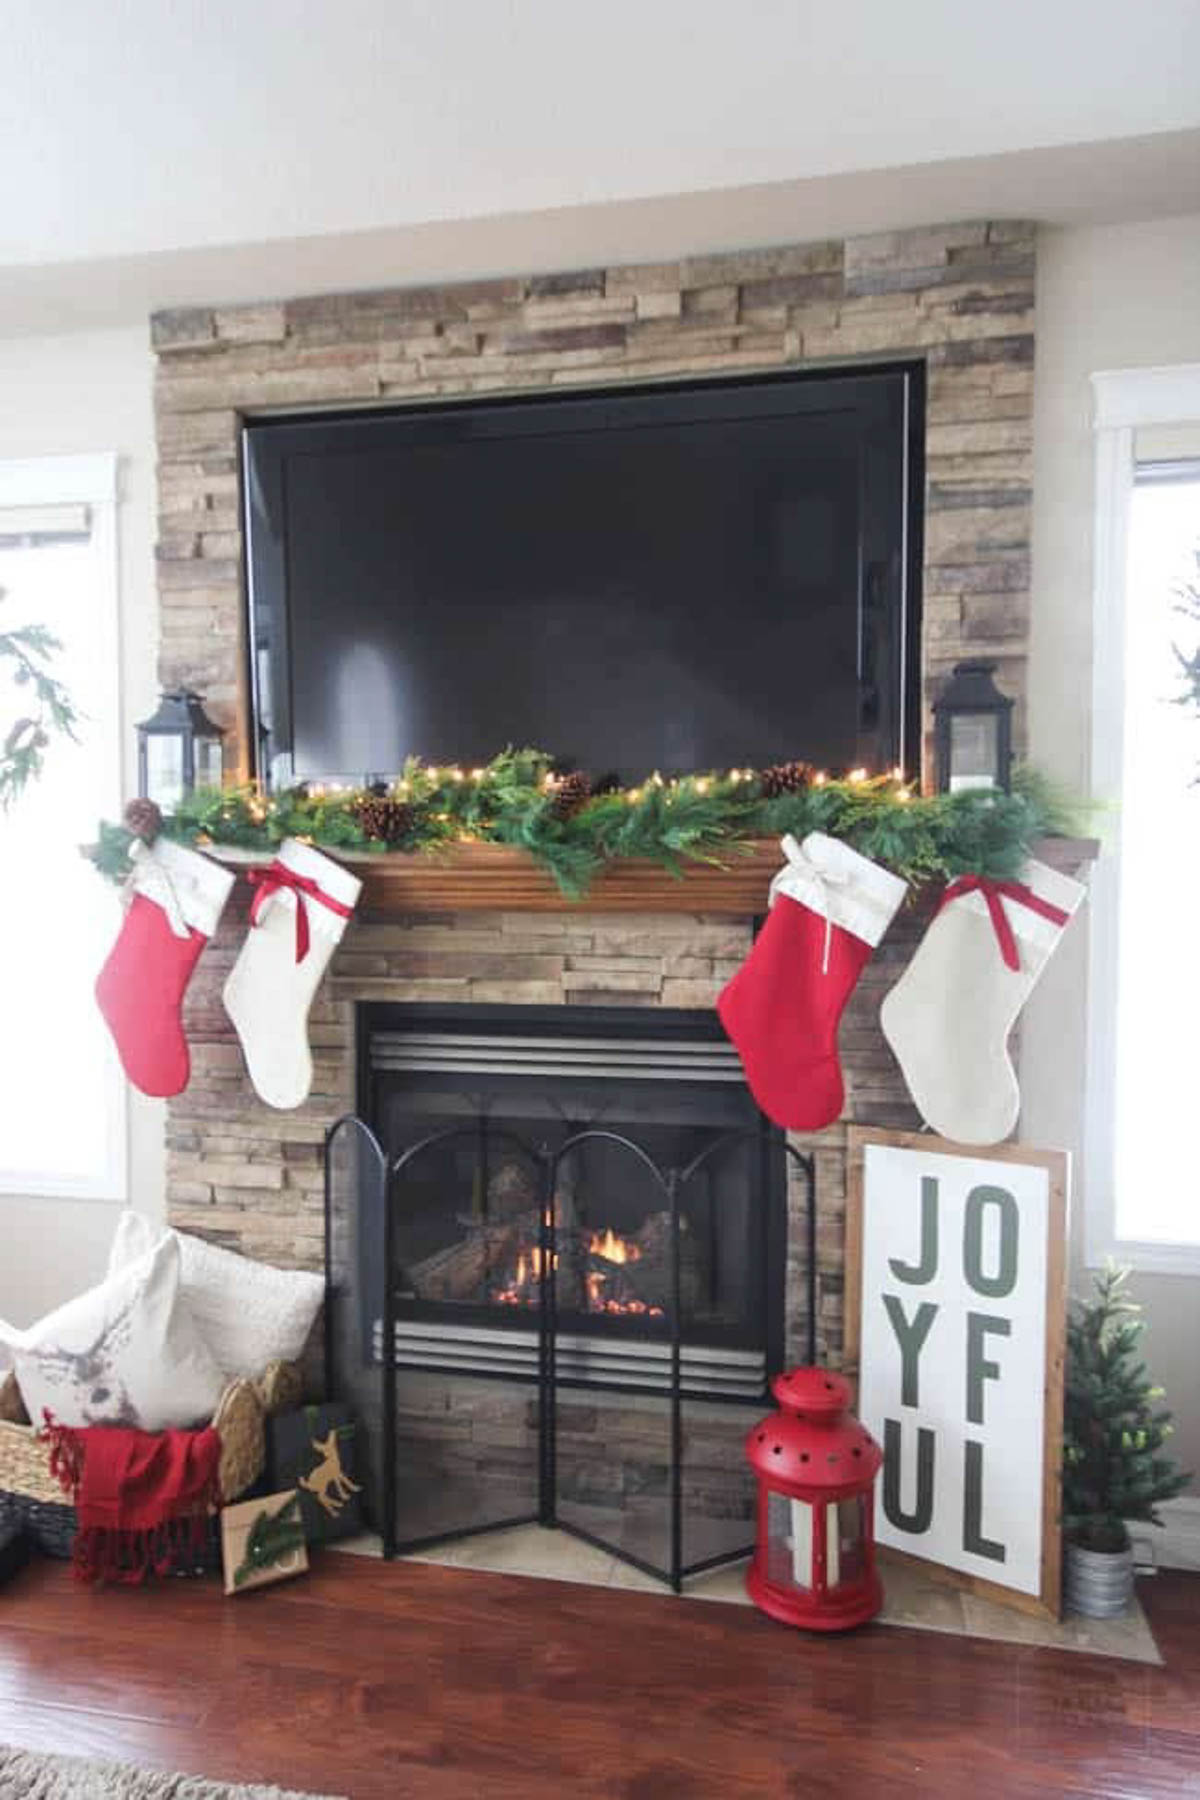
And the Reversible Holiday Wood Signs
But I didn’t stop there! Since I made my sign reversible, on the flip side I used Bayberry green to paint the word JOYFUL. Which happened to be the perfect addition to my Christmas fireplace as well.
I wish I had had a beautiful front porch to photograph these in front of, because I’m almost positive they would look amazing with some seasonal flower pots beside the door!
DIY Fall and Holiday Custom Wood Signs
Want to create your own custom wood signs for the holidays? Follow these steps to create your own, reversible autumn wood signs and holiday wood signs.
Materials
- Paint (I used Fusion Mineral Paint)
- 1/4" Plywood
- 3/4" Pine board
- Wood glue
- Wood stain
- Vinyl
- Cricut Machine
Tools
- Saw
- Router Table or Table Saw (if you want a reversible frame)
- Nail gun
Instructions
- Cut frame pieces to the proper length and width.
- Cut a quarter inch groove into the frame pieces.
- Slide the plywood board into the grooves of the frame.
- Use wood glue and a nail gun to secure the sign into place.
- Paint plywood on both sides, and stain the frame as desired.
- Use the Cricut machine to cut out stencils onto vinyl.
- Apply the stencils to the plywood, and paint desired color.
If you like these custom wood signs, don’t forget to check out the rest of the fabulous home tours!


25 holiday signs made with cricut that anyone can DIY
Wednesday 4th of December 2019
[…] JoyfulBy: Love Create Celebrate […]
20+ Creative DIY Fall Signs | Knick of Time
Monday 19th of August 2019
[…] DIY Reversible Holiday Wood Signs from lovecreatecelebrate.com […]
Louis Clark
Monday 19th of November 2018
Amazing holiday sign. I love how big they are and the wood frame. Thank you for sharing your tips with us.
Aubrey
Friday 6th of July 2018
This is so perfect!!! I don't have a Cricut but I do have a Silhouette Cameo. I was wondering what font you used so I could make a cut file that's compatible for my Silhouette?? Thanks!!
Lindivs
Friday 6th of July 2018
Thank you!! I think it's a font that's exclusive to Cricut :( Maybe you can find something similar on the Silhouette! I hope you get to make your own!
10 Charming and Fun Christmas DIY Ideas to Try This Year - Megan Morris
Thursday 14th of December 2017
[…] Love how charming yet simple this sign is. It could add some character to a variety of spots in your home for the holidays. Tutorial: Love Create Celebrate […]