
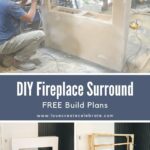
Learn how to make a stunning modern DIY Fireplace Surround with this easy tutorial. Download the free build plans to start building your own new DIY Electric Fireplace Surround!
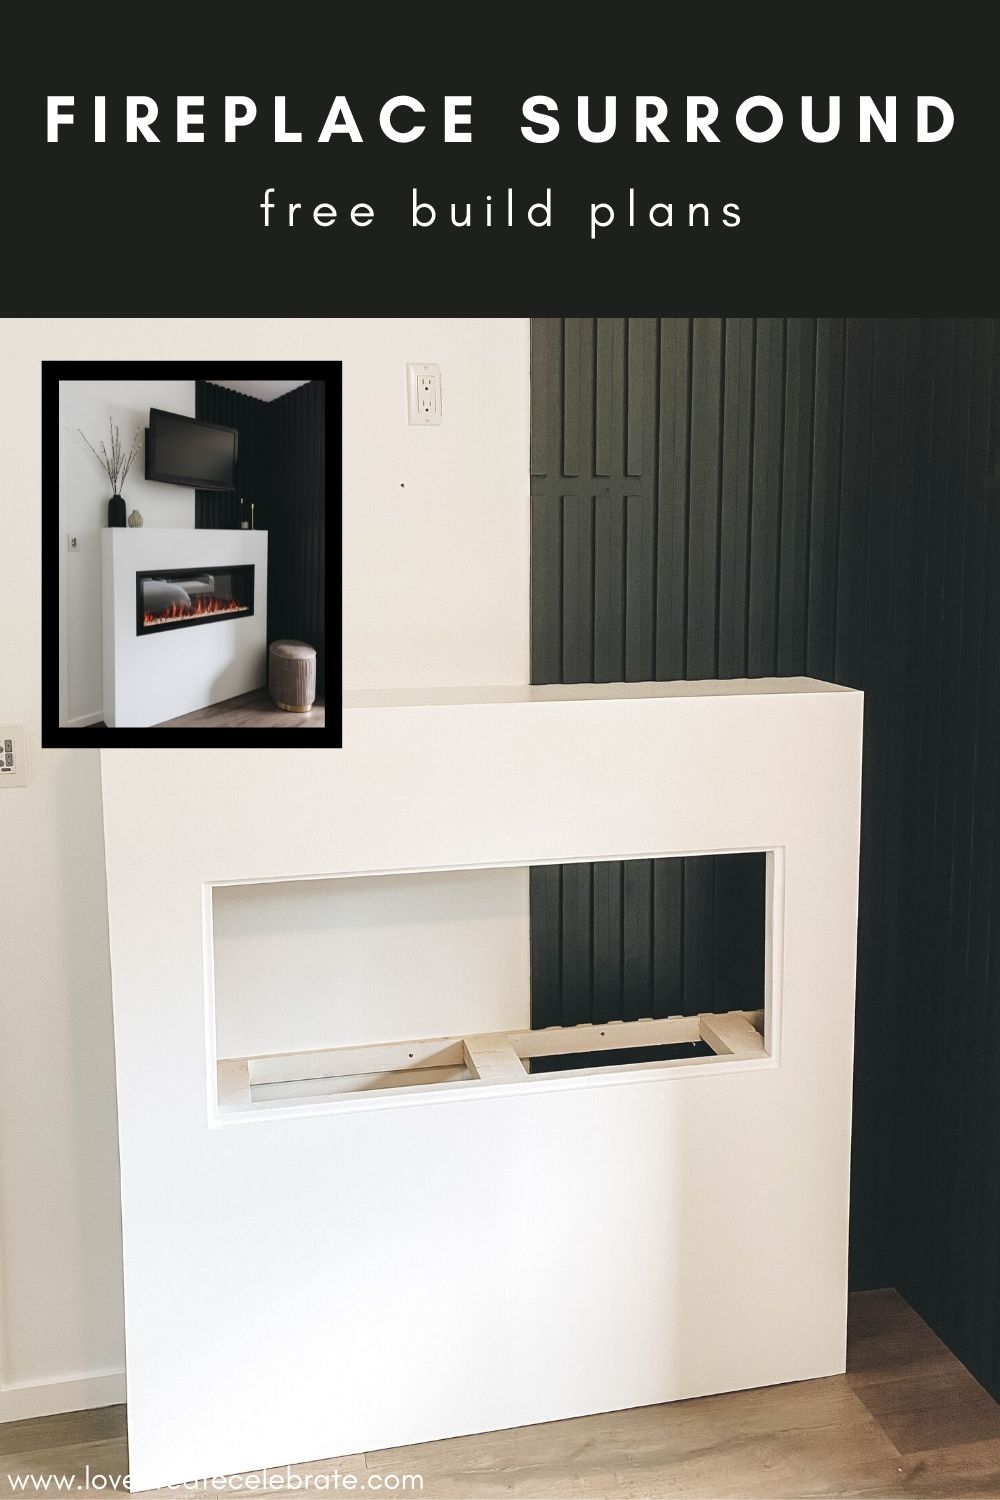
Our previous home had a beautiful fireplace in our primary bedroom, we didn’t know how much we were going to miss it until we left. Our current bedroom has a little nook across from the bed that was made for a fireplace, which lead us to sharing our DIY fireplace surround build with everyone. A fireplace in the bedroom is such a luxury! And where we live, with the cold, snowy winters, having a little extra heat is going to be amazing.
*This post may contain affiliate links. When you buy a product through one of our links, we get a commission at no cost to you! Thank you for supporting our blog so that we can continue to bring you posts like these. For more information, please see our disclosure page.*
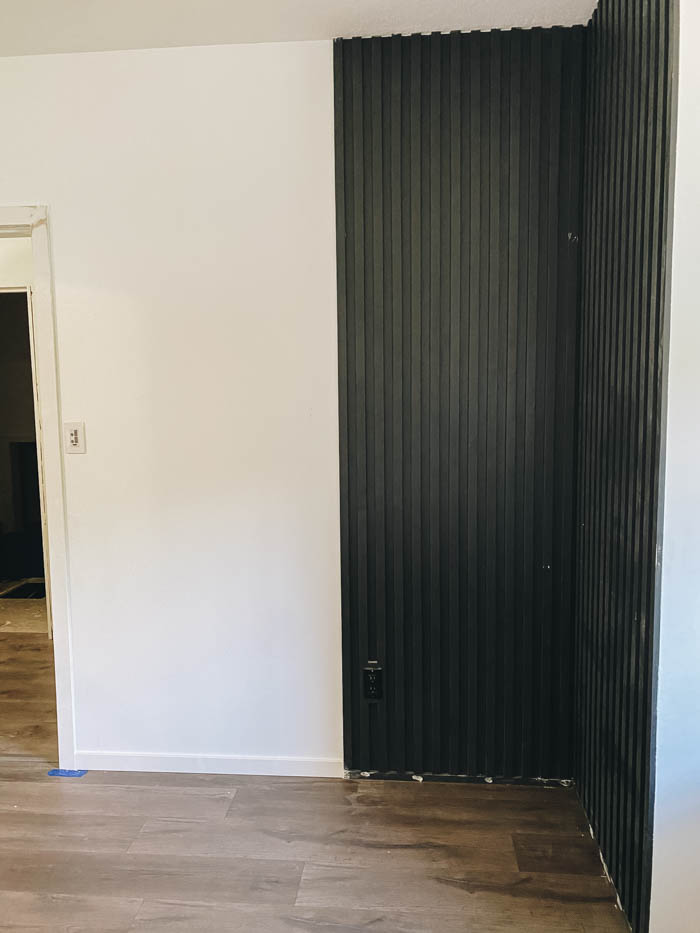
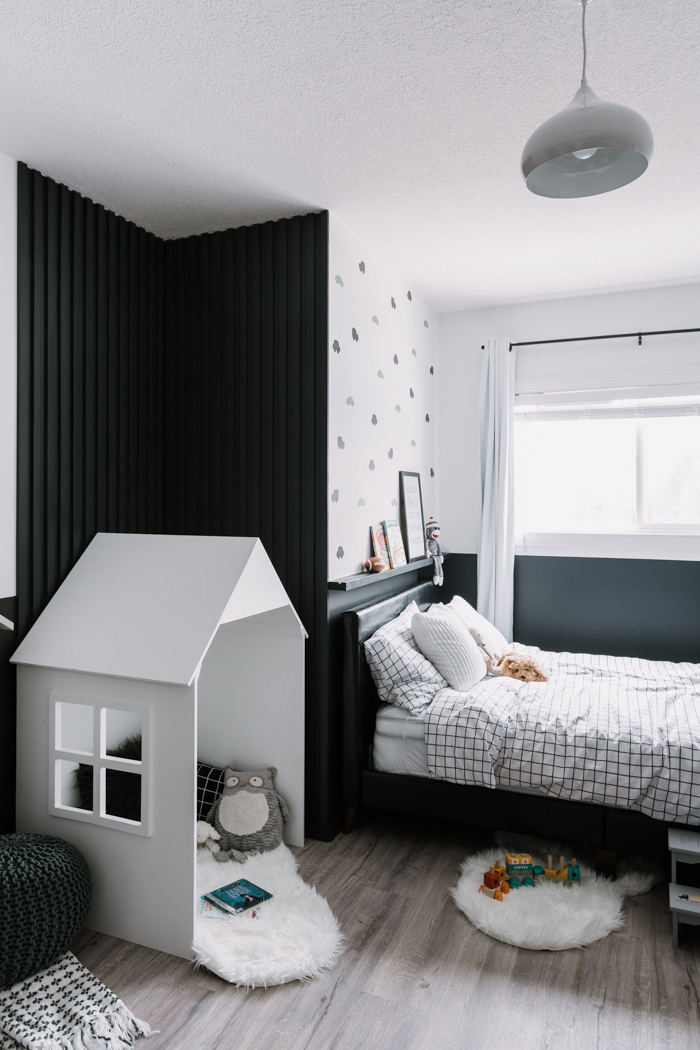
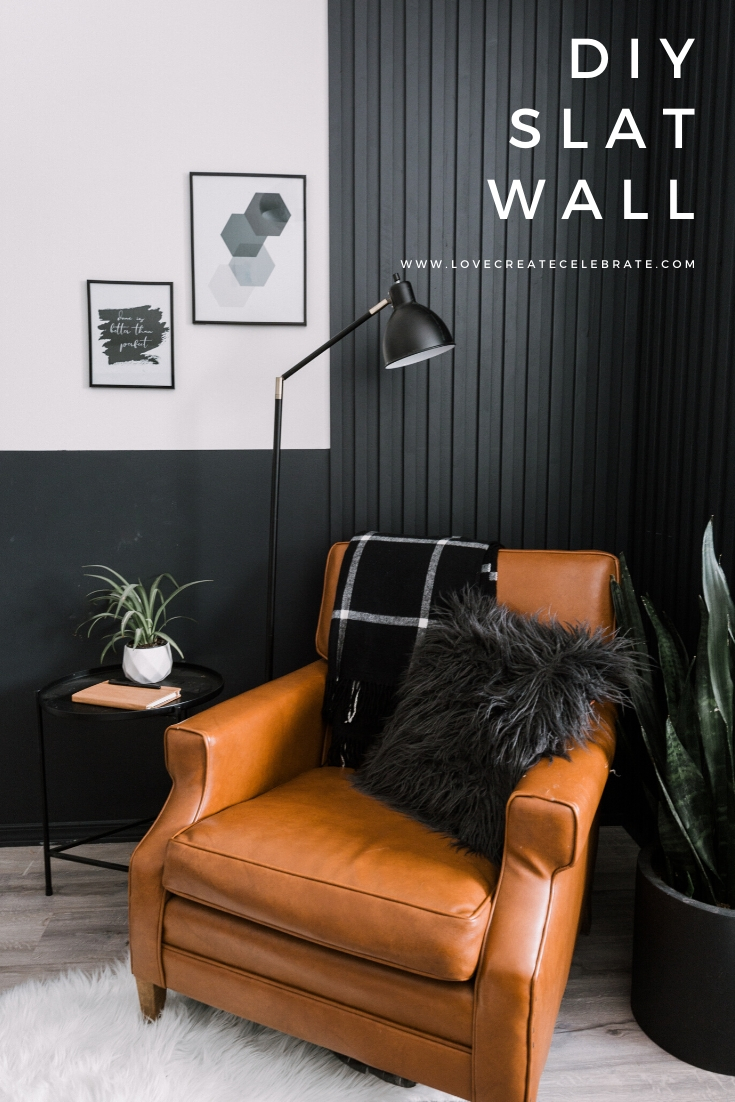
The photo above is the wall that we’re adding this fireplace too. This bedroom used to belong to our children, but when we decided to add an ensuite to the primary bedroom, we had to make this room the primary bedroom since it’s the only room that could fit an ensuite. We originally built the black slat wall for the kids’ room, but now we’re incorporating it into our fireplace design.
When the opportunity came up to team up with Napoleon and install a fireplace in our primary bedroom we couldn’t wait. This post will go over how we installed our new Napoleon ENTICE™ 42 and built a custom DIY Fireplace Surround in our primary bedroom.
Electric vs Gas Fireplace
In our home we had the choice of either a electric or Natural Gas fireplace (wood burning wasn’t going to be an option for us). As we wanted to install this in our primary bedroom the choice was fairly simple for us to go with electric due to the follow:
- no venting required
- no natural gas connection required
- smaller setback and Minimum Clearance to Combustibles compared to gas
- generally cheaper install costs / easier to install
- minimal maintenance
- new electric fireplace technology has come a long ways and flames/ambers give a better visual appearance that older models
- You can have the fire visual without the heat which is a nice option
Why you might want to go with a Natural Gas fireplace:
- real flames provides a nice ambiance for a room
- can assist with heating a room and reduce need for your furnace to run (can be a good back up in case power goes out (natural gas can run with no power)
- depending where you live Natural Gas can be cheaper to run than electrical
If you want to run a gas fireplace here is a custom surround we did in our living room. It was a full custom tiled fireplace surround with built-in hidden cord management and flush mounted TV and sound bar.
DIY Electric Fireplace Surround Build plans
To start download you build plans below. This will give you all the dimensions, materials, and cut sizes to complete your build.
Grab your FREE Fireplace plans! Subscribers to our e-mail list can access the build plans for FREE:
Material/Supplies/Tool links
Fireplace
Lumber/Build materials
- 2 x 1/2″ MDF 4×8 sheet
- 4 x 2×2 x 10′
- 3 x 2×4 x 8′
- 1 x 1×4 x 8′
- DAP construction adhesive
- DAP spackling
Tools
- Cordless drill and impact
- Cordless brad nailer
- Kreg Pocket Jig
- Router
- Flush trim bit
- Track saw (similar)
- Paint sprayer
- Stud finder
Video Tutorial of How to your DIY Electric Fireplace Surround
In the video below we show the full build from start to finish for the build of the DIY fireplace surround. We also show the installation of the fireplace unit and some of the features the Napoleon ENTICE™ 42 unit has.
DIY Electric Fireplace Surround Build Instructions
This DIY fireplace surround is designed for the Napoleon ENTICE™ 42, however you could scale it for another electric fireplace insert by modifying the size of the hole/surround if required. The Part Letters are referenced from the build plans.
Cut Materials
- Cut your 2×2 and 2×4 to length based on the cut list on the design plans
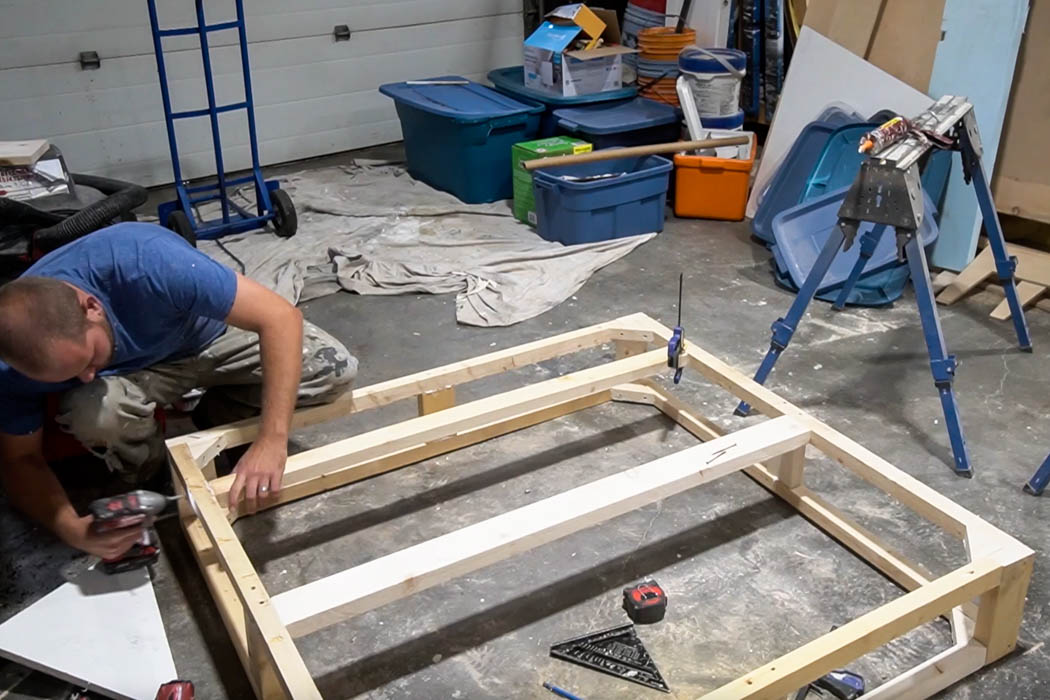
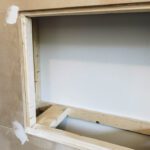
Build Frame
- Build your outer frame (Parts A and B). We used screws and construction adhesive to attach the boards together
- Attach your sides together by securing Parts C (upper and lower supports) with screws, construction adhesive and pocket holes
- Add the center blocking along the outer frame (Part G)
- Add the corner bracing to frame, at this stage you will also want to confirm your frame structure is square by taking diagonal measurements from corner to corner (these measurements should be the same if the surround is square). You can adjust this and once you are happy with measurements secure the corner braces in place with screws and construction adhesive.
- Install the bracing for the fireplace insert (Parts D, E, F, and H).
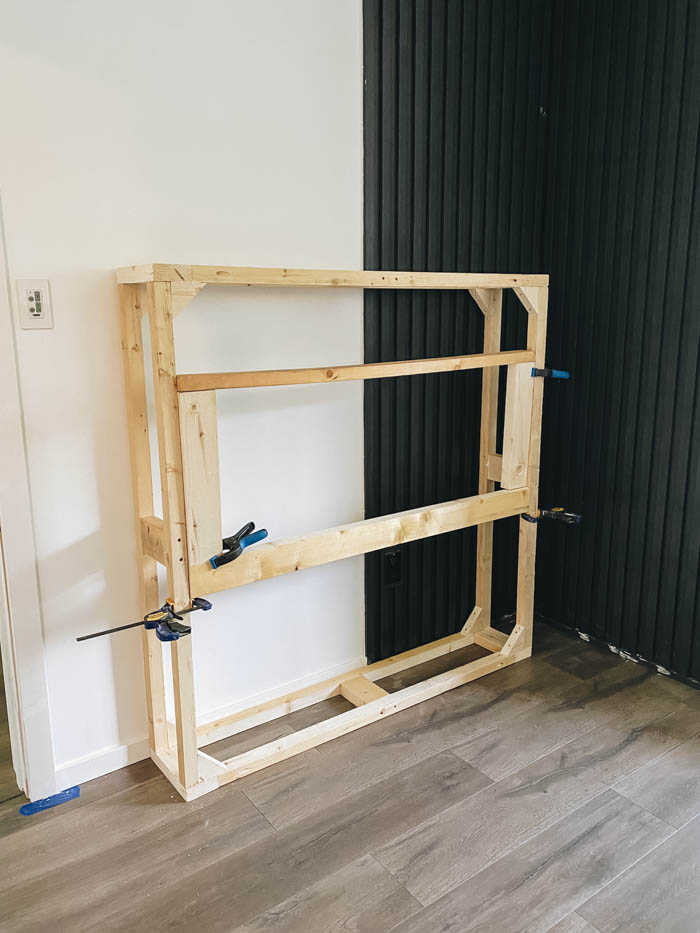
Check frame
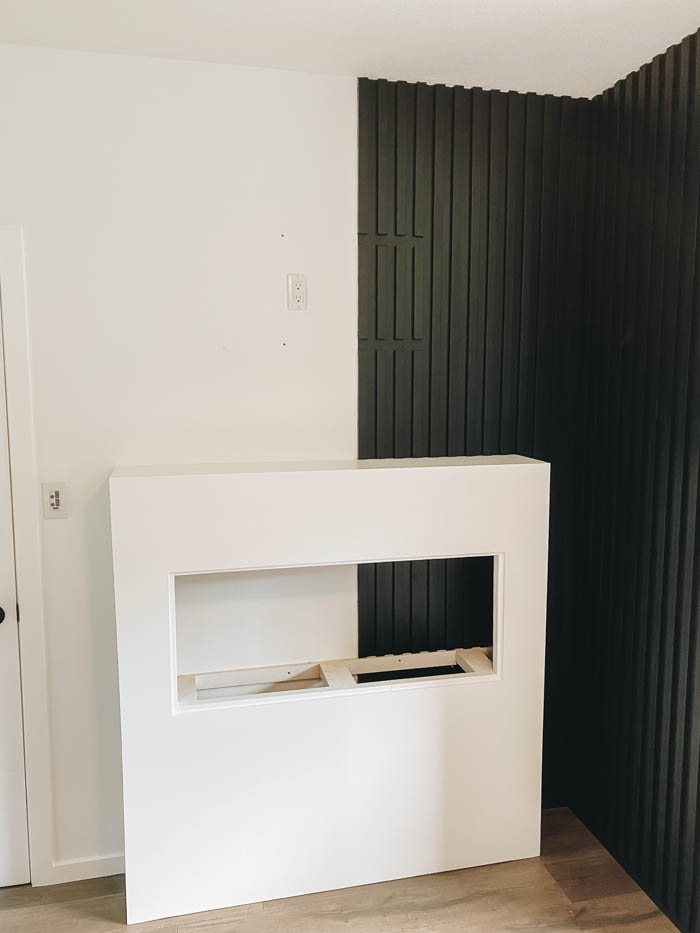
- Step 7: Do a dry fit of your fireplace insert into your frame to ensure if fits and to and mark out the outer perimeter of the unit in pencil to show limits of where the MDF will start (for flush mount install).
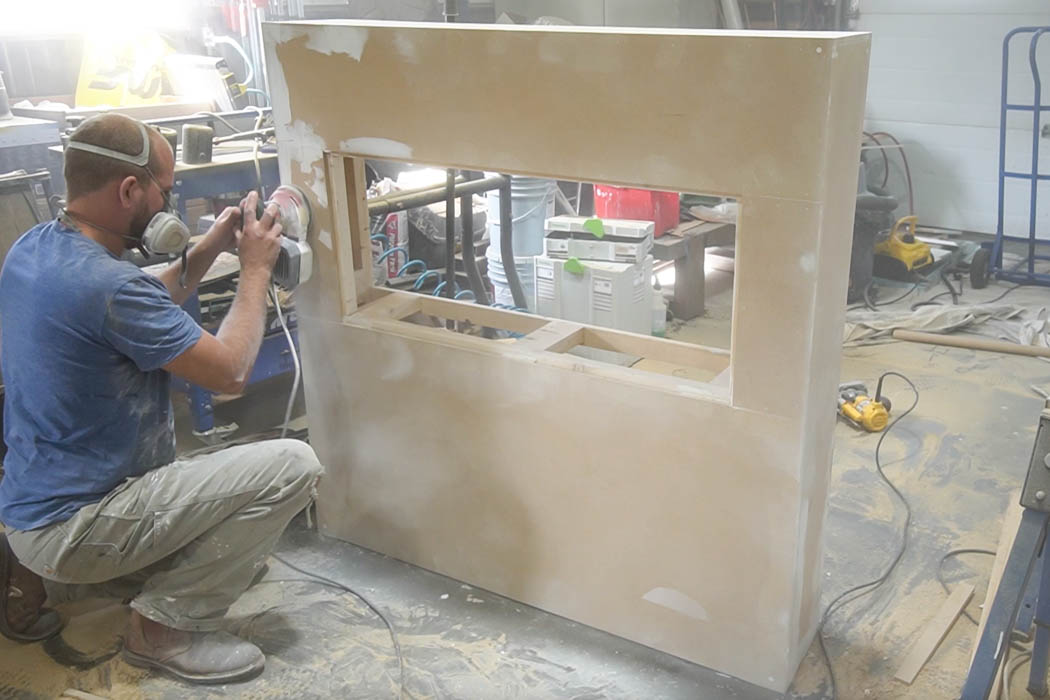
Add MDF cladding
- Cut out panels of 1/2″ MDF for the sides, top, and front face. I started with the sides, making the panels slightly larger (about 1/4″) and than using a Router and flush trim bit to cut to exact size once MDF panel was secured to the frame using a brad nailer and brad nails and construction adhesive.
- Once the sides were installed, I did the top and than the front face to minimize the seams you would see from the front. The front panels should be installed up to (not over) the lines marked out previously from when the fireplace was dry fitted to allow the fireplace to have a flush mount install once completed.
- You can check fitment again by installing your fireplace insert into the surround to ensure everything fits properly before starting with paint.
Prep for Paint
- Fill nail holes and joints with spackling and sand smooth.
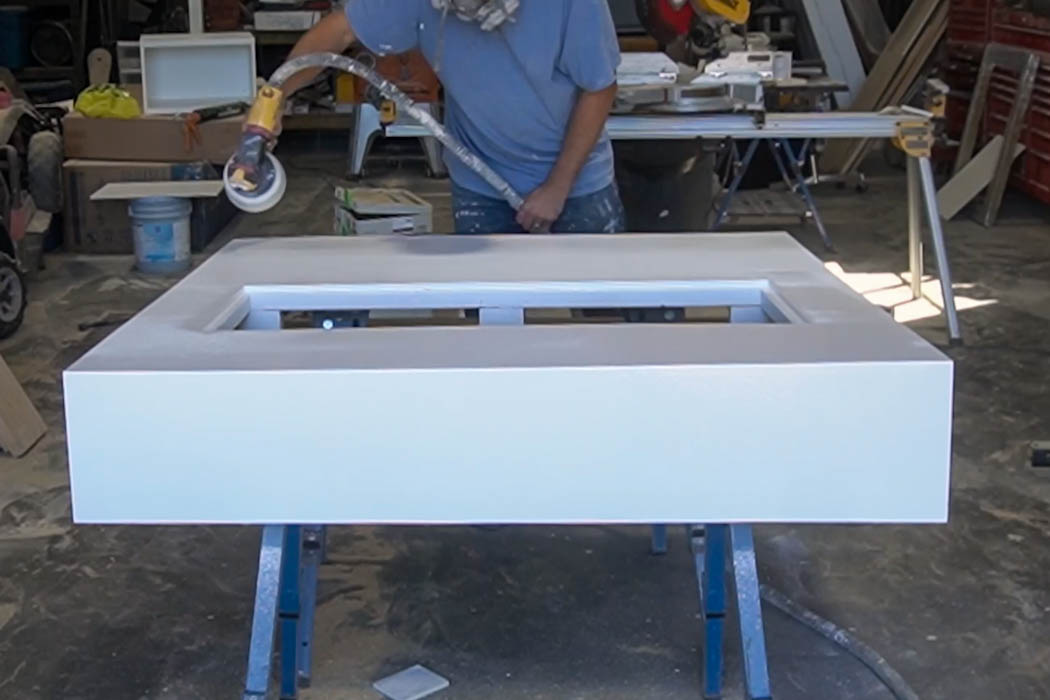
Prime
- Prime fireplace surround, we used our Paint sprayer to quickly paint the surround
- If required fill any holes/defects/joints again with spackling , sand smooth, and give the entire surround a light sand.
Final Paint
- Paint your surround with an interior paint, we choose to go with the same paint we used on our walls in the bedroom. We used our Paint sprayer to apply the paint.
Install DIY Fireplace surround
- Install your surround once the paint is dry. I secured the fireplace to the wall by screwing through Parts F and C into studs in the wall (confirming location using a stud finder).
- You will also need electrical for the fireplace as well, we had a plug in the right location already. However if you require custom electrical to be run for the fireplace contact a local electrician to complete the work.
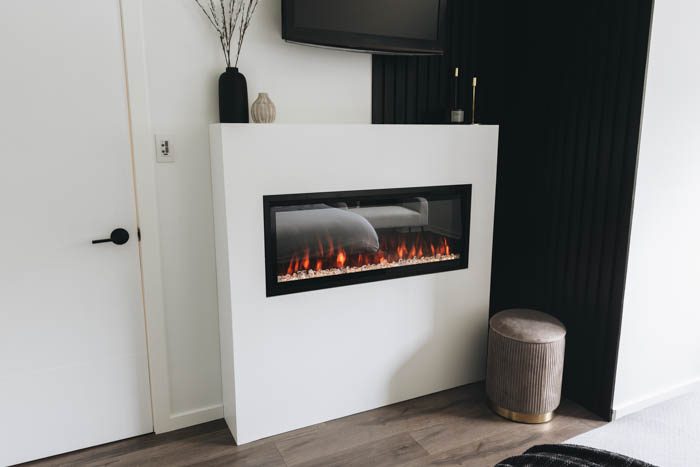
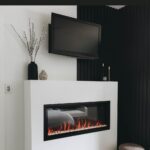
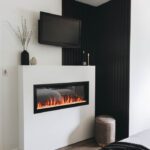
- With the your DIY Electric Fireplace Surround complete and secured to the wall you can now plug and slide in your Napoleon ENTICE™ 42 into place and enjoy your new fireplace!
Using your Napoleon ENTICE™ 42
The Napoleon ENTICE™ 42 has some great features. The ENTICE™ 42 allows you to customize your fire experience by being able to change the following options:
- Amber colours: You can choose from purple, red, yellow, green, blue, orange as well as how bright the embers are
- Flame colour settings: You can choose from orange (1-4 settings) and/or a combination of blue flames (1-4 settings) or have the flames completely off.
- Flame Pattern: There are 5 different flame patterns to choose from.
- Timer option: You can run the heater/fireplace on a timer to allow it to turn off after a set time.
- Heater: There are multiple settings for the temperature as well as the option to just view flames with no heat.
- Fan: multiple settings for fan speed as well as on/off.
All these options allow for a great experience that can be customized to the mood you are going for.
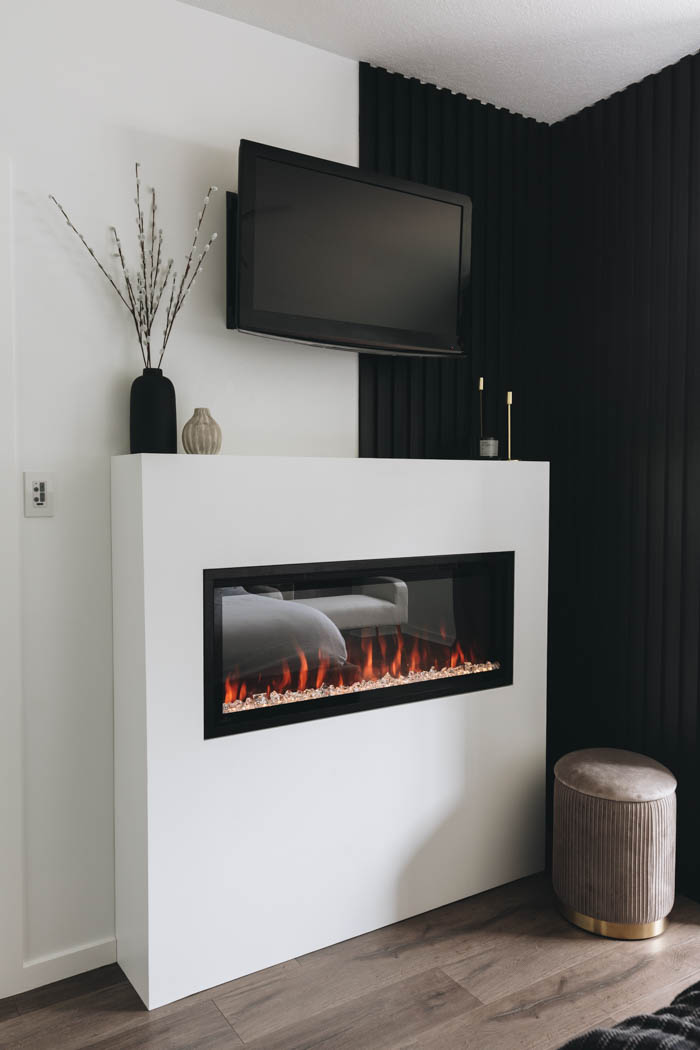
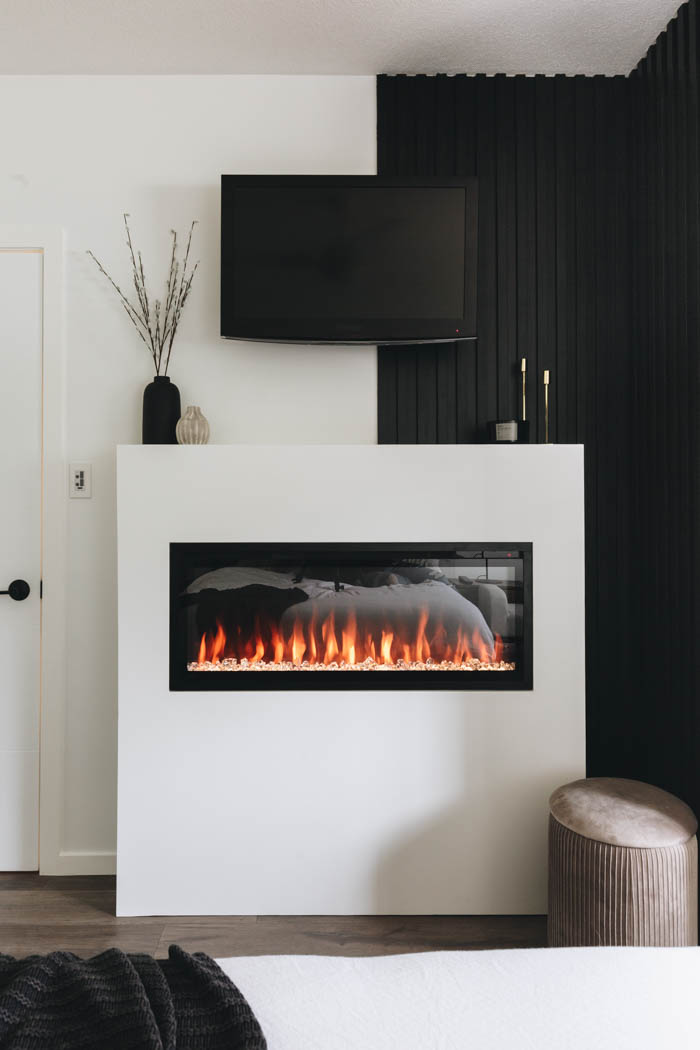
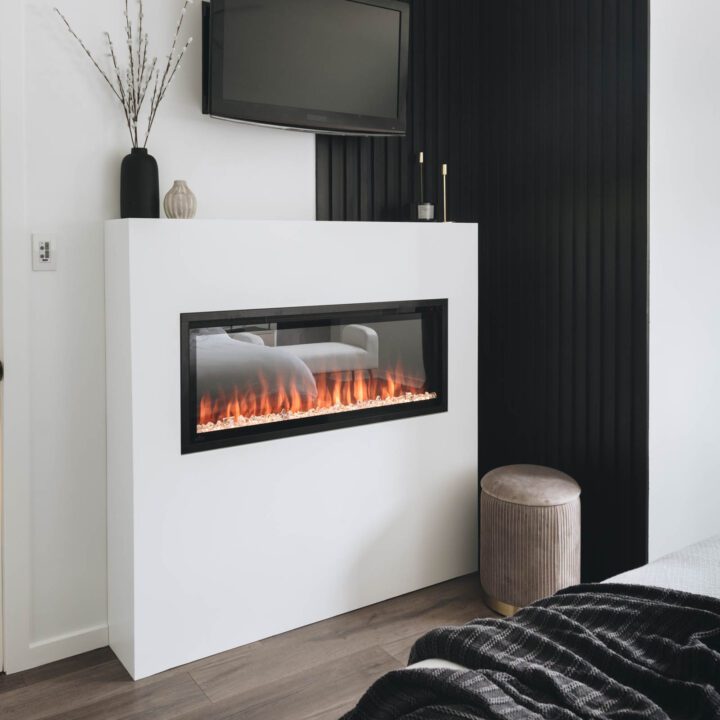
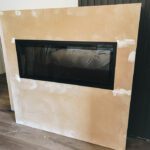
Our Finished Fireplace Surround
We’re so happy to have a fireplace headed into fall this year! I love the sleek design and the ambiance it adds to the room.
DIY Electric Fireplace Surround
Learn how to make a stunning modern DIY Fireplace Surround with this easy tutorial. Download the free build plans to start building your own new DIY Electric Fireplace Surround!
Materials
- 2 x 1/2" MDF 4x8 sheet
- 4 x 2x2 x 10'
- 3 x 2x4 x 8'
- 1 x 1x4 x 8'
- Napoleon Entice 42 electric fireplace
Tools
Instructions
- Cut your 2x2 and 2x4 to length based on the cut list on the design plans
- Build your outer frame (Parts A and B)
- Attach your sides together by securing Parts C (upper and lower supports) to frame
- Add the center blocking along the outer frame (Part G)
- Add the corner bracing to frame, at this stage you will also want to confirm your frame structure is square.
- Install the bracing for the fireplace insert (Parts D, E, F, and H).
- Do a dry fit of your fireplace insert into your frame to ensure if fits and to and mark out the outer perimeter of the unit on frame.
- Cut out panels of 1/2" MDF for the sides, top, and front face.
- Fill nail holes and joints with spackling and sand smooth.
- Prime fireplace surround
- If required fill any holes/defects/joints again with spackling and smooth. Give the entire surround a light sand.
- Paint your surround with an top coat paint
- Install your surround and secure to wall
- With the your DIY Electric Fireplace Surround complete and secured to the wall you can now plug and slide in your Napoleon ENTICE™ 42 into place and enjoy your new fireplace!
Notes
build plans available here
If you’re interested in that black slatted feature wall, we have a full tutorial on how to make it!


Sharon
Thursday 13th of July 2023
This is beautiful!
Do you have any suggestions for how to make this work outside? I think they make outdoor electric fireplaces?? Would be interested in suggestions for and outdoor frame? I could probably start with the wood frame, but would need to use a weatherproof material on top of it? Any thoughts would be greatly appreciated!
I just LOVE this! Thanks so much for sharing!!
Lindi
Tuesday 14th of November 2023
You would have to use a material that is ok with moisture? MDF might not be the best choice. Also I would recommend a exterior paint to seal it. If you want the smooth look you could do concrete board with a stucco finish?