
An easy DIY candy cane craft idea using dollar store supplies. Add a modern DIY candy cane ornament to your tree this year!

Christmas is my favorite time of the year. I love everything about it and I love decorating for the season! I wanted a Scandinavian-style vibe for our Christmas decor. These DIY candy cane ornaments turned out perfectly to fit that style.
You all know how much I love Dollar Store DIYs! I love taking cheap items from the dollar store and make them look like expensive home decor. There is no reason to purchase high-dollar decor items when you can get the look you’re going for with a little creativity and a few items from the Dollar Store.
Today I’m joining some other talented bloggers who wanted to share their DIY ornaments! Make sure to check out all of the projects at the end of the post.
Let’s make a DIY candy cane ornament!
*This post may contain affiliate links. When you buy a product through one of our links, we get a commission at no cost to you! Thank you for supporting our blog so that we can continue to bring you posts like these. For more information, please see our disclosure page.*
How to Make a Candy Cane Ornament
Supplies Needed
- Candy canes
- Velvet fabric ( I used white and beige) – or velvet ribbon!
- Best 3-in-1 Craft Glue
Step-by-step Tutorial
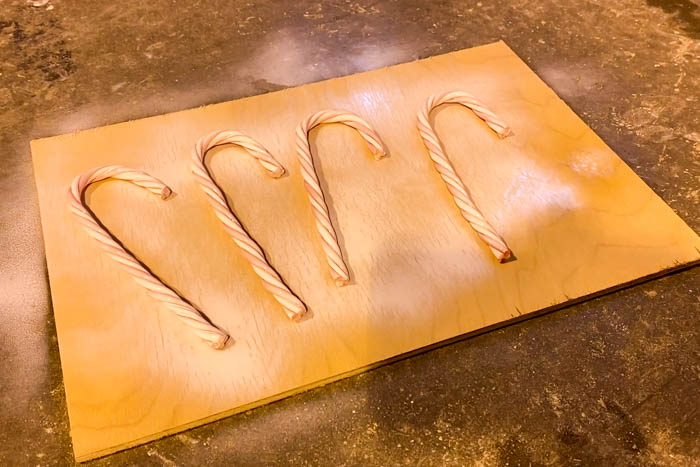
I got some ugly, red and white candy canes at the Dollar Store. They’re plastic and they look cheap so I wanted to do something else with them. Plus, I don’t think I’ve ever seen a modernized version of the traditional candy cane ornament! It was overdue.
The first thing I did was spray paint them white with a primer. I’m going to be wrapping them in velvet fabric and I didn’t want the red to show through the velvet fabric. As I side note, I can’t believe our dollar store had velvet! I snatched that up so fast!
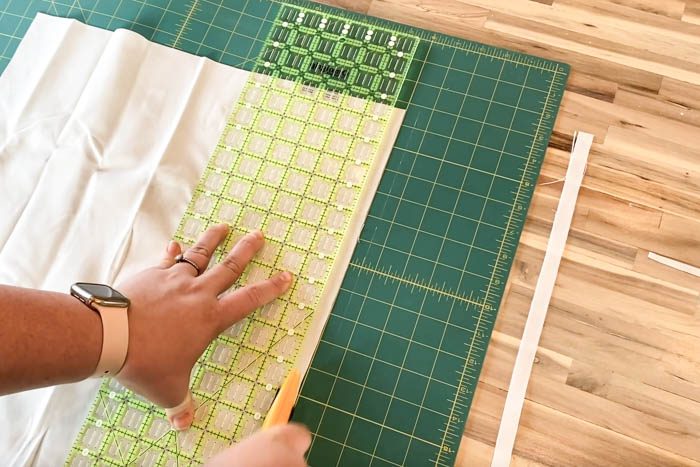
In order to put the velvet on and make it look like a candy cane, I needed to cut the velvet into strips. I cut the white velvet and tan velvet using my rotary tool into 1/2 inch strips. I only needed four, but I cut a few extra just in case.
If you have velvet ribbon, you can also use that instead and skip the entire cutting phase!
Once everything was cut and prepped, I used my favorite craft glue and got ready to glue the strips onto the candy canes.
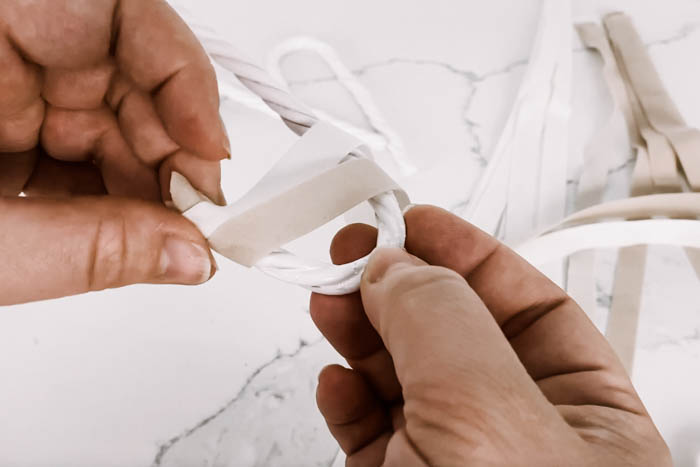
I started by placing some glue on the end of each candy cane and added both colors of velvet strips side by side. Then I waited a minute to make sure that the glue was set. Once it was set, I started wrapping the velvet strips around the candy cane.
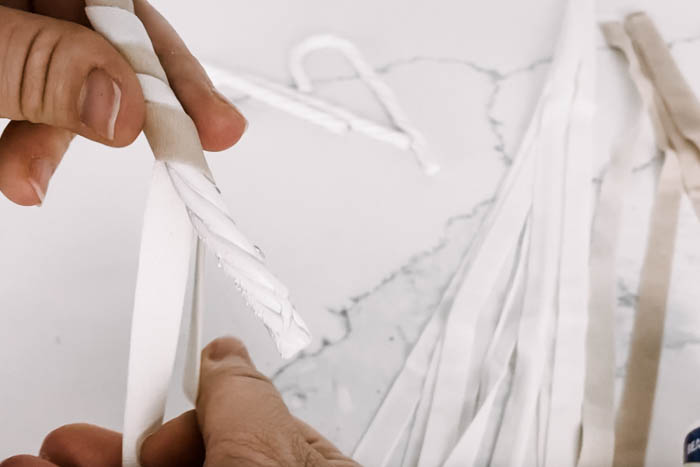
I wrapped the velvet around the candy cane one piece at a time, one strand after another, adding glue every couple of rounds to make sure that the velvet would stay in place.
I did both colors at the same time because if I had done one color first, it would have sat completely under the other color and the balance would have been off. I really wanted them to overlap over the bottom edges.
When I got to the bottom, I just cut them up really short, added some glue, and tucked the velvet together nicely so it created a nice, smooth finish on both ends.
Our Finished DIY Candy Cane Ornaments
Here is how the candy canes look when they are finished. I was so happy with them. They matched the rest of our holiday decor beautifully and look so much nicer on the tree than the plastic dollar store version!

I absolutely LOVE these and was so happy with them when they were finished! I’m so happy to have a set of four DIY candy cane ornaments. I was pretty happy to make a version that I thought was modern and Scandinavian and actually pretty!


As I mentioned, today I’m joining some of my talented blogging friends who are also sharing their DIY Christmas Ornament ideas with you. Be sure to visit their posts by clicking on the links below the images!
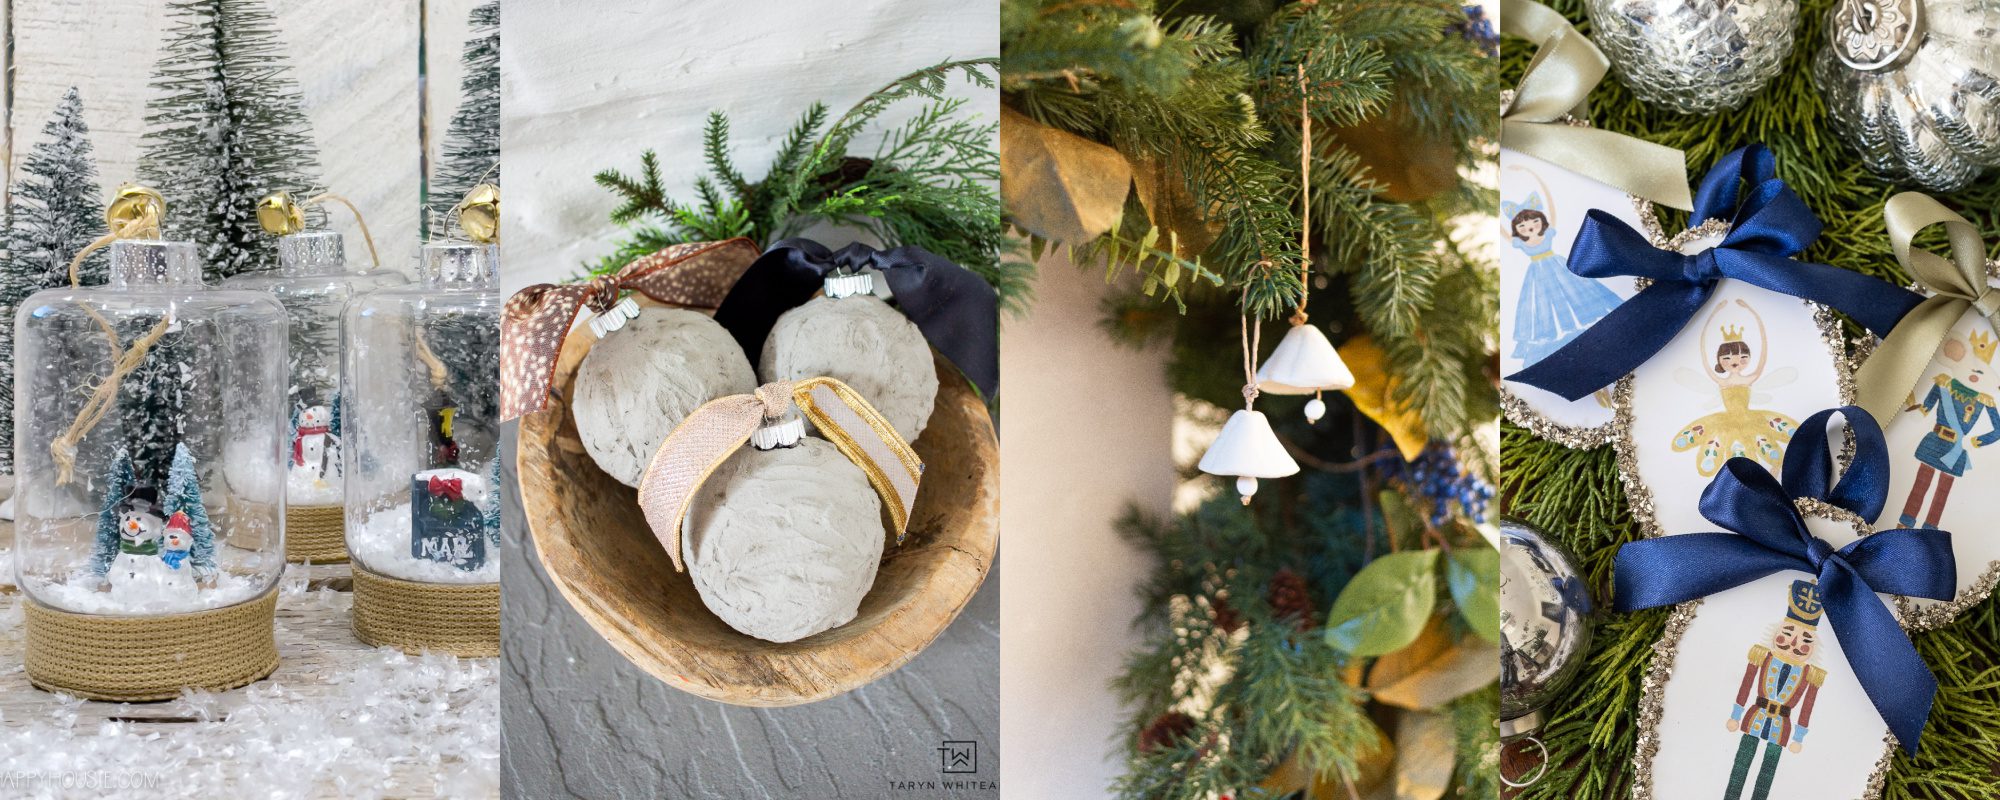
DIY Mini Cloche Dollar Store Christmas Ornaments at The Happy Housie
DIY Concrete Ornaments at Taryn Whiteaker
DIY Clay Bell Ornaments at Zevy Joy
DIY Printable Nutcracker Ornaments at Sincerely, Marie Designs

DIY Boho Wood and Tassel Holiday Ornaments at Tatertots and Jello
How To Make DIY Paper Christmas Star Decorations at Life is a Party
Cinnamon Stick Sleigh Ornaments at A Pretty Life
Easy DIY Wooden Christmas Ornaments at She Gave it a Go
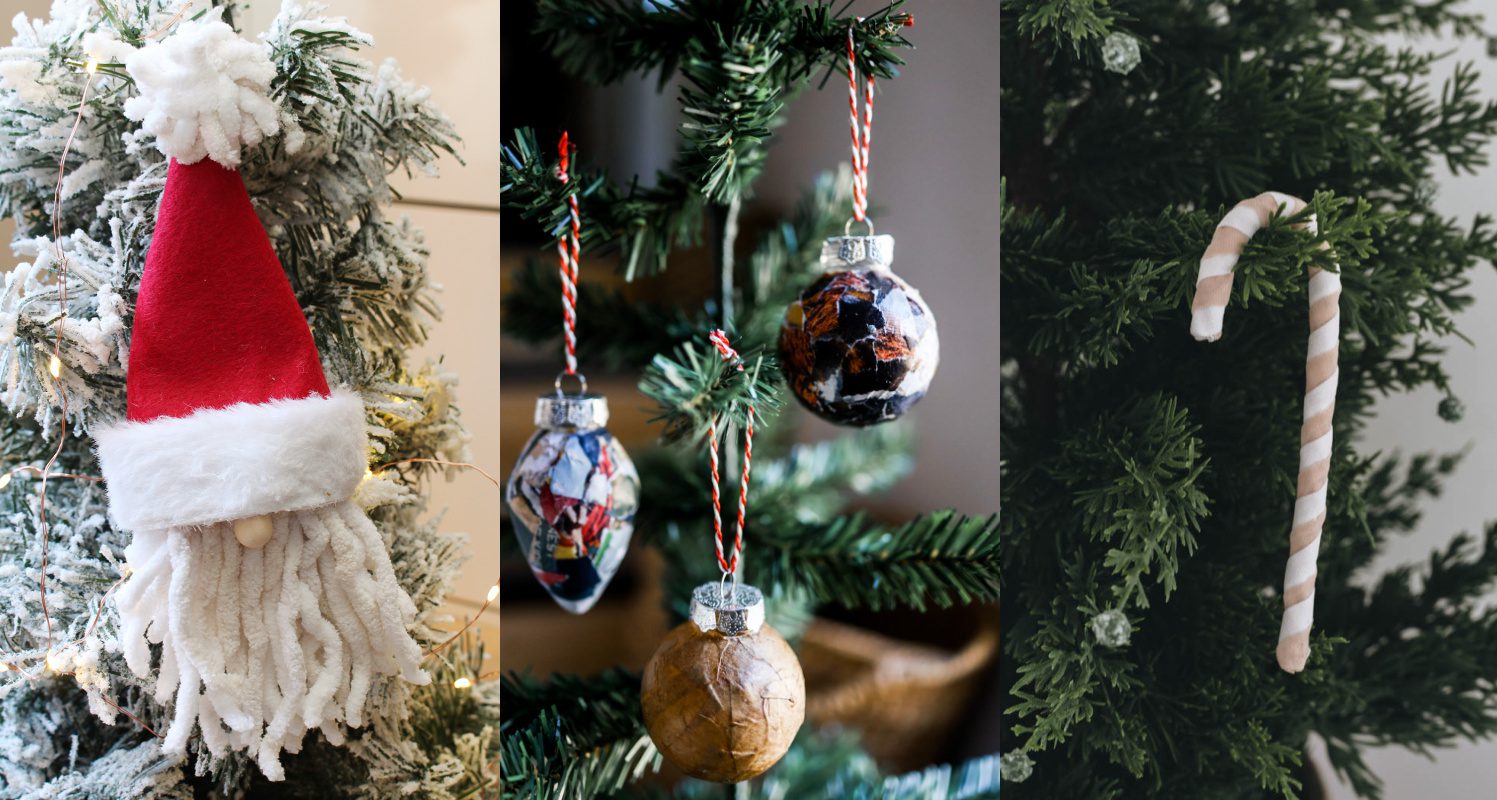
DIY Santa Gnome Ornaments at Clean & Scentsible
MOD Podge Paper Ornaments at Place of My Taste
Candy Cane Ornaments at Love Create Celebrate
Be sure to check out the video below to see me make these DIY candy cane ornaments along with five other Dollar Store Christmas decorations!

Looking for more Christmas decor inspiration?
- Modern Christmas Decorations [Whole Home Tour!]
- Free Printable Christmas Gift Tags
- Mini Wooden Christmas Trees

Modern DIY Candy Cane Ornament
An easy DIY candy cane craft idea using dollar store supplies. Add modern DIY candy cane ornaments to your tree this year!
Materials
- Candy canes from the Dollar Store
- White and tan velvet fabric from the Dollar Store
- Best 3-in-1 Craft Glue
Tools
- Rotary fabric cutting tool
Instructions
- Spray paint the candy canes white to keep the red from showing through the velvet fabric.
- Cut velvet fabric into 1/2 inch strips using a rotary tool. You will need 4 of each color, but a few extra just in case.
- Add glue to the end of the candy cane, place the ends of the ribbon side by side on the glue and allow to set.
- Then wrap them around the candy cane together, but one at a time so that the edges overlap nicely.
- When you get to the bottom, cut the ribbons short, add some glue, and tuck them in nicely to create a smooth finish on both ends.

Shreya @ The Creatives Hour
Wednesday 8th of December 2021
Wow! This is awesome! Thanks for the tutorial;)
Jo-Anna
Thursday 11th of November 2021
These are so pretty Lindi! I love that you used velvet ribbon!
Lindi
Thursday 11th of November 2021
Thank you! I definitely think the velvet takes them up a notch! You'd never know they were dollar store ones!