
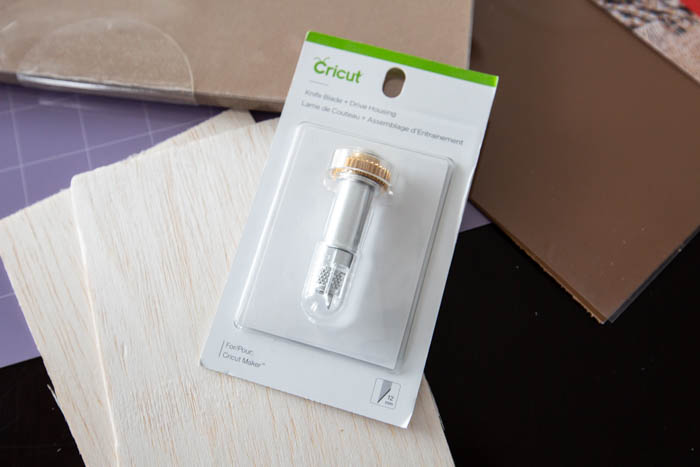
The Cricut knife blade is here! Here’s everything you need to know about how to use the knife blade, including how it works, the materials it cuts, and projects you can make with it!
I was there, in person, when Cricut announced that they were coming out with a knife blade. It was announced with Cricut came out with their newest cutting machine, the Cricut Maker. I’ve been using a Cricut since my scrapbooking days, and in those days, honestly, it was mostly a craft tool for paper crafters, but these days, the new Cricut Maker is for ANYONE that wants to DIY! I’ve made some amazing projects with leather, wood, and chipboard on my Cricut Maker and no one every believes that I made it myself when it’s cut out so perfectly! I’ve seen the knife blade in action, used it many times, and today I want to share everything you need to know about the Cricut Knife Blade!
*This post was sponsored by Cricut and may contain affiliate links. As always, opinions are 100% my own. For more information, please see my disclosure page.*
What is the Cricut Knife Blade?
The Cricut Knife blade is one of the newest tools for the Cricut Cutting Machines. It was released with the new Cricut Cutting Machines. If you don’t know what a Cricut is, it’s basically a mini CNC – it can cut out a ton of designs that are pre-made or designed by you up to 12″ by 24″ (at a time).
The Knife blade is exactly what it sounds like – a mini knife blade. It is part of the Cricut Adaptive Tool System, which means it has that little gears at the top that allow you to change it out with other blades in the adaptive tool system. It allows you to FINALLY cut thicker materials than ever before on your Cricut!
What Materials Can the Knife blade Cut?
The knife blade cuts materials up to 2.44mm thick – which is soooo much thicker than any previous cutting craft tool!
Here are some of the materials and thicknesses that the Knife blade cuts:
- Balsa Wood – up to 3/32″
- Basswood – up to 3/32″
- Tooling leather – up to 7 oz. (stiffer leather)
- Garment leather – up to 5oz. (Cricut sells a bunch of these!)
- Cricut Chipboard – 2mm
- Matboard – 2-ply or 4-ply
- Craft foam – up to 3mm
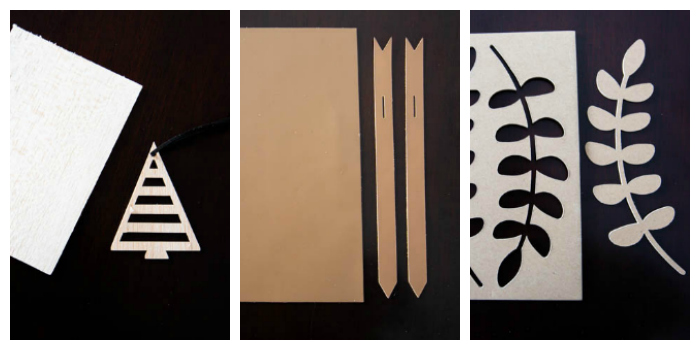
So far I have cut balsa wood, genuine leather, and chipboard with my knife blade and it worked really well! Here are those projects if you are interested:
- Balsa Wood – Cutting Holiday ornaments
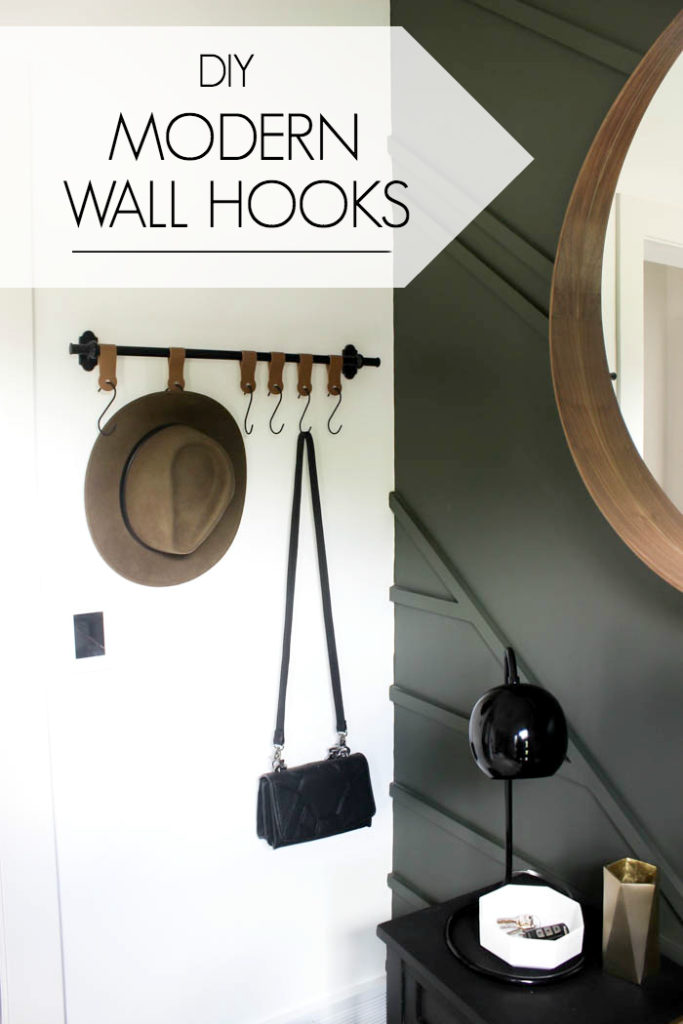
- Leather – Entry Wall Hooks
- Chipboard – Decorative Bowls (coming next week!)
What’s the Difference Between Balsa Wood and Basswood?
I thought that I would briefly touch on this, since I had didn’t know the answer to this myself! in both cases you need to buy wood pieces that are straight (i.e. not warped or bent) and pieces that full and not composite pieces (i.e. not glued together), or they could get stuck in the machine and not cut properly.
Balsa Wood: Balsa is a very lightweight and fragile wood that is often used for crafting models (like model airplanes). I’ve cut a few things and definitely have to keep it out of reach of my toddler fingers! It is cheaper and easy to find on Amazon or in craft stores. The Cricut Maker can cut it at 1/32″, 1/16″, and 3/32″ thick with the Knife Blade.
Basswood: Basswood is a stronger craft wood. It is heavier and sturdier than balsa. It’s generally easier to paint and stain because it holds the products better and isn’t as fragile to handle. The Cricut Maker can cut it at 1/32″ and 1/16″ thick with the Knife Blade.
How do you use the Cricut Knife Blade?
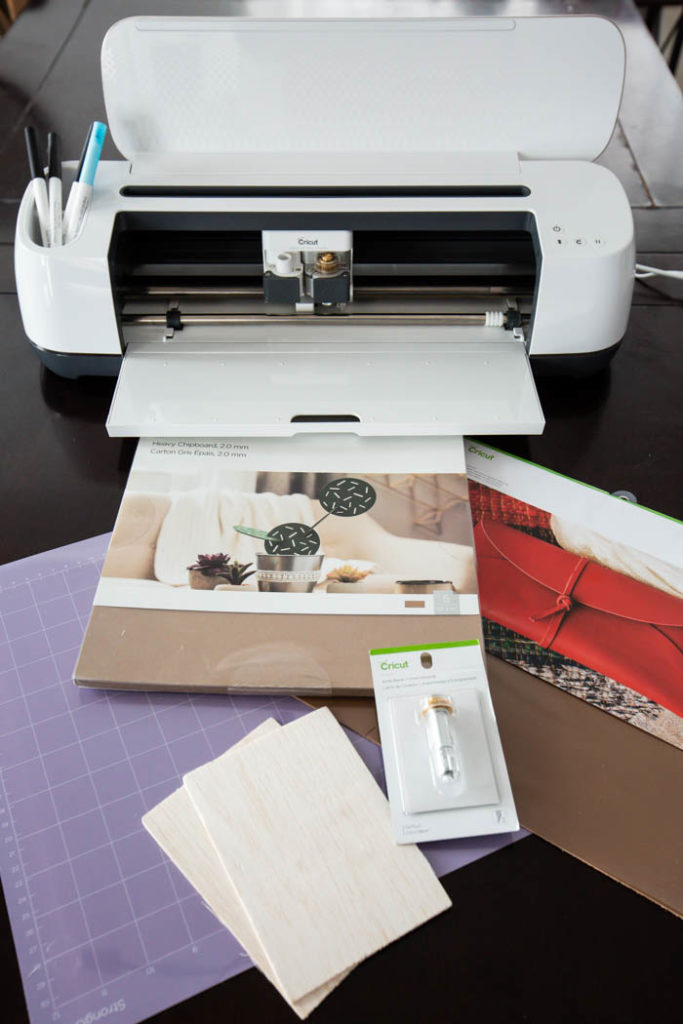
First, you must have a Cricut Maker – the knife blade does not work with earlier machines, and you must use the Cricut Design space to design the projects you are cutting.
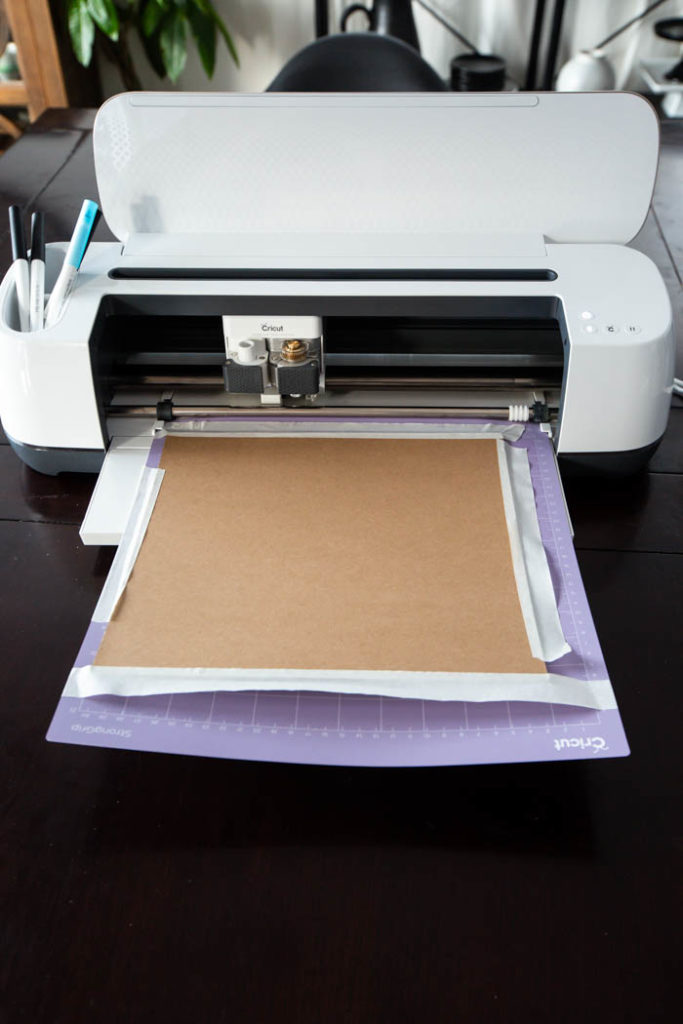
Second, you have to use the strong grip mat for any knife blade projects. These are the purple mats that Cricut sells. I never really used these mats until the knife blade was released and now I use them all the time. They are sold in 12″ by 12″ and 12″ by 24″ versions. Most of the materials also require you to tape down your project so that you have the best adherence to the mat possible, and your mat doesn’t jostle out of place.
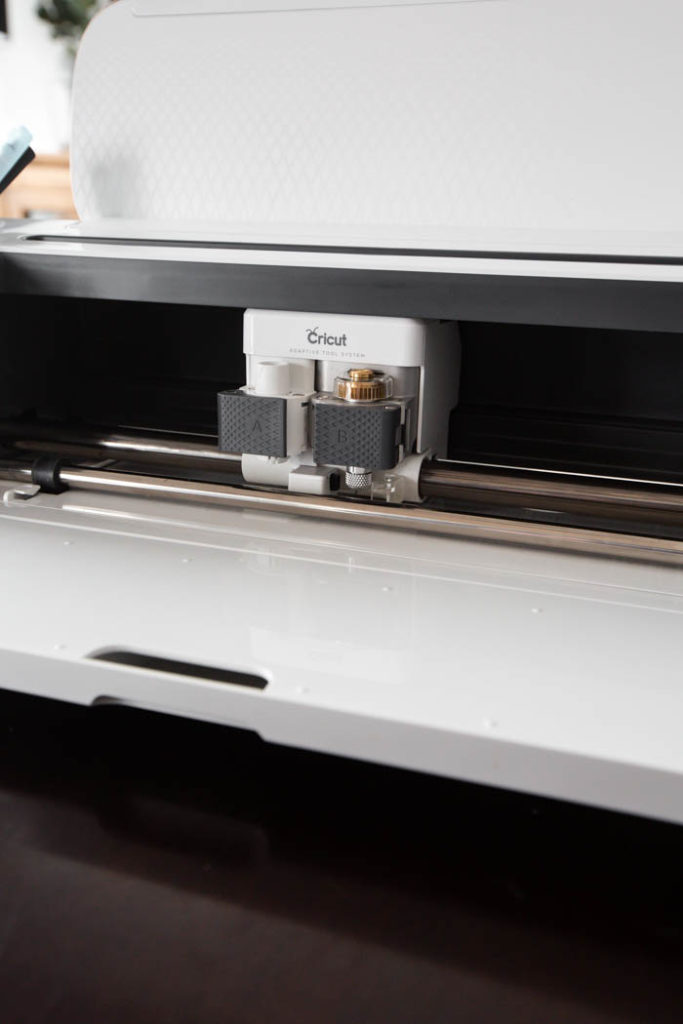
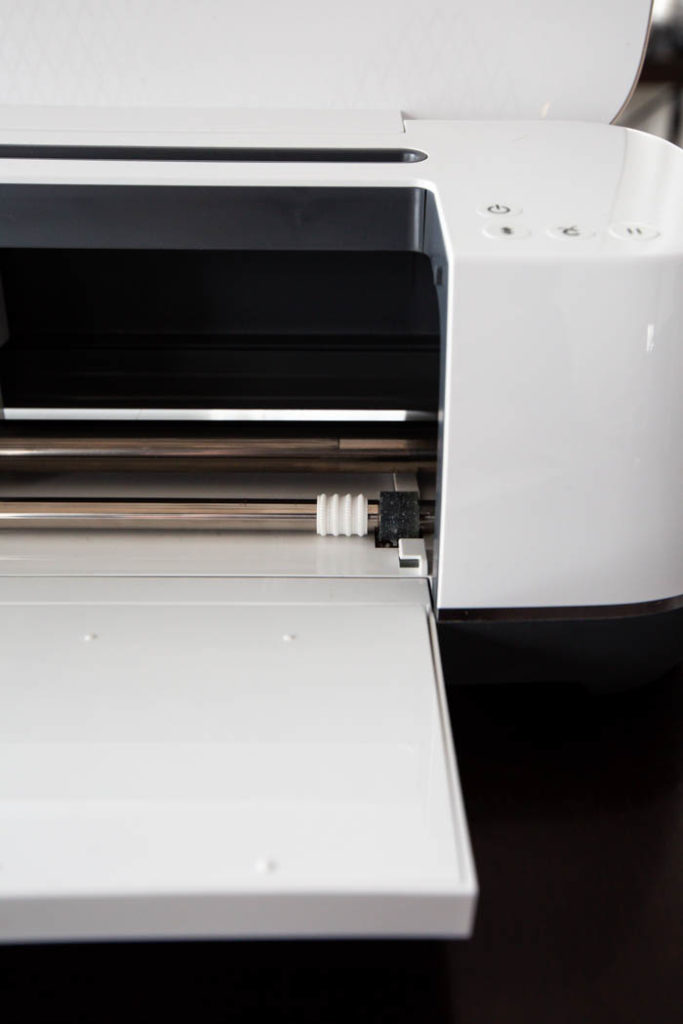
Third, you must move all of the stars over to the right-hand side of your Cricut. You can see a photo of how I moved the stars above this paragraph. You simply move them by hand. The stars are meant to feed the mat and thinner materials through the Cricut machines, but when it comes to thicker materials they are not needed, and in fact, they inhibit the machine from pulling the thicker materials through! Once I forgot to move the stars while cutting leather, and it left a very noticeable imprint on my leather all the way down the sheet! Then the material you cut must be only 11″ in width (because you don’t want any material under the last inch where you have moved the stars). If you are using Cricut genuine leather, for example, you must cut off an inch of the leather before you start the cut (I’m petitioning for them to sell 12″ by 11″ pieces instead of 12″ by 12″ so I don’t have to cut it off myself! lol).
Fourth, and probably the most important, is that cutting with the Knife blade can take a looooong time! Some of the cuts I’ve tried to do, required 20 passes of the knife blade. Depending on how detailed your pattern is, this could be a lot longer than you expected, especially since the Cricut can cut paper and vinyl in just minutes or even seconds sometimes.
Three Mistakes I’ve Made with My Knife Blade:
I’ve been experimenting a lot with my knife blade and have definitely made a few mistakes already! Here are some of the things I tried to do that didn’t quite turn out as planned:
- Too Intricate of a Design – Above you can see that I cut out some eucalyptus leaves out of chipboard. Those worked great, but before that, I tried to cut out some other floral stems, which was waaay too intricate for the Knife Blade. I started it and walked away – when I came back, many of the small pieces were already ripping, and the Cricut Design Space said I had 23 more hours of cutting left! So I promptly stopped that, lol. What I didn’t realize was that it is not recommended to use the knife blade for cutting images or details smaller than ¾”.
- Not Leaving Enough Time to Cut – When the Cricut cuts thicker materials, it has to do multiple passes on the same cutting path, and increases pressure gradually. This means that it can often pass up to 20 times on a design and takes much longer than any thinner material. I’ve majorly underestimated how long this can take. Some simple designs (e.g. pentagons) I’ve cut can be done in ten minutes – other designs have taken hours to cut. So be patient and give yourself lots of time!
- Materials are Too Thick – The thickness measurements that Cricut has given, are not just suggestions. I was cutting balsa wood once and having an awful time with it. My wood kept getting caught under the bar, and shifting on the cutting mat. I finally realized that my wood was too thick. We actually ran my wood through our planer to flatten it out, and then tried again and it cut perfectly!
How the Knife Blade Works:
If you’re curious how the knife blade works, you may want to check out this video. It shows the Cricut Maker using the knife blade to cut balsa wood:
I hope that answers all of your knife blade related questions. If you have any more questions, please ask! I’d love to share more of my knife blade knowledge with you!
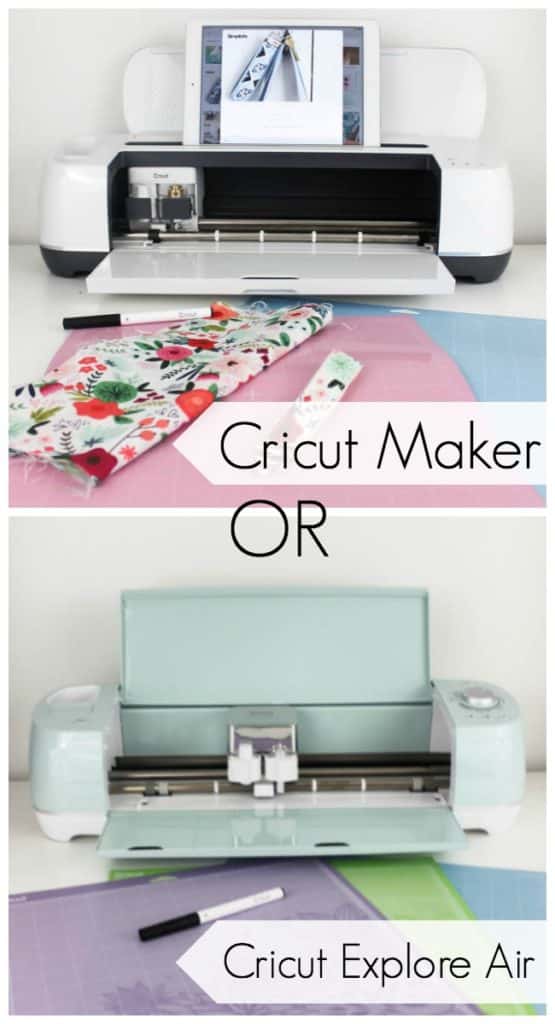
If you’d like to hear more about the differences between the Cricut Maker and Cricut Explore Air machines, here’s a great overview!
Of maybe you want to see how I used the Cricut Maker to cut leather for these amazing Entry Hooks!

This is a sponsored conversation written by me on behalf of Cricut. The opinions and text are all mine.
![Cricut knife blade and materials it can cut with text overlay reading "how to use the cricut knife blade [& all of the materials it can cut]](https://lindiandruss.com/wp-content/uploads/2019/03/How-to-Use-the-Cricut-Knife-Blade-with-Video-150x150.jpg)
Beth
Saturday 8th of January 2022
What do you find is the best wood & wood thickness to cut with on the Cricut Maker?
Lindi
Tuesday 11th of January 2022
The stuff directly from Cricut will always be the best, because it's tested thoroughly with with machine. I've bought balsa wood at Michael's that works great, and found some great options on Etsy before too! You just have to make sure it's thin enough for the machine (compare against the Cricut wood). Hope that helps!