Easy DIY calendar display! Make this simple dollar store calendar hanger in minutes to brighten up your office space!

Are you working from home? With all of the changes over the past couple of years, home offices have become more and more of a necessity! This simple DIY Calendar Display, and the Free printable calendar that goes with it, are one quick and easy way to bring some personality and organization into your home office.
I wanted a nice work space, but didn’t want to spend tons of money on supplies, so I visited our local dollar store and came up with 6 ideas to organize my work space without breaking the bank.
*This post may contain affiliate links. When you buy a product through one of our links, we get a commission at no cost to you! Thank you for supporting our blog so that we can continue to bring you posts like these. For more information, please see our disclosure page.*
How to Make a DIY Calendar Display
I have free printable and downloadable calendars that I give away on my blog every year. And what I wanted to do with this frame was create a nice way to display these calendars. Click here for your own free printable calendar.
This project is a quick, easy, and affordable DIY that I did along with 5 other dollar store projects to organize my office space.
Materials Needed
- Dollar Store Wooden Canvas/Artist’s Panel
- Ruler
- Black Gel Stain
- Hinge Clip
- Fast-Drying Glue
- FREE printable calendar
Step-by-step tutorial for dollar store Calendar Display DIY
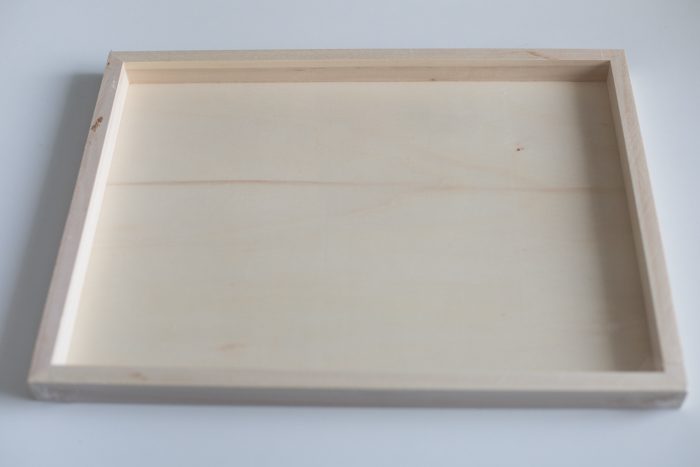
For this project you’ll need a 12×16 inch wooden canvas or artist’s panels that I got at our local Dollar Store.
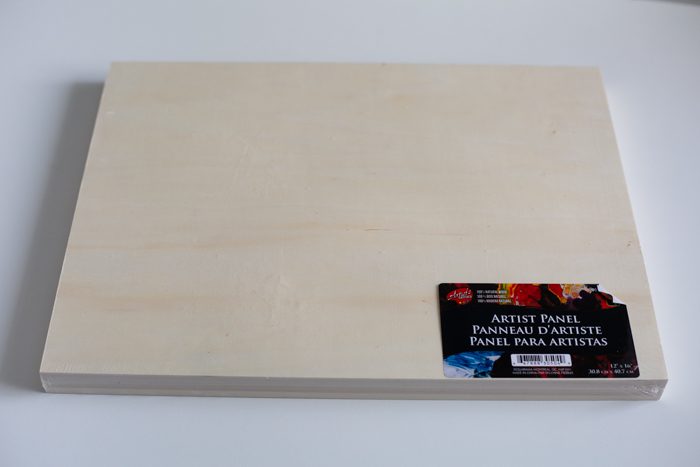
I used my favourite black gel stain, which is from Minwax, and I stained all of the sides of the artist’s canvas.
The primary difference between gel and a traditional stain is that gel stain sits on top of the wood while a traditional stain sinks in. As a result, I get a deeper black colour than a traditional black stain, but I also can still see some of the wood grain and texture through.
You can use paint as well if you won’t want to stain, and the only difference is that you wouldn’t see the texture and grain of the wood.

Once the stain was dry, I looked for a clip to help me hang my calendar. This clip is one that I previously had and actually had previously spray painted when I made my DIY Metal Wall Grid (another affordable DIY organizational idea!), but if you need a new one, I have seen similar ones at the Dollar Store as well.
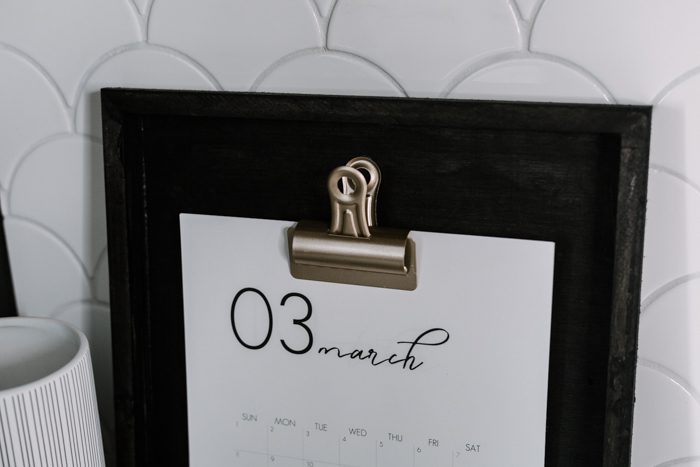
Next, I measured with a ruler to find the center of the frame, so I knew exactly where I wanted the clip and the calendar to sit. Then I used my favourite fast-drying glue, Power-Tac, to glue the clip in place.
Most crafters out there use glue guns for small projects like this, but honestly, I never use a glue gun! Here’s a great full list of alternative glues that don’t burn your fingers, or leave clumps, or strings on your work.
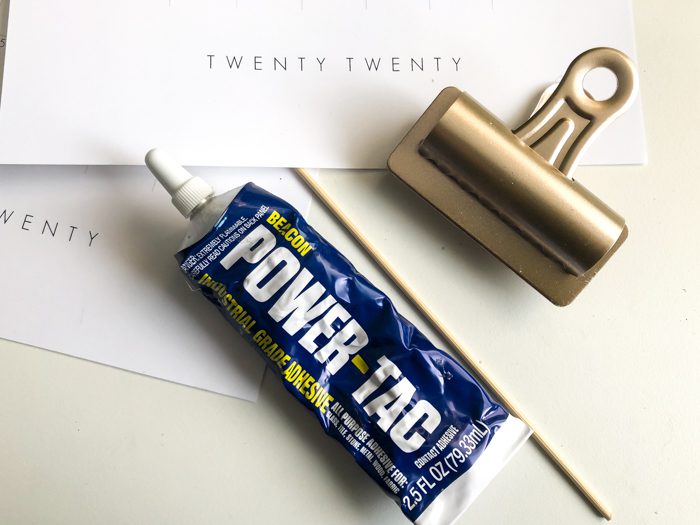
It only took a couple of minutes for that glue to set, and then the calendar was ready to use.
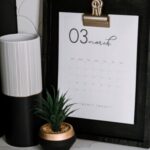
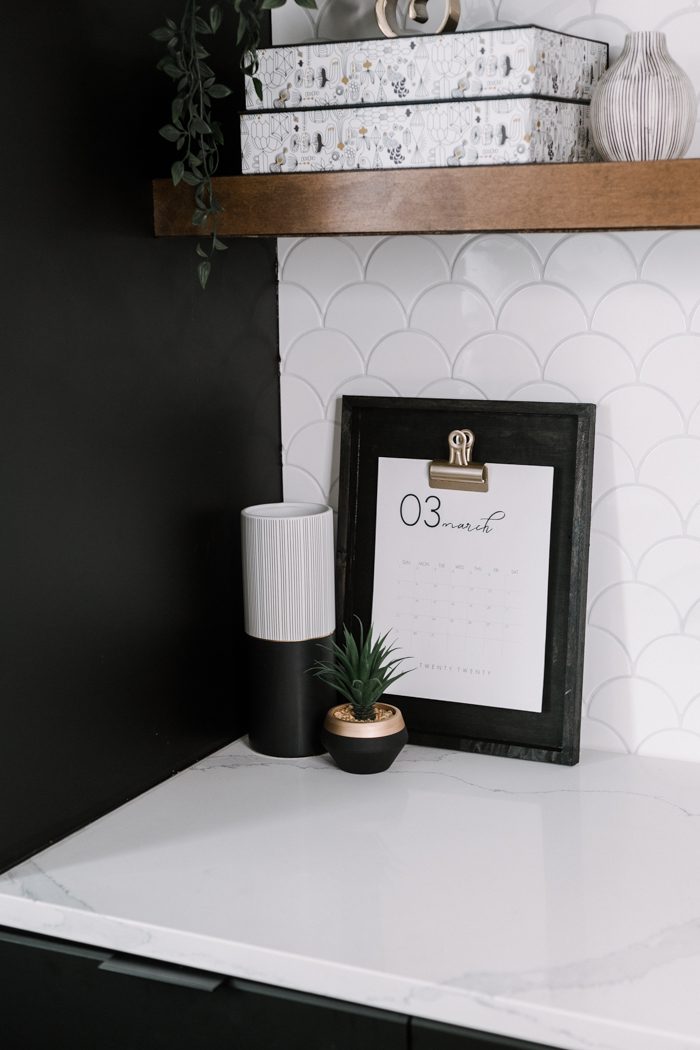
My Finished Hanging Calendar Display DIY
I love that I finally have a nice way to display my calendars and keep track of my dates in the office. You can also use this display board to hang photos, dream boards, etc. Such a simple, stylish addition to a work from home space.
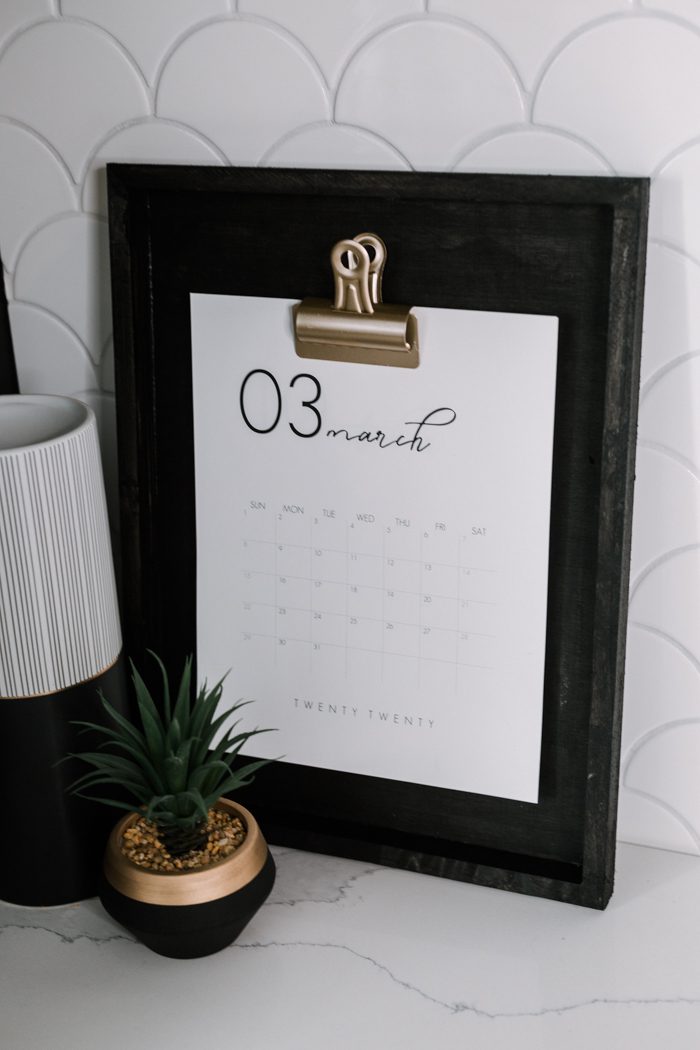
I definitely see this guy sticking around for a long time.
More Dollar Store Office Projects
This calendar display was one of 6 projects I did to organize my office using dollar store supplies. Check out the video below to see how I made the other 6 quick and easy projects!
Don’t forget to subscribe to our YouTube channel for more great dollar store DIYs!
For more great dollar store DIY ideas, check out these beautiful DIY vases!