
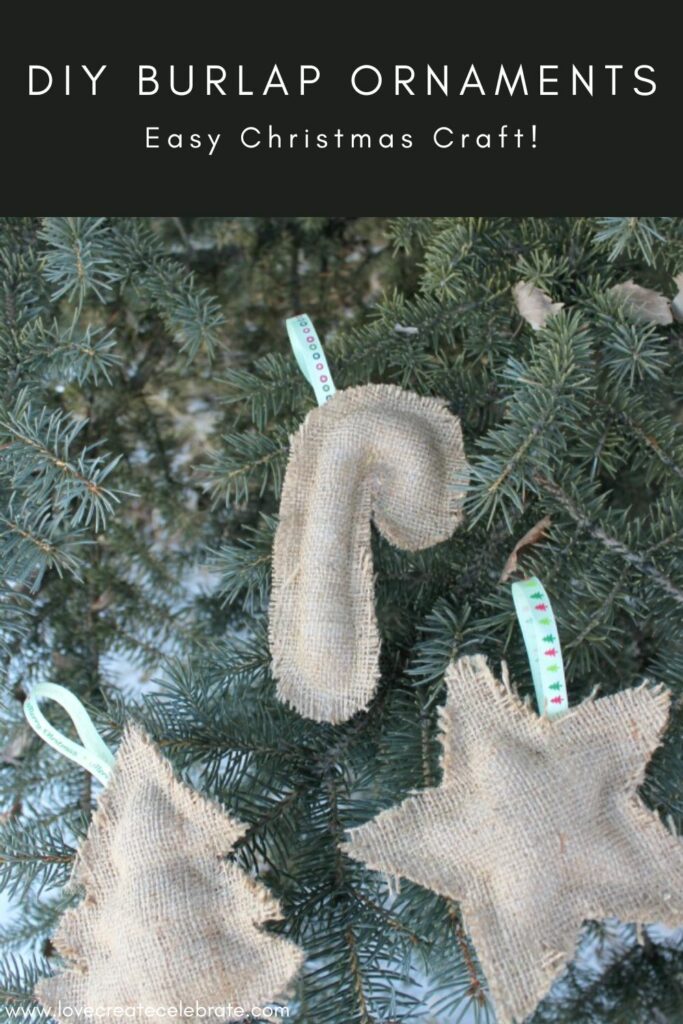
Quick and easy Christmas craft! Sew these DIY burlap ornaments using the templates provided for 3 festive shapes!
Christmas time is here…. Anyone else singing in their head right now? Last year my Christmas Home Tour was FULL of great burlap creations because I love adding pieces of rustic and natural decor. I had the idea for these adorable Burlap Ornaments last year but I didn’t get around to making them, but I’m excited to share them now! I’m also thrilled to be joining 5 other great bloggers to share our holiday burlap DIYs!
*This post may contain affiliate links. When you buy a product through one of our links, we get a commission at no cost to you! Thank you for supporting our blog so that we can continue to bring you posts like these. For more information, please see our disclosure page.*
How to Make your DIY Burlap Ornaments
These were a super quick sewing project that makes a big impact on my Christmas tree!
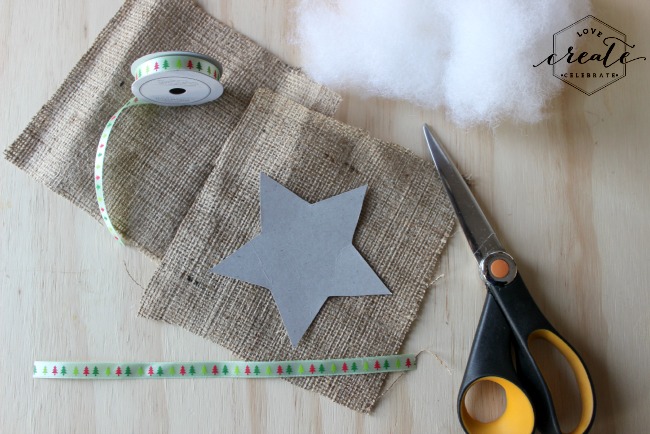
Materials Needed
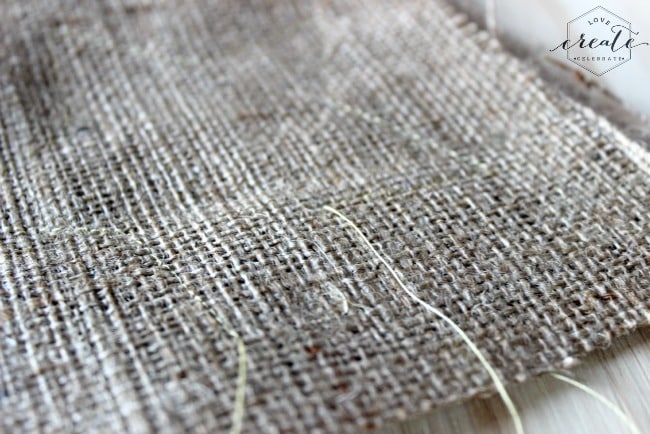
- Tightly woven burlap
- The ornament template (below)
- Cotton Stuffing
- Scissors
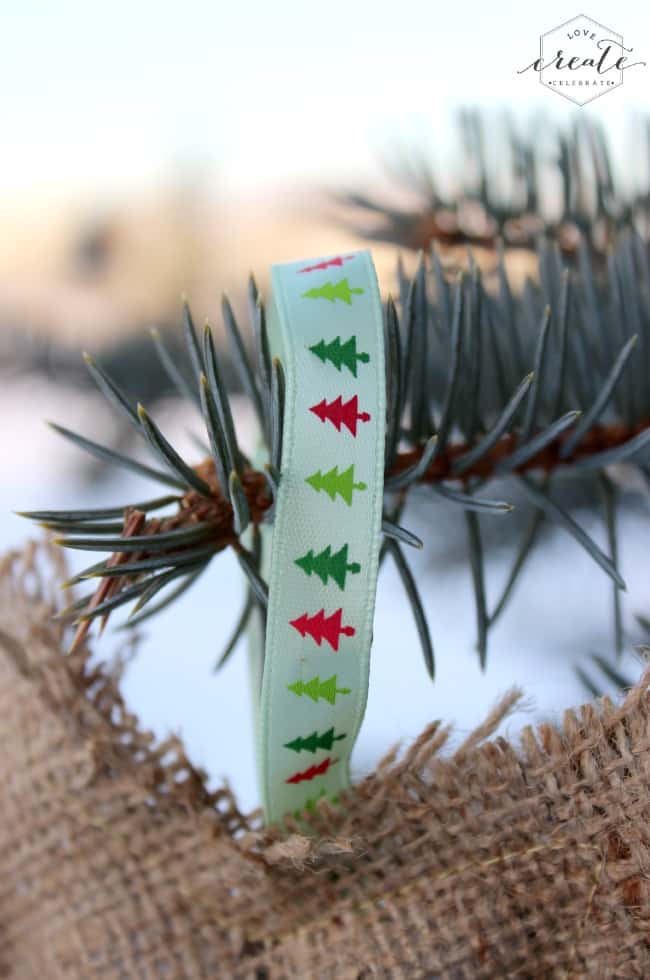
- Ribbon
- Sewing Machine
- Neutral Thread
Step-By-Step Tutorial for your DIY Burlap Ornaments
Start by downloading the Burlap Ornament Template here.
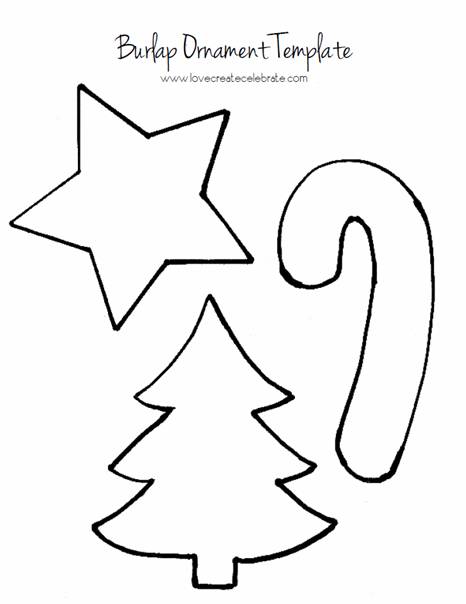
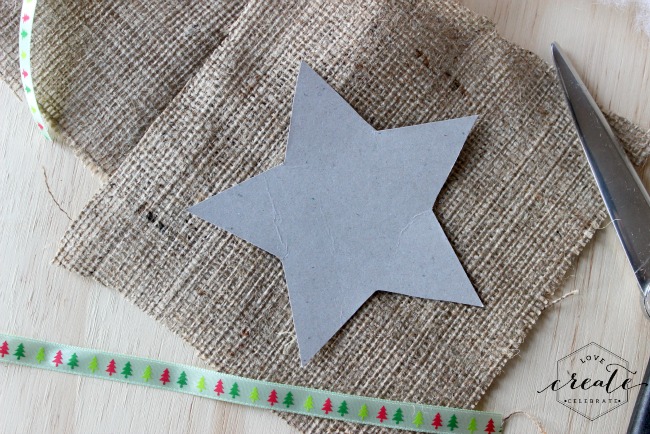
Once you had the template downloaded, you want to cut it out on cardboard or thick card stock. Cut your burlap so that there is about an inch of burlap at the edge of the template on all sides.
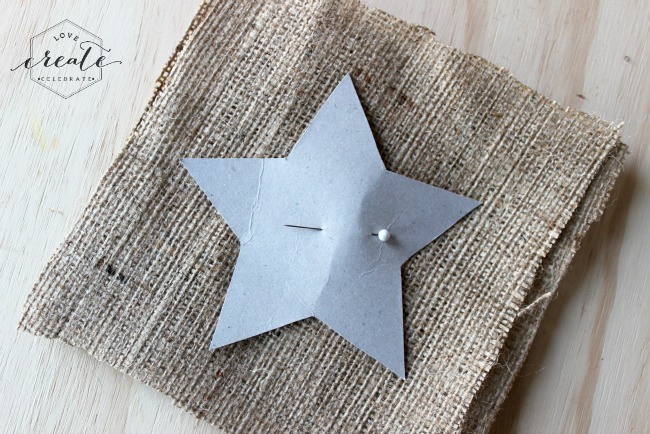
Next, put both layers of burlap together, and pin your template to the centre of your burlap pieces.
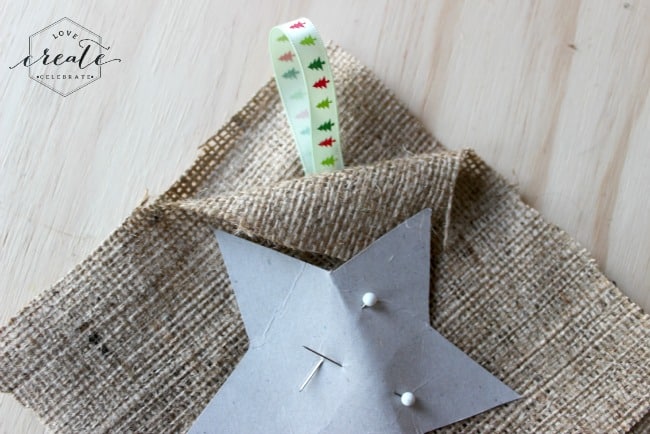
Next, cut 6 inches of ribbon, fold it in half, and pin it in to the middle of the ornament, between the two layers of burlap, so that you you can sew it into place.
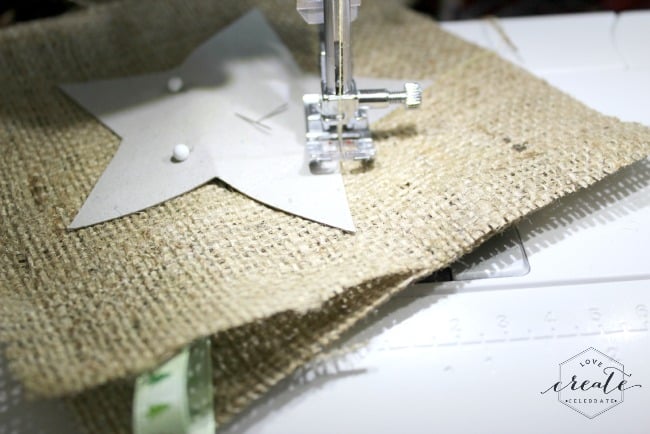
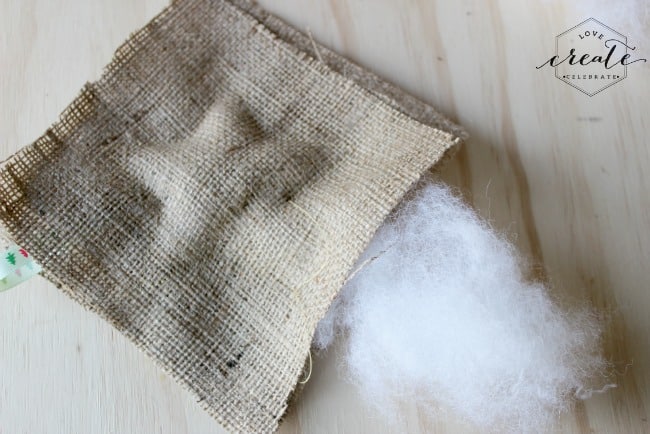
Use your sewing machine to sew along the template, leaving about an inch open to allow you to stuff the ornament. On the star, I just left one of the entire sides open.
You can see (vaguely) where my strings start and end below.
Then stuff away! Making sure that you add enough to fill the unseen part of the ornament too! Then sew up the open edge.
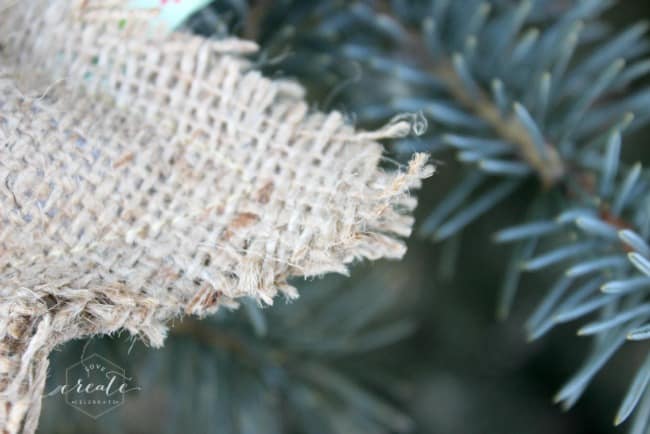
Once you are done sewing, cut around the entire edge of the star, leaving about 1/2″ from the line you sewed. Do this all the way around – and make sure not to cut your ribbon!
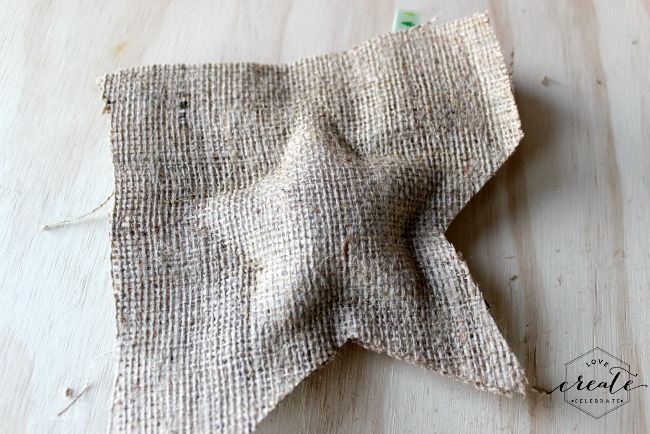
Finally, fray all of the edges by pulling them apart by hand. Sometimes you will have full strings come loose, which you can cut off with your scissors. Let the little pieces stay off, and just pull the attached pieces away from one another.

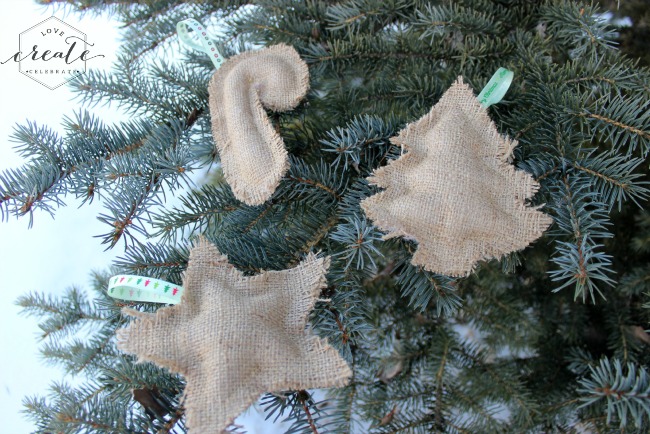
Then you’re done! I’ll let the picture show off the beautifully done rustic burlap ornaments.

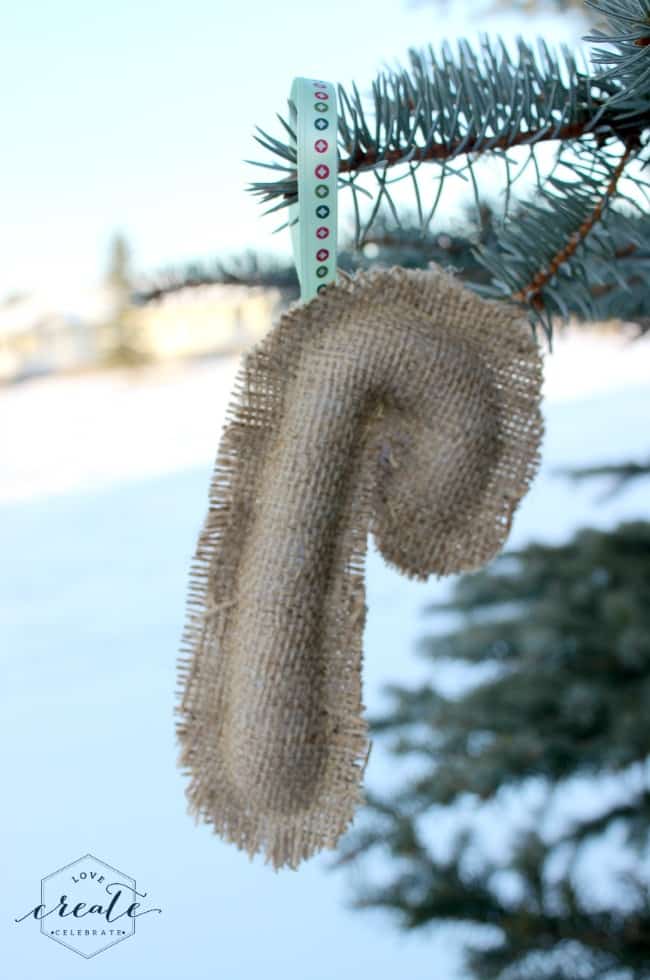
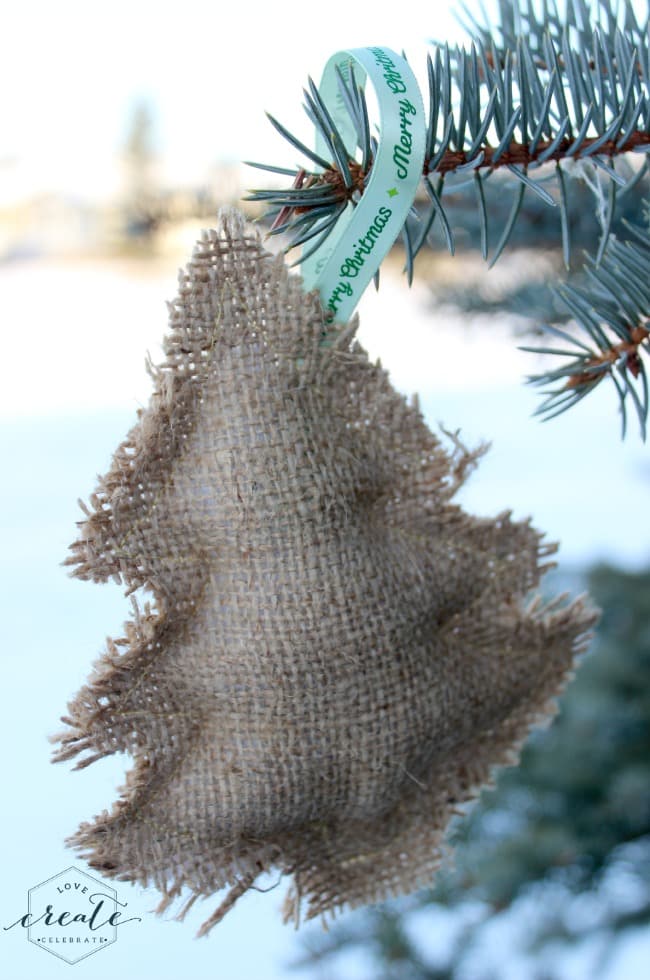
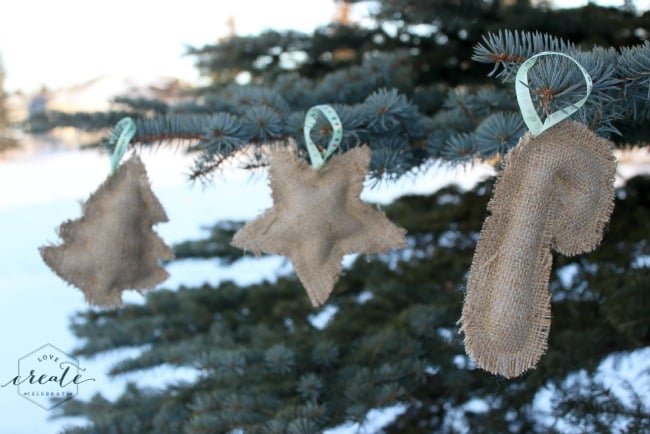
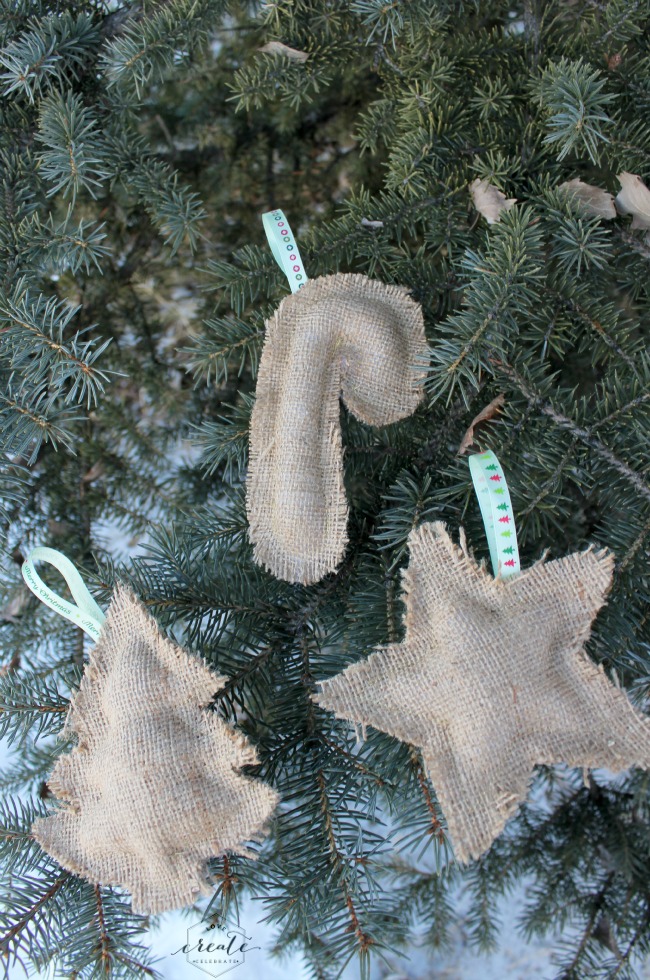
Enjoy your beautiful burlap ornaments!
Burlap Holiday Projects from Our Friends
Check out these other great burlap holiday projects below!
The Honeycomb Home – Burlap Christmas Trees
Just Call Me Homegirl – Burlap Card Display
Love Create Celebrate – Burlap Oranaments
Creative Ramblings – Burlap Christmas Banner
Refashionably Late – Burlap Table Runner
More Holiday Season Projects
Don’t forget to subscribe to our YouTube channel for more great holiday season DIYs!
For more great easy holiday season ornament ideas, check out these modern DIY Candy Cane Ornaments!


DIY Burlap Ornaments
Quick and easy Christmas craft! Sew these DIY burlap ornaments using the templates provided for 3 festive shapes!
Materials
- Tightly woven burlap
- Ornament templates
- Cotton Stuffing
- Scissors
- Ribbon
- Sewing Machine
- Neutral Thread
Instructions
- Download the burlap ornament templates
- Cut out the templates on cardboard or thick card stock
- Cut your burlap so that there is about an inch of of burlap at the edge of the template on all sides
- Put both layers of burlap together, and pin your template to the centre of your burlap pieces
- Cut 6 inches of ribbon, fold it in half, and pin it in to the middle of the ornament, between the two layers of burlap
- Use your sewing machine to sew along the template, leaving about an inch open to allow you to stuff the ornament
- Stuff the ornament. Make sure to add enough stuffing to fill the unseen part of the ornament too
- Sew up the open edge.
- Cut around the entire edge of the ornament, leaving about 1/2" from the line you sewed
- Fray all of the edges by pulling them apart by hand
- Hang your ornaments on the tree!


A Burlap Christmas - DIY Table Runner • REFASHIONABLY LATE
Wednesday 20th of March 2019
[…] Love Create Celebrate – Burlap Ornaments […]
Easy Burlap Card Display - Just Call Me Homegirl
Wednesday 8th of February 2017
[…] Love Create Celebrate – Burlap Oranaments […]
Pili
Sunday 13th of December 2015
Lindi, love the rustic look of those ornaments, thanks for sharing with us at Two Uses Tuesday!
Kathy
Wednesday 9th of December 2015
These ornaments add such a fun texture! Great tutorial. Thanks for sharing at The Creative Circle. xoxo
Melissa
Tuesday 8th of December 2015
These are the perfect amount of rustic chic. Love them. I bet you could even stuff them with a little cinnamon or dried potpourri.