
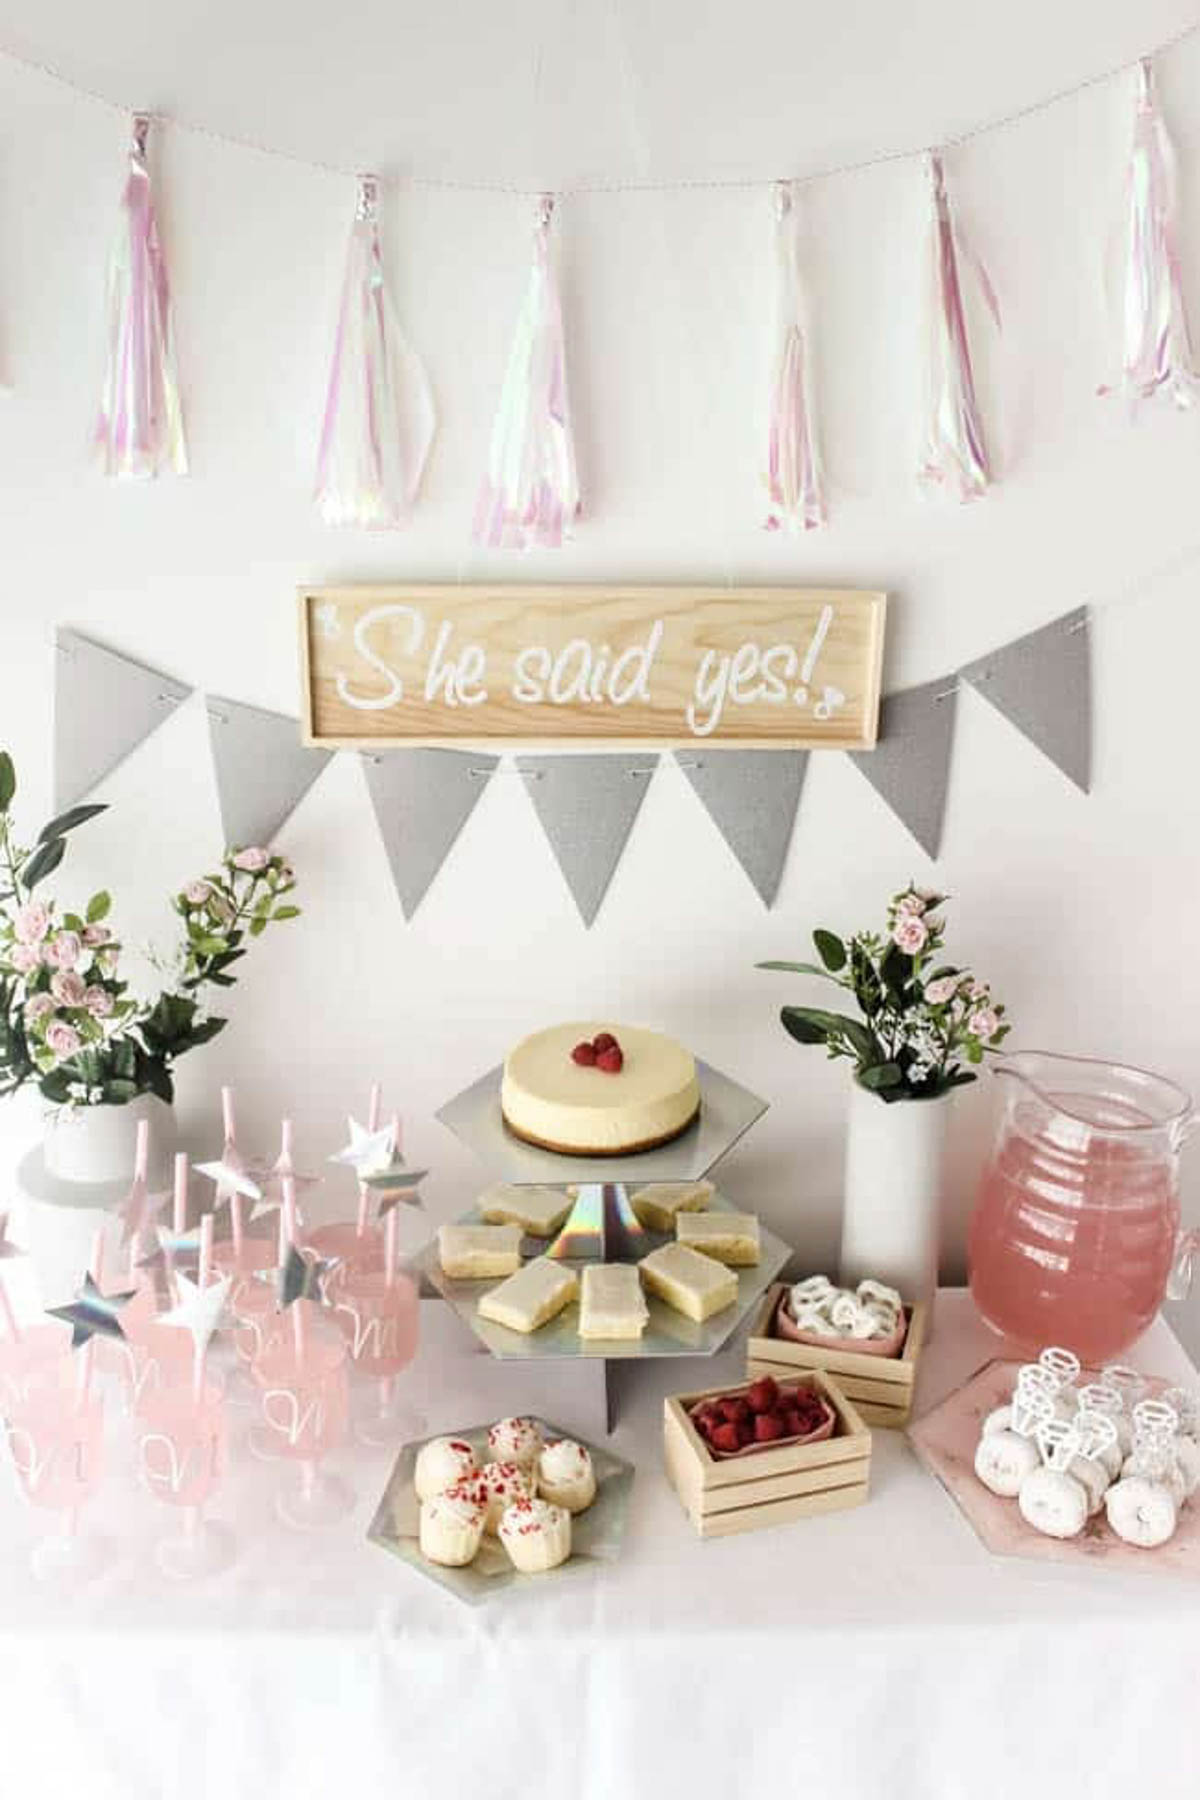
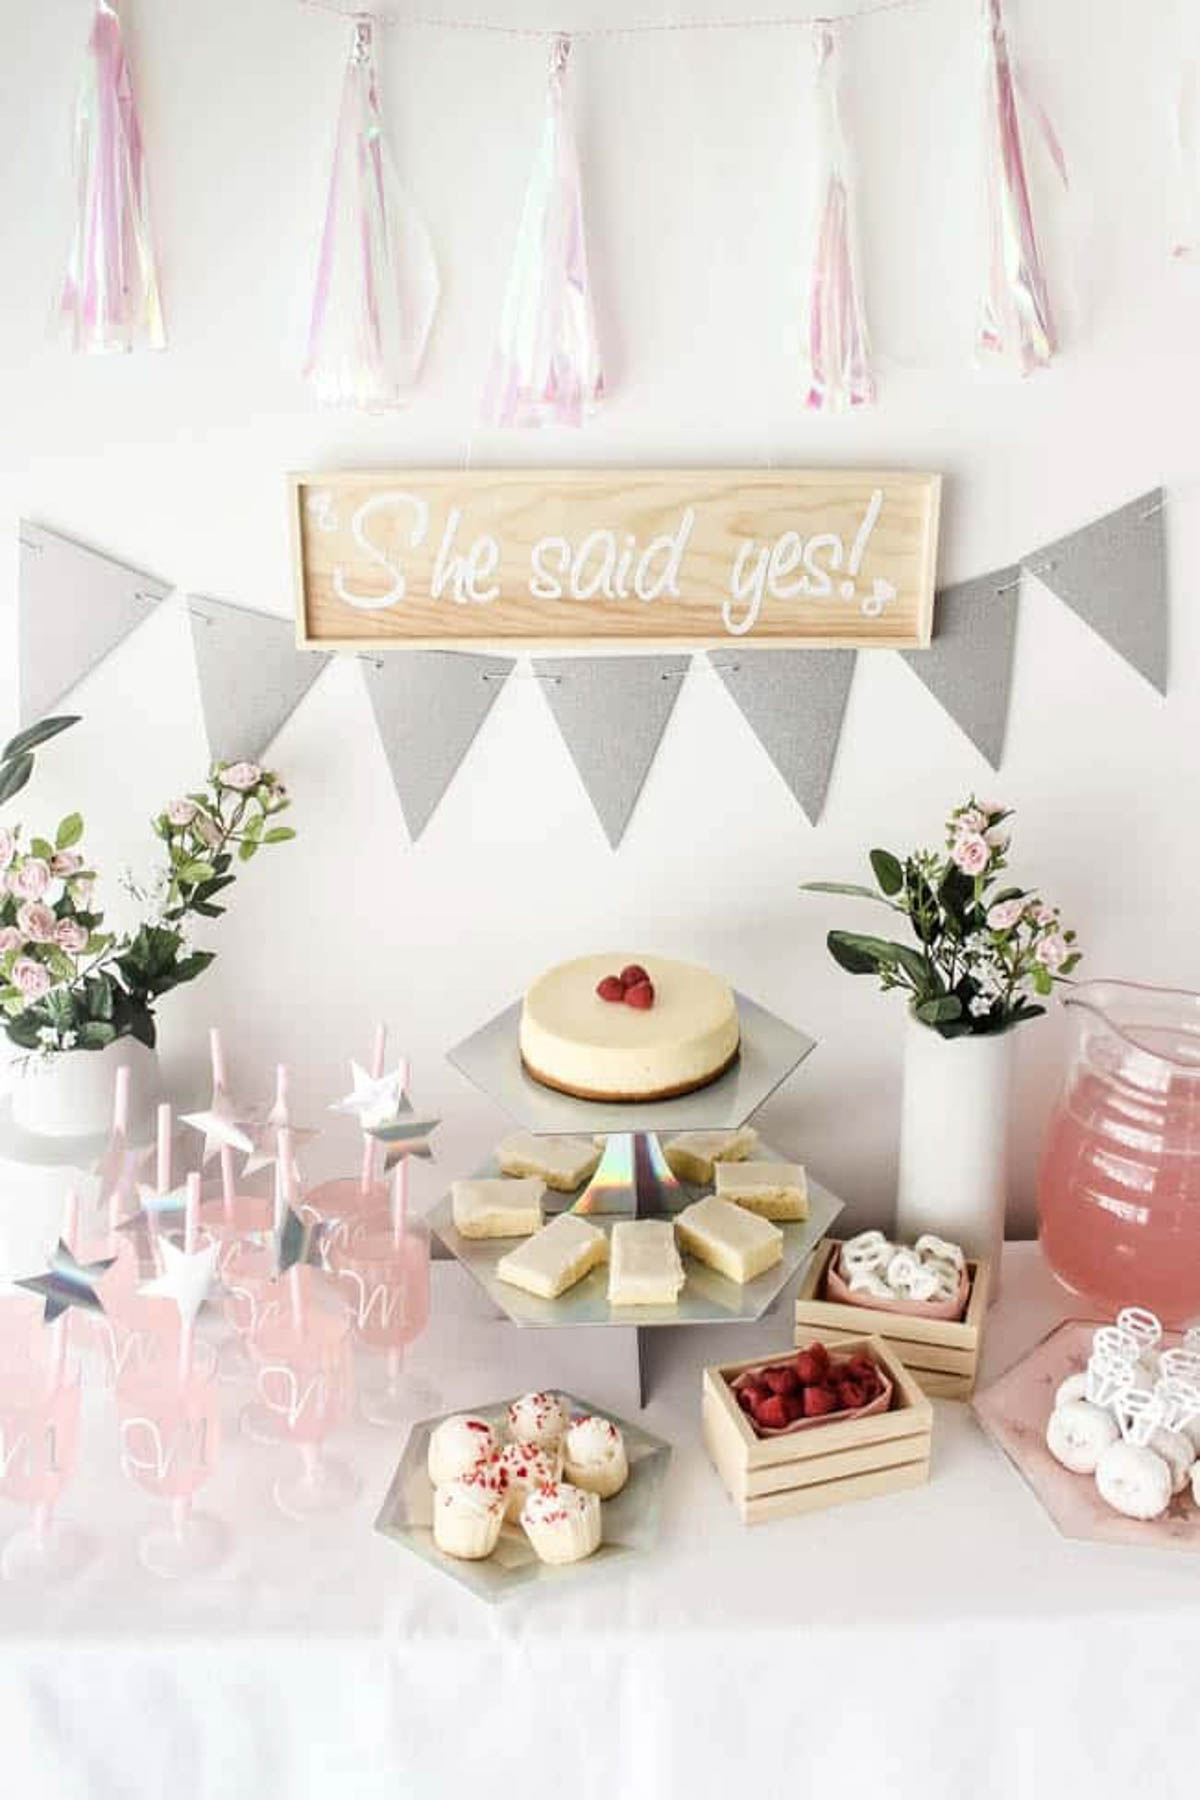
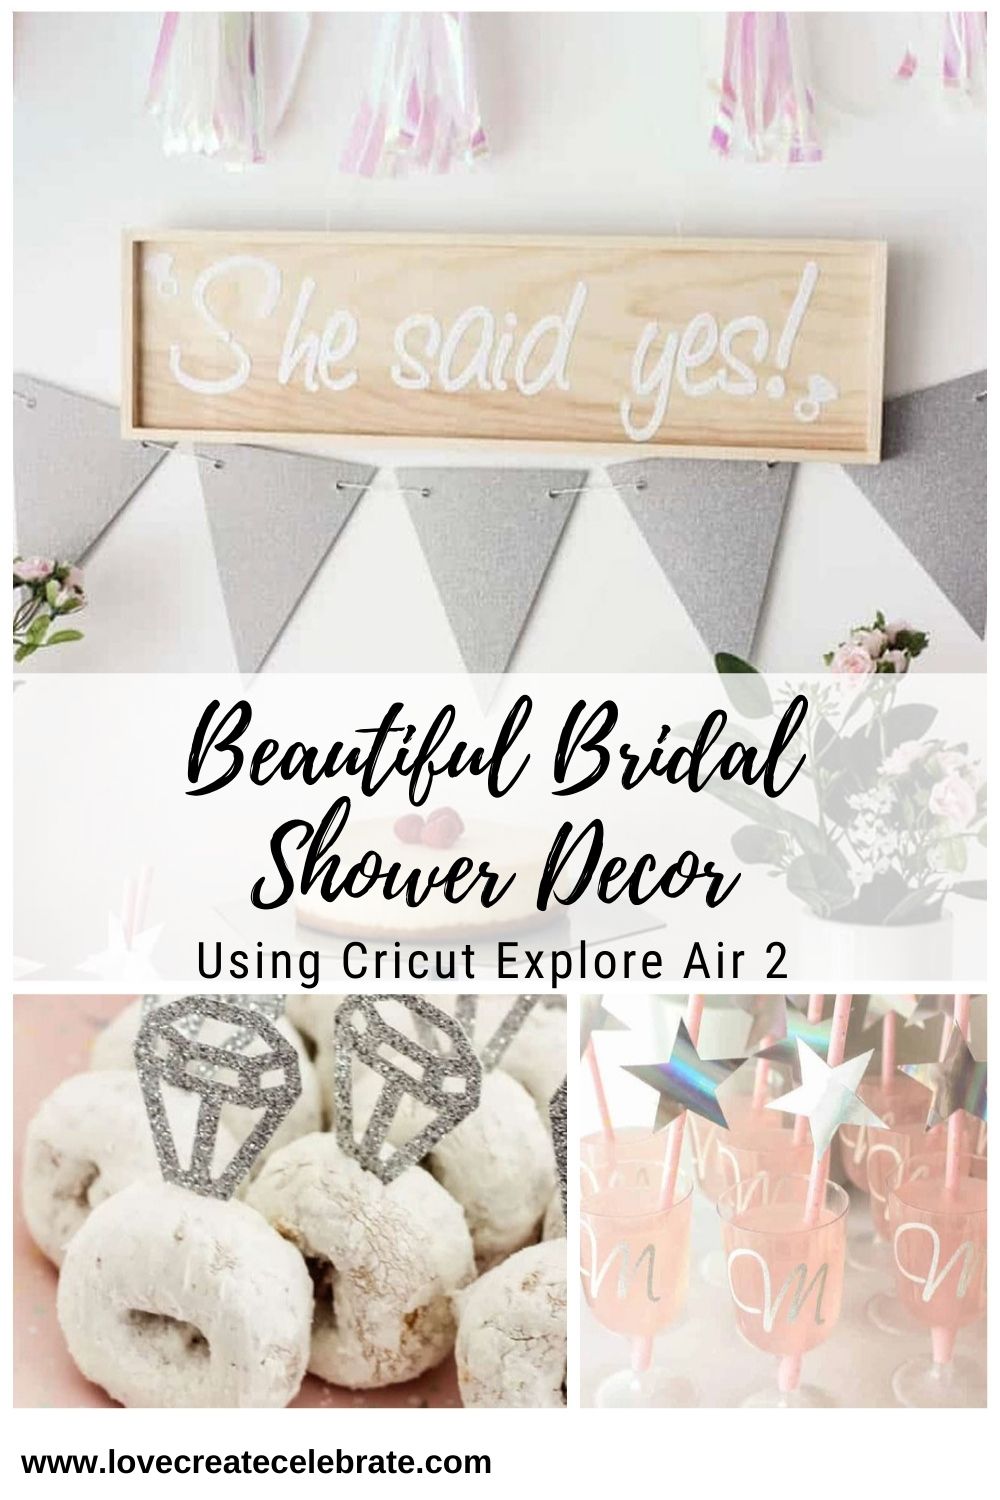
Beautiful Bridal Shower Decorations for the Modern Bride! Decorate with the Iridescent Martha Stewart Celebration Line, and personalize your party with the Cricut Explore 2! You’re bride will be thrilled with the subtle glitter and glam in these pink and silver decorations!
It’s wedding season! Anyone else already have a line up of bridal showers to attend or host?! Honestly I love hosting parties and helping host parties (when I can find the time… lol). A bridal shower is such a fun event to host – there ‘s so much excitement in the air. When it comes to bridal shower decorations, you can usually add a bit of extra glam and glitter. Although I still do it in my own usual, subtle, modern way.
*This post was sponsored by Cricut and may contain affiliate links, for which I would earn a small commission. As always, opinions are 100% my own. For more information, please read my see disclosure page.*
When I started Love Create Celebrate, I planned to share all of the things I loved, created and celebrated. These days the celebration part hasn’t been a huge part of the blog for all of the usual reasons… time, home renovations, kids… but when Cricut asked me to share some of the new Martha Stewart Celebrations Line, I couldn’t say no! If there’s ever a party I can decorate for, it’s one where everything you need comes beautifully coordinated already!
Cricut Explore Air 2 machine exclusively available at Michael’s, and friends… it. Is. Beautiful (We expect no less from you Martha). The pearl colour with gold accents is honestly stunning! The Cricut Explore Air 2 Bundle is available now and comes with colour coordinated tools (weeder, spalula, scissors, scraper, and tweezers), as well as 25 exclusive Martha Stewart projects!
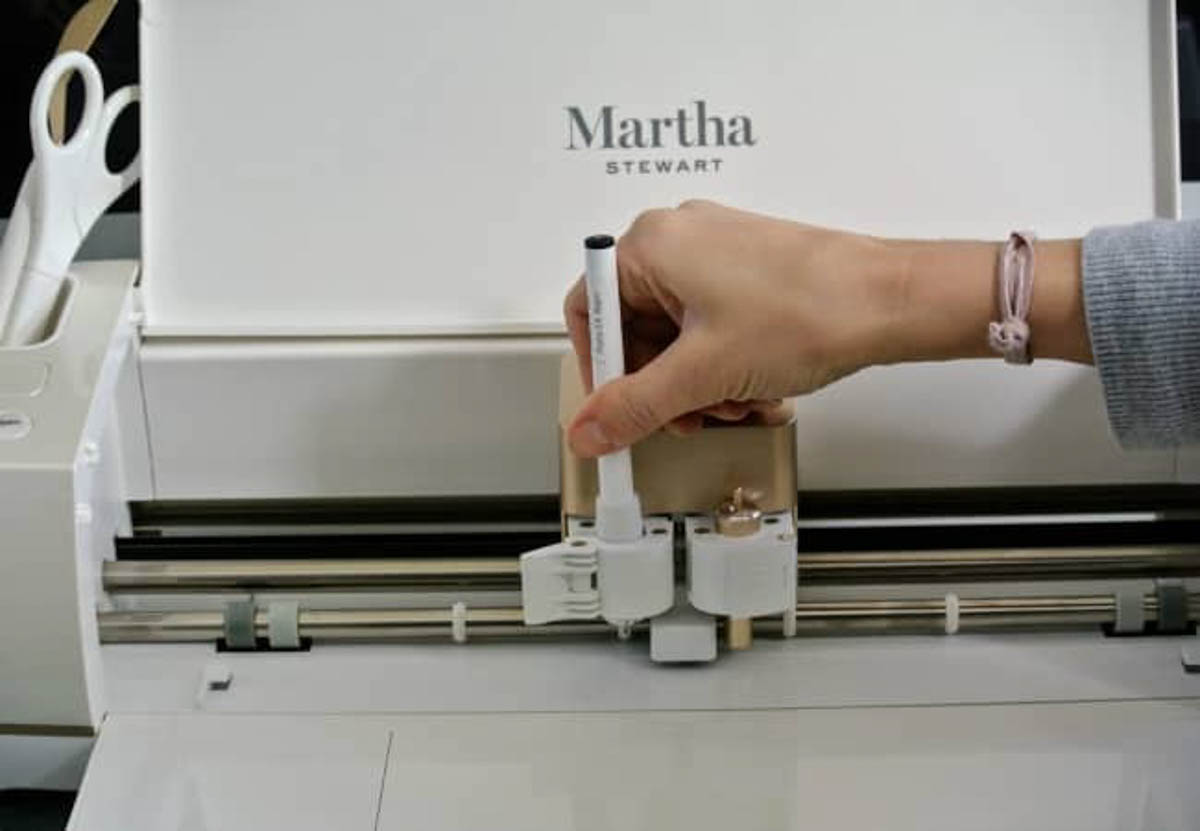
You guys already know how much I love my Cricut machines. I use my Cricut for half of the DIY decor I do around here! The Cricut machine is a beautiful new addition to the family. And it does all of my favourite things, including writing, scoring, and cutting 100 different materials, from cardstock, to vinyl, to foil, and faux leather.

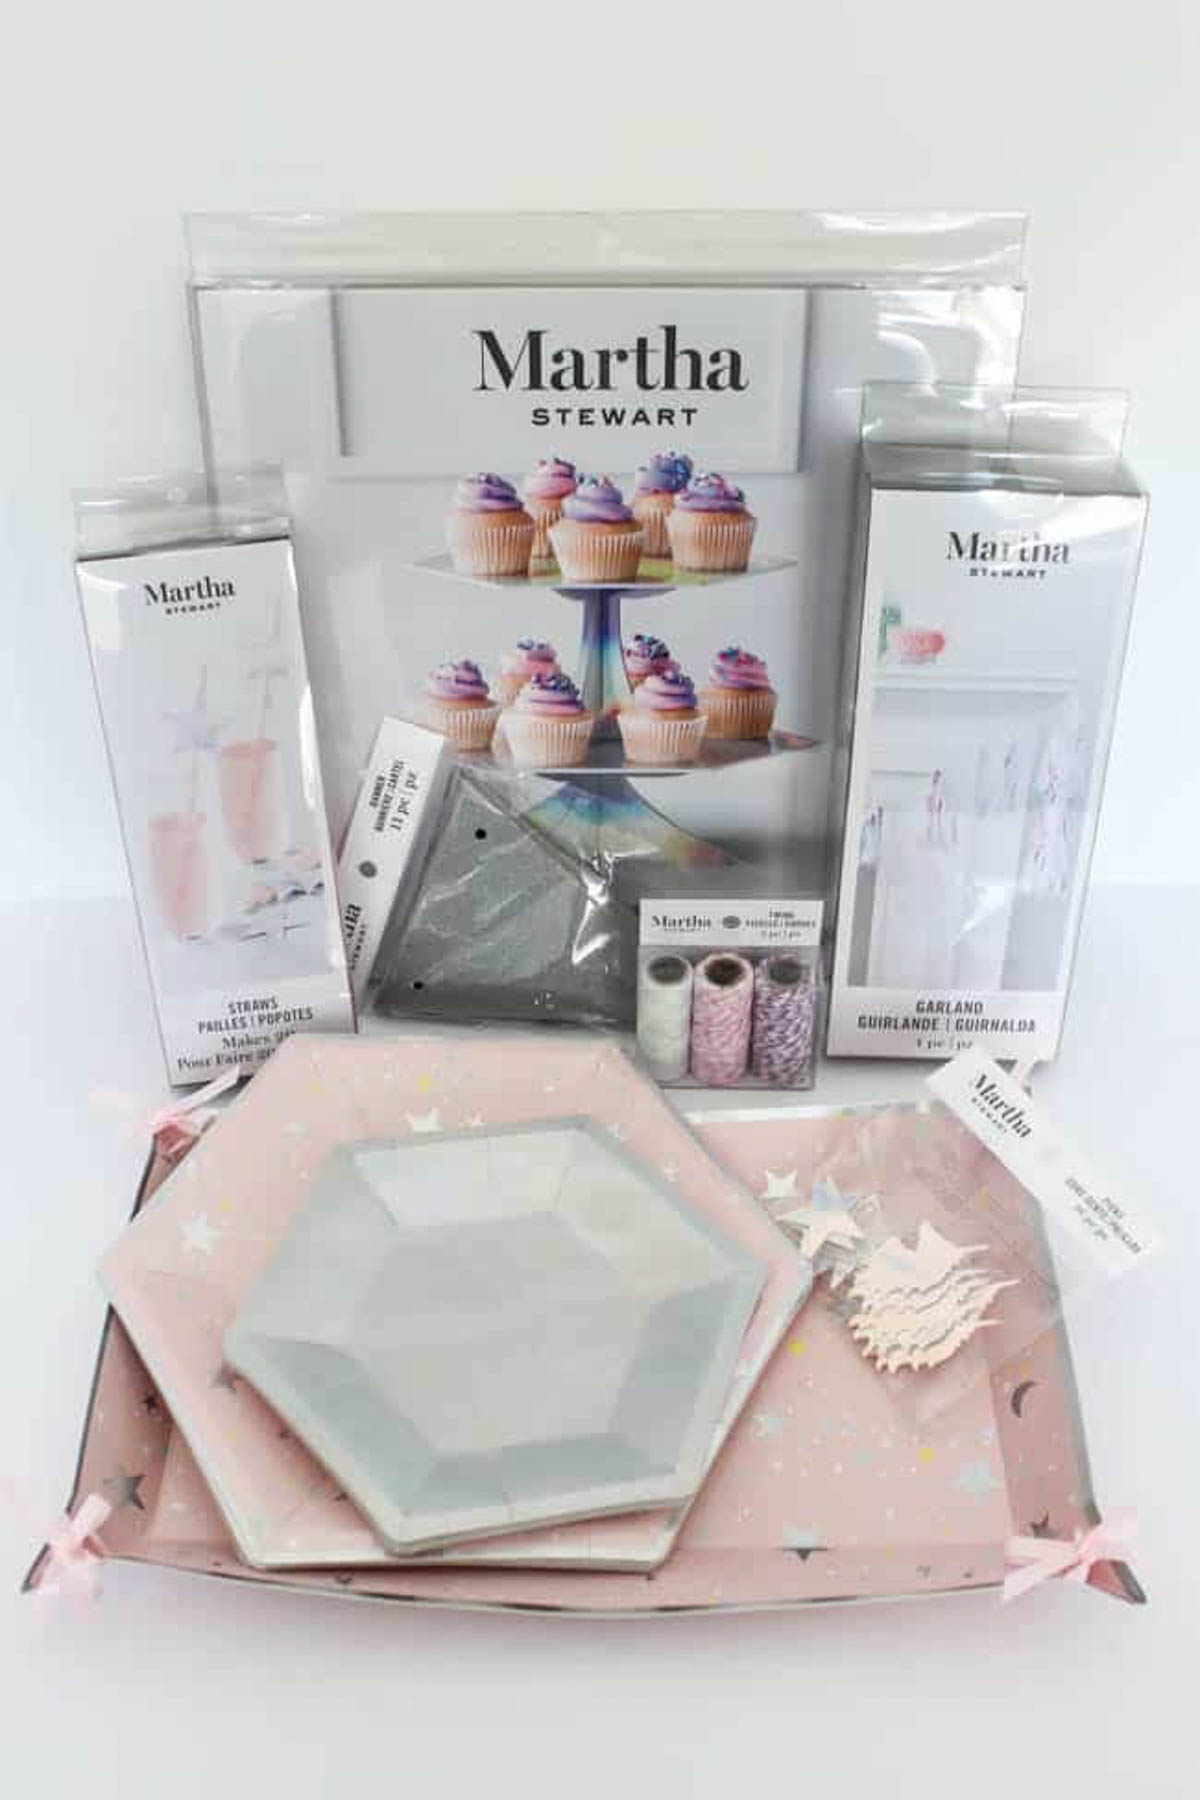
Obviously I had to try everything out immediately, lol. And since we’re diving into wedding season, I thought I would customize some bridal shower decorations with my new Cricut! The colours and themes for the party were taken from the new Martha Stewart Celebrations Line called Iridescent. Martha has started an entirely new line of party supplies and decor that gives you EVERYTHING you need, from balloons, to plates and napkins, to party favor packages. There’s a party line for virtually any colour or theme at all!
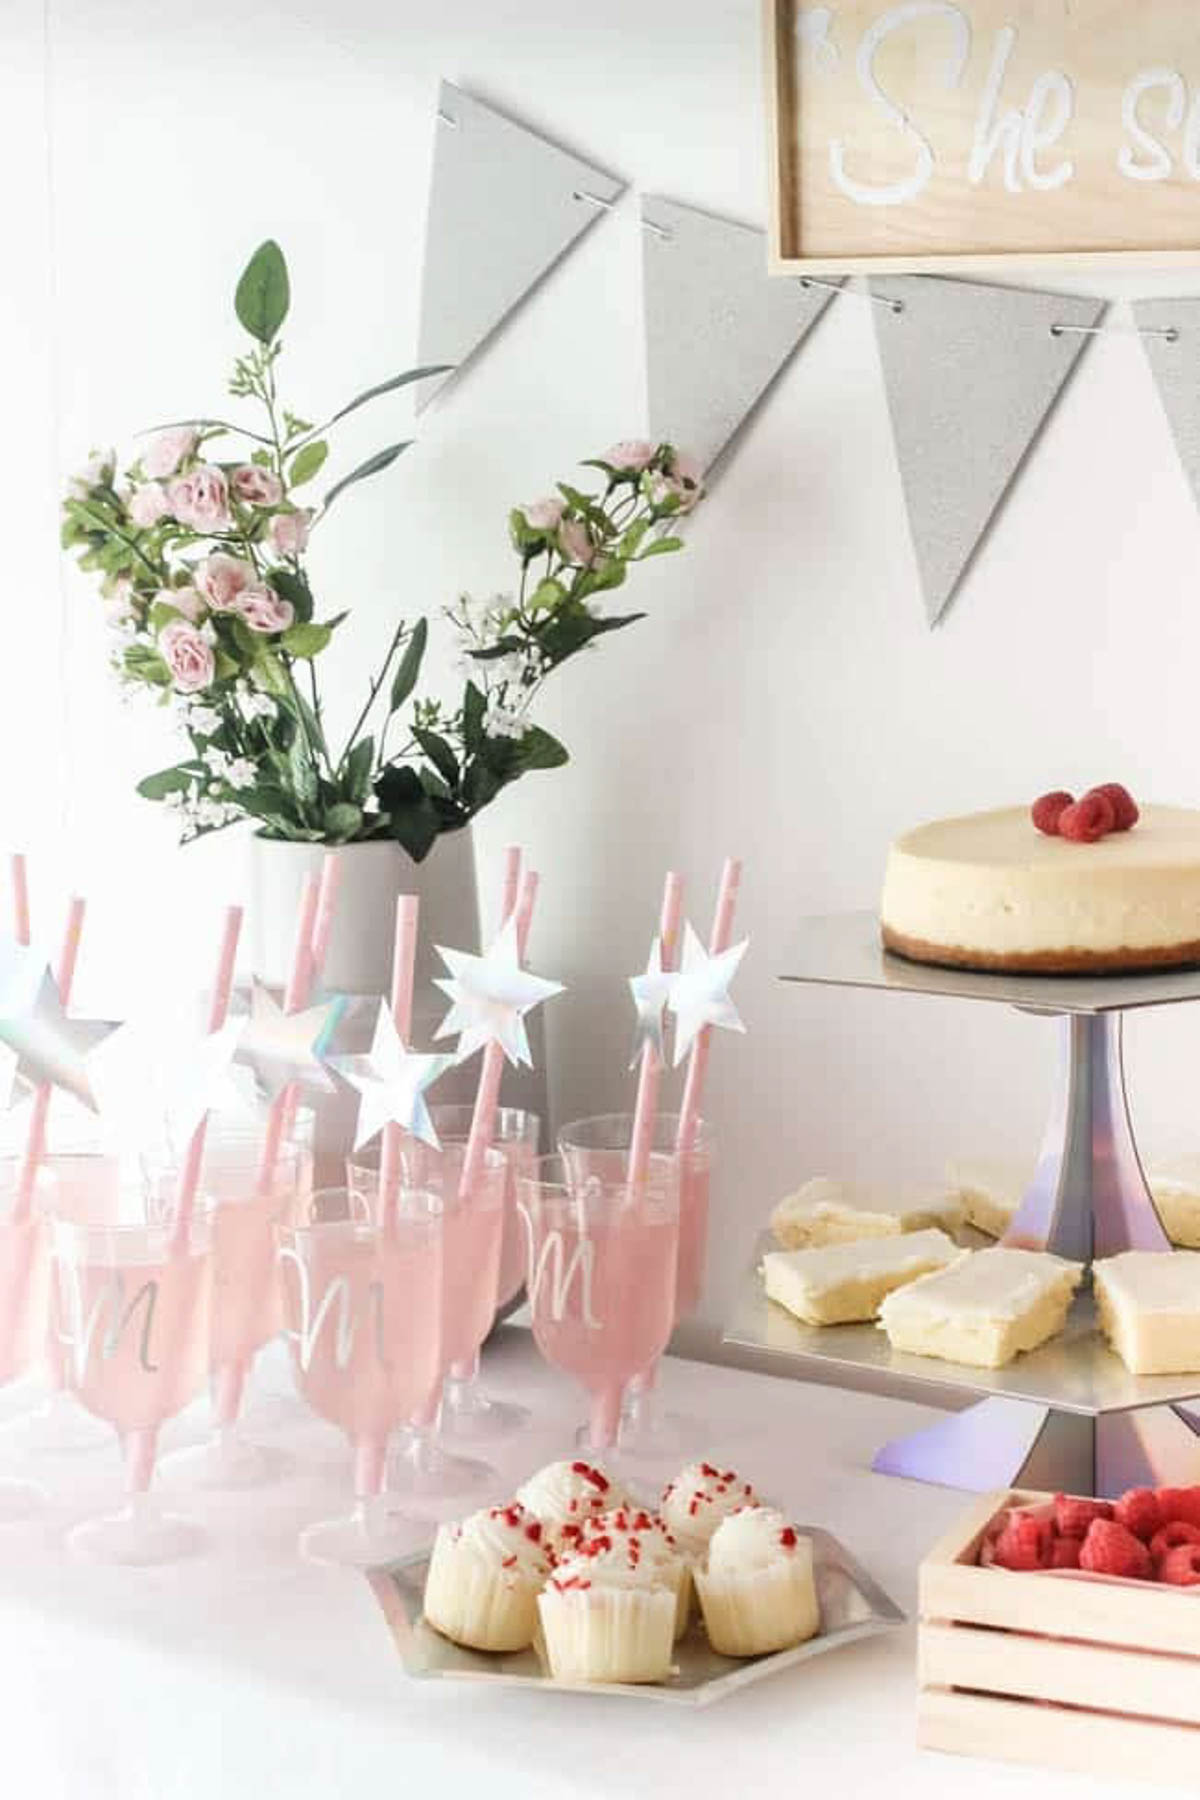
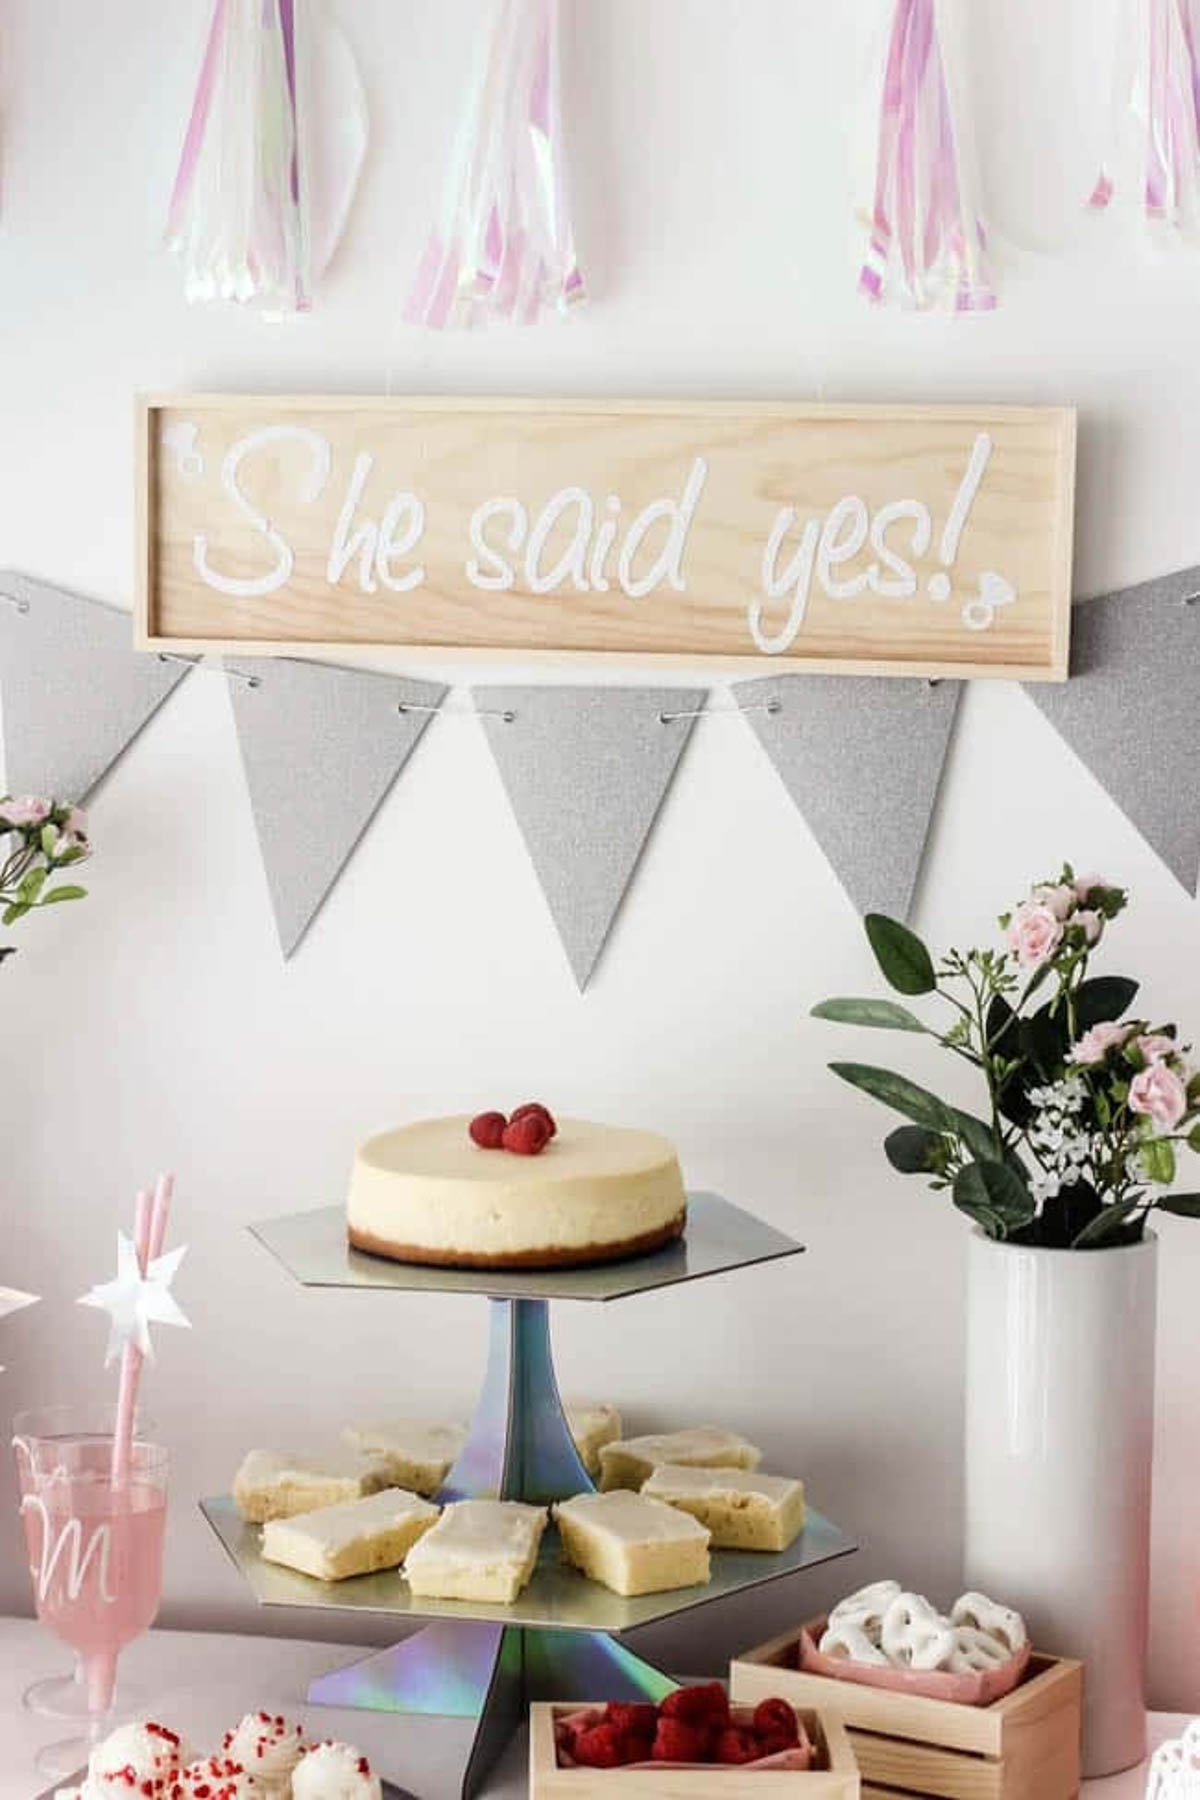
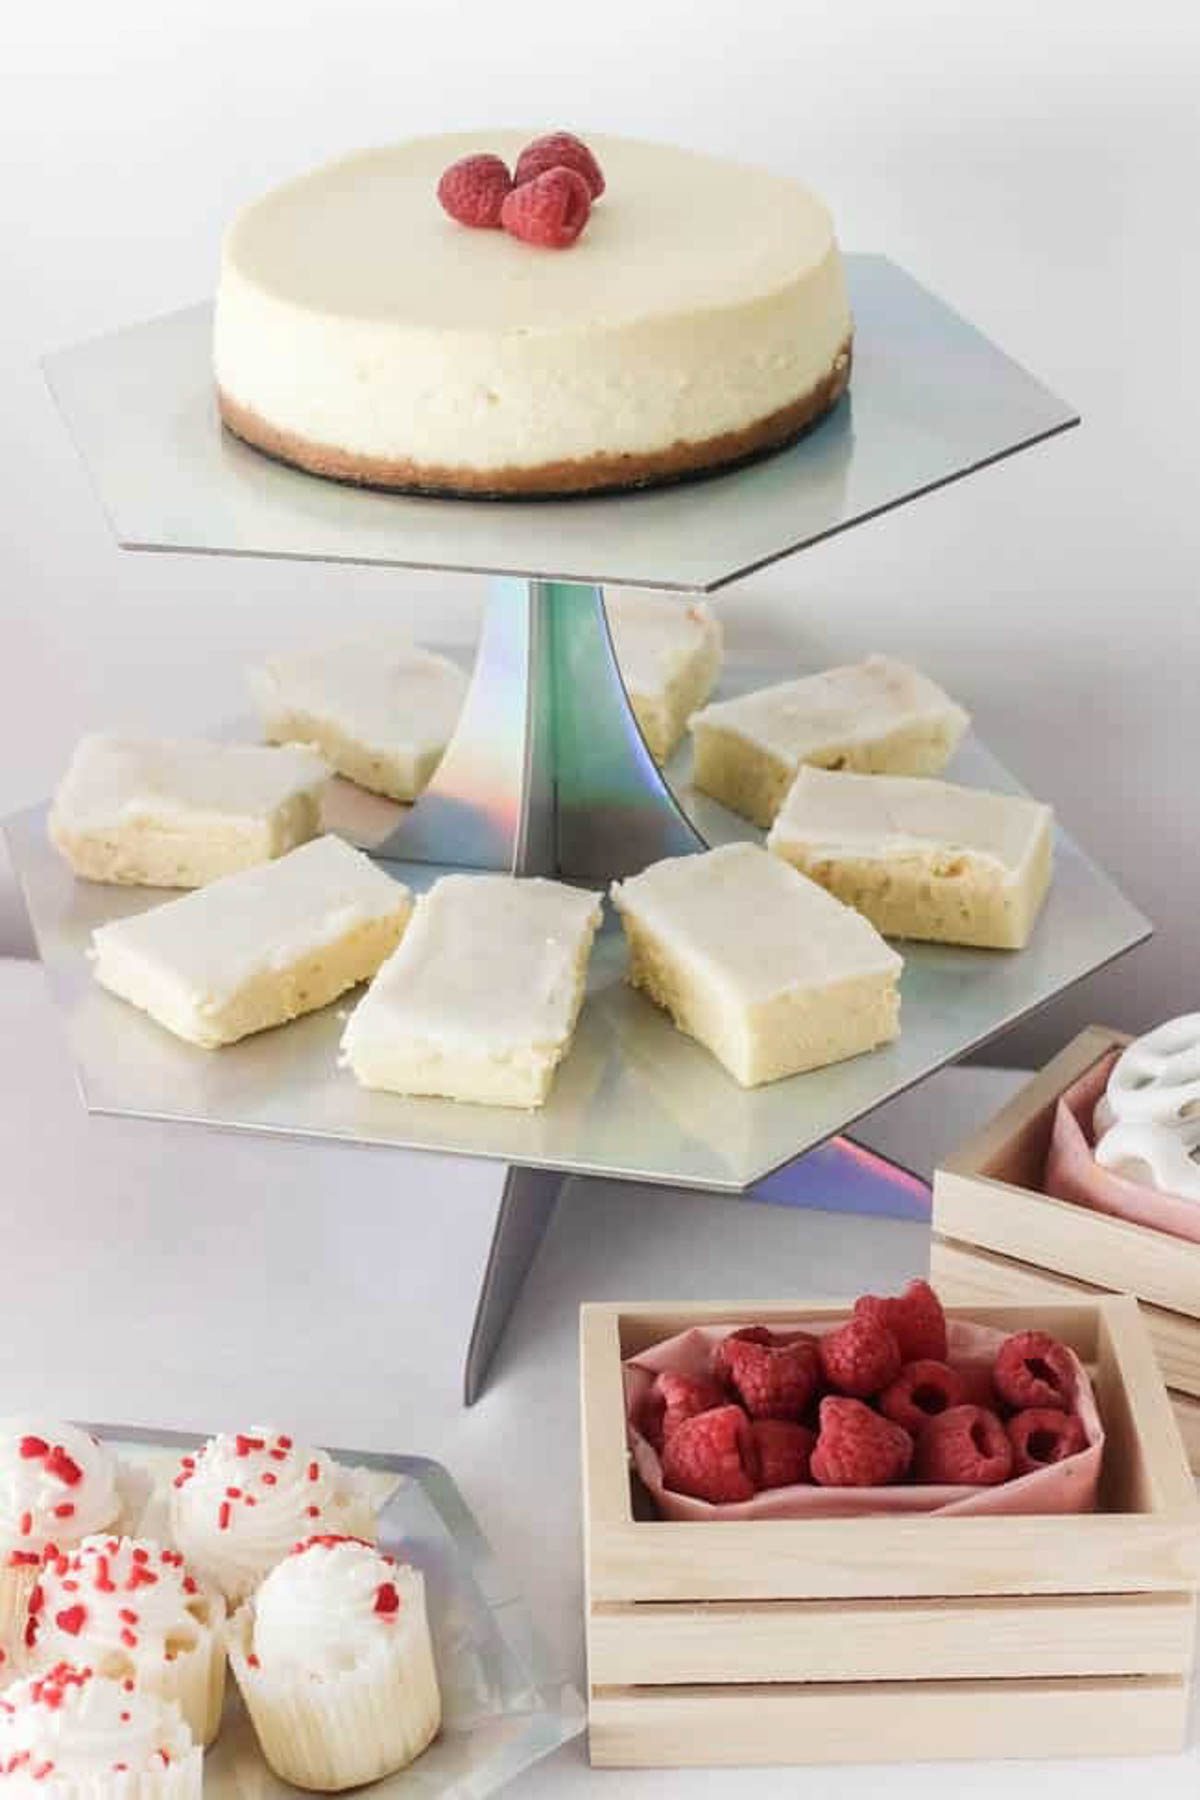
The Iridescent line was perfect for my bridal shower! The plates, cake stands, straws, garlands, strings, and even the favor bags holding goodies in my crates were all from this beautiful party line! Then, I used some coordinating Cricut vinyls and cardstock to personalize some beautiful bridal shower decorations too!
3 Beautiful Bridal Shower Decorations:
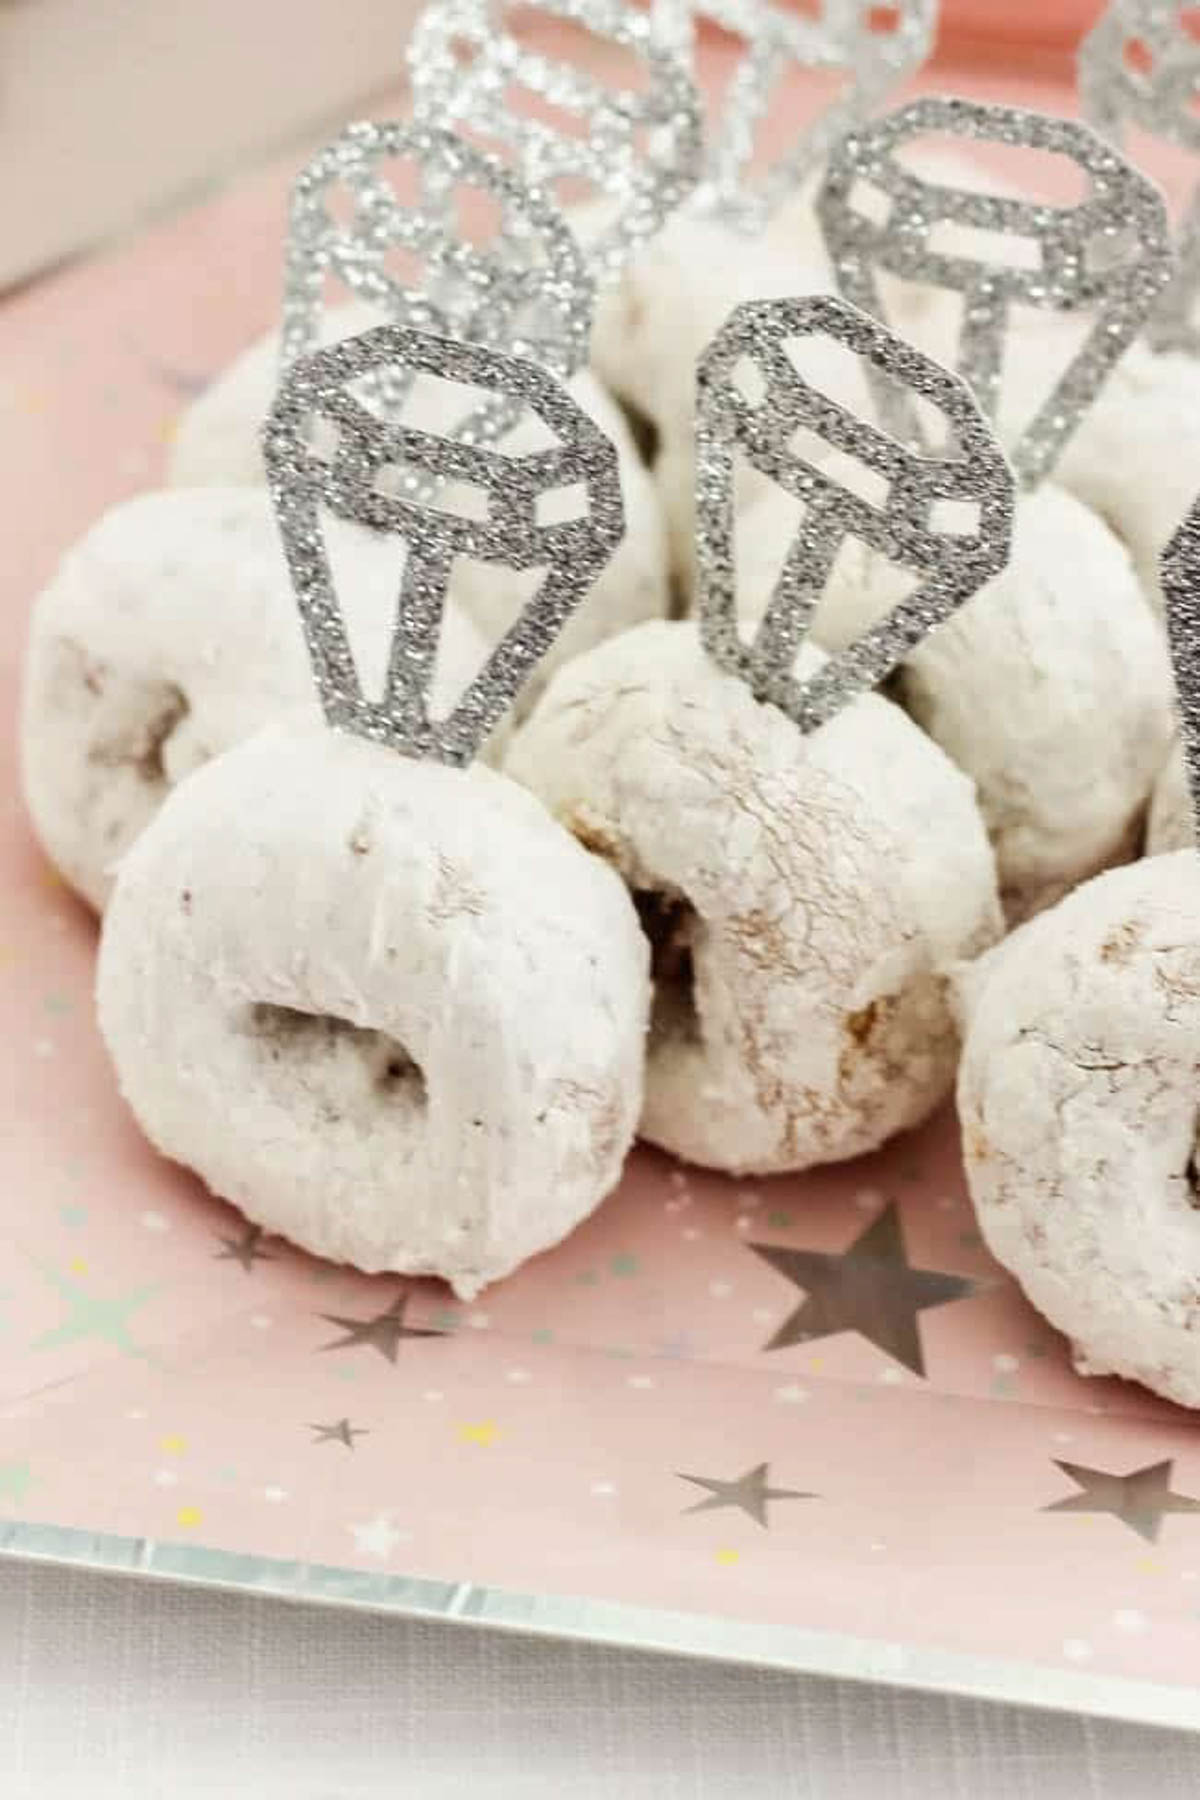
Donut Engagement Rings
Materials:
Toothpicks
Design space file: OPEN HERE
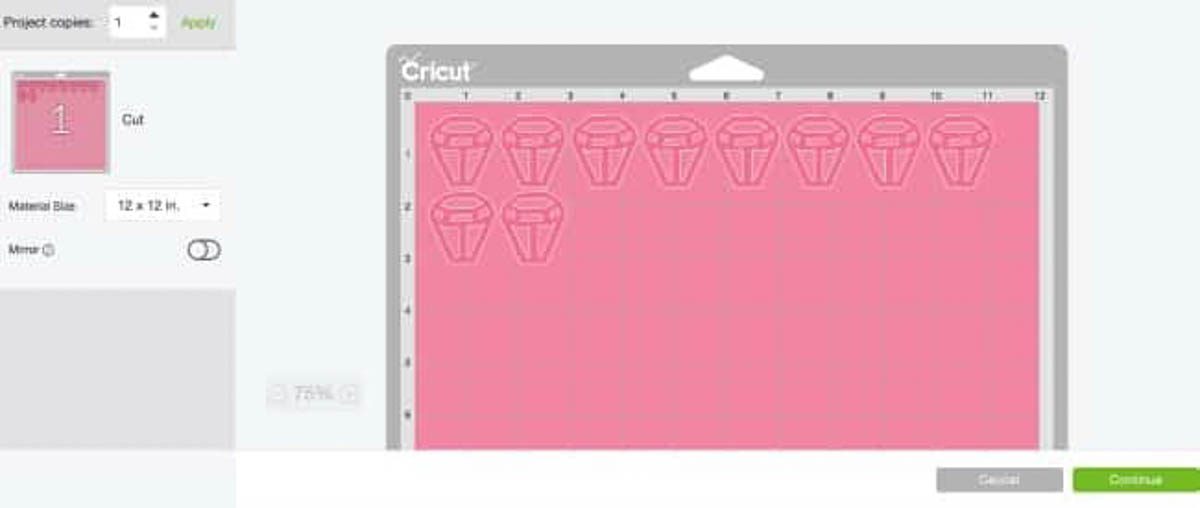
Open the design space file and customize your diamonds to cut however many you need! Then click “make it” to cut the materials with your Cricut.
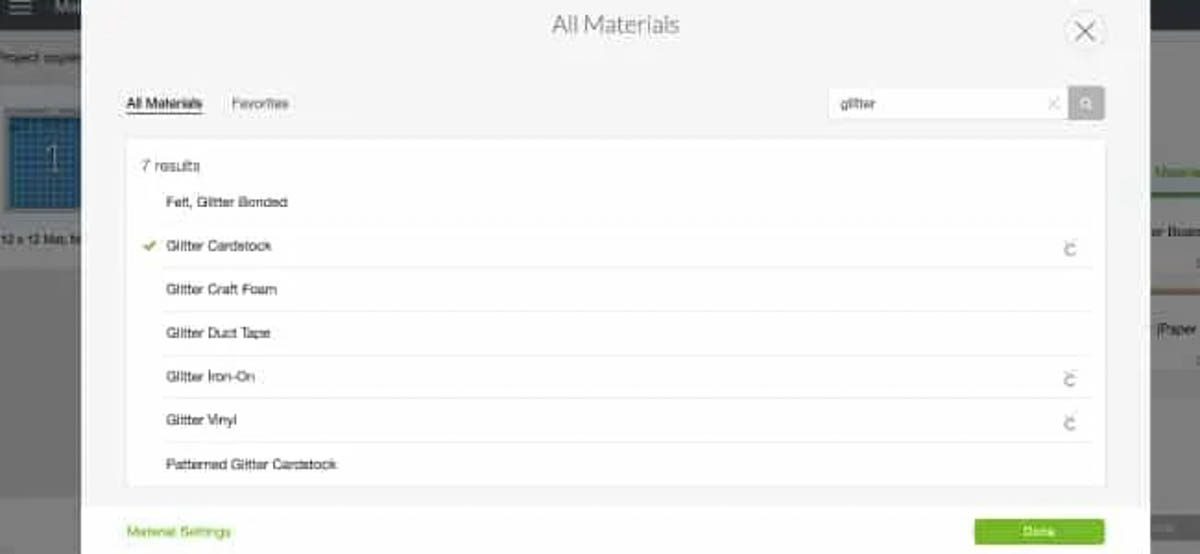
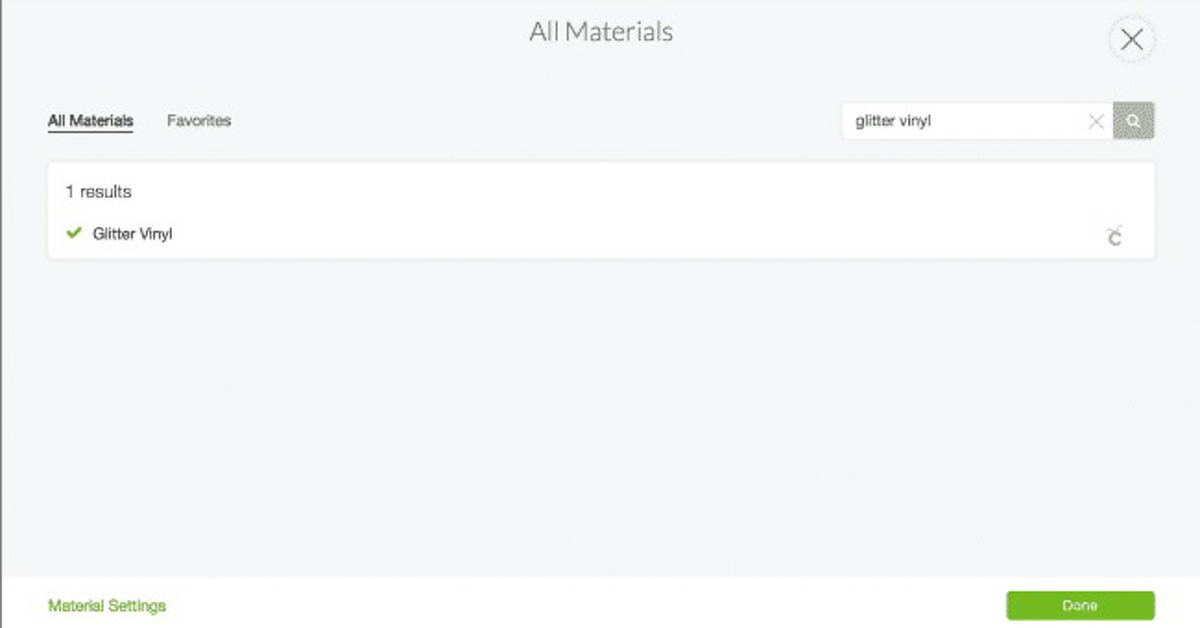
Make sure to select “glitter cardstock” as your material, but searching for it.
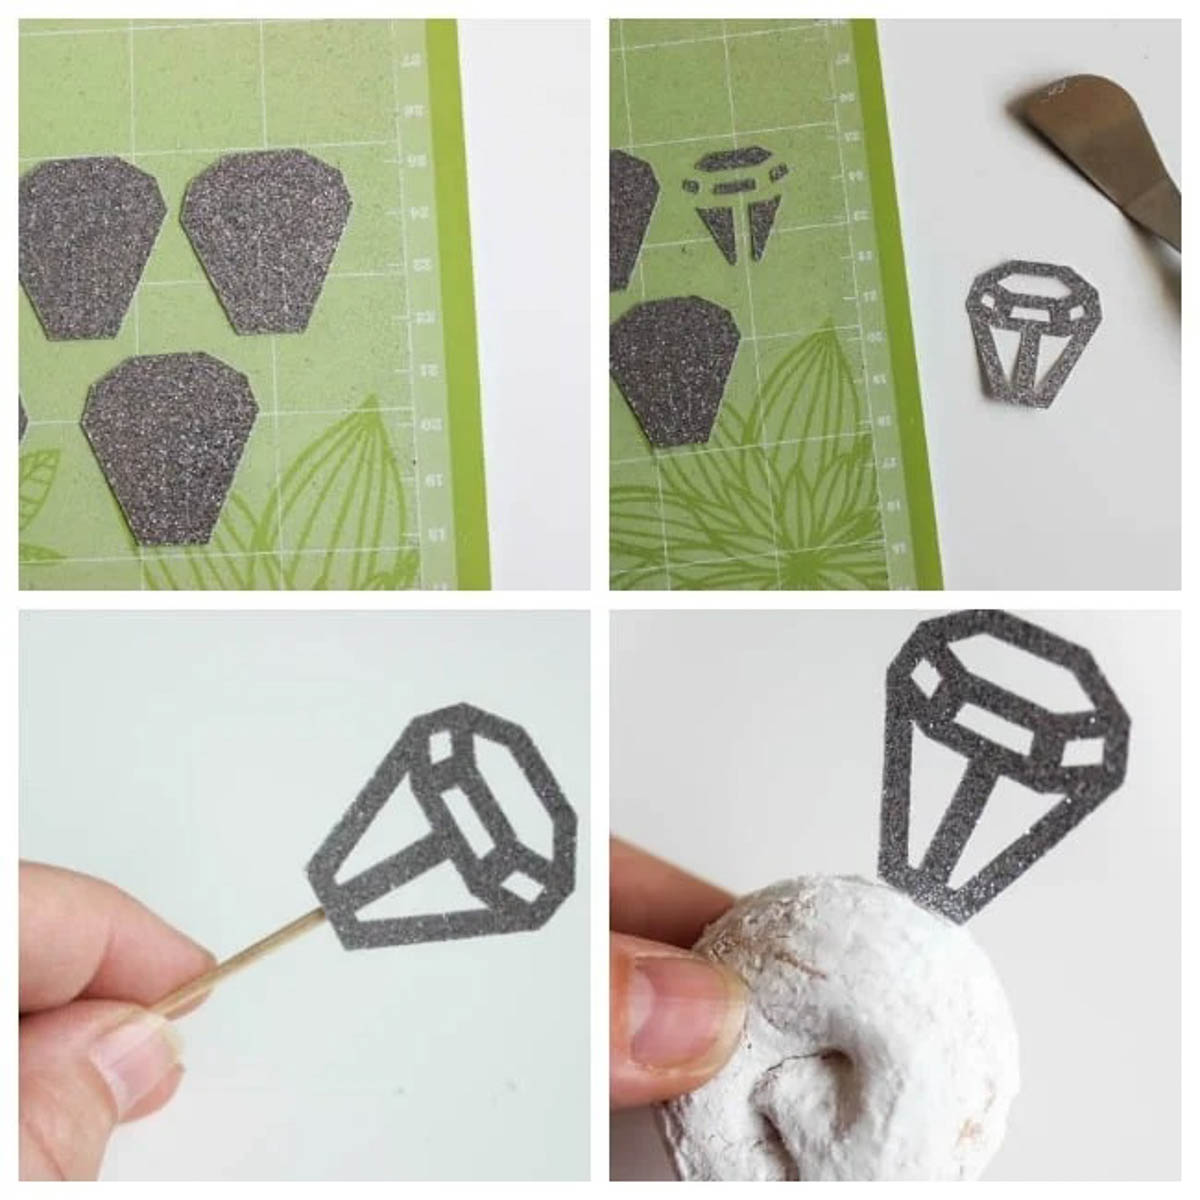
Once it’s cut, use a weeding tool or spatula to release the diamond pattern, attach the diamonds to a toothpick, and you’re ready! When it’s party time, stick them right on top of your donuts :)

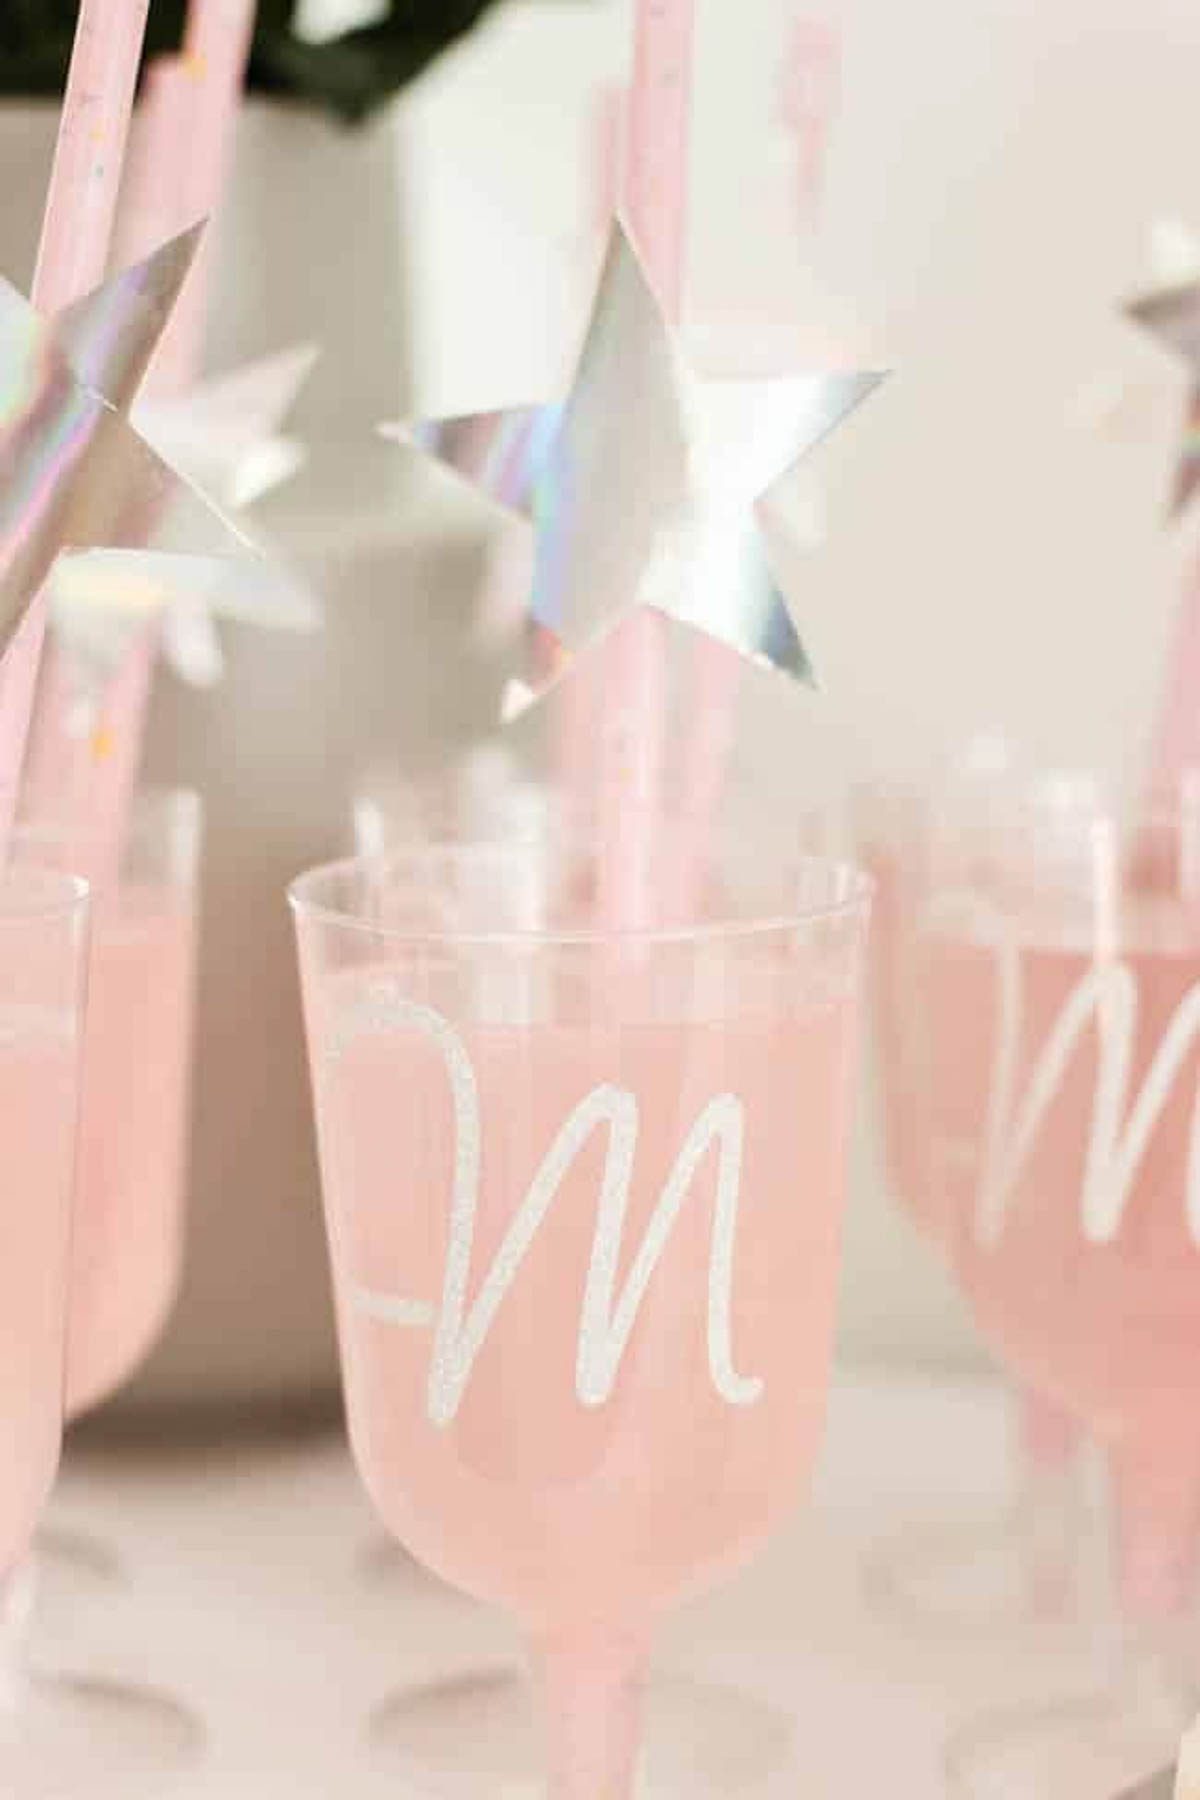
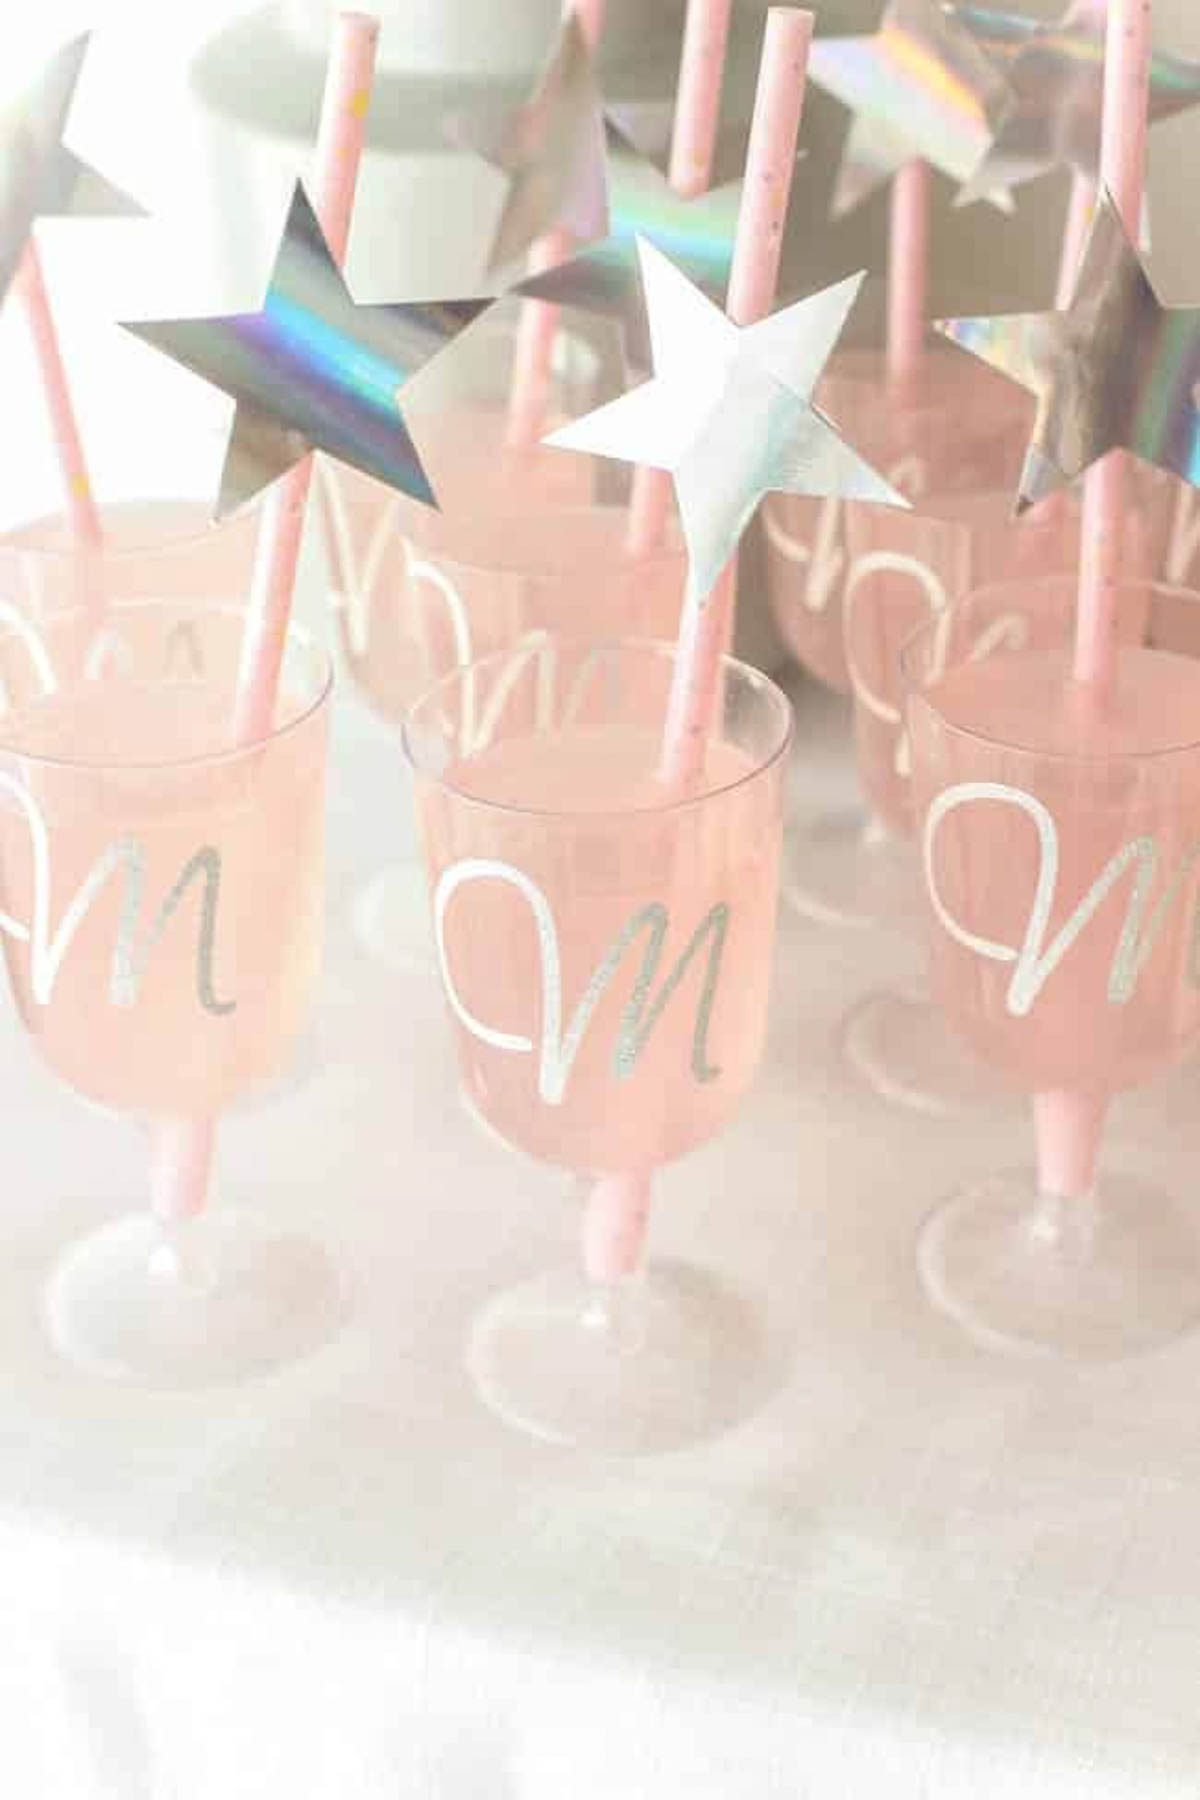
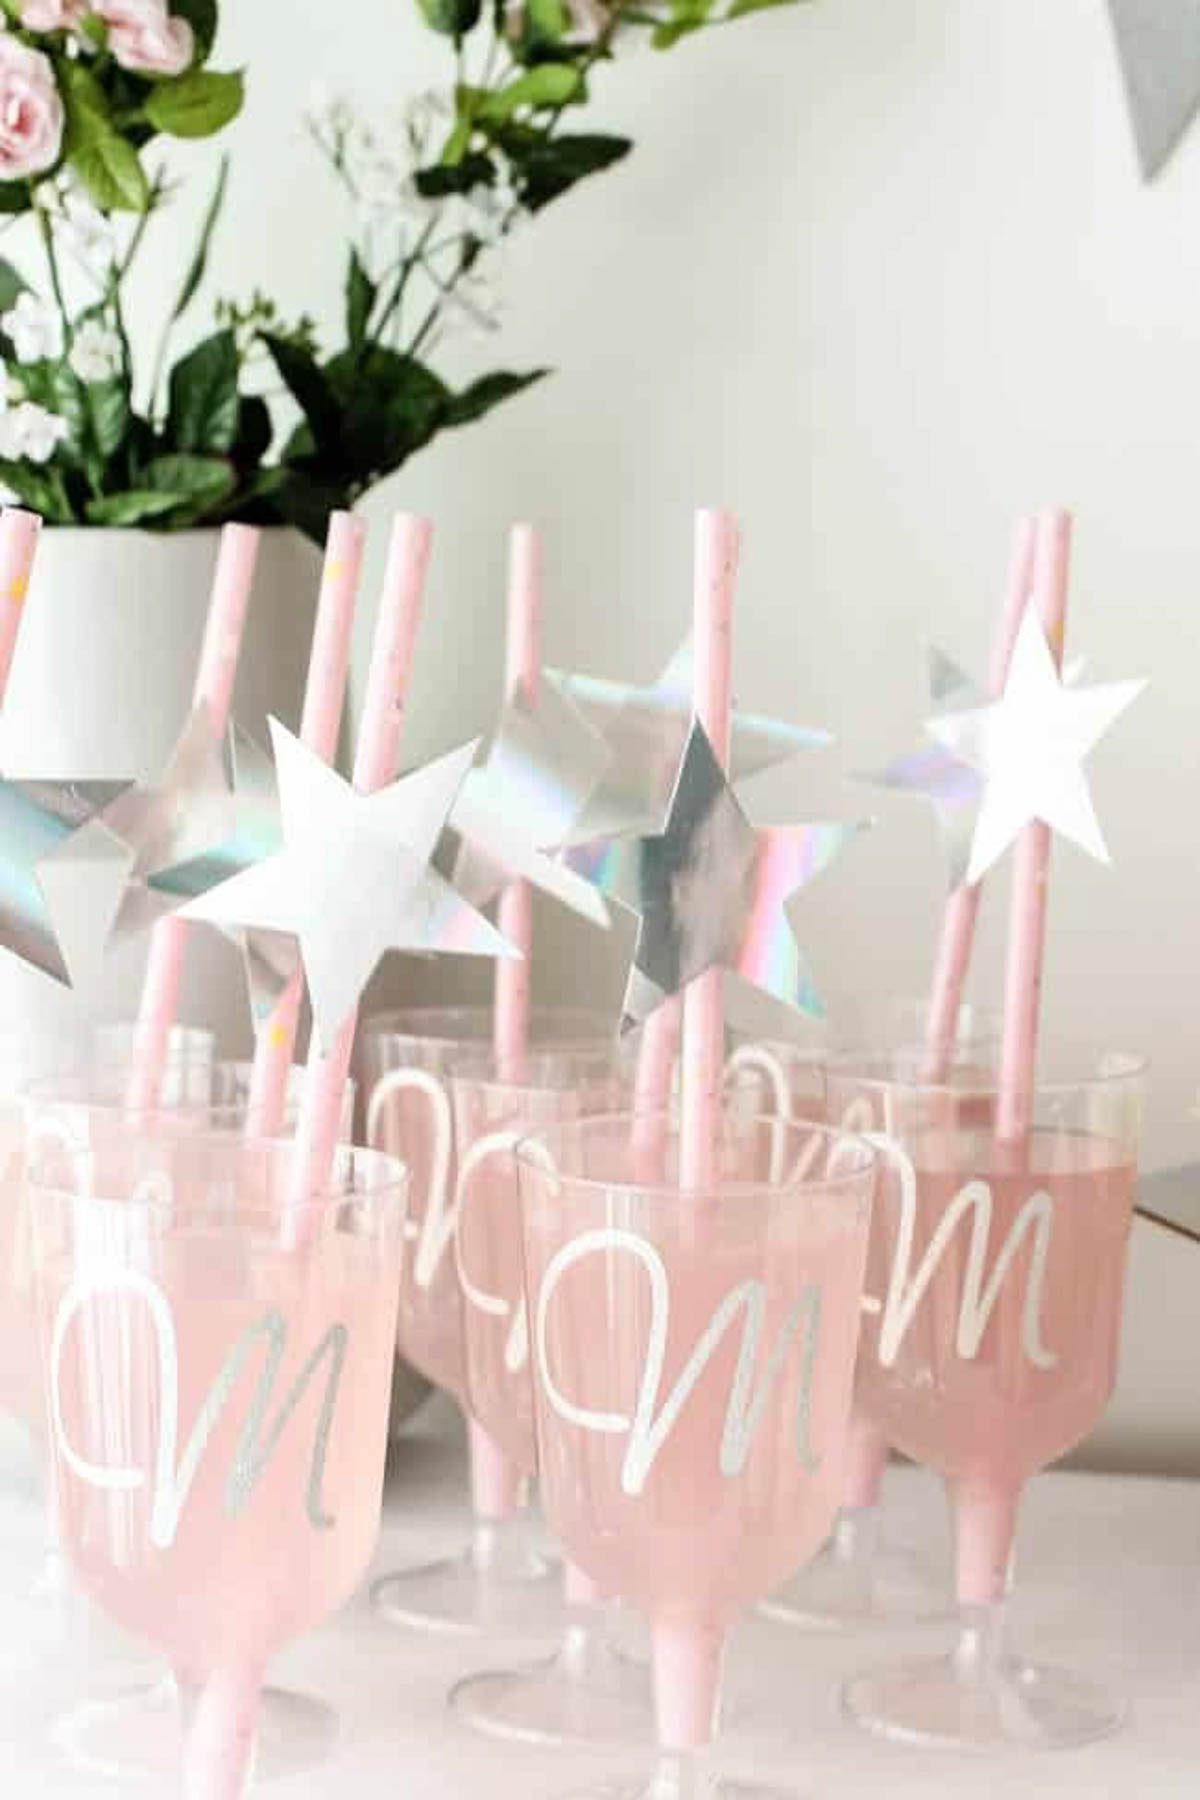
Monogrammed Champagne Glasses
Materials:
Martha Stewart Cricut Explore Air 2
Champagne glasses
Design space file: OPEN HERE
If you thought the last project was easy, this one is even easier! Start by opening the design space file (above), and customizing the monogrammed letter you’ll need. If you need an “M”, you’re good to go! lol. You can add as many letters as you need for your glasses.
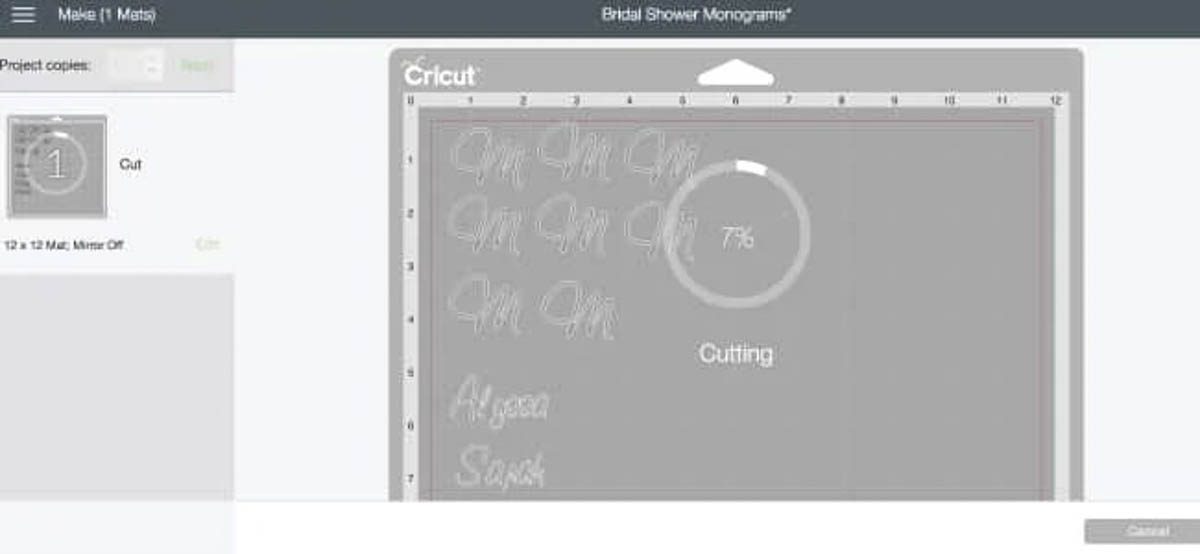
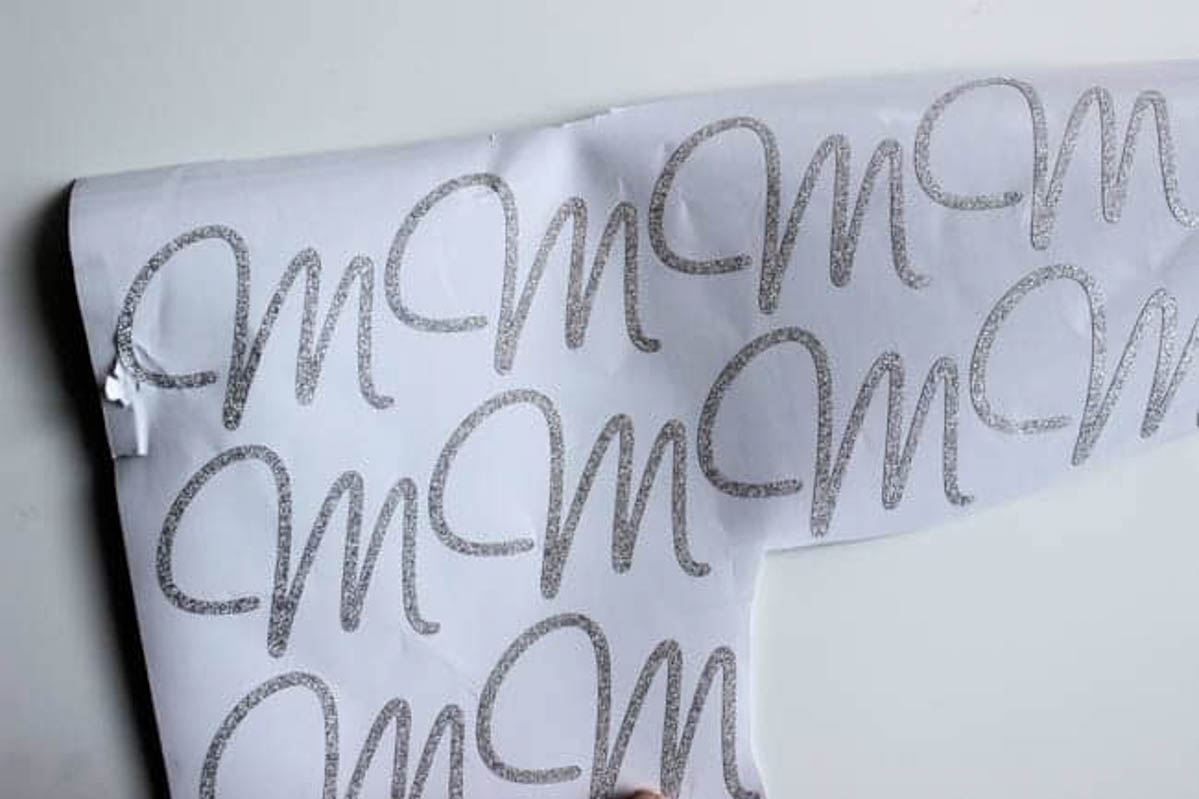
Once the letters are cut, use the weeding tool to remove the negatives (or parts of the image you don’t want to use) from your glitter vinyl. You can use transfer tape to transfer each letter to a glass or just lift each letter carefully and transfer them by hand!
The result is so beautiful and it took no time at all to make!
Easy “She Said Yes” Sign
Materials:
Martha Stewart Celebrations Line
12″ by 24″ regular cutting mat
Wood Board (available at Michael’s!)
Design space file: OPEN HERE
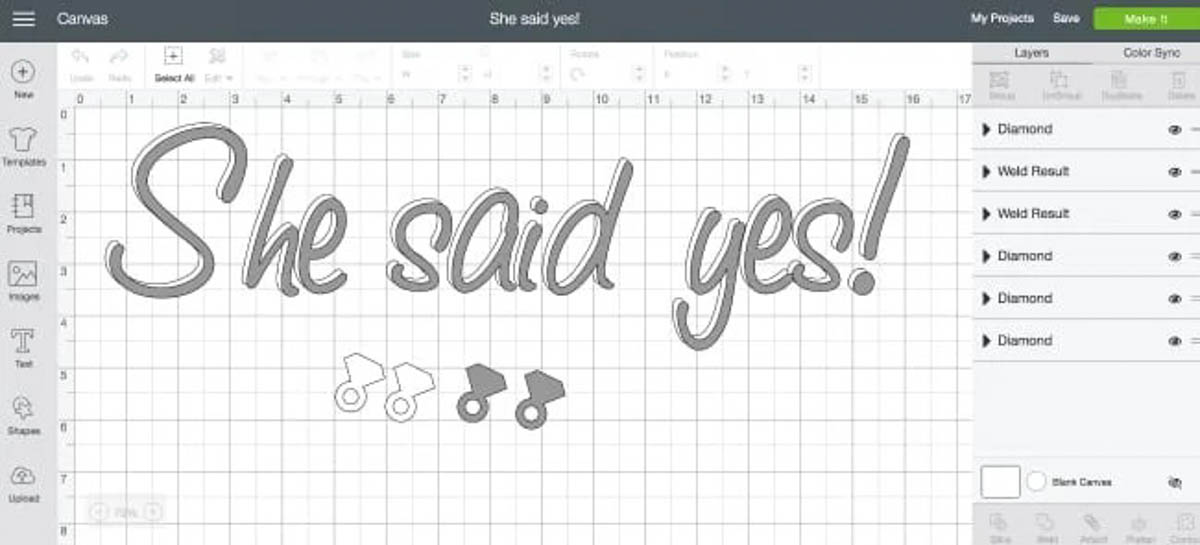
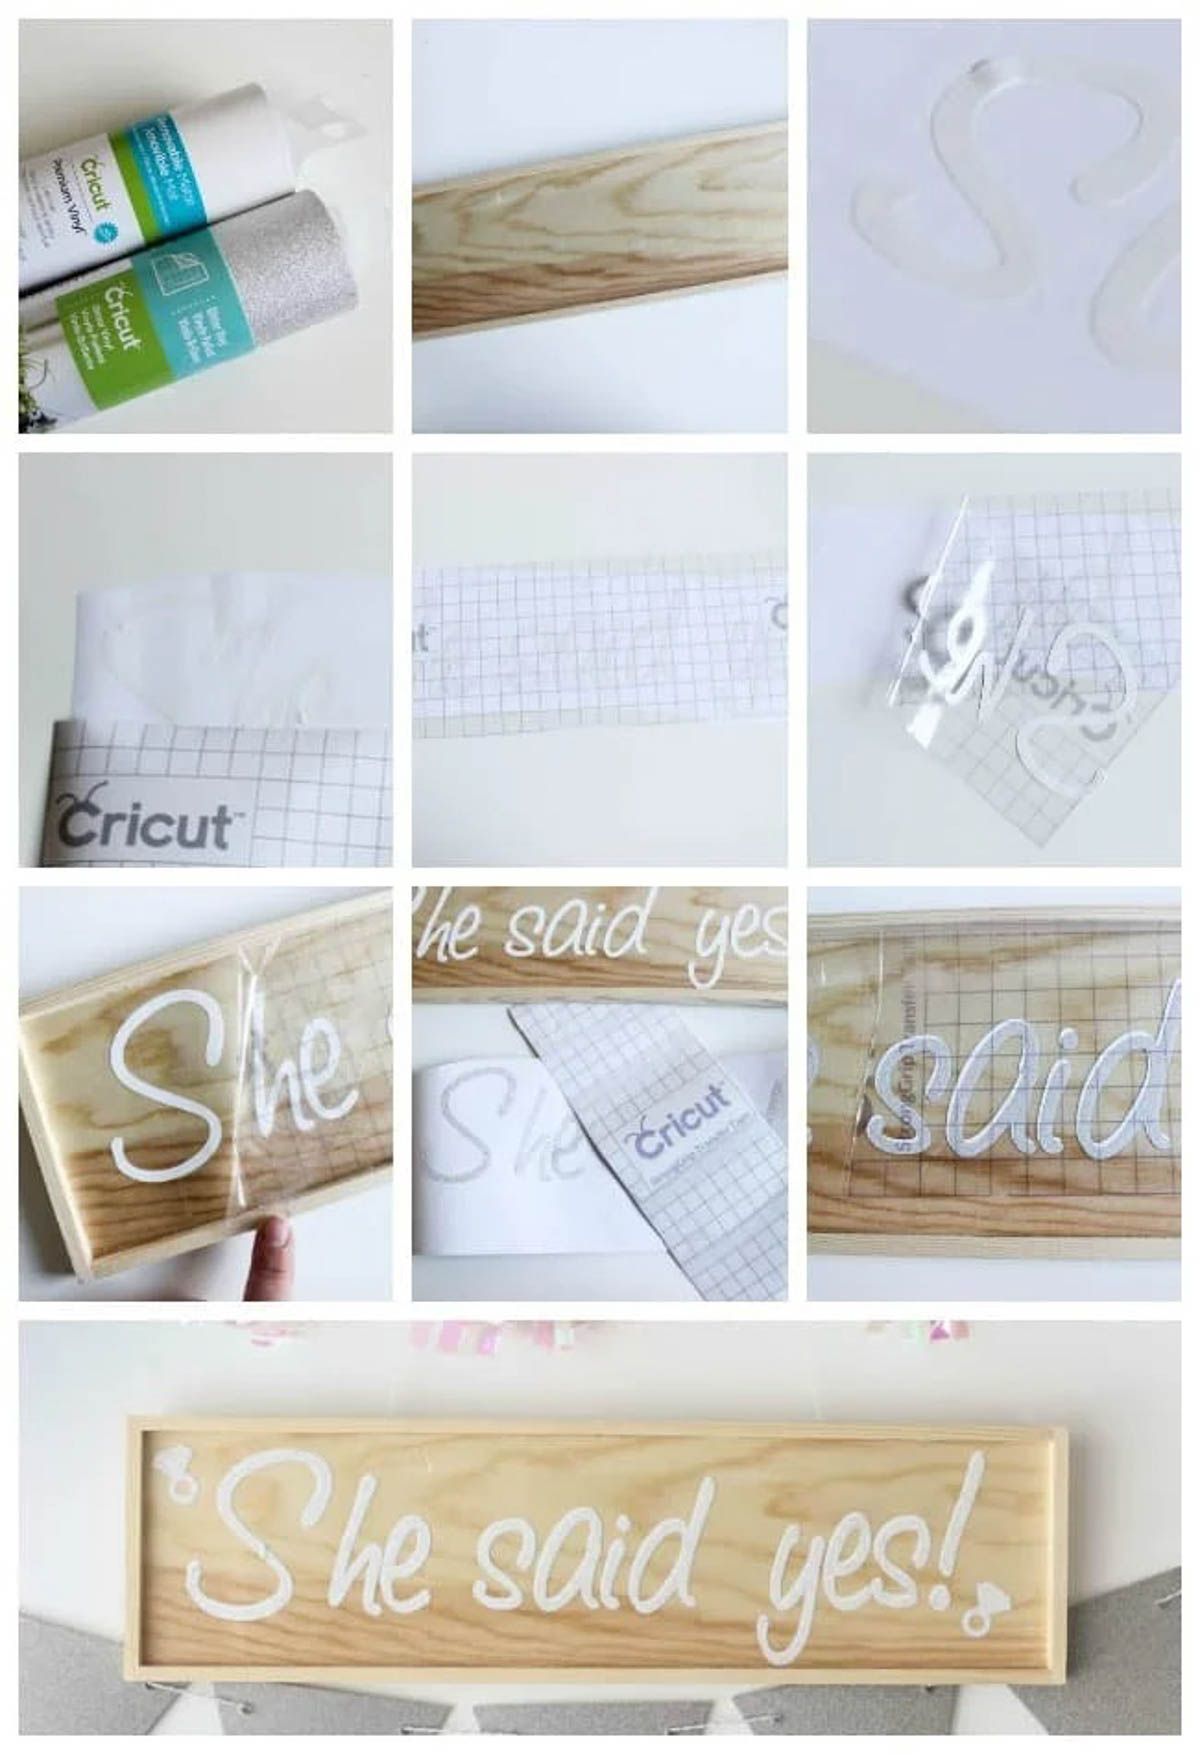
There are a couple of extra steps to this DIY, but you’ll LOVE the results! I had a few of these natural wood decor pieces at home already (all from Michael’s!), and I thought they would compliment the pretty pinks and iridescent colours beautifully.
Start by opening the Design Space file, and customizing the size so that it fits your sign.
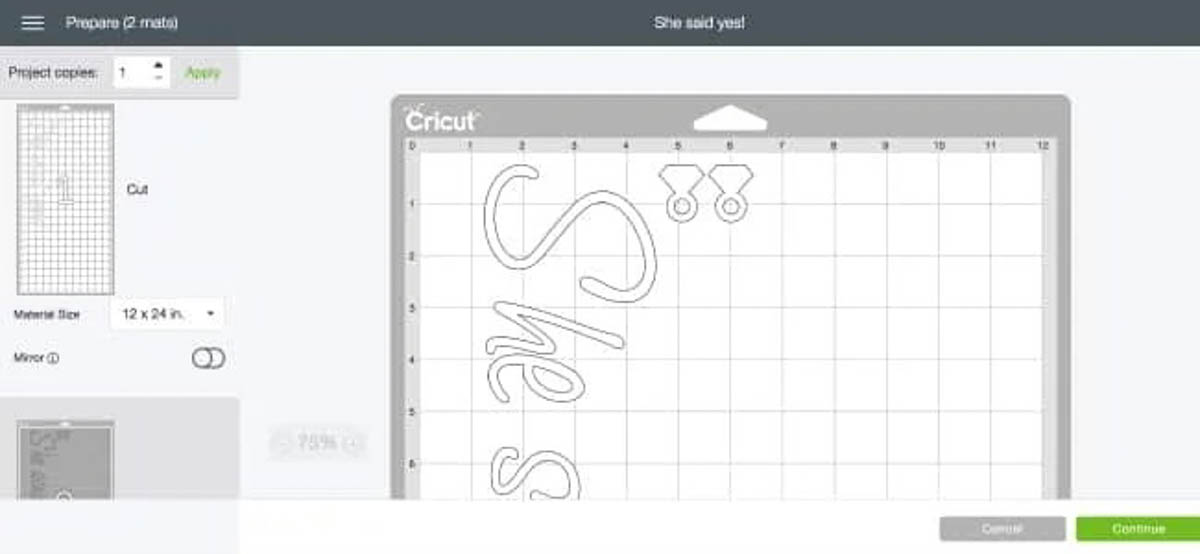
Because of the length of my phrase, I used a 14″ cutting mat.
Steps from to left to bottom right:
- Your materials to cut – white and glitter vinyl
- The wood board background
- “She said yes!” cut in white vinyl from the Cricut Explore Air 2, with the negative portions removed
- Cut a piece of transfer tape to fit over your design
- Remove the backing from the transfer tape and apply it on top of the cut vinyl.
- Peel the vinyl up with the transfer tape
- Place it on your wood sign, and careful remove the transfer tape
- If you want a double layer, do the same thing with the glitter vinyl, but use the “strong” transfer tape that comes with it when you purchase the Cricut glitter vinyl
- Apply the glitter vinyl overtop of the white vinyl
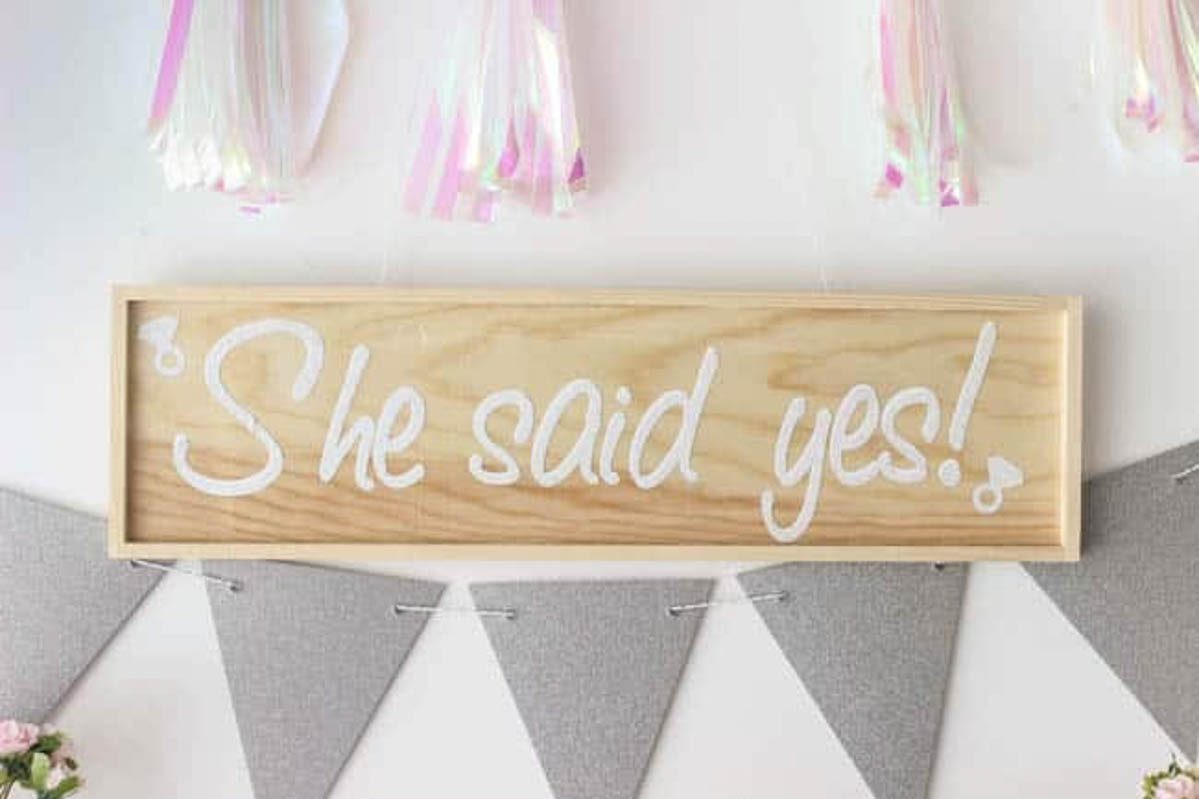
Aren’t these beautiful bridal shower decorations! The sign was the perfect addition to the bridal shower. And it’s so versatile, I can use it again and again even if I choose to host a bridal shower with a new theme.
Are you convinced yet? The Cricut Explore Air 2 and the Martha Stewart Celebrations Line are the perfect combination to customize bridal shower decorations and host a beautiful celebration!

This is a sponsored conversation written by me on behalf of Cricut. The opinions and text are all mine.
Lori
Sunday 2nd of July 2023
HELP!!!
I LOVE the donut engagement ring but I can’t get the file to load. When I open design space it’s blank. What am I missing?
Beautiful Bridal Shower Decorations with Cricut - Love Create Celebrate - Gift Guides
Sunday 19th of January 2020
[…] Source by milahtaylor […]
DIY Bridal Shower Ideas with the Cricut - Hey, Let's Make Stuff
Thursday 9th of May 2019
[…] shows us how to use our Cricut to make Beautiful Bridal Shower Decorations for any […]
Jen T
Monday 7th of May 2018
What a fun collaboration! I love the blingy donuts! :)
Charynn
Friday 4th of May 2018
So cute! Those "rings" are the most adorable thing!