
An affordable interior door makeover that anyone can do! Transform those boring hollow core wooden doors into gorgeous modern 5 or 6 panel doors.
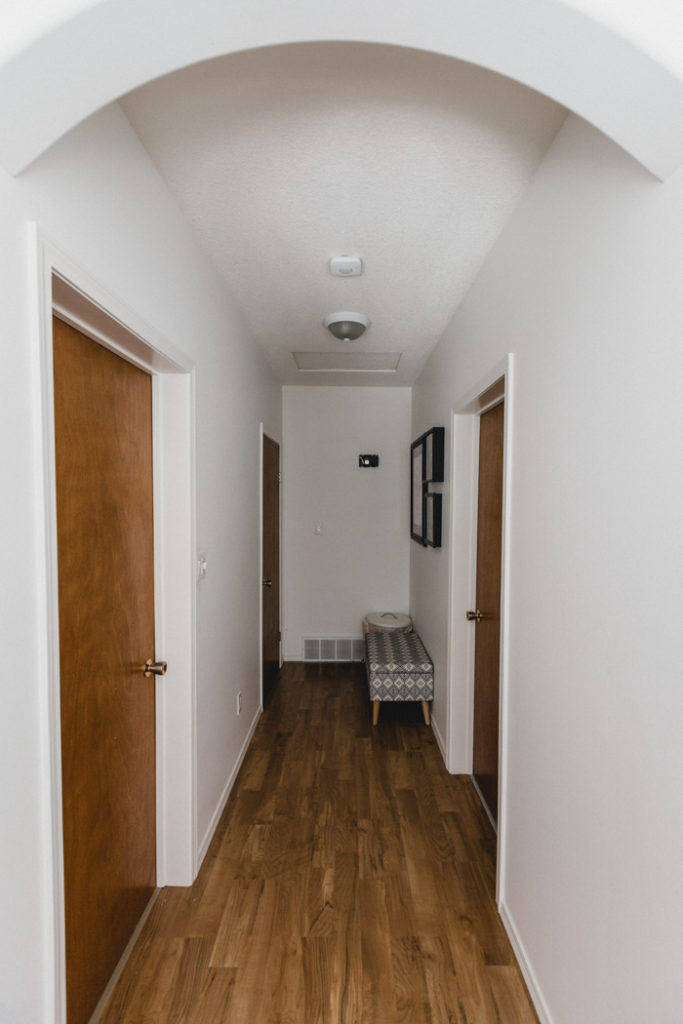
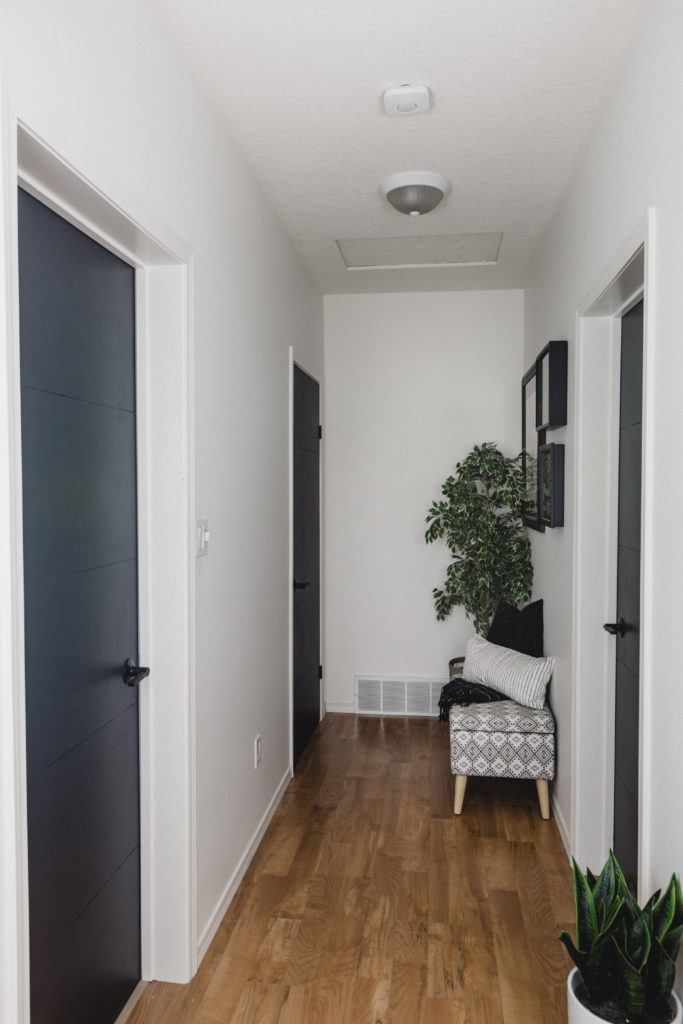
Interior doors are expensive. It really adds up when you have to replace three or four doors, which makes an interior door makeover so appealing! Our upstairs hallway has been completely untouched. Nothing. Nada. Since we moved in.
The upstairs as a whole has been largely neglected until earlier this year when we did our first quick Master Bedroom Refresh. But we’re finally sharing another project to improve the look of our upstairs hallway, and it’s a very affordable interior door makeover that I know you all will love!
*This post was sponsored by Valspar Canada. As always, opinions are 100% my own. For more information, please see my disclosure page.*
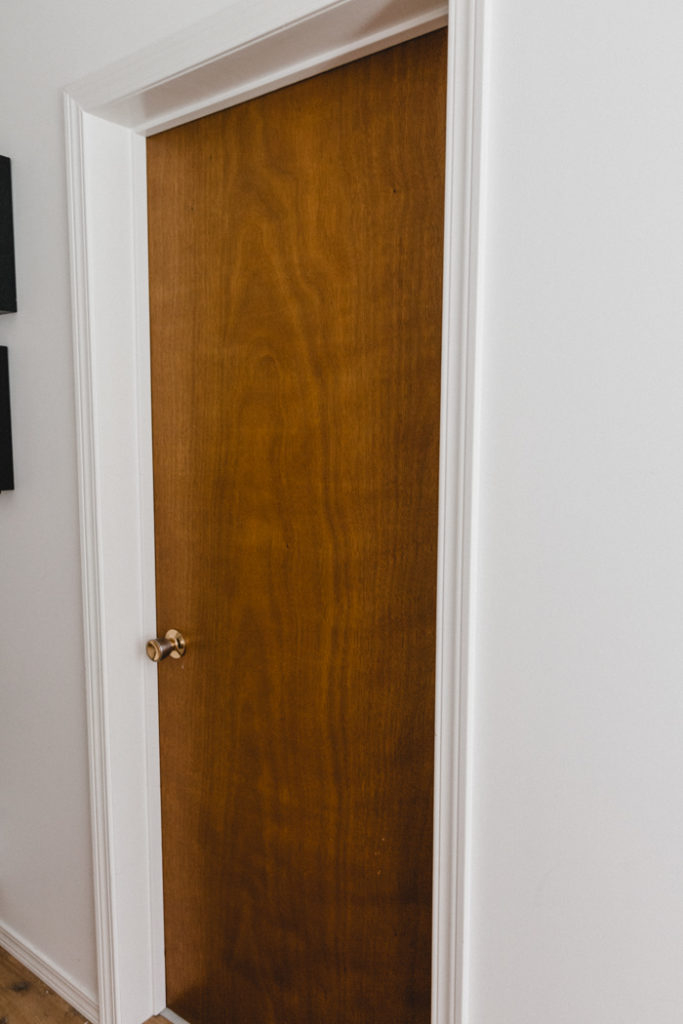
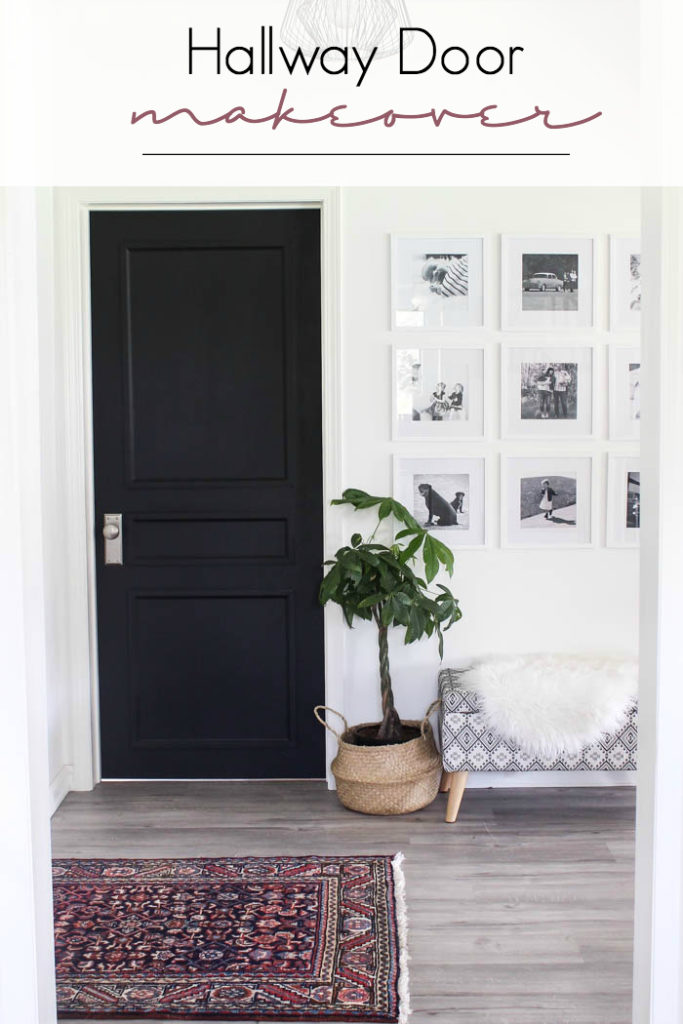
These are our current hallway doors. The boring, hollow core wooden doors that you’ve probably seen in many homes over the years. These doors were actually originally found at a local Habitat Restore.
My husband’s parents built this house. They did everything as affordably as they could, which meant picking up a lot of second-hand items. They have worked great and served their purpose, but my modern-loving soul was dreaming of an upgrade.
When I started this project, I shared on Instagram, and I honestly did not know if they were going to turn out! But I’m happy to report that I love the end results.
How Do You Know if You Door is Hollow Core?
Before we get started, it’s important to know if your doors are hollow core! You can often just tap on the door to see if it sounds hollow or solid. However, this isn’t always the case.
The more reliable method is to remove the door from the frame and if it’s easy to lift, then it’s likely a hollow core door, since hollow doors are much lighter than solid doors. Although, if you have solid wood doors, you can also easily do this project on wood doors too.
Video Tutorial for our Interior Door Makeover
For all of the visual learners, we made a video tutorial of the entire process. There are a few things that are easier to learn visually than through words, so I hope this make the process clearer.
An Easy Interior Door Makeover
Transforming your doors is as easy as using a circular saw and a paint brush. Anyone could do this transformation, and I mean anyone!
Materials Needed for Door Makeover
How to Cut Your Interior Doors
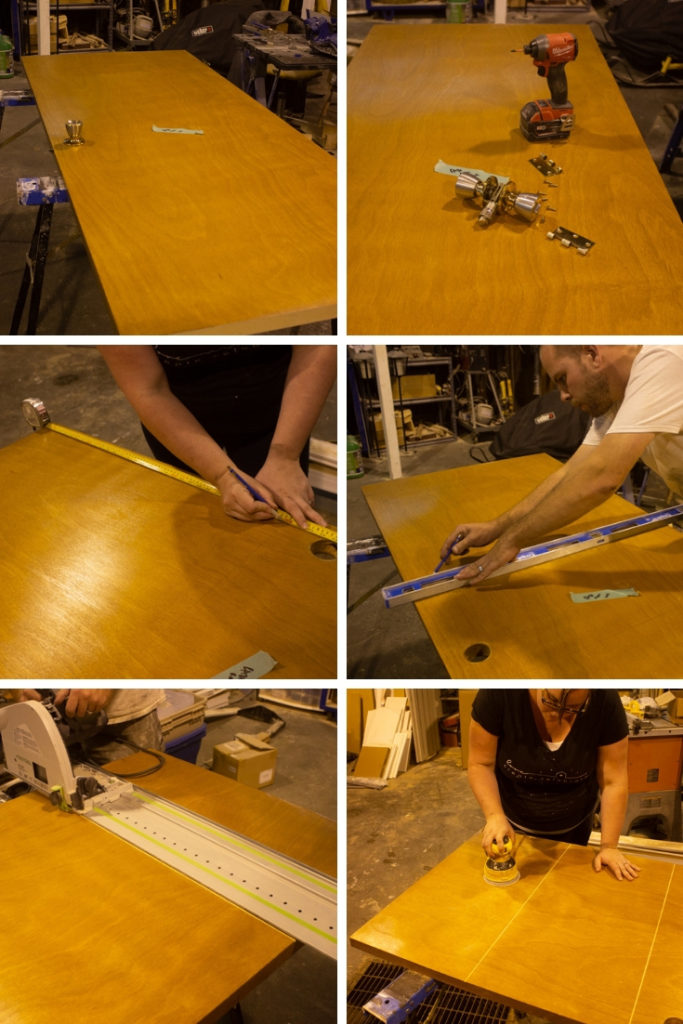
The hardest part of this entire project is cutting your doors. Honestly, I was a bit terrified to cut them. It’s only a thin wood veneer on top of a hollow core and it’s dangerously thin for someone to be cutting it! But we took is slow and it worked.
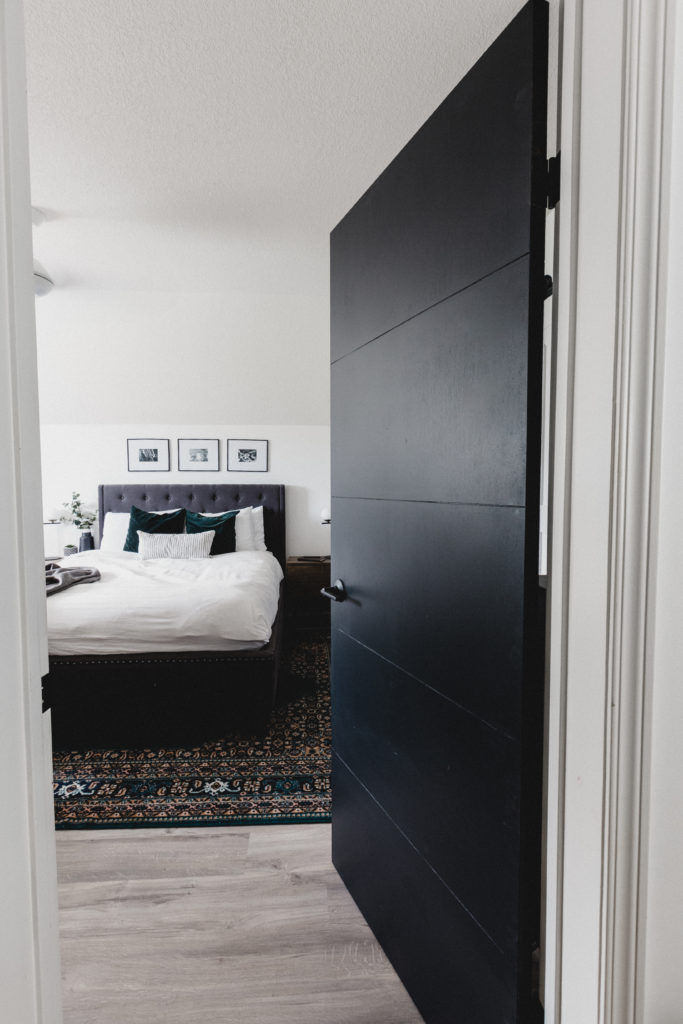
I wanted five equal panels, and four cuts separating them. Our door was just about 80 inches tall, so we measured every 16 inches and made a mark, and then drew a line across the door so that we knew exactly where to cut.
Once your thin cuts are made, give everything a very light sand. Just enough sanding to roughen up the surface and allow the paint to adhere. When you’re done, you can turn our door over and make the same cuts on the other side as well if you wish.
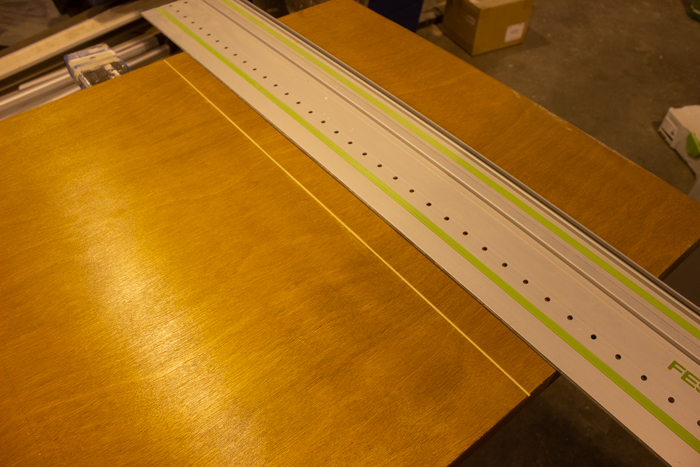
We made our very thin cuts (approx. 1/6th of an inch) using a track saw, but you can also use a circular saw with a straight edge, or a 2×4 board clamped to the door to act as a guide for your saw.
If you don’t have a track saw, here’s a great video on how to cut those straight lines without one:
How to Paint Your Interior Doors
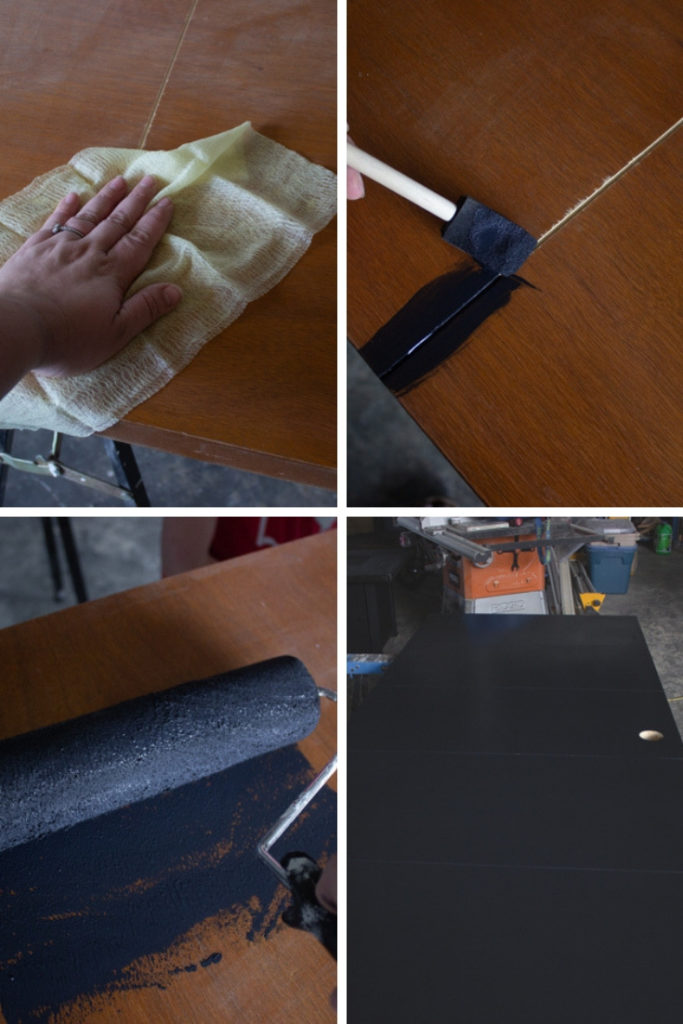
Painting is the easiest part of this project! Although also the most time consuming, lol. Each side of your doors will require two coats of paint. I used a small foam brush (thank you dollar store!) to get into the grooves that I had made with the saw. Then I used a large roller to paint the fronts and sides.
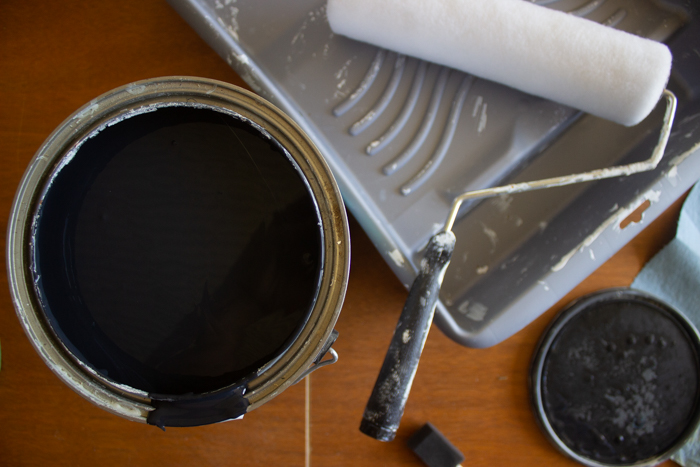
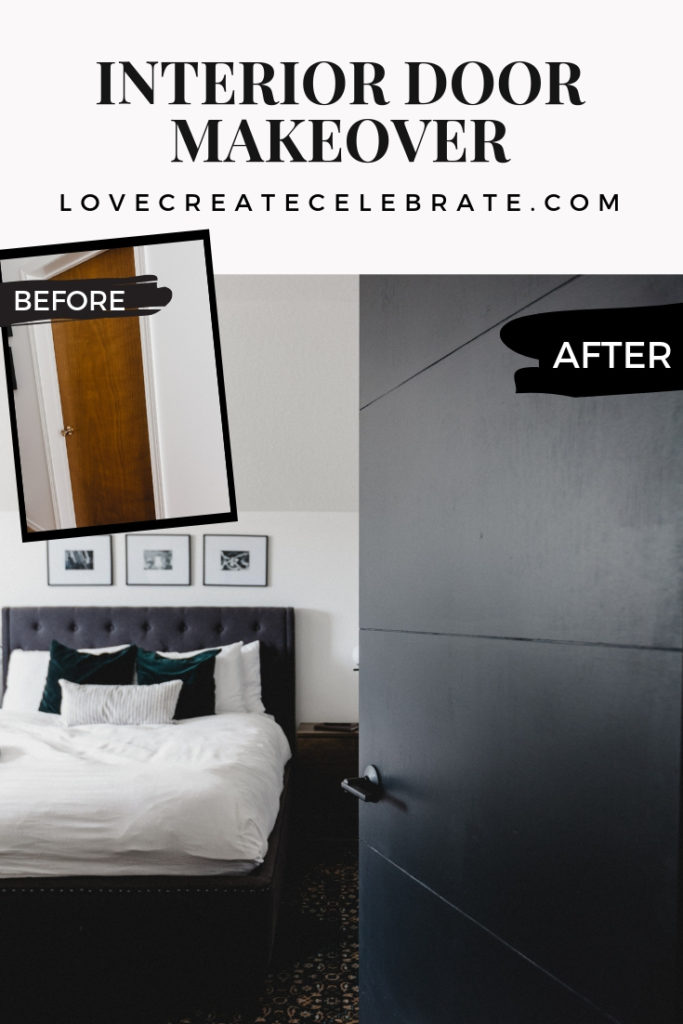
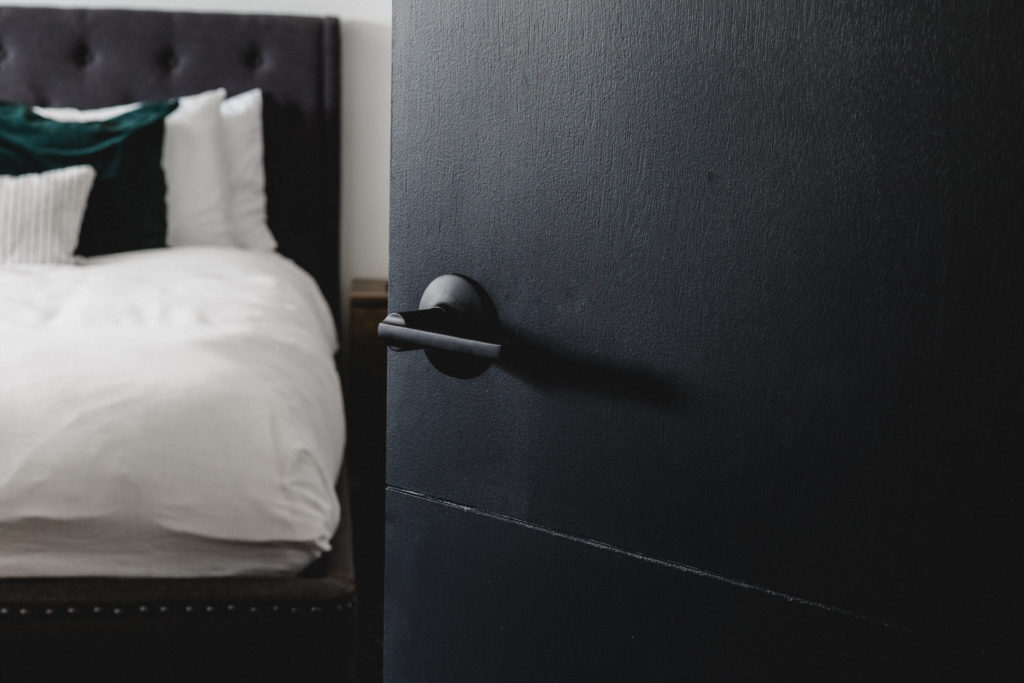
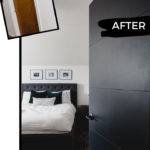
I wanted deep dark doors, so I chose to use Deep Well by Valspar. It’s a very deep, almost black colour with blue undertones. Some lights made it look more navy than others, but in my dark hallway with no natural light, it’s the perfect black for our interior door makeover!
In retrospect, I wish we had primed the doors first, and would highly recommend it! We used a paint and primer in one, which I now recognize was not enough because they did get some fairly easy scratches on them.
However, 2 years later we sanded, primed, and painted these same doors white (yes, we went from dark to light!) and they have held up amazingly well. Literally not even one scratch and we have 3 kids and 4 pets, lol.
How To Fix Holes on Hollow Interior Doors
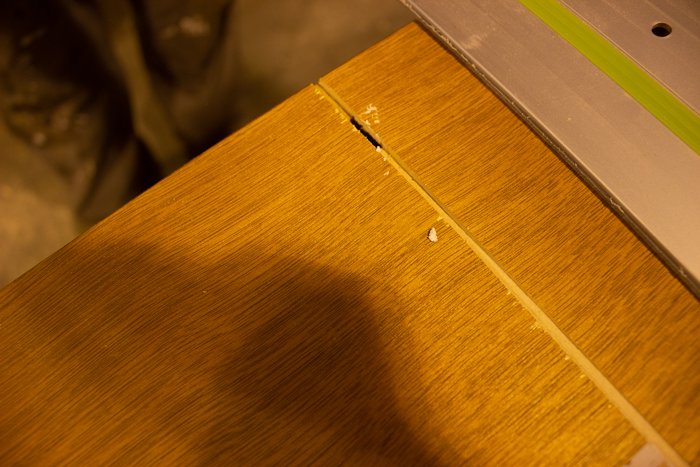
We made one tiny error on one of our three doors. The veneer was a bit thinner, and we accidentally cut right through to the hollow core of the door.
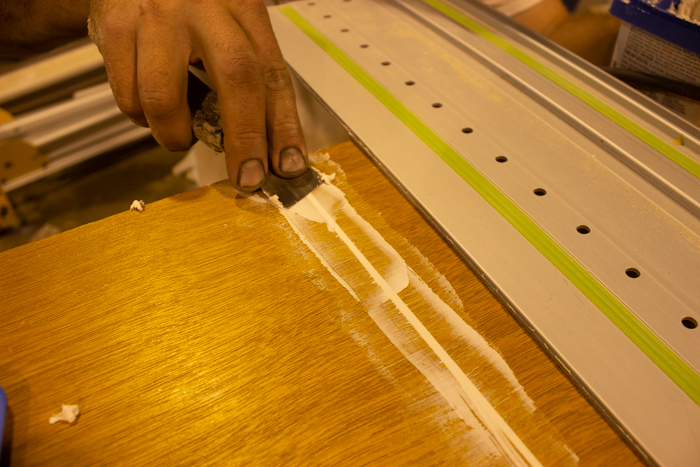
If you happen to do this as well, we recommend that you fill that gap with a fast-drying putty, and fill the entire line. When it is dry, sand it down and cut a new line with your track saw a couple of millimetres before or after your other line. You don’t want to cut on the same spot again because the putty likely won’t hold up to a new cut.
We did this on one of our doors, and I bet you can’t tell which one! The millimetre or two difference is not even noticeable.
My Doors Don’t Fit When Re-Installing Them
When your doors are finished and painted, it’s time to install them. Installation is fairly straight forward. If you find that your doors are not fitting exactly as they used to, it is likely because of the extra layers of paint. Even a millimetre or two can throw off the alignment of a door.
If that is the case, it is likely just the paint in the way of the hinges that is giving you grief. Take a chisel and chisel out any of the excess paint in the hinge locations, and re-install your door.
Our Interior Door Makeover Reveal
This simple transformation completely changed the look of our hallway. I love the new dark doors. The fresh cuts really do look like panels and modernize the space sooooo much!
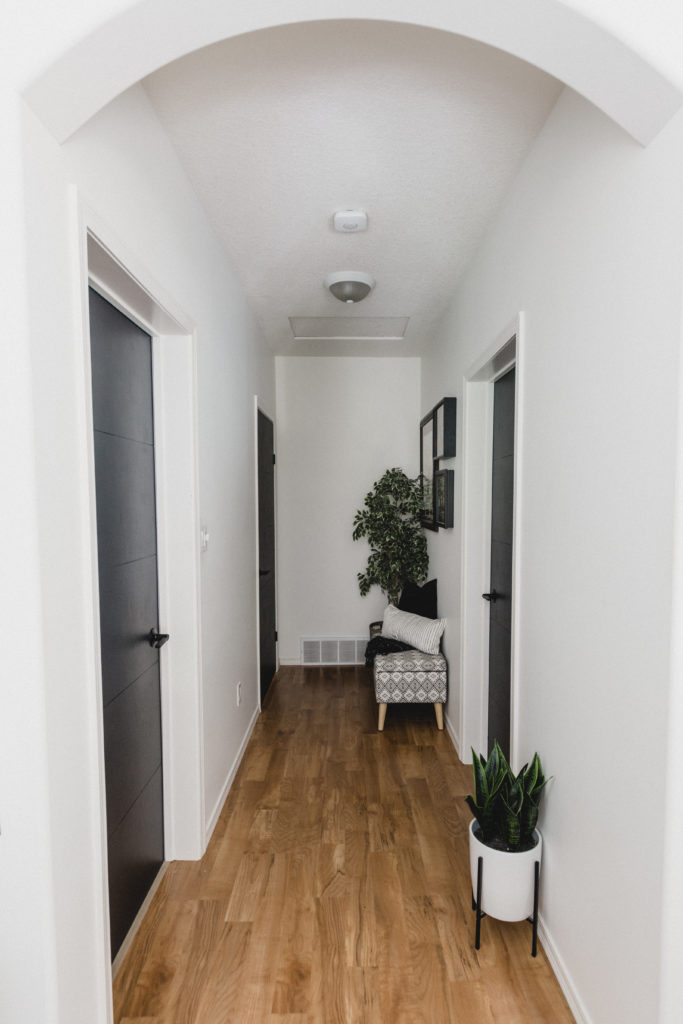
It was a little harder to photograph and see the lines on these dark doors in our hallway, but in person you can see them beautifully! And when you open the doors and let the natural light pour in on them, they shine!
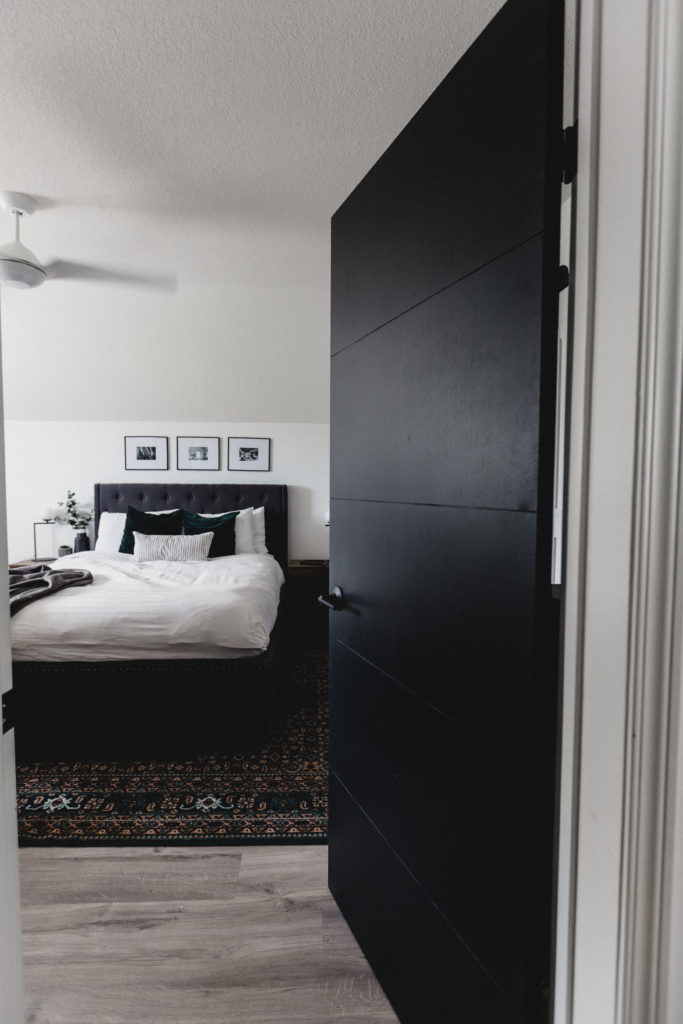
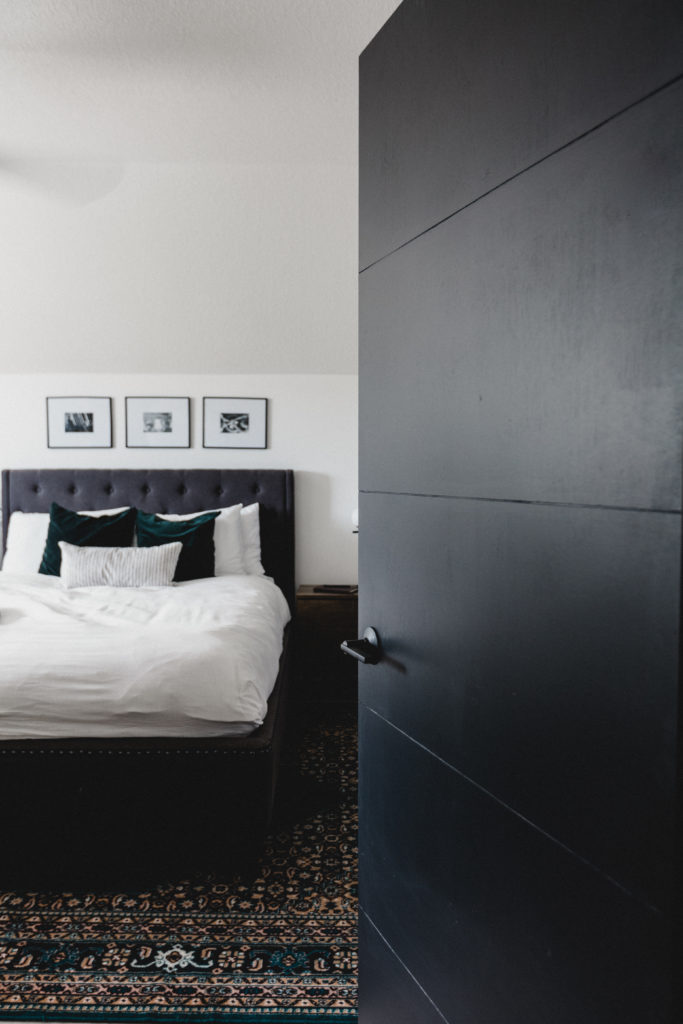
Since the entire project was FREE, we splurged a bit on some new matte black handles. The old knobs would’ve looked awful on here. I’m so glad I went with these ones because they look amazing!

Interior Door Makeover
This interior door makeover is stunning! Love the design of these DIY painted doors. It's the perfect way to transform those boring hollow core wooden doors. Use a saw and some dark paint to bring these doors from outdated to modern!
Materials
- Paint - Deep Well by Valspar
- Tack Cloths
- Door Handles and Hinges
Tools
- Track Saw or Circular Saw
- Orbital Sander
Instructions
- Take doors off of hinges.
- Remove hinges and hardware
- Using a measuring tape, measure your door divide the distance by five - for five equal panels.
- Take that number and mark out the locations of your four cuts. Mark it on the left and right side of the door, and use a large level or straight edge to draw a straight line in pencil.
- Using your track saw, cut a straight line along your four pencil marks. Your cut should be minimal - approx. 1/16th deep.
- Repeat on the other side of the door if you wish for the design to be on both sides.
- Lightly sand the entire door.
- Use a tack cloth to remove any dust and/or debris.
- Paint your doors in your colour of choice.
- Add handles, and hinges and re-install interior doors.
Recommended Products
As an Amazon Associate and member of other affiliate programs, I earn from qualifying purchases.


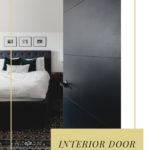
If you’re not sure about these doors, check out our other Interior Hallway Door Makeover! Navy blue and equally amazing!
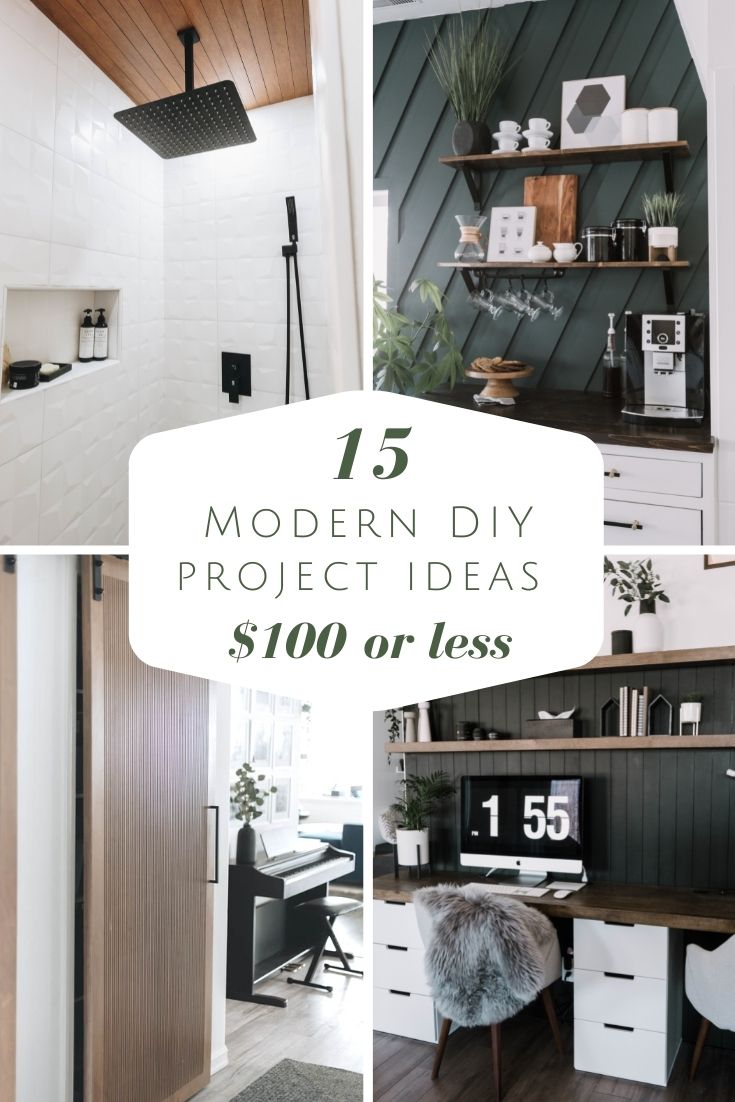
If you’re a fan of affordable DIYs, we’ve shared a ton of amazing DIYs for Under $100 that you should definitely check out!
*This post was first published in August 7, 2019 and has since been updated.

Nicole Gosling
Friday 8th of September 2023
LOVE, LOVE, Love this design. It's amazing how it changed the look of your hallway.
Russel Vanderschaaf
Friday 27th of October 2023
Thank you!
Pam Jackson
Friday 18th of August 2023
I have the core filled doors in my house but my problem is wanting to paint them leads into other issues. I want the black doors. I have new doors to hang, all white that will need paint, but my baseboards and door frames are still the natural wood, stained and sealed. I really don't want to get into painting that stuff esp not after the fact they are in great shape for a 60 yr old home. Guess maybe, I will do the doors in a dark brown leaving the wood frames. That should mix well with the wood tones.....I love your look
Russel Vanderschaaf
Friday 27th of October 2023
Creating our dream homes requires so much trial and error! I love your idea! Hope it worked out!
Danielle
Sunday 24th of October 2021
Love these doors and your helpful tutorial so much! Wondering if you think you could use a router for the lines or why a saw might be better?
Lindi
Sunday 24th of October 2021
We didn't have a router bit that thin at the time, but if you use a straight edge or a guide, a router could work too!
Stephanie
Sunday 13th of June 2021
I love this look! Are you still happy with them today?
Is there a reason you didn’t spray them?
You mentioned you wish you would have primed them. Anything other changes?
Lindi
Sunday 13th of June 2021
We are still really happy with them! We are going to repaint them this year because we knicked them a couple times while renovating (and didn't prime them before!), but this time we are going to prime them. Still really happy with the look!
Fatima
Saturday 27th of March 2021
Hi, love the doors! What colour did you use for the walls and did you paint the trim and ceiling the same colour? Totally love it!!!
Lindi
Monday 5th of April 2021
The walls were white design from Para Paints I believe! The ceiling was just white ceiling paint and I can't remember the trim colour - sorry!